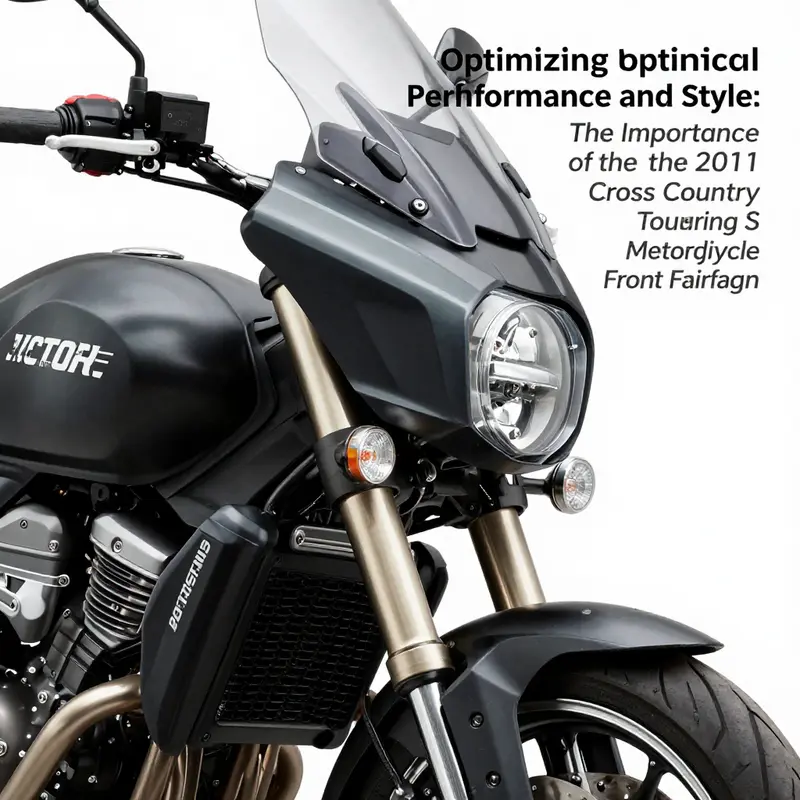
As motorcycle design continues to evolve, components like the front fairing of the 2011 Victory Cross Country Touring S play a pivotal role in optimizing performance, aesthetics, and rider experience. With its key functions that enhance aerodynamics and comfort, the front fairing becomes not just an accessory but a necessity. Businesses dealing in motorcycle parts and services will benefit significantly from understanding how to source compatible replacements, the technical specifications involved, and the value of aftermarket options. Each chapter of this article delves into these critical aspects, offering insights that can help enhance sales and customer satisfaction. We’ll explore compatibility, technical specifications, aftermarket options, installation considerations, and the profound impact of the front fairing on the rider’s journey, equipping business owners with the knowledge to support their clients effectively.
Beyond Aesthetics: Compatibility, Sourcing, and Fit for a 2011 Touring Motorcycle Front Fairing

A front fairing does more than frame a motorcycle’s face. On a 2011 touring-class machine, the fairing is the primary interface between rider and wind, a chassis-adjacent body panel that shapes aerodynamics, cabin comfort, and the silhouette that defines the bike from curb to horizon. When the goal is to maintain or restore that delicate balance of performance and presence, the front fairing becomes a test of precision as much as a cosmetic touch. The chapter you just read framed the idea that compatibility matters far beyond appearance. It is here, in the careful alignment of parts, mounting points, and design intent, that a rider discovers whether a replacement or upgrade will truly serve the journey rather than merely cover a gap. The right front fairing, verified to fit year and model, does not just reduce buffeting; it preserves the intended airflow, preserves instrument clarity, and keeps the windscreen in harmonious proportions with the chassis geometry. That harmony is where comfort and efficiency meet, ride after ride, mile after mile.
To understand why compatibility is so critical, consider a touring framework built around a specific year’s wind pressure, headlight alignment, and mounting architecture. Every hole pattern, every notch for the instrument cluster, every cutout for switches and wiring, is calibrated for a unique blend of wind resistance and rider reach. A fairing from a different year or a different model may look similar, yet small deviations in mounting points, anchor brackets, or the curvature of the plastics can render the piece unreliable. The problem often appears not as an obvious misfit but as subtle misalignment: gaps where the fairing rest too loosely, creaks at highway speeds, or a windscreen that no longer sits at the intended height. This is not merely a matter of aesthetics; it is a question of structural integrity, aerodynamics, and rider confidence on long hauls. The best sourcing decisions begin with accepting that front fairings are year-sensitive components, designed to work within a precise ecosystem of brackets, fasteners, and nearby assemblies.
The practical challenge begins with the marketplace itself. A 2011 touring motorcycle front fairing is a specialized object. It exists within a family of parts that share a common geometry, yet diverge as the bike’s design matured through the years. When seeking a replacement or upgrade, the rider faces several layers of verification. Are you looking at a fairing that fits the exact year and model, or is it one that merely resembles the original form? Does the listing specify the mounting brackets required for installation, or will you need to source those separately? Is the windscreen compatible with the fairing’s cutouts and hinge points, or will you be forced to chase a new windscreen that matches the updated contours? These questions are not academic. They determine whether a purchase shortens a project or extends it, whether a weekend job becomes a weeklong hunt, or whether a rider’s travel plans remain intact or are put on hold.
In this context, the sourcing landscape can feel as technical as the assembly itself. A robust approach begins with understanding that the front fairing is composed of multiple interacting components. The main fairing shell, yes, but also upper and lower mounting brackets, the windscreen, the headlight or headlamp assembly, the instrument cluster housing, and the various gaskets and weather seals that manage airflow and moisture. Some aftermarket solutions promise a perfect look, yet require a different arrangement of brackets, which means new mounting hardware and careful re-routing of electrical connectors. Others may advertise universal fit or close approximations, enticing a dream of a universal upgrade that finally delivers a clean aesthetic. But universal fit rarely translates to stable fitment at highway speeds, where vibrations and wind forces test every joint. The reality is that compatibility is a composite requirement: you must confirm the shell’s geometry, the bracket pattern, the cutouts for lights and cables, and the precise dimensions of the windscreen/sun visor interfaces.
The question then becomes practical: where do you begin, and how do you verify fit without turning the project into a gnarled puzzle? First, assemble a parts map that lists all components required for a year-specific front-end assembly. Identify the exact part numbers when possible, and note whether those numbers correspond to OEM or aftermarket alternatives. Second, insist on source quality. Trusted sellers, clear photos of mounting points, and explicit notes about year and model compatibility reduce the risk of misfit. Third, cross-check with reference resources such as part catalogs, service manuals, and dealer sheets in addition to marketplace listings. This triad—part numbers, seller transparency, and authoritative references—offers the best guard against ill-fitting fairings that do not align with the machine’s intended wind dynamics.
When it comes to marketplaces, the practical guidance translates into a disciplined search and verification process. Listings for the fairing or its mounting brackets may appear under broad bodywork or fairings categories, and discerning sellers will specify compatibility with the exact year and model. A notable advantage in online exchanges is the presence of part-specific filters and compatibility guarantees. A “guaranteed fit” designation, where available, provides a baseline assurance that the part has been confirmed to fit the year and model. Yet even with such assurances, the discerning buyer goes a step further. They compare the visible mounting patterns in listing images to the bike’s own measurements, they request close-up photos of the bracket mounting points and the screw hole spacings, and they verify the presence of critical hardware such as upper fairing stays or mounting rubbers that may not be visible in a stock photo. The careful buyer also checks the part’s paint condition, noting whether a repaint or repair could affect panel alignment or the panel’s edge contour, which in turn impacts the seamless flow from fairing to windscreen and to the bike’s overall silhouette.
For any rider weighing a front fairing upgrade or replacement, a practical, methodical approach to compatibility is not merely about matching a shape to a frame. It is a process that recognizes that the fairing’s job is to slice through air with minimal distortion, and that the rider’s comfort hinges on a predictable wind cushion. A correctly matched fairing aligns the windscreen so that its top edge sits at the right height relative to the rider’s line of sight, providing clear visibility and reducing the need for wave-like postural adjustments that can lead to fatigue. The headlight openings must frame the beam correctly, ensuring that illumination remains focused and that any integrated daytime running light or signal light remains within the intended field of view. The instrument cluster cutouts must accommodate existing gauges without forcing a cramped, awkward layout that distracts the rider during a long ride. Inadequate fitment can produce wind noise, buffeting, and rattles that gnaw at rider focus. Sourcing, therefore, is not a matter of collection; it is a critical design choice with direct consequences on performance and safety.
Beyond the practicalities of mounting points and visual harmony lies a more subtle dimension: the way a front fairing interacts with the bike’s overall aerodynamics. On a touring machine, the fairing’s form channels air around the rider and across the engine bay, turning a potential wind obstacle into a controlled flow that reduces fatigue and shields sensitive components. A mismatch, even a small one, can alter the intended air stream in a way that increases drag or creates zones of turbulent flow. That is why the process of verifying fit should include a mental checklist of how the fairing will sit during long-range travel, how it meets the windscreen to form a clean seal against rain, and how the lower extensions align with the lower fairings to maintain a continuous, jet-like airflow beneath the rider’s line of sight. The goal is not simply to replace a panel; it is to preserve or restore the engineered balance that made the original design effective at speed and under load.
In this light, the decision between OEM and aftermarket becomes a question of fidelity to the original design intent versus the benefits of lighter weight, cost considerations, or a desired styling update. OEM replacements tend to offer the most straightforward compatibility path because they are designed to align with the existing mounting architecture and with the machine’s electrical and lighting interfaces. Aftermarket options can provide value in terms of customization and availability, but they often require careful verification of bracket configurations, additional hardware, and sometimes modifications to the mounting interface. A careful buyer keeps an eye on the total parts package: does the listing include the mounting brackets, or will those need to be sourced separately? Are there changes to the windscreen mount points or to the instrument housing that would necessitate a broader front-end refresh? These factors determine how smoothly a project progresses from a collection of parts to a fully integrated, riding-ready front end.
Another layer of consideration is the condition and history of the available fairing. Pre-owned shells may carry cosmetic blemishes, fading, or stress marks that could affect structural integrity. Even when a fairing appears visually sound, it is wise to request a clear accounting of any prior repairs, the status of the mounting points, and whether the shell retains all factory fastener locations. Some listings reveal a fairing that matches the exterior lines but lacks essential hardware, which can derail a project before it begins. A seller’s willingness to provide serial information, photos of the internal mounting points, and candor about fit challenges is a telling indicator of reliability. For the buyer, this diligence reduces the risk of a mismatch that not only wastes time and money but also introduces uncertainty into the bike’s alignment and handling.
In the end, the journey to find a compatible front fairing for a 2011 touring motorcycle is a blend of engineering awareness and market literacy. It requires recognizing the fairing as a system component, not a standalone cosmetic piece. It demands careful checks of part numbers, bracket configurations, and mounting hardware. It calls for a disciplined sourcing process that balances OEM fidelity with the availability and potential customization offered by aftermarket options. And it rewards the rider with a front end that not only looks right but feels right—the wind managed, the handlebars steady, and the rider’s posture comfortable over hundreds of miles. When those conditions align, the journey through compatibility becomes a smooth passage rather than a detour, letting the bike’s classic character shine through its restored or upgraded front end.
For those seeking a concrete starting point, practical notes from recent sourcing experiences emphasize the importance of part-specific details and seller transparency. Buyers should search for listings that clearly state compatibility with the exact year and model, verify mounting bracket availability, and request close-up images of critical interfaces before purchasing. The safer path remains a combination of OEM-referenced compatibility and a careful review of any aftermarket offerings to ensure the front fairing integrates without forcing further changes to the bike’s electrical or mechanical systems. It is a careful discipline, but one that delivers long-term dividends in ride quality and mechanical reliability. As with any major anchor piece of bodywork, the front fairing is where design intent meets practical engineering—the point at which a rider can still feel the original balance, even as the bike gains a fresh, trustworthy shell that will carry them into the next long stretch of road.
External resource for practical verification and listings: https://www.ebay.com
Aerodynamic Harmony: The Front Fairing of a 2011 Touring Cross-Country Motorcycle
The front fairing of a touring motorcycle from the early 2010s played a central role in shaping the riding experience as much as it defined the silhouette of the bike itself. On a model designed for long-haul journeys, the fairing was not merely a decorative shell but a carefully engineered element that balanced protection, stability, and rider comfort. In the context of a 2011 touring cross-country machine, the front fairing embodies a practical philosophy: shield the rider from the elements without compromising airflow, visibility, or access to the bike’s core systems. The result is a cohesive, almost architectural component that integrates the rider’s needs with the machine’s overall dynamics, turning potential wind fatigue into a more manageable physical condition and enabling steadier highway progress even when the road stretches into hours of uninterrupted riding.
From a design standpoint, the front fairing is the first line of interaction between the rider and the environment. It has to manage wind pressure, buffeting, and lift, while also serving as a platform for essential features such as the headlight, instrumentation, and, increasingly, integrated control surfaces. In the 2011 touring cross-country configuration, the fairing is designed to work in concert with a windscreen and bodywork that together create a streamlined profile. The objective is not just reduced drag in the abstract sense; it is a practical reduction of wind resistance that translates into lower fatigue during long rides, improved stability at speed, and a calmer, more controlled feel at the bars. The interplay between the fairing and the steering geometry matters, too. As the rider’s line of sight sits above the glassy surface of the windscreen, the fairing’s shape must guide the air so that it does not induce unnecessary turbulence near the rider’s helmet. When done well, the rider senses a sheltered cockpit that still remains responsive to rider input, a sensation of control rather than a rigid barrier between human and machine.
Material choice for the front fairing in this class of bike is inherently linked to real-world durability and performance. Publicly shared specifications for exact dimensions or material composition are not always disclosed by manufacturers, especially for specific model-year details. However, the fairing commonly employs impact-resistant, rigid plastics—often a type of acrylonitrile butadiene styrene, or ABS—chosen for its balance of toughness, lightness, and ease of molding. ABS offers a degree of rigidity to maintain a sharp outer contour, while also providing enough resilience to absorb minor road hazards such as gravel, small rocks, and contact with branches or errant debris without cracking. The use of such materials also simplifies integration with other components, allowing mounting points to be engineered with a predictable interface to metal brackets, fuel tank cover panels, and lower fairings. In a touring machine meant to cover thousands of miles, this compatibility carries practical weight: replacement parts and upgrades can be planned with a clearer picture of how the fairing will align with the rest of the bodywork.
What the rider feels during a long stretch of highway is a composite sensation. Airstream flow over the fairing should glide smoothly, with minimal buffeting around the helmet and shoulders. When the air glances across the glossy surface of the fairing, it generates lift and pressure patterns that either amplify or dampen gusts depending on the bike’s speed, weight distribution, and the rider’s posture. An effectively designed fairing lowers the wind pressure on the rider’s chest, redirects heavier currents away from the torso, and channels them toward the sides and rear where they pose less disruption to steering and balance. In practice, this means a more relaxed posture at highway speeds, with the arms resting naturally and the wrists remaining comfortable rather than tensed against the forces of wind resistance. The rider experiences a predictable ride profile, where the combination of the fairing and the windscreen seems to carve a corridor through the air rather than a turbulent breach that sends energy through the frame. The more predictable this corridor, the less mental energy the rider has to invest in fighting the wind, leaving more attention available for navigation, road awareness, and ongoing comfort.
Beyond the aerodynamic purpose, the fairing serves an easier-to-overlook but critical function: it houses and protects a portion of the bike’s facially exposed systems. The design integrates the optics of the headlight and the dashboard, giving the rider a clear line of sight to vital gauges and indicators while keeping them shielded from harsher weather. The fairing’s shape must accommodate a clean routing path for wiring, cooling intakes, and the mounting hardware that ties these elements to the bike’s frame. A well-integrated fairing can reduce the likelihood of rattles and misalignment as metal and plastic temperature cycles occur with changes in weather and road conditions. Such integration eases maintenance and service life. With long-distance travel in mind, access panels and mounting points are placed with practicality in mind: they simplify routine inspections, allow for straightforward component swaps, and enable a rider or mechanic to service the setup without disassembling essential parts of the bike’s bodywork.
The practical reality of replacements and upgrades is inseparable from the fairing’s initial design. For riders who plan to replace or upgrade the front fairing or install compatible accessories, the critical considerations are compatibility with mounting hardware and alignment with existing body panels. The skew of the fairing’s edges, the spacing of the mounting holes, and the precise location of windscreen fasteners all influence whether a given aftermarket component will fit cleanly. This is not simply a matter of texture or color; it is about the geometry of the bike’s front-end ecosystem. Any mismatch can lead to accelerated wear on brackets, misalignment of the headlight or instrument cluster, or increased air leakage that undermines the very wind protection the fairing is meant to deliver. The best practice is to consult official service documentation for model-year specifics. In some cases, the official manuals provide exact torque specifications for mounting bolts, recommended hardware, and any required spacing or shim usage to guarantee a secure, rattle-free assembly. The reality is clear: accuracy in the mounting procedure translates directly into both performance and durability, especially when riding becomes a test of endurance.
When assessing the front fairing in a touring context, riders also weigh aesthetic considerations—how the fairing contributes to the bike’s iconic silhouette while remaining faithful to the machine’s overall design language. The fairing’s lines are meant to complement the flow of the gas tank cover, the cockpit, and the side panels. The goal is a visually cohesive front end that communicates purpose—wind management, protection, and a sign of the machine’s readiness for long stretches of road. Yet behind that aesthetics lies engineering reality: the shape must avoid creating eddies that could degrade stability at high speed or at crosswinds, while still preserving the rider’s sense of inclusion in the bike’s aerodynamics rather than being shut off from the air entirely. A successful front fairing is both a technical asset and a design ambassador, presenting a pragmatic face to the road that honors the machine’s touring intent.
The broader context of compatibility and maintenance is never far from the practicalities of ownership. As with any complex, integrated component, the front fairing interacts with a variety of supplementary parts—from windshields and lower fairings to cooling ducts and lighting assemblies. When a rider seeks replacements or upgrades, it is essential to confirm that the chosen parts align with the bike’s mounting geometry and frame fasteners. The service manual and technical bulletins are the most reliable sources for such specifications, offering precise mounting points and step-by-step procedures. The manual’s guidance reduces the risk of misalignment, ensures the structural integrity of the front end, and preserves the intended aerodynamics. The process of verifying compatibility often involves more than simply matching model years; it can require attention to production runs, minor revisions in mounting bracket shapes, or updates to the headlight assembly that affect the surrounding fairing geometry. In short, the front fairing is not a standalone shell; it is a living interface between design, engineering, and daily riding realities.
For readers seeking the clearest path to precise technical specifications, the most reliable route is to access the official service manual or the technical documentation published by the manufacturer. While many public-facing sources provide broad descriptions of the fairing’s role, only the manufacturer’s documentation contains the exact figures that matter for maintenance and upgrades—weight, dimensions, mounting hardware, and accessory compatibility. This information can typically be obtained through an authorized dealer portal, where technicians and owners alike can access the model-year-specific data necessary to service or upgrade the front end. The reality is straightforward: if you want verified, up-to-date data tailored to the 2011 model year, the official documentation is the gold standard. Maintaining alignment with this source ensures that the front fairing continues to perform as intended, preserving aerodynamic efficiency, rider protection, and the long-distance comfort that defines touring riding.
As a practical takeaway, a rider considering a front-fairing upgrade or replacement should approach the project with two guiding questions in mind. First, will the component physically fit within the surrounding geometry of the bike’s front end, including the windscreen, headlight, and the lower panels? Second, will the installation procedures align with the torque specifications, mounting sequences, and any required spacers or shims outlined by the official documentation? Answering these questions with care helps maintain the machine’s intended performance envelope. It also preserves the balance of rider protection and comfort that is the essence of a touring-focused front fairing. In the end, the fairing’s importance lies not only in how it looks or the promises of wind protection but in how it participates in a holistic design that supports comfort on hours of open-road travel and reliability in the most demanding riding conditions.
For those who want to explore further fundamentals and historical context around front fairings in touring motorcycles, a broader look at the evolution of wind management and rider comfort across the segment can provide useful perspective. The core principles—streamlined aerodynamics, protection for the rider, and a maintenance-friendly integration with bodywork—remain consistent even as materials, graphics, and electronics evolve. The 2011 model year sits at an interesting juncture: it reflects a period when engineers were refining the balance between aesthetic mass and functional mass, a balance necessary for long-haul reliability. Riders and technicians who study this era can appreciate the compromises and decisions that shaped the front end’s behavior on the road. The practical takeaway from this historical lens is that the front fairing represents a synthesis of many small choices—material, form, mounting, and integration—that come together to produce a riding experience that is at once protected, stable, and visually coherent with the bike’s touring mission.
Ultimately, the front fairing on a 2011 touring cross-country motorcycle embodies a design philosophy that values rider endurance as a core metric of performance. It is the product of integration: the clip that locks aerodynamic efficiency to rider comfort and mechanical reliability. A front fairing that performs well is not merely a cosmetic feature; it is a functional shield that reduces fatigue, a mechanism for stable steering through variable wind conditions, and a boundary that defines the rider’s relationship with the machine during long, winding days on the road. This synthesis of function and form is what makes the front fairing a central feature of the model’s touring identity. It is this identity that continues to influence how riders think about wind management, maintenance, and upgrades as they plan their journeys on a bike built for long distances and open horizons.
External resource for additional official specifications and documentation can be consulted at the manufacturer’s authorized documentation portal: https://www.polarisdealer.com
Riding the Wing: Navigating Aftermarket Front Fairings for the 2011 Victory Cross Country Touring S
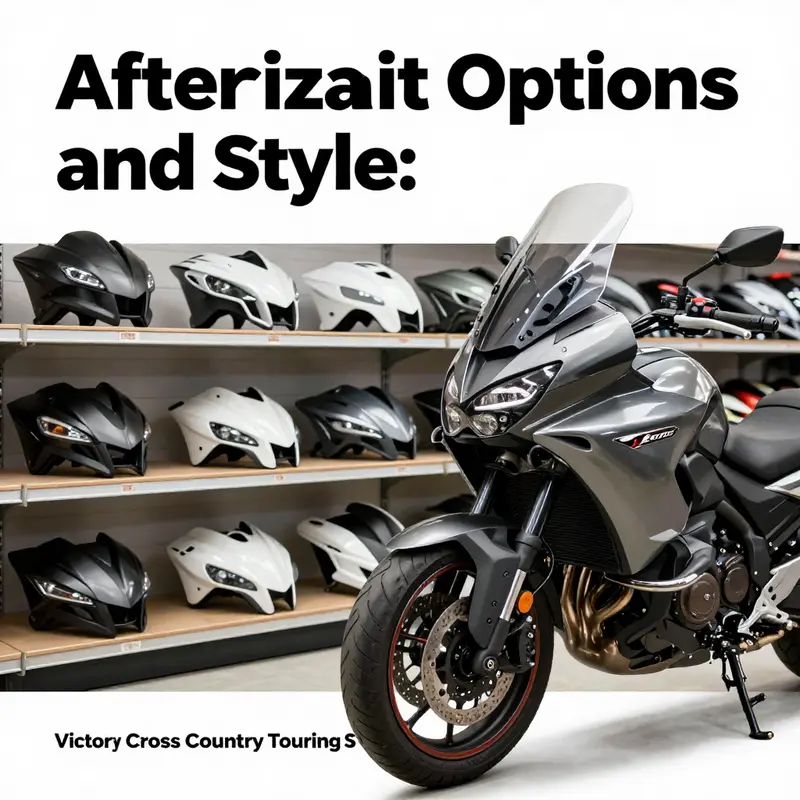
The front fairing on a motorcycle is more than a face. It is a carefully engineered blend of aerodynamics, rider comfort, and style that can redefine long-distance performance. For the 2011 Victory Cross Country Touring S, the front fairing is not merely a shield against wind; it is a focal point of the bike’s identity, a canvas for weather protection, airflow management, instrument visibility, and even heat routing. Touring models in Victory’s lineup have long prioritized comfort on extended rides, and the Cross Country Touring S takes that ethos a step further with a batwing-like silhouette that wraps around the rider. When owners think about aftermarket options, the conversation inevitably returns to how a front fairing can be aligned with the bike’s frame, its electrical system, and the rider’s own expectations for wind blast, noise, and heat. The goal is not to chase novelty for novelty’s sake but to curate a setup that preserves the model’s core strengths while offering incremental gains in ride quality and aesthetics. In this light, aftermarket front fairings become a practical narrative about fit, function, and fidelity to the rider’s long-haul ambitions.
For many riders, the gateway to meaningful upgrades begins with a pragmatic look at the mounting hardware. The front fairing is a collection of parts that must work in harmony with the bike’s frame, headlight assembly, gauge cluster, and wind deflectors. On a 2011 Cross Country Touring S, compatibility matters as much as cost. One of the more concrete, budget-conscious options that surfaces in online markets is a set of pre-owned mounting brackets. In the current marketplace snapshot, a listing for 14 Victory Cross Country Touring Front Fairing Mounting Brackets presents an entry point for those seeking to re-time and align a previously installed fairing or to repair a damaged mounting system. Priced at a modest $14.00, such brackets can be the hinge on which a broader fairing project turns. They are not glamorous, but they are essential. Without solid mounting hardware, even the most thoughtfully chosen fairing becomes a cosmetic shell that rattles at highway speed and wobbles through imperfections in the road.
Having established the importance of the mounting framework, it’s useful to widen the lens to the other bodywork components that commonly accompany a front fairing upgrade. Chrome saddle heat shields and air deflectors, for instance, often appear in the same aftermarket ecosystem as front fairings. Even when they do not constitute a complete fairing package, these small, complementary pieces can significantly affect the rider’s comfort and the bike’s thermal management. The saddle heat shields, when positioned correctly, can deflect heat from the engine and exhaust away from the rider’s thighs during hours in the saddle. The air deflectors, meanwhile, can be tuned to influence the boundary layer of air that travels over the tank and rider’s torso, smoothing the wind flow and reducing cockpit buffeting. The practical effect is a more controlled cabin of air—less turbulence, less fatigue, and more confidence when cruising at highway speeds or carving through gusts.
Of course, many riders do still crave a more dramatic leap, and the aftermarket ecosystem responds with customization options that reach beyond simple brackets and shields. Custom paint schemes, graphic accents, or even full fairing replacements are among the routes available to the determined owner. It is worth noting, however, that the excerpted findings indicate that while high-end aftermarket kits exist that can be tailored to match the premium feel of a Cross Country Tour—with its batwing fairing, integrated ventilation, and a polished, touring-ready finish—the specific listings for complete replacement front fairings are not always detailed in public marketplaces. This reality underscores a broader truth about aftermarket front fairings: while there is abundant scope for enhancement, the most reliable paths to a cohesive result lie in selecting parts with verified fitment and compatibility to the 2011 model year’s geometry, wiring, and mounting points.
Within this landscape, the practical approach blends a respect for the bike’s original design with a willingness to adapt. The Cross Country Touring S is not a blank canvas; it is a compact system in which each component is sized and tuned for a specific path through wind and weather. A front fairing upgrade, therefore, should be seen as a careful negotiation between preserving the model’s aerodynamic intent and upgrading the rider’s comfort, protection, and visibility. The batwing silhouette, for instance, is more than a stylistic flourish; it channels air around the rider’s torso and toward deflectors that shepherd airflow down and away from vulnerable wiring and hardware. Any aftermarket effort must consider whether the chosen fairing will preserve or enhance this relationship. If the upgrade veers toward a different wind profile—whether more shielded or more exposed—the rider should be prepared to recalibrate shocks, windscreens, and deflectors, as changes in wind force can reverberate through ride quality and handling feedback.
A practical starting point for many owners is to consult the broader universe of aftermarket fairings, which include both brand-agnostic components and brand-specific solutions. While the available listings in one marketplace emphasize specific vintage or model-year fitments, the underlying engineering principles remain consistent: mounting reliability, alignment accuracy, and integrated weather protection. When evaluating a potential front fairing upgrade, attention to fitment notes is crucial. The 2011 Cross Country Touring S relies on a fixed relationship between the lower edges of the fairing and the top surfaces of the auxiliary body panels. Some aftermarket options may require minor reshaping of bracket points or adjustments to the windscreen height, but a well-documented product will outline these requirements and provide the necessary hardware and instructions for a clean installation.
As riders investigate further, a practical heuristic emerges: start with the brackets and hardware, then layer in the weather-shielding and airflow-control elements, and finally assess whether a replacement fairing itself is warranted. This hierarchy makes sense because the front fairing’s performance is not just about the shell’s shell but about how the entire front-end system behaves in real-world conditions. A properly mounted set of brackets ensures that subsequent components align precisely with the bike’s geometry, preserving the intended rider line of sight to the instrument cluster and ensuring that the headlight remains properly aimed. The interplay of light and shadow on the instrument panel, the clarity of the gauge faces, and the reach to the switchgear all become part of the upgrade calculus. Any misalignment can produce glare, reduced visibility, or even electrical strain due to misrouted harnesses.
From a purchasing perspective, the marketplace’s dynamics reflect a balance between availability and price. The pre-owned brackets listed for the 14-piece set illustrate the kind of value that can be found in the secondary market. This scenario speaks to a broader phenomenon: the Cross Country Touring S, with its distinctive silhouette, has a dedicated following that keeps a portion of the rider community engaged in restoration, maintenance, and occasional upgrades. For those seeking to refresh a bike that has seen long miles, the used parts route can be especially appealing because it reduces the capital risk of a full front-end swap while offering a route to preserve original hardware quality. Yet, it also requires due diligence—verifying that all mounting points are intact, that there is no hidden cracking in the brackets, and that the fastener threads remain clean and secure.
Alongside these practicalities, the aesthetic dimension should not be overlooked. The Cross Country Touring S invites a look that is both cohesive and purposeful. Chrome accents, even when modest, can elevate the overall visual language of the bike and complement the chrome around the instrument cluster or saddle hardware. A front fairing that harmonizes with the bike’s chrome and paint can contribute to a sense of polished, long-range capability. Conversely, mismatched finishes or ill-fitting panels can create a disjointed appearance that detracts from the bike’s carefully sculpted lines. The rider’s eye takes in how the wind deflectors align with the fairing’s profile, how the windscreen mirrors the height and curve of the rider’s seating position, and how the lower air deflectors tuck into the fairing’s sides to channel air away from the engine bay without causing unwanted turbulence around the fork area.
For readers seeking further context on aftermarket front-end options across brands, a broader lens can be helpful. A curated path through the world of aftermarket fairings from other manufacturers demonstrates a shared logic: fitment confidence, finish compatibility, and installation support. For example, a general overview of fairings from a major aftermarket catalog highlights how different brands approach heat management, airflow, and bodywork integration, all of which echo the concerns facing Victory riders. This wider view can be particularly instructive when a rider contemplates a non-OEM solution that still aims to respect the Cross Country Touring S’s aero-architecture. To explore this broader spectrum, one can browse a wide range of collections such as Suzuki fairings, which illustrate how similar design challenges are solved across manufacturers. This cross-brand context helps riders understand what features to look for, such as mounting point compatibility, wind deflector height, and paint-mortion strategies that help a replacement panel blend with the bike’s existing colorway and finish. See the Suzuki fairings collection as a reference point for a range of mounting philosophies and aesthetic languages that can inform a thoughtful front-end upgrade.
In final consideration, the process of upgrading a 2011 Victory Cross Country Touring S front fairing is a disciplined exercise in compatibility, precision, and taste. It asks riders to honor the bike’s aerodynamic intent while exploring the kinds of improvements that bring measurable benefits in comfort and control. The bracket sets, heat shields, and deflectors may not grab headlines, but they anchor the practical reality of upgrading a touring machine. A well-chosen combination—brackets that securely anchor the fairing, heat shields that deflect engine heat from the rider, and deflectors that sculpt the air into a smooth, quiet, and manageable flow—can transform long rides into a more forgiving and enjoyable experience. When the time comes to consider a more ambitious route, a full fairing swap may be on the table, but it is a decision that should be grounded in careful assessment of fitment, weight balance, wiring harness routing, and the risk-reward calculus of performance versus aesthetics. In practice, many riders begin with the mounts and simple aesthetic upgrades, then, if the riding experience calls for it, progress toward a complete front-end refresh that respects the model’s distinctive character while embracing the benefits of modern aftermarket engineering.
External resource guidance and market availability often converge on the same practical path. For a starting point in sourcing parts and pricing, a targeted online search in marketplaces like eBay can yield both used and new components, along with community-driven guidance on fitment and compatibility. Because the landscape changes with new listings, it is wise to approach the process with patience and a clear sense of the bike’s needs. Prospective buyers should keep a checklist that centers on mounting integrity, alignment accuracy, and finish compatibility. A careful, informed approach reduces the risk of investing in components that do not deliver the expected improvement or that require extensive modification to function properly. In sum, the 2011 Victory Cross Country Touring S front fairing represents a meaningful intersection of form and function. The aftermarket ecosystem, when navigated with care, offers a path to elevate both comfort and presence on the road, while preserving the essence of Victory’s touring philosophy. For riders who want a broader sense of available options beyond the specific model year, the Fendered landscape of fairings across brands provides useful context as a guidepost for what works well in a front-end upgrade. And as always, the journey from brackets to brilliance is a careful one—measured not in flashy promises, but in the quiet, reliable improvements that make every mile feel better.
For a broader catalog of related aftermarket options, see the Suzuki fairings collection.
If you’re just beginning your search for a practical upgrade route, remember that the most important steps are verifying fitment, ensuring solid mounting, and prioritizing airflow management that respects the bike’s original geometry. And when you’re ready to investigate pricing and availability, a broad marketplace search will reveal brackets, shields, and several complete or partial fairing solutions that can be tailored to a 2011 Victory Cross Country Touring S. The market rewards patience and due diligence, especially when the goal is to maintain the bike’s touring ethos while embracing a touch of modern efficiency. To explore a wide range of aftermarket options and practical examples, begin with the broader context of fairing collections and then narrow your focus to pieces that explicitly mention Victory Cross Country Touring compatibility. In this way, you can craft a front-end upgrade that not only looks right but also performs in a way that honors the spirit of the bike’s original design, delivering comfort, efficiency, and a renewed sense of confidence on the road.
External resource: https://www.ebay.com
Wind, Alignment, and Endurance: Installing and Living with the Front Fairing on a 2011 Touring Cruiser
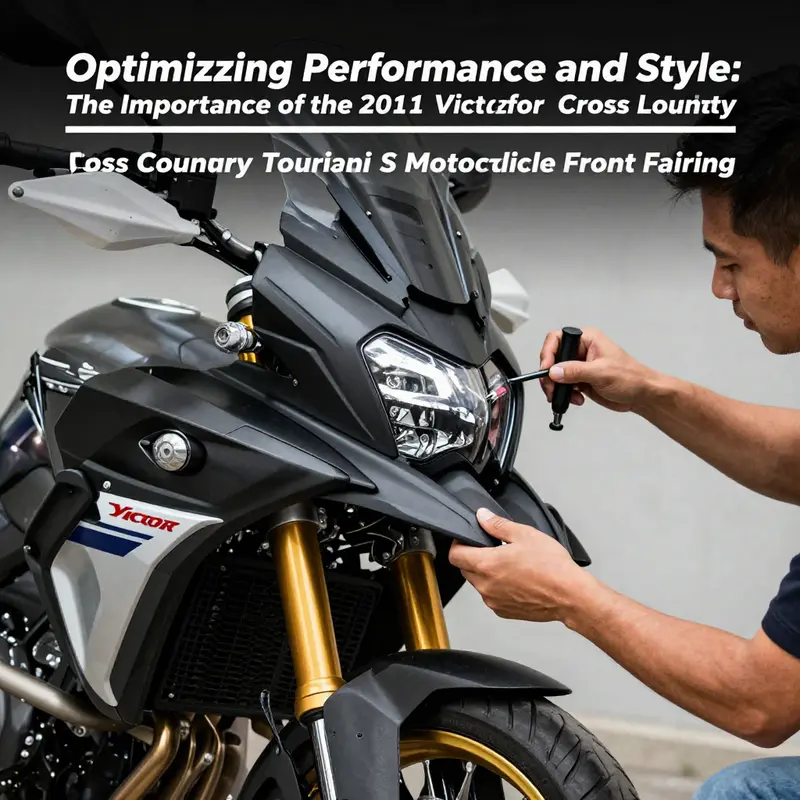
The front fairing of a long-haul touring motorcycle is more than a cosmetic shell. It governs the rider’s comfort, the bike’s efficiency, and the overall confidence you feel when you point the front wheel toward miles of pavement. On the 2011 touring model in question, the front fairing is a carefully engineered balance of aerodynamics, protection, and access to essential systems. When you look at the road ahead, the fairing is the shield against turbulence and wind fatigue, but it also serves as a housing for lighting, instrumentation, and, in many setups, a portion of the electrical harness that powers the bike’s awareness and visibility on the road. This chapter navigates the terrain of installation considerations that keep that balance intact, turning what can feel like a fragile upgrade into a durable, ride-ready feature that remains harmonious with the bike’s chassis and its long-distance mission.
The first measure of success is model verification. Within a single year and model line, manufacturers may introduce subtle refinements to the frame geometry, mounting points, and fairing profile. The 2011 touring variant had variations that could look nearly identical from a distance but diverge in how the upper mounting points align with the handlebars and the steering head assembly. A mismatched fairing can create misalignment not only in appearance but also in load distribution. When the fairing sits at the wrong angle or uses incompatible fasteners, it can become a source of stress concentration. This is more than a cosmetic risk; rigidity is a pillar of aerodynamics. If the fairing doesn’t sit true, wind can find an edge to buffet against, and the rider will notice a shift in handling feel, especially at highway speeds and in crosswinds. The prudent approach is to confirm you have the correct fairing variant for the specific year and trim level you’re working with, and to double-check the mounting points against the service documentation. This step, though straightforward, sets a baseline for every subsequent alignment, bracket fitting, and electrical routing task.
Once the correct piece is in hand, the next critical phase is alignment. The fairing must align precisely with the handlebar mounts and, above all, the upper triple tree. The geometry matters because this is where aerodynamic efficiency begins. Even a millimeter of deviation can alter the cockpit’s feel, the headlight’s shielding, and the way the air streams across the rider’s torso and neck. Proper alignment isn’t only about the straight line to the road; it’s about how the air wraps around the rider and how that air path interacts with the rider’s posture. A fairing that sits high or low relative to the rider’s seating position can create wind pressure that translates into fatigue, numbness, or a dry throat on long rides. In practice, achieving alignment is a dialogue between precise measurements and a careful visual check. It means checking that the fairing’s centerline is coaxial with the wheel’s axis when the front wheel is in the straight-ahead position, and confirming that the upper brackets seat evenly on their shoulders without crowding or staggering.
The mounting bracket alignment deserves special attention as well. The brackets connect the fairing to the frame and to the steering assembly, and their geometry dictates how evenly the fairing distributes load across the bike’s front end. If brackets are misaligned, mounting bolts can bear unevenly, and over time that uneven load becomes a stress point. Cracking, panel distortion, and even rub against adjacent components can result if the fairing isn’t seated with perfect symmetry. The remedy is simple in principle but exacting in practice: verify the bracket planes are parallel and co-planar with the bike’s design planes, use the recommended fasteners, and, when necessary, include shims or spacers that the manufacturer specifies to achieve a true, balanced fit. The emphasis on proper bracket alignment is not an invitation to force-fit; it’s a reminder that every fairing panel is part of a system that must behave as a single, connected body at speed and under load.
Part quality becomes the hinge between a temporary fit and a lasting installation. The recommendation is to favor OEM parts or high-quality aftermarket equivalents that are certified for the platform. The rider’s safety and the bike’s durability live in those choices. Subpar brackets, imperfect gaskets, or ill-fitting interior panels can introduce flex, which, under vibration, translates into flutter, noise, and even looseness that erodes the precision of the steering and the feel in the rider’s hands. A robust fairing system relies on components that meet the dimensional tolerances and surface finishes the original design anticipated. Those tolerances are not arcane numbers; they are practical constants that keep headlights aligned, wind glare minimized, and the rider’s posture supported by the fairing’s shaping rather than fighting against it.
Electrical integration is another domain where meticulous routing and secure connections pay dividends in reliability and safety. The fairing, particularly on touring models, often houses integrated lighting and sometimes contributes to the bike’s instrumentation pathway. The practitioner must ensure that all electrical connections—headlights, turn signals, dash illumination—are routed in a way that preserves clearance for interior panels, does not abrade against fasteners or moving parts, and remains shielded from vibration. That means using shielded conduits where required, employing grommets at entry points, and securing the harness with appropriate clips that do not transmit vibration to the connector terminals. A common pitfall is allowing a wire run to cross over the steering range, which can cause chafing as the bars are turned from lock to lock. The electrical plan should also contemplate serviceability. If a module requires removal of the fairing for maintenance, the harnesses should be accessible without the need to pry panels free forcefully. The goal is a clean, serviceable system that preserves weather sealing and keeps the rider’s cable paths clear of hot components or rotating hardware.
Post-installation inspection is the bridge between a successful fit and long-term reliability. After you’ve torqued the fasteners to the manufacturer’s specifications and confirmed that all electrical lines are secure, a comprehensive check of the front end should follow. The steering head bearings must rotate with smoothness that feels the same with the fairing in place as it did before installation. Suspension components should show no binding or premature wear due to added weight or altered aerodynamics. It’s not uncommon for a new fairing to shift ever so slightly after the first few miles of riding; that is why a follow-up inspection is prudent. The rider should then perform a careful, slow-speed test ride in a controlled environment to evaluate handling changes, feel of the fairing at low speed, and any newly introduced vibrations or wind noise. Only after these checks does the rider proceed to longer test days. The objective is not to chase a perfectly silent ride in a vacuum but to ensure that the fairing works with the bike’s natural dynamics rather than against them, and that any minor adjustments needed are identified before a long road stint begins.
Beyond fit and function, the fairing’s influence on the riding experience deserves a narrative. A well-fitted front shell improves stability, reduces rider fatigue by smoothing wind across the torso and shoulders, and can shape the bike’s overall acoustics by dampening wind-induced noises that creep into the cockpit. The rider’s posture benefits, too. A fairing that harmonizes with the bars and windscreen helps maintain a comfortable head and neck position, which translates into longer, more enjoyable rides. At the same time, a poorly matched fairing can produce buffeting, a phenomenon that disrupts vision and concentration. The subtle art of installation, therefore, is not to chase a perfectly quiet air but to balance wind pressure with the rider’s posture and the bike’s steering dynamics. This balancing act becomes especially important on a touring machine designed for sustained miles, where the difference between an hour of fatigue and several hours of uninterrupted comfort is often the outcome of a single precise mounting and careful alignment.
As with any major upgrade on a touring motorcycle, a pathway toward longevity includes documenting the process and considering future maintenance. A clear record of the parts involved, the torque specs used, and any alignment checks performed provides a valuable reference for future service. That record becomes a practical guide when you inspect the bike in the months ahead or when you transfer ownership of the machine. It also supports future upgrades, whether the goal is to fit additional lighting, mount wind deflectors, or swap to a different windscreen. The installation should leave you with a system that can be serviced with the same discipline you apply to the engine’s routine maintenance. If questions arise, the service manual from the manufacturer remains the most reliable source for the precise steps, torque values, and alignment parameters that ensure compatibility with the bike’s frame and front-end geometry.
To situate this discussion in the broader landscape of aftermarket modification and maintenance, a practical approach is to assess how similar assemblies are treated across brands. The way a fairing couples to the frame, the emphasis on bracket alignment, the importance of clean electrical routing, and the discipline of post-install inspection are universal themes that transcend a single model. They reflect an engineering principle: the surface, when combined with the core, must reinforce the core’s integrity rather than compromise it. That principle anchors the rider’s confidence on the road, especially when the bike is tasked with long-distance endurance, variable weather, and the unpredictable demands of real-world riding.
For riders who want to explore the wider ecosystem of fairing design and fitment, it can be instructive to observe how different lines categorize their fairings, the common mounting strategies, and the types of bracket systems employed. The examples you encounter in the marketplace, even as you choose the path that best suits your bike, tend to converge on the same fundamentals: precise alignment, robust mounting, high-quality materials, and clean electrical integration. And while the specifics may differ, the core discipline remains the same. The front fairing is not a standalone shell; it is an integrated system that must speak the same language as the bike’s chassis and rider’s ergonomics. In practice, that means respecting the geometry, following the manufacturer’s recommended parts and procedures, and proceeding with a methodical, test-first mindset before committing to a long ride.
Internal resources can provide a broader sense of how aftermarket fairings are positioned within the market and what sorts of fitment challenges commonly arise. For a sense of how aftermarket fairings categorize their offerings and how different lines frame compatibility, you can explore the Honda fairings collection. This resource provides a comparative lens that helps a rider understand common mounting patterns and bracket configurations, which can illuminate the mechanics of a similar installation on a touring model. While not a substitute for model-specific guidance, it offers a practical context for appreciating the operational choreography required to make a front fairing work harmoniously with the chassis, controls, and rider posture. Honda fairings collection.
In closing, the installation of a front fairing on a touring motorcycle is a study in precision, patience, and respect for the bike’s architecture. The process begins with confirming the correct components and ends with a ride that feels more controlled, more comfortable, and more confident. The rider who approaches the job with attention to model-specific geometry, bracket alignment, high-quality parts, and meticulous electrical routing will reap the benefits of a fairing that performs without inviting vibration, noise, or wear. A well-executed installation aligns with the machine’s purpose: to carry a rider farther with less fatigue and more enjoyment, mile after mile, season after season. For those seeking formal, step-by-step guidance, the official service manual remains the definitive reference, offering precise instructions, torque specs, and diagnostic checks tailored to the exact model year and configuration in question.
External resource:
- Official technical details and installation guidance can be found in the official service manual for the model: https://www.victorymotorcycles.com/service/manuals/2011-cross-country-touring-s-service-manual
Wind, Comfort, and the Open Road: How the Front Fairing Shapes the Touring Experience on the 2011 Touring Cruiser
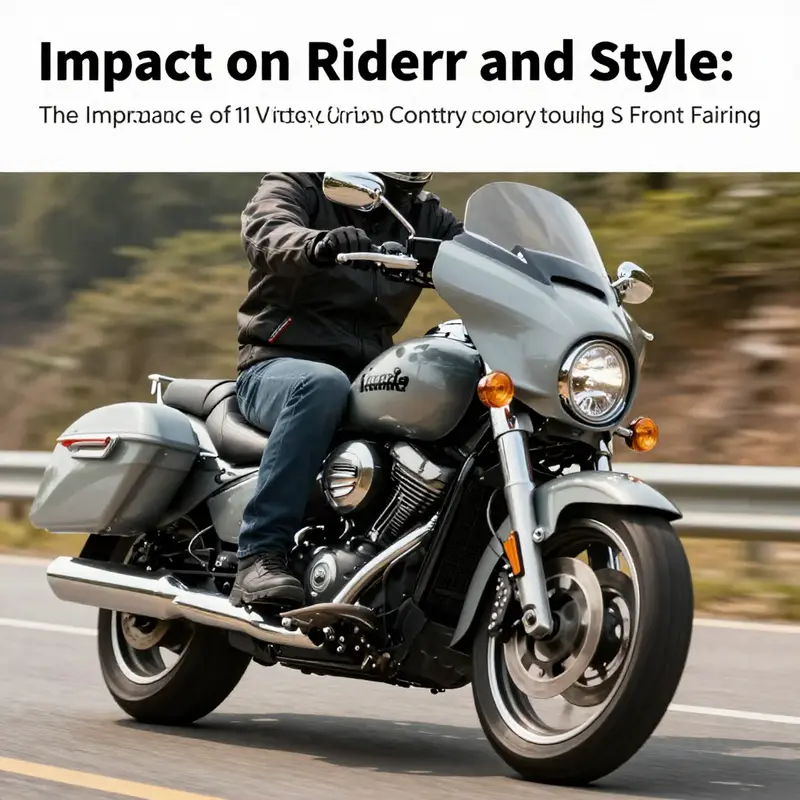
The front fairing on a touring cruiser from 2011 stands as much more than a protective shield for the rider. It is a carefully sculpted interface between machine and air, a device that translates wind into comfort, and a visual statement about how this bike was meant to be ridden. In the long arc of a highway journey, where hours become miles and miles become memories, the front fairing performs a quiet but relentless job: it choreographs the rider’s interaction with wind, noise, and posture. This is not merely about aerodynamics in the abstract; it is about how a single design element can change fatigue into endurance, how comfort can shift a ride from a test of will to a sustained dialogue with the road, and how form and function converge to shape both perception and performance on the open highway.
The design and structure of the fairing are immediately recognizable to any observer familiar with touring motorcycles: a large, full-width batwing silhouette that seems to rise from the front of the bike like a protective cape. The visual language is familiar and iconic, a shape that riders come to associate with long-distance exploration. But beyond its signature outline, this configuration performs a practical orchestration of airflow. The batwing profile channels air over and around the rider, creating a smoother wind envelope that reduces the turbulent gusts that buffet the upper body. It is in these subtle shifts of air that the rider begins to notice a difference: the helmet sounds drop from a constant whoosh to a cleaner, steadier rhythm; the shoulders feel supported rather than strained; the neck and upper back experience less wind pressure during hours of highway cruising. The fairing becomes a tangible ally against fatigue, a crucial ally when riding through time zones, through changing weather, and along endless ribbons of pavement.
A primary function of any front fairing is wind protection, and in this model the protection is felt most during steady highway speeds that characterize touring. The wings of air that would ordinarily slam into the rider’s torso are redirected and dampened, creating a more controlled flow that reduces buffeting at head level and alongside the helmet. Buffeting is not merely an annoyance; it disrupts balance and concentration, forcing micro-adjustments that accumulate into fatigue. By smoothing the air, the fairing helps the rider maintain a steadier posture with less muscular tension in the neck and upper spine. This is especially meaningful on long rides when the rider’s focus needs to be preserved for navigation, road conditions, and changing scenery rather than pitched battles with wind stress. The wind that would otherwise press against the chest and torso becomes a more harmonious partner, allowing the rider to relax into the geometry of the bike rather than fighting against it.
Aerodynamics, however, is not solely about frontal wind deflection. The fairing shapes the global airflow around the rider and the vehicle, influencing how air climbs over the shoulders, behaves around the arms, and exits behind the cockpit. A well-designed fairing lowers drag while stabilizing the rider’s sense of forward momentum. On a touring machine, where every mile is a potential fatigue point, these aerodynamic considerations translate into more than speed; they translate into endurance. When the rider experiences less drift and less gust-induced turbulence, the wrists and elbows carry less of the wind’s energy. The hands can rest more naturally on the bars, the wrists pay less of a toll, and the overall body tension tends to stay within a comfortable, sustainable range. These effects are subtle, but their cumulative impact can redefine a day’s ride from a test of stamina into a sustained, confident cruise.
There is also a design logic at work that speaks to integration. The front fairing does not exist in isolation; it is part and parcel of the bike’s entire visual and mechanical system. It houses essential components such as headlights and turn signals, shaping how these elements read to onlookers and how they perform under various lighting conditions. The placement and sizing of the lights influence visibility and perception at dusk or dawn, while the turn signals contribute to the fairing’s overall silhouette. This integration is important for the rider’s sense of safety and control. A fairing that blends harmoniously with the bike’s lines contributes to a feeling of cohesion—an attribute that is noteworthy on a touring motorcycle where rider confidence depends as much on how the machine communicates with the road as on raw mechanical capability.
From a rider’s comfort perspective, the fairing’s impact extends beyond wind itself. By shaping the air, it can subtly ease the rider into a more relaxed riding position. A calmer wind environment reduces the need for tense muscle engagement, especially in the shoulders and back. When fatigue prevention is part of the design, the rider can adopt a posture that supports longer hours in the saddle without sacrificing control. This is particularly valuable on straight highway stretches where fatigue can creep in gradually but inexorably. The fairing thus supports not only the body’s immediate comfort but also the broader physiological rhythms of long-distance riding: breathing stays steadier, posture remains aligned, and the rider’s focus is preserved for spotting wildlife, road debris, or fading landmarks in the distance.
Aesthetics, too, play a role in the rider experience. The batwing’s bold, expansive contour communicates a particular identity—one that signals purpose, travel, and a sense of adventure. While function remains the priority, the form of the fairing reinforces the idea that this is a machine built for exploration, not just commuting. The visual feedback—the way the wind-sculpted front interacts with the rider’s line of sight and the bike’s overall stance—helps to create a sense of anticipation for the road ahead. In a touring context, where the road is as much a companion as a route, the fairing becomes a partner in storytelling as much as in performance.
Compatibility and interchangeability emerge as practical concerns for riders thinking about upgrades or replacements. The front fairing is not a one-size-fits-all component. When considering replacements or enhancements, riders must account for mounting points, hardware compatibility, windscreen height and curvature, and the fit with headlights and indicators. A well-matched replacement preserves the bike’s geometry, preserving aerodynamic continuity and ensuring that the new component works harmoniously with existing electrical connections and protective features. This is not merely about keeping things aligned; it’s about maintaining the integrity of the ride’s wind profile, which underpins comfort and stability at speed. The process often involves balancing the desire for a newer look or improved materials with the practical realities of how the fairing integrates with the bike’s chassis and electronics.
For riders and enthusiasts interested in expanding their understanding of how different fairing configurations influence aero performance and rider comfort, a broader look at fairing families can be enlightening. Exploring a variety of brand approaches to the same functional goal reveals how the core ideas—wind deflection, streamlined air passage, and rider-supportive geometry—manifest across designs. To connect with a broader discussion of fairings and their role in shaping ride quality, see the Yamaha fairings collection, which offers a range of configurations that illustrate how manufacturers approach wind management in different chassis archetypes. This reference helps put the 2011 touring model’s front fairing in a wider context of aerodynamic thinking across popular sport and touring platforms, providing a useful contrast between sport-oriented fairings and the more expansive touring profiles that prioritize rider shelter and calm air.
For readers who want to locate aftermarket options or alternatives that may suit their preferences for look, sound, and wind experience, the landscape of fairing designs is surprisingly diverse. The key questions revolve around fit, rigidity, and the way the new shape interacts with the rider’s posture at typical touring speeds. A fairing that is too aggressive in its wind bypass can create new forms of turbulence or noise; one that is too small may fail to deliver the comfort gains that touring riders expect. The art lies in selecting a configuration that preserves the bike’s intended riding feel while offering a tangible enhancement to day-long comfort and control. In practice, this means paying attention to hardware compatibility, the alignment of mounting points, and how the selected fairing changes the vehicle’s center of gravity and the rider’s line of sight at typical riding radii. It also means recognizing that the front fairing’s role is part of a broader system of wind management that includes the windscreen, the seat, and even the rider’s gear, since helmet shape and helmet ventilation can modulate the perceived benefits of the fairing design.
As the road stretches ahead, the front fairing’s value becomes clear not just in measured performance metrics but in the rider’s impression of the journey itself. The sense of shielded air, the quieted wind noise, the steadier ride on uneven pavement, and the confidence born from an integrated optical and mechanical package all contribute to a riding experience that feels more like a companionable voyage than a series of miles logged. In this sense, the 2011 touring cruiser’s front fairing encapsulates a philosophy of design that privileges endurance and comfort without sacrificing the excitement of open road riding. It is a reminder that in motorcycling, as in travel, the most meaningful improvements often come from elements that stand between rider and weather, transforming a long ride into a memorable passage rather than a routine traversal.
External reference: https://www.victorymotorcycles.com/motorcycles/2011-cross-country-touring-s
Internal link reference: For readers curious about how different fairing families influence aero performance and rider comfort, you can explore the Yamaha fairings collection. This broader perspective helps place the touring model’s front fairing in a wider conversation about wind management and rider experience across brands. Yamaha fairings collection.
Final thoughts
Understanding the front fairing of the 2011 Victory Cross Country Touring S motorcycle is essential for motorcycle business owners seeking to enhance both their offerings and customer experiences. By focusing on compatibility, technical specifications, aftermarket options, and installation considerations, businesses can provide their clients with not only quality products but also reliable services that cater directly to their needs. The impact of the front fairing goes beyond aesthetics, affecting rider comfort and performance on the road. Therefore, staying informed on these aspects is crucial for maintaining a competitive edge and ensuring customer satisfaction. As the motorcycle market continues to evolve, prioritizing such integral components will ensure business longevity and success.