Introduction
Motorcycle fairings are critical for both the aesthetics and aerodynamics of bikes, making their repair a must-have skill for businesses serving riders. Understanding how to fix motorcycle fairings effectively not only ensures high-quality service but also boosts customer trust and retention. This guide is designed to provide business owners with a comprehensive approach to fairing repair—from careful removal and damage assessment to crack restoration, precise reinstallation, and crucial final adjustments. Alongside these practical chapters, you’ll learn about the essential tools and materials required for efficient repairs. Each chapter builds on the previous to give you a seamless workflow that can be integrated into your repair operations, helping you minimize mistakes and maximize quality.
Tables of Contents
Chapter 1: How to Fix Motorcycle Fairings: Removal and Initial Damage Assessment
- Essential Steps for Safe Fairing Removal to Protect Your Motorcycle’s Integrity
- Mastering Precise Damage Evaluation After Fairing Removal
Chapter 2: How to Fix Motorcycle Fairings: Crack Repairs and Surface Restoration Techniques
- Effective Strategies for Repairing Cracks in Motorcycle Fairings: Durable and Seamless Restoration
- Effective Crack Repair and Surface Refinishing Methods to Restore Motorcycle Fairings
Chapter 3: Reinstalling Motorcycle Fairings with Precision: Mastering Alignment and Secure Fastening
- Essential Preparation and Mounting Techniques for Flawless Motorcycle Fairing Installation
- Mastering Fairing Alignment and Secure Fastening Techniques for Lasting Repairs
Chapter 4: How to Fix Motorcycle Fairings: Tools and Materials Needed for Effective Repair
- The Essential Toolkit for Motorcycle Fairing Repairs: Mastering Repair with the Right Tools and Materials
- A Practical Guide to Materials and Step-by-Step Repairs for Motorcycle Fairings
Chapter 5: How to Fix Motorcycle Fairings: Final Adjustments and Reattachment of Components
- Mastering Fairing Alignment and Secure Fastening for Durable Repairs
- Mastering Component Reattachment and Functional Testing for a Secure Motorcycle Fairing Installation
Chapter 1: How to Fix Motorcycle Fairings: Removal and Initial Damage Assessment
1. Essential Steps for Safe Fairing Removal to Protect Your Motorcycle’s Integrity
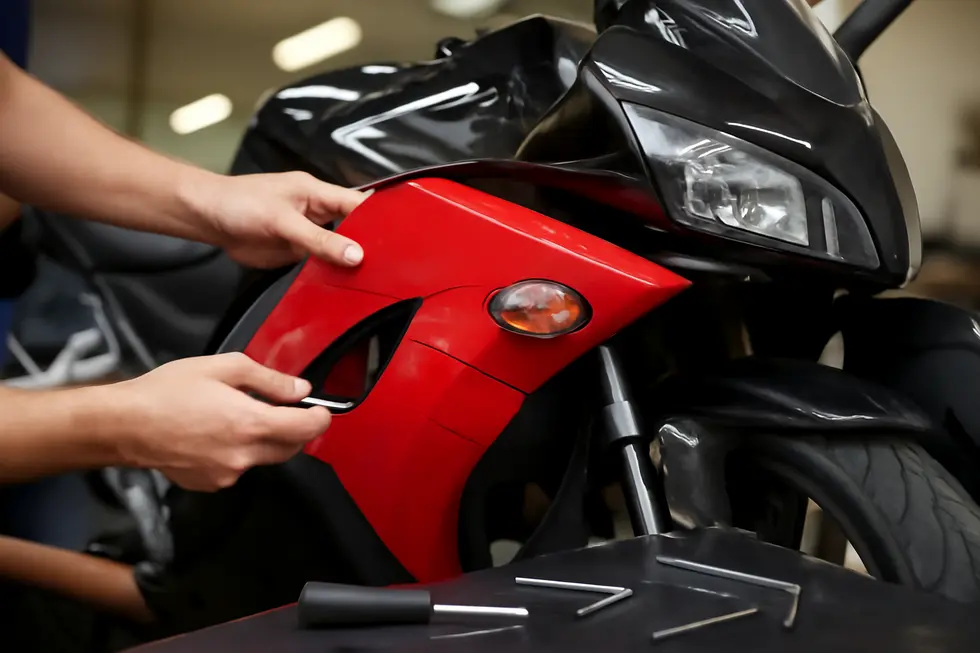
Removing motorcycle fairings demands a careful, methodical approach to avoid inflicting further damage on these often fragile components. Start by detaching all external attachments such as turn signals, mirrors, luggage racks, and any taped or removable lenses. This step prevents accidental breakage or scratches during the removal process.
Use the correct tools—screwdrivers, hex keys, and wrenches—to gently loosen bolts and screws. Rather than hastily removing fasteners, gradually loosen them which helps minimize stress and cracking on plastic panels. Avoid forcing parts apart; if a fastener resists, double-check for hidden screws or clips rather than applying excessive force. During removal, keep close track of all clips, brackets, and mounting points. These parts are often the most vulnerable to damage, with tabs cracking easily if mishandled.
If access is limited, or to reduce strain on mounting points, it sometimes helps to temporarily relocate nearby electrical components or hoses. This maneuver creates extra space for maneuvering brackets or panels without placing undue pressure on the fairing material.
After fully removing the fairings, a thorough inspection is crucial for spotting less obvious damage. Look closely for cracks, especially near bolt holes where stress concentrates. Check for any warping, broken tabs, or missing clips—issues that can affect fit and safety once the fairings are reinstalled. Don’t underestimate minor cosmetic flaws; they can hide deeper structural weaknesses that may worsen under riding conditions.
Following these careful removal methods safeguards the fairings’ integrity and ensures a solid foundation for repair or replacement. For practical, step-by-step visual guidance on safely removing stock fairings from models like the 2024 Yamaha R3, this TikTok tutorial offers valuable tips: https://www.tiktok.com/discover/how-to-remove-stock-fairing-2024-r3. Additionally, for an in-depth discussion on spotting initial damage after crashes, visit the Kings Motorcycle Fairings blog.
For further insights on choosing and maintaining your motorcycle fairings, explore reliable advice at Summit Fairings’ blog, offering detailed information and expert tips to enhance your repair process.
2. Mastering Precise Damage Evaluation After Fairing Removal
Conducting an accurate damage assessment immediately after removing motorcycle fairings is essential to ensure effective repairs and prevent further issues. This process begins with a deliberate and cautious removal of all fairing panels, taking care not to damage delicate mounting points or hardware. Keeping bolts, screws, and clips organized facilitates smoother reassembly and allows easy verification of all attachment areas.
Once the panels are off, a thorough visual inspection must be performed. Look closely for cracks, scratches, missing or broken tabs, and any warping or deformation that may compromise the fairing’s structural integrity. Equally important is examining the attachment points not only on the fairings but also on the motorcycle’s frame. Check for bends, fractures, or damaged mounting hardware that could affect secure fastening later.
Damage to supporting brackets, bolts, or adjacent bodywork should also be identified. Impacts or stress transmitted through the fairings can affect these underlying components, potentially undermining the overall fit and safety of the bodywork. Evaluating these areas helps determine whether parts can be repaired or must be replaced.
Systematic documentation is vital—clearly record all findings through photographs and detailed notes before proceeding. This step establishes an objective reference to guide repair decisions and ensures no damage is overlooked during restoration.
Recognizing that stable mounting generally requires a minimum of three secure points on each panel, special attention to mounts’ condition is essential to avoid relying on temporary fixes like zip-ties. Following these precise evaluation methods not only safeguards the integrity of your repair work but also promotes the longevity of the fairings once reinstalled.
For additional insights and a broad selection of fairing options to aid in restoration projects, explore the wide-ranging affordable motorcycle fairings available. Visual tutorials such as “How Do You Install Motorcycle Fairings?” by The Racing Xpert also offer valuable guidance on damage assessment and repair techniques.
Chapter 2: How to Fix Motorcycle Fairings: Crack Repairs and Surface Restoration Techniques

1. Effective Strategies for Repairing Cracks in Motorcycle Fairings: Durable and Seamless Restoration
Repairing cracks in motorcycle fairings is a crucial step to restore both their structural integrity and visual appeal. The choice of repair method depends largely on the type of fairing material and the size and location of the crack. For thermoplastic fairings, plastic welding offers a robust and lasting solution. This technique involves melting the cracked edges and fusing them back together, often reinforced with plastic filler rods to ensure strength. Plastic welding produces a repair that can withstand vibrations and impacts common on motorcycles.
For fairings made of fiberglass, a specialized repair approach is necessary. Applying a fiberglass repair kit involving resin and cloth layers over the damaged area effectively restores structural support. Once cured, the surface can be sanded smooth and properly painted, sealing the repair and restoring a flawless finish. Fiberglass repair is especially suited for larger or deeper cracks where simple bonding might not suffice.
A popular quick-fix method combines super glue and baking soda for rapid crack bonding. By first supporting the cracked area with tape behind it, then sprinkling baking soda on the crack before applying cyanoacrylate glue, the baking soda acts as a catalyst. This hardens the glue instantly to fill gaps and stabilize the damage, making it a practical option for minor repairs or emergency fixes.
To enhance repair durability and prevent crack extension, drilling small stop holes at both ends of the crack before applying any adhesive is a recommended mechanical reinforcement technique. These holes reduce stress concentration points that could otherwise cause the crack to grow.
After structural repair, it’s important to restore the fairing’s surface aesthetics. Sanding the area smooth, applying plastic or body filler where needed, and repainting provide a seamless finish. For superficial scratches, mild abrasives like toothpaste may reduce visibility, but they are not viable for cracks.
Choosing the right combination of these techniques ensures a strong, durable repair that preserves your motorcycle’s style and protection. For more insights and tips on motorcycle fairings and repairs, explore this comprehensive resource on motorcycle fairings and repairs.
For visual demonstration of these repair techniques, the video “How Do You Install Motorcycle Fairings?” by The Racing Xpert offers practical guidance to complement these methods.
2. Effective Crack Repair and Surface Refinishing Methods to Restore Motorcycle Fairings
Repairing motorcycle fairings to their original strength and appearance requires a careful blend of structural fixes and surface restoration techniques. Addressing cracks effectively often begins with plastic welding or hot stapling, where heated staples are embedded to stitch the cracked area from behind. This approach not only seals the damage but reinforces the plastic for durable resilience against future stress. When welding tools are unavailable, high-strength epoxy resins provide a reliable alternative. Applying epoxy evenly along the crack and clamping the pieces ensures a strong bond after curing, ideal for seamless repairs on common fairing materials. Many riders also rely on specialized plastic repair kits that combine adhesives, fillers, and reinforcement options designed specifically for fairing plastics to restore broken or weakened sections.
Surface restoration extends beyond structural fixes to maintaining or enhancing the visible finish. Minor scratches can often be mitigated with household abrasives like toothpaste, which lightly buffs imperfections without harsh chemicals or professional tools. For a flawless finish following crack repairs, sanding the affected area smooth and applying primer with color-matched paint is vital to protect and renew the fairing’s look. Plastic fillers assist in leveling surface inconsistencies before polishing to blend repairs naturally into the original fairing texture. Throughout this process, maintaining careful, even pressure and progressive sanding grits ensures an even, professional result.
Combining crack repair and surface restoration methods maximizes both the durability and aesthetic longevity of fairings. This holistic approach allows riders to confidently restore damaged panels without costly replacements, preserving the bike’s style and integrity. Learn more about practical solutions and materials for fairing repairs at the Summit Fairings blog.
For visual learners, detailed guidance including bracket installation, crack bonding, and protective fastener use is well captured in the video “How Do You Install Motorcycle Fairings?” by The Racing Xpert, offering step-by-step demonstrations on common repair techniques.
Chapter 3: Reinstalling Motorcycle Fairings with Precision: Mastering Alignment and Secure Fastening
1. Essential Preparation and Mounting Techniques for Flawless Motorcycle Fairing Installation
Achieving a perfect reinstall of motorcycle fairings relies heavily on thorough preparation and meticulous mounting strategies. Before installation, carefully remove the old fairings, keeping track of every bolt, clip, and fastener. Organizing these components by labeling or placing them in compartments prevents confusion and loss during reassembly. It’s crucial to clean all mounting surfaces with mild detergents and soft cloths to eliminate grease, dirt, or residues that could impede proper fitting or cause uneven seating.
Inspect all mounting points on both the fairings and motorcycle frame for damage or rust. Addressing these issues in advance safeguards against weakened attachment and ensures the fairings sit flush. Disconnect any electrical connections that may obstruct fairing placement, but do so cautiously to avoid wiring damage.
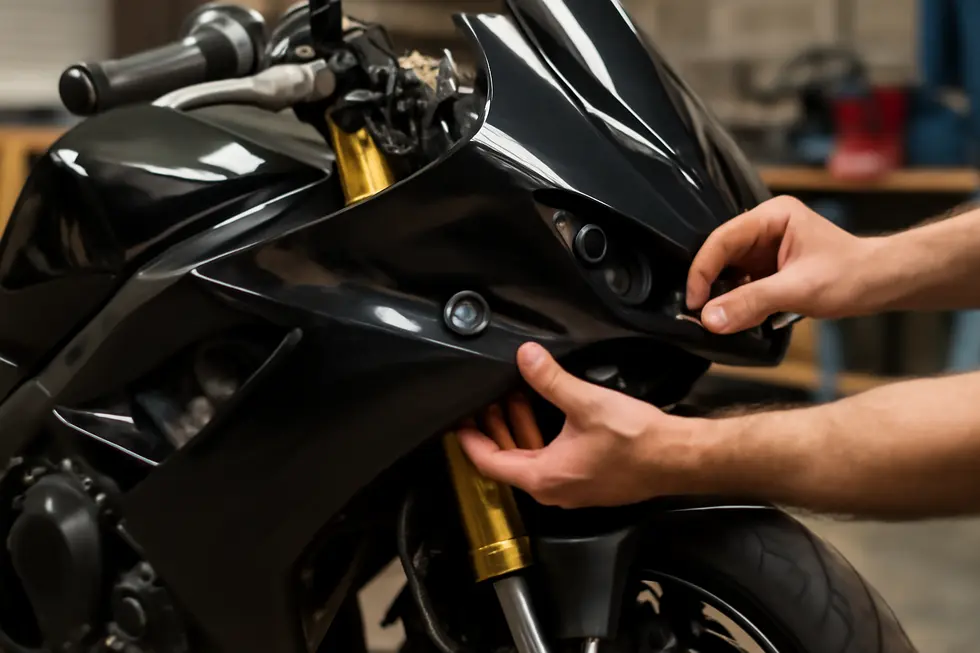
Once preparation is complete, proceed by loosely fitting the larger fairing panels, such as the front cowl, without fully tightening bolts. This approach offers flexibility to adjust alignment precisely, ensuring tabs and mounting holes line up seamlessly. Follow a logical sequence—front fairings first, then the side panels, and finish with rear or tail sections—maintaining consistent fitment without putting undue stress on mounting points.
Use fasteners specific to your motorcycle model, including Allen screws, bolts, and clips. Applying a thread locker to bolts helps maintain tightness against vibration loosening over time. During installation, constantly check for interference with cables, hoses, or wiring to prevent pinching or misalignment.
Once alignment is confirmed, tighten all bolts methodically, using rubber grommets and washers where applicable to protect delicate fairing material from cracking. Keep tension even and avoid overtightening to extend the longevity of the plastic or fiberglass parts.
Working in a clean, organized space and wearing protective gloves reduces risk of scratching or damage to the fairings. If custom mounts or brackets are necessary for aftermarket parts, fabricate or adjust them carefully to achieve secure fitment without stress points. Secure loose cables behind the fairing with zip ties to maintain a neat appearance and functionality.
Following these precise preparation and mounting techniques results in a snug, durable installation that preserves the bike’s aerodynamic profile and protective capabilities. For a detailed, model-specific step-by-step demonstration, the SuperC Dubai tutorial on GSXR 2006 fairing installation offers excellent visual guidance.
For comprehensive insights on sourcing and installing a wide variety of motorcycle fairings, explore this in-depth resource on motorcycle fairings.
2. Mastering Fairing Alignment and Secure Fastening Techniques for Lasting Repairs
Achieving a precise alignment combined with secure fastening is crucial when reinstalling motorcycle fairings to restore both form and function. Begin by positioning the fairing panels loosely over the frame, carefully engaging their tabs, grooves, or slots designed to nest seamlessly with the bike’s structure. Sliding the panels forward until screw holes align loosely helps avoid forcing parts into place, which could cause stress or misfit. If mounting brackets are involved, slightly adjusting their position can enhance the snugness of the fit, ensuring gaps are minimal and the fairings rest flush against adjoining components.
Fastening starts with inserting the appropriate screws or bolts—commonly 4mm Allen screws—into their designated points but only tightening them partially at this stage. Gradually tightening all fasteners evenly using a star or criss-cross pattern is essential to distribute pressure uniformly across the fairing panels. This method mitigates the risk of localized stress that can lead to cracking or warping, especially on fiberglass or plastic materials prone to damage under uneven tension. Applying a medium-strength threadlocker on critical bolts further prevents loosening caused by the vibrations inherent to motorcycle operation.
To protect delicate mounting points, incorporating rubber grommets or washers between fasteners and fairing surfaces acts as a cushion, absorbing vibrations and reducing the chance of cracks around screw holes. For added reinforcement where tabs or mounting areas are weakened, backing plates or pop rivets can provide supplemental support, extending the fairing’s durability.
Before concluding installation, conduct a thorough check to ensure the fairings do not interfere with steering, throttle, brakes, electrical wiring, or suspension movement. Reinstall other components such as mirrors, air ducts, or headlights, guaranteeing all elements align correctly and smoothly operate. This attentive process not only preserves the aesthetic and aerodynamic properties of the motorcycle but also contributes to a safer, more reliable ride.
For detailed installation procedures and alignment tips, consider consulting comprehensive tutorials such as the video “How Do You Install Motorcycle Fairings?” by The Racing Xpert, which provides step-by-step visual guidance tailored to popular motorcycle models.
For more information on replacement fairings and additional repair tips, visit Explore the Best Motorcycle Fairings at Summit Fairings.
Chapter 4: How to Fix Motorcycle Fairings: Tools and Materials Needed for Effective Repair
1. The Essential Toolkit for Motorcycle Fairing Repairs: Mastering Repair with the Right Tools and Materials
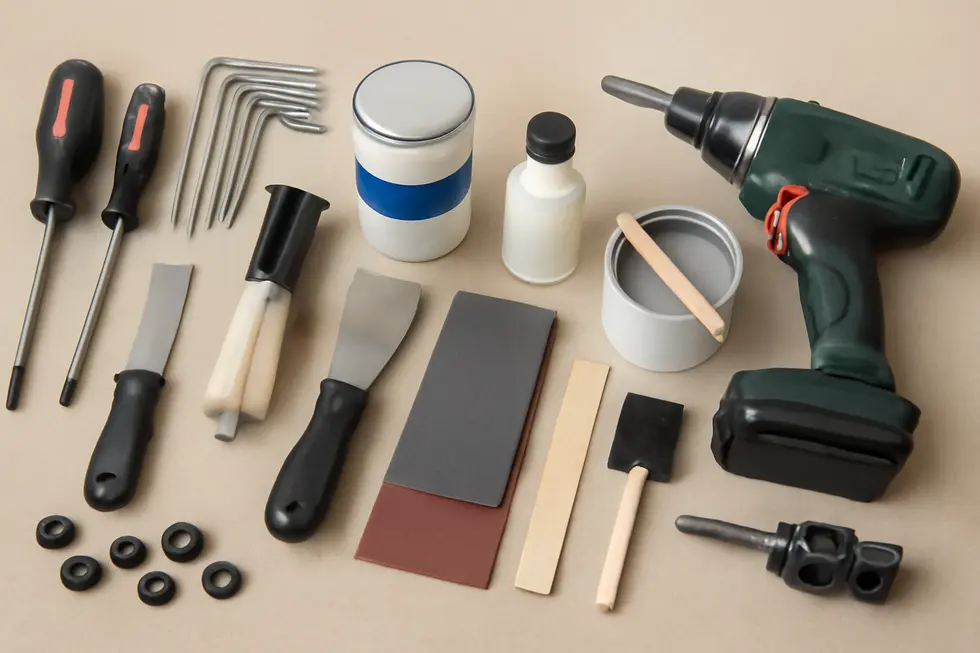
Fixing motorcycle fairings requires more than just know-how—it demands the right arsenal of tools and materials to ensure a precise, durable repair. Starting with basic hand tools, a reliable set of Torx and hex drivers is fundamental for removing and reinstalling the diverse fasteners securing fairings. Alongside these, a variety of Phillips and slotted screwdrivers cover most screws encountered during disassembly. A small socket set is essential to handle nuts and bolts that hold the fairing and its brackets firmly in place.
Securing fasteners after reassembly is critical to withstanding road vibrations. Threadlocker plays a vital role here, locking bolts and screws to prevent loosening while avoiding overtightening that can damage fragile plastic or fiberglass parts. Before any repair work begins, cleaning supplies like lint-free cloths are indispensable to clear dirt and grease from cracked or broken areas, ensuring strong adhesion of repair compounds.
When addressing cracks or breaks, the choice between fiberglass repair kits and plastic welding kits depends on the fairing material and severity of damage. Fiberglass kits typically involve layering resin and cloth to restore structural strength, while plastic welding gently melts and fuses plastic parts back together. Both techniques often require sanding—using fine-grit sandpaper and sanding blocks—to smooth surfaces for flawless finish and paint application.
Specialized adhesives and epoxy resins provide additional bonding strength, especially for small cracks or tab repairs where welding or fiberglass might not be practical. Depending on the repair extent, paint supplies and mounting hardware such as replacement plates or rubber grommets may become necessary to restore not only structural integrity but also aesthetics and proper fit.
A well-rounded toolkit for motorcycle fairing fixes thus includes mechanical hand tools, threadlocker, cleaning materials, plastic or fiberglass repair kits, sandpaper, adhesives, and optionally paint equipment and mounting hardware. This comprehensive collection empowers riders or technicians to carefully disassemble, repair, and reassemble fairings with professional confidence and lasting results.
For further insights on acquiring quality fairings and parts after repair, consider exploring affordable motorcycle fairings at Summit Fairings. More detailed guidance on installation techniques is also available through expert video resources like “How Do You Install Motorcycle Fairings?” by The Racing Xpert.
2. A Practical Guide to Materials and Step-by-Step Repairs for Motorcycle Fairings
Successfully repairing motorcycle fairings demands a well-chosen array of materials and tools, paired with a structured repair method. Begin with gathering specific supplies like a fairing repair kit, which usually contains plastic welding rods or specialized adhesives, body fillers, and reinforcing mesh. These kits are indispensable for restoring cracked or broken plastics to a durable state. Equally important are sandpapers of varying grits, used to smooth surfaces before repainting, along with primer, paint matched to your bike’s color, and a clear coat to protect and add gloss. Optional but helpful materials include cleaning solvents to prepare surfaces and reinforcing mesh to strengthen larger cracks.
On the tools front, a comprehensive kit featuring screwdrivers (both Phillips and slotted), Allen wrenches, combination wrenches, and pliers forms the backbone for disassembly and reassembly. Sanding blocks or an electric sander streamline surface prep. Together, these facilitate careful removal and precise fastening of fairings without causing additional damage.
The repair process starts with carefully removing the damaged fairing, using the appropriate tools to avoid exacerbating cracks. Clean the affected area thoroughly with solvents to eliminate grease and grime, ensuring good adhesion. Then assess the damage carefully to decide whether plastic welding or epoxy adhesive is best suited. With plastic welding, heat fuses cracks for a strong bond, while epoxy adhesives offer an effective alternative for home repairs. Reinforcement with fabric mesh over wider cracks boosts strength prior to applying filler.
After filling gaps with body filler, sand progressively with finer grits for a seamless surface flush with the rest of the fairing. Apply primer designed for plastics and follow with color-matched paint using thin, even coats. Finish by spraying a clear coat for protection and shine. Once fully cured, reinstall the fairing, paying close attention to fastener torque and alignment to prevent stress that can cause new damage.
This methodical combination of proper materials, adequate tools, and a careful step-by-step approach ensures repairs that restore both the appearance and integrity of motorcycle fairings. For a helpful visual walkthrough, consider reviewing detailed tutorials such as those presented by The Racing Xpert in their instructional video on fairing installation and repair.
Chapter 5: How to Fix Motorcycle Fairings: Final Adjustments and Reattachment of Components
1. Mastering Fairing Alignment and Secure Fastening for Durable Repairs
Achieving precise alignment and secure fastening during the final stages of fixing motorcycle fairings is essential for both aesthetics and safety. Begin by loosely installing all mounting brackets and fasteners. This initial loose fitting allows you to adjust the fairing pieces freely, ensuring they slide smoothly into their intended positions using grooves, slots, or molded tabs as natural guides. These features help maintain proper placement relative to the motorcycle frame without forcing parts, minimizing the risk of damage.
Carefully verify clearances around critical areas such as handlebars, wiring harnesses, suspension components, and controls. Proper spacing prevents interference with steering and operation once the fairings are fully secured. If necessary, adjust the bracket positions before final tightening.
When you are confident of the fit, tighten fasteners evenly and cautiously. Avoid overtightening bolts or screws on plastic or fiberglass parts, as excess pressure can cause cracking. Employ rubber grommets and washers at bolt holes when possible; these distribute force evenly and cushion the fairing material. In some situations, using pop rivets or backing plates provides extra reinforcement on vulnerable mounting points, enhancing long-term durability.
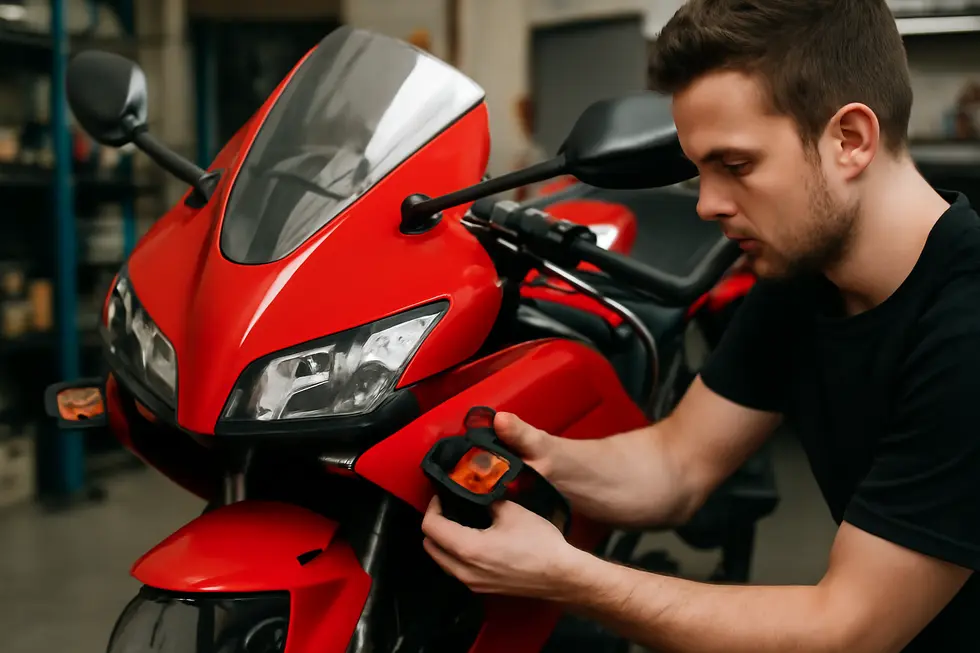
Following secure installation, proceed to reattach ancillary components such as headlights, turn signals, mirrors, and air ducts. A comprehensive stability check should confirm that no fairing parts impede any controls or steering movements.
The process typically requires standard hand tools, including screwdrivers, hex keys, and wrenches. Occasionally, a drill may be needed for careful hole adjustments. Patience during alignment cannot be overstated—repeated minor tweaks are the key to perfecting fitment before you complete the installation.
Following these techniques ensures your repaired motorcycle fairings are durable, well-aligned, and fully functional. For a step-by-step visual guide demonstrating bracket installation and the importance of protective grommets and washers, consider resources such as this detailed tutorial. For more insights on selecting and fitting quality fairings, explore valuable tips from Summit Fairings.
2. Mastering Component Reattachment and Functional Testing for a Secure Motorcycle Fairing Installation
Completing the repair of motorcycle fairings involves a meticulous process of component reattachment paired with thorough functional testing to guarantee both aesthetic integrity and operational safety. Once the fairing shells and brackets are loosely positioned and aligned, begin by fingertightening bolts, which allows for minute adjustments to ensure perfect clearance around handlebars, controls, and wiring harnesses. Incorporating rubber grommets within bolt holes plays a crucial role by absorbing vibrations and distributing pressure evenly, thus protecting the fairing’s fiberglass or plastic materials from cracking under stress. Should the holes not match perfectly, subtle modifications like careful grinding help achieve a seamless fit without compromising structural integrity.
With alignment confirmed, proceed to carefully tighten all fasteners. The use of washers in conjunction with rubber grommets is essential here to prevent distortion of the fairing material as bolts are secured firmly to the frame. It is vital to avoid overtightening as excessive torque can lead to cracks, especially on delicate or aging plastic components. Once the fairings are securely mounted, the next step is the reattachment of functional elements such as headlights, turn signals, mirrors, air ducts, and windshields. Attention to the proper positioning and secure fastening of these parts ensures that they perform effectively and do not interfere with any electrical systems or rider controls.
Following full assembly, comprehensive functional testing is indispensable. This includes verifying the sturdiness of the fairing installation, confirming that steering and suspension movements remain unobstructed, and ensuring all fasteners retain their tightness after initial movement or vibration of the motorcycle. This phase not only safeguards rider safety but also preserves the visual appeal of the bike by keeping components flush and secure. For those seeking visual support during this process, detailed tutorial videos provide step-by-step guidance on bracket installation, alignment precision, and the correct use of protective hardware.
Adhering to these detailed steps ensures that repaired motorcycle fairings are not only restored to their original form but are also reliably integrated into the bike’s function and safety systems. For further insights into fairing options and maintenance tips, the Summit Fairings blog offers an excellent resource on exploring quality aftermarket fairings, enhancing repair outcomes and customization.
Final thoughts
Effective repair of motorcycle fairings requires a blend of precision, the right materials, and methodical workflow—from removal and assessment through crack repair and final reassembly. For business owners, mastering these steps ensures your shop delivers repairs that extend the life and appeal of the motorcycle, satisfy customers, and maintain operational efficiency. By investing in proper tools and developing a disciplined approach to fairing maintenance, your business can confidently handle a key element of motorcycle care that directly impacts safety, style, and rider experience.
Ready to elevate your ride? Summit Fairings delivers premium, custom-fit fairings that blend style and durability. Whether you’re chasing speed or turning heads, we’ve got your bike covered. Don’t wait—transform your machine today. Click, customize, and ride with confidence. Your perfect fairing is just a few clicks away. Act now!
About us
undefined