Introduction
Motorcycle fairings are critical both for a bike’s aerodynamic performance and aesthetic appeal. For business owners offering repair services, mastering the process of fixing fairings can mean the difference between a satisfied customer and costly reworks. The journey to restoring a damaged motorcycle fairing involves three essential phases: careful removal and preparation, precise fiberglass repair techniques, and secure, accurate reinstallation. Each stage demands specialized knowledge and attention to detail, ensuring structural integrity while maintaining the vehicle’s style. By honing skills in these areas, repair shops can enhance their service quality, reduce turnaround time, and increase customer trust. This guide breaks down these key chapters, providing actionable insights tailored for business owners aiming to optimize their motorcycle fairing repair operations.
Tables of Contents
Chapter 1: Removing and Preparing to Fix Motorcycle Fairing
- Mastering the Art of Fairing Removal and Prep: A Detailed Guide for Lasting Repairs
- Essential Tools, Safety Practices, and Careful Precautions for Effective Motorcycle Fairing Removal and Preparation
- Mastering the Art of Cleaning, Inspecting, and Preparing Motorcycle Fairings for Effective Repair
Chapter 2: Fiberglass Repair Techniques to Fix Motorcycle Fairing Damage
- Mastering Surface Preparation: The Crucial First Step in Fiberglass Fairing Repairs
- Mastering the Art of Fiberglass Cloth and Resin Application for Durable Motorcycle Fairing Repairs
- Mastering Finishing Touches and Replacement Decisions in Motorcycle Fairing Fiberglass Repairs
Chapter 3: Installing and Securing to Properly Fix Motorcycle Fairing
- Essential Preparation: Surface Cleaning and Component Removal for Fairing Installation
- Essential Bracket Installation and Fastening Strategies for Secure Motorcycle Fairing Mounting
- Ensuring Perfect Alignment, Vibration Durability, and Thorough Final Inspections in Fairing Installation
Chapter 1: Removing and Preparing to Fix Motorcycle Fairing
1. Mastering the Art of Fairing Removal and Prep: A Detailed Guide for Lasting Repairs
Successfully removing and preparing a motorcycle fairing for repair begins with a deliberate, methodical approach. First, assembling the correct tools is crucial; typical needs include a mix of screwdrivers—both Phillips and flat-head—alongside Allen wrenches and possibly socket sets. The motorcycle should be parked securely on a level surface, with the battery disconnected or its negative terminal removed to prevent any electrical shorts during the process. Protective gloves and eye protection help guard against injury and accidental scratches to painted surfaces.
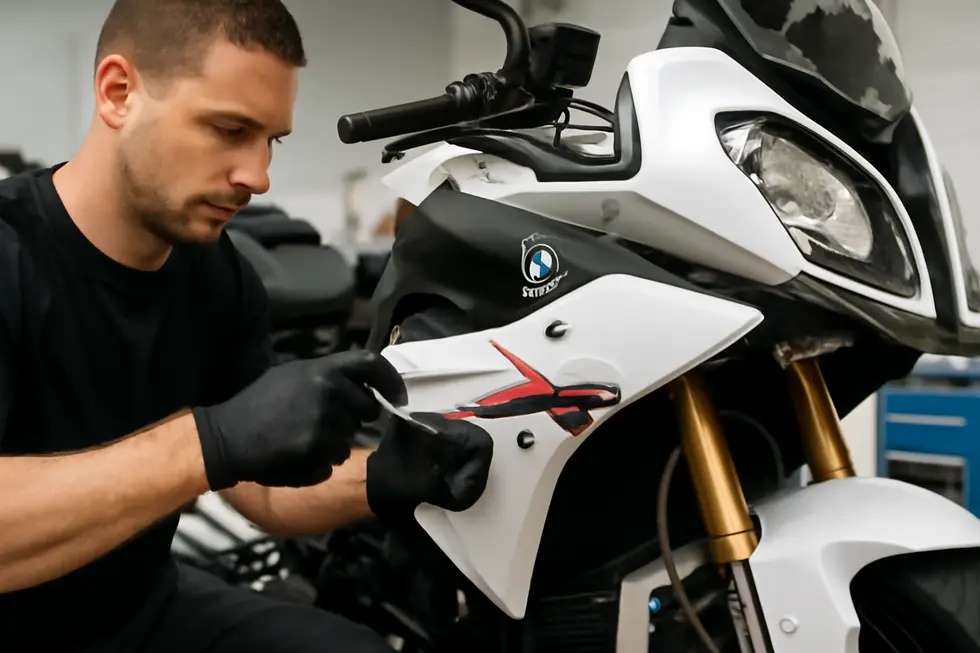
Many motorcycles require seat removal as an initial step to access hidden fairing fasteners. For example, on models like the BMW S1000XR, the seat is removed by inserting and turning the key before gently lifting it off. Tank covers often follow; unscrewing their fasteners carefully exposes additional fairing bolts that are otherwise concealed. Identifying every anchoring screw is fundamental, especially since screws such as various M5 sizes might secure the panels at side mounts, front corners, or rear sections. Using the exact screwdriver or Allen wrench for each fastener not only prevents damage to the hardware but also smooths reassembly later.
Once all screws and bolts are removed, the next crucial phase is to delicately detach the fairing panels. Many panels are pressure-fitted or clipped, so simply pulling can risk cracked plastic or broken clips; gentle prying helps avoid such damage while freeing the components. Electrical connectors attached to integrated components like indicators or lights must be unplugged carefully to protect wiring harnesses.
With the fairing pieces removed, it’s essential to conduct a thorough inspection for cracks, scratches, or damaged mounting tabs. Cleaning the surfaces removes dirt and grease that could interfere with repairs. For plastic fairings, techniques such as plastic welding, melting edges, or applying fillers provide effective fixes. Testing repaired or replacement panels by fitting them back temporarily enables verification of proper alignment with brackets and related components. This step ensures the panels neither strain fasteners nor obstruct steering, suspension, or control mechanisms.
Final preparation before reinstallation includes placing rubber grommets or washers under screw heads to distribute pressure evenly and minimize the risk of new cracks. Ensuring all electrical parts like lights and indicators reconnect properly and function as intended completes this stage. Documenting the disassembly with photos often aids reassembly precision by preserving the exact placement of parts and fasteners.
Following these careful steps, a rider or mechanic achieves a safe, clean removal and sets the foundation for durable, aesthetically pleasing fairing repairs. To explore a deeper range of choices and detailed guidance on motorcycle fairings, consider discovering affordable motorcycle fairings, which can complement restoring your bike’s look after repair.
For a visual and procedural supplement, step-by-step removal and installation guides specific to particular models provide invaluable reference, ensuring none of the nuanced details are overlooked during the repair journey.
2. Essential Tools, Safety Practices, and Careful Precautions for Effective Motorcycle Fairing Removal and Preparation
Removing and preparing a motorcycle fairing for repair requires more than just basic mechanical skills—it demands the right tools, strict safety practices, and deliberate precautions to prevent damage to parts and ensure personal safety. The process begins with assembling essential tools designed specifically for fairing work. Commonly needed are Phillips and flat-head screwdrivers to remove the various screws commonly securing panels. Allen wrenches are indispensable for loosening bolts and fasteners, particularly those using hex heads. For specialized fairings such as ABS or race setups, quick-release fasteners like 1/4 turn pins may be used, significantly speeding up removal and reinstallation without compromising security.
Safety should be paramount throughout the procedure. Position the motorcycle on a level, stable surface to avoid any risk of tipping while you work. Electrical safety matters as well—disconnecting the battery, or at least the negative terminal, cuts down risk of shorts when unplugging wiring connectors during panel removal. Protective gear like gloves and safety glasses safeguard hands and eyes from sharp edges, splinters, or debris that may come loose. It’s also important to use gentle prying tools rather than forcing clips or fasteners, helping avoid accidental damage such as broken tabs, scratched paint, or deformed panels.
Following a logical sequence when detaching parts ensures a smooth process and reduces strain on mounting points. Generally, upper fairings come off first, followed by mid and lower sections, preventing unnecessary stress on plastic clips and brackets. Electrical connectors should be unplugged carefully, preferably using tool assistance to avoid pulling on wires directly, protecting the integrity of the harness. Once removed, organize all parts and fasteners systematically—labeling or photographing during dismantling greatly aids reassembly, ensuring every screw and clip returns to its original place.
Supporting panels properly is crucial when detached so they don’t bend or warp under their own weight. Panels resting on uneven surfaces or hanging off one side may develop cracks or lose shape, complicating repairs. These handling precautions preserve the fairing’s structure and appearance, setting a strong foundation for the upcoming repair phase.
Adopting these best practices aligns with model-specific recommendations found in manufacturer service manuals and tutorials. For example, detailed guides like the Yamaha YZF-R6 fairing removal walkthrough provide valuable step-by-step insights into tools, safety, and methodical disassembly tailored for specific models. This approach not only protects your bike but also improves efficiency and confidence during fairing repair work.
For further guidance and related fairing care tips, explore additional insights at the Explore the Best Motorcycle Fairings at Summit Fairings blog.
Committing to careful tool selection, strict safety measures, and deliberate removal precautions ensures a damage-free process that preserves the fairing’s integrity and sets the stage for a high-quality repair outcome.
3. Mastering the Art of Cleaning, Inspecting, and Preparing Motorcycle Fairings for Effective Repair
Properly cleaning, inspecting, and preparing motorcycle fairings forms the foundation for any successful repair job. Starting with cleaning, the goal is to remove all dirt, grease, and contaminants without damaging the fairing’s surface. A gentle approach is essential—using a mild detergent diluted in water softly sprayed over the panels ensures grime lifts cleanly. For stubborn grease spots, a light application of a degreaser can be effective, but should be used sparingly to avoid harming the paint or plastic substrates. Using a soft brush or microfiber mitt for agitation helps preserve the fine finish by preventing scratches. Once cleaned, thorough rinsing coupled with drying using a microfiber towel or gentle airflow prevents water spots and ensures no residue remains in crevices or mounting channels.
Inspection follows cleaning as the critical next step. With the fairing now clearly visible, careful examination under strong lighting reveals any cracks, chips, holes, or compromised mounting tabs. For fiberglass fairings, special attention is placed on detecting delamination or soft spots, signs of structural weakening. Running a finger along edges and mounting holes can expose hidden imperfections that visual checks alone might miss. These findings determine the complexity of the repair—small cracks and holes often lend themselves well to patching with resin and fiberglass cloth, while large or extensively damaged sections may require replacement or professional intervention.
The final yet vital phase before repair begins is surface preparation. Sanding damaged areas removes loose debris and roughens the surface, which improves adhesion for bonding materials. Starting with coarse sandpaper tackles larger imperfections and prepares the substrate, while progressively finer grits refine the edges and blend transitions more smoothly. Fiberglass repair demands careful layering of resin and cloth, ensuring no air bubbles become trapped, as these reduce strength and finish quality. Each layer must cure fully before subsequent sanding smooths the patch for a seamless integration. Pinholes and minor surface flaws are addressed with body filler, applied thinly and sanded to a flawless contour. Before repainting, applying a primer suited for plastics guarantees paint adherence and a uniform finish.
Additional care during reassembly helps prevent future damage. Avoiding over-tightening bolts reduces stress points that cause new cracks. Using washers or rubber grommets where appropriate cushions mounting pressure. Finally, applying protective wax or coatings after paint work preserves the repaired surface and maintains shine for the long term.
Mastering these techniques—cleaning with sensitivity, detailed inspection, and meticulous surface preparation—ensures motorcycle fairings receive the durable, professional repairs they require. For further insight into these preparatory steps, see this comprehensive guide on motorcycle fairings. External resources, such as detailed video tutorials on fiberglass repair, also complement these practices by providing visual reinforcement to enhance repair quality and confidence.
Chapter 2: Fiberglass Repair Techniques to Fix Motorcycle Fairing Damage
1. Mastering Surface Preparation: The Crucial First Step in Fiberglass Fairing Repairs
Surface preparation is the essential foundation in the fiberglass repair process for motorcycle fairings. Without thorough and precise preparation, even the highest quality resin and fiberglass cloth cannot form a strong, lasting bond. The process begins by meticulously cleaning the damaged area to remove all contaminants such as dirt, grease, or any debris that could interfere with adhesion. Using a suitable cleaner or degreaser ensures the surface is free from oils or residues that naturally accumulate during riding.
Following cleaning, the next critical step involves sanding the area surrounding the damage. This sanding should be light yet thorough enough to create a roughened texture, which significantly improves the bonding capabilities of both polyester and epoxy resins. Sanding also exposes fresh fiberglass strands beneath the surface, providing an ideal substrate for the new resin layers to fuse with. Care must be taken not to oversand or weaken the fairing panel further but rather to remove only the surface gloss and any weakened layers.
Equally important is the removal of any loose or broken fiberglass fragments around cracks, holes, or breaks. These compromised fibers do not contribute to the structural integrity of the repair; leaving them attached risks weakening the repaired area and causing premature failure. Ensuring that only solid, fully intact material remains guarantees that the patch will have a firm base.
When the damage is accessible from the inside of the fairing, working from this perspective allows for a superior repair. Applying resin and fiberglass cloth patches slightly larger than the damaged section from the interior creates a reinforcement that better restores the fairing’s original strength. This approach also helps maintain the fairing’s external appearance since the outer surface remains mostly untouched.
Choosing compatible resin is another key consideration during this phase. Polyester resin is common but less flexible, while epoxy resin offers greater strength and adhesion, especially on complex or stressed areas. The resin must be applied evenly, saturating the fiberglass cloth thoroughly to prevent air pockets or weak spots. Subsequently, layers of fiberglass cloth are carefully laid over and bonded with the resin, rebuilding the fairing’s form and resilience.
Properly executed surface preparation not only restores structural integrity but also improves the final appearance of the fairing. It sets the stage for seamless blending between the repaired section and the original material, reducing the need for heavy fillers or excessive finishing work.
For a detailed visual guide that complements these best practices, refer to this comprehensive video tutorial, which clearly demonstrates each stage of surface preparation and repair. For those interested in exploring a wider selection of components to complement your repair, the insightful resources available at Summit Fairings Motorcycle Fairings Blog offer valuable information on quality fairing options.
By dedicating adequate time and care to surface preparation, riders and technicians alike can achieve durable, professional-grade repairs that restore both strength and style to their motorcycles.
2. Mastering the Art of Fiberglass Cloth and Resin Application for Durable Motorcycle Fairing Repairs
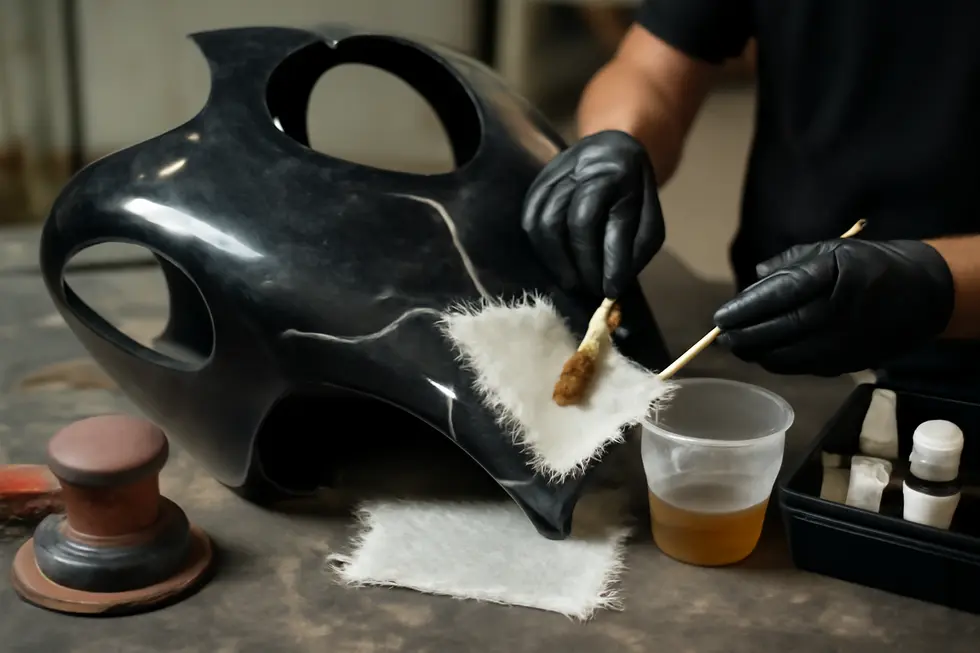
Repairing motorcycle fairings made from fiberglass requires a careful, step-by-step approach to restore both strength and appearance effectively. The core of this process involves the strategic application of fiberglass cloth combined with resin, usually polyester or epoxy, to mend cracks, holes, and surface imperfections.
Initially, thorough damage assessment and surface preparation are critical. The affected area must be meticulously cleaned to remove grease, dirt, and loose fragments. Sanding the surface lightly creates a textured base that significantly enhances the adhesion of the repair materials. This preparation ensures the patch bonds firmly to the original fairing, preventing future separation or weakness.
Once prepared, fiberglass cloth is cut into patches slightly larger than the damaged zones. This overlap provides reinforcement beyond the immediate crack or hole, distributing stress evenly across the repair site. Applying resin directly onto the sanded surface before placing the cloth acts as a binding agent, saturating the fibers and anchoring the patch securely to the fairing.
The layering technique is vital to rebuild the fairing’s structural integrity. After laying the first patch saturated with resin, additional layers can be applied to regain the original thickness and strength of the damaged panel. Each layer is saturated with fresh resin to create a seamless composite that hardens into a rigid, durable form resistant to impact and wear.
Curing time varies but generally requires several hours at room temperature for the resin to harden completely. This curing stage must not be rushed, as improper hardening can lead to weak spots or incomplete bonding. Once fully cured, the repair area is sanded smooth to remove excess resin and rough edges, restoring the fairing’s contour and preparing it for refinishing.
Finishing touches, such as painting or clear coating, help blend the repair with the original surface, delivering a professional appearance. Attention to detail here ensures the motorcycle retains its visual appeal and aerodynamic performance.
Considerations such as working in a well-ventilated area and following resin manufacturer instructions precisely are essential for safety and efficacy. Using compatible resin types for your specific fiberglass material will optimize repair quality and longevity.
This fiberglass cloth and resin application offers a practical balance between long-lasting structural repairs and cost-effectiveness, especially compared to fully replacing damaged fairings. This technique allows riders and repairers to maintain original fitment and design while restoring durability.
For an in-depth overview of motorcycle fairings and to explore more on maintaining and repairing them, visit the comprehensive Summit Fairings blog.
3. Mastering Finishing Touches and Replacement Decisions in Motorcycle Fairing Fiberglass Repairs
Achieving a durable and visually appealing repair on motorcycle fiberglass fairings hinges on meticulous finishing techniques and informed replacement choices. The process begins with thorough surface preparation; cleaning the damaged area removes dirt, grease, and loose particles that could weaken adhesion. A light sanding follows, creating a slightly rough texture that promotes resin bonding and ensures the fiberglass cloth or mat adheres effectively. Reinforcement involves applying fiberglass layers and resin—either polyester or epoxy—that extend beyond the damage’s edges to restore strength and prevent further cracking.
Once structural repair is established, finishing the surface dramatically influences both longevity and appearance. Applying a high-quality primer forms a solid base, improving paint adherence and resistance to wear. For many repairs, adding a gel coat layer enhances surface smoothness and provides UV resistance, which is essential for preventing future discoloration and degradation. Painting requires compatible paints designed specifically for fiberglass to ensure optimal coverage and flexibility, often needing multiple thin coats to achieve uniform color and finish. To further protect the surface, optional clear coats guard against scratches, moisture, and environmental exposure, making the repair more resilient under everyday riding conditions.
Deciding between repair and full replacement depends largely on damage severity and safety considerations. Minor cracks and broken tabs can often be restored with proper fiberglass techniques, but extensive structural damage or irreparable mounting points may necessitate replacement. Evaluating whether the repair can bear mechanical loads safely is critical, especially for fairing parts integral to aerodynamic stability or rider protection. When replacement is required, sourcing aftermarket fairing components that precisely match the original fitment is vital to avoid installation difficulties and ensure proper alignment.
Professional assessment is advisable if uncertainty exists regarding the repair’s effectiveness or the extent of damage. Carefully combining reinforcement and finishing steps not only restores the fairing’s function but maintains its aesthetic integrity, preserving the motorcycle’s overall appearance. For a deeper dive into quality repair workflows and finishing tips, comprehensive instructional resources demonstrate the entire process from inspection to final paint, making complex repairs accessible and more reliable.
For additional insights on acquiring compatible fairing parts and repair resources, explore this detailed guide on discover unmatched choices in motorcycle fairings.
Chapter 3: Installing and Securing to Properly Fix Motorcycle Fairing
1. Essential Preparation: Surface Cleaning and Component Removal for Fairing Installation
Properly preparing your motorcycle before installing and securing a fairing is a crucial step that ensures a flawless fit and long-lasting durability. Begin by parking your bike on a stable, level surface—this not only provides a safe working environment but also prevents unwanted movement during the process. Setting the motorcycle firmly on a stand is advisable, as it offers additional balance and frees your hands for precise work.
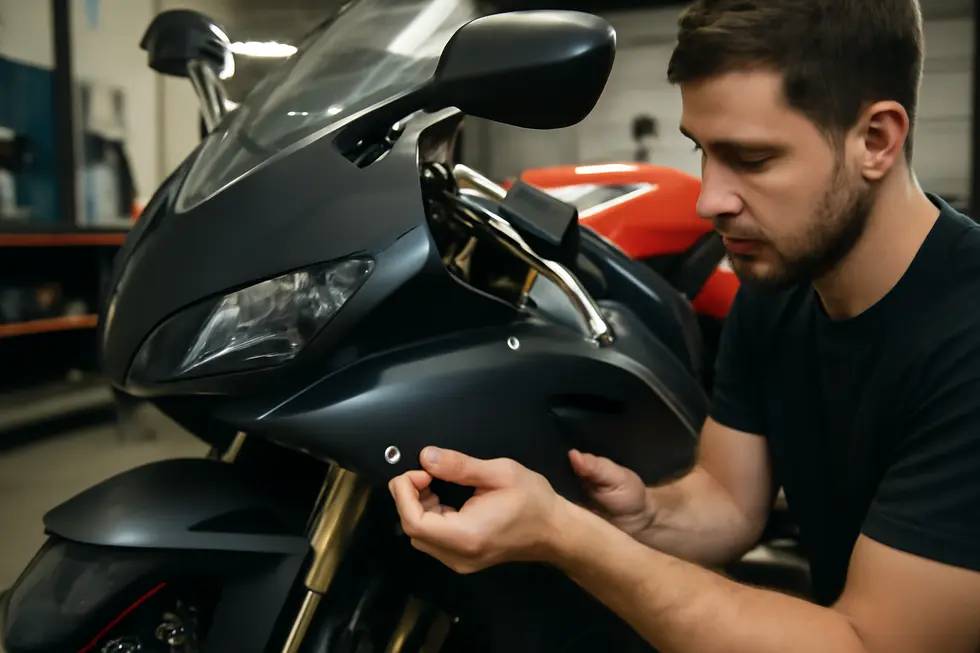
Next, attention must be given to removing any components that could interfere with fairing installation. Items such as side covers, mirrors, and parts mounted near the handlebars or frame shoulders often obstruct access to fastening points. Carefully detaching these pieces reveals the underlying structure and mounting locations, allowing for accurate alignment of the new panels without forcing or damaging adjoining parts.
Once these components are cleared, thorough cleaning of the mounting surfaces becomes paramount. Dirt, grease, or residue buildup can compromise the adhesion and seating of the fairing, leading to rattling or stress cracks over time. Use appropriate cleaning agents to wipe down the frame, bracket areas, and contact points, then visually inspect each for signs of wear, cracks, or corrosion which could weaken the mounting or impair fitment.
If your model requires mounting brackets, install them loosely at this stage. Finger-tight fasteners allow you to later adjust alignment easily, ensuring the fairing sits perfectly without undue tension or gaps. It is equally important to protect delicate fairing materials—typically plastics or fiberglass—by fitting rubber grommets into each bolt hole before securing the panels. These buffers cushion the fairing against pressure from tightening bolts and prevent stress fractures.
Complementing the rubber grommets, washers placed underneath help distribute tightening force evenly, further protecting the fairing’s integrity. Position the fairing carefully against the attached brackets or frame, double-checking clearances with control cables, handlebars, and wiring harnesses. These clearances guard against interference with steering or hand controls during operation.
With everything aligned precisely, begin finger-tightening all fasteners to allow a final, small adjustment if necessary. Once satisfied, tighten each fastener securely but avoid over-torquing, which can cause cracking or strip threads.
Finally, reattach any previously removed parts such as headlights, mirrors, or air ducts. Confirm that all electrical connections function properly and that controls retain full range of motion unhindered by the new fairing installation.
This methodical preparation paves the way for an installation process that not only looks professional but enhances the motorcycle’s aerodynamics and rider comfort. For visual step-by-step guidance on precise bracket installation and alignment techniques without damaging fairing materials, consider viewing expert tutorials such as The Racing Xpert’s fairing installation guide. Additionally, you can explore a wide selection of motorcycle fairings that fit various models and styles at Summit Fairings’ blog, offering helpful insights into matching your bike’s needs with the right components.
2. Essential Bracket Installation and Fastening Strategies for Secure Motorcycle Fairing Mounting
Successfully installing and securing motorcycle fairings hinges on precise mounting bracket installation combined with meticulous fastening techniques. The process begins with loosely attaching the mounting brackets to the motorcycle frame, allowing room for adjustment needed to accommodate the fairing panels. This initial loose fit is crucial to ensure the fairing aligns perfectly without forcing components into place, which could generate stress points or interfere with controls.
When positioning the fairing onto the bike, attention to clearance is vital—ensure it does not obstruct handlebars, wiring harnesses, or moving parts like suspension linkages. Many brackets and fairing shells feature built-in grooves or alignment slots to facilitate accurate fitting. Using these design features as guides helps position panels so that mounting holes align naturally without modification, preserving the fairing’s structural integrity.
Protecting the fairing material, often delicate fiberglass or lightweight plastic, requires careful use of rubber grommets and washers at each bolt hole. Rubber grommets act as buffers that distribute mounting pressure evenly, greatly reducing the risk of cracking or fatigue caused by vibration and stress over time. Washers placed behind these grommets add further reinforcement, preventing bolts from crushing mounting points or deforming the fairing surface. This layered approach to mounting hardware optimizes durability and maintains aesthetic quality.
With alignment and protective elements in place, fastening proceeds cautiously. Bolts and screws are tightened incrementally and evenly to avoid placing too much force on any single point. Over-tightening can lead to hairline fractures or warped panels, so consistent, moderate torque is essential. Some installations may call for additional reinforcements such as backing plates or pop rivets to improve stability, particularly on fairings exposed to higher wind loads or harsh riding conditions.
After the brackets and fairings are firmly secured, auxiliary parts like headlights, turn signals, air ducts, and windshields are mounted with equal care. Proper positioning of these components supports motorcycle ergonomics and ensures safe operation. Finally, a comprehensive inspection should confirm the fairing assembly neither restricts steering nor interferes with controls. Periodic rechecks of fasteners maintain the integrity of the installation over time.
Essential tools include screwdrivers, hex keys, wrenches, and occasionally a drill to create or refine mounting holes if slight adjustments are necessary. Many fairing kits promote direct bolt-on installation, which eliminates the need for drilling and simplifies the process for riders.
This methodical approach to bracket installation and fastening ensures your motorcycle fairing remains securely mounted, protected against damage, and aligned precisely for optimal performance and appearance. For a broader range of fairing options and detailed guidance on installation, consider exploring affordable motorcycle fairings at Summit Fairings.
Complementary step-by-step video guides from trusted sources provide valuable visual instructions on proper bracket installation, use of grommets, and final securing techniques, enhancing both understanding and confidence throughout the repair process.
3. Ensuring Perfect Alignment, Vibration Durability, and Thorough Final Inspections in Fairing Installation
Achieving a secure and visually flawless motorcycle fairing installation hinges on meticulous attention to alignment, vibration resistance, and comprehensive final checks. Proper alignment is the cornerstone of this process; the fairing panels or brackets must sit precisely flush with the bike’s mounting points to distribute stress evenly and maintain structural integrity. Misalignment can lead to undue pressure on mounting tabs, inviting cracks or warping over time. Utilizing any factory alignment guides or subtle marks on mounting hardware helps ensure each piece fits as intended, avoiding gaps or uneven panel edges that diminish both aesthetics and protection.
Equally important is safeguarding the fairing against vibrations inherent to motorcycle operation. Using the correct fasteners — such as bolts and screws specified for the model — and tightening them to exact torque settings prevents premature loosening caused by rhythmic road shocks. Thread-locking compounds can be applied judiciously to secure these fasteners further without making disassembly impossible. Care must be taken not to overtighten, as excessive pressure may induce cracks in rigid polymer or fiberglass fairings. Strategic use of rubber grommets or washers at mounting points absorbs vibration energy and reduces concentrated stress, prolonging part life.
Before completing the installation, thorough final inspections confirm the integrity and functionality of the assembly. All mounting points should be double-checked for tightness, with no hardware left loosely fitted or missing. Wiring harnesses routed through the fairings — including lighting and signal wires — must be free of pinch points or tension to prevent electrical faults or chafing damage. The engagement of push-pull clips and rubber inserts securing the plastic panels must be verified to ensure panels remain stable at speed and under varying conditions. Any unevenness or noticeable gaps in panel fitment warrant prompt adjustment to restore clean lines and aerodynamic efficiency.
A cautious test ride following reinstallation provides the ultimate confirmation of success. Gentle acceleration and varied road conditions help reveal hidden issues such as rattling or vibration indicating loose mounts or improper fit. Addressing these promptly preserves both fairing longevity and rider safety.
This dedicated approach to alignment, vibration resistance, and final verification transforms a routine fairing replacement into a reliable restoration of your motorcycle’s protection and style. For detailed model-specific hardware guidance and installation tips, exploring resources like the Summit Fairings blog can expand your knowledge and confidence.
Final thoughts
Successfully fixing motorcycle fairings requires a comprehensive approach that covers removal, repair, and reinstallation with equal care. Business owners who invest in understanding the nuances of these phases will find their service reliability and customer satisfaction increase significantly. Proper removal prevents unintended damage, thorough fiberglass repair restores both strength and aesthetics, and careful reinstallation ensures durability and performance longevity. By integrating these practices, repair shops can confidently deliver high-quality results that preserve the unique style and functionality of each motorcycle. Ultimately, mastering fairing repairs isn’t just about fixing panels—it’s about building trust and attracting repeat business through professionalism and skill.
Ready to elevate your ride? Summit Fairings delivers premium, custom-fit fairings that blend style and durability. Whether you’re chasing speed or turning heads, we’ve got your bike covered. Don’t wait—transform your machine today. Click, customize, and ride with confidence. Your perfect fairing is just a few clicks away. Act now!
About us
undefined