Introduction
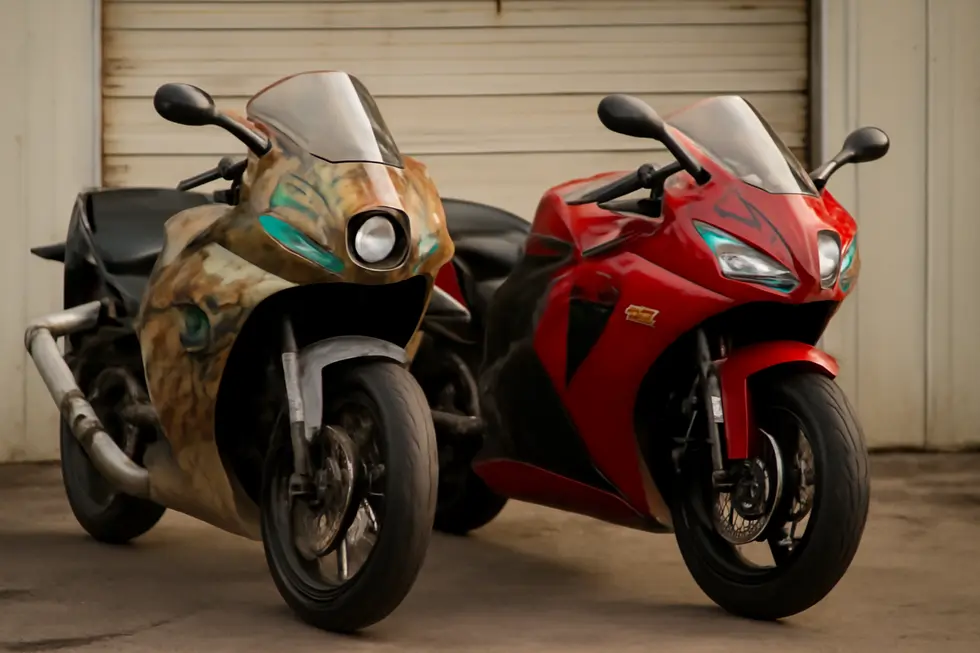
Homemade motorcycle fairings present a unique business opportunity by merging craftsmanship, customization, and cost efficiency. For business owners in the motorcycle aftermarket and customization sectors, understanding the materials, techniques, and processes behind DIY fairing fabrication is vital to unlocking new market potentials and enhancing product offerings. This comprehensive exploration covers key facets such as material choices and fabrication methods, the essential tools required, and finishing techniques that ensure professional results. Further, it addresses the critical aspects of fitment and aerodynamics, which influence both performance and customer satisfaction. Inspiration and educational resources that accelerate skill acquisition for fabricators are also highlighted, alongside a comparative analysis that positions homemade fairings against commercial kits. Collectively, these insights enable business leaders to tap into the growing demand for personalized motorcycle components, develop innovative product lines, optimize cost structures, and differentiate their brand in a competitive marketplace.
Tables of Contents
Chapter 1: Materials and Techniques for Homemade Motorcycle Fairing Fabrication
- The Essential Materials Shaping Homemade Motorcycle Fairings: Roles and Characteristics
- Mastering Metal Shaping and Thermoplastic Forming: Core Fabrication Methods for DIY Motorcycle Fairings
- Mastering Material Choices and Crafting Techniques to Enhance Performance and Style in DIY Motorcycle Fairings
Chapter 2: Tools and Equipment Essential for Homemade Motorcycle Fairing Creation
- Essential Mechanical Hand Tools for Precise Assembly and Secure Fitting of Homemade Motorcycle Fairings
- Mastering Cutting and Shaping: Effective Techniques and Tools for Fiberglass and Plastic Fairing Fabrication
- Mastering Final Touches and Secure Mounting: Achieving Durable and Professional-Quality Homemade Motorcycle Fairings
Chapter 3: Finishing and Painting Processes in Homemade Motorcycle Fairing Projects
- Essential Surface Preparation for Durable and Flawless Fairing Finishes
- Mastering Priming and Painting Techniques for Durable and Sleek Homemade Motorcycle Fairings
- Mastering Clear Coating and Final Finishing for Durable, Glossy Homemade Motorcycle Fairings
Chapter 4: Fitment and Aerodynamics Considerations for Homemade Motorcycle Fairing
- Mastering Fitment Precision and Structural Strength for Aerodynamic Efficiency
- Streamlining Fitment: Applying Aerodynamic Design Principles to Homemade Motorcycle Fairings
- Strategic Material Choices and Practical Approaches to Enhancing Fitment and Aerodynamics
Chapter 5: DIY Inspirations and Tutorials for Homemade Motorcycle Fairing Construction
- Essential Planning and Preparation for Successful DIY Motorcycle Fairings
- Mastering Secure Attachment: Brackets, Mounting Adjustments, and Protective Hardware for DIY Motorcycle Fairings
- Mastering Removal and Installation: Essential Techniques for Homemade Motorcycle Fairings
Chapter 6: Comparative Analysis of Homemade Motorcycle Fairing versus Commercial Kits
- Technological Foundations Shaping Homemade and Commercial Motorcycle Fairings
- Balancing Costs and Coverage: Economic and Warranty Realities in Homemade versus Commercial Motorcycle Fairings
- Navigating Customization and Installation Challenges: Homemade Fairings Versus Commercial Kits
Chapter 1: Materials and Techniques for Homemade Motorcycle Fairing Fabrication
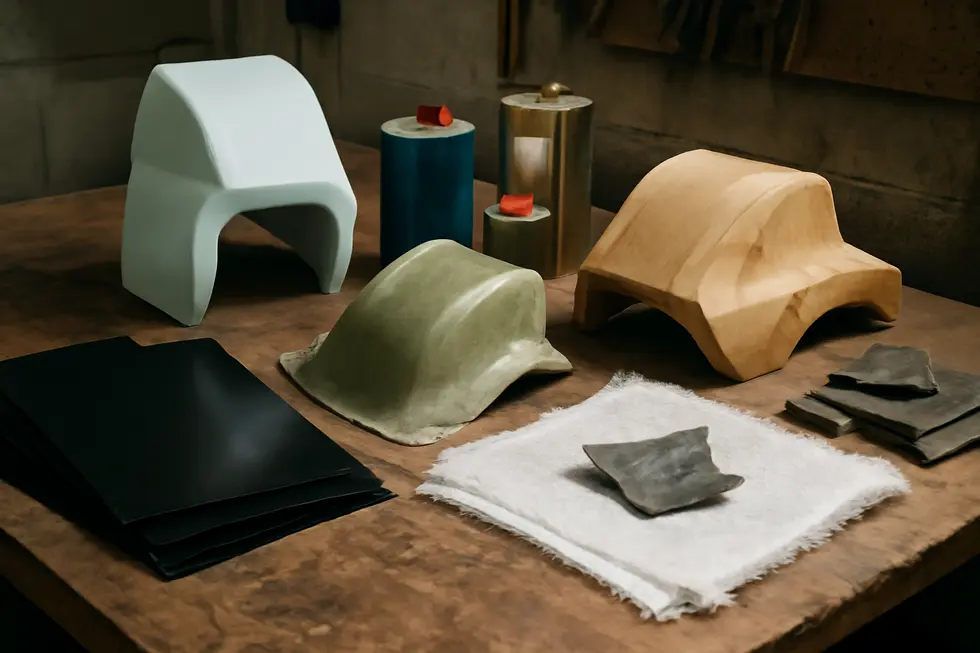
1. The Essential Materials Shaping Homemade Motorcycle Fairings: Roles and Characteristics
Creating homemade motorcycle fairings calls for materials that balance strength, weight, and workability. Among the most popular is fiberglass, favored for its affordability and ease of use. Layers of fiberglass cloth saturated with resin form a strong, rigid shell that can be shaped into complex contours, making it ideal for custom designs and repairs. Unlike factory options, fiberglass allows for greater flexibility in adapting to a bike’s unique frame.
For performance-focused builds, carbon fiber is prized for its exceptional strength-to-weight ratio and smooth finish. Though requiring specialized prepreg materials and precise curing techniques, it vastly improves the fairing’s structural integrity without adding bulk. However, its complexity and cost often relegate carbon fiber fairings to advanced projects.
In many homemade applications, plastics like ABS and polypropylene are relied upon for their durability and impact resistance. These thermoplastics can be shaped via vacuum forming or molded using simple heating techniques, making them accessible for DIYers. Plastic welding repairs further enhance their practicality.
Crucial supporting materials such as polyester or epoxy resins bind fibrous reinforcements, while core fillers like foam boost stiffness without excessive weight. Metal hardware, including steel brackets and weld-on mounts, are essential to secure the fairing firmly to the motorcycle frame, ensuring proper fit and aerodynamic function.
Choosing the right combination hinges on desired durability, finish, and fabrication skill. Fiberglass’s versatility makes it the cornerstone for many enthusiasts crafting affordable, personalized fairings. For deeper insights into composite materials and fabrication, resources like Hexcel Composites offer extensive guidance.
Explore further ideas on durable, affordable covers with a comprehensive guide to affordable motorcycle fairings.
2. Mastering Metal Shaping and Thermoplastic Forming: Core Fabrication Methods for DIY Motorcycle Fairings
Fabricating homemade motorcycle fairings hinges on mastering two primary shaping methods: metal forming and thermoplastic molding. Metal fairings typically start with cold-rolled mild steel sheets, commonly 20 gauge thick. Crafting these involves skillful use of shaping tools such as nylon hammers, sandbags, and planishing hammers to manipulate metal surfaces. Techniques like shrinking and stretching are essential to contour steel smoothly around curves. Starting with cardboard or paper templates helps to accurately mark areas requiring compression or expansion before transferring guides directly onto metal. These hand-shaping processes enable precise control over complex shapes without industrial molds.
In contrast, thermoplastic forming uses heat to soften plastic sheets, allowing them to be molded over custom-shaped foam or the motorcycle frame itself. Once cooled, the hardened plastic yields lightweight, rigid parts ideal for seat pans or aerodynamic fairings. This method facilitates custom fitment and smooth surfaces ready for finishing with sanding and paint. While metal provides robustness and a unique aesthetic, thermoplastics offer easier handling and faster prototyping.
Compared to commercial fairings, which rely on precision molds and composite materials like fiberglass or ABS plastic enhanced with UV-resistant coatings, homemade fabrication emphasizes adaptability and hands-on craftsmanship. Each step—from prototyping to final finishing—balances material properties and available tools to achieve a personalized, functional result. For a deep dive into metal shaping techniques tailored to motorcycle fairings, a comprehensive guide is available online, offering practical insights for enthusiasts.
For more inspiration and tips in motorcycle customization, see this source on exploring the best motorcycle fairings.
External reference on metal shaping: https://www.returnofthecaferacers.com/honda-cb750/cafe-racer-cowl-metal-shaping-guide/
3. Mastering Material Choices and Crafting Techniques to Enhance Performance and Style in DIY Motorcycle Fairings
Achieving an ideal balance between performance and aesthetics in homemade motorcycle fairings depends largely on selecting the right materials and applying refined fabrication techniques. Cold-rolled mild steel, particularly in 20-gauge thickness, offers a robust yet malleable base for durable metal fairings. While thicker steel provides increased strength, it often complicates shaping and adds unwanted weight. Thermoplastic sheets excel when precise, heat-formed contours are needed; their ability to soften and harden upon cooling allows seamless molding directly onto the bike’s frame for a tailored fit. Moreover, advanced composites like prepreg materials deliver lightweight panels with impeccable surface finishes, ideal for those seeking high-quality, race-inspired aesthetics with reduced finishing labor.
The fabrication process benefits from traditional metalworking tools such as nylon hammers, shrinker-stretchers, bead rollers, and English wheels to sculpt smooth, aerodynamic curves. Beginning with cardboard prototypes refines design accuracy before cutting into metal or plastic, minimizing waste and ensuring proper fitment. Heat shaping plastics demands controlled heating to preserve material integrity, followed by firm molding to achieve the desired form.
Performance optimization extends to incorporating aerodynamic principles drawn from racing applications, such as managing airflow around brake ducts and cooling elements. Custom-fabricated mounting brackets that expertly balance rigidity and weight are essential for maintaining structural integrity without adding bulk. By weaving durable materials with time-tested shaping methods and aerodynamic insight, builders can create fairings that are as functional as they are visually striking.
For those interested in in-depth customization and fabrication guidance, exploring detailed tutorials at Summit Fairings’ blog can provide valuable insights. Further details on composite materials are available via external industry sources like CompositesWorld.
Chapter 2: Tools and Equipment Essential for Homemade Motorcycle Fairing Creation
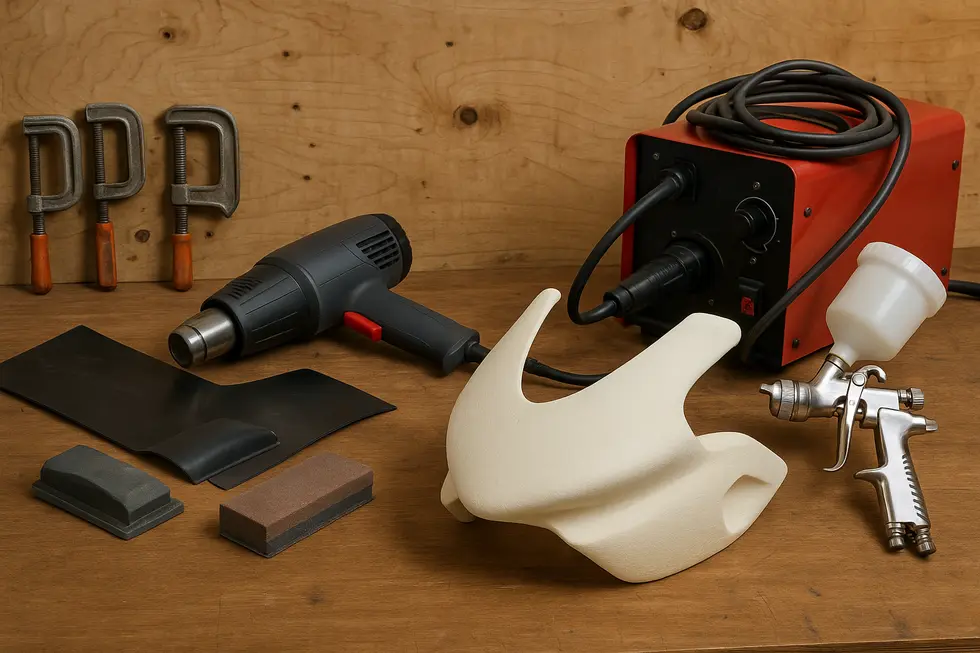
1. Essential Mechanical Hand Tools for Precise Assembly and Secure Fitting of Homemade Motorcycle Fairings
Crafting homemade motorcycle fairings demands not only creative vision but also a well-equipped toolkit to ensure the fairing fits securely and functions seamlessly. At the core of this toolkit are mechanical hand tools, indispensable for the assembly and precise fitting of custom bodywork. Fundamental instruments include wrenches, sockets, screwdrivers, pliers, and a torque wrench, each playing a critical role throughout the installation process.
Wrenches and socket sets provide the leverage needed to tighten or loosen bolts and nuts that secure mounting brackets and fairing panels, accommodating various sizes encountered during assembly. Screwdrivers, both Phillips and flathead, aid in fastening screws typically used on plastic or metal fairing components. Their versatility makes them a staple for adjusting smaller attachments or interior trims.
A torque wrench elevates accuracy by allowing bolts to be tightened to manufacturer-recommended settings, preventing damage from over-tightening while ensuring stability. This precision is vital when dealing with custom mounts that require consistent clamping force. Beyond these essentials, files and sanding tools offer the ability to fine-tune mounting points or smooth edges, enhancing the overall fit and finish.
For optimal organization, a compact mechanic’s tool kit that consolidates these basics ensures portability and quick access, streamlining the fabrication process. Mastering these tools bridges the gap between raw materials and a professional-quality custom motorcycle fairing. For further practical insights on homemade fairing assembly and fitting techniques, the collection of detailed guides at Explore the Best Motorcycle Fairings at Summit Fairings is an excellent resource.
2. Mastering Cutting and Shaping: Effective Techniques and Tools for Fiberglass and Plastic Fairing Fabrication
Creating homemade motorcycle fairings demands precise cutting and shaping techniques tailored to materials like fiberglass and thermoplastics. Cutting tools such as finely toothed jigsaws, rotary tools, and sharp utility knives enable accurate shaping of fiberglass mats and plastic sheets, ensuring clean edges that contribute to a polished final product. For detailed contours, rotary tools with specialized attachments facilitate fine sculpting, while sanding blocks and orbital sanders progressively refine surfaces from coarse to smooth.
Heat guns play a versatile role by softening plastics and lightly warming fiberglass for gentle bending, allowing fairings to conform closely to the motorcycle’s frame. Fabricating fiberglass components involves layering resin-soaked cloth over molds or shaped bases, then curing for a durable, lightweight finish. This process requires resin, hardeners, mixing containers, and application brushes, alongside essential safety gear such as respirators and gloves to guard against fumes and skin contact.
Fastening hardware, including quick-release fasteners, is crucial for attaching fairings securely yet conveniently, enhancing both function and aesthetics. Alongside metric Allen wrenches and basic hand tools, these secure mounting points ensure the fairings remain stable without sacrificing ease of maintenance. Mastery of these tools and techniques transforms raw materials into customized fairings that blend strength, style, and precise fitment.
For enthusiasts seeking detailed, step-by-step guidance on cutting and removing fairings, a wealth of tutorial content is available online, providing invaluable insights into effective tool use and safety practices. To explore a broad selection of affordable motorcycle fairings and gain inspiration for your projects, visit Summit Fairings blog.
External resource: https://www.youtube.com/watch?v=0tyCFuoKJJE
3. Mastering Final Touches and Secure Mounting: Achieving Durable and Professional-Quality Homemade Motorcycle Fairings
Creating a homemade motorcycle fairing that rivals commercial counterparts requires meticulous attention to finishing techniques and thoughtful mounting solutions. After shaping and curing fiberglass or ABS components, smoothing the surface through progressive sanding—from coarse to fine grit—ensures an even canvas. Imperfections like pinholes are expertly filled with body filler or glazing putty, then refinished to blend seamlessly. Priming prepares the surface for paint adhesion, while careful application of paint, matched to your motorcycle’s scheme, delivers a vibrant, personalized look. Clear coats not only enhance gloss but also protect against wear, with wet sanding between layers aiding flawless blending. Final polishing and sealing with a protective wax safeguard the finish against environmental damage, preserving its shine and resilience.
Equally vital is the mounting process. Removing any existing fairings demands caution to avoid damaging critical components like turn signals or mirrors. Employing adjustable brackets allows precision alignment before tightening fasteners, a crucial step for stable attachment and aerodynamics. Bolts, screws, and nuts secured with washers or rubber grommets diffuse stress and vibration, preventing cracks in the fairing material. In high-stress areas, reinforcements such as pop rivets or backing plates add durability and longevity. Regular maintenance, ensuring all hardware remains tight after rides, preserves safety and fitment integrity.
Gentle cleaning with mild soap and soft tools extends the life of your finish without harm. This integrated approach to finishing and mounting guarantees homemade motorcycle fairings that are not only visually striking but also reliably durable, blending artistry with functional craftsmanship. For further guidance and detailed tutorials on these advanced finishing and mounting techniques, visit this comprehensive motorcycle fairings resource.
Chapter 3: Finishing and Painting Processes in Homemade Motorcycle Fairing Projects
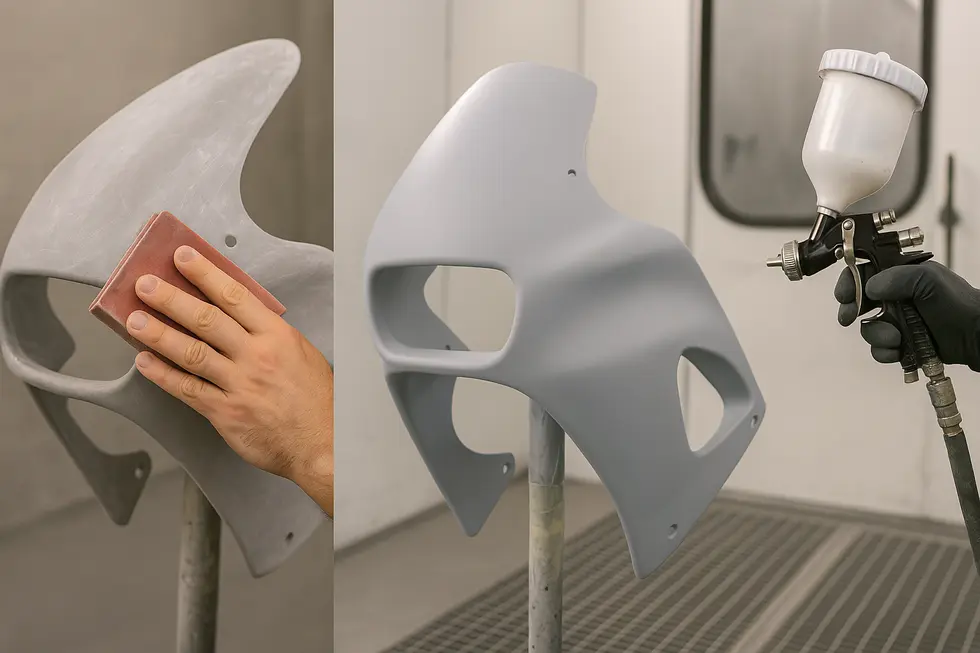
1. Essential Surface Preparation for Durable and Flawless Fairing Finishes
Surface preparation is the foundational step in achieving a durable and visually appealing finish on homemade motorcycle fairings. Before any primer or paint touches the surface, thorough cleaning is vital to eliminate dirt, grease, and contaminants that could compromise adhesion. Using appropriate cleaners ensures the fairing’s surface is free of residues, setting the stage for the subsequent steps.
Sanding plays a crucial role by dulling glossy surfaces, often with 600 to 800 grit sandpaper, fostering better bonding of primers and paints. For plastic fairings like ABS, this also removes existing coatings and imperfections. When cracks or damage appear, creating V-grooves aids in effective filler application, smoothing out the surface for a seamless finish.
Post-sanding, meticulous dust removal through vacuuming or wiping with tack cloths prevents unwanted blemishes during painting. Applying plastic-compatible primers and fillers not only evens out surface irregularities but also acts as a robust base for paint layers. Selecting flexible, UV-resistant paints and primers specifically formulated for plastics helps prevent peeling or cracking over time.
Just before painting, a final cleaning wipe ensures no oils or dust remain, promoting optimal paint adhesion. This sequence—cleaning, sanding, repairing, dust removal, priming, and final wiping—integrates essential techniques that collectively guarantee a smooth, lasting finish on homemade fairings.
For detailed procedures and tips on prepping plastic surfaces for painting, visiting dedicated resources like the Plastic Repair Centre can provide valuable insight.
2. Mastering Priming and Painting Techniques for Durable and Sleek Homemade Motorcycle Fairings
Achieving a flawless finish on homemade motorcycle fairings hinges on meticulous priming and painting techniques that build durability and enhance aesthetics. The process begins with thorough surface preparation, essential for proper adhesion. Cleaning removes dust, grease, and residues, followed by progressive sanding—from coarser grits like 180 to finer ones such as 240 and 320—to create a smooth foundation. Plastic surfaces benefit from light scuff sanding with fine abrasive pads, which significantly improves primer bonding.
Applying a high-build 2K primer specially formulated for plastics and metals fills imperfections and ensures an even base. Multiple thin coats, sprayed carefully with appropriate equipment, promote uniform coverage without sagging. Allowing sufficient drying time between coats is crucial. After priming, a delicate sanding pass with fine grit sandpaper removes any texture inconsistencies like orange peel, resulting in a refined smoothness that readies the fairing for paint.
Painting itself demands patience and precision; numerous light, even layers prevent runs and achieve consistent color depth. Each coat must dry completely before the next application. The final protective step is clear coating, which not only amplifies gloss but also guards against environmental damage. Proper curing and application of the clear coat safeguard the finish for long-term resilience.
Before priming, any cracks or imperfections should be repaired, with plastic welding as an effective method for plastic fairings. Maintaining clean, dry conditions is imperative throughout the process. When reinstalling painted fairings, minor adjustments ensure perfect alignment and fit, preserving both function and form.
For enthusiasts looking for visual demonstrations and detailed primer and paint application techniques, instructional videos are a valuable resource, guiding through sanding sequences and spray gun usage for professional results.
Explore more detailed guidance and resources on achieving top-quality finishes in homemade motorcycle fairings at Your Ultimate Source for Affordable Motorcycle Fairings.
3. Mastering Clear Coating and Final Finishing for Durable, Glossy Homemade Motorcycle Fairings
Achieving a professional, durable finish on homemade motorcycle fairings hinges on meticulous clear coating and final finishing steps. After the base paint has dried and any minor imperfections or scratches have been carefully touched up, the surface should be sanded using very fine grit sandpaper—typically between 1500 and 2000 grit. This wet sanding process smooths the paint surface, eliminating imperfections without compromising the color layers beneath.
Applying the clear coat demands patience and precision: multiple thin layers should be sprayed evenly over the painted fairing, rather than a single heavy coat, to avoid runs and ensure proper curing. This transparent protective layer enhances gloss, deepens the color’s richness, and guards against environmental wear including UV rays, fuel exposure, and abrasion.
Once the clear coat has fully cured according to the product’s guidelines, polishing with a fine-grade compound refines the shine and removes any residual texture or dust contaminants. To seal the finish, a protective wax or sealant is applied, adding weather resistance and sustaining the glossy appearance over time.
Throughout this process, thorough surface cleaning with degreasers before application and masking off adjacent areas for overspray control are essential practices. These steps help maintain adhesion and prevent unintended paint contamination. This careful layering and finishing technique, whether working with fiberglass, ABS plastic, or custom materials, results in a finish that not only looks stunning but also stands up to daily use and exposure.
For detailed visual guidance, the tutorial “How To Repair Scratches In Motorcycle Paint?” clearly demonstrates sanding, touch-ups, clear coating, and polishing techniques essential for impeccable homemade fairing finishes.
Explore further expert insights and tips on achieving flawless finishes through resources like the Summit Fairings blog.
Chapter 4: Fitment and Aerodynamics Considerations for Homemade Motorcycle Fairing

1. Mastering Fitment Precision and Structural Strength for Aerodynamic Efficiency
Achieving a well-fitted and structurally sound homemade motorcycle fairing is essential for both safety and aerodynamic performance. Precision in fitment begins with accurate measurements and careful trimming to ensure the fairing closely hugs the motorcycle’s contours. This tight fit eliminates gaps that would otherwise cause wind buffeting and reduce aerodynamic efficiency. Secure attachment relies on quality mounting hardware or custom brackets designed to firmly anchor the fairing to the frame, minimizing vibrations that can lead to misalignments or material fatigue. Proper surface preparation around mounting points, including smoothing and polishing, helps maintain aerodynamics and prevents cracking.
Structural integrity balances lightweight design with durability by choosing strong materials like fiberglass or carbon fiber composites. Reinforcing critical areas, especially around mounting points and exposed edges, guards against deformation caused by road forces and wind pressure. Incorporating strategic vents manages heat from the engine and exhaust, avoiding warping while maintaining aerodynamic flow. The shape and smoothness of the fairing play a pivotal role in reducing drag; streamlined contours and tapered edges minimize turbulence, while carefully designed windshields lessen rider fatigue by easing airflow around the helmet and torso.
Drawing inspiration from advanced motorcycle designs enhances the homemade fairing’s effectiveness. By integrating these considerations—precise fitment, reinforced structure, and optimized aerodynamic shaping—riders can craft fairings that not only look unique but perform reliably at speed. For deeper insights into aerodynamic principles applied to motorcycles, this detailed analysis offers valuable guidance: BMW S1000RR aerodynamic study.
For practical tips on achieving exact fit and mounting solutions, exploring resources like the comprehensive motorcycle fairing guides found at Summit Fairings blog can provide useful methods and inspiration.
2. Streamlining Fitment: Applying Aerodynamic Design Principles to Homemade Motorcycle Fairings
Achieving optimal aerodynamic performance in homemade motorcycle fairings hinges on integrating smooth, continuous contours and precise fitment that reduce drag and promote airflow efficiency. The fairing’s shape must flow seamlessly around the motorcycle and rider, eliminating sharp edges or gaps where air turbulence can form and degrade stability. This streamlined design reduces wind resistance, allowing smoother passage through the air and enhancing overall handling at speed.
Equally important is the secure attachment of fairings to the frame with carefully measured mounting points to prevent fluttering or vibration, which increase drag and rider fatigue. Incorporating gentle wind deflection through thoughtfully curved windshields or upper fairing areas helps channel airflow over the rider, mitigating buffeting and improving comfort during longer rides. While high-end racing fairings may employ winglets for downforce and traction, homemade designs benefit from understanding these principles by focusing on balanced stability and traction without excessive protrusions.
Weight considerations also impact aerodynamics; utilizing lightweight materials like fiberglass preserves maneuverability while supporting complex shaping. Adequate ventilation remains essential, so well-placed vents or ducts maintain engine and brake cooling without disrupting airflow efficiency. Finally, rider positioning complements aerodynamic fairing design—tucking in elbows and lowering torso exposure synergize with the fairing’s curves.
By drawing inspiration from professional racing shapes and adapting them using available materials and tools, homebuilders can craft fairings that optimize airflow and rider protection. For detailed insights and step-by-step methods in fairing design and fabrication, exploring comprehensive motorcycle fairing resources can be invaluable. Learn more about achieving aerodynamic balance and fitment in custom builds at affordable motorcycle fairings resource.
(Reference: Living With Gravity, article on MotoGP motorcycle aerodynamics and design evolution.)
3. Strategic Material Choices and Practical Approaches to Enhancing Fitment and Aerodynamics
Selecting the ideal materials is foundational to achieving both precise fitment and aerodynamic efficiency in homemade motorcycle fairings. Among popular choices, ABS plastic stands out for its balance of impact resistance, affordability, and ease of molding, allowing DIY builders to create smooth, lightweight panels. Fiberglass also remains a common option, prized for durability and sculpting flexibility, though it demands more labor-intensive layering and curing steps. For those pursuing the highest strength-to-weight ratio and superior rigidity, carbon fiber provides exceptional benefits but adds complexity and cost to fabrication.
Beyond material characteristics, precise fitment is crucial to secure attachment and aero performance. Customized molds or templates, shaped to the exact dimensions of the motorcycle, ensure mounting points align perfectly and the fairing hugs the frame without gaps or stress. Using metal brackets—aluminum or stainless steel—can add robust internal support, minimizing vibration and maintaining structural integrity during rides.
Aerodynamic considerations focus on crafting smooth, contoured surfaces that streamline airflow, reducing drag and turbulence. Stiffer materials like carbon fiber maintain shape under high speeds, preserving aerodynamic profiles better than flexible plastics that may deform. Additionally, shielding fairings from exhaust heat using thermal wraps prolongs material life and performance.
Final finishing touches, including multi-layer painting and clear coats, protect the surface while enhancing smoothness and UV resistance, vital for sustained aerodynamic efficiency. Iterative test fitting and adjustment remain essential to balance fitment accuracy with optimized airflow.
For further mold options and material details that can support these fabrication strategies, extensive resources are available online, offering insights for tailoring fairings to various motorcycle models. A recommended external resource on motorcycle fairing molds can be found here. For more guidance on customization and affordable options, explore this comprehensive motorcycle fairings blog.
Chapter 5: DIY Inspirations and Tutorials for Homemade Motorcycle Fairing Construction
1. Essential Planning and Preparation for Successful DIY Motorcycle Fairings
Creating a homemade motorcycle fairing begins with careful planning and thorough preparation to ensure a smooth construction and fitting process. Start by setting up a clean, well-lit workspace where your motorcycle can stand securely on a flat surface, allowing easy access to all parts during assembly. Gathering the right tools and materials ahead of time is crucial. Essential components include mounting brackets, bolts, rubber grommets for protecting fairing edges, washers, and a drill for any modifications. Quick-release fasteners are highly recommended if you plan to remove the fairing frequently or want simplified maintenance.
Before permanent installation, take precise measurements and align mounting points by loosely tightening bolts. This flexibility allows you to check clearances around the handlebars and avoid wiring interference, which is vital for both safety and fairing integrity. Protect delicate materials like fiberglass or ABS plastic by incorporating rubber grommets in bolt holes; this prevents damage from overtightening and distributes stress evenly.
To streamline the process, consider using pre-made templates or kits, which can offer pre-drilled holes and OEM-style fitment, reducing guesswork and enhancing durability. When designing your fairing, factor in airflow management; integrating air ducts can improve performance and cooling.
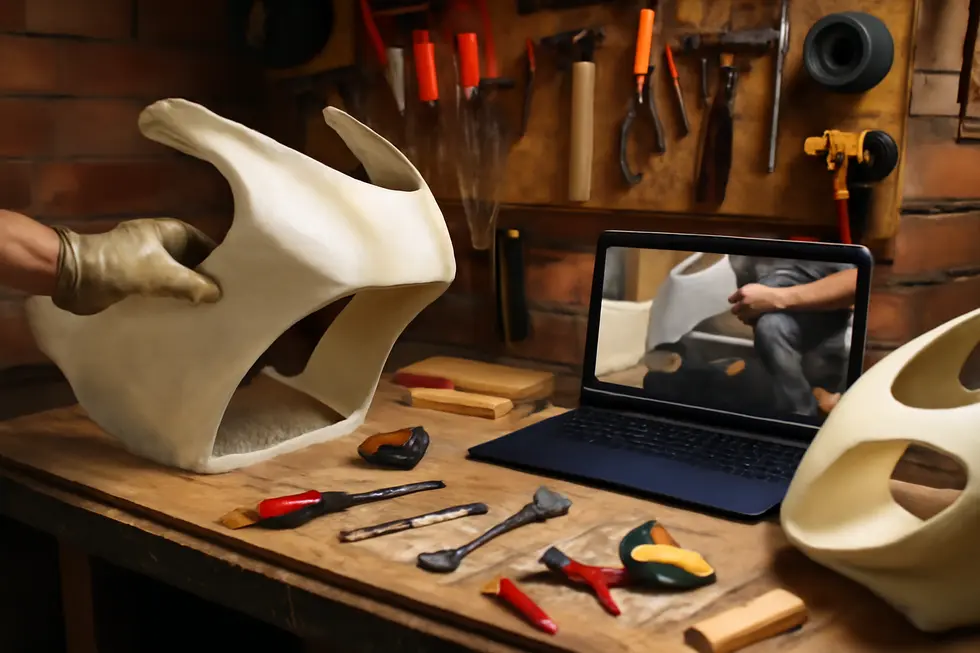
For practical guidance, instructional installation videos demonstrate bracket securing, alignment, and attaching lighting components, which can be invaluable resources. Exploring these tutorials, including stunt bike builds involving custom mounts and hole modifications, can inspire creative approaches while teaching essential fitting techniques.
This comprehensive preparation strategy supports a successful, customized fairing project tailored to your motorcycle’s needs. For additional insights on fairing options and styles, explore discover affordable motorcycle fairings at Summit Fairings.
External detailed guidance via video is available here: How Do You Install Motorcycle Fairings? – The Racing Xpert
2. Mastering Secure Attachment: Brackets, Mounting Adjustments, and Protective Hardware for DIY Motorcycle Fairings
Brackets, mounting adjustments, and protective hardware form the backbone of effective homemade motorcycle fairings, ensuring both secure attachment and durability. Brackets act as vital connectors between the fairing and the motorcycle frame. DIY builders typically craft these supports from strong materials like steel or aluminum, shaping them to fit unique frame geometries. Because each fairing design varies, custom-fabricated brackets guarantee a stable and vibration-resistant fit that commercial kits may not provide.
The importance of mounting adjustments cannot be overstated. Incorporating features like slotted holes, adjustable clamps, or rubber mounts allows fine-tuning the alignment and fit of the fairing. Rubber grommets and vibration-dampening spacers serve dual purposes: they cushion contact points, preventing cracking or deformation, and absorb shock to enhance rider comfort and fairing longevity. These flexible mounts accommodate slight misalignments caused by frame variances or road vibrations, which is crucial for maintaining both aesthetics and safety.
Routine inspection of mounting hardware, recommended at least biannually, helps detect wear, corrosion, or loosening bolts before issues escalate. Many DIY tutorials emphasize this practice, highlighting how correct installation and maintenance reduce failures and the need for repeated adjustments.
By integrating sturdy, well-designed brackets with vibration-isolating mounts and protective spacers, homemade fairings achieve a professional balance of rigidity and flexibility. This thoughtful hardware setup not only preserves the structural integrity of the fairing but also enhances its visual appeal and riding performance, aligning perfectly with customization goals. For more insights on fairing hardware and detailed installation guidance, explore resources like the comprehensive motorcycle fairings blog at Summit Fairings.
3. Mastering Removal and Installation: Essential Techniques for Homemade Motorcycle Fairings
Effective removal and installation of motorcycle fairings are pivotal steps in any homemade fairing project. Careful disassembly ensures panels remain intact and serve as reliable references during reassembly. Start by identifying all screws and bolts securing the fairings, typically M5 variants differing in length based on the motorcycle model. Using the right tools—Phillips and flat-head screwdrivers, Allen keys, and sometimes pliers—helps prevent stripping or breakage. To avoid damaging delicate push-pull clips or inserts, gently pry panels from their edges rather than forcing them. Disconnect any electrical connectors or hoses with care to preserve functionality.
During installation, preparation of the motorcycle is essential. Clean mounting surfaces and remove leftover hardware to ensure a secure fit. Mounting brackets might require reinforcement or new holes, which should be drilled with precautions such as using a magnet to catch metal shavings. Position your custom fairing carefully on these brackets, aligning grooves precisely for a snug fit. Begin tightening bolts loosely to permit slight adjustments, then evenly torque all fasteners to minimize stress that can crack ABS or fiberglass panels. Employ washers or rubber grommets to cushion edges and reduce vibration damage. Reattach ancillary components like mirrors or headlights, verifying their proper alignment and operation.
Homemade fairings often demand trial fits and adjustments due to unique shapes and materials. Reinforcing mounting points is crucial to withstand road vibration and riding stresses. Meticulous documentation of each step, including photos, ensures smoother reinstallation and avoids frustration.
For detailed example guides inspired by real-world applications, the thorough BMW S1000XR fairing removal guide offers valuable insight adaptable for DIY construction.
Chapter 6: Comparative Analysis of Homemade Motorcycle Fairing versus Commercial Kits
1. Technological Foundations Shaping Homemade and Commercial Motorcycle Fairings
Homemade motorcycle fairings and commercial kits differ profoundly in their technological underpinnings, shaping performance and durability. Commercial manufacturers utilize sophisticated engineering tools like CAD (Computer-Aided Design) and CFD (Computational Fluid Dynamics) to refine every curve and vent for optimal airflow. This technology enables precise aerodynamic tuning, enhancing stability, reducing drag, and improving rider comfort during high-speed travel. Materials in commercial kits often include premium fiberglass, carbon fiber, and CNC-machined aluminum, combining lightness with exceptional strength and finish consistency.
In contrast, homemade fairings rely heavily on manual craftsmanship. Builders typically shape fiberglass or ABS plastic sheets by hand, often using foam molds or heat guns without access to aerodynamic simulation tools. This process, while flexible and highly customizable, risks less refined airflow management and irregular build quality. Structural integrity may vary as homemade designs lack factory testing for impact resistance or long-term durability.
The manufacturing gap also manifests in consistency: commercial kits are factory-produced with strict quality controls, resulting in uniform parts, whereas homemade projects embrace trial and error, yielding unique but sometimes uneven outcomes. Despite these differences, homemade fairings excel in personal expression and cost-effectiveness, allowing enthusiasts to tailor designs without technological constraints.
Understanding these technological contrasts clarifies why commercial kits outperform in aerodynamics and finish, while homemade fairings offer unmatched creative freedom. For those interested in exploring material options and cost-saving strategies in fairing creation, visiting affordable motorcycle fairings insights can provide valuable perspectives.
For further reading on aerodynamic advantages in commercial designs, see the detailed analysis of precise airflow control in advanced motorcycle fairings here.
2. Balancing Costs and Coverage: Economic and Warranty Realities in Homemade versus Commercial Motorcycle Fairings
Economic considerations play a pivotal role when choosing between homemade motorcycle fairings and commercial kits. Homemade options generally offer substantial cost savings by eliminating manufacturer markups and branding expenses. Material and labor costs tend to be lower, making DIY fairings an attractive choice for enthusiasts on a budget. However, these savings come with trade-offs. Crafting a fairing requires skill, time, and patience, and the iterative nature of fabrication may reduce overall economic advantages. Additionally, homemade fairings sometimes lack the consistent finish and durability typical of commercial products, potentially impacting the motorcycle’s resale value adversely.
Conversely, commercial kits carry a higher upfront price reflecting professional manufacturing, quality control, and brand assurance. These kits deliver reliable fitment, polished finishes, and materials designed to withstand the rigors of riding. The enhanced aesthetic and functional quality can increase the motorcycle’s appeal and maintain or even boost resale value.
Warranty implications further differentiate these options. Commercial fairings typically include manufacturer warranties addressing defects and workmanship, providing buyers with tangible protection and confidence in product reliability. Moreover, factory-designed kits reduce the risk of interfering with the motorcycle’s original warranty when installed correctly. In contrast, homemade fairings come with no formal warranty. Any failure or damage must be addressed by the owner, potentially increasing long-term expenses. Additionally, modifications involving custom fairings may void the manufacturer’s warranty on the motorcycle, especially if they affect OEM components.
Overall, the decision balances immediate cost savings and creative freedom against durability assurances and warranty coverage. Evaluating these factors is essential in tailoring fairing choices to personal priorities and ride demands. For a deeper dive into affordable motorcycle fairing options, explore this ultimate source for affordable motorcycle fairings.
Reference external insights on warranty standards and policies can be found here.
3. Navigating Customization and Installation Challenges: Homemade Fairings Versus Commercial Kits
Customization is the defining hallmark of homemade motorcycle fairings. Riders can precisely shape, style, and paint their fairings to reflect individual tastes, achieving unique forms unattainable with standard kits. However, this creative freedom demands advanced fabrication skills, accurate measurements, and patience through iterative fitting. Material quality varies significantly, hinging on the chosen substances—like fiberglass or carbon fiber—and the builder’s craftsmanship. Consequently, installation often proves challenging, as homemade fairings may lack standardized mounting points, requiring custom brackets or modifications to the frame for secure fitment. This process involves considerable time investment, from design and fabrication to sanding, painting, and trial fittings, making durability contingent on the builder’s expertise with finishing techniques.
In contrast, commercial fairing kits prioritize ease and consistency. Constructed from pre-tested materials such as ABS plastic or carbon composites, these kits offer uniform quality with factory finishes that withstand wear. Their design includes pre-drilled holes and matched hardware, facilitating straightforward bolt-on installation within a shorter timeframe. Customization is typically limited to paint and decals, as the shapes correspond to specific motorcycle models. Some kits provide repair parts or replacement mounting pegs to address common issues, enhancing reliability without complicating assembly.
Choosing between homemade and commercial fairings involves balancing the desire for personalized aesthetics against installation simplicity and material reliability. Riders seeking a tailored look must be prepared for longer build times and technical challenges. Conversely, those prioritizing convenience and proven durability may opt for commercial kits despite their limited uniqueness. For enthusiasts pursuing custom builds, comprehensive guidance and tips on fabrication and fitment can be found through specialized communities and resources such as affordable motorcycle fairings.
More detailed examples and comparisons, including commercial bolt-on wind deflectors compatible with models like the Honda MSX 125 SF, illustrate how the trade-offs between customization and ease impact real-world choices. Ultimately, the balance of skills, patience, and priorities guides the rider’s optimal fairing solution.
Reference: https://wuzzos.com/Motorcycle-Fairings-Bodywork-For-Honda-Grom-125-For-Sale-461112/
Final thoughts
Homemade motorcycle fairings represent more than a DIY endeavor; they offer strategic advantages for business owners in the motorcycle aftermarket industry. By mastering the array of materials and fabrication techniques, investing in the right tools, and prioritizing finishing and fitment details, businesses can deliver uniquely customized products that appeal to discerning riders. Embracing instructional resources enhances skill development while providing an expanding opportunity for innovation. While commercial kits boast convenience and consistency, the homemade approach unlocks personalization and cost efficiencies that resonate strongly in niche markets. Ultimately, integrating homemade fairing capabilities can position your business at the forefront of motorcycle customization, delivering both style and function that riders value.
Ready to elevate your ride? Summit Fairings delivers premium, custom-fit fairings that blend style and durability. Whether you’re chasing speed or turning heads, we’ve got your bike covered. Don’t wait—transform your machine today. Click, customize, and ride with confidence. Your perfect fairing is just a few clicks away. Act now!
About us
undefined