Introduction
Motorcycle fairings significantly influence a bike’s appearance and aerodynamics, and scratches can negatively affect both aesthetics and perceived value. For business owners in motorcycle sales, repair shops, or customization services, mastering scratch repair techniques is essential not only for maintaining product quality but for boosting customer satisfaction and profitability. This guide covers every crucial step—from preparing surfaces meticulously to addressing light scratches efficiently, dealing with deep gouges expertly, and finishing repairs with flawless painting. It also highlights when professional intervention is necessary, helping you determine the best course for complex damage. By understanding these processes, you can improve your service offerings and ensure motorcycles leave your care looking as good as new.
Tables of Contents
Chapter 1: Cleaning and Preparing the Surface for How to Fix Scratches on Motorcycle Fairings
- Mastering Deep Cleaning and Surface Conditioning for Optimal Scratch Repair on Motorcycle Fairings
- Essential Surface Sanding and Degreasing Techniques to Perfectly Prepare Motorcycle Fairings for Scratch Repair
Chapter 2: Techniques for Light Scratch Removal in How to Fix Scratches on Motorcycle Fairings
- Effective Cleaning and Polishing Strategies to Restore Motorcycle Fairings from Light Scratches
- Mastering Fine Grit Wet Sanding and Polishing to Restore Motorcycle Fairings’ Shine
Chapter 3: Comprehensive Methods for Deep Scratch Repair on Motorcycle Fairings
- Essential Surface Preparation and Filling Techniques for Restoring Deep Scratches on Motorcycle Fairings
- Mastering Refinishing, Painting, and Protective Coating for Seamless Deep Scratch Restoration
Chapter 4: Painting and Finishing Processes in How to Fix Scratches on Motorcycle Fairings
- Mastering Surface Preparation: The Key to Flawless Motorcycle Fairing Repairs
- Mastering Application and Protective Finishes for Flawless Motorcycle Fairing Repairs
Chapter 5: When to Seek Professional Help: Understanding Damage Severity in Motorcycle Fairing Scratch Repairs
- How to Accurately Assess Scratch Severity: Deciding When Professional Repair Is Necessary
- The Key Benefits of Professional Repair Services for Motorcycle Fairings
Chapter 1: Cleaning and Preparing the Surface for How to Fix Scratches on Motorcycle Fairings
1. Mastering Deep Cleaning and Surface Conditioning for Optimal Scratch Repair on Motorcycle Fairings
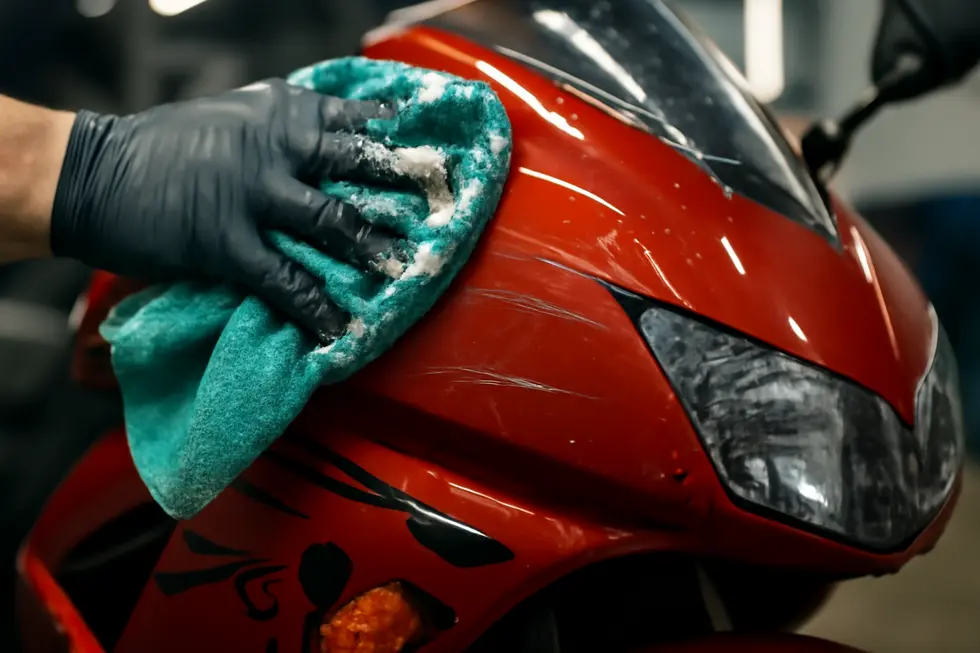
Achieving a flawless repair on motorcycle fairings begins with meticulous cleaning and conditioning of the surface. This essential preparation ensures that dirt, oils, and residues do not interfere with scratch correction materials and enhances the longevity of the repair. Start by using a mild soap or a specialized motorcycle wash to gently cleanse the fairing. Employ soft microfiber mitts or detailing brushes to agitate the dirt without introducing new scratches or dulling the finish. Maintaining a moist surface during this process, with the assistance of sprays like snow foam or bike wash solutions, effectively loosens embedded debris for a thorough clean while safeguarding the paint’s integrity.
Once washing is complete, it is crucial to dry the fairing thoroughly using a soft cloth, removing all moisture which could compromise sanding, polishing, or filler adhesion. Carefully inspect the surface afterward. When oxidation or stubborn scratches are present, wet sanding becomes necessary. Using fine-grit sandpaper, beginning with about 400 grit, lightly sand these areas while keeping the sandpaper wet. This technique prevents further scuffing and gradually smooths the damaged layer, readying the surface for repair treatments.
Following sanding, applying a plastic polish or rubbing compound specifically formulated for motorcycle plastics restores gloss and eliminates minor abrasion marks. This step not only enhances the visual smoothness but also primes the surface to better accept fillers and paint.
Beyond these core steps, protecting the fairings from prolonged UV exposure before repair is vital to avoid premature paint degradation. Additionally, once repair work concludes, sealing the surface with wax or ceramic coatings preserves the finish and simplifies future maintenance.
This comprehensive cleaning and surface preparation protocol is foundational for effective scratch repair, preventing contaminants from disrupting adhesion or finish quality. For further insight into gentle yet thorough cleaning techniques, see the instructional video “Clean your Motorcycle with Confidence” by SHINY SIDE UP.
For more guidance on maintaining and repairing motorcycle fairings, explore expert advice at your ultimate source for affordable motorcycle fairings.
2. Essential Surface Sanding and Degreasing Techniques to Perfectly Prepare Motorcycle Fairings for Scratch Repair
Surface sanding and degreasing are foundational steps when preparing motorcycle fairings for scratch repair. These processes ensure the damaged area is properly primed for filler adhesion, painting, and clear coating, which is key to achieving a seamless and durable finish.
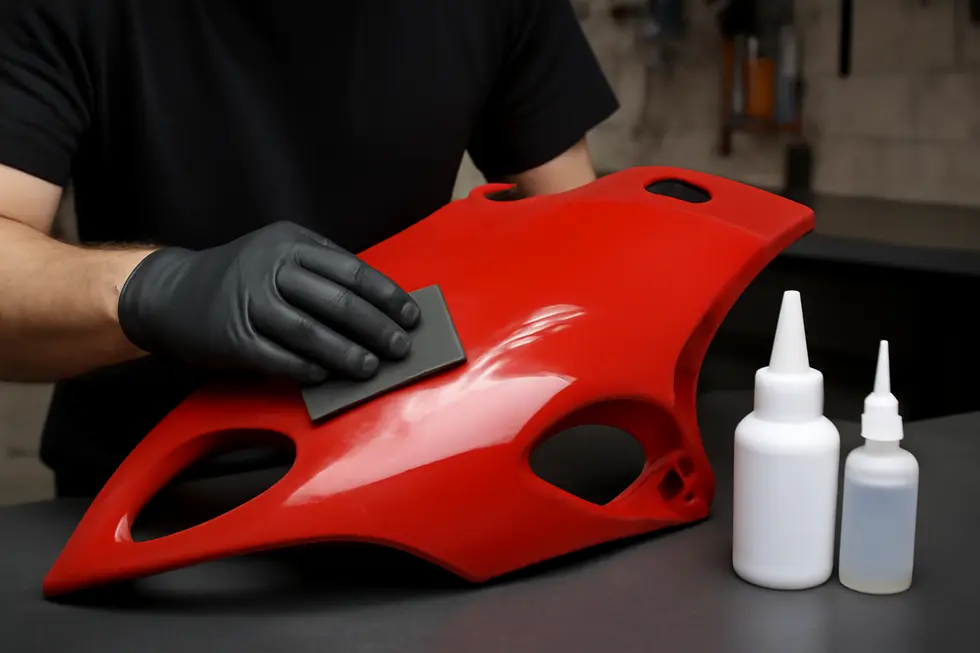
To begin, sanding with fine-grit sandpaper suited for plastics is crucial. Starting with a grit of around 800 removes imperfections and smooths out deeper scratches without causing further damage. Progressively using finer grits, such as 1500 and then 2000, further refines the surface by eliminating sanding marks and creating a subtle texture. This texture improves the bonding of fillers, primers, and paint by allowing them to adhere more effectively, preventing peeling or unevenness later in the repair process.
Before sanding, the fairing must be thoroughly degreased to remove dirt, oils, wax, and other contaminants that can compromise repair materials. Using a dedicated degreasing agent or an appropriate plastic cleaner helps achieve a completely clean surface. After applying the degreaser, it is important to wipe the area with a lint-free cloth and let it dry completely to avoid trapping moisture beneath repair layers.
Additional techniques, like carving a shallow V-groove along scratches, can enhance filler adhesion and reduce visible repair lines. When combined with meticulous sanding and cleaning, this approach creates a more professional, less noticeable repair. Professionals often follow sanding and degreasing with a polishing or paint decontamination step to remove microscopic residues, producing an ultra-smooth base perfect for painting.
Proper preparation not only supports durable repairs but also plays a significant role in maintaining the aesthetic integrity of your motorcycle’s fairings. For further insights on motorcycle fairing options and maintenance, explore affordable motorcycle fairings at Summit Fairings.
For detailed guidance on sanding and degreasing techniques in plastic repairs, see this comprehensive resource: https://plasticrepaircentre.co.za/category/general-information/
Chapter 2: Techniques for Light Scratch Removal in How to Fix Scratches on Motorcycle Fairings
1. Effective Cleaning and Polishing Strategies to Restore Motorcycle Fairings from Light Scratches
Removing light scratches from motorcycle fairings starts with a careful cleaning process that sets the foundation for effective polishing. Begin by using a gentle soap and water mixture or a plastic-safe cleaner to eliminate dirt, grease, and other residues from the surface. Avoid aggressive scrubbing to prevent further damage to the paint or protective coatings. Thorough drying ensures no moisture remains, which could interfere with the polishing that follows.
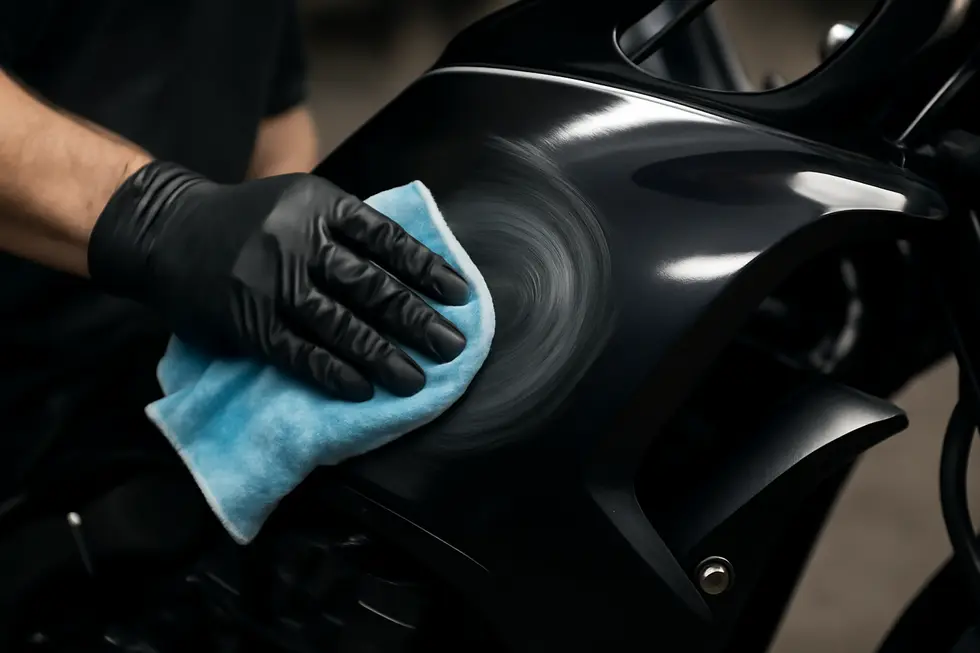
Polishing is the next critical step to diminish the visibility of light surface scratches. Employ a fine polishing compound or a mild scratch remover designed specifically for plastic or painted surfaces. Applying the product with a soft microfiber cloth or foam applicator in small, circular motions helps blend scratches into the surrounding area by smoothing the surface texture. This technique effectively reduces the appearance of blemishes without compromising the fairing’s finish.
Once polishing has improved the look of scratches, adding a protective layer enhances both longevity and shine. Using a quality wax or a ceramic coating seals the surface, restoring luster while shielding it against future abrasions and UV damage. Ceramic coatings are especially beneficial for maintaining vibrant color and preventing oxidation on plastic fairings.
It is important to avoid harsh abrasives or high-speed buffing machines unless you possess experience, as these can make scratches worse or strip protective finishes. Testing any product on a small, hidden section helps ensure compatibility and avoids unintended damage.
By combining gentle cleaning with careful polishing and protective sealing, light scratch repair preserves your motorcycle fairings’ original appeal. For guidance on how to safely remove fairings before undertaking more involved repairs, consider exploring detailed tutorials specific to models like the Yamaha YZF-R6. Such resources complement these techniques, enabling you to maintain and restore your bike with confidence.
For more insights on matching your repair efforts with high-quality fairing upkeep, visit Explore the Best Motorcycle Fairings at Summit Fairings.
Additional step-by-step repair guidance can be found in video tutorials such as “How To Repair Scratches In Motorcycle Paint?” which covers these cleaning and polishing foundations in depth.
2. Mastering Fine Grit Wet Sanding and Polishing to Restore Motorcycle Fairings’ Shine
Light scratches on motorcycle fairings can often be effectively handled through a precise combination of fine grit wet sanding and professional polishing techniques. This approach is carefully designed to remove superficial imperfections while preserving the underlying paintwork and clear coat, maintaining both appearance and durability.
The process begins by selecting ultra-fine wet sandpaper, typically ranging from 2000 to 3000 grit. Using wet sandpaper is critical—water acts as a lubricant, minimizing heat buildup and preventing the sandpaper from clogging, which could cause further scratching. The sanded area is gently and evenly abraded with light pressure, allowing the abrasive to smooth the clear coat around the scratch without thinning it excessively. This controlled abrasion subtly levels the surface, effectively blending fine scratches into the surrounding finish.
After wet sanding, the key to restoring the fairing’s gloss lies in a multi-stage polishing sequence. Starting with mild polishing compounds and progressing to finer grades, the sanding marks are gradually eliminated. Both machine buffers and hand-applied compounds are used depending on the extent of the damage and user experience. This polishing step revitalizes the surface shine and blends the repair invisibly.
For plastic fairings that may lack a clear coat, specialized plastic restorers or polishers are recommended after initial cleaning and sanding to renew clarity and smoothness. Professionals often rely on paint thickness measurements before sanding to avoid oversanding and potential damage. Moreover, testing the process in an inconspicuous area ensures that the technique suits the specific surface.
Careful fairing removal is sometimes necessary before repair. Following best practices during disassembly—such as gentle prying and protecting paint and wiring—prevents new damage and simplifies refinishing.
For those wanting visual guidance, detailed tutorials covering multi-stage wet sanding and polishing techniques provide valuable step-by-step insight enabling confident scratch removal. Overall, this refined approach balances effective scratch correction with respect for the fairing’s finish integrity and aesthetic quality.
For more insights on selecting quality motorcycle fairings and maintaining their finish, visit Summit Fairings Blog.
An illustrative comprehensive method can be found in tutorials like Fresh Layer Mobile Detailing’s multi-stage correction utilizing 2000+ grit wet sanding followed by precise polishing.
Chapter 3: Comprehensive Methods for Deep Scratch Repair on Motorcycle Fairings
1. Essential Surface Preparation and Filling Techniques for Restoring Deep Scratches on Motorcycle Fairings
Preparing the surface meticulously and applying the appropriate filler are pivotal steps in successfully repairing deep scratches on motorcycle fairings. The process begins with an exhaustive cleaning of the damaged area to eliminate dirt, grease, and any wax residues that could hinder adhesion. Using soap and water followed by drying with a soft cloth ensures a clean base for subsequent steps.
Assessing the scratch’s depth is crucial next, determining if the damage exposes primer or plastic beneath the paint. Deep scratches typically require filling to restore the fairing’s smooth contour. To optimize filler adhesion, a V-shaped groove is often created along the scratch’s length, removing loose material and providing a textured surface that anchors the filler securely. Sanding at this stage is best done wet with fine-grit sandpaper to reduce dust and produce a smooth finish for filler application.
When applying filler, selecting a product designed specifically for plastic fairings ensures durability. The filler must be carefully pressed into the groove to fill the gouge fully and then left to cure completely. After curing, the area is sanded progressively with finer grit sandpapers until perfectly flush with the surrounding surface. This gradual sanding refines the repair and prepares it for primer.
Priming seals the repaired area and promotes effective paint adhesion, especially when using primers compatible with plastic. Masking the surrounding fairing guards against overspray, preserving the original finish. Once the primer dries, touch-up or spray paint matched to the original color is applied. The final step involves polishing with rubbing compound to blend the repaired patch seamlessly into the existing paintwork, restoring gloss and uniformity.
For additional visual guidance and expert instruction, this detailed YouTube tutorial offers step-by-step repair techniques. For those interested in exploring high-quality fairing options alongside repair advice, the Summit Fairings blog is an excellent resource.
This thorough approach ensures deep scratch repairs on motorcycle fairings are both resilient and visually indistinguishable from the original finish.
2. Mastering Refinishing, Painting, and Protective Coating for Seamless Deep Scratch Restoration
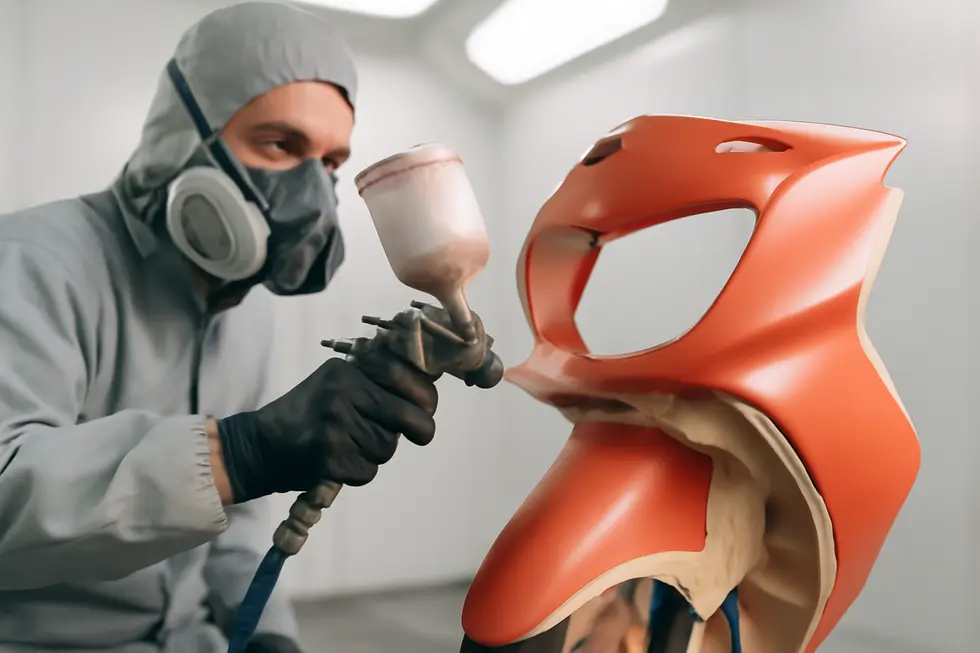
Repairing deep scratches on motorcycle fairings culminates in the critical process of refinishing, painting, and applying protective coatings. After the necessary cleaning and surface preparation—which often includes precise sanding or V-grooving to smooth jagged edges—the scratched area is primed for color restoration. This stage demands careful attention to detail, as matching the paint tone to the original fairing ensures a cohesive look. To prevent overspray from affecting intact areas, masking the surrounding surfaces is essential. Whether a touch-up or full repaint is required, applying even, thin coats guarantees a consistent finish.
Once the paint is fully dried, the application of a protective clear coat or advanced ceramic coating serves as a barrier against UV rays, future scratches, and environmental wear. This protective layer not only preserves the renewed color and gloss but also strengthens the fairing against everyday hazards. For additional shine and protection, waxing the area can complement coatings by sealing the surface further and enhancing visual depth. Selecting high-quality coatings and applying them evenly will integrate the repaired section seamlessly with the rest of the motorcycle’s finish.
These refined steps transform a badly scratched fairing back to its original aesthetic and contribute significantly to durability. Each phase—from surface prep to the final protective layer—plays a vital role in ensuring the repair endures both time and use. To visualize these detailed techniques, practical tutorials like the YouTube guide on repairing motorcycle paint scratches offer valuable demonstrations for each stage of refinishing, painting, and coating.
For more insights into high-quality fairings and maintenance tips, explore the wide range of options available at Summit Fairings.
External Resource: https://www.youtube.com/watch?v=h_jzqmYNQK8
Chapter 4: Painting and Finishing Processes in How to Fix Scratches on Motorcycle Fairings
1. Mastering Surface Preparation: The Key to Flawless Motorcycle Fairing Repairs
Achieving a seamless and durable finish when repairing scratches on motorcycle fairings begins long before paint touches the surface. Proper surface preparation is the cornerstone of a professional-looking repair, directly influencing paint adhesion, finish smoothness, and long-term durability. The first step involves thoroughly cleaning the scratched area to eliminate all dirt, grease, wax, and oils that can obstruct the bonding of fillers and paint. Using a mild soap and water solution or isopropyl alcohol ensures an uncontaminated foundation, while careful drying with a soft cloth prevents moisture entrapment beneath subsequent layers.
For scratches that penetrate the fairing surface, light sanding with fine-grit wet sandpaper is essential. This process smooths the jagged edges of the damaged area and creates a subtly roughened texture that promotes superior adhesion of filler and paint layers. Maintaining moisture during sanding reduces dust and helps achieve an even finish. Following sanding, protecting the rest of the fairing with masking tape or plastic guards is crucial to prevent unwanted paint overspray and to maintain the untouched areas’ appearance.
Once the surface is impeccably prepared, applying polishing compounds or appropriate fillers can begin, followed by carefully matched touch-up paint and a clear coat to restore gloss and resistance. Additional advanced preparation techniques, such as paint decontamination, further refine the surface by removing microscopic impurities. This extra care helps achieve a smooth, flawless finish and is a prerequisite to the application of protective coatings, which chemically bond with the clear coat to provide durable protection against environmental damage.
In essence, meticulous cleaning, drying, light sanding, and masking form a vital sequence that builds the foundation for every successful scratch repair. Those who master these preparatory steps will find their motorcycle fairings restored with professional-quality results that maintain both appearance and protection.
For a detailed visual guide to these preparation and repair techniques, refer to this comprehensive tutorial video. Additionally, explore more about motorcycle fairings and repair tips at Summit Fairings blog.
2. Mastering Application and Protective Finishes for Flawless Motorcycle Fairing Repairs
Achieving a seamless repair on motorcycle fairings requires a meticulous approach to both the application of paint and the protective finishes that follow. Once the scratched area is cleaned and properly prepped, understanding the depth of the scratch determines the next step—whether polishing out a minor imperfection or executing a full repair with filler and repainting.
For light scratches, polishing compounds gently restore the surface by smoothing microscopic abrasions. This process requires circular motions with a microfiber cloth to blend the scratch into the surrounding paint, creating an almost invisible finish. However, when the damage is deeper, the repair extends beyond polishing. Filling scratches, sometimes using specialized adhesives or fillers, rebuilds the surface contour that sanding and smoothing tools then refine before paint application.
Painting must be carefully executed to replicate the original color and finish. Masking tape and plastic sheeting shield adjacent fairing parts from overspray, preserving the bike’s overall aesthetic. Using paint matched to the motorcycle’s original shade, ideally designed for plastics, ensures color consistency and adhesion quality. Applying thin, even coats and allowing proper drying between layers prevents runs and uneven textures.
Following paint application, a clear coat seals the repair, enhancing durability and gloss. To extend the life of the finish, applying a protective layer such as a ceramic coating is highly effective. This molecular bond strengthens resistance to UV rays, scratches, dirt, and oxidation, all common threats to motorcycle fairings. Ceramic coatings also simplify future cleaning and maintain a vibrant shine for years.
Beyond these steps, consistent maintenance—such as gentle washing, waxing, and careful storage away from harsh sunlight—helps preserve the repair’s integrity and overall appearance. Proper technique in masking, layered painting, and protection ensures that the repaired fairing blends flawlessly with the original finish and withstands everyday wear.
For more guidance on preparing and applying finishes on fairings, explore detailed repair insights at Summit Fairings’ blog. Additionally, visual tutorials like the YouTube video “How To Repair Scratches In Motorcycle Paint?” provide step-by-step demonstrations to enhance understanding and confidence in these finishing techniques. (https://www.youtube.com/watch?v=h_jzqmYNQK8)
Chapter 5: When to Seek Professional Help: Understanding Damage Severity in Motorcycle Fairing Scratch Repairs
1. How to Accurately Assess Scratch Severity: Deciding When Professional Repair Is Necessary
Determining whether to tackle scratch repairs on motorcycle fairings yourself or seek professional help hinges primarily on assessing the damage’s depth and extent. Light scratches confined to the clear coat often lend themselves well to home DIY methods. These minor surface imperfections, while visually bothersome, generally do not threaten the fairing’s structural integrity. For such scratches, a thorough cleaning followed by careful application of polishing compounds or mild abrasives is usually sufficient to reduce their visibility and restore a smooth finish. If you feel confident with these basic steps and the scratches are exclusively cosmetic, a DIY approach is appropriate.
However, scratches that penetrate beyond the clear coat and expose the underlying plastic or fiberglass substrate require more careful consideration. Such damage not only affects the appearance but can also compromise the panel’s strength and weather resistance. In these cases, attempts at home repair without specialized knowledge and equipment risk worsening the damage or producing an uneven finish. Additionally, visible cracks, breaks, or distortion of the fairing parts clearly indicate structural harm that exceeds basic surface repair. These situations demand professional intervention to restore both function and aesthetic coherence.
Experts possess the right tools and materials to effectively sand, fill, and repaint damaged areas, blending repairs seamlessly with the surrounding finish. They also understand how to safely remove and reinstall fairings without adding stress or causing new damage—critical for repairs involving deeper scratches or cracks. Proper bolt tensioning, use of washers or grommets, and careful handling of electrical connections are part of their routine practices.
When uncertain about the severity, or if damage exposes underlying material or causes deformation, visiting a professional body shop provides peace of mind. Professionals can evaluate the damage fully, advise on repair versus replacement, and achieve durable results with an expert finish. This approach also safeguards your motorcycle’s appearance and structural integrity, ensuring that repairs do not inadvertently reduce safety or resale value.
For a detailed step-by-step guide on assessing and repairing motorcycle paint scratches, this comprehensive video tutorial is an excellent resource. For insights on choosing replacement parts and maintaining your bike’s style, consider exploring options available at Summit Fairings, your go-to destination for motorcycle fairings.
2. The Key Benefits of Professional Repair Services for Motorcycle Fairings
The Key Benefits of Professional Repair Services for Motorcycle Fairings
Choosing professional services for repairing scratches on motorcycle fairings offers distinct advantages that go well beyond basic DIY fixes. Professionals bring a wealth of expertise and experience tailored to the unique demands of motorcycle bodywork. Their deep understanding of various fairing materials and paint finishes equips them to apply precise techniques that restore your bike’s appearance without risking further damage. This expertise extends to handling complex curves and concealed damages that are often overlooked during casual home repairs.
Access to specialized, high-quality materials is another significant benefit professionals provide. Unlike typical consumer-grade products, professionals utilize advanced paints, fillers, and protective coatings such as ceramic layers that enhance durability. These treatments protect against UV exposure, weathering, and future scratches, ensuring your bike maintains a fresh and resilient finish that outlasts standard touch-ups.
A major draw is the ability of experienced technicians to create flawless, showroom-quality results. Their skill in matching paint shades and delicately blending repairs into the surrounding finish vastly improves aesthetic continuity, making repairs virtually invisible. Achieving this at home without extensive practice and the right tools is challenging and often yields less satisfactory outcomes.
Moreover, entrusting scratch repair to professionals saves valuable time and effort. Instead of navigating the trial and error of sanding, filling, painting, and polishing, riders benefit from a streamlined process performed with efficiency and care. Many workshops also offer complementary services such as full maintenance checks or convenient vehicle pickup and drop-off.
Professional intervention is particularly advisable when scratches are deep, large, or affect critical areas of the fairing. Additionally, if you seek long-term protection or possess a motorcycle of considerable value, relying on expert care ensures your investment is preserved appropriately.
For more insights into protecting your motorcycle’s appearance and choosing custom fairings, explore a comprehensive resource at Explore the Best Motorcycle Fairings at Summit Fairings.
For step-by-step guidance on repair procedures, the video “How To Repair Scratches In Motorcycle Paint?” offers thorough visual instruction covering cleaning, sanding, filling, painting, and finishing techniques.
Final thoughts
Successful motorcycle fairing scratch repair demands a systematic approach tailored to the nature and severity of damage. Starting with thorough cleaning and preparation sets the foundation for effective restoration. Light scratches, when carefully addressed with polishing techniques, can easily be diminished, maintaining the fairing’s visual appeal with minimal investment. Deeper scratches require more technical steps, including sanding, filler application, and curing, before refinishing paints and clear coats restore the surface to its original quality. Understanding when damage surpasses in-house capabilities is equally critical to protect your business reputation and ensure client satisfaction. Equipped with these strategies, business owners can refine their service quality, reduce rework, and elevate their brand by delivering pristine motorcycle fairings consistently.
Ready to elevate your ride? Summit Fairings delivers premium, custom-fit fairings that blend style and durability. Whether you’re chasing speed or turning heads, we’ve got your bike covered. Don’t wait—transform your machine today. Click, customize, and ride with confidence. Your perfect fairing is just a few clicks away. Act now!
About us
undefined