Introduction
For business owners in the motorcycle customization and repair industry, mastering the installation of motorcycle fairings is crucial for delivering high-quality results that meet client expectations. Fairings not only protect a motorcycle’s internal components but also define its aesthetics and aerodynamics, making their proper installation indispensable. This guide breaks down the fairing installation process into three essential chapters: first, preparing and removing existing components to ensure a clean, damage-free foundation; second, mounting and aligning fairing panels to guarantee a flawless and secure fit; and third, wiring and securing integrated components such as headlights and indicators to maintain safety and functionality. Each chapter builds a technical understanding indispensable for professionals looking to enhance their service offering with confidence and precision.
Tables of Contents
Chapter 1: Preparing and Removing Existing Components for How to Install Motorcycle Fairings
- Step-by-Step Removal and Preparation Techniques Tailored to Specific Motorcycle Models
- Essential Safety and Technical Guidelines for Removing Motorcycle Components Before Fairing Installation
- Essential Tools and Proven Techniques for Safe and Effective Component Removal When Installing Motorcycle Fairings
Chapter 2: Mastering the Art of Mounting and Aligning Motorcycle Fairing Panels
- Essential Preparation and Inspection Techniques for Perfect Fairing Panel Alignment
- Mastering Precise Mounting and Alignment Techniques for a Flawless Motorcycle Fairing Installation
- Mastering Stability and Final Alignment Checks for Durable and Safe Motorcycle Fairing Installation
Chapter 3: Wiring and Securing Components When Learning How to Install Motorcycle Fairings
- Mastering Fairing Bracket Alignment and Wiring Management for a Flawless Installation
- Mastering Electrical Wire Management and Protection for Safe Motorcycle Fairing Installation
- Ensuring Precision and Reliability: Final Testing and Securing After Motorcycle Fairing Installation
Chapter 1: Preparing and Removing Existing Components for How to Install Motorcycle Fairings
1. Step-by-Step Removal and Preparation Techniques Tailored to Specific Motorcycle Models
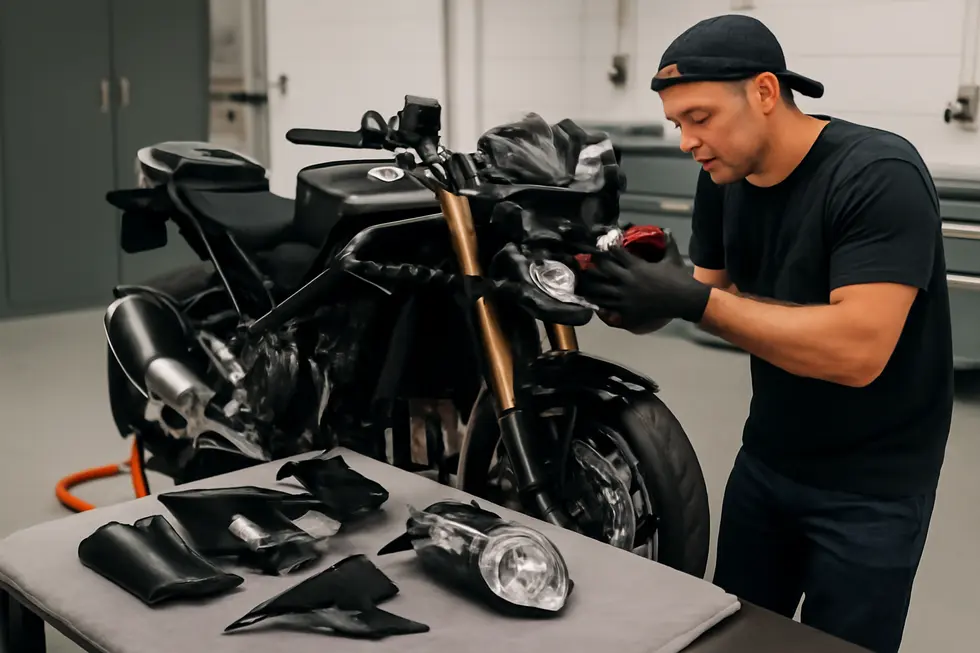
The foundation of a clean and efficient motorcycle fairing installation lies in the meticulous removal of existing components, adapted to the unique layouts of various motorcycle models. Beginning with securing the bike on a stable, level surface, the first critical safety step is disconnecting the battery’s negative terminal to prevent electrical shorts during disassembly. Using the correct tools such as Phillips and flat-head screwdrivers, Allen wrenches, and socket spanners, you should document the process by taking photographs. These serve as valuable guides for reassembly, ensuring every screw and connector finds its rightful place.
Fairing removal demands careful identification and systematic extraction of the multiple fasteners holding panels in place. For example, the BMW S1000XR requires unscrewing M5 bolts from strategic points like its front upper side panels beneath the beak area and near frame mounts above the engine clutch assembly. In contrast, the Yamaha YZF-R6 (models 2008–2016) involves carefully detaching a sequence of upper, mid, and lower panels using both screwdrivers and Allen keys, making special note not to force plastic clips and cause breakages.
Attention to detail continues when detaching delicate wiring, such as turn signals or headlights, where connectors must be gently disconnected without pulling on wires. Separating plastic locator plugs from their rubber sockets is another sensitive step, warranting caution to avoid bending or cracking parts that maintain panel alignment.
Once the old fairings are removed, installing the new mounting brackets is the next phase. Many bracket designs prioritize ease of installation, such as styles that bolt directly onto existing frame locations without requiring drilling. Brackets are first loosely attached to allow positional adjustments, aligning carefully to match the groove and slot patterns on the new fairing shells. This adjustment phase is vital to ensuring the panels sit flush and reduce stress on mounting points.
When fitting the new fairings, insertion of rubber grommets around bolt holes protects fragile fiberglass or plastic from cracking under pressure. Panels are held against the brackets, bolts hand-tightened first to permit minor adjustments before final torqueing. If necessary, slight modifications like careful grinding around mounting holes may be required to achieve proper alignment, especially with aftermarket kits.
The final securing of components involves tightening fasteners evenly, often employing washers to distribute pressure. Additional parts included in fairing kits such as turn signals, headlights, or mirrors must be reattached with proper cable routing secured by zip ties or adhesive mounts to prevent wear from vibration or movement.
As a finishing measure, a thorough check of fitment ensures that the fairings do not obstruct handlebars, suspension travel, or interfere with wiring—critical for both performance and safety. This structured, model-conscious approach streamlines installation and enhances the motorcycle’s appearance and protection.
For an in-depth example and visual step-by-step guidance, refer to the detailed BMW S1000XR panel removal guide.
For supplemental techniques and tips on selecting compatible mounts and kits tailored to your bike, explore expert advice on the best motorcycle fairings.
2. Essential Safety and Technical Guidelines for Removing Motorcycle Components Before Fairing Installation
When preparing to replace or install motorcycle fairings, ensuring safety and adherence to technical standards during component removal is fundamental. Stability is the foremost concern; positioning the motorcycle firmly on a center or paddock stand is necessary to prevent accidental tipping. This stable base allows for safer handling of parts and tools throughout the process.
Equipping yourself with appropriate personal protective equipment (PPE) such as gloves and eye protection shields against cuts from sharp edges or flying debris that may arise when loosening or detaching components. Employing the correct tools—commonly screwdrivers, Torx drivers, socket wrenches, and potentially hex keys—helps ensure fasteners are removed cleanly without stripping threads or damaging mounting points. Precision in this step preserves the integrity of threaded holes, which is crucial for the secure refitting of new fairings.
Before dismantling any component, it is advisable to document the setup with photos to assist in accurate reassembly later. Components often removed include seats, mirrors, license plate brackets, and safety bars. Some of these parts may have wiring or electrical connections attached, so careful disconnection is required to avoid damaging cables or connectors.
Thorough cleaning of mounting surfaces before installing new panels cannot be overstated. Dirt or grease residues can interfere with proper alignment and adhesion, and risk scratching painted surfaces during assembly. Use mild soaps and soft cloths rather than abrasive chemicals, as fairing materials and paint finishes are delicate. After installation, applying a protective wax layer helps maintain the finish’s condition against environmental wear.
Adhering to the manufacturer’s torque specifications when tightening bolts during reassembly is essential. Over-torquing can strip threads or crack plastic fairings, while under-torquing risks loose parts that compromise riding safety. For those lacking mechanical experience, consulting with or entrusting the task to a professional ensures that installation meets safety and functional standards, preventing costly damage or injury.
These combined technical and safety practices establish a strong foundation for an effective and secure fairing installation. They not only protect the motorcycle’s frame and finish but also promote rider safety. For more detailed advice on motorcycle fairings and related installations, consider exploring specialized resources such as the Explore the Best Motorcycle Fairings at Summit Fairings blog.
Additional safety details and torque guidelines can also be found in manufacturer manuals to complement these best practices.
3. Essential Tools and Proven Techniques for Safe and Effective Component Removal When Installing Motorcycle Fairings
Installing motorcycle fairings begins with carefully removing existing components using the right tools and precise techniques to ensure a flawless installation. The process demands patience and attention to detail, starting with securing the motorcycle firmly on a stable surface or stand. This stability prevents accidental movements that could lead to damage or injury.
Key tools include Phillips and flathead screwdrivers, hex keys, and wrenches to loosen and remove fasteners safely and efficiently. When fairings or brackets require modification or custom fitting, tools like a drill with appropriate bits and even a rotary tool such as a Dremel may be necessary. Protecting the motorcycle’s finish is critical; placing removed parts on a soft surface like a blanket avoids scratches and dents during disassembly. When drilling new mounting holes, placing a magnet wrapped in cloth underneath catches metal shavings, preserving the bike’s paintwork and preventing corrosion.
During removal, it’s crucial to document the process by taking photographs or notes. This record helps accurately reassemble components later, reducing frustration and errors. Electrical connections for headlights or turn signals must be disconnected carefully to avoid damage to wires or connectors. Keeping all screws, bolts, and clips organized—such as in labeled containers—simplifies finding the right fasteners during reinstallation.
Inspection of the motorcycle’s mounting points should be thorough. Existing holes often allow straightforward attachment of fairings, but some kits require drilling new holes or adding mounting brackets. Mounting brackets are typically installed on the frame’s neck or main sections and must be tightly secured for stability. If brackets must be fabricated or modified, ensure precise bends and secure fittings to minimize vibration and prevent misalignment, which can compromise the bike’s appearance and safety.
Before installing new fairings, clean all attachment areas meticulously to remove dirt or grease, improving adhesion and fitment. For multi-piece fairing kits, assembling panels—including windshields and headlight housings—off the bike helps streamline installation and prevents damage.
Adhering to these best practices creates a foundation for a professional-quality installation, enhancing both the aesthetics and aerodynamics of the motorcycle. For a detailed, step-by-step visual guide on removal and installation techniques specific to certain models, see this installation walkthrough. Additionally, exploring insights on fairing options and installation tips can be found through comprehensive articles on motorcycle fairings at Summit Fairings.
Chapter 2: Mastering the Art of Mounting and Aligning Motorcycle Fairing Panels
1. Essential Preparation and Inspection Techniques for Perfect Fairing Panel Alignment
Successful installation of motorcycle fairings hinges on thorough preparation and meticulous inspection before mounting and alignment. The process begins with ensuring the motorcycle is stable and secure on a level surface and stand to prevent any movement during work. This stability is crucial, as it provides a safe and controlled environment to handle delicate fairing panels and hardware.
Before installation, remove any existing bodywork or components that could obstruct mounting brackets or panels. Carefully storing these parts on a soft surface prevents damage and facilitates reassembly if needed. Once cleared, loosely install the mounting brackets to the motorcycle’s frame without fully tightening them. This approach allows room for adjustments during alignment and helps avoid the risk of misplacing attachment points.
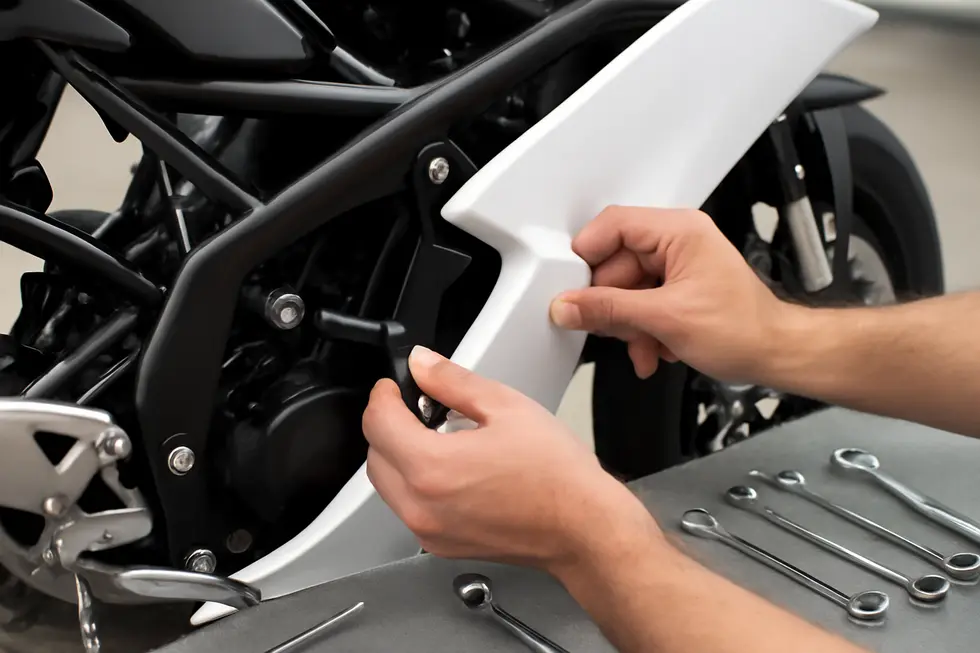
When positioning the fairing panels, hold them gently into place and align them relative to mounting brackets, paying close attention to the motorcycle’s design features such as grooves, slots, or interlocking edges. Temporary finger-tightening of bolts enables incremental positioning to achieve the best fit without strain on any part. This phase requires patience, as a forced fit could cause cracks or distortion in the panels.
Clearance checks are critical to preventing interference with essential controls and moving parts. Inspect areas around the handlebars, wiring harnesses, levers, steering range, and suspension components to ensure unrestricted movement and zero contact with the mounting hardware. Adjust the brackets as necessary to maintain adequate space, preserving the rider’s control and safety.
To protect the panels, use rubber grommets in bolt holes that penetrate fiberglass or plastic materials, preventing cracks under pressure. Washers behind the grommets help distribute tightening force evenly on the frame. Such protective elements safeguard the fairings’ integrity while securing them firmly.
In cases where holes or mounting points do not align perfectly after initial fitting, mild modifications—like filing or grinding edges—can be applied carefully. Avoid forcing panels or brackets into place, as this risks damaging both the fairing and the motorcycle’s finish.
Once satisfied with the position and clearance, fully tighten all fasteners with controlled torque to avoid over-tightening, which might cause stress fractures or warping. The final inspection includes verifying adjustments to mirrors, confirming full handlebar motion, and checking operational lighting and signals. This attention to detail ensures the fairings are not only aligned aesthetically but also function safely and securely.
For a clear, step-by-step visual demonstration of mounting and alignment preparation, the Racing Xpert video guide is an excellent external resource. Additionally, exploring detailed advice on choosing the right fairings can be found at Explore the Best Motorcycle Fairings at Summit Fairings, providing valuable insights to complement the installation process.
2. Mastering Precise Mounting and Alignment Techniques for a Flawless Motorcycle Fairing Installation
Achieving a secure and precisely aligned fit for motorcycle fairing panels requires a blend of careful preparation, methodical mounting, and fine adjustments. The process begins with initial fit checking, where the fairings are gently placed on the bike to identify any obstructions or misalignments before fastening. Cleaning the attachment points thoroughly ensures dirt or debris doesn’t interfere with the fit, promoting a clean and stable connection.
Mounting brackets form the backbone of the installation, often anchoring the fairings to the motorcycle’s frame around the neck area or existing bolt locations. These brackets must be installed firmly using the original hardware and tightened with care to the manufacturer’s torque specifications. Over-tightening can strip threads, while under-tightening risks loosening vibrations during rides, so calibrated precision is key.
Fairings typically capitalize on pre-existing mounting holes; however, when modification is necessary, drilling new holes should be handled with caution. Using a magnet wrapped in a soft cloth beneath drilling points effectively captures metal shavings, safeguarding the bike’s paint and finish from damage. Aligning these holes precisely before drilling helps maintain the integrity and symmetry of the panels.
When it’s time to secure the panels, bolts and screws should be fastened loosely at first. This allows for slight adjustments to ensure panels sit flush against each other without gaps or stress on the surfaces, reducing the risk of cracks or warping. Evenness in gaps around edges prevents unnecessary strain and enhances the overall aesthetics.
Once aligned, fasteners should be tightened following a sequence that evenly distributes pressure. Employing a torque wrench guarantees that each bolt meets recommended settings, promoting durability and preventing warping. Many fairing kits feature interlocking sections—locater plugs or push-pull inserts—which must be engaged properly to hold panels together securely and consistently.
Finally, a thorough inspection confirms that the fairings are stable, correctly oriented, and do not impede moving parts or cables. Secure routing of wiring harnesses and fastening with zip ties prevent interference and prolong component life. These careful steps ensure not only a professional-quality finish but also bolster the motorcycle’s aerodynamic performance and structural longevity.
For an in-depth example of these mounting and alignment techniques, the fairing installation walkthrough by The Racing Xpert provides a detailed visual guide, illustrating bracket placement and fitment adjustment with clarity The Racing Xpert fairing installation. For further exploration of fairing options and insights into quality materials, visit our collection of expert insights on explore the best motorcycle fairings at Summit Fairings.
3. Mastering Stability and Final Alignment Checks for Durable and Safe Motorcycle Fairing Installation
Ensuring the stability and precise alignment of motorcycle fairing panels is one of the final and most critical steps in the installation process. This phase demands both patience and attention to detail to secure a flawless fit that protects the bike and enhances its aesthetics. Initially, all bolts and fasteners should be fingertight, allowing the panels slight movement. This temporary looseness is essential for performing fine adjustments and achieving even gaps and flush alignment between adjoining panels, which prevents forced fits that could lead to cracking or warping.
During this stage, carefully inspect the clearances around moving elements like handlebars, cables, and controls. Proper spacing guarantees unrestricted operation and avoids rubbing or pinching that could interfere with riding safety. Employing rubber grommets in mounting holes is a valuable technique to cushion the fairing material, reducing stress concentration and evenly distributing bolt pressure. This is especially important for fiberglass and plastic panels that can crack under excessive or uneven tightening.
If the mounting holes or brackets don’t perfectly align, minor, careful modifications such as grinding or slight reshaping can help achieve the best fit without damaging the panel’s integrity. After confirming the panels rest properly with consistent clearances and no tension points, systematically tighten all fasteners to the torque specifications recommended by the manufacturer. Over-tightening must be avoided as it risks damaging the fairing and mounting hardware, while under-tightening can lead to vibrations and instability.
A thorough final inspection includes double-checking each mounting point for security and ensuring no parts exhibit looseness or play. It is equally important to reconnect any detached electrical components like headlights, indicators, or mirrors, verifying the functionality of all lights and signals before the motorcycle is ridden. Post-installation, it is advisable to recheck fastener tightness after the first 50 to 100 miles, as vibrations may cause some bolts to loosen during initial use.
Following these best practices will lead to a fairing installation that not only looks professional but remains stable and safe under real-world riding stresses. For further insights and step-by-step visuals on achieving optimal fairing fitment and securing mounting brackets, the detailed video tutorial by The Racing Xpert provides an excellent resource.
For additional guidance on selecting the right fairings and preparing your motorcycle, visit the comprehensive advice available at Explore the Best Motorcycle Fairings at Summit Fairings.
Chapter 3: Wiring and Securing Components When Learning How to Install Motorcycle Fairings
1. Mastering Fairing Bracket Alignment and Wiring Management for a Flawless Installation
Achieving a professional and secure installation of motorcycle fairings hinges on the precise alignment of brackets and careful management of wiring. Before mounting new fairings, it is critical to prepare the motorcycle by removing existing panels and thoroughly cleaning all attachment points. Dirt or residue can prevent proper seating of brackets and panels, potentially causing misalignment that leads to stress on the fairings during rides.
Fairing brackets usually attach to predetermined frame points, such as near the neck or existing bolt holes. Proper bracket alignment ensures the fairings sit flush and stable, avoiding vibrations or undue pressure that could cause cracks. If new holes are required for mounting, proceed cautiously, placing a magnet wrapped in cloth beneath the drilling area to catch metal shavings and protect the bike’s frame and finish. All bolts securing brackets must be firmly tightened following torque specifications to maintain rigidity while preventing damage from overtightening.
Once brackets are positioned, careful panel alignment is necessary before tightening fasteners. This stage demands patience to gently adjust panels, ensuring even spacing and avoiding forcing pieces into place, which can lead to fractures. Maintaining this attentiveness preserves the fairing’s structural integrity and visual appeal.
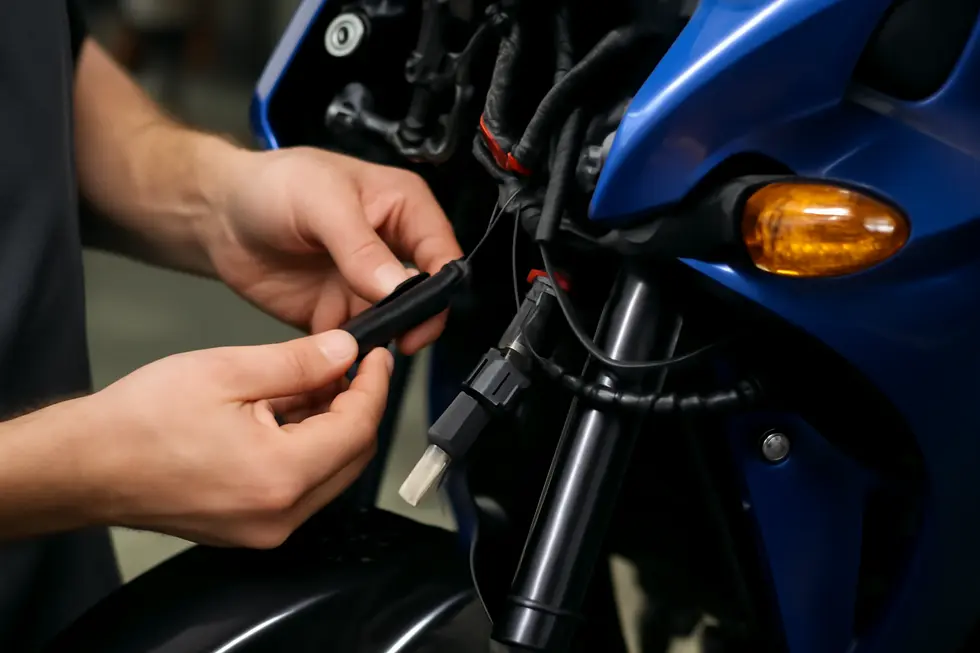
Handling the wiring requires equal care. When the old fairings are removed, electrical connectors should be disconnected delicately to avoid breaking clips or damaging wires. Keeping track of wire routing by photographing or labeling each connection significantly eases reinstallation, preventing cross-connections and functional errors. Wires need to be routed away from heat sources like the engine or exhaust, and from moving parts that could chafe or sever cables. Securing wiring with zip ties, clips, or protective sleeves prevents movement that might lead to wear and accidental disconnections.
Moreover, ensure all connectors snap together smoothly without forcing them, avoiding broken tabs that can cause intermittent electrical issues. Once all panels and wiring are installed, using a multimeter or simply activating the electrical system to test headlights, turn signals, and other components confirms proper connections and safe operation.
Working on a stable surface with the motorcycle secured on a stand reduces the risk of accidental damage during this intricate process. Also, placing removed parts on soft surfaces guards against scratches and chips, preserving component quality. Following these detailed steps guarantees that fairing brackets and wiring are not only functional but also enhance the motorcycle’s resilience and aesthetics.
For comprehensive guidance on bracket installation and wiring best practices, see the detailed visual instructions in How Do You Install Motorcycle Fairings? – The Racing Xpert.
To explore a variety of options for upgrading your bike’s fairings, visit Explore the Best Motorcycle Fairings at Summit Fairings.
2. Mastering Electrical Wire Management and Protection for Safe Motorcycle Fairing Installation
Properly managing and protecting electrical wiring is essential when installing motorcycle fairings to maintain electrical integrity and ensure safety. The process begins by disconnecting the battery to eliminate risks of shorts or shocks while working with the bike’s wiring harness. This simple first step safeguards against accidental damage and is a critical safety precaution.
Identifying ignition and power wires accurately is the next priority, which can be done through wiring diagrams or using a multimeter for verification. This step is especially crucial when integrating components like kill switches or other controls with the fairings, as improper handling can disrupt essential circuits. When modifying or extending wiring, using high-quality crimp connectors or soldering connections ensures a durable joint. Insulating these connections thoroughly with heat shrink tubing or electrical tape protects them from moisture and corrosion, which is vital given the exposure to outdoor conditions motorcycles endure.
Routing wires thoughtfully prevents future issues. Ideally, cables should follow existing harness paths and be secured firmly with cable ties, keeping them away from moving parts or sharp edges that could lead to wear or breakage. This careful routing also facilitates smooth fairing installation and removal without snagging. Any switches installed as part of the fairing setup need to be mounted in accessible yet shielded locations. Protecting switches from exposure reduces the chance of corrosion or failure caused by water or debris.
During disassembly, it is important to remove only necessary body panels, taking care not to stretch or pinch underlying wires. After completing all wiring tasks, reconnect the battery last and perform a comprehensive function check of all electrical components before finalizing fairing attachment. This final test guarantees that no connections were overlooked and that everything operates safely and as intended.
A disciplined approach to wiring not only ensures safety but also contributes to the long-term reliability of the motorcycle’s electrical system amid the new fairings. Tools like wire strippers and quality crimpers aid precision in making connections, while choosing durable insulation materials improves resilience. For additional clarity on safely wiring components such as kill switches during this process, you can refer to detailed guides that cover proper identification, connection techniques, and secure mounting.
For insights on neatly securing cables around handlebars and routing harnesses under fairings, industry tips emphasize avoiding quick-splice connectors in favor of robust connections and using cable ties to maintain order. This holistic attention to electrical wiring complements the mechanical installation steps, ensuring that your fairings not only fit perfectly but that your motorcycle remains safe and fully operational.
For more comprehensive guidance on selecting high-quality motorcycle fairings to complement your installation efforts, visit Explore The Best Motorcycle Fairings at Summit Fairings.
External reference on kill switch wiring best practices can be found in dedicated PDF guides outlining step-by-step safe wire handling and testing procedures.
3. Ensuring Precision and Reliability: Final Testing and Securing After Motorcycle Fairing Installation
Completing the installation of motorcycle fairings requires meticulous final testing and secure fastening to guarantee long-lasting performance and rider safety. After loosely assembling the fairing panels, the initial focus is on verifying the correct alignment, fit, and clearance of each component. This step ensures that panels integrate seamlessly without forcing or gaps that could cause vibrations or damage during riding. Once the fitment is confirmed, fasteners such as screws and bolts should be tightened using a torque wrench set to the manufacturer’s specifications. Avoiding over-tightening is crucial to prevent cracking the fairings or stripping the threads, while under-tightening can lead to looseness and instability.
Alongside physical mounting, all electrical components incorporated within or behind the fairings demand thorough attention. Indicators, headlights, and any integrated wiring harnesses should be tested with the bike’s ignition on or by using a multimeter to confirm power continuity and signal function. Cable routing needs to be carefully inspected and secured with zip ties or adhesive mounts to keep wiring from contacting hot engine parts or moving suspension components. This prevents premature wear or electrical faults after the fairings are secured.
Performing a detailed inspection after tightening address points such as hose routing, control cable free play, and fluid line clearances. Panels must not pinch or kink any hoses or cables, as this could impair bike operation. It is also beneficial to double-check that mounting brackets remain firmly attached to the frame, as vibrations during riding could loosen insufficiently secured hardware. Observing manufacturer guidelines on screw sequence and torque values enhances structural integrity.
Before concluding the installation, a carefully controlled test ride should be undertaken. This trial run helps identify any rattling, misalignment, or interference introduced by the new fairings. Adjustments can then be made promptly, ensuring the motorcycle performs reliably under real-world conditions. Such practical verification complements the visual and mechanical checks, offering confidence in both safety and aesthetic finish.
Documenting your work with photos or notes during this phase can aid future maintenance or reinstallation. For those seeking step-by-step visual guidance, many tutorials illustrate these testing and finalization practices for specific motorcycle models and fairing kits.
This comprehensive approach strikes a balance between precision and patience, turning a challenging fairing installation into a professional-quality upgrade. For more insights into selecting and fitting quality fairings, explore expert resources like this detailed blog on affordable motorcycle fairings.
Additional external reference for specific tightening sequences and electrical testing can be found at: https://blog.summitfairings.com/blog/
Final thoughts
Installing motorcycle fairings demands meticulous attention to detail, technical skill, and a methodical approach to ensure both aesthetic excellence and functional durability. By beginning with thorough preparation and careful removal of existing parts, professionals create the foundation for a damage-free installation. Following up with accurate mounting and alignment steps guarantees that fairings fit securely and withstand riding vibrations. Finally, correctly wiring and securely fastening integrated components protect operational safety and preserve the motorcycle’s integrity. For business owners, refining these processes enhances service reputation and guarantees client satisfaction, translating into sustained success in the motorcycle customization and repair sector.
Ready to elevate your ride? Summit Fairings delivers premium, custom-fit fairings that blend style and durability. Whether you’re chasing speed or turning heads, we’ve got your bike covered. Don’t wait—transform your machine today. Click, customize, and ride with confidence. Your perfect fairing is just a few clicks away. Act now!
About us
undefined