Introduction
Managing motorcycle repairs and restorations demands meticulous care, especially when dealing with spray paint mishaps on fairings. Spray paint can mar the appearance of motorcycle fairings, impacting both aesthetics and resale value. Business owners and professionals who handle fairing maintenance must understand a thorough process to remove unwanted spray paint without damaging the underlying surface. This process begins with proper cleaning and preparation, followed by the selection of appropriate solvents designed for plastic surfaces. Applying removal techniques carefully—rubbing and, if necessary, gentle sanding—ensures the paint comes off while maintaining fairing integrity. Safety precautions protect workers and materials during the process, and post-removal steps restore the fairings’ finish for a polished, showroom-quality look. Each chapter of this guide delves into these crucial steps, offering a comprehensive roadmap to confident spray paint removal for your business operations.
Tables of Contents
Chapter 1: Initial Preparation Steps for How to Remove Spray Paint from Motorcycle Fairings
- Thorough Cleaning and Surface Conditioning: Foundations for Safe Spray Paint Removal on Motorcycle Fairings
- Smart Testing and Protective Masking: Key Preparation Techniques for Spray Paint Removal from Motorcycle Fairings
Chapter 2: Effective Selection and Use of Plastic-safe Solvents for Motorcycle Fairing Spray Paint Removal
- Choosing and Applying Gentle Solvents for Safe Spray Paint Removal from Motorcycle Fairings
- Chemical Composition and Advantages of Plastic-Safe Paint Removers for Motorcycle Fairings
Chapter 3: Techniques for Gently Rubbing and Sanding in How to Remove Spray Paint from Motorcycle Fairings
- Mastering Wet Sanding: Essential Tools, Grit Choices, and Lubrication for Safe Spray Paint Removal on Motorcycle Fairings
- Restoring Shine and Surface Integrity: Polishing and Buffing After Sanding Motorcycle Fairings
Chapter 4: Essential Material and Safety Insights for Removing Spray Paint from Motorcycle Fairings
- Understanding Fairing Materials and Safe Methods to Remove Spray Paint Without Damage
- Essential Safety and Material Practices for Protecting Motorcycle Fairings During Spray Paint Removal
Chapter 5: Post-removal Cleaning and Surface Restoration: Preparing Motorcycle Fairings for a Pristine Finish
- Advanced Techniques and Material Care for Surface Refinement After Spray Paint Removal
- Balancing Costs, Community, and Care: The Broader Impact of Post-removal Cleaning and Restoration
Chapter 1: Initial Preparation Steps for How to Remove Spray Paint from Motorcycle Fairings
1. Thorough Cleaning and Surface Conditioning: Foundations for Safe Spray Paint Removal on Motorcycle Fairings
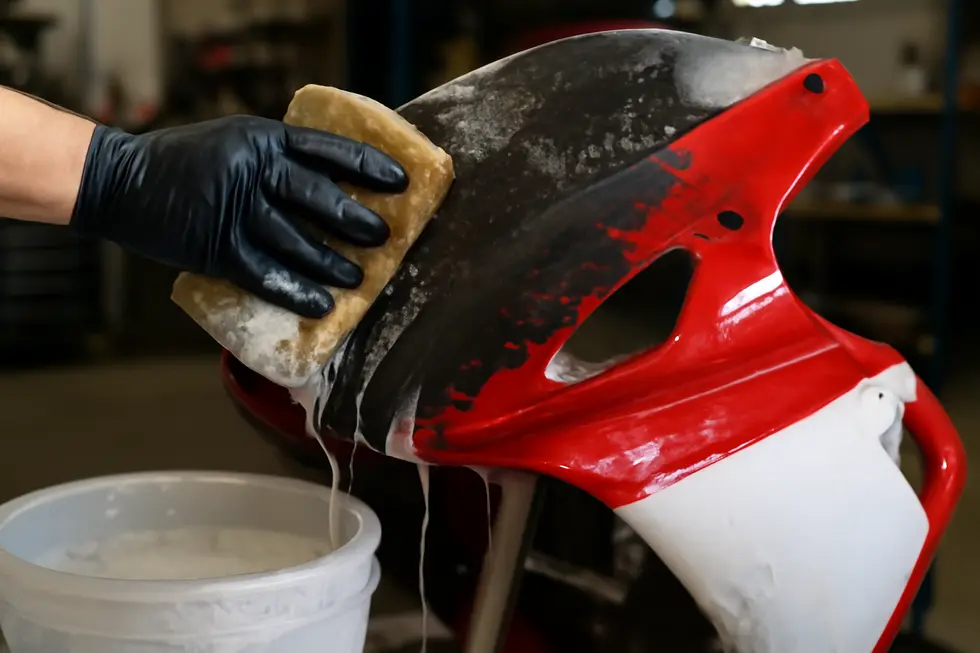
Effective removal of spray paint from motorcycle fairings begins with meticulous cleaning and careful surface conditioning, which are critical to safeguarding the integrity of the fairing material while preparing it for treatment. The process initiates by thoroughly washing the fairings using a mild soap and water solution. This step eliminates any dirt, grease, or environmental contaminants that could interfere with the paint removal chemicals and compromise their efficiency. Proper cleaning ensures the surface is free of loose debris, providing a uniform base that allows solvents or paint strippers to focus solely on the spray paint without unintended reactions.
Following the initial wash, it is vital to remove residual oils or waxes that simple soap and water may leave behind. Implementing a wax and grease remover designed for automotive plastics removes these contaminants effectively. This creates a chemically clean surface that enhances solvent action and prevents blotchy or inconsistent results when lifting spray paint. Neglecting this step can cause adhesion issues if repainting follows, thus careful decontamination helps ensure uniformity and longevity of any subsequent finishes.
Beyond cleaning, surface decontamination focuses on smoothing out minor surface imperfections invisibly embedded in the clear coat or plastic itself. Such imperfections can interfere with paint removal treatment and, ultimately, the refinishing process. By gently performing wet sanding with very fine grit sandpaper—commonly around 2000 grit—or applying a light single-stage polish, the surface attains a smooth, uniform texture without damage. This step is delicate but crucial; it removes microscopic roughness and prepares the surface to accept protective layers while minimizing the possibility of damage when solvents or abrasives are later applied.
Protecting the fairing throughout this preparation also involves proper priming when repairs are necessary. For plastic fairings, using a flexible 2K polyester or epoxy filler and primer strengthens the surface and ensures excellent adhesion of replacement paint. This step guards against future cracking or peeling caused by previously damaged or uneven areas. Finally, once the spray paint is fully removed and any repairs completed, applying a clear coat or advanced ceramic coating provides a durable, glossy barrier. This protective finish resists environmental wear and simplifies future maintenance, preserving the fairing’s aesthetic and structural quality.
Incorporating these cleaning and surface conditioning steps creates a clean, stable platform ideal for the delicate process of spray paint removal. Proper preparation balances the need for effective paint lifting with protecting the underlying material to extend the lifespan and appeal of motorcycle fairings. For more insights on maintaining and upgrading these components, explore comprehensive resources like Explore the Best Motorcycle Fairings at Summit Fairings.
Reference: Com-Paint’s detailed guide highlights how attentive surface preparation, including polishing and wet sanding, supports superior results when removing paint or refinishing motorcycle plastics (https://com-paint.com/en/blog/surface-preparation/).
2. Smart Testing and Protective Masking: Key Preparation Techniques for Spray Paint Removal from Motorcycle Fairings
Smart Testing and Protective Masking: Key Preparation Techniques for Spray Paint Removal from Motorcycle Fairings
Before beginning the spray paint removal process on motorcycle fairings, thorough preparation is essential to protect the fairing’s surface and ensure effective results. A key part of this preparation involves both testing and masking, which work together to safeguard sensitive areas and verify that chosen methods will not cause damage.
Firstly, cleaning the fairings thoroughly sets the stage for accurate testing and masking. Dirt, grease, and other contaminants can affect how paint removers interact with the surface, so using appropriate cleaners tailored for plastics and painted finishes is crucial. This ensures any solvents or acids applied later will target the spray paint itself, not impurities.
Once clean, the next step is precise masking of areas that must be preserved. Components like trims, glass elements, decals, or even adjacent painted sections require protection to avoid accidental damage or overspray from paint removers. Quality masking tape paired with protective coverings creates a reliable barrier. Masking also supports clean, crisp separation lines, preventing unwanted paint stripping beyond the intended zones.
Equally important are the testing procedures that confirm the suitability and safety of removal agents. Conducting a test patch on a small, hidden area of the fairing reveals how the existing paint and plastic substrate will respond. This step helps identify risks such as discoloration, surface dulling, or plastic softening before applying solvents broadly. These tests also determine the most effective solvent concentration and application technique.
In addition, evaluating the paint system composition by gently polishing or applying test compounds to tiny sections provides insight into whether the paint is single-stage or clear-coated. This knowledge guides adjustments in removal methods and finishing steps. Testing primers, sealers, or repainting materials in advance further ensures compatibility and adhesion, avoiding future issues during refinishing or protective treatments.
Finally, preparing the workspace with ample lighting and ventilation safeguards both the user and the fairings. Proper airflow reduces inhalation of fumes, while good lighting aids in detecting fine imperfections or residual paint. Wearing protective gloves and following manufacturer safety recommendations reduce physical risks.
Through meticulous cleaning, strategic masking, and careful testing, these initial preparation steps create a controlled environment. This approach protects the integrity of the motorcycle fairings throughout the paint removal process. For more in-depth insights on preparation techniques and surface care, consult detailed guides such as those offered by Plastic Repair Centre, and explore related instructional content in the Summit Fairings blog.
For comprehensive procedures on testing primers and sealers, refer to resources like The Spray Source, while methods for surface oxidation removal and masking find effective explanations in Fresh Layer’s tutorials.
Chapter 2: Effective Selection and Use of Plastic-safe Solvents for Motorcycle Fairing Spray Paint Removal
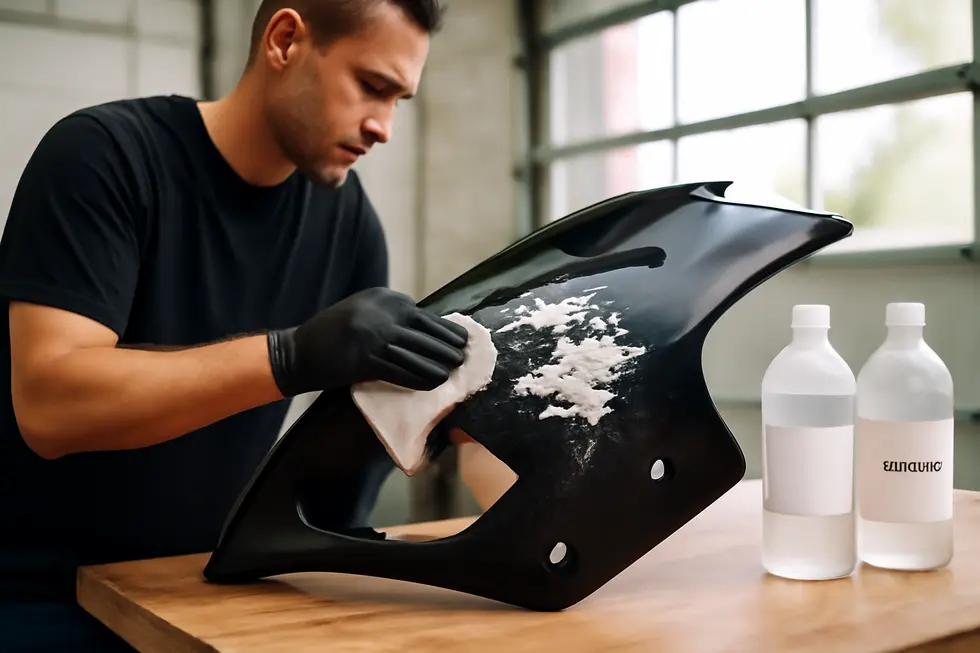
1. Choosing and Applying Gentle Solvents for Safe Spray Paint Removal from Motorcycle Fairings
Removing spray paint from motorcycle fairings demands a careful balance between effectiveness and preservation of the plastic or fiberglass surface underneath. The first step in this process is selecting solvents or paint removers specifically designed to be safe on materials like ABS plastic and fiberglass, which form the majority of fairings. Harsh industrial paint strippers often contain chemicals such as methylene chloride or N-Methyl-2-pyrrolidone (NMP), which can warp, discolor, or degrade plastic surfaces. Avoiding these aggressive ingredients protects the fairings from irreversible damage while still addressing the unwanted paint layer.
Opting for plastic-safe paint removers is essential because these products are formulated with milder active agents that effectively dissolve spray paint without attacking the substrate. They penetrate layers of lacquer, enamel, urethane, or epoxy paint gently, safeguarding the texture and integrity of the fairings. Before any broad application, it is vital to perform a patch test on a hidden area of the fairing to confirm the remover’s compatibility. This precaution helps prevent unexpected reactions such as discoloration or surface dulling.
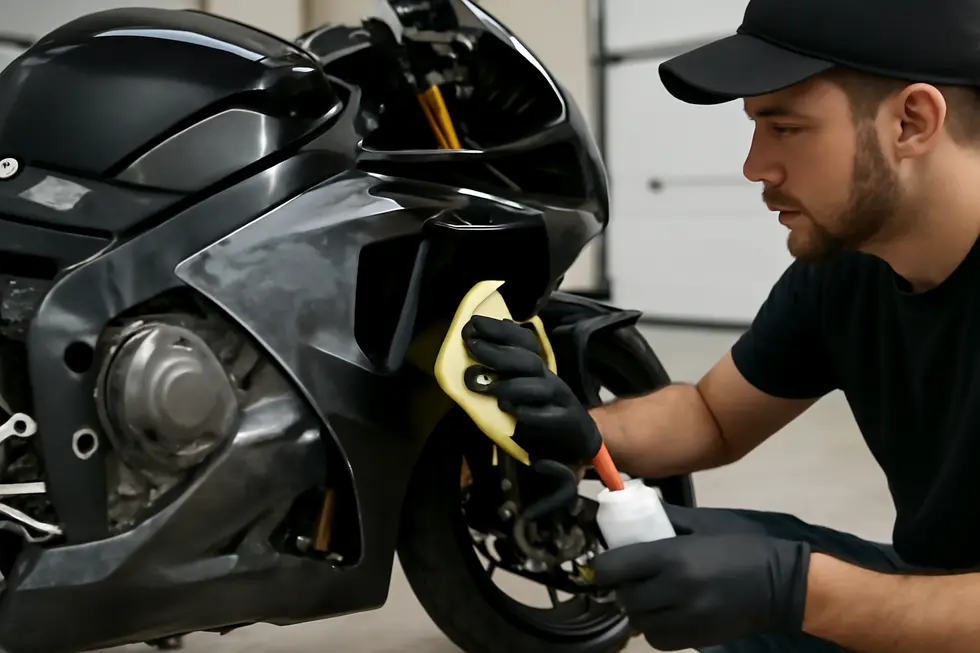
Application typically involves brushing or spraying a thin, even coat of the remover on the affected area and allowing it to sit just long enough for the paint to soften—manufacturer directions provide exact timing to avoid overexposure. Once softened, gently lifting the paint with plastic scrapers or soft cloths prevents scratching. Rubbing must be patient and light to preserve the fairing’s finish. If residues persist, repeating the process in controlled steps is safer than forcing removal with harsh methods.
Before applying removers, the fairings should be cleaned with mild, plastic-safe degreasers that strip away dirt, grime, and oils. This ensures solvents act directly on the spray paint, not contaminants that can interfere with their efficacy or harm the plastic. Once the paint is removed, thorough rinsing with water and gentle cleaning removes any chemical residues.
Post-removal care is just as critical. Applying a motorcycle-safe wax or polish reinstates luster and adds a protective layer against future damage or grime buildup. This treatment also helps maintain the smooth finish essential to the fairings’ appearance and durability. Because fairings are exposed to the elements and mechanical wear, this additional protection extends their lifespan.
For riders and DIY enthusiasts, comprehensive guides and tutorials are valuable for understanding the nuances of solvent types and application techniques. Selecting the right product and applying it cautiously can mean the difference between successful paint removal and costly surface damage. For further insight into maintaining motorcycle components and surface care, a detailed blog on motorcycle fairings offers extensive resources.
For more on identifying suitable products and safety precautions, manufacturer safety data and guidelines remain the most reliable references. Knowing exactly what ingredients will interact with motorcycle plastics allows for safer, more effective restoration without compromising the fairings’ integrity.
(Reference: https://www.napaonline.com/en/p/DC_ST300)
2. Chemical Composition and Advantages of Plastic-Safe Paint Removers for Motorcycle Fairings
Removing spray paint from motorcycle fairings demands a delicate balance between effectiveness and preservation of the plastic substrate. Plastic-safe paint removers are specifically formulated to achieve this by using milder solvents that selectively target paint layers without compromising the integrity of common fairing plastics such as ABS and polycarbonate. Unlike aggressive strippers containing harsh chemicals like methylene chloride, these removers often utilize gentler agents such as benzyl alcohol, soy-based gels, or citrus terpene derivatives. These components ensure the remover can penetrate and dissolve spray paint efficiently yet maintain compatibility with the underlying plastic.
A noteworthy formulation aspect is the gel-based nature of many plastic-safe removers. This viscous consistency provides control during application, especially on vertical, curved, or intricate fairing surfaces, minimizing dripping or runoff. This focused application reduces the risk of solvent pooling and excessive exposure, which can otherwise lead to surface damage. Additionally, low volatility and reduced toxicity ingredients enhance user safety by emitting fewer harmful vapors and lowering environmental impact. This makes the removal process safer in both home and professional settings.
The benefits extend beyond mere paint dissolution. These removers protect the fairing’s surface from swelling, cracking, or discoloration — common side effects when inappropriate chemical strippers are used. Preserving the plastic’s smooth finish is essential not only for cosmetic reasons but also to retain structural strength, which is crucial for fairings exposed to aerodynamic forces and road debris. Furthermore, the use of biodegradable and non-toxic components aligns with eco-conscious practices, reducing hazardous waste concerns.
When using these products, it is vital to conduct a small-area test to confirm compatibility with a specific fairing part. Application typically involves gently brushing or spreading the gel remover, allowing it to work for a recommended time, and then softly agitating with a cloth or sponge to lift the paint. Avoid abrasive tools to protect the surface. Following the removal, many gel removers require neutralization steps and thorough rinsing to ensure no residue remains that could interfere with repainting or finishing.
Ultimately, reliance on plastic-safe paint removers supports a methodical approach to spray paint removal that safeguards fairing materials and prepares the surface for refinishing. This approach is particularly advantageous for enthusiasts and professionals aiming to maintain original plastic quality while restoring appearance. For detailed guidance and safe paint removal alternatives, resources such as Central Indiana Stucco Repair discuss effective chemical stripping methods suitable for delicate surfaces (source).
For further insights on maintaining and restoring plastic motorcycle components, exploring expert discussions and tips at Summit Fairings’ blog can provide valuable context.
Chapter 3: Techniques for Gently Rubbing and Sanding in How to Remove Spray Paint from Motorcycle Fairings
1. Mastering Wet Sanding: Essential Tools, Grit Choices, and Lubrication for Safe Spray Paint Removal on Motorcycle Fairings
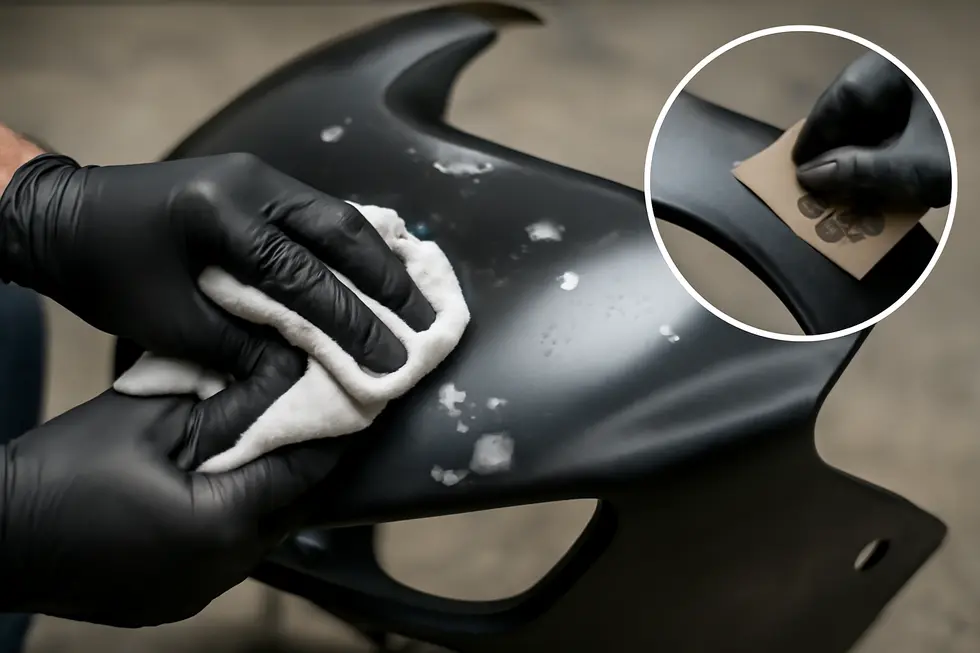
When tackling the removal of spray paint from motorcycle fairings, wet sanding stands out as a highly effective technique that balances gentle abrasion with thorough paint removal. This method employs fine grit sandpapers combined with continuous lubrication to safeguard the fairing’s surface while gradually erasing unwanted paint layers. Choosing the right materials and adopting proper sanding practices ensures the fairings maintain their integrity and smoothness throughout the process.
Starting with sandpaper grit, selecting fine grades between 1500 and 2000 is crucial. Coarser sandpapers can quickly cause visible scratches or uneven surface wear, potentially damaging the original plastic or existing paint beneath the spray paint. Fine grit sandpaper delicately scuffs only the topmost paint layer, making it possible to remove paint without compromising the fairing’s finish. The process often begins with 1500 grit to break down the spray paint surface, then advances to 2000 grit to smooth and perfect the area for polishing or repainting.
Keeping the sanding area wet is key to minimizing damage. Water or a gentle lubricant is applied continuously to the sandpaper and fairing surface. This lubrication serves multiple purposes: it reduces friction-generated heat that can warp or melt plastic, prevents abrasive particles from clogging the sandpaper, and allows the sanding motion to glide smoothly. Lubrication also lifts paint residue off the surface rather than grinding it in, which assists in achieving a finer and cleaner finish.
To execute wet sanding, it is best to employ a soft sanding block or a power tool such as a dual-action (DA) sander equipped with an interface pad. These tools distribute pressure evenly, preventing concentrated stress spots that could damage the fairing. When sanding, working on manageable segments—typically around two feet square—helps maintain control and consistency. Using overlapping circular or cross-hatch strokes ensures that sanding marks blend uniformly, avoiding patchy or worn areas. Light to moderate, consistent pressure is essential; pressing too hard risks over-sanding and clear coat thinning, while too light pressure prolongs the process unnecessarily.
Equally important is the rhythm of the sanding motion. Avoid lingering on one spot to prevent indentations or uneven material removal. Maintain steady speed and direction changes with each pass. Frequently rinsing the surface and sandpaper removes paint debris, preserving lubrication and preventing scratches caused by trapped particles. This periodic cleaning step supports efficient sanding and a flawless surface.
This careful, progressive sanding approach prepares motorcycle fairings for the next stages of finishing, like polishing or repainting, preserving their original contours and surface quality. For riders and restorers seeking comprehensive resources, detailed tutorials illustrate these wet sanding methods effectively, enhancing both safety and results. For more insights on maintaining motorcycle fairings, consider exploring resources like Explore the Best Motorcycle Fairings at Summit Fairings.
For an authoritative guide on sanding and finishing paintwork, consult the Eastwood DIY Auto Paint Guide, which details best practices and tool recommendations for careful wet sanding and polishing.
2. Restoring Shine and Surface Integrity: Polishing and Buffing After Sanding Motorcycle Fairings
Once the delicate process of sanding has successfully removed spray paint and surface impurities from motorcycle fairings, restoring the smoothness and luster of the plastic surface becomes essential. Polishing and buffing serve as the vital next steps to eliminate the fine scratches left behind by sanding and to rejuvenate the fairings’ original glossy finish without compromising their durability.
Using fine grit wet sandpaper, typically between 1000 and 2000 grit, is crucial to ensure minimal surface damage during sanding. After this step, applying a polishing compound specifically formulated for automotive plastics helps smooth out microscopic scratches. These compounds contain gentle abrasive particles which subtly refine the surface, gradually blending any uneven textures created by sanding. This process not only improves aesthetics but also helps to prepare the surface for protective treatments.
Buffing complements polishing by enhancing reflectivity and achieving a high-gloss appearance. This can be done manually with soft microfiber cloths or using a mechanical buffer on a low-speed setting to avoid heat buildup, which risks damaging the paint layer. The key is to use gentle, even pressure and slow, controlled motions. Overzealous buffing or excessive friction may cause dulling or swirl marks, undermining the restoration effort.
After polishing and buffing, cleaning the fairings with a diluted isopropyl alcohol solution (around 20% concentration) gently removes residual polishing oils. This step is essential for preparing the surface for any final sealing or protective application. Whether applying wax, sealants, or advanced ceramic coatings, a clean and oil-free base ensures these layers bond effectively, offering prolonged protection against environmental factors and minor abrasions.
For enthusiasts considering repainting or refinishing beyond cleaning, utilizing high-quality clear coats—such as 2K clear coat sprays—can be instrumental. These clear coats provide robust protection and depth of gloss. When applied correctly, they allow for light wet sanding and subsequent polishing, ensuring a smooth, professional-grade finish that complements the fairings’ original design.
This integrated approach to sanding, polishing, and buffing emphasizes patience and precision. It balances effective spray paint removal with the preservation of the fairings’ surface integrity, delivering a finish that looks professionally maintained. For more comprehensive insights and techniques related to motorcycle fairings, exploring detailed resources like affordable motorcycle fairings at Summit Fairings can provide additional inspiration and practical tips.
Further guidance and visual demonstrations can be found in specialized tutorials focusing on motorcycle paint finishes, which illustrate the critical synergy of careful sanding, polishing, and buffing to achieve durable gloss and surface protection. For an in-depth reference, see the complete guide to spray painting techniques for bikes and cars, which highlights the importance of these restorative steps: https://www.com-paint.com/the-complete-guide-to-spray-paint-for-cars-and-bikes/
Chapter 4: Essential Material and Safety Insights for Removing Spray Paint from Motorcycle Fairings
1. Understanding Fairing Materials and Safe Methods to Remove Spray Paint Without Damage
Motorcycle fairings are crafted from a variety of materials, each with unique characteristics that profoundly influence how to safely remove unwanted spray paint. Most commonly, fairings are made from ABS plastic, fiberglass, carbon fiber, or composite blends. ABS plastic is favored for its light weight, flexibility, and resilience against impact. It is widely used as an OEM standard due to its affordability and durability. Fiberglass, often chosen for aftermarket or custom builds, offers superior strength and greater rigidity but is more prone to cracking under stress. Meanwhile, high-performance motorcycles frequently utilize carbon fiber for its exceptional strength-to-weight ratio, albeit at higher cost. Composite materials merge fibers and resins to strike a balance between strength, weight, and cost, tailoring performance to particular needs.
Recognizing the material type of your motorcycle fairings is fundamental before attempting spray paint removal, as some solvents or techniques can adversely affect specific plastics. Harsh chemicals or aggressive abrasives may discolor, warp, or crack the surface, reducing the fairings’ protective and aesthetic qualities. Therefore, the approach must be tailored to maintain the integrity of these materials.
The initial step involves thoroughly washing fairings to remove dirt, oils, and residues that could shield spray paint or impair solvent performance. Using a gentle soap and soft cloth ensures the surface remains intact without introducing scratches. The next consideration is the choice of solvent: plastic-safe paint removers or mild solvents designed for automotive plastics are preferred. Strong chemicals like pure acetone or conventional paint strippers are generally too aggressive and risk damaging plastics such as ABS or fiberglass.
Before applying any solvent broadly, perform a patch test on a discreet section of the fairing. This precaution reveals any discoloration or surface reaction that could compromise appearance or structure. When applying the solvent, use a soft cloth and gentle, consistent motions to gradually lift spray paint without scrubbing harshly. Avoid abrasive tools such as coarse sandpaper or metal scrapers which can leave permanent scratches or weaken the fairing.
Following paint removal, thoroughly rinse and clean the fairings to remove solvent residues. Applying a protective coating like a wax or ceramic layer helps restore surface gloss, adds a protective barrier against UV damage, and repels dirt and moisture. Regular maintenance with mild cleaning agents and protective finishes extends the lifespan and appearance of the fairings, preserving both safety functions and the motorcycle’s aesthetic.
These material-conscious precautions emphasize a balance between effective spray paint removal and the preservation of fairing integrity, ensuring continued rider safety and vehicle performance. For further exploration of fairing care and removal techniques, resources such as Kings Motorcycle Fairings experts provide valuable insights.
For more on selecting and maintaining fairings suited to your motorcycle, explore detailed options and advice from Summit Fairings.
Reference: Kings Motorcycle Fairings: Practical tips on paint removal and protective maintenance.
2. Essential Safety and Material Practices for Protecting Motorcycle Fairings During Spray Paint Removal
Removing spray paint from motorcycle fairings demands a careful balance between effective paint elimination and preserving both the material integrity and personal safety. The first critical step is selecting a solvent or paint remover that is compatible with the fairing’s construction, which is commonly plastic or fiberglass composite. Using products specifically formulated for these materials helps avoid cracking, discoloration, or surface deterioration. Harsh solvents may offer faster results but often at the cost of damaging the fairing, undermining the entire restoration effort.
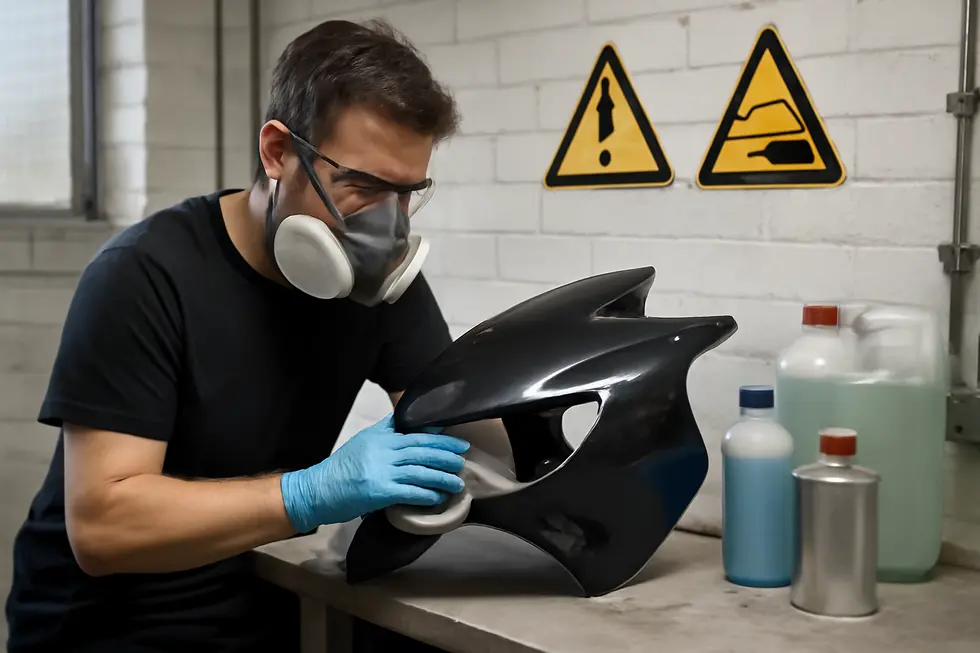
Personal protective equipment (PPE) is indispensable during this process. Wearing nitrile gloves shields the skin from harmful chemicals, while safety goggles prevent accidental splashes from reaching the eyes. Additionally, using a mask or respirator minimizes inhalation of volatile organic compounds released by paint removers. These fumes pose health risks and can cause dizziness or respiratory irritation. Conducting the work outdoors or in a well-ventilated space further reduces fume concentration, enhancing safety.
Before applying any remover widely, testing it on a small, hidden section of the fairing is vital. This spot test assures no adverse reactions such as discoloration or softening occur. If the test area remains unchanged, the solvent can be cautiously applied to the spray paint spots. Application is best done using a soft cloth or sponge, gently rubbing to lift the paint without aggressive abrasion.
For delicate surfaces, combining chemical removal with gentle mechanical methods can improve results while preserving the fairing. Light polishing with low-heat pads and bike-safe polishes or solvents often succeeds in removing residual paint while restoring shine. This approach avoids harsh sanding that risks deeper scratches or material compromise.
After removing the spray paint, thorough rinsing and drying of the fairings are essential. Any leftover chemical residue can degrade the surface over time or interfere with future protective finishes. Clearing residues supports longer-lasting restoration and maintains the fairing’s appearance and durability.
Maintaining these safety and material-conscious practices not only protects the motorcycle fairings but also ensures the user’s health is safeguarded. For detailed guidance on preserving fairing integrity during maintenance, exploring professional motorbike detailing resources and specialized tutorials—such as those found on Summit Fairings’ blog—provides valuable insights.
By integrating solvent compatibility, PPE, ventilation, testing, gentle application, and thorough cleanup, enthusiasts can confidently remove spray paint while maintaining their motorcycle’s cosmetic and structural quality.
Reference: Safety guidelines for chemical use with plastics and composites.
Chapter 5: Post-removal Cleaning and Surface Restoration: Preparing Motorcycle Fairings for a Pristine Finish
1. Advanced Techniques and Material Care for Surface Refinement After Spray Paint Removal
Once the spray paint has been carefully removed from motorcycle fairings, the critical phase of post-removal cleaning and surface restoration begins. This process involves more than simply wiping down the fairings; it requires a combination of technological methods and carefully selected materials that preserve the integrity of the fairings while preparing them for repainting or finishing.
The first step centers on thorough cleaning and degreasing. After paint removal, residues such as solvent traces, oils, or dust can linger on the surface, potentially interfering with subsequent steps. These contaminants are stripped away using specialized degreasers formulated for automotive parts. These products not only cleanse but also slightly etch the surface, enhancing adhesion for primers and topcoats applied later. This precise cleaning technique ensures that the fairings’ surface is free of anything that might compromise the new finish.
Neutralizing chemical residues is an often overlooked but essential stage. Many chemical strippers and preparatory cleaners contain acidic or alkaline agents that, if left on the surface, can corrode or deteriorate the fairing’s material over time. Applying a neutralizing solvent tailored to counteract these residues prevents damage and promotes the longevity of any newly applied coatings.
Sanding follows, acting as both a refinement and repair step. Using progressively finer grit sandpaper smooths out rough patches or crusty residues left from the paint removal process. This gentle abrasion levels the surface, removing microscopic imperfections and enabling uniform paint application or polishing. Careful technique here prevents scratching or weakening the fairing material, preserving its durability.
To further protect and prepare the fairings, epoxy primers or sealants are applied. These materials seal the surface, offer corrosion resistance, and provide a robust foundation for paint adherence. Special attention is needed when dealing with fragile or sensitive parts; selecting epoxies compatible with the fairing’s material ensures structural integrity remains intact.
The finishing touch involves polishing and wet sanding to eradicate texture inconsistencies like orange peel effects often found in spray applications. Polishing compounds and buffing restore a smooth, glossy surface, returning the fairings to their showroom-bright condition.
Together, these advanced surface restoration techniques balance mechanical abrasion with chemical treatment, maintaining the fairings’ quality and enabling an excellent finish after unwanted spray paint removal. These methods complement foundational removal steps and support any future refinishing efforts.
For enthusiasts seeking detailed demonstrations of these final refinishing processes, comprehensive restoration tutorials and expert guides provide invaluable visual instruction, enhancing understanding of sanding and polishing nuances.
Further insights into maintaining and restoring motorcycle fairings can be explored with affordable motorcycle fairings options.
2. Balancing Costs, Community, and Care: The Broader Impact of Post-removal Cleaning and Restoration
Removing spray paint from motorcycle fairings goes beyond simple aesthetic improvement; it carries important economic and societal consequences that affect motorcycle owners, communities, and the environment. The financial aspect primarily hinges on the cost of specialized cleaning agents and the labor required for careful restoration. Products designed to dissolve paint without harming plastic surfaces demand investment, often ranging from moderate to substantial depending on quantity and brand. This cost is compounded when professional help is enlisted to ensure damage avoidance. Mishandling the removal process can lead to permanent surface harm, sometimes making fairing replacement necessary, which significantly escalates expenses.
From a societal perspective, maintaining the appearance of motorcycles influences their resale value, owner pride, and even social perceptions. A well-kept vehicle reflects responsible ownership, while persistent paint damage can deter potential buyers or degrade the motorcycle’s image within the riding community. Additionally, the safe disposal and use of paint removal chemicals link directly to environmental stewardship. Many of these solvents contain volatile organic compounds or harsh substances, and improper handling risks contaminating water sources or soil, inviting regulatory and ecological repercussions.
In shared living or public environments, where unauthorized spray painting can cause property damage, the thoroughness of post-removal cleaning carries further weight. Residents or motorcycle owners who fail to clean spray paint effectively may face financial penalties, strained neighbor relations, or legal disputes over property damages. This dynamic underlines a broader social responsibility to respect shared spaces and address any harm caused promptly and correctly.
Ultimately, the process is a careful balance of investing in effective materials and techniques to restore motorcycle fairings while minimizing economic strain and social conflict. Prioritizing safe, environmentally conscious methods and understanding community standards helps riders preserve their equipment and their standing within wider social settings. For those interested in exploring options beyond cleaning and restoration, the availability of quality replacement fairings offers a cost-effective alternative, detailed further in resources such as this comprehensive guide on affordable motorcycle fairings.
The economic and social impacts underscore that post-removal cleaning and surface restoration are not just technical tasks—they represent responsible ownership, community respect, and environmental care, essential to sustainable motorcycle maintenance.
Final thoughts
Removing spray paint from motorcycle fairings requires a methodical and careful approach to preserve the structural integrity and visual appeal of the surfaces. Starting with meticulous preparation ensures that cleaning agents effectively target only the spray paint, while the correct choice of solvents prevents damage to the plastic and original paint layers. Employing gentle rubbing techniques and, when necessary, light sanding avoids surface abrasions and maintains smoothness. Throughout the process, adhering to safety protocols protects staff and materials, fostering a productive and safe workspace. The final cleaning and polishing restore the fairings’ professional appearance, ensuring customer satisfaction with flawless results. For motorcycle businesses, mastering these steps not only enhances service quality but also reduces costly repairs, making the spray paint removal process a valuable skill in fairing maintenance and restoration.
Ready to elevate your ride? Summit Fairings delivers premium, custom-fit fairings that blend style and durability. Whether you’re chasing speed or turning heads, we’ve got your bike covered. Don’t wait—transform your machine today. Click, customize, and ride with confidence. Your perfect fairing is just a few clicks away. Act now!
About us
undefined