Introduction
Sticker residue on motorcycle fairings poses a unique challenge to maintaining a bike’s pristine appearance. For business owners dealing with motorcycle sales, rentals, or maintenance, mastering safe and efficient removal techniques is essential to uphold product value and customer satisfaction. Understanding heat application to soften adhesives, safe chemical use, and mechanical removal methods empowers businesses to clean fairings without compromising paint or plastic surfaces. Preparing and cleaning surfaces properly sets the foundation for success, while choosing the right cleaning products prevents damage and improves results. Protective measures throughout the process ensure that fairings retain their structural and visual integrity, ultimately enhancing durability and appeal. Each chapter of this guide delves deeply into these critical aspects, providing a comprehensive blueprint for professional sticker residue removal on motorcycle fairings.
Tables of Contents
Chapter 1: Mastering Heat Application for Safe and Effective Sticker Residue Removal on Motorcycle Fairings
- Controlled Heat Techniques: Essential Methods and Precautions for Removing Sticker Residue from Motorcycle Fairings
- Essential Tools and Precision Techniques for Heating and Clearing Sticker Residue Without Damage
Chapter 2: Safe Chemical Use in How to Remove Sticker Residue from Motorcycle Fairing
- Selecting Gentle, Effective Chemicals to Protect Motorcycle Fairings While Removing Sticker Residue
- Mastering Protective Methods and Careful Application for Chemical-Safe Sticker Residue Removal
Chapter 3: Mechanical Methods of How to Remove Sticker Residue from Motorcycle Fairing: Peeling and Scrubbing
- Mastering the Art of Peeling: Gentle Techniques for Removing Sticker Residue from Motorcycle Fairings
- Mastering Gentle Scrubbing: The Key to Preserving Your Motorcycle Fairing While Removing Sticker Residue
Chapter 4: Cleaning and Preparing Surfaces in How to Remove Sticker Residue from Motorcycle Fairing
- Essential Cleaning Strategies for Pristine Motorcycle Fairings Before Tackling Sticker Residue
- Essential Surface Care: Drying, Protection, and Residue Management for Motorcycle Fairings
Chapter 5: Selecting the Ideal Cleaning Solutions for Removing Sticker Residue from Motorcycle Fairings
- Navigating Material Sensitivities: Choosing Cleaning Products That Protect Your Motorcycle Fairing’s Finish
- Mastering Safe and Effective Product Use to Protect Your Motorcycle Fairing
Chapter 6: Protective Measures to Prevent Damage While How to Remove Sticker Residue from Motorcycle Fairing
- Mastering Gentle Techniques to Safeguard Your Motorcycle Fairing During Sticker Residue Removal
- Choosing Gentle Solvents and Tools: Key Steps to Safeguard Your Motorcycle Fairing During Sticker Residue Removal
Chapter 1: Mastering Heat Application for Safe and Effective Sticker Residue Removal on Motorcycle Fairings
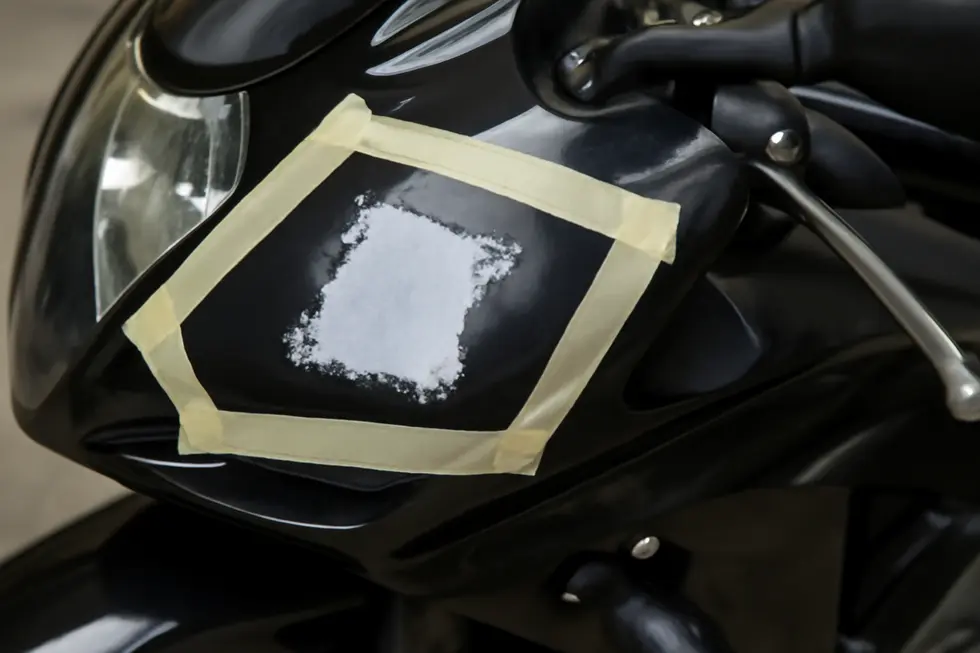
1. Controlled Heat Techniques: Essential Methods and Precautions for Removing Sticker Residue from Motorcycle Fairings
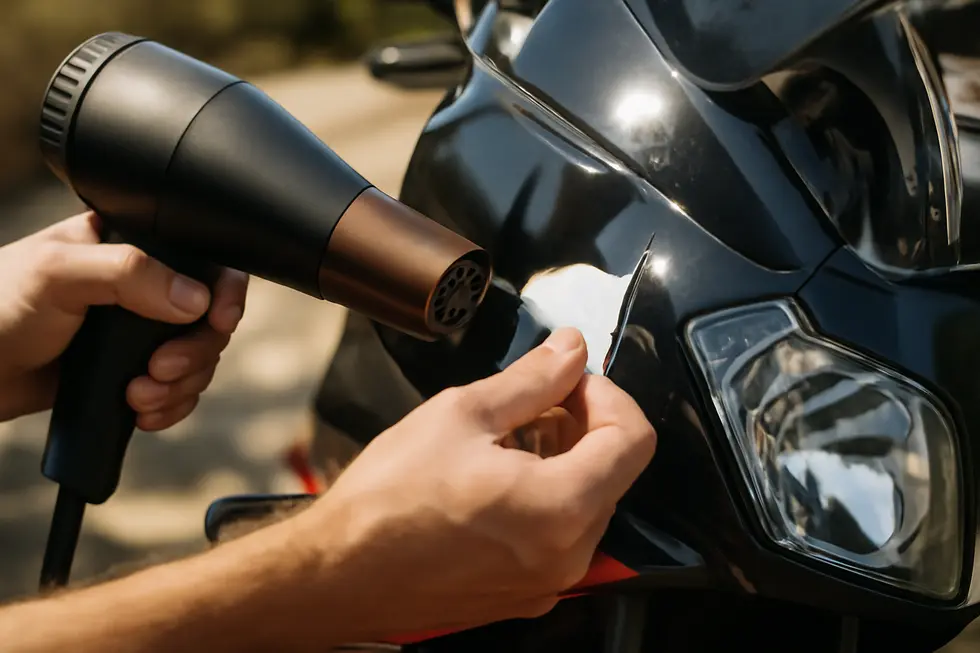
Removing sticker residue from motorcycle fairings demands a precise balance of gentle heat application combined with cautious handling to preserve the surface integrity. The key is to soften the stubborn adhesive by applying controlled heat, which loosens the bond between the sticker’s glue and the fairing’s delicate plastic or acrylic finish. Common tools like a hairdryer or heat gun are ideal, but must be employed correctly to avoid damage.
Begin by selecting a low to moderate heat setting and holding the heat source at a safe distance, continuously moving it to distribute warmth evenly. This practice prevents localized overheating that can cause warping or melting of the fairing material. To minimize risk, it’s wise to test the heat on a small, inconspicuous section before proceeding to the entire sticker area. This step confirms the fairing’s tolerance to heat and ensures no discoloration or cracking occurs.
Once the adhesive desiccates and softens, gently peel the sticker at a low angle using a plastic scraper or even your fingernail. Avoid harsh scraping tools that might scratch or gouge the surface. Sometimes residue remains even after peeling; in such cases, applying a mild, bike-friendly adhesive remover or warm soapy water with a microfiber cloth effectively cleans off leftover glue without causing damage.
Steer clear of aggressive chemicals like isopropyl alcohol or abrasive cleaners, which can induce micro-fractures or dull the fairing’s finish, especially in acrylic or polycarbonate components. Safety precautions also extend beyond the fairing—working in a well-ventilated environment and using gloves when handling chemical removers protects your skin.
This heat-assisted method is widely embraced for vinyl sticker removal because it enhances ease and reduces residue without sacrificing the motorcycle’s appearance. For further insights on protecting and maintaining your motorcycle’s bodywork during cleaning processes, explore the comprehensive resources on motorcycle fairing care.
By applying heat carefully, peeling deliberately, and using safe cleaning agents, you ensure your motorcycle fairing emerges pristine and undamaged after sticker removal.
2. Essential Tools and Precision Techniques for Heating and Clearing Sticker Residue Without Damage
Applying controlled heat is central to removing sticker residue from motorcycle fairings without harming their finish. Utilizing common heat sources like a hairdryer or a heat gun on a low setting gently softens the vinyl sticker and loosens its adhesive bond. This softening reduces the force needed to peel off stickers, lowering the risk of damaging delicate paint or plastic surfaces. The warmth also activates the adhesive’s properties, making it more pliable and easier to work with.
The process begins by evenly warming the sticker’s surface, avoiding prolonged exposure to high heat that could warp or discolor the fairing. Using a plastic scraper or even a fingernail, a corner of the sticker is carefully lifted once the adhesive has softened. The sticker is then gradually peeled off at an angle, with intermittent heat applied to maintain softness and prevent stubborn spots from tearing or leaving residue.
Any remaining adhesive can be effectively removed using gentle solvents like adhesive removers, light oils, or rubbing alcohol, applied with a soft microfiber cloth to avoid surface scratching. Among solvents, products similar to WD-40 are valued for dissolving residue without compromising fairing materials. It is important to refrain from harsh chemicals that might degrade or crack sensitive plastics commonly used in fairings.
This combination of precise heat application, suitable tools, and careful solvent use ensures that sticker residue is removed cleanly. The fairing’s finish remains intact and polished, extending its aesthetic life and preserving the sleek look of the motorcycle. For those seeking deeper insights on heat gun techniques for decal removal, a detailed external video guide demonstrates best practices.
For those interested in exploring quality motorcycle fairings that complement such maintenance techniques, this ultimate source for affordable motorcycle fairings offers valuable resources and options.
Chapter 2: Safe Chemical Use in How to Remove Sticker Residue from Motorcycle Fairing
1. Selecting Gentle, Effective Chemicals to Protect Motorcycle Fairings While Removing Sticker Residue
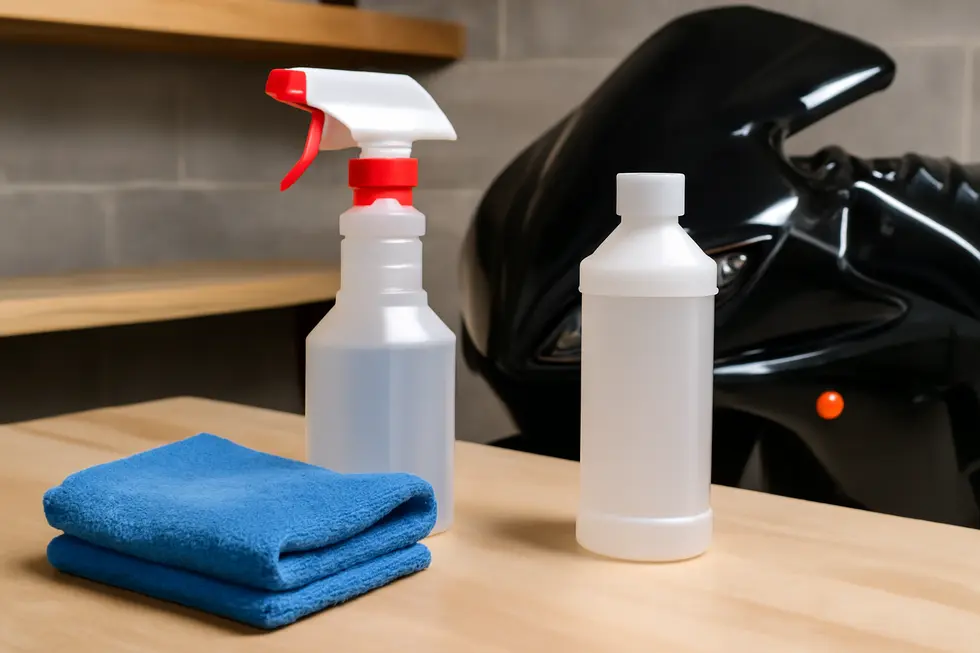
When removing sticker residue from a motorcycle fairing, choosing safe and gentle chemicals is crucial to maintain the integrity of the bike’s finish. Harsh solvents like acetone, paint thinner, or industrial-grade chemicals can quickly damage the paint or plastic, causing discoloration or even cracking. Instead, prioritize substances that effectively dissolve adhesive residues while being gentle on delicate surfaces.
Isopropyl alcohol is a widely recommended chemical due to its quick evaporation and minimal residue, making it ideal for dissolving sticky adhesive without leaving streaks. Using it with a soft microfiber cloth helps prevent scrapes during the cleaning process. However, it’s important to use isopropyl alcohol at concentrations around 70% or higher and always test it on an inconspicuous spot first to ensure compatibility with the fairing material.
Non-acetone nail polish removers offer another gentle alternative, as they avoid the aggressive solvents found in acetone-based formulas. Applying non-acetone remover sparingly with a cotton ball allows for controlled softening of adhesive residues on painted or plastic parts.
Specialized adhesive removers specifically formulated for automotive surfaces are often the safest bet. These products are designed to remove decals and sticky residue without compromising paint, plastic, vinyl, or metal finishes. Their non-acetone formulations and VOC compliance make them suitable for use in various environments, provided manufacturer instructions are followed precisely.
Complementing chemical use with gentle mechanical action, such as softly rubbing with plastic scrapers or rubber erasers, helps lift residue without scratching. Home remedies like baking soda paste, white vinegar, or cooking oil can sometimes assist but usually require more effort and thorough rinsing.
Always begin by cleaning the surface with mild soap and water to remove dirt, enhancing the effectiveness of any chemical treatment. By selecting safe, effective chemicals and combining them thoughtfully with soft tools, you can remove sticker residue without risking damage.
For more insights on preserving and maintaining motorcycle parts, explore practical tips from Summit Fairings’ blog.
Additional information on gentle decal removers can be found via specialized automotive product resources.
2. Mastering Protective Methods and Careful Application for Chemical-Safe Sticker Residue Removal
Mastering Safe Techniques to Preserve Your Motorcycle Fairing’s Finish involves a delicate balance of protective measures and precise application methods. Successfully removing sticker residue hinges on preventing damage to the fairing’s paint or plastic surfaces while thoroughly eliminating adhesive remnants. Using gentle tools like plastic scrapers or plastic razor blades is essential, as metal alternatives can cause scratches and permanent surface marks. These plastic tools allow you to lift and peel sticker edges carefully without risking damage, providing a mechanical foundation before chemical application.
Applying heat beforehand softens the adhesive, reducing the force needed to remove stickers. Gentle, controlled warmth from a hairdryer or low-heat gun enhances safety and efficiency without warping or altering panel colors. Once softened, residues often lift more easily, minimizing the need for abrasive effort.
When chemical removal is necessary, choosing solvents wisely becomes critical. Mild agents such as diluted soap solutions or low-concentration isopropyl alcohol applied via soft microfiber cloths gently dissolve the adhesive. Avoid harsh chemicals or strong solvents that risk discoloration, cracking, or etching, especially on delicate acrylic or polycarbonate surfaces common to fairings. Always test solvents on small, inconspicuous areas first to confirm compatibility.
During application, working in well-ventilated areas and using protective gloves shields your skin and reduces inhalation risk from any fumes. By combining soft mechanical techniques with moderate heat and mild chemical solvents, residue dissolves safely without aggressive scrubbing.
Following removal, some stickers leave slight gloss irregularities or dull spots on the clear coat. Light polishing can restore the finish and ensure the fairing’s aesthetic remains uncompromised. For those preferring commercial decal removal products, strict adherence to manufacturer instructions ensures efficacy without harm.
Adopting this comprehensive, cautious approach guarantees sticker removal success while preserving the look and structural integrity of your motorcycle fairing. For those interested in exploring quality fairings and further maintenance tips, the Explore the Best Motorcycle Fairings at Summit Fairings blog offers valuable insights into choosing and caring for premium surfaces.
Additional guidance on chemical safety and material compatibility can be found via specialized cleaning resources focused on automotive plastics.
Chapter 3: Mechanical Methods of How to Remove Sticker Residue from Motorcycle Fairing: Peeling and Scrubbing

1. Mastering the Art of Peeling: Gentle Techniques for Removing Sticker Residue from Motorcycle Fairings
Mastering the Art of Peeling: Gentle Techniques for Removing Sticker Residue from Motorcycle Fairings
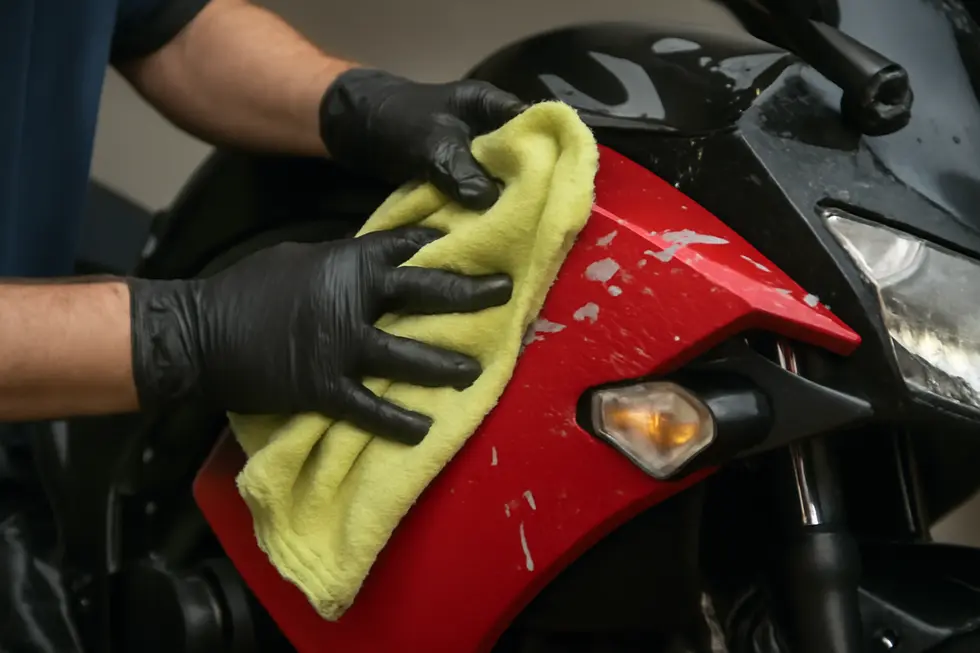
Removing stubborn sticker residue from a motorcycle fairing requires precision and patience, especially when employing peeling and scrubbing methods. The process begins by softening the adhesive to ensure the sticker lifts without damaging the surface. Applying controlled heat using a hairdryer or exposing the bike to sunlight helps loosen the adhesive, making the underlying glue layer more pliable. This step is crucial for enabling a slow, clean peel.
When peeling, it is vital to start at the sticker’s edge and lift gently at a low angle. This approach prevents the sticker from tearing and reduces the risk of scraping or removing paint. Peeling too quickly or at a steep angle can leave fragmented residue that becomes more laborious to clean. Once the main sticker has been removed, some sticky traces usually remain. Here, gentle scrubbing with a soft microfiber cloth or sponge is the key. Using a pH-balanced mild detergent or soapy water assists in dissolving the remnants without harming the fairing’s finish.
For more persistent adhesive spots, pairing the scrubbing with safe, bike-friendly adhesive removers is effective. Care must be taken to avoid harsh chemicals or abrasive tools that could scratch or degrade the acrylic or polycarbonate components common in fairings. Microfiber towels are preferred due to their softness and ability to capture residue without scratching.
It’s also wise to clean and dry the surface before and after peeling and scrubbing to prevent dirt from settling back into the adhesive. Testing any peeling or cleaning method on a discreet area first ensures the fairing’s finish remains unscathed.
These delicate peeling and scrubbing techniques strike an optimal balance between removing adhesive residue effectively and preserving the motorcycle’s aesthetic integrity. By mastering these mechanical methods, you protect your bike while restoring its sleek, sticker-free surface.
For further detailed insights, consult resources like this guide on motorbike sticker removal or explore expert tips on maintaining your motorcycle’s exterior at the Summit Fairings blog.
2. Mastering Gentle Scrubbing: The Key to Preserving Your Motorcycle Fairing While Removing Sticker Residue
Removing stubborn sticker residue from a motorcycle fairing requires a careful mechanical approach that balances effectiveness with preserving the surface’s finish. The process begins with deliberate peeling—slowly lifting the sticker at a low angle to minimize leftover adhesive and avoid tearing. This step sets the stage for effective scrubbing, which focuses on dissolving the remaining glue without harming the fairing’s paint or plastic.
When it comes to scrubbing, soft microfiber cloths or gentle sponges are essential tools. Their fine texture cleans without scratching or dulling sensitive surfaces, especially on plastic or painted fairings. Using harsh abrasives or rough materials can irreversibly mar your bike’s appearance, so softness is paramount. Incorporating mild soap dissolved in water while scrubbing helps loosen adhesive bonds, making residue easier to remove with minimal effort.
For more persistent sticky patches, applying approximately 70% isopropyl alcohol on a lint-free cloth can break down the glue’s chemical structure safely. It’s important to use this sparingly and test a small hidden area first to ensure compatibility with your fairing’s material. After scrubbing, promptly wiping the area with a clean, damp cloth removes leftover cleaning agents and dissolved residue, preventing streaks or residue buildup.
Patience is crucial throughout this process; aggressive scrubbing can damage the surface instead of restoring it. A helpful tip is to apply gentle heat before peeling, which softens the adhesive and reduces residue, thus simplifying the subsequent scrubbing.
Implementing these mechanical scrubbing techniques ensures that your motorcycle fairing remains both pristine and free of sticky traces. For additional insights on maintaining and restoring motorcycle surfaces, explore this comprehensive guide on the best motorcycle fairings.
For further details on effective residue removal, refer to the detailed industry discussion on safe sticker cleaning methods here.
Chapter 4: Cleaning and Preparing Surfaces in How to Remove Sticker Residue from Motorcycle Fairing
1. Essential Cleaning Strategies for Pristine Motorcycle Fairings Before Tackling Sticker Residue
Proper cleaning and surface preparation are fundamental steps when removing sticker residue from motorcycle fairings. These processes not only enhance residue removal efficiency but also protect the fairing’s finish from damage during the cleaning routine.
Start by gently washing the affected area using a mild soap or a cleaner specifically designed for automotive surfaces. This initial cleanse removes dirt, grease, or debris that could interfere with adhesive softening or cause micro-scratches later. Using a soft microfiber cloth during washing helps minimize friction and reduces the risk of abrasion on delicate paint or plastic surfaces.
Following this, heat application plays a critical role in loosening stubborn sticker adhesives. Employing a hairdryer or positioning the bike in sunlight can make the adhesive more pliable, enabling easier peeling without aggressive scraping. This step softens the residue, reducing the need for harsh mechanical action that might harm the fairing.
If residue persists after peeling, carefully apply gentle adhesive removers compatible with motorcycle finishes. Citrus-based solvents, automotive-safe commercial cleaners, or small amounts of rubbing alcohol can effectively break down the glue. However, it’s important to avoid overly aggressive chemicals like high-concentration isopropyl alcohol on acrylic or polycarbonate fairings, as these may cause cracks or discoloration.
Once softened, use non-abrasive tools such as plastic scrapers or microfiber cloths to lift residue delicately. Always work slowly and at a shallow angle to safeguard the underlying surface.
After residue removal, perform a final cleaning with soap and water to remove solvent traces. Thorough drying is essential before applying new decals or protective coatings, ensuring optimal adhesion and finish preservation.
Adhering to these preparation and cleaning strategies balances effective residue elimination with the preservation of your motorcycle’s aesthetic appeal and material integrity. For further tips on selecting sound cleaners and caring for your fairings, explore expert advice on motorcycle fairings.
This comprehensive method establishes a pristine base that simplifies subsequent removal steps, such as heat application and solvent use, while minimizing risks to your motorcycle’s appearance.
2. Essential Surface Care: Drying, Protection, and Residue Management for Motorcycle Fairings
Successfully removing sticker residue from a motorcycle fairing hinges on meticulous surface preparation, most notably ensuring the surface is clean and completely dry before progressing. Moisture can compromise adhesive removal efforts and even harm the paint or plastic material beneath. Starting with a dry surface guarantees that any cleaning agents or treatments will perform optimally without interference or damage.
Protection plays a pivotal role throughout this process. Heating techniques can gently soften adhesives without scratching or degrading the fairing’s finish, which is especially important given the delicate nature of motorcycle plastics and paints. This thoughtful approach reduces the risk of accidental surface damage common with aggressive scraping or harsh chemicals.
When residue lingers after peeling the sticker, targeted treatments are necessary to dissolve the sticky remnants without compromising the fairing. Using solvents and adhesive removers safe for painted surfaces—applied sparingly with a soft cloth—helps lift residue without abrasion. Plastic scraping tools can assist in loosening tougher patches, but must be handled gently to avoid marking the surface. Once residue is removed, thorough washing with soap and water ensures that no chemical traces remain, preserving the integrity of the fairing’s finish.
After cleaning, applying a protective layer such as wax or a paint protection film can safeguard the surface, reducing the likelihood of future adhesive buildup and enhancing longevity. This protective step also prepares the surface perfectly for new decals or films, as an impeccably dry and clean foundation enables better adhesion and durability.
Adhering to this sequence—starting with a dry surface, applying careful protection during residue removal, and concluding with cleansing and safeguarding treatments—strikes the ideal balance between effective residue elimination and maintaining your motorcycle’s appearance. For those interested in selecting the best replacement fairings and compatible care products, exploring resources like Summit Fairings’ blog can be highly beneficial.
For further insights on paint protection and care techniques, see official guidance on paint protection film maintenance provided by expert sources here.
Chapter 5: Selecting the Ideal Cleaning Solutions for Removing Sticker Residue from Motorcycle Fairings
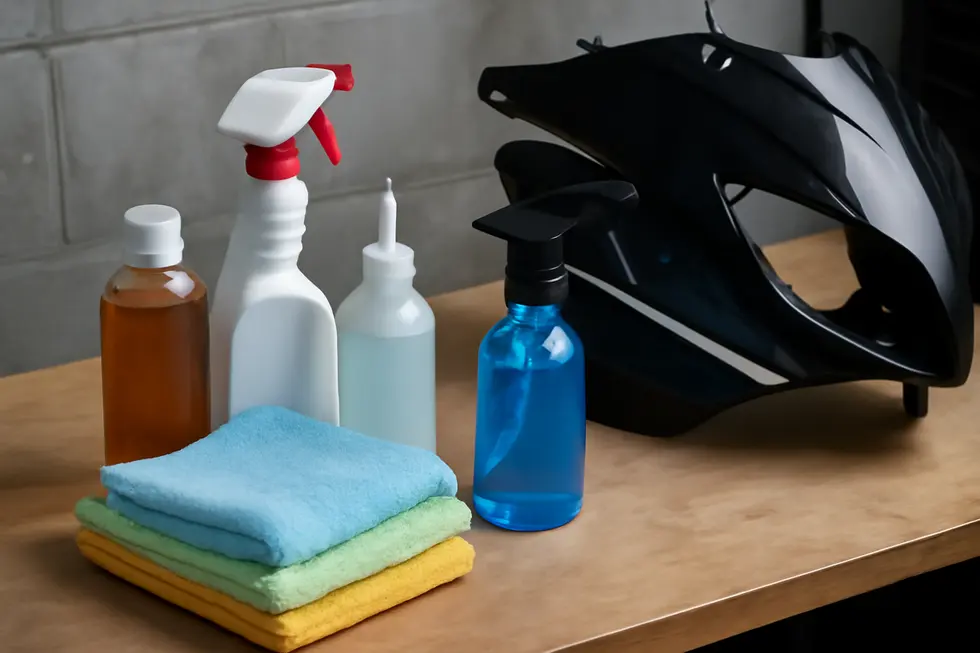
1. Navigating Material Sensitivities: Choosing Cleaning Products That Protect Your Motorcycle Fairing’s Finish
Motorcycle fairings are often crafted from ABS plastic or fiberglass and feature delicate painted surfaces that demand careful cleaning methods. When tackling sticker residue, understanding the material sensitivity of your fairing is crucial to prevent any damage such as discoloration, cracking, or scratching.
Harsh chemicals or abrasive tools can irreversibly harm the fairing’s aesthetic and structural integrity. For example, while solvents like acetone are powerful adhesive removers, their aggressive nature often leads to paint stripping or plastic degradation, making them unsuitable unless explicitly confirmed safe for the material. Instead, mild solvents designed specifically for automotive plastics and decals should be prioritized. These agents can dissolve residues without compromising the underlying finish.
Equally important is avoiding abrasive cleaners or rough cloths. Scouring pads and coarse fabrics may leave micro scratches that dull the paint and increase susceptibility to further damage. Soft microfiber towels are preferred because they gently lift residue without abrasion.
Before fully applying any cleaning product, perform a spot test on an inconspicuous section of the fairing. This practice verifies compatibility and ensures the solution won’t cause unintended discoloration or surface damage.
In many cases, applying gentle heat beforehand softens the adhesive, reducing the need for stronger chemicals. Using a hairdryer or placing the motorcycle in daylight temporarily loosens the residue, making it easier to wipe away safely.
By selecting cleaning agents formulated for delicate automotive surfaces and coupling them with non-abrasive tools, you safeguard both the finish and material from harm while effectively removing stubborn sticker remnants. For additional guidance on maintaining your fairing’s appearance after cleaning, consult resources like your ultimate source for affordable motorcycle fairings.
2. Mastering Safe and Effective Product Use to Protect Your Motorcycle Fairing
Selecting the right products and applying them safely is crucial when removing sticker residue from a motorcycle fairing. The bike’s finish—often a delicate painted plastic or composite material—requires gentle yet effective cleaners that dissolve adhesive without harming the surface. Begin by opting for adhesive removers designed specifically for automotive use or diluted isopropyl alcohol, avoiding harsh solvents like acetone or paint thinners that can strip paint or degrade plastics. Using a soft microfiber cloth is essential to prevent scratches while applying these solutions.
Before treating the entire affected area, test the chosen cleaner on a small, inconspicuous spot. This step safeguards against unexpected discoloration or damage, helping you confirm the product’s compatibility with your fairing. Instead of spraying or pouring directly onto the surface, apply the cleaner onto the cloth first. This controlled application reduces oversaturation and potential seepage into seams or sensitive areas.
Work the residue gently with the cloth in light circular motions. Excessive pressure can dull the paint or cause microabrasions, so patience is key. For stubborn adhesive patches, make use of gentle heat beforehand—such as a hairdryer—to soften the glue, easing removal without resorting to aggressive scrubbing. After the residue has lifted, cleanse the area with mild soap and warm water to remove any chemical remnants, then dry thoroughly to avoid water spots or streaks.
In addition to liquids, detailing brushes with soft synthetic bristles can aid in delicately lifting leftover residue from crevices without scratching. This technique complements the microfiber cloth application by reaching areas otherwise difficult to access.
Vinyl stickers often leave less residue if they are UV-resistant and designed to peel cleanly from painted surfaces, minimizing cleanup time and effort. For further tailored advice on product selection based on your fairing’s material and paint type, consider visiting communities and resources dedicated to motorcycle care like the Summit Fairings blog.
By carefully selecting and applying the right cleaning products with gentle techniques, you can effectively remove sticker residue while preserving your motorcycle fairing’s finish and longevity.
Chapter 6: Protective Measures to Prevent Damage While How to Remove Sticker Residue from Motorcycle Fairing
1. Mastering Gentle Techniques to Safeguard Your Motorcycle Fairing During Sticker Residue Removal
Removing sticker residue from a motorcycle fairing demands patience and care to protect the delicate finish beneath. A key step involves gently softening the adhesive with controlled heat, typically from a hairdryer set on low or gentle sunlight exposure. This approach loosens the residue, allowing the sticker to be peeled back slowly at a shallow angle. Pulling too quickly or using sharp instruments can easily damage paint or plastic surfaces, so it is critical to avoid such shortcuts.
When residue remains after peeling the sticker, mild cleaning agents prove invaluable. Substances like citrus-based cleaners or specialized removers designed for painted surfaces effectively dissolve sticky glue without harming the fairing. However, strong solvents, particularly harsh forms of alcohol such as isopropyl, should be tested first on an inconspicuous spot due to the risk of cracking or dulling fragile acrylic or polycarbonate bodywork. Accompanying the remover with a soft microfiber cloth or a plastic scraper ensures residue lifts without scratching.
Before beginning residue removal, ensure the fairing’s surface is thoroughly cleaned and dried. Dirt and moisture can increase abrasion risks and complicate adhesive breakdown. Post-cleaning, rinse the area gently to remove any lingering residue or solvent, preserving the clear coat and paint integrity.
Additionally, protecting your motorcycle from exposure to high-pressure water or extreme weather around the cleaning process prevents weakening the adhesive or the finish. These careful, gentle methods align with recommended practices for handling resin and vinyl stickers typically found on motorcycles, offering effective removal without sacrifice to aesthetics or structure.
For additional insight on selecting appropriate cleaners and maintaining fairing condition, exploring trusted motorcycle fairing sources can provide valuable guidance. One such resource emphasizes heat application and residue-free removal strategies, which align seamlessly with these protective techniques.
Explore more about motorcycle fairings and maintenance at Explore the Best Motorcycle Fairings at Summit Fairings.
External reference: Star Sam Stickers highlights the importance of gentle heat and careful residue removal to keep decals clean and fairings unharmed.
2. Choosing Gentle Solvents and Tools: Key Steps to Safeguard Your Motorcycle Fairing During Sticker Residue Removal
Selecting the right solvents and tools is crucial when removing sticker residue from motorcycle fairings to prevent damage to paint and plastic surfaces. Using solvents that are both effective and gentle ensures the fairing’s finish remains intact throughout the process. Commonly, isopropyl alcohol serves as a reliable choice because it dissolves adhesive residues without compromising the integrity of acrylic or polycarbonate parts. Equally important are motorcycle-specific degreasers formulated to remove sticky residues safely, avoiding harsh chemicals that may cause discoloration or wear.
When applying these solvents, always begin by thoroughly cleaning the surface to remove dirt or grease, which can interfere with solvent performance. A mild cleaner or isopropyl alcohol wipe-down sets the stage for effective residue softening. Following this, apply a gentle adhesive remover, allowing it a few minutes to break down the adhesive. Throughout this step, avoid aggressive solvents or fuel-unsafe products that risk damaging the fairing’s protective coatings.
The choice of tools to physically remove residue is just as significant. Soft microfiber cloths provide a non-abrasive way to rub away softened adhesive without scratching. Plastic scrapers are preferable over metal or steel wool, which can leave permanent marks or degrade the surface. Employing light, patient strokes while peeling at an angle further helps protect the fairing from unwanted damage.
Additionally, protective measures such as wearing gloves safeguard your skin from solvent exposure, and working in a well-ventilated space reduces inhalation risks. It’s recommended to test any solvent or cleaning agent in an inconspicuous spot before full application to catch any unforeseen reactions. Unlike heat application methods, avoid heat guns or industrial steamers here, as they may warp or weaken plastic components.
By carefully selecting mild yet effective solvents and combining them with appropriate tools, this method balances thorough sticker residue removal with preservation of your motorcycle fairing’s finish and durability. For more insight on maintaining your motorcycle’s appearance and choosing the right care products, explore this resource on motorcycle fairing care.
For detailed information on safe degreasing and solvent options, refer to external guidelines on using cleaning agents that avoid damage to painted and plastic surfaces.[1]
Final thoughts
Removing sticker residue from motorcycle fairings demands a precise balance of technique, product choice, and protective care. Applying heat gently softens adhesives, while safe chemical agents like WD-40 and rubbing alcohol effectively dissolve stubborn glues without compromising the fairing’s finish. Mechanical methods such as careful peeling and light scrubbing, combined with proper surface preparation and selecting the right cleaning products, ensure residue is eliminated without causing damage. Protecting the fairing during the removal process preserves its structural integrity and maintains aesthetic quality—crucial for any business invested in motorcycle appearance and longevity. Implementing these strategies confidently will enhance the bike’s value and customer satisfaction, making residue removal a straightforward, reliable step in your maintenance or sales routine.
Ready to elevate your ride? Summit Fairings delivers premium, custom-fit fairings that blend style and durability. Whether you’re chasing speed or turning heads, we’ve got your bike covered. Don’t wait—transform your machine today. Click, customize, and ride with confidence. Your perfect fairing is just a few clicks away. Act now!
About us
undefined