Introduction
Motorcycle fairings are pivotal in defining a bike’s style and protection. For business owners in the motorcycle customization or repair industry, mastering the art of spray painting motorcycle fairings not only elevates product quality but also boosts customer satisfaction and retention. This process involves several critical steps—starting from meticulous surface preparation to final clear coat finishing. Understanding priming techniques and selecting the right paint products are equally vital to achieving a flawless, lasting finish. For shops aiming to balance quality with budget, exploring DIY and cost-effective approaches can be valuable. Each chapter here delves deeply into these essential elements, offering insights that businesses can apply to improve service efficiency, achieve professional-grade results, and stay competitive in the motorcycle aftermarket industry.
Tables of Contents
Chapter 1: Essential Steps in Surface Preparation for Motorcycle Fairing Spray Paint
- Mastering Contaminant Removal: The Key to Pristine Motorcycle Fairing Surfaces
- Mastering Sanding and Adhesion Techniques for Flawless Motorcycle Fairing Paint Finishes
- Achieving Lasting Durability Through Primer and Finishing Techniques
Chapter 2: Priming Techniques for Lasting Motorcycle Fairing Paints
- Mastering Surface Preparation and Priming: Building a Durable Base for Motorcycle Fairing Spray Paint
- Essential Primer Selection and Application Process for Smooth, Durable Motorcycle Fairing Finishes
- Optimizing Finish Longevity and Vibrancy Through Effective Priming and Maintenance
Chapter 3: Mastering Base and Color Coat Techniques for Motorcycle Fairing Spray Paint
- Essential Surface Preparation and Base Coat Application for Flawless Motorcycle Fairing Finishes
- Choosing and Using Spray Equipment to Achieve Flawless Base and Color Coats on Motorcycle Fairings
- Mastering Color Coat Layers and Drying Techniques for a Flawless Motorcycle Fairing Finish
Chapter 4: Mastering Clear Coat Finishing for Durable and Glossy Motorcycle Fairings
- Unlocking the Power of Clear Coat: Protection and Preparation for Motorcycle Fairings
- Precision Application Techniques and Essential Tools for a Flawless Clear Coat Finish
- Expert Techniques for Applying and Perfecting Clear Coat on Motorcycle Fairings
Chapter 5: Choosing the Right Motorcycle Fairing Spray Paint Products and Kits
- Optimizing Compatibility: Tailoring Spray Paint Products to Motorcycle Fairing Materials
- Selecting Durable Spray Paints and Kits for a Vibrant, Long-Lasting Motorcycle Finish
- Mastering Product Selection and Application Techniques for Motorcycle Fairing Spray Paint
Chapter 6: DIY and Budget Approaches in Motorcycle Fairing Spray Paint
- Choosing the Right Materials and Preparing Surfaces for Budget-Friendly Fairing Paint Jobs
- Smart Cost-Saving Methods and Essential Kits for DIY Motorcycle Fairing Painting
- Mastering Advanced Techniques and Finishing Secrets for Budget Motorcycle Fairing Paint Jobs
Chapter 1: Essential Steps in Surface Preparation for Motorcycle Fairing Spray Paint
1. Mastering Contaminant Removal: The Key to Pristine Motorcycle Fairing Surfaces
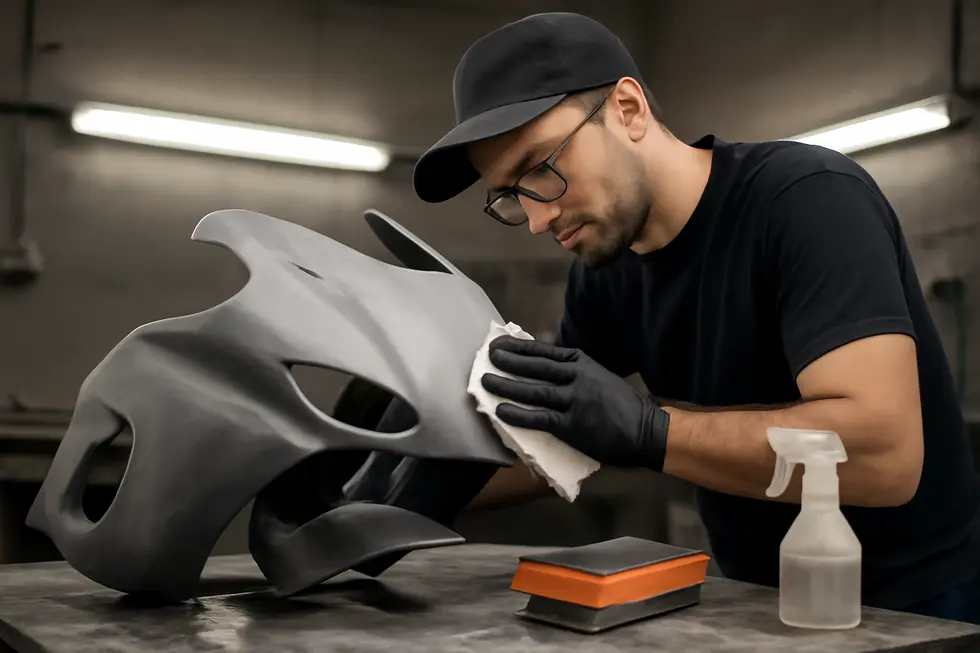
Achieving a flawless spray paint finish on motorcycle fairings starts with impeccable cleaning and contaminant removal. Dirt, grease, oil, and residues from previous coatings are invisible enemies that compromise paint adhesion, causing peeling and bubbling over time. The surface must be meticulously stripped of these substances to create a pristine canvas.
Begin by thoroughly washing the fairings with warm water and mild soap to eliminate loose grime. For tougher substances such as tar or bug residue, gentle soaking softens contaminants, preventing scratches during scrubbing. Following a complete rinse and drying, degreasing is critical; this step employs solvents like isopropyl alcohol or specialized cleaners to dissolve oils and waxes that water alone cannot remove.
Once dry, sanding plays a vital role in contaminant removal and surface smoothing. Employ a progressive grit sequence starting with coarser grades to remove old paint or imperfections, then finer grits to produce an even texture. Each sanding phase should be followed by wiping with a tack cloth dampened in alcohol, ensuring no dust or particles remain to interfere with primer adhesion.
Before proceeding to primer or paint, a final wipe with a lint-free cloth and a surface prep solvent guarantees absolute cleanliness. Attention to detail in this phase is especially crucial when working on repaired or cracked areas, where lingering debris could weaken repairs or cause paint failure.
For more insights on quality motorcycle fairings and maintenance, explore the resources at Summit Fairings. This thorough approach ensures the paint layers bond securely, setting the foundation for durable and visually striking results.
2. Mastering Sanding and Adhesion Techniques for Flawless Motorcycle Fairing Paint Finishes
Achieving a durable, high-quality finish when spray painting motorcycle fairings hinges on mastering sanding and adhesion techniques. The process begins with carefully sanding the fairings using fine grit sandpaper such as P800 or P1200, often employing wet sanding to create a smooth yet slightly textured surface. This texture is vital for promoting mechanical adhesion of primers and paints, while removing old clearcoats, minor imperfections, or residual contaminants. For areas with damage or leftover adhesives, fillers can be applied and sanded down to level the surface, ensuring uniformity before painting. Sanding must be consistent and thorough, balancing surface abrasion without compromising the plastic or composite substrate beneath. Once sanding is complete, the surface requires thorough cleaning with appropriate degreasers to remove dust, oils, and residues that could inhibit paint adhesion. Following cleaning, applying a plastic-specific adhesion promoter or primer designed for ABS or composite materials is critical. This bonding layer enhances paint durability and helps prevent peeling or chipping. Often, professionals apply multiple primer coats with light sanding between layers, building a smooth, well-adhered foundation for paint application. When repairing cracks or damage, plastic welding or repair methods restore structural integrity prior to final surface preparation. Using quality sanding tools such as elastic latex foam sponges can improve consistency in sanding and polishing. Additionally, protecting the painted fairings from UV damage with resistant waxes or coatings extends color vibrancy and adhesion longevity. For composite fairings like carbon fiber, specialized treatments such as wipe-on ceramic coatings provide further finish protection. These comprehensive sanding and adhesion steps form the backbone for a resilient, visually striking paint job that elevates motorcycle fairing aesthetics and lifespan. For more insights on maintaining smooth fairing surfaces, explore this guide on discover affordable motorcycle fairings at Summit Fairings.
3. Achieving Lasting Durability Through Primer and Finishing Techniques
Applying primer marks a pivotal stage in preparing motorcycle fairings for spray painting. Serving as the bridge between the raw surface and paint layers, primer enhances adhesion, creating a stable base that prevents peeling and chipping. Beyond adhesion, primer also evens out surface irregularities by filling minor imperfections left after sanding, ensuring a uniform foundation for the color coats that follow. Light sanding before primer application helps produce an even smoother surface, promoting better coverage and finish quality.
While certain specialty paints may bypass primer due to their inherent adhesive qualities, most spray paint projects benefit significantly from this preparatory layer, especially on plastic fairings. After the primer is fully dried, the fairings are ready for the base and color coats, which must be applied carefully to maintain a flawless surface.
The final surface treatment involves sealing the paintwork with a clear coat. This protective layer safeguards against UV damage, minor scratches, and environmental wear. Depending on the desired finish—glossy or matte—the clear coat also enhances aesthetic appeal, restoring depth and vibrancy to the color. Regular maintenance, including gentle cleaning and protective waxing, complements the finishing process to preserve the fairings’ shine and resilience over time.
For a comprehensive overview of preparing and finishing fairings, exploring in-depth guides on fairing surface preparation can provide valuable insights into achieving professional results.
Chapter 2: Priming Techniques for Lasting Motorcycle Fairing Paints
1. Mastering Surface Preparation and Priming: Building a Durable Base for Motorcycle Fairing Spray Paint
Achieving a flawless, long-lasting finish on motorcycle fairings depends heavily on meticulous surface preparation followed by proper priming. The process starts with an exhaustive cleaning to remove dirt, grease, and residues that can hinder paint adhesion. Using an automotive-grade cleaner reduces the risk of scratches while ensuring contaminants like wax or bug residue are thoroughly eliminated. Once clean, the surface must be carefully sanded with progressively finer sandpapers—usually between 320 and 800 grit—to smooth imperfections and create a uniform texture that helps the paint bond effectively.
Priming is not merely a preliminary step but a critical layer that enhances the paint’s adhesion and prevents peeling. For plastic fairings, primers designed for flexible plastic substrates are essential; they accommodate the slight movement of ABS or similar materials, preventing cracks. Applying primer with steady, overlapping spray strokes from 6 to 8 inches away ensures even coverage, while multiple thin coats reduce the risk of runs or bubbles. Adequate flash-off time between coats is crucial to allow solvents to evaporate, avoiding adhesion failures.
Before advancing to color layers, a light scuff sanding with 800 to 1000 grit wet/dry paper can optimize surface texture for topcoats. Special attention is necessary for repaired areas or spots where decals were removed, as these may differ in porosity and need extra priming care. A final inspection under good lighting and a careful wipe-down with a lint-free cloth removes any lingering contaminants. This thorough preparation and priming sequence form the backbone of an enduring, high-quality paint finish that withstands wear and environmental factors. For deeper insights into these processes tailored specifically to motorcycle parts, the explore the best motorcycle fairings at Summit Fairings blog offers valuable guidance.
2. Essential Primer Selection and Application Process for Smooth, Durable Motorcycle Fairing Finishes
Achieving an impeccable paint finish on motorcycle fairings hinges on both selecting the right primer and applying it with precision. Proper surface preparation is the foundation: after thorough cleaning, sanding smooths the substrate to ensure consistent adhesion. Masking protects areas not intended for paint. Primer choice depends largely on the fairing material and the desired durability. Epoxy primers excel on metal by offering excellent adhesion and corrosion resistance, while urethane primers provide flexibility and strong bonding on plastic and metal surfaces. Acrylic primers dry quickly but trade off some durability, making them better suited for rapid jobs rather than long-term resilience.
Application demands steady, controlled spray passes maintaining a consistent distance—typically 6 to 8 inches—with about 50% overlap for uniform coverage. Thin coats allow primers to flash off before subsequent layers, preventing runs and encouraging smooth build-up. Light sanding between coats using ultra-fine grit further refines the base, eliminating imperfections that could mar the final paint layers.
Environmental factors such as dust-free surroundings and moderate temperature also influence the primer’s performance. Once primed correctly, base and color coats adhere better, forming the foundation for a flawless clear coat finish that enhances gloss and protects against damage.
Completing this cycle with careful curing and polishing ensures a finish that withstands wear while amplifying the motorcycle’s style. For deeper insights into quality fairings that complement expert painting, exploring reliable suppliers can enhance your project’s outcome—learn more from this detailed resource.
3. Optimizing Finish Longevity and Vibrancy Through Effective Priming and Maintenance
Achieving a long-lasting, vibrant finish on motorcycle fairings hinges on meticulous priming coupled with ongoing care. Proper surface preparation remains fundamental—cleaning thoroughly to eliminate dirt, grease, and old paint residues, followed by careful sanding to create an even texture. Repairing any cracks prior to priming ensures structural soundness and a flawless foundation. Selecting a primer specifically formulated for ABS plastic and automotive use guarantees strong adhesion and corrosion resistance. Applying it in thin, uniform layers with consistent spray distance prevents common flaws such as runs or unevenness.
Once primed, multiple thin coats of UV-resistant base and color paints deepen vibrancy and guard against sun fading. The final clear coat seals and protects the finish, enriching gloss while providing a durable shield against environmental wear and chemical exposure. Yet, the paint’s endurance relies heavily on regular maintenance: gentle washing with pH-neutral cleaners and soft cloths prevents micro-abrasions, and avoiding harsh chemicals preserves gloss. Parking in shade or indoors curbs UV damage, while a protective cover supplements this defense outdoors.
Periodic application of motorcycle-safe wax offers an added barrier that both repels contaminants and enhances shine, extending the fresh appearance of your paint. This integrated approach, from priming through attentive upkeep, is essential for sustaining a professional-quality finish that retains its color intensity and resilience over time. For further insights on durable surfaces, explore detailed motorcycle fairing resources.
Chapter 3: Mastering Base and Color Coat Techniques for Motorcycle Fairing Spray Paint

1. Essential Surface Preparation and Base Coat Application for Flawless Motorcycle Fairing Finishes
Surface preparation is the cornerstone for achieving a smooth, durable finish when spray painting motorcycle fairings. Start by meticulously cleaning the fairings to remove all dirt, grease, and old paint residues. This cleaning step ensures contaminants do not interfere with paint adhesion. Next, sanding transforms the surface texture, starting with coarser grit sandpaper—typically around 240 grit—to eliminate imperfections and old coatings. Progressively moving to finer grits, sometimes up to 2000 grit, refines the surface to a silky smooth finish that promotes flawless paint layering.
Once sanding is complete, wiping down the surface with a tack cloth removes any dust particles that could cause imperfections. Before proceeding, it’s wise to test primer and paint compatibility on a small, inconspicuous area to prevent bubbling or peeling.
Applying the primer marks the first spray step after preparation. Use a high-quality primer suited for plastic fairings applied evenly to form a uniform base. Allow it to dry fully, usually about an hour, then lightly sand to smooth any rough spots. The base coat follows as a critical foundation layer sprayed in thin, uniform coats. Maintaining consistent spray distance and fluid motions prevents runs or uneven coverage. Each layer must dry adequately before the next is added to ensure a perfect, defect-free base for the color coats.
This meticulous process ensures the color layers will adhere well and exhibit uniform vibrancy and durability. For more insight on sourcing quality fairings suited for painting projects, visit Summit Fairings.
2. Choosing and Using Spray Equipment to Achieve Flawless Base and Color Coats on Motorcycle Fairings
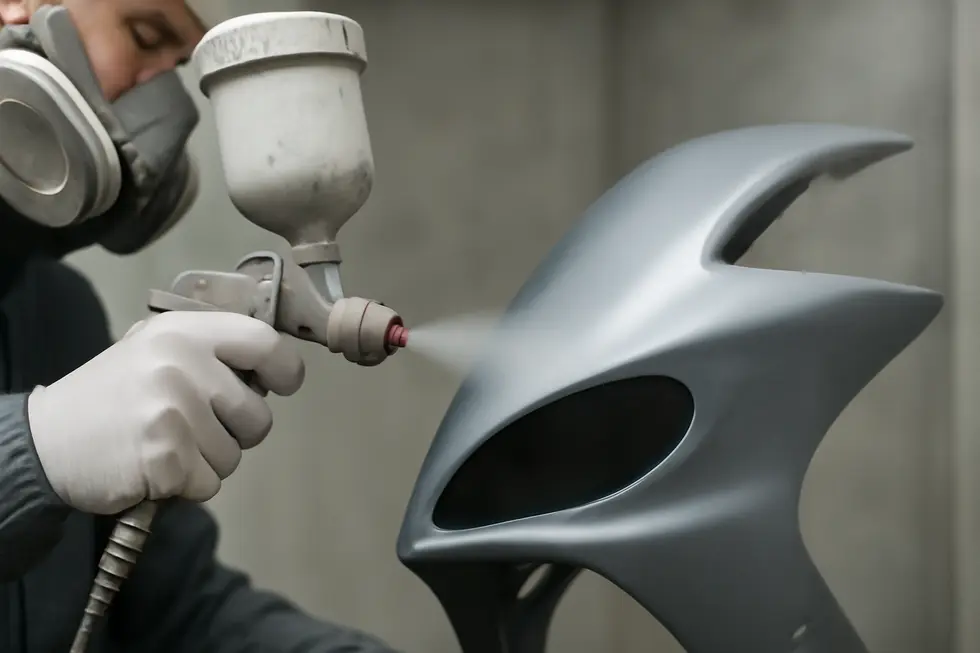
Selecting the right spray equipment is fundamental to achieving a smooth, professional finish when applying base and color coats on motorcycle fairings. Spray guns designed for automotive or plastic use offer the control required to produce thin, even layers that prevent runs and pooling. These tools allow consistent atomization of paint, ensuring each layer bonds well to the surface and builds optimal color depth.
Effective technique involves maintaining a steady, even distance—typically between 6 to 10 inches—from the fairing surface, moving the spray gun in smooth, overlapping motions. This approach minimizes overspray and avoids uneven coverage. For the base coat, multiple thin passes are preferable to one heavy coat, promoting adherence and preventing texture imperfections. After the base settles, applying the color coat demands patience, with each layer applied lightly and allowed to dry adequately before the next. This method enhances color richness and durability.
Using spray equipment that supports proper ventilation and atomization of automotive-grade paints ensures the final result withstands environmental challenges. Protective gear like masks and gloves are essential during application to protect the user. By focusing on technique and equipment optimized for motorcycle fairings’ unique plastic surfaces, painters can achieve vibrant, long-lasting finishes that elevate a bike’s appearance.
For further insights on fairing options and finishing techniques, exploring dedicated resources on motorcycle fairings can be invaluable.
3. Mastering Color Coat Layers and Drying Techniques for a Flawless Motorcycle Fairing Finish
Applying the base and color coats to motorcycle fairings demands precision in both layering and drying to achieve a professional finish. Once the fairing’s surface is meticulously prepped, the base coat sets the foundation with a smooth, even layer that ensures optimal paint adhesion. Maintaining a steady spray distance and consistent speed is crucial during this step to avoid patchiness or runs. After the base coat dries, usually within the timeframe recommended by the paint manufacturer, the focus shifts to the color coat.
Color coats benefit from multiple thin layers rather than a single heavy one. Spraying light, uniform layers allows each to bond properly while minimizing imperfections like drips or orange peel texture. Some advanced finishes can be created by layering translucent color coats over metallic bases, resulting in unique visual effects such as rich chrome or candy-like sheens. Allowing adequate drying time between each coat—notably 7 to 10 minutes for fast-drying formulations—prevents softening or blending that reduces clarity and depth.
Final drying times are just as important. A well-cured paint film minimizes susceptibility to scratches and enhances durability. Applying a quality clear coat after the color layers seals the finish, adding gloss and further protection. For longevity, additional surface treatments like ceramic coatings can defend against UV exposure and environmental wear.
For those seeking detailed insight into professional layering and drying methods, the comprehensive advice on Summit Fairings’ blog offers valuable guidance on mastering these critical phases of spray painting motorcycle fairings.
Chapter 4: Mastering Clear Coat Finishing for Durable and Glossy Motorcycle Fairings
1. Unlocking the Power of Clear Coat: Protection and Preparation for Motorcycle Fairings
Clear coat finishing is a crucial step in spray painting motorcycle fairings, serving as the transparent protective layer that seals and enhances the painted surface. This topcoat not only imparts a deep, glossy shine but also safeguards the fairing against UV rays, chemical exposure, and minor scratches sustained during regular riding. Its application extends the longevity of the paintwork, ensuring the motorcycle maintains a vibrant, showroom-quality appearance despite harsh outdoor conditions.
Achieving a flawless clear coat finish begins with meticulous surface preparation. Cleaning the fairing thoroughly to remove grease, dirt, and any residue is essential; contaminants compromise adhesion and cause imperfections. After cleaning, precision wet sanding with ultra-fine grit (1500–2000) smooths the surface, eliminating minor blemishes and creating an ideal texture for the clear coat to bond. All sanding dust must be carefully washed away and the area dried completely to prevent interference during spraying.
If any repairs are needed, touch-up paint and a light base clear coat applied followed by delicate sanding ensure a seamless blend before final clear coating. Only when the surface is perfectly clean, dry, and uniform should the clear coat be applied. This layer seals the underlying color coats, locking in vibrancy and enhancing the fairing’s resilience.
For enthusiasts seeking comprehensive guidance, exploring detailed tutorials on buffing and finishing motorcycle fairings can deepen understanding and improve results, complementing any spray painting project specific to motorcycle fairings.
2. Precision Application Techniques and Essential Tools for a Flawless Clear Coat Finish
Achieving a professional clear coat finish on motorcycle fairings hinges on precise application and the right equipment. Preparation starts with ensuring the painted surface is free from dust, grease, or any imperfections—fine sanding may be employed to create an ultra-smooth base. Applying the clear coat in thin, even layers is crucial; each layer must dry thoroughly before the next to avoid drips and uneven gloss. Maintaining a consistent spray distance and smooth, controlled motion helps prevent streaks and cloudiness, preserving the clarity and depth of the finish.
High-quality tools, especially a fine-nozzle spray gun, are vital for even coverage and blower-free application. Equally important is working in a dust-free, temperature-controlled environment to eliminate contaminants and ensure the clear coat cures flawlessly. After the final coat dries, polishing with soft pads and fine compounds enhances the gloss and removes minor flaws. For deeper imperfections, carefully selected cutting compounds designed for plastics can restore clarity without damaging the surface.
Choosing equipment aligned with the specific clear coat and paint types ensures compatibility and durability. Following manufacturer guidelines maximizes longevity and appearance. To support ongoing protection, applying supplementary coatings like ceramic sealants can shield the finish from UV rays and minor abrasions. For further insight on achieving a pristine finish, explore detailed resources on motorcycle fairings and paint techniques available at Summit Fairings’ blog, your ultimate source for expert guidance and fairing solutions.
3. Expert Techniques for Applying and Perfecting Clear Coat on Motorcycle Fairings
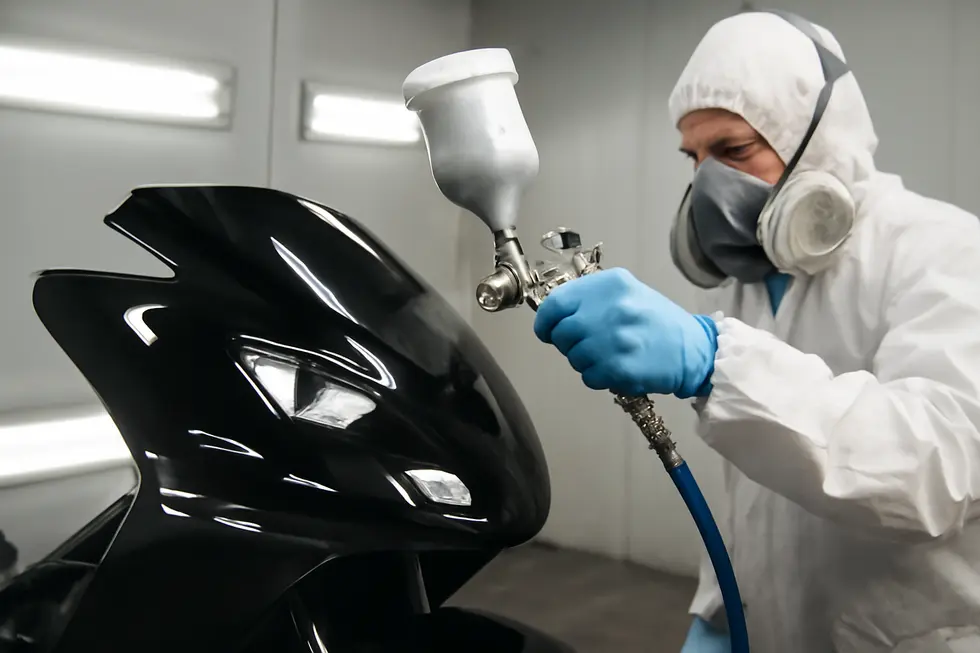
Achieving a flawless clear coat finish on motorcycle fairings requires precision in application, patience during drying, and careful quality control. The clear coat acts as a protective sealant that enhances gloss while safeguarding the paint underneath from UV damage, scratches, and environmental wear. To begin, apply the clear coat in thin, even layers using an automotive-grade spray tool or aerosol, maintaining a consistent spray distance and smooth motions. This prevents runs and uneven texture that can ruin the smooth, glossy surface desired.
Each clear coat layer should be allowed adequate drying time—typically at least 15 minutes—before the next application. This gradual build-up ensures proper curing and adhesion without trapping solvents that cause defects. After completing the final coat, curing for a minimum of 24 hours is essential before any further refinements like wet sanding or polishing are undertaken. Wet sanding with ultra-fine grit paper smooths out minor imperfections and prepares the surface for polishing, which brings out the mirror-like shine and depth.
Thorough surface preparation prior to clear coating, such as cleaning, sanding, and priming, contributes significantly to final results. Routine inspection at every stage helps identify issues early, allowing corrections before defects become permanent. For those seeking enhanced durability, applying a ceramic coating post-polishing adds an extra layer of protection, boosting both longevity and gloss retention. Following these detailed clear coat finishing steps ensures your motorcycle fairings remain vibrant and resilient, perfectly complementing their custom paintwork. For further insight into selecting quality fairings as a canvas for your paint, visit the detailed resources on explore the best motorcycle fairings at Summit Fairings.
Chapter 5: Choosing the Right Motorcycle Fairing Spray Paint Products and Kits
1. Optimizing Compatibility: Tailoring Spray Paint Products to Motorcycle Fairing Materials
Selecting the ideal spray paint and kit for motorcycle fairings hinges on understanding the compatibility between paint chemistry and the fairing’s material composition. Most fairings are crafted from materials like ABS plastic, fiberglass-reinforced plastic (FRP), or carbon fiber composites, each demanding distinct paint formulations. ABS plastic, favored in many aftermarket fairings, requires flexible, plastic-specific paints paired with adhesion promoters to prevent cracking and peeling. Fiberglass fairings call for paints that bond well with porous surfaces, making automotive urethane or two-part epoxy systems optimal for durability and shine. Carbon fiber fairings demand gentle treatment with specialized automotive-grade paints and clear coats to preserve the weave’s integrity while providing protection.
Beyond material matching, proper surface preparation including thorough cleaning, degreasing, and sanding is crucial to maximize adhesion. Paint systems designed for motorcycle fairings often specify UV resistance and impact toughness to withstand environmental stresses and vibrations. Avoiding solvent-heavy paints that could deform plastics is also vital. Many high-quality kits offer customizable or pre-matched colors tailored for popular models, aiding both aesthetic appeal and consistency.
By carefully aligning paint products and kits with the fairing’s material characteristics and adhering to recommended application conditions, riders achieve finishes that endure and enhance their motorcycles’ visual impact. For additional insights on choosing compatible motorcycle fairings, explore reliable sources such as Summit Fairings.
2. Selecting Durable Spray Paints and Kits for a Vibrant, Long-Lasting Motorcycle Finish
Choosing the optimal spray paint products for motorcycle fairings is essential to achieve a finish that combines visual impact with durability. Success begins with selecting paints formulated specifically for plastic surfaces, ensuring strong adhesion and resistance to peeling or chipping. High-quality automotive-grade spray paints, including those with vibrant pigment options, provide excellent coverage and maintain color intensity over time. Applying paint in thin, even coats preserves smoothness while preventing runs or uneven patches.
Specialized kits often include primers designed to bond with plastic substrates and topcoats that protect against UV rays and abrasion. Techniques such as layering a base coat beneath the color layer enhance opacity and depth. For riders seeking unique effects, candy paints offer deep, luminescent finishes but require precise application and finishing steps. Tools like mini spray guns can improve control and evenness, contributing to a professional-looking result.
Selecting paint products that are compatible with high-temperature or outdoor exposure conditions guarantees that the finish withstands environmental wear. Moreover, considering the fairing material—whether ABS plastic or other composites—guides product choice to balance flexibility and toughness. For a comprehensive guide on applying these paints for a flawless finish, enthusiasts can explore detailed tutorials on achieving professional results with readily available spray paint kits.
For further insights into motorcycle fairing options and paint compatibility, reviewing resources about affordable motorcycle fairings at Summit Fairings can be invaluable.
3. Mastering Product Selection and Application Techniques for Motorcycle Fairing Spray Paint
Achieving a durable, vibrant finish on motorcycle fairings depends heavily on selecting the right spray paint products and mastering their application. Motorcycle fairings, usually made from ABS plastic or fiberglass, require paints formulated for strong adhesion and flexibility to avoid peeling or cracking. Paint kits designed specifically for plastics include carefully matched primers, base coats, and clear coats, ensuring each layer bonds properly while delivering vivid color and gloss. The primer stage cannot be overlooked, as it creates a foundation for the paint to adhere effectively, especially on smooth or previously painted surfaces.
When applying paint, multiple thin layers are essential to prevent runs and achieve even coverage. Each coat—whether primer, base color, or clear—should be sprayed from a consistent distance with smooth, overlapping motions. Proper drying time between these layers is crucial to ensure a resilient finish. A quality clear coat seals colors against UV damage and abrasions, significantly extending the life and appearance of your paint job.
Tools also play a vital role; from fine grit sandpapers that smooth the surface, to spray guns or aerosols designed for an even mist, every component affects the outcome. For enthusiasts looking to explore custom or candy finishes, specialized translucent paints can be applied over metallic bases to create deep, luminous effects.
By combining carefully selected products with attentive application methods, you ensure your motorcycle fairings not only stand out visually but also withstand daily wear. For comprehensive guidance on acquiring suitable fairings and accessory options, consider visiting a detailed source dedicated to motorcycle fairings and their finishing techniques.
Chapter 6: DIY and Budget Approaches in Motorcycle Fairing Spray Paint
1. Choosing the Right Materials and Preparing Surfaces for Budget-Friendly Fairing Paint Jobs
Selecting materials for DIY motorcycle fairings requires balancing durability, cost, and paint compatibility. Common options like fiberglass and ABS plastic offer affordability and ease of shaping, making them ideal for budget projects. Fiberglass provides lightweight yet slightly brittle panels, whereas ABS plastic is tougher and easier to handle but a bit heavier. Regardless of material, thorough cleaning is essential—using plastic-safe cleaners or isopropyl alcohol removes oils and dust that could interfere with paint adhesion. Prior to painting, applying a primer designed for plastics ensures longevity and prevents peeling.
For spray painting, surface preparation directly impacts the final look. After cleaning, masking off areas not to be painted protects logos or vents. Applying paint in thin, even layers while maintaining consistent distance reduces runs or uneven patches. Each coat should dry completely before the next application, promoting a smooth finish. Affordable spray paint options that hold up well on plastics deliver both good color vibrancy and durability, crucial for protective fairing surfaces.
Budget builders may also explore repurposing existing parts or sourcing low-cost fairing kits online to cut expenses without sacrificing quality. Careful attention to material selection and surface prep forms the foundation for an impressive, cost-effective finish. To dive deeper into affordable motorcycle fairing options, this resource offers valuable insights: discover affordable motorcycle fairings at Summit Fairings.
2. Smart Cost-Saving Methods and Essential Kits for DIY Motorcycle Fairing Painting
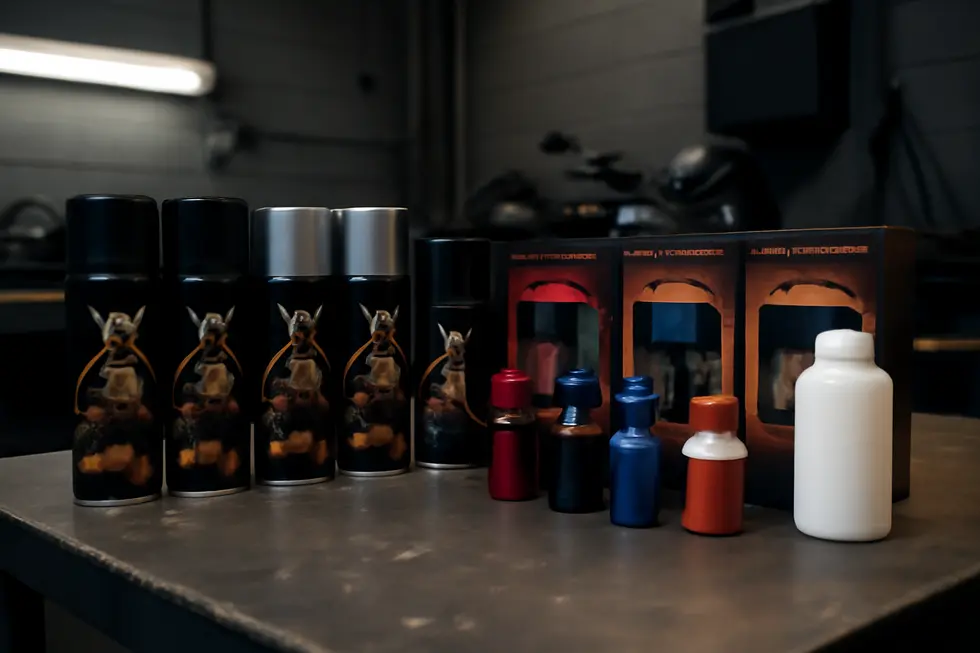
Embracing budget-friendly motorcycle fairing spray paint techniques means focusing on accessible materials and effective methods that don’t sacrifice quality. A cornerstone is the use of versatile aerosol spray paint kits that consolidate primer, base, color, and clear coats into convenient cans. These kits enable enthusiasts to achieve an even, durable finish without costly equipment like spray guns or professional booths. Equally vital is meticulous surface preparation—cleaning, sanding, and priming fairings remain indispensable to secure adhesion and eliminate flaws before painting. Choosing pre-primed or economy body kits constructed from ABS plastic presents an economical route; they require less prep and still deliver solid durability compared to pricier materials. For those crafting custom fairings, resin infusion kits bundle necessary supplies, helping create lightweight, sturdy components affordably at home. Another option to elevate the finish is to invest in budget mini spray guns, which offer improved control over aerosol cans while remaining user-friendly for hobbyists. Applying white gelcoat or economy paint variants further cuts costs while maintaining a respectable finish. Altogether, balancing thorough preparation with these cost-effective products and kits forms an ideal DIY approach. Such methods help riders refresh their fairings with professional-looking results and durable protection, all on a manageable budget. For a practical guide on these affordable spray painting techniques, detailed visual resources can illustrate the entire process step-by-step. Explore more on cost-conscious fairing options at your ultimate source for affordable motorcycle fairings.
3. Mastering Advanced Techniques and Finishing Secrets for Budget Motorcycle Fairing Paint Jobs
Mastering Advanced Techniques and Finishing Secrets for Budget Motorcycle Fairing Paint Jobs
Achieving a professional, durable finish on motorcycle fairings without breaking the bank demands meticulous attention to detail beyond basic painting. The journey begins with thorough surface preparation to eliminate old paint, grease, and imperfections, creating a flawless foundation for paint adhesion. Primers designed specifically for plastic surfaces must be applied in thin, even layers to ensure the paint adheres smoothly and uniformly. When applying the base and color coats, multiple thin layers reduce the risk of drips or uneven coverage. Smooth, controlled spray motions at the correct distance are vital to avoid runs and maintain consistent texture.
Matching the original factory colors and finish types—whether glossy, matte, or semi-gloss—enhances authenticity, especially for vintage restorations. Once color coats cure, the clear coat seals and protects the paint while adding depth and shine. Light wet sanding with ultra-fine grit removes minor imperfections, setting the stage for polishing. Carefully using polishing compounds can bring out a mirror-like gloss, but caution is needed near edges to prevent damaging the paint layers.
Budget-friendly options like two-component aerosol spray cans offer surprisingly durable finishes without professional equipment. Removing badges and hardware before painting guarantees full coverage and a clean, seamless look. Following these advanced steps, enthusiasts can craft attractive, long-lasting fairing finishes that rival professional results. For more insights on economical motorcycle upgrades, explore affordable options available at Summit Fairings.
Final thoughts
Achieving flawless motorcycle fairing spray paint results requires meticulous attention to every step—from surface preparation to the final clear coat finish. For business owners, mastering these techniques translates into enhanced product quality, customer satisfaction, and a strong market reputation. Using the right primers and paint products tailored to plastic surfaces ensures durability and vibrant finishes that withstand the rigors of riding conditions. Meanwhile, understanding cost-effective methods allows businesses to cater to a broader client base without compromising standards. By integrating these best practices, businesses can confidently deliver premium motorcycle aesthetics and protection that riders appreciate and trust.
Ready to elevate your ride? Summit Fairings delivers premium, custom-fit fairings that blend style and durability. Whether you’re chasing speed or turning heads, we’ve got your bike covered. Don’t wait—transform your machine today. Click, customize, and ride with confidence. Your perfect fairing is just a few clicks away. Act now!
About us
undefined