Introduction
Painting ABS plastic motorcycle fairings is an integral part of the aftermarket motorcycle enhancement industry. This process is not just about aesthetics; it significantly impacts the bike’s longevity and resale value. Understanding the precise techniques involved—from surface preparation to curing—is crucial for business owners aiming to deliver high-quality results. This article will explore essential chapters that detail each step of the process: focusing on how proper preparation and the right materials lead to a durable and professional finish. By equipping yourself with these insights, your motorcycle painting services can stand out in a competitive market.
Tables of Contents
Chapter 1: Mastering Surface Preparation for Flawless ABS Plastic Motorcycle Fairing Painting
- Essential Techniques for Preparing ABS Plastic Surfaces Before Painting
- Innovative Approaches to Surface Preparation for Optimal Finish on ABS Plastic Motorcycle Fairings
Chapter 2: Mastering the Art of Priming: Key Techniques for Painting ABS Plastic Motorcycle Fairings
- Essential Priming Techniques for Achieving Flawless ABS Plastic Motorcycle Fairing Paint Jobs
- Strategic Approaches to Effective Priming of ABS Plastic Motorcycle Fairings
Chapter 3: Crafting a Robust Foundation: Mastering Surface Preparation and Priming Techniques for ABS Plastic Motorcycle Fairings
- Surface Preparation and Priming Techniques in Paint Application Methods for ABS Plastic Motorcycle Fairing
- Techniques for Superior Paint Application on ABS Plastic Motorcycle Fairings
Chapter 4: Transforming Fairings with Lasting Protection: The Essential Role of Clear Coats in ABS Plastic Painting
- Fortifying Aesthetic Appeal: The Indispensable Protective Shield of Clear Coat for ABS Plastic Motorcycle Fairings
- Enhancing Aesthetics and Longevity: The Critical Role of Clear Coat in Painting ABS Plastic Motorcycle Fairings
Chapter 5: Mastering the Curing Process: Ensuring Longevity for Painted ABS Plastic Motorcycle Fairings
- Optimizing the Curing Process for Stunning and Resilient Motorcycle Fairings
- Elevating Durability and Performance: The Critical Role of Curing in Painting ABS Plastic Motorcycle Fairings
Chapter 1: Mastering Surface Preparation for Flawless ABS Plastic Motorcycle Fairing Painting
1. Essential Techniques for Preparing ABS Plastic Surfaces Before Painting
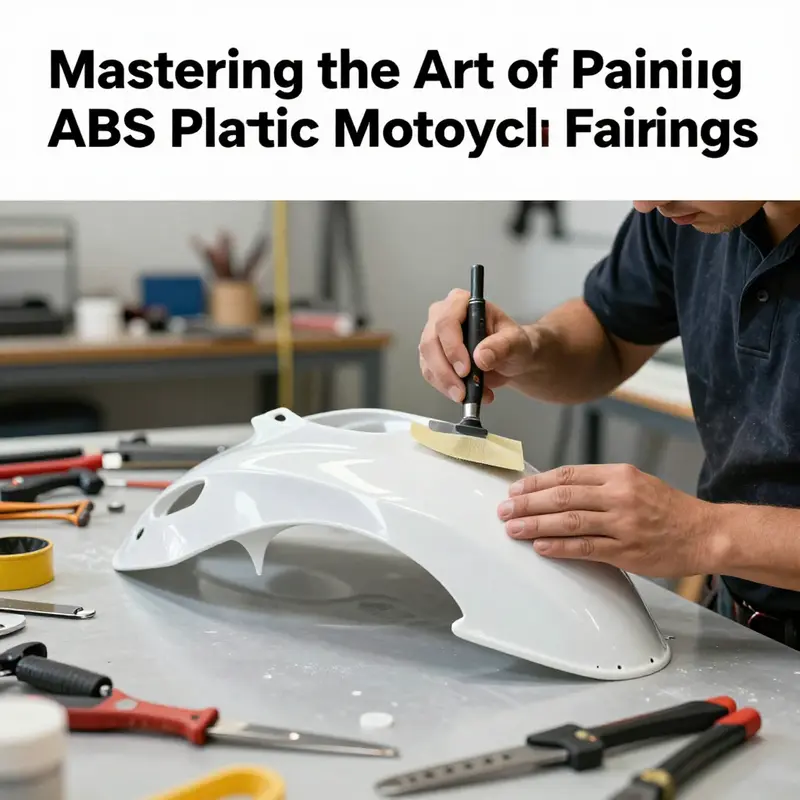
When embarking on the task of painting ABS plastic motorcycle fairings, the importance of meticulous surface preparation cannot be overstated. The success of your paint job hinges on how well you prepare the surfaces, as this step lays the groundwork for the paint to adhere properly and ultimately ensures a durable, high-quality finish. A blend of cleaning, etching, and priming are among the key procedures that form an effective surface preparation strategy.
Cleaning and Degreasing speaks to the foundational phase of preparation. Start by thoroughly cleaning the ABS plastic fairings to eliminate oils, dust, dirt, and other contaminants. It’s essential to use products that effectively break down grease and grime without damaging the plastic. Opt for a dedicated plastic cleaner or, in its absence, isopropyl alcohol (IPA) applied with a lint-free cloth. Ensuring a clean surface minimizes any risk of residues interfering with paint adhesion in the subsequent steps of the process.
Having achieved a clean surface, you move on to Surface Activation via Chemical Etching. This procedure addresses ABS plastic’s inherent challenge: its low surface energy, which can hinder paint adherence. Utilizing a specialized ABS primer containing solvents is critical here; such primers will work on a microscopic level, roughening and slightly swelling the surface. This micro-mechanical alteration enhances the plastic’s capacity for bonding with paint. Always follow the manufacturer’s instructions for correct application and allow adequate drying time, as this phase is vital for setting the tone for the layers to come.
Once the primer has adequately dried, Light Abrasion through sanding comes into play. Using 400 to 600 grit sandpaper, lightly abrade the surface to further increase surface area and create small mechanical keying points crucial for the primer and paint to grip. Following this, it is essential to wipe down the surface again with isopropyl alcohol. This will remove any residual dust particles left behind during the sanding process, ensuring that the surface is pristine and ready for the next coat.
For those seeking high-performance outcomes, applying an Adhesion Promoter becomes a game-changing step. Although optional, this addition can immensely bolster the integrity and longevity of your paintwork, especially in conditions subject to UV exposure and fluctuating temperatures. An epoxy primer or a universal bonding agent helps in creating a robust bond between the paint and the fairing, ensuring that your hard work pays off in the long run.
A Final Inspection and Preparation is paramount before jumping into painting. Ensure the fairing is thoroughly dry and free from any fingerprints, dust, or debris. A clean, dust-free environment is crucial during this stage, as any particles can lead to imperfections in the finish. Utilizing a tack cloth helps in meticulously removing any lingering particles, creating a flawless canvas for the paint application. This level of thoroughness in preparation is often what separates a mediocre job from a professional-grade finish.
By systematically executing these steps—cleaning with a dedicated cleaner, activating the surface with a quality chemical etchant, employing light sanding, optionally applying an adhesion promoter, and conducting a final inspection—you maximize the chances of achieving a perfect paint job on your ABS motorcycle fairings. Each of these techniques is crucial for ensuring that the paint not only adheres well but also withstands the test of time, keeping your motorcycle looking fresh and vibrant long after the job is completed.
Ultimately, careful attention to surface preparation, alongside the right choice of products designed for plastic, serves as the backbone of a successful painting process. For those looking for quality ABS motorcycle fairings to invest time in, you can find a wide selection that caters to various bike models, enhancing your customization efforts while ensuring they are paint-ready to achieve impressive results.
2. Innovative Approaches to Surface Preparation for Optimal Finish on ABS Plastic Motorcycle Fairings
Surface preparation is the cornerstone of achieving a high-quality paint finish on ABS plastic motorcycle fairings. The journey towards professional results begins with cleansing the fairings, as readiness and cleanliness ensure that contaminants do not thwart the adhesion process. Start by utilizing a specialized plastic cleaner or isopropyl alcohol to eliminate any lingering grease, dust, or wax. This meticulous initial cleaning paves the way for a successful painting endeavor, establishing a solid foundation for the subsequent steps.
Once the surface is clean, it’s essential to address any existing imperfections such as cracks, gouges, or deep scratches that could jeopardize the final appearance. For this, a plastic welder can be employed to fill these gaps. After the filler has cured, smoothing it out becomes critical; use fine-grit sandpaper to feather the edges and blend the repaired areas with the original surface seamlessly. This practice not only restores structural integrity but also improves paint adhesion, steering clear of potential paint lifting or peeling down the line.
Next, it is advisable to apply a specialized plastic bonder specifically formulated for ABS plastic. This bonder strengthens the integrity of the repaired surface, ensuring that paint adheres more effectively. The true magic of a flawless finish lies in the level of smoothness attained through wet sanding with 2000-grit sandpaper. This step is non-negotiable. Wet sanding eliminates minor blemishes while being careful not to create deep scratches that could disrupt the paint’s smooth appearance. This technique achieves a uniform surface texture and is preferred as it minimizes clogging of the sandpaper and prevents the generation of excessive heat—two detrimental factors for the plastic material.
An essential part of the process comes after the wet sanding—a thorough rinse and dry to evict any residual water and minute plastic particles. Any remnants left on the fairing can invite contamination during painting, manifesting as unsightly blemishes on what should be a pristine finish. Thus, a clean, dry environment is paramount before proceeding to the next step.
The evolution of coatings for paint application has brought about the widespread availability of self-priming primers enriched with micro-abrasives and adhesion promoters. These innovative solutions reduce the number of preparation steps without compromising on quality. By incorporating these advanced primers into your workflow, you can streamline the preparation process, saving time while still ensuring a reliable bonding surface for paint.
Moreover, cutting-edge advancements in surface preparation have introduced transformative techniques such as plasma cleaning systems. These systems enhance surface conditions at a molecular level, significantly boosting paint adhesion capabilities. Although often found in industrial applications, portable plasma cleaners are now emerging, making it easier for enthusiasts to achieve superior results when refinishing their motorcycle fairings.
Another recent development in the preparation toolkit is the availability of UV-curable primers. These types of primers offer the advantage of quick curing times, allowing for a faster turnaround in the painting process. Additionally, they exhibit enhanced resistance to environmental factors, such as humidity and UV exposure, which can deteriorate other types of paint and primers over time. The competitive edge provided by these innovative materials is invaluable for those committed to achieving lasting results.
An important aspect often overlooked is how specific surface textures on new fairings can influence adhesion. When purchasing new ABS plastic fairings, one might notice a subtle texture or slight scratches on the surface. These characteristics can be beneficial when preparing the fairing for painting, as they provide additional grip for the primer to adhere to, making the adhesion process more robust. However, the complete process requires a balanced approach, ensuring the surface texture is not too coarse, which could compromise the desired sleek finish.
The interplay between traditional techniques and modern innovations paves the way for a comprehensive approach to surface preparation. An effective preparation process encompasses thorough cleaning, damage repair, sanding, and the strategic use of advanced products. By taking these meticulous steps, one ensures a smooth transition to paint application, setting up the motorcycle fairing for an impeccable finish that not only looks great but also stands the test of time. So, when you’re gearing up to paint your ABS plastic fairings, remember that the quality of your paint job sits squarely upon the shoulders of effective surface preparation. Each step taken meticulously enhances the aesthetics and durability of the final product, forming a lasting relationship between rider and machine, one that speaks of dedication and craftsmanship.
For more insights and product options for your motorcycle fairing needs, consider visiting this collection of fairings for popular Japanese brands: Honda Fairings.
Chapter 2: Mastering the Art of Priming: Key Techniques for Painting ABS Plastic Motorcycle Fairings
1. Essential Priming Techniques for Achieving Flawless ABS Plastic Motorcycle Fairing Paint Jobs
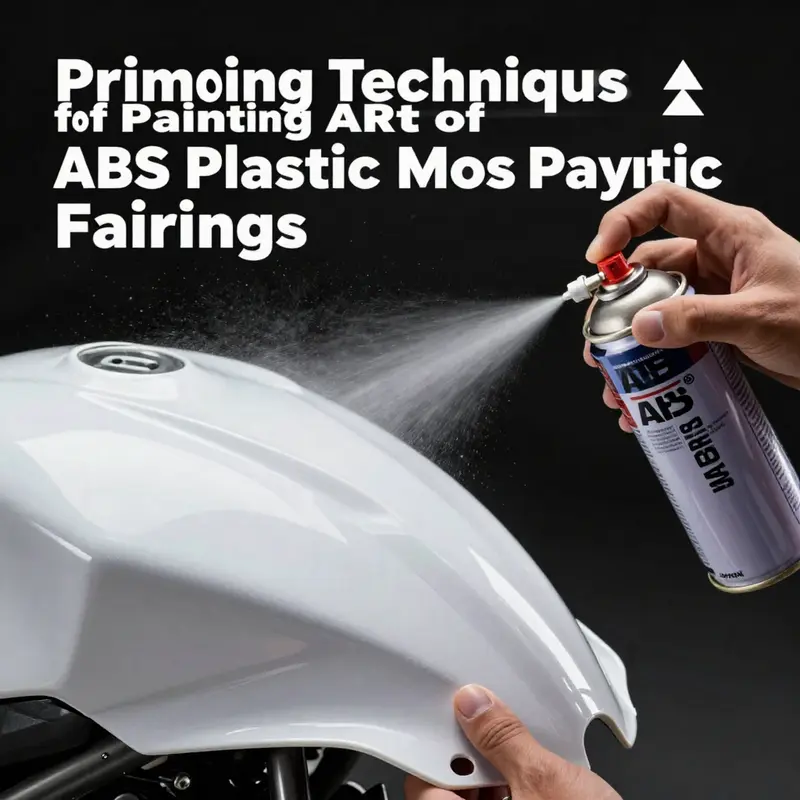
Painting ABS plastic motorcycle fairings successfully hinges on a well-executed priming process, a critical phase that determines the longevity and appearance of the final paint job. Given the unique properties of ABS plastic, which is inherently non-porous and requires special handling, the priming techniques employed can significantly influence the adhesion and durability of the paint. Understanding the necessary steps and the materials involved is crucial for any motorcycle enthusiast looking to refresh or personalize their bike’s fairings.
The priming journey commences well before the first stroke of paint is applied. It begins with meticulous surface cleaning, a step that cannot be overstated in importance. Using a degreaser, the fairings must be thoroughly scrubbed to eliminate oils, dirt, and any wax residues. This cleaning ensures that the foundation for priming is free from contaminants that could compromise adhesion. Once the surface is clean, the next phase involves light sanding, which prepares the plastic by opening up micro-surfaces for the primer to grip. Utilizing fine-grit sandpaper, typically between 1200 and 2000-grit, facilitates the creation of a slightly textured finish that enhances mechanical bonding. This step also serves to eliminate any minor imperfections that may have accumulated on the fairings during previous use.
Following the initial cleaning and sanding, the most critical step of applying a plastic bonder comes into play. Unlike standard primers, a plastic bonder is engineered to chemically bond with the ABS surface, forming a robust interface for subsequent materials. The distinction here is profound; generic primers simply do not provide the necessary adherence needed for ABS. Once you have selected a bonder specifically designed for ABS plastic, it can be applied either by spraying or using a brush, depending on the size and intricacy of the fairing design. Allow the bonder to cure adequately—typically around 24 hours—before moving on to the next step.
With the plastic bonder fully cured, a second round of light sanding is advisable. This step smooths any raised areas or imperfections that may have arisen during the bonding process, ensuring that the surface is as flawless as possible. After this, another cleaning session is warranted to eliminate any dust and debris left over from sanding, thereby preparing the fairings for primer application.
The application of high-quality primer specially formulated to be compatible with plastics is the next significant milestone in this priming process. This primer acts as a sealing agent for the surface, promoting even application of the subsequent colors while suppressing any potential color bleed from the underlying ABS material. It is vital to select a primer that complements both the bonder employed and the final topcoat, whether it be an acrylic enamel or urethane, to assure optimal results. A professional technique involves applying the primer in thin, even coats, allowing each layer to dry before applying additional coats, as this promotes much better adhesion and elasticity in the paint finish.
Environmental factors play an essential role in achieving impeccable results. All priming should take place in a controlled environment, free from dust, and with suitable temperature and humidity levels that do not detract from the chemical properties of the primer and paint. High humidity or low temperatures can hinder the curing process, leading to weak adhesion and a compromised finish that may deteriorate over time. This environment should also be well-ventilated, allowing for any fumes to escape and ensuring that the painter has a clear workspace to navigate.
Ultimately, the expertise displayed during the priming process directly influences the final aesthetic and performance of the painted motorcycle fairings. Following the comprehensive steps outlined—from cleaning and sanding to bonding and priming—equips any motorcycle enthusiast or professional painter with the tools needed to achieve a striking and long-lasting finish. By approaching the priming phase with precision and attention to detail, riders can transform their motorcycles into eye-catching machines that reflect their personality and love for the craft.
Investing time and effort into these techniques not only prepares the fairings for a stunning new look but also lays a solid groundwork for the intricate art of painting motorcycle fairings. By ensuring that every step is followed meticulously, the end result will be a durable, professional-quality paint job that performs admirably under the pressures of weather and road wear, making the motorcycle not just a mode of transport, but a vibrant personal statement.
For those interested in starting their journey with professional-grade fairing replacements and gaining insights into the variety of options available, consider exploring the collection of Honda fairings for high-quality materials that can support any ambitious customization project.
2. Strategic Approaches to Effective Priming of ABS Plastic Motorcycle Fairings
When embarking on the journey of painting ABS plastic motorcycle fairings, one pivotal step often distinguishes the average from the exceptional: priming. This stage is crucial, as it directly impacts the adhesion and longevity of the paint applied thereafter. To ensure a flawless finish that not only looks good but withstands the rigors of the road, a strategic approach to priming is required, encompassing selection, preparation, environmental factors, application techniques, and curing considerations.
Choosing the Right Primer
Selecting a primer that is compatible with ABS plastic is of utmost importance. Generic primers may seem appealing due to cost or availability, but they can lead to adhesion failures or even stress cracking, compromising the integrity of the fairing. It is advisable to choose specialized primers specifically designed for plastics, guaranteeing a robust bond between the primer and the fairing. These primers typically feature bonding properties that act like a bridge, enhancing the strength of the connection between the plastic substrate and the subsequent topcoat. By investing in a quality product here, you lay the groundwork for a durable finish.
Thorough Surface Preparation
Surface preparation is a decisive factor in the priming process. Before any primer touches the fairing, it is essential to clean the ABS surface meticulously. This involves removing any oils, waxes, or contaminants present on the fairing, which can be effectively achieved with a specialized degreaser or an alcohol-based cleaner. Following the cleaning process, light sanding with fine-grit sandpaper—typically between 600 to 800 grit—is essential. This sanding creates micro-abrasions on the surface, promoting mechanical adhesion of the primer. After sanding, removing all dust is critical; even microscopic particles left behind can severely impact the primer’s effectiveness. Use compressed air or a tack cloth to ensure a pristine surface before application.
Optimal Environmental Conditions
External factors such as temperature and humidity play a significant role in the priming process. For optimal results, the application environment should ideally be within a temperature range of 18 to 25°C (65 to 77°F) with low humidity levels—below 60%. High humidity can lead to moisture affecting the drying time of the primer and create problems like bubbling or uneven finishes. Additionally, applying primers in a clean, dust-free space minimizes the risk of contamination, which is crucial for achieving a smooth, even coat.
Mastering the Application Technique
Once the primer is selected and the surface is prepared, attention to application technique becomes paramount. Spraying the primer should be done with care, avoiding heavy application that can cause sagging, runs, or extended cure times. Rather than applying a single thick layer, it is advisable to apply multiple thin coats. This method not only ensures an even finish but also facilitates proper curing between layers. Each coat should be allowed to dry thoroughly before the next is applied, which can vary depending on the product used, so it is crucial to consult the manufacturer’s instructions. This layering technique also helps to reduce the risk of cracking and improves overall durability.
Understanding Curing Times
The importance of allowing adequate curing time cannot be overstated. For the best results, most ABS-specific primers recommend a minimum of 24 hours of curing time at room temperature before any sanding or application of the topcoat. Some primers may necessitate even longer curing periods, depending on their specific chemistry. It can be tempting to rush through this step, particularly if an eager atmosphere encourages quick results, but failing to allow full curing can lead to compromised adhesion and eventual paint failure. Always adhere to the technical data sheet provided by the primer manufacturer, as it includes indispensable application instructions and compatibility information critical to achieving a successful outcome.
In crafting a long-lasting, visually appealing finish on ABS plastic motorcycle fairings, a strategic focus on priming cannot be overlooked. The selected primer should be tailored for ABS, the surface must be meticulously prepared and cleaned, environmental conditions must align with optimal application practices, and curing times should be diligently observed. By integrating these approaches into your painting process, you significantly enhance your chances of achieving a finish that does justice to your motorcycle’s aesthetic and protective needs. For guidance on specific fairing models and aftermarket solutions, you can explore options like Summit Fairings to elevate your project further.
Chapter 3: Crafting a Robust Foundation: Mastering Surface Preparation and Priming Techniques for ABS Plastic Motorcycle Fairings
1. Surface Preparation and Priming Techniques in Paint Application Methods for ABS Plastic Motorcycle Fairing
Painting ABS plastic motorcycle fairings is not just about selecting the right color; it revolves significantly around thorough surface preparation and effective priming techniques. These steps lay the groundwork for achieving a beautiful and long-lasting finish. Proper preparation enhances paint adhesion, ensuring that the labor invested in customizing a bike delivers impressive results.
Cleaning the Surface
The first step in surface preparation is cleaning, a crucial task often underestimated. Before you even think about primer, it’s essential to eliminate any grease, wax, or contaminants that may disrupt adhesion. Many choose specialized plastic cleaners, but isopropyl alcohol is equally effective. A clean surface prevents residues from interfering with the bond between the paint and the ABS substrate, thus setting the stage for the following steps.
Sanding the Surface
Next, it’s imperative to sand the fairings lightly, creating a mechanical key for improved adhesion. It’s best to use sandpaper with a fine grit, typically between 800 and 1200. This step is effective in generating a mildly rough texture that enhances the bond between the plastic and the primer. The goal here is not to strip the plastic but to simultaneously prepare it and smooth it out for the next phases. Following the sanding process, any residual dust can be easily cleared away using a tack cloth, ensuring a pristine surface for additional treatment.
Application of Plastic Bonder
As we progress, the introduction of a plastic bonder or adhesion promoter can significantly enhance the bond strength between the primer and the ABS plastic. This product binds well to the substrate and provides a solid foundation for the paint system. After applying the bonder uniformly, allow it to cure according to the manufacturer’s guidelines. A subtle, yet impactful step is lightly sanding the bonder after curing to ensure a seamless transition for the primer.
Priming the Surface
With the surface prepared, it’s time to apply primer, a vital layer that supports the topcoat. Selecting a high-quality primer specifically designed for ABS plastic is essential. Such primers typically contain solvents and additives aimed at boosting adhesion and reducing delamination risks. Application should be executed using a spray gun to achieve an even finish. Thin, consistent coats are preferable; excess material can lead to runs or sags, compromising the final outcome. Drying times are crucial as well: a waiting period of approximately 15 to 30 minutes between coats fosters proper layer formation without hindering adhesion.
Ensuring Quality Control
During this phase, it’s crucial to avoid over-spraying. Applying too thick a layer of primer can introduce bubbling or poor adhesion issues, which can be challenging to correct later in the painting process. Once the primer is adequately dried, inspect the surface thoroughly; it shouldn’t feel gritty or inconsistent. Any rough spots can be sanded gently, providing a smoother finish for the subsequent topcoat.
Final Outcome and Benefits
Properly prepared and primed fairings yield a reliable and robust base for painting. This rigorous process not only ensures visually striking results but also contributes to extending the longevity of the paint job. Fairings painted under these conditions exhibit heightened resilience against everyday challenges—UV exposure, moisture, and other environmental elements. By meticulously following these preparation and priming techniques, riders can enjoy the satisfaction of transforming their motorcycle’s aesthetic while ensuring its durability for the miles ahead.
In conclusion, the careful execution of surface preparation and priming techniques defines the success of any painting project, particularly for high-impact areas like motorcycle fairings. It’s the unseen craftsmanship that ultimately underscores the glory of a freshly painted bike.
For more detailed guidance and tips on painting motorcycle fairings, check out the tips provided in Motorcycle Fairing Painting Tips. Successful preparation can make all the difference; be meticulous, patient, and ensure that each step is honored in the journey of transforming your motorcycle.
2. Techniques for Superior Paint Application on ABS Plastic Motorcycle Fairings
Successfully painting ABS plastic motorcycle fairings requires understanding the nuances of material properties and application techniques. This intricate process begins well before the first can of spray paint is even uncapped, primarily focusing on the critical step of surface preparation. Before starting, ensuring that the fairing is thoroughly cleaned is imperative. Using a dedicated plastic cleaner or isopropyl alcohol effectively removes oils, waxes, and contaminants that could hinder adhesion. It’s essential to utilize a light sanding approach with 320-400 grit wet/dry sandpaper. This creates a mechanical texture, known as a key, that enhances paint adherence. After sanding, employ a tack cloth to remove dust particles that can settle on the surface, leading to imperfections in the final coat.
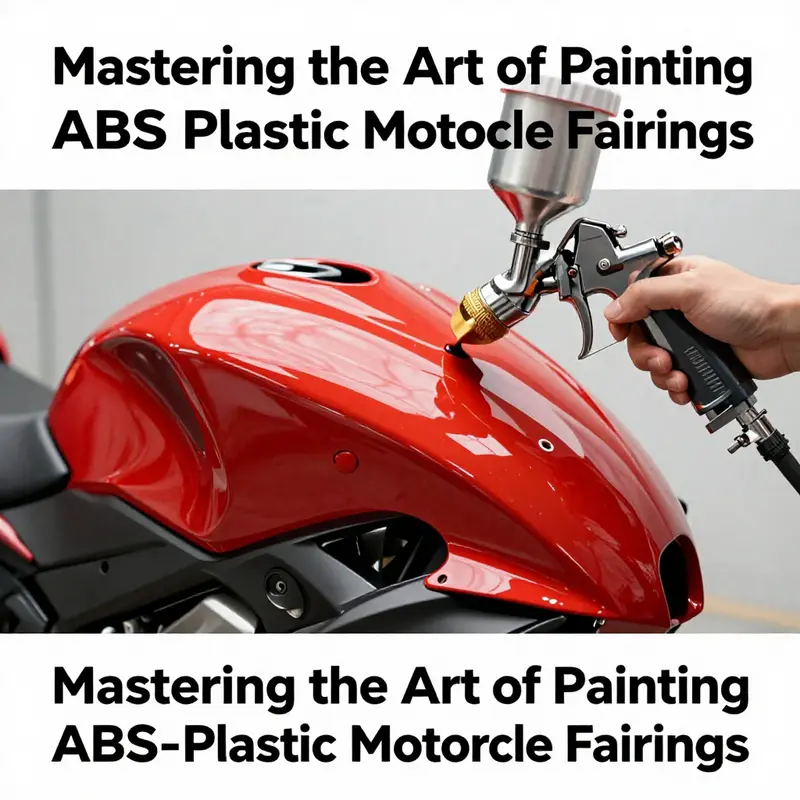
Once the fairing is clean and prepared, the next step is primer application. Selecting a high-quality primer specifically formulated for plastics is crucial, as these products contain adhesion promoters designed to bond chemically with ABS surfaces. The application method can significantly impact the outcome; for best results, use an airless or HVLP (High Volume Low Pressure) spray gun. When applying primer, opt for 2-3 thin, even coats to ensure full coverage without causing runs or drips, waiting approximately 15-30 minutes for each coat to flash off—don’t rush this drying process, as it’s vital for achieving an optimum bond. A properly primed surface ensures long-lasting adhesion and minimizes the risk of future delamination.
Moving forward to the topcoat application, the choice of paint is equally important. High-performance automotive-grade urethane paints are recommended due to their robust resistance to UV light, chemicals, and abrasions. Apply the topcoat in multiple thin, even layers—typically 3-5 coats—using the same HVLP technique. Position the spray gun about 6-8 inches from the surface and maintain a consistent speed while moving in a steady, overlapping pattern. This consistency is key to avoiding common pitfalls, such as uneven coverage or wrinkling. Allow at least three hours of drying time between coats, ensuring that each layer has adequately dried before applying the next, promoting effective curing and a smooth finish.
An additional layer to consider is the clear coat, which while optional, is highly recommended for enhancing gloss and providing extra protection against environmental factors. After the base color has cured for around 24 hours, applying a compatible clear coat can significantly increase the durability of the painted surface. Use the same application techniques, ensuring thin and even layers for optimal results.
It’s also noteworthy to emphasize the curing and drying phase. After completing the final coat, allow the paint to cure at room temperature for a minimum of 72 hours before exposing the fairing to challenging conditions. Some professionals leverage industrial processes involving forced curing in ovens (at 40-80°C) to accelerate this phase, although this typically necessitates specialized equipment not accessible to most DIY enthusiasts.
Throughout this process, several key considerations must be kept in mind. Always work in a clean, dust-free environment that is well-ventilated to ensure efficient drying and safety. Protective gear such as a respirator, gloves, and safety glasses is highly advisable to safeguard against harmful fumes and particulates. Following the manufacturer’s instructions regarding the specific paint system being employed is crucial—these guidelines are tailored to accommodate optimal application results. Avoiding high humidity environments (exceeding 70%) and extreme temperatures (below 12°C or above 30°C) is vital, as these factors can adversely impact both drying and adhesion.
Many resources underscore the significance of maintaining a consistent film thickness (typically suggested at 13-20μm per coat) and controlling spray pressure (2-3 kg/㎡) during application. These guidelines are vital and translate directly to the context of painting ABS fairings, ensuring a professional-level smooth finish. Attention to detail at every step, from preparation through application and curing, can transform an ordinary fairing into a visually striking and durable component of your motorcycle. As you embark on this painting journey, remember that every phase, particularly those detailed above, combines to form a successful paint application experience that can make your motorcycle uniquely yours. For those interested in seeking out new materials, consider browsing specialized collections of motorcycle fairings to find the ideal starting point for your project: here.
Chapter 4: Transforming Fairings with Lasting Protection: The Essential Role of Clear Coats in ABS Plastic Painting
1. Fortifying Aesthetic Appeal: The Indispensable Protective Shield of Clear Coat for ABS Plastic Motorcycle Fairings
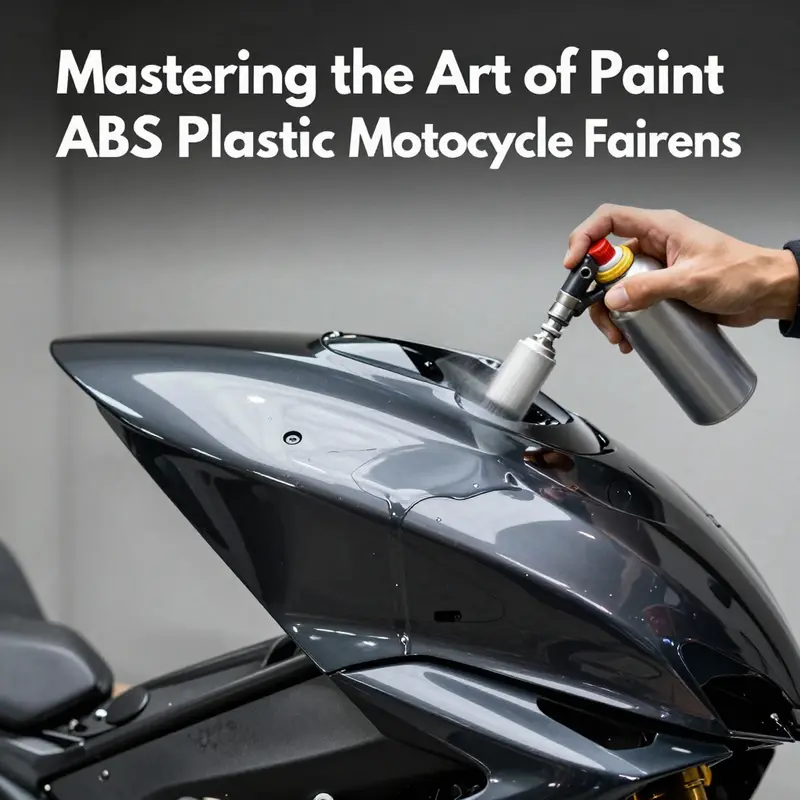
When painting ABS plastic motorcycle fairings, the importance of using a clear coat is paramount—it’s not merely an afterthought but rather a crucial player in the longevity and durability of your paint job. ABS plastic, known for its strength and ease of use, faces invisible threats from the very environment in which motorcycles operate. These threats stem from harmful UV rays, chemical spills, and the inevitable wear and abrasions that occur during daily use. Therefore, a well-applied clear coat becomes an essential defense mechanism, safeguarding the painted surface and preserving the investment made in transforming a motorcycle’s aesthetic.
The underlying function of a clear coat is to serve as a barrier—one that absorbs the brunt of environmental stressors. Without this protective shield, the base paint can suffer from fading, chalking, or degradation over time, creating an unsightly appearance that detracts from the motorcycle’s overall design. A clear coat not only helps in maintaining the vibrancy of colors but also enhances the paint’s finish, imparting a glossy, professional look that catches the eye. This poured-on layer significantly adds depth to the paintwork, which is particularly important for riders looking to customize their bikes to reflect personal style.
However, applying a clear coat is not as straightforward as it may seem. Riders and customizers should be cautious in selecting the right formula, ensuring it’s tailored for ABS plastic. Generic automotive clear coats may not adhere correctly to ABS surfaces and might result in unintended stress fractures. This mismatch occurs due to the differing flexibility and thermal expansion rates between standard clear coats and ABS plastic. Thus, investing in a clear coat specifically designed for plastics can lead to better adhesion, while still offering the necessary flexibility to handle the vibrations and temperature fluctuations commonly experienced by motorcycles.
For the best results, many experts recommend a two-part polyurethane clear coat system because it offers superior hardness, resistance to chemicals, and stability against UV rays compared to single-component options. Its sophisticated formulation not only fortifies the painted layer but also enriches the vehicle’s look, making it even more imperative in the application phase. Following meticulous preparation processes—such as washing, sanding, and masking—ensures that the clear coat adheres correctly, thus fortifying its protective qualities.
Another best practice in clear coating involves the method of application. Professional finishers advocate for applying multiple, thin layers instead of one thick coat. This technique mitigates issues such as runs, sags, or bubbles, ultimately resulting in a flawless finish. Each layer should be allowed to cure adequately before the next application, creating a robust structure that forms a shield against the elements. Additionally, letting the final coat cure for the prescribed time before exposing the motorcycle to the outdoors is a crucial phase—one that shouldn’t be rushed. Allowing the clear coat to cure fully strengthens its bond to the painted surface, enhancing overall durability against scratches and environmental wear.
The clear coat serves more than just a functional role; it can dramatically influence the aesthetic appeal of the motorcycle fairing. The protective layer amplifies color richness and contributes to a cohesive finish that ties together the bike’s overall design. Riders who opt for custom colors can elevate their creativity, knowing that the right clear coat will hold their artistic vision in place against the myriad stresses faced during rides. By understanding the significance of this finishing step, motorcycle enthusiasts not only improve the durability of their paint job but also contribute to the long-lasting appeal of their vehicles.
In summary, using a high-performance, ABS-specific clear coat is a necessary step in the painting process for motorcycle fairings. It is integral to preserving the visual integrity of the paintwork while offering crucial protection against environmental degradation. As such, the attention to detail in this aspect can determine how well the custom-painted fairings stand up against the years, underscoring the necessity of investing time and resources into quality painting and finishing practices. Whether embarking on a DIY project or opting for professional services, understanding the role of the clear coat is vital in achieving the desired outcomes for both protection and appearance. As motorcycle enthusiasts, taking the extra steps in ensuring a robust painting process translates into maintaining the beauty and functionality of a beloved ride.
For enthusiasts looking to upgrade their motorcycle aesthetics with quality fairings, exploring various motorcycle fairing options can provide inspiration and the necessary components to ensure a stunning, visually striking result.
2. Enhancing Aesthetics and Longevity: The Critical Role of Clear Coat in Painting ABS Plastic Motorcycle Fairings
The application of a clear coat is fundamental when it comes to painting ABS plastic motorcycle fairings. It not only amplifies the visual aesthetics of the paint job but also provides vital protection, ensuring that the finished product endures the various adversities of the open road. In this exploration of the clear coat’s importance, we will delve into its numerous benefits while providing insights for proper application techniques, ultimately guiding you toward achieving a pristine and lasting finish.
Protection Against UV Rays
One of the foremost advantages of using a high-quality clear coat is its inherent resistance to harmful ultraviolet (UV) rays. These rays, prevalent in sunlight, can wreak havoc on painted surfaces, causing colors to fade and degrade over time. This fading not only diminishes the visual appeal of your motorcycle but can also lead to more significant paint integrity issues. Utilizing a clear coat—with a premium 2K formula—provides a robust barrier against these UV rays, ensuring your beautiful paint job retains its luster throughout multiple seasons.
Shielding Against Weather Conditions
Weather conditions can be as treacherous for painted surfaces as UV exposure. Rain, snow, humidity, and extreme temperatures all present challenges that can lead to deterioration of unprotected paint. A clear coat serves as a formidable barrier against these environmental factors, safeguarding the paint underneath from moisture that can cause blistering or peeling. This weather resistance is crucial for motorcycle enthusiasts who expose their bikes to a variety of climates, enabling your fairing to remain intact and visually appealing, regardless of the elements.
Enhancing Scratch and Chemical Resistance
Motorcycles often encounter abrasive conditions that can scratch or harm the finish. The application of a clear coat provides an additional layer of defense against scratches from road debris and even chemical spills, such as fuel or cleaning agents. Without this protective coating, your paint job is left vulnerable to unsightly blemishes that can mar the overall appearance. The right clear coat not only withstands minor abrasions but also imparts chemical resistance, extending the life of the paint and ensuring your fairings maintain their pristine condition.
Preventing Fading and Oxidation
In addition to protecting against scratches, a clear coat helps prevent the fading and oxidation that occur on exposed paint surfaces. The interplay of air and moisture can lead to oxidation, resulting in dullness and lack of vibrancy in your motorcycle’s color scheme. The integrity provided by a clear coat helps to keep the surface looking fresh and lustrous, effectively prolonging the life of the paint job. Skipping this important layer may greatly reduce the lifespan of your investment in custom paintwork, leading to potential reworks down the line.
Aesthetic Enhancement
Beyond protection, a clear coat provides a level of depth and gloss that can elevate your motorcycle’s appearance to a professional standard. The shiny finish created by a well-applied clear coat can add richness to the color, making it sparkle under sunlight and attracting attention. Motorcycle enthusiasts understand that a striking appearance plays a significant role in a bike’s identity, and a clear coat can elevate this aesthetic to showroom quality. The glossy finish serves not just as a protective layer but as a crucial component of your motorcycle’s overall character.
For those aiming for that impeccable finish, the application process of a clear coat warrants careful attention. It begins with thorough surface preparation, following the same meticulous practices used in base painting, ensuring the surface is meticulously clean, smooth, and free from contaminants. Correct mixing ratios of the clear coat are crucial; always adhere to the manufacturer’s recommendations to achieve optimal results. Finally, allowing adequate curing time is essential. Rushing this process might lead to a compromised finish, with a potentially less durable final product.
In conclusion, the importance of a clear coat in painting ABS plastic motorcycle fairings cannot be overstated. It provides critical protection against environmental hazards while simultaneously enhancing the motorcycle’s aesthetic appeal. For those pursuing a flawless finish for their bikes, referencing comprehensive guides on proper painting techniques, such as those available at various automotive detailing resources, will be invaluable. Whether it’s a vivid Honda CBR1000RR or a sleek Yamaha YZF-R1, taking the time to apply a quality clear coat will yield a stunning, professional-grade appearance that lasts, making it a worthwhile investment for any motorcycle enthusiast.
Chapter 5: Mastering the Curing Process: Ensuring Longevity for Painted ABS Plastic Motorcycle Fairings
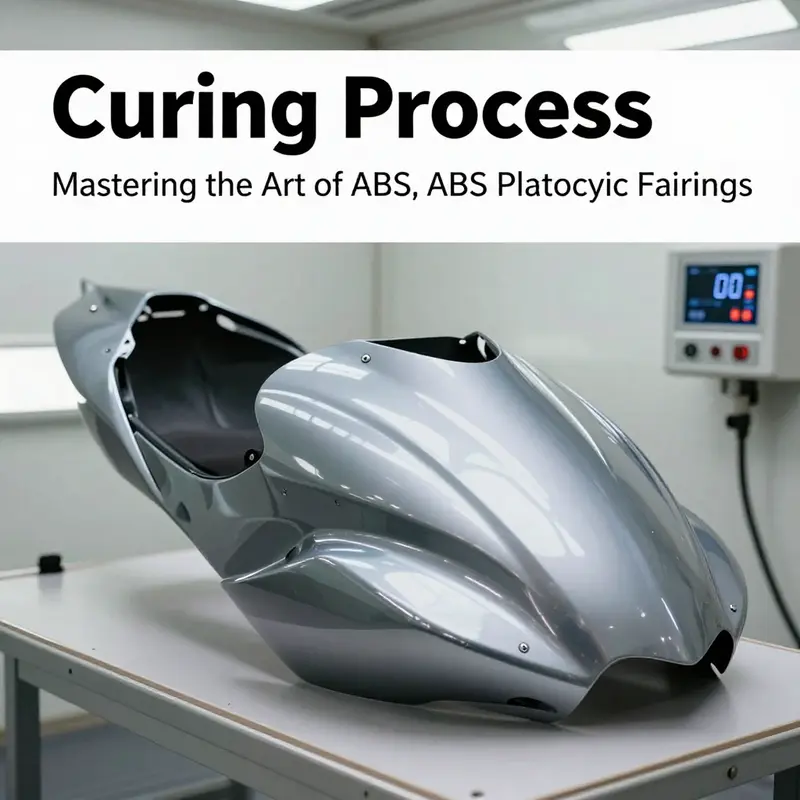
1. Optimizing the Curing Process for Stunning and Resilient Motorcycle Fairings
The curing process is a pivotal stage in painting ABS plastic motorcycle fairings, transforming a freshly coated surface into a durable protective layer that withstands the rigors of the road. After the labor-intensive steps of surface preparation, priming, and painting, the completion of the process relies on the correct implementation of a curing regimen. A well-executed cure will not only enhance the aesthetic appeal but also extend the lifespan of the painted finish.
Upon completion of painting, it is crucial to allow the clear coat to cure adequately, which commonly requires a timeframe of 24 to 48 hours under ideal conditions. This duration, however, is not one-size-fits-all; it can fluctuate depending on several factors, including the type of paint used and the ambient environmental conditions such as temperature and humidity. The importance of patience during this phase cannot be overstated: rushing the curing process can lead to a myriad of issues including poor adhesion, surface defects, and long-term degradation, jeopardizing the visual and structural integrity of the fairing.
To optimize curing, ensure the painted fairing is stored in a clean environment devoid of excess dust and contaminants. The temperature plays a significant role, with the ideal range being between 68–77°F (20–25°C). Maintaining moderate humidity is equally essential; excessive moisture in the air can affect the drying properties and overall quality of the finish. Furthermore, direct sunlight or rapid temperature fluctuations can cause the ABS plastic to warp or crack, which would be detrimental to the finish. To mitigate these risks, consider utilising a professional curing oven if available. Such ovens provide a controlled environment that accelerates the curing while sustaining consistent temperature and humidity levels, leading to superior results.
Understanding the materials in use can profoundly impact the output. Selecting the right primer and paint is just the beginning of achieving a lasting finish. Utilizing a plastic bonder specifically formulated for ABS surfaces is highly recommended. This primer increases the adhesion between the paint and the fairing, ensuring longevity and durability. Once this has been applied, a light sanding should follow to create a smooth surface for the subsequent layers of primer and paint. Each layer must be treated with care, with the application performed in thin, even coats to prevent runs and drips that could compromise the finish.
Additionally, attention should be given to the application technique. Spraying from a consistent distance and at the correct angle will result in a uniform coverage, a necessity for effective curing. Once the clear coat layer is applied, patience truly pays off. As the coating transitions from a liquid state to a solidified finish, the chemical reactions that occur during the drying phase require the prescribed time to unfold fully.
For further insights, the Motorcycle Mechanics Institute (MMI) offers a comprehensive guide that covers industry-standard techniques for both OEM and aftermarket applications, presenting valuable references for those passionate about motorcycle refurbishments. Their methodologies emphasize the significance of each step in achieving a stunning finish, aligned with best practices in the motorcycle bodywork domain.
After the curing period is complete, it is advisable to conduct a gentle inspection of the fairing to ensure that the finish effectively cured without imperfections. Look for chips, cloudy areas, or any signs of adhesion failure. If any defects are detected at this stage, they must be addressed as soon as possible to avoid furring the fairing’s overall appearance. Light polishing may be employed to enhance the gloss and fidelity of the painted surface without risking damage to the underlying coat.
Concluding this stage, the newly painted fairings should ideally be protected from environmental exposure for an additional duration before being installed back on the motorcycle. This practice ensures that the paint has adequately set, avoiding any potential threats from dirt, moisture, or ultraviolet rays.
With your fairings now optimally cured and beautifully coated, they not only exhibit an appealing aesthetic but are also equipped to resist chipping, fading, and damage from the elements. This attention to detail, particularly during the curing process, is what distinguishes a professional job from a DIY project gone awry. Investing time into understanding and improving the curing method set the stage for a fairing that looks great and stands the test of time, ensuring that your motorcycle retains its charisma and allure for years to come. To find out about the best replacements for damaged fairings or the ideal make and model for upgrades, check out various motorcycle fairing collections.
2. Elevating Durability and Performance: The Critical Role of Curing in Painting ABS Plastic Motorcycle Fairings
The curing process represents a pivotal phase in the painting of ABS plastic motorcycle fairings, intricately affecting both the durability and performance of the finish. Proper curing establishes a robust bond between the paint and the fairing substrate, culminating in a resilient exterior that is resistant to chips, fading, and environmental deterioration. This alignment of aesthetics and endurance not only beautifies the motorcycle but also bolsters its structural integrity during high-speed rides and adverse weather conditions.
To achieve the best results, the curing process necessitates a meticulously controlled environment where temperature and humidity levels are optimized. Typically extending over 24 to 72 hours, this phase is tailored to the specifications of the paint system employed. In professional settings, heated ovens are often used, allowing for precise temperature regulation, which accelerates the necessary chemical reactions within the paint’s resin matrix. This acceleration promotes a tighter cross-linking of the components, significantly enhancing not just hardness, but also scratch resistance and long-term UV stability.
Rushing or skipping the curing stage can have detrimental repercussions. Insufficient curing can lead to surfaces that remain soft and tacky, rendering them vulnerable to damage from handling, airborne debris, or exposure to moisture. Moreover, such a hurried approach undermines the very purpose of painting—securing a protective layer that ensures longevity. Therefore, dedicating adequate time to the curing phase becomes essential, particularly when considering the high stakes of motorcycle performance and rider safety.
The environmental conditions during curing play a critical role in ensuring the final product emerges without imperfections. A clean atmosphere devoid of dust and airborne contaminants is paramount. Particles settling on the paint while it is still wet can mar the finish and compromise the paint’s integrity. Therefore, a well-executed curing stage contributes profoundly to the visual appeal and ensures that the fairing retains its functionality and safety profile.
In the realm of DIY repairs, where products like PlastiFix are often utilized for fairing maintenance or restoration, adhering to the manufacturer’s hot points on curing is equally crucial. Commonly, these instructions will delineate specific ambient conditions and timeframe to guarantee optimal polymerization. Ignoring these guidelines might culminate in a flawed repair that succumbs under the strain of stress or environmental exposure.
As riders look for ways to enhance their motorcycles, understanding the curing process emerges as a critical factor. Beyond visual improvements, the real value lies in how effectively the curing process shields the fairings from the rigors of the road. Riders invested in high-performance machines, such as the Honda CBR1000RR or Yamaha YZF-R1, can benefit from emphasizing not only how their bike looks but how effectively the paint will withstand the demanding conditions often associated with motorcycle riding.
Additionally, considering the aerodynamics of a motorcycle, unblemished surface finishes contribute to streamlined designs, which enhance overall performance. When curing is conducted thoughtfully, the surface remains smooth, minimizing drag and enhancing speed capabilities. This becomes indispensable, particularly at highway speeds where every detail can significantly influence ride safety and stability.
As with any technical process, the artfulness of painting and curing motorcycle fairings is driven by attention to detail and a respect for the underlying materials involved. The ABS plastic itself can come with inherent textures or production scratches that, when treated through sanding and proper priming, can create a surprisingly effective grip for the paint, much like how the pioneering racers of years past survived through trial and error.
This knowledge empowers riders and enthusiasts to take the reins of their motorcycle’s aesthetic journey, knowing that each phase—from the meticulous surface preparation to the vital curing process—plays a significant role in the machine’s long-term performance. Although it can be tempting to overlook steps in pursuit of a quick transformation, the difference between a rushed job and one that is given the time it deserves can reflect immensely during those first thunderous rides.
In summary, the intricate relationship between curing and the painted surfaces of ABS plastic motorcycle fairings cannot be overstated. For those looking to maintain or improve their motorcycle’s exterior, investing in the correct curing process will yield a durable, attractive finish ready to take on the world. Each motorcycle stands as a testament to both function and art, and understanding the science behind processes like curing allows riders to make informed choices, ensuring their machines can proudly hit the roads, equipped to face all that lies ahead, whether that’s a leisurely ride or a challenging race.
Final thoughts
In summary, painting ABS plastic motorcycle fairings is not just an aesthetic choice; it is a multifaceted process that can dramatically affect a motorcycle’s appearance and quality. From careful surface preparation to the application of a protective clear coat, each step plays a vital role in achieving a professional finish. Ensuring optimal curing conditions further enhances the durability of your work. By mastering these techniques, business owners can offer superior painting services that meet their customers’ desires for both style and longevity.
Ready to elevate your ride? Summit Fairings delivers premium, custom-fit fairings that blend style and durability. Whether you’re chasing speed or turning heads, we’ve got your bike covered. Don’t wait—transform your machine today. Click, customize, and ride with confidence. Your perfect fairing is just a few clicks away. Act now!
About us
We are one of the leading motorcycle fairing export sites, with over 3,000 styles across almost all motorcycle models. Buy from summitfairings.com, and pay 10-40% less than the prices on other sites. If you have any questions, we promise we will have your answer within six hours.