Introduction
Painting motorcycle fairings matte black not only enhances their aesthetic appeal but also offers an opportunity for businesses to provide customized services that stand out in a competitive market. This article will guide business owners through the meticulous preparation, painting, curing, and finishing process necessary to achieve a durable and visually striking matte black finish. Each chapter will build upon the previous one, ensuring you have a comprehensive understanding of how to meet your customers’ expectations while maximizing your craftsmanship.
Tables of Contents
Chapter 1: Achieving a Flawless Matte Black Finish: A Comprehensive Guide to Preparing Motorcycle Fairings
- Meticulous Surface Preparation: The Cornerstone of a Perfect Matte Black Finish for Motorcycle Fairings
Chapter 2: Mastering the Art of Finishing: Techniques for Painting Motorcycle Fairings Matte Black
- Precision Prospects: Mastering Paint Application for a Flawless Matte Black Finish on Motorcycle Fairings
Chapter 3: Crafting a Flawless Matte Black Finish for Motorcycle Fairings: The Essential Preparation Steps
- Thorough Preparation: The Key to Mastering Matte Black Motorcycle Fairing Paint Projects
Chapter 4: Mastering the Art of Matte Black: A Guide to Painting Motorcycle Fairings
- Transforming Your Ride: Professional Techniques for Matte Black Fairing Finishes
Chapter 1: Achieving a Flawless Matte Black Finish: A Comprehensive Guide to Preparing Motorcycle Fairings

1. Meticulous Surface Preparation: The Cornerstone of a Perfect Matte Black Finish for Motorcycle Fairings
When it comes to painting motorcycle fairings matte black, one of the most critical components of the process is ensuring that the surface preparation is performed meticulously. The shine-free allure of a matte finish not only enhances the aesthetics of a bike but also reflects the quality of workmanship involved in achieving that finish. A flawless matte black outcome requires a strategic approach that incorporates the right materials and a thorough understanding of each step leading up to the painting process.
Cleaning the Surface
The journey begins with cleaning, a fundamental step that sets the stage for everything that follows. Utilizing a degreaser specifically formulated for automotive surfaces is essential. This cleaning process removes oils, waxes, dirt, and other contaminants that might be lurking on the surface of the fairing. Without a clean slate, any imperfections—including small particles like dust or grease—can prevent proper paint adhesion, leading to undesirable outcomes like peeling or uneven texture later on.
In practice, cleaning should be thorough but gentle. Start by applying the degreaser across the entire fairing. Allow the solution to sit for a few minutes, so it can effectively break down the built-up grime. Following this, a non-abrasive cloth or sponge should be used to wipe away the residues, ensuring that no lingering contaminants remain.
Sanding for Smoothness
Once you have a clean surface, the next step is sanding, which serves two critical purposes: creating a “key” for the paint to grip onto and smoothing out any imperfections or old finishes. It’s essential to approach this step with care. Starting with 600-grit sandpaper helps in the initial phase where deeper scratches or old clear coats must be addressed. As you progress, gradually switch to finer grits, such as 1200 and 1500, which play a vital role in achieving a smooth finish without making the fairing glossy.
Employing a sanding block or a dual-action (DA) sander will help maintain even pressure across the surface, which prevents creating uneven spots that can lead to a patchy paint job. Sanding should be done uniformly, ensuring that all areas receive equal attention. It’s important to avoid over-sanding in any single spot, as this can create dips or imperfections that will be noticeable once the matte black paint has been applied.
After sanding, it is crucial to eliminate any residual dust that may have settled on the surface. A tack cloth proves to be invaluable in this situation. It will attract and hold dust particles securely, making it a fantastic tool for ensuring the surface is free from any debris prior to the application of primer or paint. Alternatively, compressed air can be used to blow away any leftover particles, although one should take care not to direct oil from the compressor onto the surface.
The Importance of Primer
For a successful matte black finish, using a high-quality primer is a non-negotiable step. The primer serves as the foundation upon which your paint will adhere and can significantly enhance the longevity and durability of the finished product. When selecting a primer, it’s vital to choose one specifically designed for plastic or ABS materials, which are the primary components of most motorcycle fairings.
Applying the primer should be executed with precision. Think of it as laying the groundwork for a solid painting strategy. When priming, applying multiple thin coats rather than one thick coat is advisable. This approach reduces the risk of runs and ensures a more uniform texture, while giving the primer adequate time to dry between applications.
Most manufacturers provide guidelines on drying times, and it is crucial not to rush this process. A well-dried primer will help in forming a robust bond with the paint. Once the primer has completely cured, a light sanding using finer sandpaper (around 1500 to 2000 grit) can further enhance the surface texture and interaction with the subsequent paint layers.
The Art of Painting
Now comes the moment that many have been waiting for: the act of applying the matte black paint. For the best results, a high-quality automotive paint tailored specifically for plastic surfaces should be used. This choice not only ensures outstanding adhesion but also helps achieve the desired matte finish.
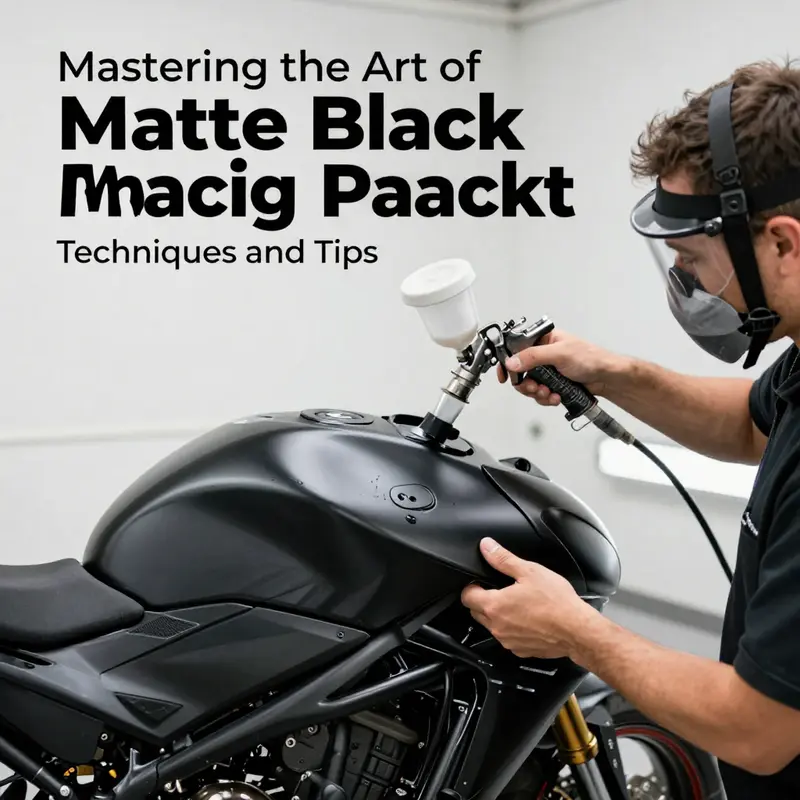
When it comes to application method, utilizing an HVLP (High Volume Low Pressure) spray gun allows for optimal control, delivering fine atomization and an even application. Start by firming your grip on the spray gun and hold it at a consistent distance (typically 6-12 inches) from the fairing to maintain even coverage. Striking a balance between speed and precision is essential to prevent runs or drips—issues that can hamper the beauty of your matte black finish.
The technique involves applying multiple thin coats of paint to build up the color without obscuring the matte effect or creating an orange peel texture. After laying down your first coat, allow it to flash off. This term refers to the period during which the paint dries slightly before the next application. The ideal window allows the subsequent layer to bond properly without disrupting the initial coat. Generally, waiting anywhere from 10 to 20 minutes between coats is advisable, although specific products may have particular recommendations.
Sealing the Finish with Clear Coat
While many may consider the painting process complete after applying the matte black paint, the finishing touch involves applying a matte clear coat. This step serves dual purposes: it adds an extra layer of protection against environmental damages such as UV rays and scratches, while ensuring the retained matte finish remains distinct and vibrant.
Choosing the right clear coat is crucial; regular clear coats typically impart a gloss that will undermine the non-reflective quality that makes matte black so appealing. Instead, look for a matte clear coat specially formulated to complement matte finishes and maintain the unique aesthetics associated with matte black. The application process should mimic that of the paint to ensure consistent coverage, and again, multiple thin applications are critical.
Working in the Right Environment
Throughout the surface preparation and painting process, the environment cannot be overlooked. Ideally, this undertaking should take place in a clean, well-ventilated space—preferably a dedicated spray booth. This type of environment minimizes the risk of airborne contaminants such as dust and debris landing on wet paint, which can mar the finish and compromise the final result.
Wearing appropriate protective gear is also important when mixing and applying paints and primers. Gloves, masks, and goggles can protect against harmful fumes and direct contact with harmful substances. Any precautions taken will contribute to achieving that flawless matte black finish, reflecting both skill and care in your work.
In conclusion, the meticulous nature of preparing motorcycle fairings for a matte black paint job cannot be overstated. Every step, from cleaning and sanding to priming and painting, combines to create a cohesive process that leads to a polished finish. Undertaking this comprehensive approach ensures the longevity and appearance of your motorcycle fairings, enhancing both the look and durability of your ride. Armed with the right tools, techniques, and a strategic mindset, anyone can embrace the art of creating a stunning matte black finish, transforming their motorcycle into a true embodiment of style and performance.
Chapter 2: Mastering the Art of Finishing: Techniques for Painting Motorcycle Fairings Matte Black
1. Precision Prospects: Mastering Paint Application for a Flawless Matte Black Finish on Motorcycle Fairings
Achieving a professional matte black finish on motorcycle fairings involves a symphony of precision, patience, and the right techniques. Each step in the process not only influences the eventual aesthetic quality but also the durability and longevity of the paint job. This subchapter will guide you through the nuanced paint application techniques necessary for a successful transformation of your motorcycle fairings, ensuring that the end result is not only visually stunning but also robust enough to withstand the rigors of the road.
Surface Preparation: The Foundation of a Flawless Finish
Before opening a can of paint, meticulous preparation of the fairing is paramount. The very first step begins with cleaning, as any oils, dirt, or previous wax coatings can inhibit paint adhesion. A degreaser specifically formulated for plastics should be employed here, ensuring that all contaminants are thoroughly removed. Its use sets a clean slate for the painting process, which is especially important given the fine finish we are aiming to achieve.
Following cleaning, the preparation continues with sanding. Using sandpaper with a grit between 800 and 1200, lightly scuff the surface of the fairing. This action is crucial not just for removing imperfections but for creating a texture that facilitates the bonding process of the paint. Gentle circular motions are best, ensuring an even application across the surface area. After sanding, a secondary cleaning with a tack cloth or a microfiber cloth is necessary to eliminate any residual dust that might compromise adhesion or create imperfections in the paint layer.
Next, take the time to assess the fairing for any imperfections like scratches or blemishes. Often, these can be remedied with body filler or a primer surfacer that can fill in minor gaps or irregularities. The use of these materials, followed by thorough sanding, guarantees a smooth foundation for your eventual paint application. Remember, the quality of your surface preparation will echo through the vivid matte black finish you strive for.
Priming: The Key to Long-Lasting Adhesion
Once the fairing is spotless and smooth, the next step involves the application of a high-quality plastic primer. Choose a product that is specifically designed for plastics, as typical primers may not adhere well and could lead to future peeling or flaking. Apply the primer in thin, even coats using an HVLP (High Volume Low Pressure) spray gun. This choice of equipment allows for a fine atomization of the primer, facilitating a more uniform application while minimizing overspray. Each coat should be allowed to dry according to manufacturer instructions, typically around 20-30 minutes being sufficient, ensuring that you achieve a robust bonding layer for the paint.
The beauty of primer lies in its versatility—aside from providing excellent adhesion, it often introduces a subtle color that can enhance the deepness of the matte black once the topcoat is applied. A misty primer layer can serve as the perfect backdrop, making the subsequent paint’s finish appear richer and more vibrant.
Painting: Techniques for Achieving the Perfect Matte Black
With your fairings prepped and primed, the exhilarating part begins—painting. Selecting the right matte black urethane paint is crucial. Opt for a product that is tailored for automotive applications, as these formulations tend to offer superior durability alongside resistance to chemicals and UV rays. A higher-performance urethane will withstand the harsh environmental elements much better than typical spray paints, promising longevity alongside aesthetics.
When it comes to the application technique, remember: patience is paramount. Utilizing the same HVLP spray gun employed for priming, begin applying thin layers of paint. A general rule is to maintain a distance of about 6-8 inches from the surface, moving the gun in a steady side-to-side motion to ensure an even application without runs or sags in the paint.
Apply multiple thin coats, allowing for adequate drying time between applications—this is often around 10-15 minutes but should always align with the paint manufacturer’s instructions. The benefit of applying several thin layers instead of one thick coat is significant; it helps prevent drips while allowing for a better finish. As you work, be vigilant against common pitfalls such as overspray or paint pooling in certain areas, as these can spoil the desired matte effect.
Finalizing the Finish: Curing and Topcoating
After achieving the final coat of paint, the crucial drying phase begins. It’s critical to adhere to the specific drying times as outlined by the paint manufacturer—typically ranging from 24 to 48 hours—ensuring that the paint sets perfectly before any further handling. During this time, the painted surfaces should remain untouched, allowing temperatures to stabilize and avoiding any inadvertent marks or impressions.
For those who aspire to extend the life of their matte finish, applying a clear matte topcoat is an advisable option. This step is particularly effective in providing an additional layer of protection against UV rays, scratches, and other environmental damage, while preserving that alluring matte appearance. This topcoat should also be applied using the HVLP spray gun, following similar techniques—thin, even layers with proper drying times in between—to prevent a glossy finish that could detract from the desired aesthetic.
After the topcoat, a final light sanding with very fine grit paper (around 3000-5000) can be carried out to eliminate any minor imperfections and to refine the matte finish further. Approach this action delicately, ensuring you maintain the integrity of the fresh matte black layer while smoothing any irregularities.
Lastly, the total curing period should be respected. Only after several days of curing can the fairings be safely handled or reinstalled on the motorcycle, guaranteeing that the hard work put into this painting endeavor is preserved.
The Importance of Environment and Preparation
Throughout this entire process, maintaining a clean and dust-free environment cannot be overstated. Ideally, you should work in a dedicated spray booth or a well-ventilated garage that is free from contaminants. Dust particles in the air can settle on the wet paint, leading to unnecessary blemishes on the freshly coated surface. Ensuring that your workspace is organized and clean before beginning will significantly enhance the outcome of your project.
In conclusion, each step of the painting process—from the initial preparation of the fairings through to the final application techniques—needs to be executed with care and precision. By adhering to these steps and utilizing high-quality materials and equipment, you are guaranteed a stunning matte black finish that not only enhances the aesthetics of your motorcycle but ensures its resilience against the elements. With the right approach, you can transform your fairings with confidence, knowing that the matte black finish will serve you well for miles ahead. For additional insights and specific product recommendations, refer to manufacturers’ technical data sheets, ensuring you have the supporting information necessary for a flawless outcome.
For more detailed resources, consider checking specialized products that focus on motorcycle fairing paint systems which can offer tailored solutions for your project: [PPG Motorcycle Fairing Paint Systems].
Chapter 3: Crafting a Flawless Matte Black Finish for Motorcycle Fairings: The Essential Preparation Steps
1. Thorough Preparation: The Key to Mastering Matte Black Motorcycle Fairing Paint Projects
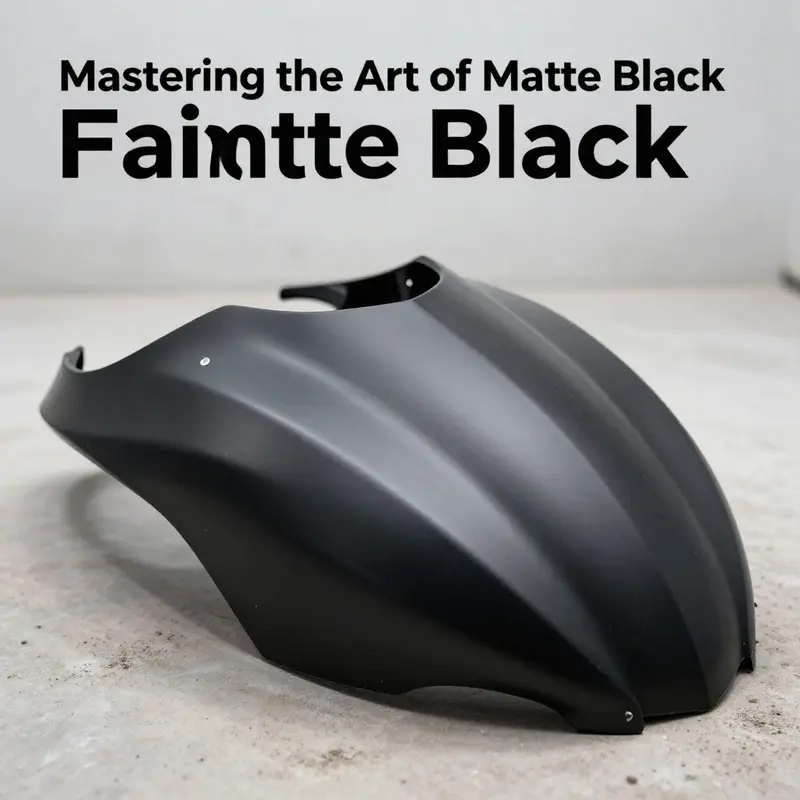
Achieving a professional-grade matte black finish on motorcycle fairings hinges on diligent preparation and attention to detail. The journey toward a stunning transformation begins well before the first stroke of paint. It starts with the removal of the fairings from the motorcycle, creating an unencumbered canvas that allows you to work without fear of overspray or damaging adjacent components. This step seems simple, yet it sets the stage for the success of the entire project, granting you necessary access to meticulously prep every inch of surface.
Once the fairings are removed, the thorough cleaning process comes next. It is crucial to eliminate any old wax, grease, dirt, or grit that may have accumulated over time. Using a dedicated plastic cleaner or a mild soap solution serves this purpose well; ensuring that you scrub every nook and cranny with care guarantees that no contaminants will interfere with the painting process. Once you’ve finished scrubbing, do not overlook the rinsing step—thoroughly rinse away all cleaning agents and debris before drying your fairings completely. Moisture left behind can prevent the paint from adhering properly, ultimately compromising the finish.
With the surface cleaned, you next need to prepare the finish through sanding. This is where the project begins to take on a more tactile form. Starting with coarse sandpaper around 800 to 1000 grit, gently abrade the surfaces of the fairing. This initial step creates a slightly textured surface, enhancing the mechanical bond between the primer and the original plastic of the fairing. Gradually move to finer grits of sandpaper, working your way up to around 2000 grit. Each pass reduces the coarseness and refines the surface for optimal paint adhesion. It’s crucial to remember that the purpose of sanding is not to remove all surface detail but rather to create an ideal texture for the next steps of the process.
After sanding, dust and debris need to be completely cleared from the surface. Utilizing a tack cloth or compressed air works wonders here, meticulously removing any particles that could mar the finish. The preparation at this stage cannot be overstated; every speck of dust can lead to unsightly imperfections in the final product.
Once the surfaces are clean and smooth, the application of a plastic bonder becomes essential. These specialized products are designed to chemically bond with the plastic of the fairings, ensuring that your primer will stiffly adhere to the surface. This step is particularly important because the unique materials used in motorcycle fairings, like ABS plastic, often require additional measures to ensure longevity and durability in the finish. It’s vital to follow the manufacturer’s instructions precisely during this phase, allocating enough curing time to allow the bonder to create a strong foundation on which to paint. While waiting, consider lightly sanding once more with fine-grit sandpaper to achieve a super-smooth surface that is ready for the primer.
Following the curing time, it’s time to tackle the primer. Understanding the significance of this step can vastly improve your results—it acts as the intermediary between the fairing and the paint, providing a smooth surface that helps avoid any issues such as chipping or peeling down the line. Prepare your primer according to the guidelines provided by the manufacturer, which may involve thorough mixing to ensure even consistency. When applying, opt for a high-quality spray gun whenever possible, as it delivers more evenly distributed coats compared to traditional aerosol cans. Aim for two thin, even layers of primer, allowing proper drying time between each application. Ideally, you should allow the primer to cure ahead of time—many primers benefit from an extended drying period to maximize bond strength.
With proper application and curing of the primer, you are now poised to transition into the painting phase. By incorporating these preparation steps diligently, you set the groundwork for a flawless matte black finish. This careful process not only enhances the aesthetic appeal of your motorcycle but also ensures that your hard work will last against various elements and wear over time. The transformation you are creating is not merely about color; it is about reinvigorating the life of your motorcycle, adding a touch of unique personality, and allowing it to shine—albeit in a beautifully understated matte black finish that turns heads.
As you continue your project, take advantage of expert techniques and safety recommendations noted in various resources. For instance, the official tutorial provided by Motorcycle Mechanics Institute serves as an excellent guide, enhancing your expertise in the precise steps involved in painting motorcycle fairings. Following these guidelines, alongside working efficiently and safely, will equip you to achieve an exceptional finish that not only looks striking but stands the test of time.
For those looking to personalize their motorcycle with a matte black aesthetic, accessing tailored fairings storage options can significantly ease the workload. Explore collections catering to your specific model, ensuring your custom project retains the integrity of your ride’s identity while enhancing its visual appeal. Whether it be a Honda or a Yamaha, the right fairings can streamline the process, allowing for an efficient transition between preparation and exhibition of your craft.
Ensuring every stage of preparation is executed with precision and care serves as reassurance for your ambitious project. With a methodical approach, the journey to painting your motorcycle fairings matte black can be an enjoyable and satisfying experience, resulting in a polished finish that reflects not only skill but your personalized vision for your beloved motorcycle.
Chapter 4: Mastering the Art of Matte Black: A Guide to Painting Motorcycle Fairings

1. Transforming Your Ride: Professional Techniques for Matte Black Fairing Finishes
Achieving a professional finish when painting motorcycle fairings matte black demands more than merely applying paint to plastic surfaces. It requires a methodical approach characterized by meticulous surface preparation, careful application techniques, and an understanding of environmental conditions that can influence the outcome of the project. With the right practices in place, even amateur painters can elevate their results to a level that resembles a high-end workshop finish.
The journey toward a flawless matte black motorcycle fairing begins with surface preparation. This is critical as the performance of your paint job is heavily reliant on the substrate’s condition. Start by thoroughly cleaning the fairings to remove any grease, oil, or contaminants that can interfere with paint adhesion. An effective degreaser will aid in this phase, ensuring the surface is free from residue that could ultimately jeopardize your efforts.
Once cleaned, it’s essential to focus on sanding the surface, a pivotal step that often dictates the success of the matte finish. Rather than opting for coarse grit sandpaper, which can create deep scratches, using fine-grit sandpaper in the range of 800-1200 grit is advisable. This approach smooths out imperfections, providing the paint an ideal canvas that promotes uniformity and helps to avoid the unsightly orange peel effect in the final product. During this stage, pay attention to any damaged areas, using a fine-bodied filler if necessary to ensure a consistently smooth surface. Follow up the sanding process with a thorough wipe-down using a tack cloth to eliminate all dust created by the sanding action. This step cannot be overlooked since any remaining particles can compromise the adhesion of your primer and subsequent coats.
Next, selecting the right paint is paramount. Because matte finishes lack gloss, they reflect light differently compared to their glossy counterparts, making it essential to choose paint that is expressly formulated for low-gloss applications. High-quality automotive paints typically feature additives that enhance flow and leveling, crucial for achieving the seamless look desired when finishing with matte black. When applying the paint, adopting a technique that emphasizes thin, even coats will yield far superior results compared to a heavy application. Using a quality spray gun or airless sprayer helps prevent the accumulation of paint that can lead to drips or runs, which are particularly noticeable in matte finishes. Each coat should be applied with a consistent, steady motion, keeping the spray nozzle approximately 6 to 8 inches from the surface and ensuring to overlap strokes slightly to avoid spotty coverage.
Allow each layer to dry thoroughly and flash off before moving on to the next coat. This not only helps with adhesion but also builds up the depth of color and finish. Rushing this process can lead to lifting paint or uneven texture, issues that are particularly telling in a matte black application where smoothness is everything.
When it comes to environmental factors, temperature and humidity must be controlled for optimal painting conditions. Ideally, the workspace should be maintained at a temperature between 65-75 degrees Fahrenheit, with humidity levels below 50%. High humidity can introduce moisture that may cause defects like pinholes or even bubbling in your finish, while extreme heat may lead to accelerated drying times that can affect how the paint lays down.
The curing process following the application of the final coat is equally important. Many novice painters may be inclined to rush this stage, but it is crucial to allow sufficient time for the paint to fully cure—typically several days under ideal conditions. This interval ensures maximum durability and allows the intended matte haze to settle into place beautifully. Cutting corners at this point can lead to soft spots or easily marred surfaces, rendering even the best-quality paint ineffective.
For those seeking to add an extra layer of durability and extend the life of their finish, employing an optional clear matte sealer can be immensely beneficial. This sealer acts as a protective barrier against UV rays, chemicals, and minor scratches, safeguarding the integrity of the matte surface without sacrificing its visual appeal. However, make sure to choose a product compatible with matte finishes to avoid inadvertent glossiness that detracts from the intended aesthetics.
Throughout this process, remain vigilant about your workspace. A clean, dust-free environment significantly enhances the likelihood of achieving a flawless matte black finish. Not only does dust contribute to an uneven paint application, but it can also become embedded within the layers, leading to an unsightly end result. Additionally, wearing appropriate protective gear is essential—not only for your safety but also to maintain the integrity of the application process.
In summary, transforming your motorcycle fairings into a stunning matte black finish involves a blend of preparatory diligence, adherence to recommended application methods, and an awareness of the conditions surrounding your painting environment. By putting these principles into practice, you can ensure that your efforts yield results that not only enhance the appearance of your bike but also last for years to come, leaving you with a ride that showcases your commitment to quality and detail. For further resources or to browse a selection of motorcycle fairings that might inspire your next project, check out available options tailored specifically for a variety of models.
Final thoughts
In conclusion, painting motorcycle fairings matte black is a detailed process that, when done correctly, can significantly enhance the appeal and longevity of the products you offer. By following the outlined steps—from thorough preparation and careful application to proper curing and finishing techniques—business owners can deliver high-quality results that not only satisfy customers but also elevate their business reputation. Embracing these practices will set you apart in the industry, enabling you to meet the demands of modern motorcycle enthusiasts effectively.
Ready to elevate your ride? Summit Fairings delivers premium, custom-fit fairings that blend style and durability. Whether you’re chasing speed or turning heads, we’ve got your bike covered. Don’t wait—transform your machine today. Click, customize, and ride with confidence. Your perfect fairing is just a few clicks away. Act now!
About us
We are one of the leading motorcycle fairing export sites, with over 3,000 styles across almost all motorcycle models. Buy from summitfairings.com, and pay 10-40% less than the prices on other sites. If you have any questions, we promise we will have your answer within six hours.