Repairing motorcycle plastic fairings is essential for maintaining not just aesthetics, but also performance and safety. With fairings made from materials like lightweight ABS plastic, the ability to restore cracked, scratched, or worn panels can save businesses significant costs compared to full replacements. In the upcoming chapters, we’ll explore effective techniques for repairing plastic fairings, the materials and tools necessary for successful restoration, and the economic benefits that come with choosing repair over replacement, establishing a well-rounded understanding for business owners in the motorcycle industry.
From Shattered Lines to Seamless Curves: Mastering the Craft of Rehabilitating Plastic Motorcycle Fairings
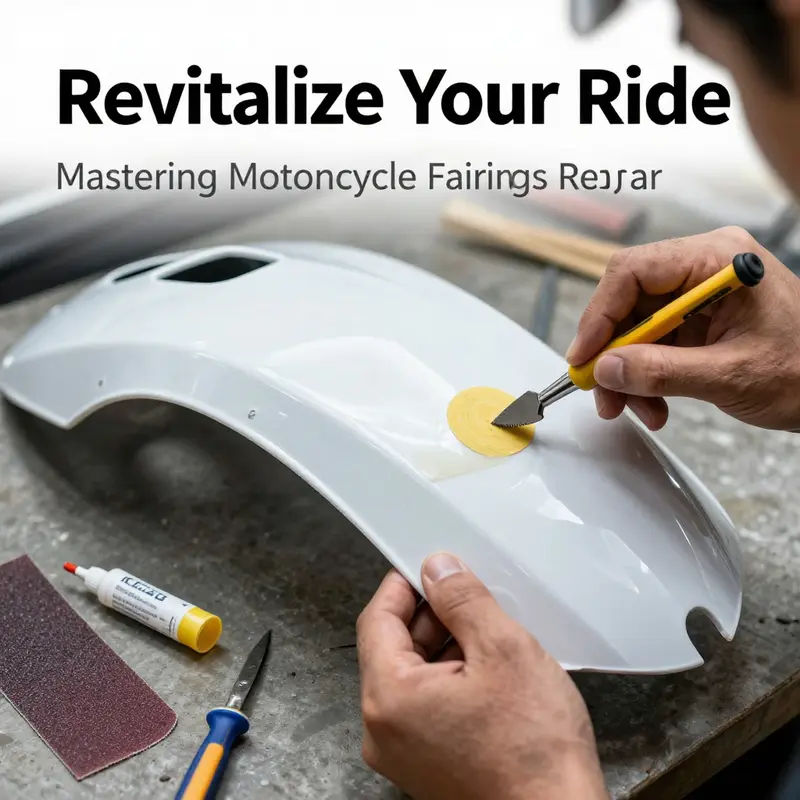
The body of a sport bike tells a story in lines and curves as much as in the ride itself. When a fairing cracks, warps, or loses its gloss to the sun and road grime, the bike loses part of its silhouette and its confidence. Repairing plastic fairings is not merely a matter of aesthetics; it is a careful balance of restoring function, preserving weight, and maintaining aerodynamic integrity. The materials most commonly used for these panels are ABS plastics, chosen for their lightness, impact resistance, and the way they respond to heat and glue. ABS’s resilience makes it possible to salvage damaged panels through a suite of techniques that range from cosmetic refinishing to structural rebuilding. The decision to repair or replace hinges on several factors: the extent of the damage, the fairing’s role in the bike’s aerodynamics, the cost of replacement versus repair, and the availability of panels that match the bike’s exact model and year. A well-executed repair can be a cost-effective alternative to replacement, especially when the damage is confined to a single panel or a small number of panels in a modular fairing kit. As with any repair project, preparation is the foundation. The work area must be clean and well-ventilated, the surfaces free of grease and dust, and the tools laid out in a logical sequence so that the repair proceeds smoothly from start to finish. In the hands of a careful practitioner, the same ABS panel that cracked during a low-speed tumble can be restored to near-original strength and appearance, while keeping the overall weight balance and fitment of the original design intact.
The repair journey begins with a clear assessment of the damage. Minor scratches and surface wear are not the same as cracks that cut through the panel or dents that distort the curvature. The type of damage guides the choice of technique and the expected outcome. When scratches only skim the surface, the path is simple: light sanding, polishing, and a careful return to a pristine finish. Sanding must be done with progressively finer grits to avoid leaving new scratches behind, and polishing compounds help restore the smooth, glassy finish that weather and UV light tend to dull. In some cases, even a hidden gem of a cosmetic fix exists: a non-gel toothpaste can serve as a gentle polishing aid for very light scratches. It is not a substitute for proper coatings, but it can help the panel regain a uniform appearance before the final sealant is applied.
Cracks and tears, especially in the areas where the panels join or around mounting points, require more deliberate methods. For smaller cracks, adhesive bonding is often enough to restore strength. High-strength two-part epoxies or AB glues are designed to bond plastics like ABS, forming a joint that remains flexible enough to tolerate the vibrational forces of riding without snapping again. A crucial step is surface preparation: clean the area, lightly scuff the surface with fine sandpaper to create a good grip for the adhesive, and ensure there is no oil or wax residue left on the plastic. The adhesive is then mixed according to the manufacturer’s instructions and applied carefully to both sides of the crack. Pressure is held with clamps or tapes until the material cures. The goal is a seamless joint that remains bonded through heat cycles and the flex of the fairing during riding.
For more robust repairs where the structural integrity is at stake, plastic welding offers a different path. A plastic welding kit uses heat and a compatible filler rod to fuse the edges of the crack, creating a multilayered bond that is typically stronger than adhesive alone. This method requires a steady hand, a controlled heat source, and a confident understanding of how ABS behaves when heated. It is not a cure-all; welds must be ground smooth and carefully finished to keep seams invisible or nearly so. In skilled hands, plastic welding can restore a fairing that might otherwise be written off as beyond repair.
When larger damages have resulted in significant deformation or missing portions, the repair process becomes a two-step drama. First, the surface is restored with a filler material designed for plastics. These fillers, often labeled as body fillers or “atomics,” are applied in thin layers to rebuild the contour. Each layer is allowed to cure and then sanded down with progressively finer grits, typically starting around 400 and finishing near 1500 for a level surface. The aim is not merely to fill; it is to recreate the original curvature so that the panel sits flush against its mates and aligns with the rest of the bike’s silhouette. The sanding must be meticulous to prevent creating new ridges that the final clear coat would have difficulty camouflaging.
Even when a panel looks salvageable, there are practical limits. If the fairing has large fractures that split components, or if warping and heat damage have altered the panel beyond its original shape, the economics of repair begin to tilt toward replacement. Original equipment manufacturer (OEM) parts, or aftermarket replacements designed to fit like the originals, offer the best guarantee of fit and function. They also maintain the weight distribution and aerodynamic properties that the bike was engineered to have. Replacement should not be a knee-jerk choice, but a calculated decision when the cost and effort of restoration exceed the value of a proper new panel.
Across these phases, one constant remains: preparation. The surface must be clean enough to see every scratch, every burr, and every seam line. A degreaser or isopropyl alcohol wipes away oils and residues that would prevent adhesives from bonding or fillers from adhering. The ambient temperature and humidity matter, too. Epoxies and fillers cure best in a stable environment, free of dust and with a predictable humidity level that won’t induce cracking as the material hardens. The masking tape is not a cosmetic prop but a shield that protects adjacent plastics and painted surfaces from overspray, dust, and accidental bonding. It is a quiet reminder that the repair is as much about controlling the process as it is about the materials themselves.
From there, the repair unfolds with a careful choreography of steps that respects both physics and aesthetics. When repairing shallow scratches, you begin with gentle sanding to feather the edges, followed by polishing to restore the gloss. The sanding must be even and consistent, or you risk leaving micro-scratches that the final clear coat would have difficulty camouflaging. The polishing compound acts as a pre-sealant to smooth the micro-abrasions and begin the process of returning the panel to its original smoothness. A common, practical tip for minor scratches is to consider a layer of paint-safe wax at the end of the process; it’s not a substitute for proper refinishing, but it helps shield the surface from future wear and makes the transition between repaired and unrepaired areas less noticeable.
For cracks and tears, the adhesive route begins with a precise amount of resin-based glue applied along the length of the crack, ensuring both sides are brought together and aligned. A clamp holds the two sides in position while the adhesive cures. There is a moment of quiet expectation when the creak of the clamp shifts to a satisfactory solid no-squeak grip. If the crack runs across a corner or follows a seam line, care must be taken to ensure that the joint is not starved of adhesive at the crack’s apex where most stress concentrates. It is not uncommon to see a second pass of adhesive after the first cure to guarantee a robust bond.
The alternative weld approach uses a plastic welder to heat-bind the edges and add a filler rod that blends with the original material. This approach often yields a more durable repair in terms of load-bearing capacity, though it requires more skill and a controlled environment. After the weld, the seam is ground smooth and prepped for refinishing. The bonding surface should then be cleaned again to remove any residual resin or fragments from the grinding operation, which could mar the next steps.
In the case of larger dents and deformation, the repair takes on a semi-scientific air. The filler is mixed with the correct hardener and applied to the low spots, then shaped with a flexible spreader to recreate the fairing’s smooth curvature. The next move is crucial: sanding. Start with 400 grit to level the surface, then step through 600, 800, 1000, and 1500 grits to achieve a near-mirror finish. It is this painstaking process that determines whether the final paint will adhere evenly and whether the gloss will match the surrounding panels. The more precise the sanding, the less obvious the repaired area becomes once color and clear coat are added.
Even when a panel looks salvageable, there are practical limits. If the fairing has large fractures that split components, or if warping and heat damage have altered the panel beyond its original shape, the economics of repair begin to tilt toward replacement. Original equipment manufacturer (OEM) parts, or aftermarket replacements designed to fit like the originals, offer the best guarantee of fit and function. They also maintain the weight distribution and aerodynamic properties that the bike was engineered to have. Replacement should not be a knee-jerk choice, but a calculated decision when the cost and effort of restoration exceed the value of a proper new panel.
Across these phases, one constant remains: preparation. The surface must be clean enough to see every scratch, every burr, and every seam line. A degreaser or isopropyl alcohol wipes away oils and residues that would prevent adhesives from bonding or fillers from adhering. The ambient temperature and humidity matter, too. Epoxies and fillers cure best in a stable environment, free of dust and with a predictable humidity level that won’t induce cracking as the material hardens. The masking tape is not a cosmetic prop but a shield that protects adjacent plastics and painted surfaces from overspray, dust, and accidental bonding. It is a quiet reminder that the repair is as much about controlling the process as it is about the materials themselves.
From there, the repair unfolds with a careful choreography of steps that respects both physics and aesthetics. When repairing shallow scratches, you begin with gentle sanding to feather the edges, followed by polishing to restore the gloss. The sanding must be even and consistent, or you risk leaving micro-scratches that the final clear coat would have difficulty camouflaging. The polishing compound acts as a pre-sealant to smooth the micro-abrasions and begin the process of returning the panel to its original smoothness. A common, practical tip for minor scratches is to consider a layer of paint-safe wax at the end of the process; it’s not a substitute for proper refinishing, but it helps shield the surface from future wear and makes the transition between repaired and unrepaired areas less noticeable.
For readers seeking practical references, it helps to consult experienced guides that consolidate the best practices into actionable steps and visuals. These resources can be invaluable for confirming bonding points, recommended grit progressions, and best-practice timing for curing and painting. When choosing to consult external or supplier guides, look for sources that offer clear, step-by-step instructions, cautionary notes about heat and solvents, and visual demonstrations of successful repairs. A well-structured guide can save time and prevent the frustration that often accompanies the first attempt at a plastic fairing repair.
If you’re exploring replacement parts while considering repair options, you can explore the Honda fairings collection to understand the relationship between OEM and aftermarket panels and how modular designs influence both repair and replacement decisions. Honda fairings collection presents a catalog-style sense of what is available for a wide range of Honda sport bikes, including common models with robust aftermarket support. Understanding the variety of shapes and mounting strategies helps in planning a repair that respects the original geometry and mounting points, which in turn supports a more accurate paint match and a cleaner final finish.
Ultimately, the right approach rests on a careful assessment and a realistic sense of when to pursue replacement. The repair pathway outlined here aims to empower riders to salvage panels when feasible, while recognizing that certain scenarios call for replacement with OEM or aftermarket panels to restore the bike’s original aesthetics and performance. In the end, a repaired fairing should feel as solid, aligned, and visually cohesive as the rest of the motorcycle, allowing the rider to focus on the ride rather than on the scar that sparked the decision to repair in the first place. If the repair project extends beyond the scope of a single weekend, that’s a natural consequence of treating each layer of the process with care. The reward is a bike that looks and rides with a renewed sense of purpose, the product of methodical work that respects the materials and the design intent of the original fairings.
External resource for deeper methods and visuals: Motorcycle Repair Tips for Plastic Fairings, which provides additional demonstrations and troubleshooting advice for common repair scenarios: https://www.motorcycle.com/motorcycle-repair/plastic-fairing-repair-tips/.
From Cracks to Confidence: Mastering Materials and Tools for Repairing Motorcycle Plastic Fairings
Repairing motorcycle plastic fairings is more than a quick patch. It is a careful reconciliation of material science, manual skill, and a painter’s eye, all aimed at restoring the bike’s shape, strength, and shine without resorting to a full replacement. The fairings that cloak a motorcycle are often made from impact-resistant plastics such as ABS or polycarbonate blends. These materials blend lightness with stiffness, a combination that helps the bike cut through air while withstanding road debris and the occasional tip-over. When fairings suffer cracks, dents, scratches, or breaks—whether from a low-speed tumble, a stray rock, or hours of sun exposure—the decision to repair rather than replace becomes both economical and environmentally responsible. Yet the path from a damaged edge to a smooth, seamless surface is paved with precise material choices, careful surface preparation, and a methodical sequence of steps that respect the integrity of the original panel and the aesthetics of the finished paint job.
Understanding the materials is the first anchor. ABS and PC plastics behave differently under heat, stress, and solvents. ABS, common in many OEM fairings, softens at moderate temperatures and flows when melted, allowing a repair to fuse into the base material if the right heat and filler are used. Polycarbonate, valued for toughness, requires more controlled heat input and sometimes different filler or welding rod formulations to avoid crystallization or heat distortion. The key is to match the repair approach to the plastic type. This is not about finding a magic adhesive that works everywhere; it is about selecting a compatible welding rod for the plastic, or a specialized filler when shaping a dent or crack, so the repaired area responds like the original when cooled. In a practical repair, the rod or filler should melt and fuse with the host material, forming a solid bond that resists future cracks and does not peel away from the surface under sun and heat.
For deeper deformations, a plastic repair compound or two-part epoxy-based filler becomes essential. The goal is not simply to fill a hole but to recreate the original contour and edge geometry. The filler must harden into a stable mass that sands flush with surrounding material and that doesn’t shrink, crack, or pull away from the substrate as it ages. Because the repair will be painted, the surface must accept paint uniformly. That is where adhesion promoters or plastic-specific primers enter the process. A modern repair typically begins with a primer that cleans and slightly roughens the surface at a molecular level, creating a chemical key for the subsequent repair material. Without this step, repairs can peel or delaminate in a matter of months, especially in the harsh UV and temperature cycles faced by motorcycles outdoors.
The sequence of preparation is deliberate and exact. Surfaces are cleaned with a solvent that removes oils, waxes, and residues from the factory process or prior repairs. Contaminants create weak spots where adhesives or fillers fail to bite. After cleaning, high points are identified, and a careful plan is laid for whether to weld, fill, or both. For hairline cracks that radiate from a mounting point, welding the crack closed with compatible rods creates a closed seam that distributes stress along the original material. For dents, a combination approach often works best: fill the deepest hollows with a plastic repair compound, sculpt to match the surrounding contour, and then refine with progressive sanding to feather the repair into the original surface.
The repair is not just a structural matter; it is an aesthetic one as well. A flawless repair must vanish beneath paint. This requires a sequence of sanding that begins coarse enough to remove excess material and shape the repair, and gradually moves toward extremely fine grits to achieve a mirror-smooth surface. A sanding block becomes essential here, preserving flat planes and preventing low spots that would telegraph through paint. Between grit changes, a tack cloth removes dust to prevent gritty inclusions from locking into the primer. The primer itself is designed for plastics, forming a uniform underlayer that improves adhesion and provides an even base for color.
Color matching is an art within an art. Fairing paint must match the original hue, sheen, and depth of the bike’s bodywork. Some riders want a perfect color reproduction; others accept a slightly lighter or darker shade if the repair is concealed by a fairing edge or a rider’s stance that emphasizes the lines rather than the color. The final clear coat protects the paint from UV degradation and minor abrasions. It also adds the glossy or satin finish that bike owners expect to see on factory panels. The overall effect is a repaired panel that looks as if nothing happened, and that continues to perform under sun, rain, and the vibrations of the ride.
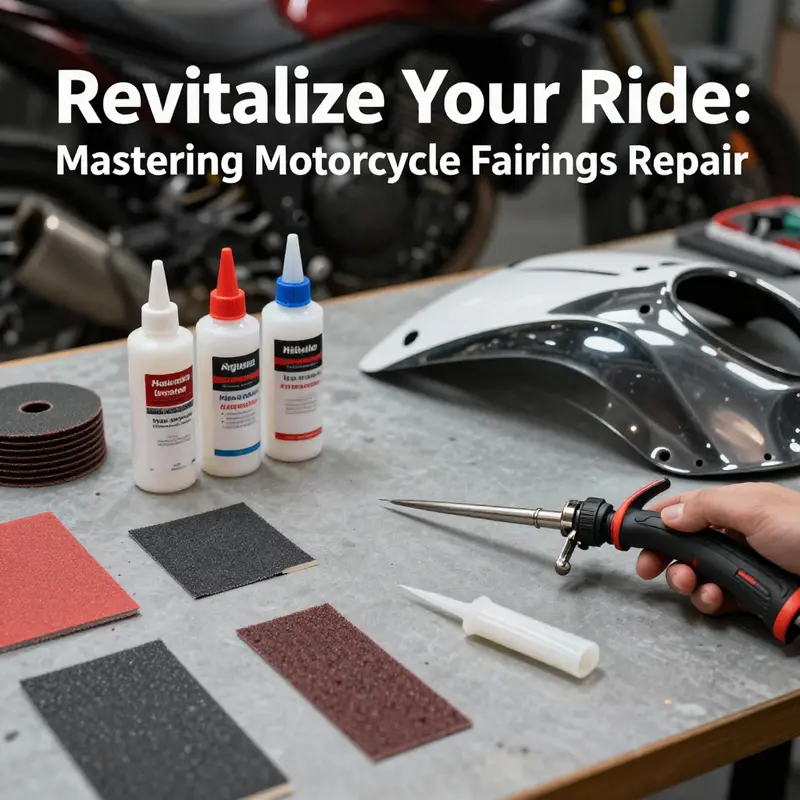
The tools and materials required for such a repair are a carefully chosen toolkit rather than a grab-bag of random items. An adjustable-temperature plastic welding gun is central to the process. This tool allows precise control of heat, which is crucial because different plastics require different melt temperatures. ABS commonly responds to heat in a moderate range, while PC or PC blends demand more restraint to avoid softening or warping adjacent material. The welding process is often described as a sewing motion, where a controlled bead of melted plastic is drawn along the crack to fuse the two sides. The result is not just a bond; it is a continuous solid that shares the same heat history as the surrounding panel, reducing the risk of future separation.
When larger repairs exceed the capacity of a simple weld, a plastic repair compound or epoxy-based filler provides the material to build back the contour. The working life of these fillers depends on their chemistry and the application method. They are designed to cure into a dense, rigid mass that sands smoothly and takes paint well. The primer that follows must be formulated for plastics, providing a chemical key that improves adhesion and guards against peeling. Sanding continues through the sequence until the repaired area is indistinguishable from the surrounding surface. Then comes the patience of paint and clearcoat, not a rushed solvent glaze but a controlled application that yields uniform color, depth, and gloss.
The repair toolbox is completed with everyday workshop essentials. A sanding block ensures even pressure during shaping, and a tack cloth captures every last dust mote before priming. Masking tape and a plastic sheet create a clean work zone, protecting adjacent panels and the frame from paint overspray. Safety cannot be an afterthought. Protective eyewear, a respirator for sanding and spraying, and gloves are indispensable. Plastics emit fumes when heated, and sanding creates fine particles that can irritate airways. A well-ventilated space is a prerequisite, not a luxury.
The practical realities of the repair include decisions about modular designs and repair-friendly fairings. Some manufacturers intentionally create panels that can be individually replaced or repaired, reducing the cost and complexity of restoration. This modular approach aligns with modern consumer values: less waste, quicker fixes, and the ability to tailor repairs to the most damaged sections while preserving the rest of the fairing. It is a reminder that repair is not merely a patchwork of materials but an integrated workflow that respects the design intent of the original panel and its function in aerodynamics, protection, and aesthetics.
As you move through the repair, keep in mind the long arc of the project. The initial crack or dent is just a symptom. The real aim is to restore the panel’s structural integrity and visual continuity so the riding experience remains confident and safe. The process rewards patience, detail, and a willingness to revisit steps if the surface reveals a nuance that was previously unseen. For instance, a slight edge deformity may call for additional heat and careful reshaping, or a second pass of filler to build a flawless contour. The best repairs are not hurried; they are iterative, each stage setting the stage for the next.
For readers who want to explore options for compatible fairings and to see how these principles translate into real-world choices, a practical nod to the broader ecosystem can be helpful. A general collection of Honda fairings offers a window into the modular philosophy that many manufacturers now embrace. It provides a catalog of panels and subassemblies that can be used as references when assessing damage and planning repairs. This approach aligns with the idea that modern fairings are designed with repairability in mind, enabling riders to salvage parts rather than dispose of entire assemblies. See the Honda fairings collection for a sense of how panels are sized, contoured, and joined in contemporary designs.
The journey from a cracked edge to a factory-like finish is a meticulous voyage. It blends the science of plastics with the craft of bodywork and the discipline of paint finishing. The result is a repaired fairing that not only looks right but also performs under the heat of the sun and the strain of wind while continuing to guard the rider and the bike’s core components. As repairs become part of the rider’s ongoing relationship with the machine, the process gains a personal dimension. Each patch carries a story of a ride endured, a near-miss avoided, or a day spent optimizing the bike’s appearance. In this light, repair becomes a sustainable practice that extends the life of the bike without sacrificing safety, profile, or emotion.
For those who want to dive deeper into the practicalities, the following resources outline the core steps and considerations in a readable, hands-on way. The materials listed here are designed for compatibility with common fairing plastics and emphasize a repair path that respects the original design while delivering a seamless finish. The careful combination of compatible welding rods, slow and measured heating, precise sanding, and patient finishing delivers durability and appearance that stand up to daily riding and to show-stopping weekend sessions alike. By approaching each repair with attention to material compatibility, surface preparation, and color matching, riders can achieve results that are both technically sound and aesthetically satisfying.
In the broader ecosystem of motorcycle repair, the tools and methods described here are part of an ongoing learning curve. The industry continues to refine plastics chemistry, welding techniques, and finishing processes to improve durability and finish quality. The underlying principle remains simple: respect the part, choose the right tool for the job, and apply a disciplined sequence that mirrors the original manufacturing process as closely as possible. When done well, a repaired fairing becomes more than a patch; it becomes a testament to practical engineering, craftsmanship, and the rider’s commitment to maintaining the machine they rely on.
To connect this approach with practical options and community knowledge, consider exploring resources that showcase repair-friendly panels and compatible fairings. For readers seeking inspiration and context about compatible components and repair-friendly designs, visit the Honda fairings collection, which illustrates how modular design supports easier maintenance and refurbishment over time. This perspective reinforces the idea that repair is a preferential strategy, not merely a fallback when replacement is too costly or unnecessary. It also invites riders to think about repair as an extension of ownership—a way to keep a beloved bike on the road longer while minimizing waste and cost.
External resources can provide supplementary guidance and real-world demonstrations of the techniques discussed. For example, a widely used plastic welding gun tool was documented in a product listing that highlights adjustable heat and compatibility with common automotive plastics. While the specifics of that listing are outside the scope of this narrative, the essential takeaway remains clear: the right tool, used with proper technique, enables durable repairs that blend back into the bike’s lines and color. Interested readers can explore the external resource linked at the end of this chapter for a practical glimpse into the hardware that makes plastic welding feasible in a home workshop.
Internal link for further context:
- Honda fairings collection: Honda fairings collection
External resource for tooling reference:
- External tool overview: https://www.alibaba.com/product-detail/Car-Plastic-Repair-Tool-Plastic-Welding-Gun_1600797549475.html
Preserving the Shape of Performance: The Economic Case for Repairing Motorcycle Plastic Fairings
When riders talk about their bikes, the fairings are often more than just plastic armor. They help shape aerodynamics, protect vital components, and define the bike’s silhouette that gives it character on every ride. But fairings are also among the most vulnerable elements on a motorcycle. They endure road debris, minor crashes, weathering, and the kind of cosmetic wear that accumulates over years of enthusiastic riding. In that context, the choice between repairing a damaged fairing and replacing it can feel like a decision between preserving a piece of the bike’s identity and chasing a newer, pristine look. The economics of this choice hinge on a straightforward truth: repairing a crack, scratch, or dent is generally far less expensive than buying a brand-new panel, and when done well, it can restore both function and finish without erasing the bike’s original design and craftsmanship. The broader story, though, is not just about the immediate price tag. It is also about how repairs contribute to a more sustainable, circular approach to equipment ownership, where preserving existing parts reduces waste and downstream costs, while keeping the bike in peak operating and aesthetic condition. This chapter explores that economic equation with careful attention to the numbers, the practical realities of repair work, and the long-term value that repair can deliver to riders, shops, and the environment alike.
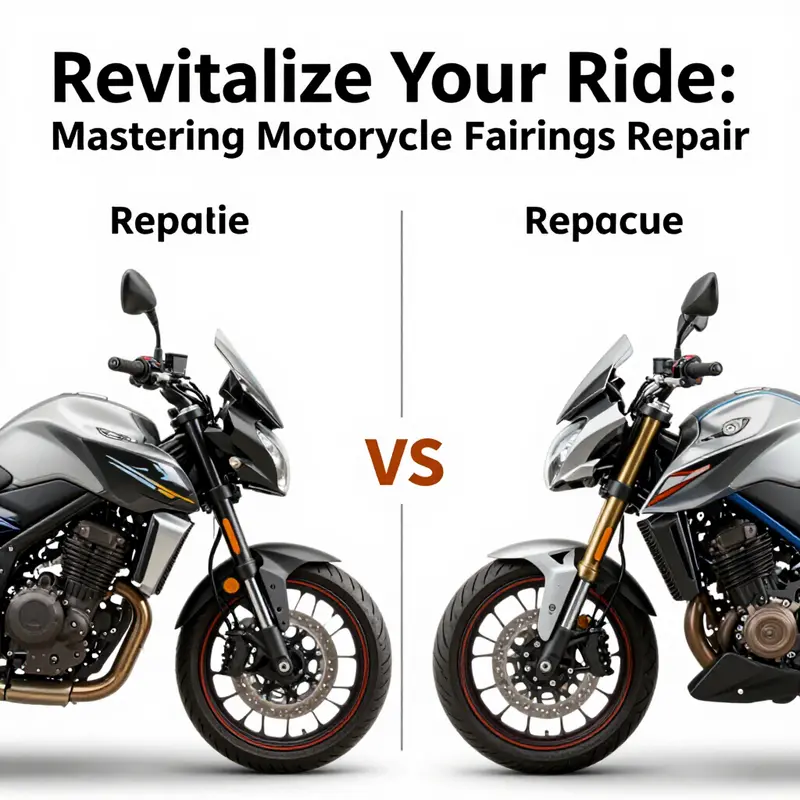
To begin with, the most tangible dimension of the repair vs replacement decision is cost. A new fairing does not come with a single universal price; it varies with the motorcycle’s make and model, the complexity of the panel, the presence of graphics or color-specific finishes, and the degree of labor required to install the part. On average, a replacement fairing can range from roughly $100 to well over $500 for a single panel, depending on whether you’re dealing with a standard, off-the-shelf component or a more specialized, OEM-grade cover that must fit precisely within an existing frame and mounting points. That spread reflects both material quality and the engineering challenges of matching curves, gaps, and mounting hardware to the bike’s original geometry. By contrast, professional repair services generally fall in a far more modest band, typically between $50 and $200 for minor to moderate damage. This means that repairing a damaged fairing can yield savings on the order of about 30% to 80% compared with replacement, depending on the extent of the damage and the repair pathway chosen. In many everyday cases—such as superficial scratches, small cracks near a mounting edge, or a dent that has not compromised surface integrity—repairs stay well within the lower end of that cost spectrum and can be completed in a few hours to a day, rather than the longer lead times often associated with ordering and installing a new panel.
There are, of course, limit cases where the economic calculus shifts. If damage is widespread, the panel’s structural integrity is undermined, or the bond holds failure becomes a concern that could jeopardize both safety and alignment, replacement may be the more prudent and ultimately less costly option in the long run. The Motorcycle Industry Association, in its 2024 cost analysis, supports that view: for minor to moderate damage such as cracks, scratches, or small dents, repairs consistently offer the most financially sensible option. When damage exceeds roughly half of a fairing’s structural integrity, replacement may be safer and more reliable. This threshold note is not a hard rule, but it provides a practical framework for riders and technicians when weighing options in real-world scenarios. It is also worth noting that repairs can preserve the original fit and aesthetics far more effectively than aftermarket replacements that may not align perfectly with the bike’s lines. That alignment matters not just for looks but for aerodynamic efficiency and the way the panels interact with wind pressure at speed.
The financial argument for repair is not only about upfront costs. It extends into downstream value: the original design and fit, if preserved, tend to maintain a bike’s resale value and its perceived condition more accurately than a mismatched or aftermarket replacement might. A well-executed repair can be nearly invisible to the untrained eye, especially when color matching and clear coating are done with care. In contrast, even a slight mismatch in shade or gloss can become a constant reminder of a repair, potentially affecting how a future buyer assesses the bike’s overall condition. For many riders with a strong attachment to their machine’s original appearance, this nuance translates into a meaningful portion of resale value. The economic benefit thus becomes twofold: immediate savings on repair versus replacement and longer-term preservation of market value by maintaining the bike’s original geometry and finish.
Beyond the bare economics, the environmental dimension adds a compelling layer to the case for repair. The Ellen MacArthur Foundation’s 2023 reporting emphasizes that extending the lifespan of vehicle components is a core strategy for advancing circular economy goals. Repairing rather than discarding or replacing aligns with the objective of keeping materials in use longer, reducing the energy and emissions associated with producing new plastics, painting, and assembling a new panel. ABS plastic, the workhorse of many fairings for its light weight and impact resistance, is well-suited to repair pathways when treated with proper adhesives, welding, and finishing processes. The key is not merely fixing a crack but restoring the panel’s surface integrity and structural behavior so it can endure the same environmental exposures as before. When riders choose repair, they participate in a value loop that minimizes waste, reduces the demand for new raw materials, and lowers the cash outlay needed to keep a bike on the road.
The environmental argument has practical resonance for riders who track maintenance costs as part of a broader ownership philosophy. A repaired fairing reduces the likelihood of a disposal event triggered by a cosmetic blemish or a shallow crack that worsens with use. It also supports a maintenance culture that values timeliness and prevention. The MIA’s analysis underscores this by indicating that, for moderate cases, repair is financially sensible and functionally adequate while the structural integrity of the panel remains largely intact. When the damage hits the 50% threshold, the safer choice becomes replacing the fairing to avoid compromising safety and alignment under dynamic riding conditions. This is not a dogmatic rule but a pragmatic guideline that reflects both consumer economics and practical engineering realities. The result is a balanced approach: repair when possible and economical, preserve the bike’s original character, and reserve replacement for cases where safety and performance would otherwise be compromised.
Another dimension to consider is the repair’s impact on aesthetics and rider confidence. The fairing is often the most visible portion of the bike, and even perfectly repaired cracks can draw attention if the texture or paint finish is inconsistent with surrounding panels. The consumer preference for a seamless appearance means that the finish quality becomes a significant part of the total cost equation. Refinishing with matched color and a durable clear coat protects against UV damage and environmental wear, ensuring the repaired panel ages like the rest of the bike. The effort invested in color matching and clear coating should not be underestimated. A high-quality refinished surface can sometimes be indistinguishable from the original, thereby preserving the bike’s visual harmony and supporting the resale value just as effectively as an intact original panel.
From a practical standpoint, the repair process for ABS fairings begins with a precise assessment. A skilled technician evaluates the extent of the damage, checks for hidden delamination, and confirms whether the panels still align and mount correctly when reassembled. This assessment informs the choice of repair pathway. For small scratches and shallow cracks, an adhesive-based approach often suffices. High-strength, flexible adhesives formulated for plastics create enduring bonds that tolerate vibration and thermal cycling. For deeper fractures or where pieces have separated, a plastic welding technique—using a compatible filler material and controlled heat—can restore continuity across the damaged region. In either scenario, surface preparation is crucial. The area must be thoroughly cleaned with isopropyl alcohol or a similar solvent to remove oils and contaminants that can weaken bonds. A light sanding with medium to fine grit ensures that the adhesive or weld grips the surface uniformly and creates a consistent profile for finishing.
The repair path then proceeds to cosmetic restoration. After structural repair, minor surface imperfections—raised edges, small pits, or smoother transitions between repaired and original material—are addressed with a filler designed for plastics. Sanding follows, with progressively finer grits to create a smooth, uniform plane. This stage is essential for achieving a finish that can hold color and a clear topcoat consistently. A primer compatible with ABS plastics is applied to promote adhesion of the final paint. The color-matching phase is handled with care, because even a tiny discrepancy in shade or gloss can be apparent under sunlight or when viewed at an angle. The final steps typically involve several thin coats of color, followed by a clear coat that seals the pigment and adds UV protection. The result should be a panel that looks, feels, and performs like it did before the damage, with a finish that remains resilient to washing, rain, and engine heat.
Adhesive and welding strategies must be selected with attention to material compatibility. ABS plastics respond well to certain epoxy-based systems and two-part resins that remain flexible enough to accommodate thermal expansion without cracking. In parallel, plastic welding a crack requires a welding rod that matches the resin type and a controlled heat source to prevent warping. The repair should avoid overheating the surrounding area, which can introduce new stresses or misshapen contours. When the repair is complete, clamping and curing times must be observed. A properly cured repair preserves the panel’s strength and its ability to absorb impact without transferring excessive loads to adjacent sections. The finishing steps then reintroduce the original gloss or a matched satin texture before the final protective coat is applied.
A practical note for riders and shops alike concerns the availability of modular panel designs. Many newer fairing sets are engineered to be broken into modular pieces, allowing for targeted replacement or repair of individual panels rather than wholesale replacement of an entire bodywork suite. This modularity is a crucial design feature that aligns with repair-friendly maintenance. It lowers the cost of repairs and speeds up the process, enabling riders to return to the road sooner without compromising fit or alignment. In this context, it is helpful to have a reliable supplier network that emphasizes repair-friendly construction and offers detailed guidance on repair techniques. The availability of technical guides or video tutorials from manufacturers or distributors can be a valuable resource, enabling technicians to follow best practices and riders to understand what to expect from a repair.
The economics of repair also interact with the lifecycle of the materials themselves. ABS plastic’s durability under UV exposure and temperature variations makes it a robust choice for fairings. Yet, as with any polymer, prolonged exposure to sunlight can lead to color fading and surface degradation if not properly protected. That is where the refinishing step—color matching and clear coating—plays a vital role. A well-applied clear coat provides a barrier against UV radiation and environmental contaminants, helping to preserve both the appearance and the structural integrity of the repaired area. The cost of refinishing must be weighed against the risk of accelerated wear if a cheaper, non-durable finish is used. In informed repairs, the investment in quality paint and clear coats pays off in the long run through a more durable appearance and fewer touch-ups over time.
The decision framework for repair versus replacement should also consider the rider’s goals and riding context. For a track-focused machine where aero performance and weight distribution are tightly calibrated, preserving the original fairing shape can be essential for predictable handling at high speeds. In such cases, a careful repair that maintains the panel’s contour and mounting alignment can deliver the best value. For daily riders who value a pristine look as part of their ownership experience, a high-quality repair that yields a near-perfect cosmetic finish can still meet expectations, especially when it preserves the bike’s overall silhouette and the cohesion of its colors. For budget-conscious riders who ride infrequently on weekends, repairing a cosmetic scratch may be enough to keep the bike looking good for another season, delaying or avoiding the expense of a new panel. In all scenarios, it is useful to adopt a staged approach: assess, repair, evaluate, and, if necessary, replace later if damage reappears or if safety concerns emerge.
From a strategic standpoint, repair pathways can enable a more resilient ownership model. A well-executed repair preserves the bike’s original parts, which often means better compatibility with mounting points and fasteners. The alignment between panels, rivets, and fairing edges contributes to a safer, more comfortable ride by maintaining consistent airflow around the motorcycle. The cost savings achieved through repair can be reinvested into maintenance—oil changes, tire replacement, and protective measures—that extend the bike’s usable life and reduce the environmental footprint of ownership. For riders who are conscious of the broader life cycle of their machines, this approach aligns with values of stewardship and efficiency. It emphasizes care for the parts that already exist rather than encouraging a replacement cycle driven solely by aesthetics or convenience.
To connect these ideas to practical decision-making, consider a rider who considers a damaged fairing on a mid-range sport bike. The repair path begins with a diagnostic assessment: is the damage limited to cosmetic issues, or does it compromise the panel’s structural integrity and mounting? If the panel still aligns properly and the attachment points show no signs of weakening, a repair plan focusing on surface restoration—crack bonding, minor filler, sanding, priming, color matching, and clear coating—can be pursued. If the assessment reveals that the crack has traversed internal ribs or that the mounting screws no longer grip securely, the repair may require more extensive structural work or, in some cases, replacement of the panel for safety and performance reasons. Even in the latter scenario, the repair philosophy remains relevant: repairs can be pursued for adjacent panels or cosmetic areas as a way to prolong the bike’s overall life while delaying the more substantial cost of full panel replacement.
A thought experiment helps illustrate the broader value of repair beyond the price tag. Imagine a rider who has invested in a set of modular fairings designed for easy panel replacement. The same rider experiences a minor impact that damages only one module. Rather than replacing multiple panels or an entire set, the rider can opt for a targeted repair or a single-panel replacement. This approach minimizes waste, reduces the time the bike spends out of service, and preserves the motorcycle’s original geometry. The modular design philosophy thus reinforces the economic and environmental merits of repair, turning a potentially disruptive incident into an opportunity to demonstrate prudent maintenance and value retention. In this context, the repair decision becomes part of a larger maintenance strategy, one that prioritizes financially and environmentally sustainable choices while respecting the bike’s design intent.
For readers who want to explore repair-friendly designs and repair tips in a hands-on way, a practical resource exists in the broader aftermarket ecosystem. A curated selection of fairings and panels, organized by vehicle family, can provide a useful starting point for understanding what designs are more conducive to repair and how modular panels can simplify the process. In particular, a look at the Honda fairings collection can offer insights into how certain design features facilitate repair work, from panel fit to finish compatibility. This exploration can help riders and technicians gauge which designs are most compatible with repair strategies and how to plan maintenance around a repair-oriented approach. Honda fairings collection provides a concrete example within the aftermarket landscape and can serve as a reference point for practical considerations in real-world repair projects.
In closing, the economic case for repairing motorcycle plastic fairings rests on a constellation of factors: direct cost savings, preservation of original design and fit, environmental sustainability, and the maintenance of resale value. The numbers favor repair for modest damage, with significant savings relative to replacement and an easier path to restoring aesthetics through careful refinishing. The threshold at which replacement becomes advisable—roughly when structural integrity is compromised by more than half—helps riders and technicians make informed judgments rooted in safety as well as cost. When repairs are executed with precision and care, they can deliver outcomes that rival the appearance and performance of new panels while aligning with a broader commitment to sustainable ownership. The story of repair, then, is not simply about meters saved or dollars spared; it is about keeping a machine’s character intact, extending its life, and reducing waste in a world where those outcomes increasingly matter as much as speed and style. For riders who want to engage deeply with this approach, the journey begins with a careful assessment, followed by a repair pathway that respects material properties, mounting geometry, and the finish that makes a bike’s appearance as compelling as its performance. External resources linked here can provide guidance on industry perspectives and cost analyses that support the practical decisions described above.
External resource: https://www.mia-uk.org/reports/repair-vs-replacement-costs-2024
Final thoughts
In conclusion, understanding the techniques, materials, and economic advantages of repairing motorcycle plastic fairings can greatly benefit business owners. Not only does effective repair extend the lifespan and performance of motorcycles, but it also presents a sustainable and cost-effective solution. By integrating these practices, businesses can enhance customer satisfaction while maximizing their profits in the competitive motorcycle industry.