Plastic motorcycle fairings are essential for both aesthetics and aerodynamics of a bike. As a business owner in the motorcycle industry, understanding how to effectively repair these fairings can vastly enhance customer satisfaction and retention. You will discover a comprehensive approach to assessing damage, selecting appropriate materials, and executing a high-quality repair throughout this guide. Each chapter addresses vital components of the repair process—from initial assessment and preparation to advanced techniques and finishing touches. Equip yourself with this knowledge to improve your service offerings and boost your brand’s reputation in the competitive motorcycle market.
Reading the Surface: Diagnosing Damage and Laying the Groundwork for Plastic Motorcycle Fairing Repairs
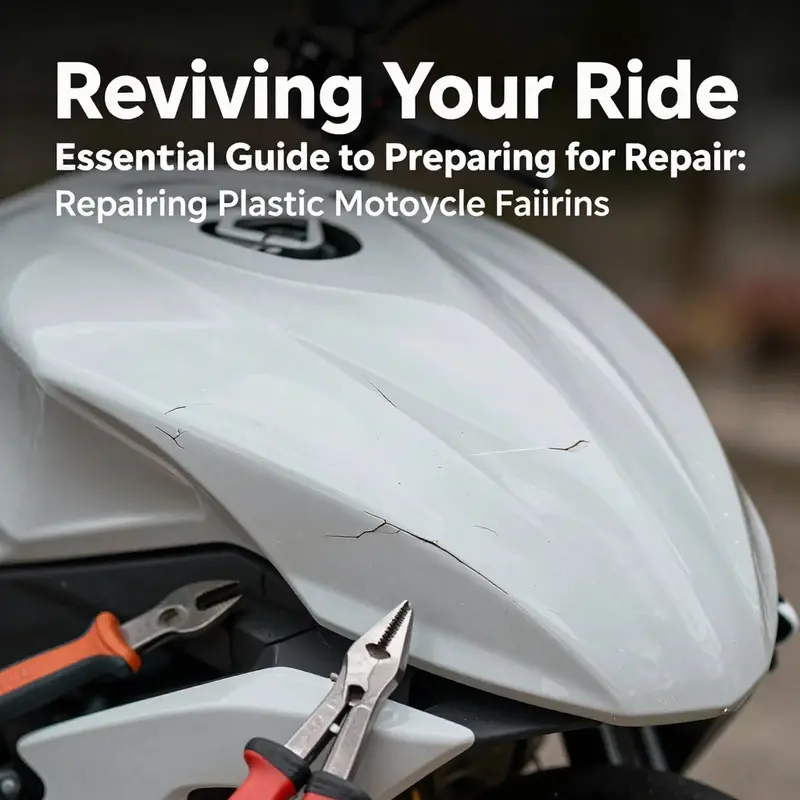
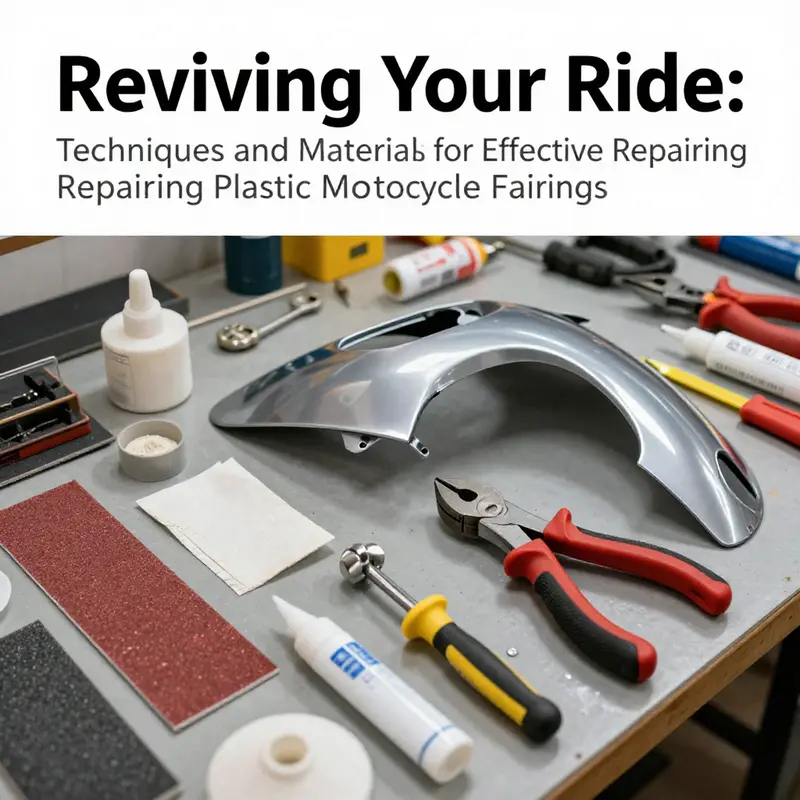
Assessing the damage on plastic motorcycle fairings is more than a quick glance at a scratch. It is a careful survey that reads how a part has endured impact, temperature, and time, and it sets the course for every repair decision that follows. The moment you stand back to take in the whole panel, you should be looking for more than the obvious chips or cracks. The edges around mounting points are high-stress zones where a small flaw can propagate into a larger failure that not only looks unsightly but can disrupt aerodynamics and handling. If a plastic piece is loose, misaligned, or shows uneven seams, those are red flags that previous repairs or improper installation may have left behind. Such conditions matter because they influence how the repair will hold, how well it will bond to the surrounding surface, and how the final finish will wear over time. The analysis also calls for a practical check of the material itself. ABS and other plastics behave differently under stress, and cold storage can reveal hidden weaknesses. If the bike has lived in subzero conditions, brittleness or deep internal cracking can appear where the eye cannot see, especially around areas that flex with speed and wind. Recognizing these signs early helps prevent a glossy but brittle patchwork that will crack again at the first rough road or sudden temperature swing. This is why a thorough assessment blends visual inspection with tactile checks and a sense of how the part has been used and stored. The goal is not only cosmetic restoration but a repair that respects the fairing’s structural role in protection and aerodynamics, as well as the long-term resilience of the finish you plan to apply. When the surface looks reasonably solid yet shows a few cracks or chips, the repair strategy narrows to bonding, filling, and smoothing the affected areas so the new layer can be laid down with confidence. If the damage is more extensive, particularly around edges or mounting bosses, the plan shifts toward reinforcement from the inside. In such cases, you are balancing the need to restore strength with the desire to keep weight and flexibility in check. It is a reminder that plastic is a different animal from metal; the repair workflow must respect its chemistry and how it adheres to itself and to primers and paints. A calm, methodical approach begins with a clean canvas and progresses through layers that build not just aesthetics but adherence and protection against the elements. The first diagnostic step is to map out the scope of the damage. Light surface scratches that have not breached the primer or base coat can often be corrected with refinement work. Deeper scratches, gouges, or small cracks demand a more involved process: bonding, filling, and controlled curing before any sanding or painting. If you notice discoloration or a brittle feel, treat it as a warning sign that the plastic has been stressed or degraded and may require reinforcement rather than a simple surface fix. In the broader sense, the assessment becomes a portfolio of decisions about whether the repair will be a cosmetic refresh or a functional restoration that preserves fit, finish, and the effect of the fairing on the motorcycle’s aerodynamics. The guiding principle is consistency between the repair materials and the plastic itself. Using a plastic-friendly adhesive, a compatible filler, a plastic primer, and plastic-specific topcoat creates a chain of compatibility that helps the repair endure. The assessment also invites a practical question about access and labor. Front fairings or windscreen areas present greater challenges because their shape and position demand precision and uniform coverage. For these zones, choosing to proceed with a professional shop that can offer a climate-controlled spray booth, careful color matching, and exacting surface finish may be the wisest path. In contrast, smaller touch-ups or interior panels can often be tackled in a well-equipped garage, provided the preparation, bonding, and curing steps are followed with discipline and patience. For riders who want to maintain a coherent look across a fairing set, this early stage is also an opportunity to consider whether a color change or a complete repaint aligns with the project goals and time frame. If the original paint is to be preserved, you must also decide how far to sand. Lightly abrading the surface with progressively finer grits prepares the substrate for bonding agents and primer. If the choice is a full repaint, you might end up removing the old paint entirely, which is a larger undertaking but can yield a more uniform final appearance and better adhesion for the new topcoat. The practical upshot of the assessment is a plan that matches the damage profile with appropriate preparation steps, a clear path for reinforcement if needed, and a realistic expectation of the time, materials, and skill involved. This is the moment to internalize that the repair is as much about the method as the material. The method must respect the plastic’s behavior under heat, moisture, and UV exposure. With this mindset, you proceed to preparation, knowing that the surface you start with redefines what you can achieve with adhesive strength, filler smoothness, and color fidelity. As you consider replacement parts or replacement panels, you can turn to a curated selection of options that makes it easier to keep a consistent appearance across the bike. For direct access to a curated selection of replacement panels, see the Honda fairings collection. This resource can help you compare shapes, mounting patterns, and finish options, ensuring your repair plan remains grounded in practical feasibility while still pursuing a clean, factory-like look. In addition to the assessment and preparation, it is useful to keep a single, guiding thread: plastics demand compatible chemistry from the first to the last step. The compatibility of adhesive, filler, primer, paint, and clear coat is what ultimately determines the repair’s success. When you commit to that sequence, you avoid the common pitfall of a finish that peels, crazes, or dulls because the materials were not designed to work together. The preparation stage then becomes a careful choreography. Start with a clean surface. Wash away grease, oils, and road grime with a mild detergent and water, then rinse thoroughly. The goal is to minimize any residual contaminants that could interfere with bonding or paint adhesion. After the wash, allow the surface to dry completely before moving to the sanding phase. The sanding begins with a coarse step to create a mechanical key for bonding agents. Use an 80 to 120 grit sandpaper to lightly abrade the damaged area and surrounding margins. The objective is not to remove material but to expose a fresh substrate and to create micro-mechanical roughness that improves the grip of adhesives and fillers. Once this initial roughing is complete, switch to a finer grade, typically 200 to 400 grit. This second pass refines the surface, reduces deep scratches, and establishes a smoother profile that will accept filler and primer evenly. After sanding, wipe the surface with isopropyl alcohol to remove dust and residual oils. The alcohol acts as a final clean before adhesives or fillers are applied and helps ensure the bond remains intimate and uniform across the repair area. At this point, if there is any obvious hole, crack, or missing material that compromises structural integrity, you should consider interior reinforcement. For larger holes or structural damage, rebuild from the inside using a supportive material such as cotton wadding or foam. This provides a backing for an epoxy-based resin or a fiberglass patch that bonds to the inner surface and offers a stable anchor for the outer repair. In higher performance or show-quality contexts, more advanced reinforcement may be desired, including carbon fiber options. While carbon fiber can yield a repair stronger than the original part, it requires precise execution and additional curing steps, so it is typically pursued when the repair impacts performance or aesthetics at a high level. Once the structural base is secure, you can turn to the bonding and filling stage. Cracks can often be bridged with a compatible plastic adhesive that cures with a rigid bond. After the crack has been bonded, or if the area was a hollow void, apply a body filler to level the surface. The filler should be chosen for its ability to bond with plastic and its resistance to shrinking as it cures. Apply with a spatula or plastic knife, then allow the filler to cure fully per the manufacturer’s instructions. Do not rush this step or skip cure time, or you risk shrinkage cracks that mirror the very problems you are trying to fix. Once cured, sand the area again using progressively finer grits, starting with 180 to 220 and moving through 320 to 400. The goal is a perfectly flat, feathered transition where the repaired zone blends into the surrounding plastic with no ridges or visible steps. After sanding, inspect the repair under good lighting. If the surface shows slight imperfections, a second smoothing pass with a fine filler or spot glazing can be used, followed by another light sanding. This careful refinement is essential to achieving a uniform base for primer. The primer used here is often labeled as a plastic primer or red primer, designed specifically for adherence to polymer substrates. The primer acts as a bond bridge between the repaired surface and the subsequent paint layers, helping to prevent peeling and to promote even color application. Apply the primer in multiple thin coats rather than a single heavy layer. Allow each coat to dry thoroughly before the next, and sand lightly between coats to maintain a smooth surface, typically with 400 grit or finer paper. When the primer has cured and feels dry to the touch, the surface is ready for topcoat painting. For the actual color application, you can use an airbrush or a spray gun, maintaining a consistent distance around 25 centimeters from the surface. A zigzag or sweeping motion helps distribute the paint evenly and reduces the risk of runs and sags. Several light coats are preferable to one heavy layer, with a typical sequence of three to four coats for full opacity and color depth. Between coats, allow the paint to become tack-free, not fully dry, to encourage adhesion of subsequent layers. After the final color coat has dried, it is time for the protective top layer. A clear topcoat seals the color, adds depth, and increases resistance to UV exposure and abrasion. The clear coat should be compatible with the base paint and the plastic substrate, and it should be chosen with an eye toward automotive or aircraft-grade durability when possible. This top layer often requires more than one pass, with light, even coats and ample drying time between applications. Finally, consider the finishing details that contribute to a professional appearance. If the goal is a seamless, factory-like finish, careful color matching is essential. Any slight hue or gloss mismatch will be noticeable on a broad, curved surface. In such cases, an expert eye for color matching and a controlled finishing environment can make a notable difference in the final look. If immediate results are not possible or if the repair area is highly visible, you may decide to rely on a local shop capable of delivering a precise color match and an even, high-gloss finish in a climate-controlled space. By now, the narrative of the repair has shifted from diagnosis to execution, but the chain of steps remains coherent: assessment shapes the plan, cleaning-based preparation prepares the substrate, reinforcement provides strength, bonding and filling restore the surface profile, priming ensures adhesion, painting supplies color and depth, and clear coating locks in the result. The entire workflow emphasizes compatibility at every stage. It is not enough to fix the surface; you must ensure the materials interact harmoniously and endure the realities of riding conditions, including sun exposure, heat cycles, moisture, and vibration. It is why many riders who value longevity opt for process discipline and, when in doubt, seek professional help for high-visibility repairs or complex reshaping tasks. For readers seeking a deeper dive into methodology and product recommendations specific to plastic motorcycle bodywork, the Motorcycle Mechanics Institute offers a comprehensive guide to repairing and restoring plastic fairings, which can provide practical context and case studies to accompany the steps outlined here. If you want to explore a curated inventory of replacement panels to match your bike more precisely, you can visit the Honda fairings collection for reference and compatibility checks. This can help you plan color and shape decisions that align with your original aesthetic while you pursue a repair strategy that feels both durable and visually coherent. For further guidance and detailed tutorials, see the external resource linked here, which expands on practical techniques and material choices for plastic fairing repairs. External resource: https://www.motorcycle.com/motorcycle-repair/repairing-plastic-motorcycle-fairings/
null
null
Gloss, Guard, and a Seamless Finish: Mastering Paint and Protection on Repaired Plastic Fairings
The final stage of repairing plastic motorcycle fairings is where the work either comes alive with a factory-like glow or fades into a lackluster finish if the process is rushed or mismanaged. After you have addressed cracks, gaps, and deep scratches, the surface you see is a canvas ready to reveal two kinds of value: color and protection. Color gives the fairing its personality, while protection preserves that personality against sun, rain, and road debris. The steps that follow are not merely cosmetic; they determine how long a repair stays intact and how well it ages in the harsh climate of riding conditions. The journey from a repaired panel to a durable, well-matched, and glossy surface requires respect for the material properties of plastics and a disciplined technique that keeps the surface free from contamination, uneven layers, and imperfections that can sabotage adhesion and finish quality. In this chapter, we explore the finishing touches—how to choose the right paint, how to apply it with control, how to build a durable, clear protection, and how to add subtle refinements that transform a repaired fairing into something that looks as resilient as it feels when you ride it. We’ll weave in practical guidance from field-tested approaches, while staying true to the core principle: plastics behave differently from metal, and the finishes we lay on them must accommodate those differences without compromising durability or aesthetics.
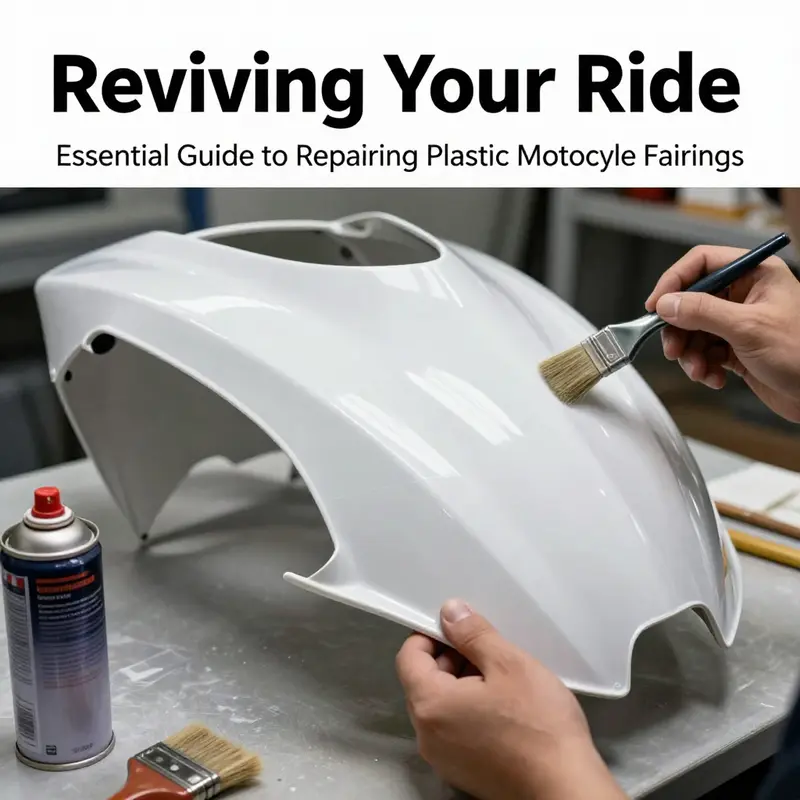
The decision about paint begins with the recognition that plastic fairings need finishes designed specifically for plastic substrates. Conventional automotive paints, while capable in many contexts, often face adhesion challenges on plastics due to the different expansion and contraction rates, surface energies, and the presence of release agents and flexible substrates. To avoid future peeling, cracking, or micro-delamination, the color system must pair a compatible topcoat with a primer that actually bonds to plastic and to the filler beneath. The path to a durable, professional-looking finish starts with this foundation: a plastic-specific primer that can create a reliable key on the bare or repaired surface, followed by color coats that are formulated for plastic, and finally a clear topcoat that seals and protects while preserving gloss. In practice, this sequence means selecting a plastic primer designed for urethane, epoxy, or acrylic systems that are compatible with the chosen topcoat, then applying the base color with care and patience. The purpose of each layer remains consistent across projects: promote adhesion, build color, and guard against environmental stressors. The result should be a uniform color field with a smooth, optically flat surface and no evidence of the repair beneath.
As you plan the color stage, the environmental setup becomes a silent partner in success. Paint and finish work on plastics benefits from a controlled environment where dust levels are low, humidity remains moderate, and temperature is steady. Even slight deviations in temperature and humidity can cause the paint to dry unevenly, leading to orange peel texture, sags, or craters that reveal the artistry failed to flatten. A clean, dust-free space—whether indoors in a workshop with proper ventilation or under a canopy in mild weather—significantly improves the odds of a top-notch result. The use of a dedicated spray gun or a high-quality aerosol system helps maintain a consistent spray pattern, which is essential for achieving the smooth, even coats demanded by a clean plastic finish. The distance from nozzle to surface matters more on plastics than on metal, where thicker coats can sometimes mask minor flaws. On plastic, a controlled, steady 25 to 30-centimeter distance tends to yield the most uniform results, particularly when combined with thin, even coats and a deliberate motion that minimizes runs and sags.
Color selection and blending are more than aesthetic choices. If you are repainting a damaged area to match the rest of the fairing, the objective is to achieve a seamless transition where the repaired region is visually indistinguishable from the surrounding panels. This requires careful shade matching, a unifying base coat where needed, and an awareness that the plastic’s surface texture can influence perceived color depth. In many cases, repairing a portion of a fairing may necessitate feathering the edges with extra care or applying a very light mist of color across the repair to help the tones blend. The goal is not a perfect color match by number alone but a perceptual match that appears continuous under normal riding light. When the repair is part of a broader restoration or when you aim for a full repaint, you may end up stripping back to bare plastic and rewriting the entire color story—every panel treated as part of a cohesive, thoughtfully designed palette. In either case, the primer that follows color must be plastic-friendly and capable of creating a lasting bond between the repaired surface and the topcoat.
The application technique for color coats is where discipline translates into beauty. Begin with a thorough surface preparation after primer, ensuring there is no dust, oil, or fingerprint left on the surface. A degreaser that is safe for plastics helps remove oils and care products that can sabotage adhesion. After degreasing, the surface should be wiped clean with a lint-free cloth and allowed to dry completely before applying color. When painting, thin, repeated coats are the rule. A zigzag or cross-hatch pattern helps avoid runs and ensures uniform deposition of pigment across the contour of the fairing. The number of coats typically required to reach full opacity is three to four, but you should adjust based on color strength and the underlying repair. Each coat needs a brief window of time to tack off and dry before the next is laid down. This window is usually 20 to 30 minutes under typical indoor conditions, but it can vary with humidity and temperature. A patient, methodical approach will prevent the common pitfalls that plague DIY finishes, such as pooling, sagging, or uneven saturation that makes the color look muddy or blotchy.
An important, sometimes overlooked step is the option to heat-cure the finish in controlled conditions. Some projects benefit from a modest post-coating heat treatment to accelerate cure and improve the hardness and adhesion of the final layer. If you pursue heat curing, you should consult the paint manufacturer’s guidelines to ensure you stay within safe limits and do not compromise the coating’s chemistry. A low-heat environment, around 60°C, for a short period—often 15 to 20 minutes after the final coat—may be recommended in certain scenarios. However, this approach should be used only when the product’s instructions explicitly allow it, as improper heat can cause gloss changes, shrinkage, or softening of the finish. This is not a universal prescription but a potential enhancement for experienced hobbyists who want to compress curing time without sacrificing durability.
Once the color layer has achieved proper opacity and uniformity, the clear protective topcoat becomes the guardian of the finish. The role of the clear coat is twofold: to seal the color, and to provide UV resistance, chemical resistance, and protection against abrasion. On plastic, the clear coat must be compatible with the underlying pigment layer and with the primer, forming a cohesive, durable system that can withstand travel-friendly exposure to weather and cleaning agents. Apply two to three thin, even coats, again using a calm motion and a 25 to 30-centimeter distance. The same cross-hatched pattern helps maintain an even surface and minimizes the risk of buff and orange-peel textures. After the final coat, allow the clear coat to cure at least 24 hours in a controlled environment before handling the fairing or mounting it back on the bike. The clear coat not only intensifies gloss but also adds a protective barrier that buffers the paint against UV radiation, environmental contaminants, and minor abrasions from road grit. It is the final, crucial safeguard that preserves the effort you invested in color accuracy and surface smoothness.
The finishing sequence—primer, color, and clear—also benefits from a few refinements that can elevate the result without turning a DIY job into a professional clinic. First, masking is not merely a step to avoid color bleed; it is a tool for preserving edge definition and creating crisp boundaries between repaired areas and existing paint. Careful masking around the repair ensures that the edges do not feather or blur, which can reveal the repair under strong light. Second, the surface texture matters. If the plastic has a slightly textured surface, a light sanding with very fine grit before priming can help the primer bond and create a smooth foundation. After painting, a final light wipe with a tack cloth can remove any stray dust, ensuring the finish looks flawless when the fairing is photographed or viewed up close. Third, during color application, any color mismatch or subtle hue difference can often be addressed by slightly adjusting the shade on the next coat or by using a very light feathering pass over the boundary area. The practical reality is that small, controlled adjustments can produce a perceptual blend that looks seamless under most lighting conditions, without compromising the entire panel’s color integrity.
If your repair requires more than only color and a clear coat—if the scratches are shallow but the base layer is still visible, or if you want to restore a heavily damaged piece to a showroom-like finish—consider additional steps that add depth and longevity. Wet sanding between coats is a technique some riders use to minimize imperfections, but it must be done with careful grit progression and water lubrication to avoid embeds or swirl marks. After the final clear coat is dry, a wet sand with ultra-fine grit and a controlled level of pressure can help achieve a glassy surface when followed by polishing with a dedicated plastic-safe compound. The polishing stage is a finishing touch that enhances the depth and clarity of the paint, especially on darker colors where imperfections like micro-scratches are more noticeable. A well-executed polish can bring back the maximum gloss, helping the finish reflect light evenly and giving the panel an almost new appearance. If you prefer a more understated aesthetic, you can also choose a matte or satin clear topcoat, but you should understand that such finishes will require different maintenance and may highlight different surface characteristics than a high-gloss finish.
The chapter would be incomplete without acknowledging the practical reality that not all repairs justify the full painting overhaul. For minor repairs where the goal is restoration rather than complete color overhaul, you may opt for a targeted approach: lightly scuff the surface, apply a compatible plastic polish to restore the original sheen, and protect with a thinner, shorter-term clear coating that you reapply as needed. On the other hand, for a full repaint or a restoration project where the entire storyline of the fairing needs to be rewritten, the process becomes a staged choreography: strip, prime, color, clear, and cure—each step closely coordinated to ensure that the resulting finish is uniform across all panels and free from the visual cues of repair. When in doubt, practice on a sacrificial panel or a test piece to dial in the spray technique, color density, and curing behavior before committing to the actual fairing.
Beyond the technique, the mindset you bring to painting and protecting repaired plastic fairings matters as much as the sequence itself. Patience, cleanliness, and organization transform a potentially messy DIY task into a predictable and repeatable process. Pre-plan the color mix, test spray patterns, and document the number of coats and the curing times. A tidy workstation with good lighting helps you detect issues such as dust nibs, color drift, or edge feathering early in the process, saving you from costly rework. The final look should be a balanced blend of aesthetic appeal and structural resilience—colors that match, depth that stuns, and a protective layer that can shrug off rain, sun, and the occasional abrasion of a road trip.
For readers seeking further context and validated procedures, a trusted guide on plastic repairs and painting provides detailed techniques and product considerations that align with the approach described here. This resource offers expert-backed techniques and product recommendations for repairing and repainting plastic motorcycle bodywork, including the emphasis on plastic-specific primers and topcoats as well as the practical steps for achieving durable, high-quality results. Honda fairings collection can be a helpful reference for understanding how different shapes and configurations influence the painting approach, color matching, and finishing needs across a range of fairing designs.
In the end, finishing touches are not an afterthought but the culmination of careful preparation, thoughtful material choices, and disciplined technique. The repair’s longevity, the sharpness of the color, and the depth of the gloss all hinge on how you navigate the balance between adhesion, color integrity, and protective durability. If you treat the color and clear stages as coequal steps, and if you respect the plastic’s behavior by using appropriate primers and topcoats, your repaired fairings will not only look factory-new but also stand up to the weather and the wear of riding life. The result is a cohesive, confident presentation of your motorcycle’s bodywork—an intentional finish that communicates care, attention to detail, and a clear commitment to preserving the value and aesthetics of your ride.
External resource for further guidance on plastic paints and coatings: official plastic paint guide.
Final thoughts
Repairing plastic motorcycle fairings is not just about restoring functionality but also enhancing the aesthetic appeal of the bike. With the insights shared across these chapters, business owners can provide exceptional repair services that meet customer needs and expectations. Understanding the complete process, from damage assessment to flawless finishing, empowers you to take on repairs confidently, improving customer satisfaction and retention. Investing in quality techniques and materials can lead to long-term benefits, establishing your business as a trusted name in motorcycle repair.