The preparation of motorcycle fairings is a critical phase that directly influences the quality of painting, repair, or modification undertaken. Choosing the right sandpaper, along with appropriate grits and techniques, is fundamental for business owners aiming to deliver high-quality service and products. Sandpaper types have varying roles, and knowing how to utilize them effectively could set your shop apart from competitors. This guide will explore the selection of sandpaper, the best practices in sanding techniques, and the economic and aesthetic implications of your choices, ensuring a comprehensive understanding that empowers business owners to excel in fairing preparation.
Polishing the Ride: Mastering Sandpaper Types and Grits for Flawless Motorcycle Fairings
Preparing a motorcycle fairing for paint, repair, or modification begins with surface readiness rather than glamour. The fairing material—fiberglass, ABS, or polycarbonate—demands a measured approach to sanding so that primers bond, paint lays down evenly, and the final finish endures years of riding. The correct sandpaper choice, grit sequence, and technique create a surface receptive to primer, base coat, and clear while preserving the fairing’s integrity. The goal is uniform texture and controlled removal that respects geometry and avoids warping delicate plastics.
Understanding common abrasive types is the first step. Aluminum oxide is the workhorse for general prep and filler removal—durable, versatile, and usable wet or dry. Silicon carbide cuts faster on smooth plastic but wears quicker, performing best when a fine touch is needed and heat must be controlled. Ceramic abrasives offer high performance for heavy removal with reduced loading, ideal when speed and finish integrity matter on tougher plastics or composites.
Next, map the grit progression: start with coarse grits (40–80) for bulk material removal and shaping; move to 120–180 for refinement; 220–320 for final smoothing; and finish with 400–800 for wet polishing and primer-ready textures. Wet sanding during fine stages reduces heat and dust and improves surface uniformity. The sequence should be executed with light, even pressure and a clean workspace; never skip a stage, and always wipe with a tack cloth between steps.
Tools and technique: random orbital sanders for flat areas, foam-backed sponges for curves, and hand sanding for tight contours. Different materials demand different approaches: fiberglass may need more aggressive removal initially, ABS tolerates bolder early work, while polycarbonate is heat-sensitive and benefits from frequent checks with water cooling. Regardless, the aim is a uniform microtexture that promotes adhesion without exposing the substrate to damage.
Safety and economy: wear a dust mask, goggles, and gloves; ensure ventilation, and contain dust with a vacuum or filter. Consider the long-term cost of abrasives against the savings in reduced repaint cycles. Keep a small inventory of grits and blocks to minimize trips to the store and maintain momentum.
Final inspection: after each grit, wipe down with a tack cloth and inspect under strong light to verify flatness and absence of visible scratches. When the surface is ready, the primer and paint will adhere more evenly, with better color depth and gloss. A properly prepared fairing looks as if the paint grew from the plastic itself and will withstand years of riding and weathering.
External resource for further guidance can be found at this detailed sanding guide for motorcycle fairings: https://www.motorcyclespareparts.com/sanding-sandpaper-guide-for-motorcycle-fairings/.
Refining the Shield: Mastering Sandpaper Techniques for Flawless Motorcycle Fairings

The fairing that shelters a motorcycle is more than a cosmetic shell; it is a protective barrier shaped to carve through air, reduce drag, and house sensors or lights. When a rider decides to repaint, repair, or modify those panels, sanding becomes a quiet, precise act of translation—from a mismatched surface to a smooth, receptive ground for primer and pigment. The process demands respect for the material, an understanding of sandpaper behavior, and a steady hand that knows when to press and when to lift away. In this chapter, the dialogue between grit, fluidity, and safety unfolds as a single, continuous practice rather than a checklist. The goal is not simply to remove old paint or scratches but to create a surface that embraces the next steps with durability, cohesion, and a finish that endures through miles of wind and sun.
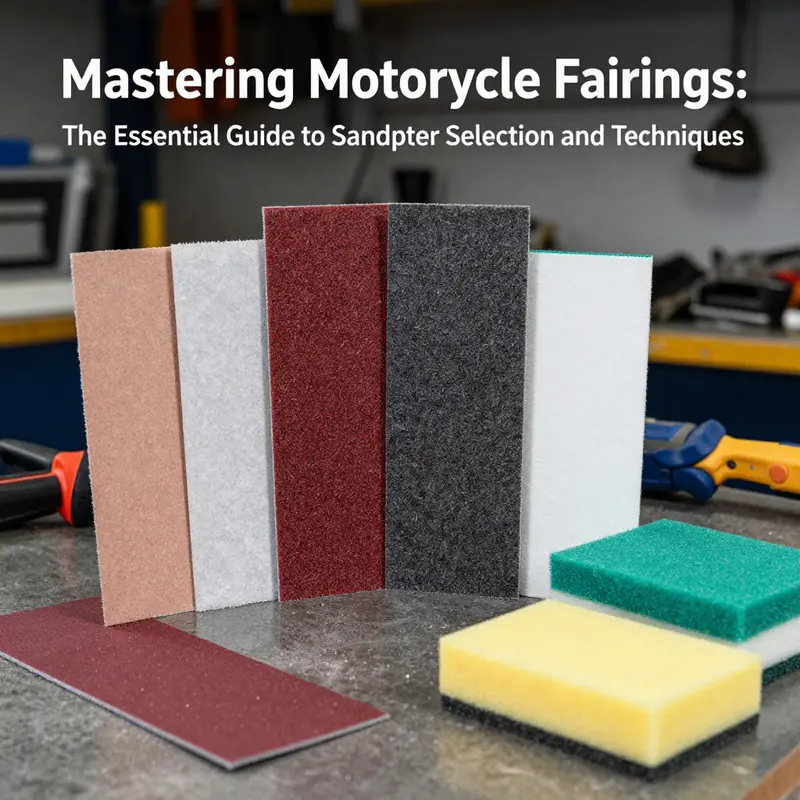
The materials used in motorcycle fairings vary widely. Many fairings are made from fiberglass, some from ABS plastic, and others from polycarbonate or blends. Each material responds differently to sanding, which means the choice of sandpaper matters as much as the technique. Sandpaper comes in a few broad families: coated abrasive paper, wet/dry varieties, and foam-backed sanding sponges. Coated abrasive paper lays down a hard, durable surface; wet/dry variants offer the versatility of either dry or water-assisted work; and foam-backed sponges provide a forgiving touch for contoured shapes. For the rough work of removing old coatings or smoothing out deep imperfections, a coarser grip is often employed, but the aim is never to gouge or heat-damage the substrate. The decision about grit is a balance between aggressiveness and control, between efficiency and the risk of setting in scratches that are hard to erase later.
A common starting point centers on a mid-coarse range that respects the thickness and resilience of the plastics involved. While some guides historically recommended use of very coarse grits—60, 80, or 120—for initial shaping or clear coat removal—the practical path for most fairings leans toward starting with a gentler but still effective range, such as 320 or 600. This approach reduces the likelihood of creating deep scratches that become visible once the final paint goes on. The initial pass with 320 or 600 is not a surrender to softness; it is a conscious choice to preserve the integrity of the underlying material while erasing the most prominent surface defects, gloss mismatches, and adhesive residues from previous coatings. If a stubborn area resists, a careful secondary pass with the same or a slightly coarser grit can be employed, but the emphasis remains on controlled abrasion rather than brute removal.
The essential sequence begins with careful preparation of the workspace and a method that respects the layers. Before ever touching the panel, it helps to decide whether you will be dry-sanding or wet-sanding at each stage. Dry sanding is fast and offers direct feedback about the surface’s roughness, but it generates a fine cloud of dust and can heat the plastic if pressed hard for long periods. Wet sanding, by contrast, uses water or a mild soapy solution to lubricate the surface, reduce heat buildup, and carry away plastic particles with the liquid. Wet sanding also tends to produce a cleaner, finer finish because the water helps flush微-scratches away from the abrasive surface. A practical approach is to begin with a dry pass to remove the most obvious irregularities, then switch to wet sanding for the finishing touches that lead to a smooth, paint-ready surface. Either way, a thorough cleaning between stages is essential. Dust carries oils, fillers, and residues that can compromise primer adhesion, so a careful wipe-down with a clean microfiber or lint-free cloth, followed by a degreasing wipe if necessary, is non-negotiable.
The surface cleaning phase is as important as the sanding itself. Contaminants trapped in pores or scratches will create adhesion failures that become glaring after paint. A surface that feels tacky or shows fingerprint smudges after a wipe is not ready for primer. In practice, this means a multi-step regimen: a light initial wipe, a more thorough wash with a mild detergent to remove dust and oils, and a final rinse that leaves no soap film. After drying completely, inspect the surface under good lighting. Tape a small area with painter’s tape to test adhesion in an inconspicuous spot—if the tape pulls fibers or paint easily, the surface needs more preparation. A second pass with the chosen grit is common after cleaning, and any raised edges or burrs should be addressed before moving forward.
As the process evolves, the technique itself becomes a conversation with the material. The circular or figure-eight motion often yields the most even wear on flat panels and consistent removal on contoured sections. However, when fairings include sharp angles or delicate ribs, it may be necessary to switch to a lighter touch or use a foam-backed sponge to maintain uniform pressure. The aim at this stage is to remove remaining micro-unevenness without creating new indentations. The foam-backed option deserves attention because it can glide over curves with less edge erosion than a hard-rigid paper can achieve. It is during these nuanced moments that the craftsman’s restraint proves as valuable as the tool’s capability. The specific choice of grit—moving from 320 or 600 to a much finer stage later—anchors the progression toward a uniform, micro-scratched surface ready for the next layer.
After the initial stage, the surface often shows a tapestry of small scratches and dust; this is where the transition to final smoothing takes effect. Cleaning becomes even more critical before advancing. A quick, thorough wipe to remove surface dust, followed by a slightly more meticulous cleaning with a cleaner suited to plastics, sets the stage for the final smoothing. When the surface is completely dry, a finer grit can be introduced. In many cases, the transition to a super-fine abrasive such as a 2000-grit paper marks the turn toward a truly seamless surface. Wet sanding at this stage is preferred, with water kept clean and neutral in pH to avoid any chemical interaction with the plastic or fillers. The goal is a satin-smooth texture with micro-scratches that are invisible to the naked eye but provide a microscopic anchor pattern for paint. The fine stage should be carried out slowly, with intermittent checks under strong light to catch any remaining imperfections that would otherwise reveal themselves through the paint.
This is also a moment to reflect on the subtleties of different plastics and how they respond to sanding. Fiberglass, while stiff and robust, can tolerate more aggressive abrasion in the early stages than polycarbonate, which is known for its tendency to haze or crack if overheated. ABS falls somewhere in between and can behave erratically if the heat builds up from aggressive sanding. For fiberglass, you often have more latitude for removing rough patches; for ABS or polycarbonate, the emphasis should remain on gentler, more controlled passes, especially near edges, corners, and thin sections. In practice, this means choosing a grit progression and pressure that honor the material’s characteristics. If a panel feels warm to the touch after a few minutes of sanding, back off and switch to a lighter grit or a wet-sanding approach to reduce heat.
As the surface nears its final stage, the polish of the sanding begins to resemble a quiet, patient conversation with the panel. The goal is a level of smoothness where the telltale signs of sanding—small swirls, pinholes, or uneven sheen—are minimized or eliminated altogether. Wet sanding with 2000-grit is a deliberate choice for many riders who want a glossy, well-adhered finish without the risk of deep scratches. The water acts as a coolant, a transport medium to carry away tiny particles, and a lubricant that allows the abrasive to move across the surface with less friction. The process requires steady hands and attention to the surface texture. Rinsing between passes is essential to keep the abrasive free of debris and to ensure the next pass contributes meaningfully to the smoothness rather than reintroducing scratches. Once the final pass is complete, a thorough rinse follows, and the panel is left to dry completely in a dust-free area. Only after this dry moment should primer be considered—any residual moisture, oil, or dust can undermine adhesion and lead to future repair work.
The best practices of sanding unite technique with safety. PPE is non-negotiable: safety goggles to shield eyes from particles, a respirator to guard against inhalation of fine dust, and nitrile gloves to protect skin from dust and any residues. Ventilation is equally important. If a dedicated spray booth is unavailable, work in a well-ventilated area with an exhaust system to minimize the concentration of airborne particles. Dry sanding should be accompanied by a dust collection system or vacuum to keep the shop air clear, especially during the initial roughing stages. Even if you are confident in your technique, the presence of fine particles makes a strong case for protective gear and controlled airflow. Pressure control is a simple but crucial rule: avoid pressing harder to accelerate the process, as excessive force can generate heat and cause micro-warping, particularly on thin or flexible sections of ABS or polycarbonate. The right pressure—consistent, moderate, and deliberate—delivers consistent results and reduces the chance of introducing defects that are difficult to correct later. And although the urge to skip steps or rush to the paint job can be strong, the established rule remains clear: never skip cleaning. Residual dust, oil, or wax can sabotage primer adherence and impair the final finish.
In considering the broader practice, it is useful to imagine sanding as a craft built on experience and observation as much as on the tool. The initial choices—320 versus 600, dry versus wet, the decision to use a foam-backed sponge for curves—shape what happens in the subsequent steps. A steady hand and a patient approach transform potential material weaknesses into a surface that holds paint with strength and beauty. The fiscal angle also factors in. While high-quality sandpaper may cost more upfront, its durability and performance can translate into fewer passes, less material waste, and a more predictable result. The long-term benefits of selecting appropriate abrasive media—smooth adhesion, reduced need for repolishing or recoating, and a finish that resists micro-damage from road debris—often outweigh the initial expense. The value proposition is not only aesthetic; it is a matter of durability and long-term satisfaction with the painted surface.
This discussion would be incomplete without acknowledging how modern practice blends traditional hand-sanding with careful, measured assess-ments of the panel’s function and form. The textures left by a properly executed sanding job are not random; they are an intentional micro-architecture. The subtle gloss and the absence of visible scratches tell a story of controlled effort, not brute force. When the fairing is later primed, sealed, and painted, the uniform surface acts as a receptive canvas that allows the color to settle evenly and the shine to emerge with clarity. The sustained quality of the finish is largely determined in those early steps, during which the sandpaper, the water, the hand, and the panel converge to create a bond that will endure through time. In this sense, sanding is not merely preparation; it is the quiet, faithful initiation of a long-lasting aesthetic and protective layer.
For readers seeking a visual blueprint of these techniques, a trusted source provides clear demonstrations on how to sand motorcycle fairings for painting. While this chapter remains focused on the principles and practice of grit and patience, the adoption of such methods can be reinforced by watching technique in action. If you wish to explore a broader catalog of fairing styles and fitments, you can browse the Yamaha fairings collection for reference on how different panels integrate into a complete bodywork system. The collection link below offers a practical sense of scale and curvature across models, which can inform a sanding approach suited to varied shapes and thicknesses. Yamaha fairings collection.
As the last considerations settle in, the value of a methodical, safety-forward approach becomes clear. Sanding is not a race; it is a conscientious negotiation with a plastic shell that must both be attractive and endure. The familiar steps—coarse to fine grit, dry to wet, dust-free cleaning, careful drying, and precise pressure—form a rhythm that, once learned, becomes nearly automatic. The repeatable success of a paint job depends on this rhythm, and the final appearance—smooth, even, without micro-swirls or high spots—justifies the careful discipline that sanding requires. With the right materials, the right technique, and a commitment to cleanliness and safety, motorcycle fairings can emerge with a finish that not only looks pristine but also resists the wear of time and weather. That is the core promise of good sanding: a foundation that respects the ride’s form while honoring the job that follows.
External resource: How to Sand Motorcycle Fairings for Painting — https://www.mmi.edu/blog/how-to-sand-motorcycle-fairings-for-painting
Rough Edges, Smooth Surfaces: Sandpaper’s Role in Crafting Durable, High-Gloss Motorcycle Fairings

Sanding a motorcycle fairing is more than a cosmetic ritual; it is the decisive hinge between a rough, uncoated surface and a lasting finish. The choice of sandpaper, the grit progression, and the technique together determine how well paint, decals, or protective films will cling and how the final appearance will behave under light, heat, and road dust. In the shop and on the bench, riders and builders alike often underestimate this stage, treating sanding as a minor chore. Yet neglect, or doing it with the wrong tools, can undo weeks of effort and investment. The surface texture you leave behind is a quiet ambassador for every subsequent layer. It communicates whether the base is ready for primer and paint, or whether you’re staring down problems like peel, micro-scratches, or uneven gloss. The stakes are practical and visual: a fairing that adheres reliably and shines evenly not only looks professional, but resists the test of time and weather, which, on a motorcycle, means the difference between performance and disappointment on the road.
A fairing, whether fashioned from fiberglass, ABS plastic, or polycarbonate, presents a mixed bag of material behavior. Each substrate responds differently to friction, heat, and moisture. Fiberglass needs careful deburring and a slightly toothier texture to host resin-based coatings, while ABS and polycarbonate demand a gentler touch to prevent surface crazing or edge chipping. Sandpaper, in this context, is not a blunt instrument but a calibrated tool that negotiates between material compatibility and coating chemistry. The goal is a surface that is uniformly dull to the touch, free of open scratches, and free of residual gloss that could trap air or contaminants under a new layer. Achieving that state requires a clear plan for grit selection, a feel for when to switch grits, and an understanding of how water, heat, and dust interact with the sanding process. The psychological and aesthetic payoff comes later, when the color hits the panel and light reveals a surface that looks deliberate rather than hurried.
The economic dimension of sanding begins long before a single sheet of paper touches the fairing. Correct sanding reduces the risk of adhesion failure, which in turn lowers the likelihood of expensive rework. A misstep—such as leaving a visible scratch or gloss variation—can prompt additional coats, more primers, or even new fairings down the line. While a skilled finish often depends on professional services, the right home setup can dramatically shrink costs. A conservative, well-executed sanding plan allows riders to perform repairs or customization without needing to purchase new skins or hire high-cost trade services. The financial logic is straightforward: every stage of preparation that produces a more durable, uniform base saves time, materials, and labor further along the process. In this sense, sanding is a long-term investment that pays off not just in the initial paint job, but in the finish’s resilience to impact, moisture, and UV exposure. The cumulative effect is a finish that holds color better, resists peeling or bubbling, and retains its gloss for longer—benefits that compound as miles mount up and exposure to the elements continues.
A practical approach to the economics begins with grit strategy. In most prep scenarios, a deliberate progression from coarse to fine grit is the backbone of a reliable finish. Initial shaping or removal of old clear coats commonly uses a coarser range—roughly 60 to 120 grit—where the goal is to flatten irregularities, knock down embedded scratches, and establish a uniform baseline. That baseline makes subsequent steps more predictable. Moving toward refinement, 400 to 600 grit becomes the standard for final smoothing. The precise target depends on the material and the coating system in use, but the principle remains the same: you want to minimize deep scratches that would telegraph through the final paint or film while maximizing the surface’s readiness to accept primer. Wet sanding is a core technique that supports this progression. By using water to lubricate the abrasive and carry away slurry, you reduce heat buildup, minimize dust, and improve the uniformity of the abrasion. Wet sanding is especially valuable on plastics and on curved geometries, where dry sanding can create focal points of friction and heat that mar the surface. In practice, wet sanding also reduces the risk of embedded debris becoming a permanent feature of the finish, a subtle but consequential factor in the long-term appearance of the bike.
The material choice of sandpaper matters as much as the grit. Coated abrasive papers are robust and effective for initial shaping and material removal, but they can clog on resin-rich surfaces or on heavily sunken scratches. Wet/dry papers offer versatility for both dry and water-assisted sessions, giving riders the option to switch tactics without changing tools. Foam-backed sanding sponges provide a gentler touch for final smoothing, particularly on complex curves or small panels around contours. The right file of sandpapers—combined with a consistent method—helps maintain edge integrity, avoids stripping edges, and preserves the geometry that defines a fairing’s aero profile. When done with care, the result is a surface that is uniformly dull to the touch and free of visible gouges. A neglected or rushed approach, by contrast, can leave surface anomalies that will reveal themselves once color or decal work begins. In the worst case, these imperfections require additional coats, more sanding, or worse still, a repaint—a significant economic cost that could have been avoided with a patient, informed hand.
Application of this discipline yields undeniable aesthetic dividends. A meticulously sanded surface reflects a refined eye and signals a higher standard of finish. The smoothing process helps to align the base with the color or film that follows, allowing pigments to lay down evenly and with consistent depth. Imperfections like scratches or inconsistent gloss are the arch-nemeses of a professional-looking paint job. Even subtle surface flaws can catch light unevenly, creating shadows that break the clean, uniform sheen riders expect from a high-performance build. The relationship between sanding quality and perceived value is nuanced but real: a surface that feels flawless up close translates into a perception of quality from every angle on the road. For decals and water-slide transfers, the payoff is equally tangible. A well-prepared substrate presents a clean, adhesive-friendly field where transfers settle smoothly, eliminating wrinkles or micro-bubbles that would otherwise betray a hurried preparation. The aesthetic rewards are not only about color depth and gloss but also about the absence of texture noise. A rider can spot an unrefined finish at a glance, whereas a truly well-prepped surface invites light to play across the panel, highlighting the form and curves of the fairing rather than the marks left by abrasive paper.
Technique, not talent alone, governs the outcome. A disciplined, repeatable approach reduces the variables that can derail a finish. Begin with a visual scan of the panel and a tactile check for high spots, pits, and old coatings that need to be leveled. Use a clean block or sanding pad to maintain even pressure and to avoid creating new ridges along the contours. When you switch grits, do so gradually and keep a light touch; pressing too hard can reintroduce deep scratches even with finer papers. A quiet rule of thumb is to change the direction of the stroke with each grit to avoid creating follow-through patterns that are visible in the final coat. The goal is an even, consistent abrasion that leaves the surface with a faint tooth and a uniform matte appearance. After the final smoothing with 400 to 600 grit, wipe the surface with a tack cloth to remove dust. A damp rag can also work, but be mindful of introducing moisture that could swell the plastic or degrade underlying primers if they are not fully cured. At this stage, the surface is ready to receive primer, a step that will define how well subsequent layers bond and how deeply the color will saturate.
In the conversation between technique and technology, there is a place for specialized solutions when surfaces become stubborn or complex. Water transfer paper, widely used for complex graphics and durable designs, offers a compelling option for parts that resist traditional decals or face curvature challenges. This approach relies not only on the film’s elasticity and cling but also on the fidelity of surface preparation. The more the base is sanded to a pristine, uniform plane, the more accurately the transfer can conform to curves without wrinkling or tearing. The film’s stretch and conformity are central to the success of a design on a tank, fenders, or other contoured sections. When paired with meticulous sanding and surface cleaning, water transfer applications can deliver high-precision aesthetics and durable finishes that stand up to road grime and UV exposure. For riders considering this path, the key is to view sanding as the foundation: a well-prepped surface allows the design to unfold without distortion, and in turn, the finish benefits from improved durability and an enhanced optical effect.
From a practical standpoint, the bridging of sanding and design is most visible in the final appearance and the long-term maintenance of the bike. The smoothness achieved through proper grit selection reduces micro-defects that often become visible only after paint has cured or after a decal has aged under sun and heat. A high-gloss finish demands a flawless base; any micro-scratch becomes a flaw magnified by clear coats. Conversely, a uniformly prepared surface tends to produce consistent color depth and more even reflections, which translates into a more striking, professional look. This is the intangible value of good practice: confidence in the bike’s appearance, whether it is on a showroom floor or a fleeting moment on a twisting road. The rider’s perception of quality feeds back into the ownership experience, influencing how the bike is perceived by others, from casual observers to potential buyers. In that sense, sanding is not merely maintenance; it is an act of design stewardship that preserves the aesthetic and functional integrity of the fairings.
For riders who want to explore more about the specific components and parts after sandings—particularly popular ranges like certain Yamaha fairings—the journey can begin with a broader collection resource that gathers compatible panels and accessories. See the Yamaha fairings collection for a sense of the variety and fitment options that exist within modern aftermarket ecosystems. This helps to contextualize the sanding work within a broader refurbishment or customization plan, ensuring that the preparation aligns with the chosen panels and their geometry. The match between surface preparation and subsequent components matters as much as the grit on the paper; it shapes how a completed assembly feels and looks once mounted and ridden. When the sanding sequence is aligned with a chosen design direction, the finished look communicates both technical competence and an artistic intention that elevates the bike beyond stock appearance.
In the broader arc of a project, the chapter on sanding would be incomplete without acknowledging the practicalities of time, cost, and accessibility. For most enthusiasts, the appeal lies in being able to perform meaningful improvements at home, given the right tools and information. The cost of the sanding materials is modest compared with the expenses of professional refinishes, especially if you’re planning multiple projects or frequent customization. The long-term value comes from the finish staying intact and looking consistent across panels for years, rather than failing after a season of weather exposure. Good sanding discipline reduces waste by ensuring coats are not wasted on poorly prepared surfaces, and it minimizes the need for repainting due to avoidable surface flaws. The cumulative effect is a fairing that maintains its color fidelity, gloss uniformity, and edge integrity over time, while also resisting the stresses of daily riding. This outcome supports the rider’s confidence and satisfaction, reinforcing the idea that attention to preparation yields performance benefits that extend far beyond the immediate paint shop.
External resource notes that support the technical backbone of this discussion can be found in specialized literature on water transfer paper for motorcycles. For readers seeking deeper technical context on the properties and applications of water transfer film, an external resource provides detailed standards and usage guidance. Understanding these properties can help ensure that the final design remains durable under real-world conditions, especially in high-heat or high-humidity environments encountered in many riding settings. Understanding Water Transfer Paper For Motorcycle: Standards, Properties, and Applications
Final thoughts
Insightful preparation techniques utilizing the right sandpaper can dramatically influence the final appearance and durability of motorcycle fairings. For business owners, investing time in sandpaper selection and sanding methods doesn’t just enhance service offering but also leads to cost-saving benefits and improved client satisfaction. A commitment to high standards in sanding can distinguish your business in a competitive market. Implementing these strategies will undoubtedly yield enhanced aesthetics and stronger, longer-lasting fairings, ensuring a successful outcome every time.