In the motorcycle customization industry, high-quality spray painting of fairings represents both an art and a skill vital for enhancing customer satisfaction and brand reputation. Business owners must recognize that effective spray painting not only allows for unique personalization but also protects against environmental wear and tear. This guide emphasizes essential preparation techniques, the selection of appropriate spray paints, and advanced methodologies that can enhance the painting process. Through comprehensive insights presented in each chapter, business owners will gain the knowledge necessary to elevate their service offerings and ensure durability and aesthetic appeal in final products.
Prep Is Prime: The Foundation of a Durable Spray-Painted Motorcycle Fairing
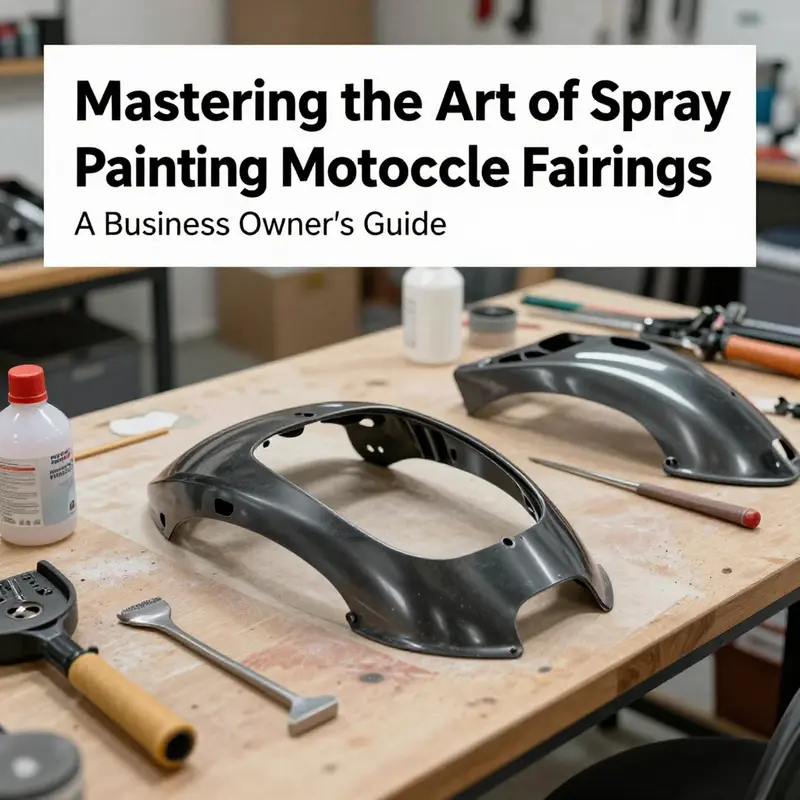
The path to a durable spray finish begins with prep. For motorcycle fairings (ABS plastic or fiberglass), surface chemistry and how the material responds to heat, UV, and vibration determine adhesion and longevity. Thorough cleaning removes oils and dust; a degreaser followed by lint-free drying ensures a clean slate. Next, light sanding (400–600 grit) dulls gloss and creates a micro-rough key, while feathering blended edges to avoid hits or ridges. After sanding, remove dust with compressed air and tack cloth. Masking is the next critical step: precise edges around lights, mirrors, and trim protect areas that must stay unpainted. Primer is applied in thin coats to bond with plastic, fill imperfections, and provide a uniform base, especially if color coverage is challenging. Environmental control matters: a dust-free space, steady temperature (roughly room temperature) and moderate humidity help the film flow and cure. A final check with a test spray ensures spray pattern, distance, and technique are correct before applying color. Color is applied in multiple thin coats, allowing flash times between coats; occasional lighter base layers may be needed for very light colors. Finally, a clear topcoat seals the color and adds gloss and UV protection. After curing (typically 24–72 hours), the surface can be buffed or waxed if desired, but aggressive polishing should be avoided during early curing. Following these steps consistently yields a durable, showroom-worthy finish that resists chipping and UV fade over time.
null
null
Beyond the Gloss: Mastering Advanced Spray Techniques for Durable Motorcycle Fairings
The work of transforming a motorcycle’s exterior from a rough shell into a protected, eye-catching canvas is a blend of science, craft, and patience. When riders and painters seek a finish that stands up to sun, wind, road grit, and the inevitable nicks of the track or street, they lean on advanced spray techniques that go beyond a simple color coat. The essence of this discipline is not merely choosing a color but orchestrating a sequence of precise steps that respect the material, the environmental conditions, and the imperatives of long-term durability. In most motorcycles, fairings are made from ABS plastic or fiberglass. Each material has its own personality under a spray gun: ABS tends to respond with good plastic adhesion when properly primed, while fiberglass can demand extra care to seal fibers and prevent micro-bleed through. Respect for these materials begins with the surface they present, and that respect translates into the even, glassy finish riders expect when they walk away from the spray booth or the garage spray area.
The preparation phase is the fulcrum of success. A fairing’s life begins with cleanliness. Any trace of oil, silicone, wax, or fingerprints becomes a magnet for adhesion failures. A proper degreasing routine removes these contaminants and helps the subsequent layers bite into the surface with confidence. After degreasing, a careful inspection follows. The fairing is examined for sanding scratches, pinholes, and resin seepage or film buildup. Small imperfections are treated with a light touch that preserves the original contours while creating a micro-mechanical key for the primer. The sanding itself is an art; fine-grit paper, typically in the 1200 to 2000 range, is employed to establish a subtle tooth without creating visible crosshatch patterns that would telegraph through the paint. The objective is not to erase every flaw but to soften it so the primer can do its job well, filling minor irregularities and providing a smooth, uniform surface for the color coats.
Priming follows with a focus on adhesion and plastic compatibility. A plastic-specific primer is used to condition the surface, reduce the risk of solvent attack, and create a uniform base color that can be covered evenly by the subsequent coats. The primer layer should be dust-free and visually uniform; any sags or dust nibs in the primer are harder to recover from than those in a mid-coat, so the preparation window is deliberate and patient. When the primer has cured, a light re-blast with fine paper and a tack cloth can remove any residual dust and lend a final bite to the base for the color. At this point, the painter has already set the stage for a finish that will resist micro-scratches, UV exposure, and the relentless vibration of highway miles.
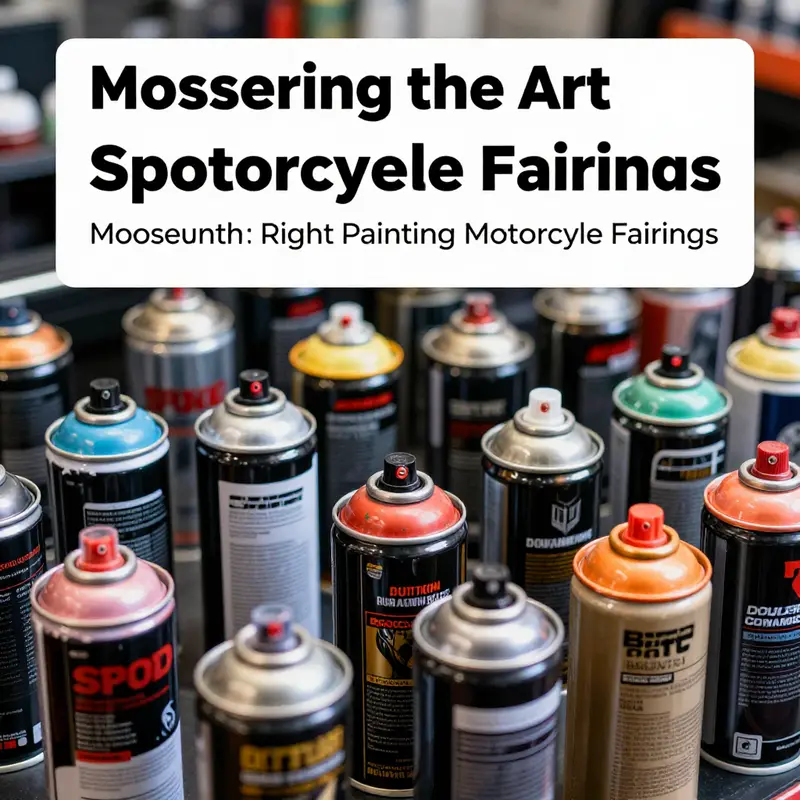
Paint selection remains a cornerstone of a durable, rich finish. The professional end of the spectrum leans toward high-solid or 2K acrylic enamel systems. These formulations offer superior color depth, better stone protection, and a broader tolerance for expansion and contraction that arises from temperature swings and the flex of the fairing as the bike moves. Because plastics inherit a certain degree of flexibility under heat and sun, the selected base color should be compatible with a flexible topcoat system. The goal is to avoid a brittle finish that could crack under impact or warp with heat. In practice, the painter will thin the base coat as required to achieve a smooth, even flow from the spray gun, often calibrating the technique to the specific equipment and environment. The result is a color field that reads as clean, vibrant, and consistent across curves, edges, and mounting points.
As the color foundation dries, the next stage—clear coating—takes the workmanship to a new level of durability and gloss. A 2K clear coat is the workhorse here. It is a two-component system that cures to a hard, impact-resistant, and highly reflective surface. The clear coat protects the color from UV light, chemical exposure, and minor abrasions while preserving the clarity of the color beneath. The application of the clear should be counted in multiple, even layers rather than a single, heavy film. Two to three coats are typical, with thoughtful intercoat intervals allowing each layer to set enough to avoid solvent entrapment and sags. The use of a controlled flash between coats is essential. Flash drying involves short, controlled intervals that let solvents evaporate without letting the surface thicken or haze over. This technique helps to avoid runs and orange-peel textures, which otherwise obscure the depth and mirror-like quality of the finish.
The environment in which these layers are laid down plays a decisive role in the final result. A well-ventilated space that minimizes dust and airborne contaminants is non-negotiable. A dedicated paint booth or a controlled workshop area offers regulated temperature and humidity, which reduces the risk of solvent collapse or micro-scratching. Temperature influences viscosity and spray behavior; humidity can encourage fogging or moisture entrapment in the film. The painter learns to read these conditions quickly, adjusting viscosity, fan speed, and spray distance to maintain a smooth, consistent laydown. The aim is a gloss that is even from edge to edge, with a color field that matches across all fairing components, including the pieces that come in pairs or sets from a single kit.
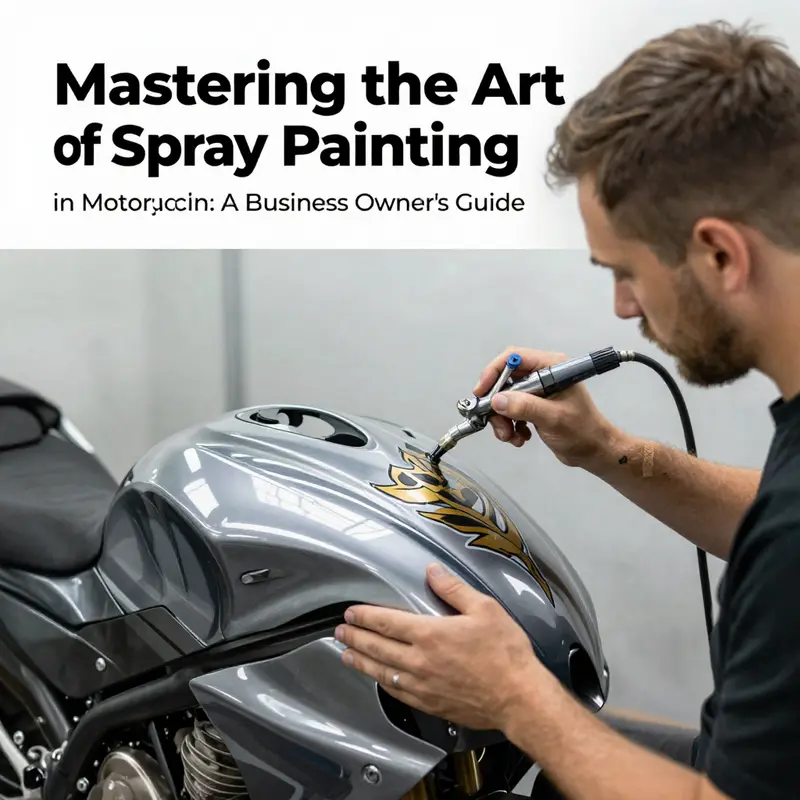
Masking and design work introduce the artistry that elevates a simple paint job to a personal statement. For those seeking something beyond a flat block of color, masking and airbrushing enable color gradients, subtle fades, or intricate designs that require precision and patience. In practice, the masking process is almost as important as painting. Careful mask selection, crisp edges, and a plan for how the design wraps around contours ensure that the pattern follows the bike’s lines rather than fighting against them. This is where the technique matters most: the painter must anticipate how light will strike the curved surfaces, how the edges will wrap around corners, and how the final piece will look when viewed from multiple angles on the street or track. The artistry resides not merely in the design but in the way paint responds to the curvature under a soft light and how the gradients align when the fairings are installed side by side.
Throughout this process, the equipment setup and the numbers behind spray technique are as critical as the artistic eye. The nozzle size, atomization quality, and spray pattern define how the paint granules align to create a film that looks seamless rather than granular. The painter follows a discipline that reduces paint usage while maximizing coverage, using multiple passes that lay down a thin, even film with enough overlap to avoid striping. The result is a uniform base color that a first glance might mistake for a solid, etched surface rather than a mass of thin layers with precise chemistry at work. The interplay between the base color and the clear coat becomes a dance of clarity and depth; the clear enhances the color, adds rigidity, and yields that coveted glass-like finish that invites another inspection with the sun at a particular angle.
Beyond the practicalities of base and clear lies the potential for personalization that still respects durability. Airbrushing can deliver delicate gradients, logos, or decorative motifs that complement the bike’s silhouette without overpowering the design. The painter who pursues these looks must be prepared for the additional practice hours, a steady hand, and the equipment calibrated for micro-control. A successful custom finish often hinges on clean lines during masking and on the ability to control the humidity and solvent evaporation rates at such a fine scale. While not every rider will embark on a custom motif, the knowledge of these techniques gives a broader range of options when a fairing is stripped and repainted, or when subtle updates are needed after a long season.
One practical advantage of the approach described here is the consistency it offers when it is time to reassemble the bike. A professional finish should be robust enough to survive handle-and-mount manipulations, storing, and routine cleaning. A properly cured 2K clear with a compatible base is less susceptible to micro-blistering or color shift when washed with standard automotive cleaners. The curing process, though; often the most underrated phase, determines how well the finish endures. Adequate curing time—commonly 24 to 72 hours, depending on film thickness and environmental conditions—allows the solvents to fully dissipate and the resin matrix to reach its final hardness. Attempting to handle or reinstall too soon invites edge lifting at the seams or micro-scratches that dull the finished surface. The patience to wait is as critical as the skill to paint.
In the broader scope of mastering these techniques, many riders benefit from structured guidance that distills years of trial and error into actionable steps. A comprehensive guide from a trusted source offers detailed, step-by-step instruction that covers paint selection, equipment setup, and finishing processes, rounding out the practical knowledge with strategic insights about consistency and efficiency. For those looking to connect with related resources and parts that complement a project, there is value in consulting dedicated catalogs of fairing components. For example, a rider exploring a specific set of fairings can explore the Honda fairings collection to assess fitment, mounting points, and preserved contours that affect surface preparation and the final appearance of the finish. This type of practical reference helps ensure that the prep and paint approach remains aligned with the shape and line of a given fairing kit, avoiding misalignments or contour mismatches that complicate painting or reassembly.
The essence of the advanced methods described here is not simply to achieve a beautiful look. It is to cultivate a finish that remains resilient through time and use. The combination of thorough surface preparation, careful primer and primer compatibility, high-quality plastics-friendly base colors, rigorous masking for any custom elements, and a disciplined layering strategy for color and clear coat creates a durable, glossy, and visually striking result. For riders and builders, the payoff is a fairing surface that resists peel, chalking, and fading and maintains a showroom-like radiance through thousands of miles of exposure. This is not achieved by chance; it is the outcome of deliberate process choices, disciplined technique, and a respect for the material properties of ABS and fiberglass. It is about turning a functional shell into a durable, expressive, long-lasting component of a machine that is designed for speed and for a personal identity.
As you move from the theory of these techniques into practice, remember that mastery is incremental. Start with a solid foundation: spotless prep, compatible primers, and a controlled environment. Build from there with careful, sequential coats and a patient curing regime. The result will be a finish that looks right in the sun and keeps looking right after hours of highway wind and the grit of rear-wheel spray. And if you want to see how this translates to a practical kit and parts strategy, you can explore the Honda fairings collection to gauge fitment and planning for future projects, ensuring your prep work aligns with the geometry and mounting points of the kit you choose. The path to a pro-level result is, ultimately, a sequence of well-executed decisions that respect the material, the environment, and the rider’s vision. For those who crave a deeper dive, a contemporary, technique-focused video resource demonstrates the precise control and timing that separates a casual paint job from a professional-grade finish. This external guide offers a visual companion to the written principles, reinforcing the steps that bring a flawless, durable appearance to life.
External resource: How To Paint Motorcycle Fairings Like A Pro – 2023 (https://www.youtube.com/watch?v=5sOZdH6rXWk)
Final thoughts
To thrive in the competitive motorcycle customization industry, mastering the art of spray painting fairings is essential. The preparation techniques outlined ensure optimal adhesion and a flawless finish, while selecting the appropriate paint guarantees durability and aesthetic appeal. Moreover, embracing advanced techniques can distinguish your business from others, providing customers with bespoke designs that reflect their personalities. By implementing the strategies discussed in this guide, motorcycle businesses can enhance both their craftsmanship and customer satisfaction, ultimately driving growth and success.