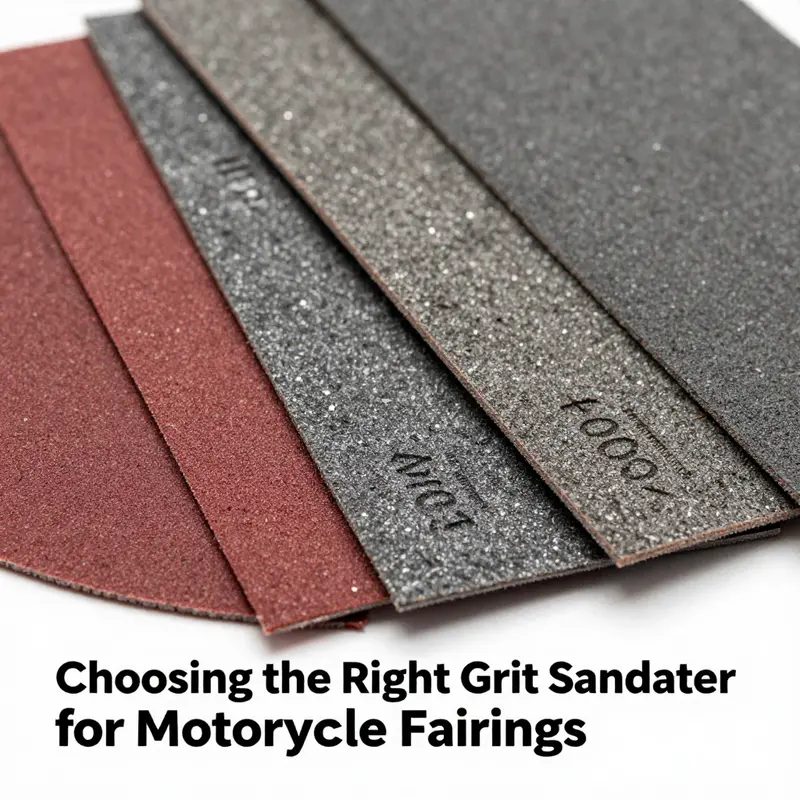
The art of painting motorcycle fairings begins long before the first coat of paint is applied, requiring meticulous preparation to ensure excellent adhesion and finish quality. Among the essential steps in this process is sanding with the correct grit sandpaper. Business owners in the motorcycle industry must understand the significance of selecting the proper grit range, typically between 400 to 600, to achieve a ‘tooth’ on the surface that primes it for painting. This article explores various facets of sanding motorcycle fairings—detailing the recommended grit, emphasizing the importance of the sanding process, highlighting common mistakes, presenting effective sanding techniques, and explaining how the sandpaper grit affects paint adhesion. Each chapter builds upon the last, equipping you with the knowledge to enhance both your product quality and customer satisfaction.
The Right Grit: Achieving Adhesion and a Flawless Finish on Motorcycle Fairings
Preparing motorcycle fairings for paint hinges on a simple, stubborn truth: the first contact between plastic and pigment is made by the surface you create with your sandpaper. In practice, that means choosing the right grit is not a mere preference but a procedural necessity. For dry sanding, the recommended range is 400 to 600 grit. This level of abrasiveness is enough to abrade the surface just enough to reveal fresh plastic and to produce what tradespeople call a surface with a good tooth. That tooth is the key to paint adhesion. It is not an optional detail; it is the foundation of a durable finish. Even when the fairings come from a mold with a clean look, there are mold release agents baked into the surface to ease ejection from the mold. Those agents can stubbornly resist bonding with primer and paint if you skip this step. The guidance aligns with professional standards and practical restoration guides that emphasize careful surface preparation as a prerequisite to any paint job. The lesson is consistent: surface science, not just color choice, determines long term outcomes.
In practice, the sanding should be done in smooth circular motions with moderate pressure. Circular motion helps avoid creating long shallow grooves or flat spots that run counter to the aim of a uniform micro scratch pattern. The pressure should be enough to wear away the top layer and micro dissolve any release agents without grinding into the underlying plastic. The goal is not to grind the surface flat as if you were leveling a wooden board, but to create a consistent micro scratch texture across all curves and transitions. When done right, the surface will feel slightly rough to the touch when you run your fingers over it, and the reflection of light will scatter in a way that indicates an even prepared surface rather than a glossy raw crest of plastic.
If you encounter heavy paint buildup, deeper scratches, or localized damage, the process changes only slightly in sequence, not in aim. Start with a coarser grit 320 for instance to aggressively scuff those problematic areas. The 320 grit bites more aggressively but leaves behind a controlled texture that you can refine quickly by stepping up to 400 and then to 600. This staged approach is a practical concession to real world conditions. It ensures you do not overheat, or skim away important details near seams and edges, while still delivering a uniform final tooth before priming. After this progression, you would normally transition to the 400-600 range for the final pass, ensuring the entire fairing surface is uniformly prepared and ready for primer.
The sequence also carries an important caution: even though the fairings may feel clean, the sanding itself creates a lot of dust. Plastic can hold the dust and micro debris in recesses and around fasteners, where it can interfere with primer adhesion if not removed. A thorough wipe down after sanding is essential. Most technicians move straight from sanding to a tack cloth wipe, then a quick degreasing with a mild solvent or isopropyl wipe, followed by another tack cloth pass. The aim is to deliver a dust free, oil free, and dry surface. Drying time matters here; give the surface a few minutes if you are working in a humid environment to ensure there is no residual moisture that could compromise adhesion.
The broader context matters as well. You are not simply preparing a patch of plastic for a single color; you are laying the groundwork for a durable, long lasting finish that resists chipping and discoloration. The 400-600 grit range is a compromise between bite and control. It scratches the surface enough to promote bonding, but it does not create deep grooves that require excessive filler or more aggressive primer steps. The idea is to arrive at a consistent texture across all surfaces, including complex curves and hard to reach transitions where mold release residues may accumulate more stubbornly. If you take time to inspect the surface from multiple angles, you will notice that light catches the micro scratches differently across edges, corners, and radii. That is a telltale sign that you need to feather edges and keep the sanding uniform to avoid creating islands of different textures that will show through the primer.
As you approach the priming stage, your focus should shift from abrasion to verification. Look for any shiny spots, splotches, or zones where the scratch pattern seems uneven. Those are the first signs that you may have skipped a spot or pressed too hard in a corner. A light re sanding with a finer pass can address these irregularities, but the key is to maintain the overall tooth without overdoing it. Remember: the primer is designed to grip the micro-scratches; if those scratches are inconsistent or too shallow, the primer may appear grainy or peel away in the long run. The consistency of the surface determines the overall smoothness of the painted finish, even before the color or clear coats are applied.
For those who are embarking on the journey of fairing restoration and repainting, the guidance is simple but exacting. Establish your grit range in advance, begin with the coarser option only where necessary, and progress methodically through to the finer grade. Maintain a light but steady pressure, and never press so hard that you heat the plastic or drive heat cracks into the surface. If you adhere to this discipline, you will create a surface that not only accepts primer readily but also provides a robust base for color, base coat, and clear. By focusing on a clean, toothy texture rather than a perfectly smooth finish at the sanding stage, you enable the paint system to do what it does best: resist chip, peel, and wear while delivering the gloss and color depth you sought from the start.
In terms of practical workflow, this approach aligns with both conventional practice and modern refinishing technique. A prepared surface is a reliable canvas. The 400-600 range has stood the test of time as a dependable, repeatable method for achieving reliable adhesion on plastic fairings. It also anchors the overall painting process to a predictable foundation, which makes subsequent steps—priming, base coat, and clear coat—more controllable and less error prone. When you consider the investment of time and materials, the payoff is a finish whose longevity speaks to the soundness of the initial surface preparation. For a concise hands on reference, you can consult the practical painting guide that consolidates these principles and translates them into actionable steps for a variety of fairing types and conditions.
If you want to explore compatible options for your specific model family and to see what others have used in practice, you can browse dedicated fairing collections that align with your motorcycle make and model. For example, the Honda fairings collection offers a range of shapes and sizes that may correspond to your project and can serve as a useful guide for understanding how different curvature and panel thickness respond to sanding and prep. External reference from Motorcycle Cruiser provides detailed steps and explanations that mirror the best practice described here. The article emphasizes the same core steps: clean, scuff, and sand within the 400-600 grit window; verify the surface texture; and ensure a dust free, dry surface before priming. This external resource reinforces the practical approach and helps validate the recommended grit pathway for various types of fairings and paint systems.
The Grit That Holds: Mastering Sanding for Durable, Seamless Motorcycle Fairings

For anyone aiming to transform a motorcycle’s plastic shell into a durable, showroom-worthy finish, the right sanding grit is not a cosmetic flourish—it is the hidden hinge that binds primer, paint, and clear coat to the fairing’s surface. The journey from factory gloss to a durable topcoat begins with understanding the precise role of abrasive grit. When you start with the correct range, you begin the process with intention, not guesswork. In practice, this means embracing a fairly narrow window of sandpaper grit for dry sanding, typically between 400 and 600. This range creates the initial tactile texture—the so-called tooth—that ensures the primer can bite properly into the plastic rather than slide across a smooth, waxy, or contaminated surface. It is the difference between a paint job that fades with time and one that resists peeling and blistering through years of riding exposure. This principle is echoed by professional restoration guides and is reinforced by practical, field-tested experience in the motorcycle refinishing community, where the goal is reliability as much as appearance. As you prepare the surface, the motion matters almost as much as the grit. Circular motions with moderate pressure help to achieve a uniform texture without creating flat spots or gouges. The circle acts as a gentle tuner, guiding grit to follow the surface’s contours and edges rather than cutting across them haphazardly. The result is a consistent key that primes can bond to evenly across the entire panel.
Even new plastic fairings are not automatically ready for paint. They often arrive with mold-release agents and surface oils from the manufacturing process that can interfere with adhesion. Skipping sanding on these parts might feel tempting, especially when a fresh pair of fairings looks perfectly smooth. Yet the gloss you see in the showroom isn’t enough for a lasting bond. The default factory finish can resist the primer’s first bite, setting the stage for premature paint failure. Adhering to the sanding step ensures the paint has a mechanical grip, not just a chemical one. This is why the practice remains a non-negotiable in professional painting and restoration, no matter how pristine the plastic appears.
To quantify the material removal and the texture you’re aiming for, convention in automotive and motorcycle refinishing guides suggests removing about 0.1 to 0.2 millimeters of the surface layer. This is not a large amount, but it is enough to remove a glossy or contaminated top film and expose a micro-roughness that the primer can grip. The goal is not to erase the original shape or flatten every feature. Instead, you are intentionally creating a light abraded surface that forms a durable mechanical bond. A subtle reality check accompanies this step: you should be able to feel the texture with your gloved finger, not see deep scratches or swirl marks that will telegraph through primer and paint. It’s a fine balance between sufficient roughness and maintaining the integrity of the original panel.
The texture you produce must also serve as a bridge for repair work. Localized damage—scratches, chips, or small gouges—should be treated with a careful blend. Technicians typically sand beyond the visible repair zone by a few centimeters to ensure a smooth transition, usually 3 to 5 centimeters beyond the edge of the imperfection. The aim is to avoid a hard edge where the new paint sits abruptly against the old finish. When done correctly, the repair area disappears under the base coat, with the new paint harmonizing with the surrounding color and texture. This blending requires patience and a light touch, particularly around curves and corners, where too much pressure can round off sharp edges or create uneven reflections.
Special finishes add a layer of nuance to the sanding process. Metallic and pearl paints, which incorporate reflective particles like aluminum flakes or mica, demand extra care. In these cases, finest-grit sanding becomes more important, and the approach shifts toward finer control. Grits in the range of 1500 or higher, used with a dual-action (DA) sander and light pressure, can prevent jagged impressions that would distort the metallic or pearlescent effect. The minute particles responsible for the shimmer can be damaged by aggressive abrasion, so the goal is to lightly abrade the surface enough to remove defects while preserving a smooth, micro-rough texture that yields a pristine base for color and clear. After this stage, the remainder of the pre-paint process—careful masking, degreasing, and a dust-free wipe—becomes essential to realize the intended depth and reflectivity of the finished job. Even with finer grits, the underlying principle remains the same: you are building a surface that binds well with primer, then with color, and finally with a clear layer that must resist UV degradation and daily wear.
Blending, however, isn’t merely about avoiding a visible seam. It’s about ensuring the entire fairing responds uniformly to lighting, weather, and ride-time. The sanding step becomes a test of surface integrity as much as a preparation ritual. If you observe glossy patches or noticeable scratches after the initial sanding, you need to reassess your approach before moving to primer. This might mean stepping back to a slightly coarser grit for a moment to re-create even abrasion or investing more time with the DA sander to flatten irregularities. The clean, even surface is the canvas on which the primer lays down a consistent base color, and the base coat sits on that foundation with uniform adhesion. The better the surface preparation, the more predictable the paint’s behavior during curing and drying, and the less likely you are to encounter days-long touch-ups or patch rework.
The discussion of grit and technique also carries practical, day-to-day implications for workshop workflows. Before you even pick up the sandpaper, plan your sequence. Start with a solid inspection of the fairing’s overall condition, identify areas of deeper gouges that require more smoothing, and map out a light, even feathering plan from edge to center. You’ll often find that final light passes with 600 grit or even higher are needed to finalize the texture just before primer. Dust management becomes a silent partner in the process. Sanding creates fine particulates that can settle into corners, edges, or the underside of a panel and sabotage adhesion or finish clarity. A tack cloth or lint-free wipe used between passes helps maintain a pristine surface as you progress through the steps.
If you are sourcing panels or reference examples for fit and finish, the Honda fairings collection offers a broad spectrum of shapes and textures to study for context and inspiration. The collection demonstrates how different fairings respond to light and how subtle curvature influences the sanding strategy you choose. For readers exploring parts compatibility or color matching in a broader project, these references can help align expectations with the realities of texture and gloss relationships on curved plastics. Honda fairings collection
The broader lesson is simple and powerful: sanding is not a mere formality but a technical requirement that guarantees the longevity of the finish. Skipping it invites risks that multiply as the seasons pass. Poor adhesion invites peeling and blistering under sun exposure and temperature fluctuations. A surface that isn’t properly keyed can also reject the primer, making subsequent layers more susceptible to moisture ingress and UV damage. The consequences aren’t just cosmetic; they compromise the protective and structural performance of the finish over time. In practice, the chain of preparation is almost as important as the paint itself, and it begins with the grit you select and the care you take during the sanding.
To complete the narrative, consider how this preparation ties into the broader workflow of painting motorcycle fairings. After sanding to the target roughness, you degrease to remove oils, dry the surface, and then apply a primer designed for plastics. The primer must bond well to the abraded surface and flow evenly under subsequent coats. The transition from primer to color coat hinges on that initial scratch pattern—too smooth, and the base paint may not adhere; too rough, and you risk an uneven finish. The interplay of grip and smoothness is delicate yet decisive. In the end, the durable, seamless finish you crave rests on disciplined surface preparation, not on shortcuts.
For readers eager to cross-check or deepen their understanding, an external resource provides practical context on pre-paint surface preparation and the critical role of sanding. The linked guide emphasizes the non-negotiable nature of the process and offers additional techniques that can refine your approach to edges, curves, and overall flatness. https://www.autoblog.com/2024/08/19/motorcycle-paint-repair-sanding-tips/
Gritwise: Steering Through Common Sandpaper Mistakes for Motorcycle Fairings to Achieve a Pro Finish
Choosing the right grit for sanding motorcycle fairings is about guiding the surface toward a paint-ready state, not chasing a perfect number. For plastic fairings, a common starting point is 400–600 grit to promote adhesion while preserving material. This level provides enough surface texture to hold primer without creating deep grooves. If the surface is new or has mold-release residues, clean and lightly abrade to ensure primer bite.
Avoid jumping to ultra-fine grits too early. Very fine paper tends to skim over high spots, clog quickly, and can leave micro-scratches that show after paint. Start with 400–600 to flatten highs, then progress to 800, 1200, and possibly 1500–2000 for a near-mirror finish before priming. This sequence preserves material and yields a consistent base for primer.
Don’t skip intermediate grits. Skipping creates hidden imperfections that are hard to correct after primer. Use the mid grits to blend transitions and reaffirm uniform texture across curves and edges.
Quality matters. Use papers designed for automotive or plastic surfaces; poor grit distribution or backing can lead to glazing or tearing on contoured areas. Dust control is non-negotiable: wipe between grits with a microfiber cloth, and use compressed air or a tack cloth to remove particles before moving on.
Technique matters as well: use light to moderate, overlapping strokes; keep the panel moving to avoid hot spots; maintain a shallow, consistent angle to avoid gouges. Inspect under good light, feel for roughness, and rework any low or high spots before primer. When ready, a uniform surface texture means primers will bed in evenly and lay down a smooth color.
Tooth and Trust: Mastering Grit for Sanding Motorcycle Fairings

Every painted surface starts with a deliberate choice about grit. For motorcycle fairings, the decision you make about sanding grit is not merely a step in prep; it is the foundation of the paint’s bite, smoothness, and long-term durability. The right grit creates a surface with the right texture—not too rough to leave scratches, not too fine to fail at adhesion. In practice, the go-to range for dry sanding fairings is a careful corridor in the 400 to 600 range. This isn’t an arbitrary number but a practical balance: enough texture to hold primer and paint, but not so aggressive that it tears at the plastic or leaves gouges that will show through the finish. This guidance aligns with professional restoration and painting workflows, where the goal is a predictable, repeatable base that technicians can trust regardless of the fairing’s condition or shape. It’s worth repeating that this step should not be skipped. New plastic fairings can arrive with mold release agents and other residues that interfere with paint bonding. If you want the color to stick and stay, you owe the surface a proper tooth, even when the part appears pristine straight from the box.
The path to that trustworthy surface is a small but decisive journey through grit. For a fairing that needs only light refinishing or a refresh of an old paint job, you start with a coarser gateway grit to strip away the worst and to flatten irregularities. In practice, many builders and restorers begin with a coarser step—around 320 to 400 grit—to knock down heavy gloss, ridges, and deep scratches. This initial pass isn’t about final texture; it’s about creating a rough landscape that the following steps can refine. After this first stage, you migrate toward the 400–600 range. This is the critical transition: you move from removing material and leveling imperfections to establishing a uniform texture that can reliably guide primer and paint. Think of it as laying a groundwork that the subsequent layers will follow, not as a final finish in itself.
Technique matters as much as grit. The motion you choose and the pressure you apply will determine whether the surface finishes smoothly or reveals faint halos of unevenness. Circular motions encourage even wear and prevent the formation of long, straight scratches that can telegraph through primer. Maintain moderate pressure; you should feel the skin of the tool working against the surface, not digging into it. A light touch at the tail of a stroke helps avoid creating valleys where primer might pool or where paint will accumulate in a single line. The goal is to produce a surface that appears dull and uniform to the naked eye, with a slight micro-roughness that will pull paint rather than repel it.
The surface you’re preparing is plastic, often ABS, with a layered reality of adhesives, primers, and sometimes old finishes. The initial sanding phase is precisely about clearing those imperfections while preserving the integrity of the underlying material. Here, the risk is not only of visible scratches but of removing too much material or heating the plastic with sustained, aggressive pressure. If you’re dealing with a fairing that carries deep gouges or stubborn remnants of old paint, you may need to revisit the issue with a coarser grit briefly, then step back into the 400–600 window to reestablish the texture. The procedure is a balance between aggression and finesse, between speed and control. As you proceed, keep the work area clean. Dust can act as a mini abrasive on the fresh surface, and any particulate lodged in the texture can create micro-roughness that undermines adhesion. A consistent wipe-down between passes helps maintain a true view of the progress and prevents the cycle of adding dust and sanding dust back into the surface.
You’ll hear painters and restorers speak about “tooth” in a way that sounds almost tactile. The tooth on a properly sanded fairing is not a roughness you hope to hide; it is a deliberate texture that offers a grip for the primer. The moment you lose that texture, you risk primer pooling in recesses and paint failing to bond strengthfully. The 400–600 grit window is the sweet spot where the surface holds the primer film evenly, without the risk of excessive scratching that might require multiple rounds of filler and sanding. On new plastic, where mold release agents can linger, that tooth becomes essential. You want the primer to hold on the surface as if it were a new skin rather than gliding off a slick surface. The right grit in the right sequence ensures that the bond is there from the first coat, that it remains there, and that the final color has a uniform, durable finish.
In practical terms, a typical prep sequence might begin with a 320 grit pass only when the fairing is visibly rough or when you are removing heavy layers of previous paint. This is a preparatory step, not the final texture. After the coarse pass, you would move through a few intermediate passes—perhaps a sequence of 400 to 600 grit—until you achieve a surface that looks and feels consistent under a light touch test. A light test with the fingertip across the surface can help you sense irregularities; you should feel a uniform dullness, not a patchwork of bright spots and rough patches. When you reach that stage, you’ve established the proper foundation for primer and paint. At this point, you’re not just removing flaws; you are shaping the surface to guide the coating through its initial film formation and curing.
The broader painting workflow supports this sanding discipline. After you achieve the desired texture with the 400–600 range, you proceed to a careful cleaning. Remove all dust, oils, and residues with a mild solvent or water and a lint-free cloth, depending on your prep protocol. The cleaner the base, the better the primer will adhere, and the more predictable the color becomes once you apply the final finish. The idea is not to leave any slick or oily film that could sabotage adhesion, and not to leave micro-particles that could grind into the film as you spray. The moisture of a subsequent rinse should be allowed to evaporate fully before you begin priming. Any dampness at the moment of primer application can trap solvents and degrade the integrity of the bond between the primer and the plastic.
If you’re focusing on a specific model or brand line, the context of fit and panel design can influence sanding choices. For instance, fairings from the Honda family tend to include complex curves and inset detailing that respond differently to pressure and motion. In this regard, a targeted browse of the specific fairings collection can offer practical cues regarding surface geometry and panel joins. For general reference and to explore options that suit a wide range of projects, you can look at the Honda fairings collection as a starting point for compatible panels and resurfacing considerations. Honda fairings collection
The chapter that follows builds on this foundation by guiding you through priming, color, and clear, and it also gently reminds you that the sanding stage you’ve just completed is the hinge on which those later steps swing. The more consistent and thoughtful your initial grit work is, the more predictable the subsequent coats will be. You’ll save time, reduce the risk of rework, and achieve a smoother, more durable finish that stands up to the vibrations and weather the bike faces on the road. If you’re seeking a broader, model-specific reference, consider exploring the broader collections linked above to identify panels that share curves or mounting points with your project. A practical way to think about this is: the smoother your base, the more forgiving your paint system will be when you apply thinner coats and when you attempt to maintain color consistency across panels.
For readers who want to deepen their understanding of the full painting workflow, a comprehensive guide like the one cited in professional practice can be a valuable companion. It provides a step-by-step narrative that mirrors the approach described here, offering additional details on prepping, priming, and finishing. As you move from sanding to primer, remember that the surface you created through disciplined grit work is what makes every subsequent layer behave itself. The final finish is not just about the color you spray; it is the cumulative result of intention, texture, and patience that begins with the choice of grit and the way you apply it.
External resource: How To Paint Motorcycle Fairings Like A Pro
Grit Progression for Durable Motorcycle Fairing Paint
Grit selection matters more than most riders expect when repainting motorcycle fairings. The goal is to create a surface that will hold primer and topcoat through weather, heat, and vibration. The recommended practice, especially with plastic or composite fairings, is a measured progression of grit that builds tooth for adhesion. Dry sanding in the 400 to 600 range is the focus for the final passes before priming, but the journey starts with coarse work to shape the surface and remove old paint or imperfections. This sequence, when done with care, creates a lasting bond that resists peeling and dulling. The emphasis on dry sanding for final passes helps keep resin dust from harming primer performance and aligns with professional guidance on texture and adhesion.
In practice, sand in circular motions with moderate pressure to keep the surface even and avoid introducing new defects. Start broadly by addressing release agents on plastic, which can interfere with bonding. A light scuff with a lower grit helps break the film and gives the primer something to grab onto. The key transition is moving from rough shaping to a controlled final texture. Uniform tooth across the panel and tiny peaks and valleys expand the surface area for adhesion while allowing primer and topcoat to flow evenly.
Avoid skipping this phase. Skipping roughening or jumping to fine sanding too soon can leave poor adhesion, primer lifting, or finish failure in heat or moisture. The recommended final dry sanding range is 400 to 600 grit, which provides texture for primer while allowing smooth topcoat application. A well-prepared surface minimizes dust and minor scratches showing through the finish.
Begin with rough shaping to erase major imperfections and remove old coatings. For plastic and fiberglass, 80 to 120 grit is typical for initial removal, establishing a rough but consistent starting point. Too aggressive sanding can create deep scratches. Balance aggressiveness with control to avoid gouges that require extra filler and sanding. After this stage, transition to mid-range grits such as 320 to 400 to refine the surface while preserving enough texture for adhesion. The goal is to smooth the most noticeable defects without erasing all texture.
When the panel has a friendlier texture, begin the final smoothing. The 400 to 600 grit range used with dry sanding becomes the focal point. The aim is a clean, uniform matte that preserves micro-features for better primer anchoring. Too fine too soon reduces roughness and can prevent mechanical bite. Sanding too coarse for too long invites visible scratches and uneven foundation that can show through the final paint. The 400 to 600 grit band is the sweet spot before priming.
An ideal post-sand surface is clean, dust-free, and uniformly matte with micro-features. These tiny peaks and valleys act as micro-anchors for primer and paint. Industry guidance emphasizes uniform texture across panels and avoiding conspicuous cross-hatch patterns. Even on new plastic, the goal remains durable adhesion rather than perfect gloss.
To put this into practice, imagine preparing a fairing cover from bare plastic. Start with 120 grit to remove stubborn layers or defects, then move to 320 or 400 to smooth while preserving texture for primer. Finish with 600 to refine. If gloss or scratch lines remain, rescan those areas with 600 or 800 grit to remove roughness while preserving texture. Keep motions steady and circular, avoid long strokes in one direction, check the surface under good light, and feel texture with gloved fingers for consistency.
In broader refinishing practice, the grit sequence translates to predictable outcomes: rough 80-120 for removal and shaping, 320-400 for refinement, and 400-600 for dry final adhesion before priming. Some guides add a final 600-800 pass for a uniformly smooth finish that still preserves micro-texture. While exact numbers vary with material and paint system, the logic remains: establish tooth, smooth highs, finish with a texture that balances adhesion and flow.
For further reference, professional guides discuss sanding sequences in automotive refinishing. The core idea is that the right grit progression reduces paint failure and orange peel, helps primer adhere uniformly, and supports consistent gloss and color. Consider the fairing as a curved surface with edges and joints, maintaining consistent pressure and controlled motion is crucial. A well-prepared base makes priming easier and the final coat more forgiving.
This discussion benefits from practical references like sanding and preparing paint surfaces guides.
Final thoughts
Mastering the use of the right grit sandpaper, primarily in the range of 400 to 600, not only enhances the aesthetic appeal of motorcycle fairings but also fortifies the paint’s longevity and performance. For business owners, understanding the nuances of this critical preparation step can significantly elevate the craftsmanship of their products, leading to higher customer satisfaction and loyalty. By avoiding common pitfalls, employing best practices, and honing effective sanding techniques, you can ensure that your motorcycle fairings stand out in a competitive market. The recommendations provided in this guide will equip you with the knowledge to deliver exceptional results consistently, reinforcing your brand’s reputation for quality.