The choice of paint for motorcycle fairings is not just a matter of aesthetics but also about protection and durability. Business owners in the motorcycle industry must understand the specific types of paint that cater to the unique materials and needs of motorcycle bodywork. This article will explore motorcycle-specific paints and their properties, provide application techniques to ensure a flawless finish, delve into maintenance strategies to preserve the paint job, discuss color choices for visual impact, and highlight environmental and safety considerations. By the end of this piece, you will have a comprehensive understanding of what it takes to paint motorcycle fairings effectively.
Durable Hues for Plastic: Mastering Motorcycle Fairing Paint
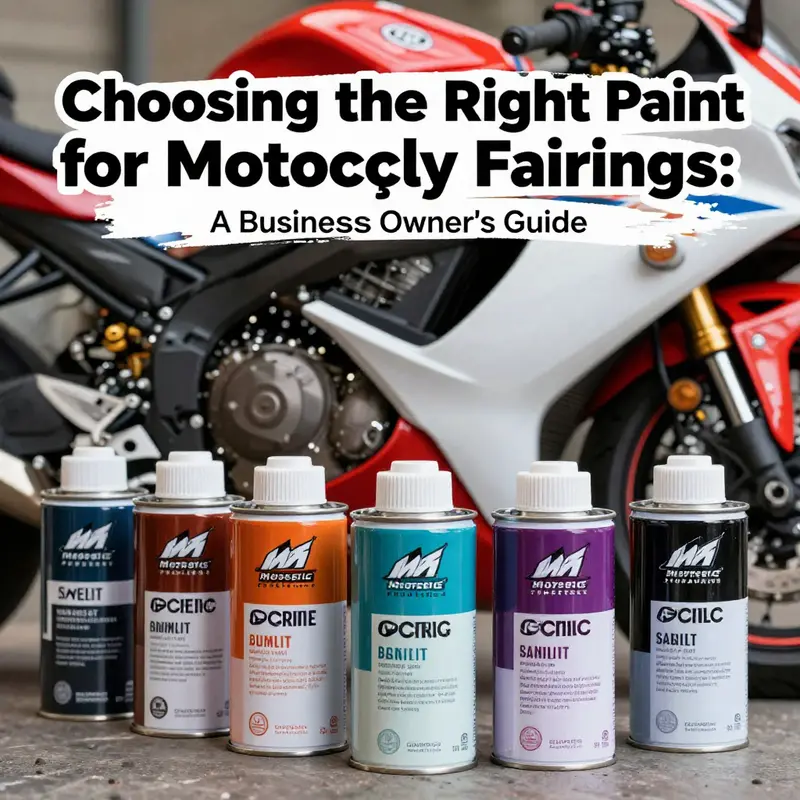
Paint on motorcycle fairings is more than color; it is a shield against sun, grit, and the constant air stream of the ride. Plastic and composite panels pose a different challenge than metal bodies. Without the right chemistry, even the most vivid colors can fade or peel in months. That is why the industry steers riders toward motorcycle specific plastic paints. These coatings are engineered for plastic, offering adhesion, flexibility, UV stability, and a hard, glossy finish that survives long roads and daily commutes.
Understanding the options means weighing performance against project scope. In professional shops, the standard for full fairing work is a high performance urethane system. Urethane paints bond deeply with plastic substrates, provide excellent impact resistance, and maintain color and gloss through years of exposure. They stand up to cleaners, gasoline vapors, and road chemicals, and they respond well to polishing and detailing, helping you recover that showroom shine after miles of sun and rain. The flexibility of urethane is key; it tolerates flexing panels and temperature swings without cracking.
Epoxy based paints offer strong adhesion and solid durability, but they do not bend as readily as urethanes. If a fairing is fully painted with epoxy, you may see micro cracking when the panel flexes under heavy riding or sits in hot sun. For DIY projects or touch ups on smaller sections, epoxy systems can be attractive due to lower cost, but for whole fairings the risk of stress cracking makes them less ideal.
Any serious paint job begins with surface preparation. Fairings must be thoroughly cleaned to remove oils and wax. Then scuff sanding with a fine grit to create a micro key that helps the primer bite. Priming is essential; plastic primers create a surface that the base coat can grip. Skipping steps shortens life, invites peel, and can ruin color quality. The most dependable results come from using a complete paint system—primer, base coat, and clear coat—with a brand that specifies compatibility for plastic substrates. For high value builds, many riders opt to involve a professional detailer who can follow a manufacturer’s procedure from base to clear.
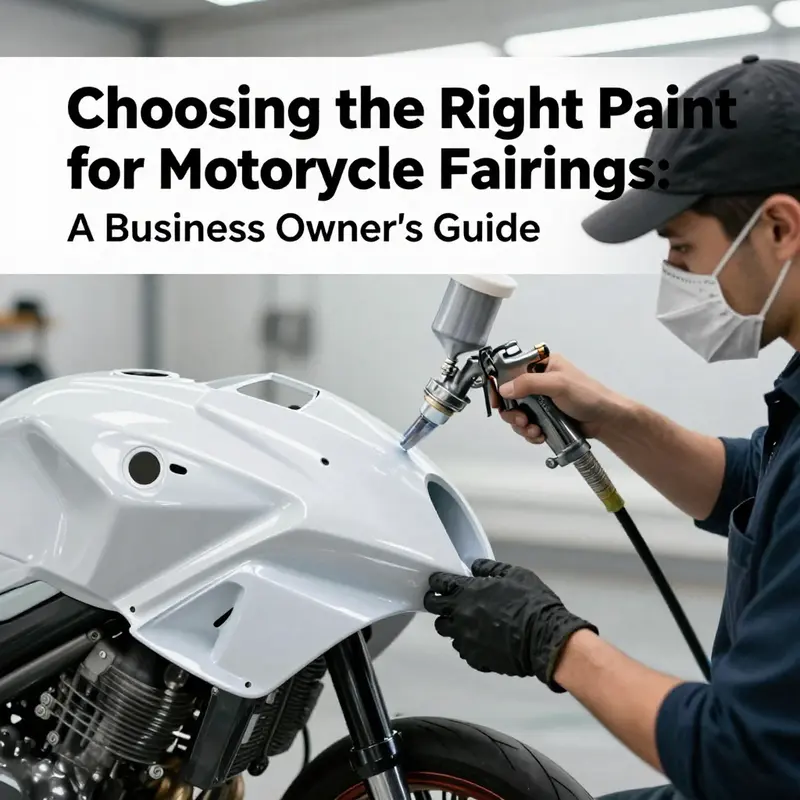
Application is where technique matters as much as product choice. Base coats must be applied in even, thin layers; multiple coats build even color without drags or sagging. Clear coats are what give the depth and the protection that keeps gloss from dulling in sun and rain. Spray pressure, nozzle size, and ambient conditions all influence final results. The paint should be mixed thoroughly to ensure pigment uniformity; thinner or reducer is used to adjust viscosity so the gun lays down a smooth, atomized mist instead of droplets. Temperature and humidity influence curing and solvent evaporation, so following the product data sheet for the recommended range is wise. Good ventilation, a clean environment, and smooth, consistent passes are the basics of a durable finish.
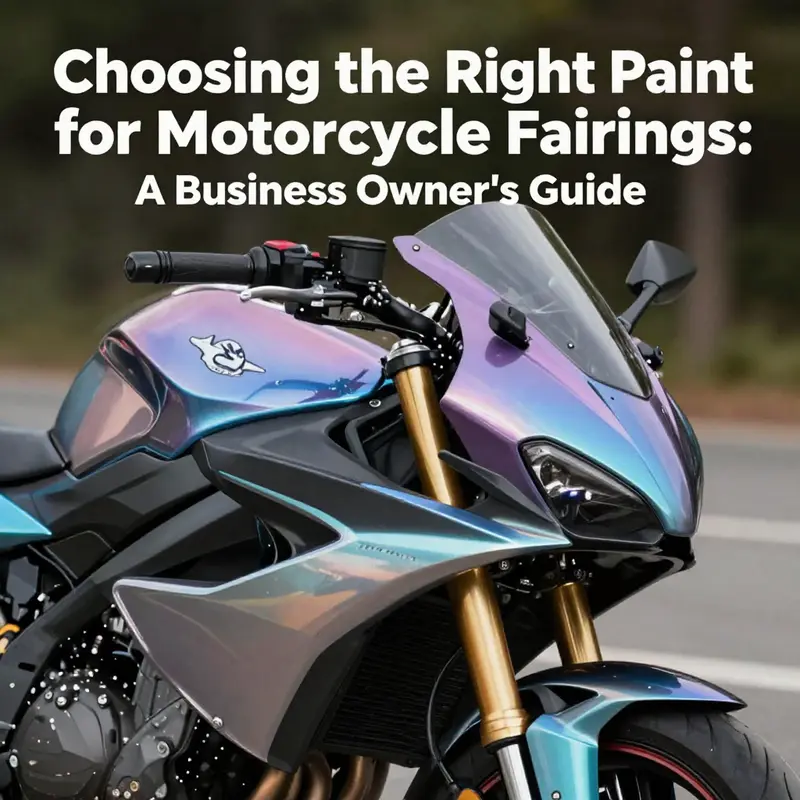
Color effects can add a personal touch, and factory level pigments can include metallics or pearlescents that catch light in different ways. If you want that sun-kissed sparkle, you might select a base coat with fine aluminum powder or mica pigments. It is crucial to confirm pigment compatibility with the clear coat and to ensure the metallic mix does not raise issues with sanding and buffing later. The same plastic paint system that coats a fairing can also be used on other plastic surfaces such as electric bikes or household appliances, which speaks to the versatility of the chemistry when adhesion, UV resistance, and chemical resistance are properly engineered.
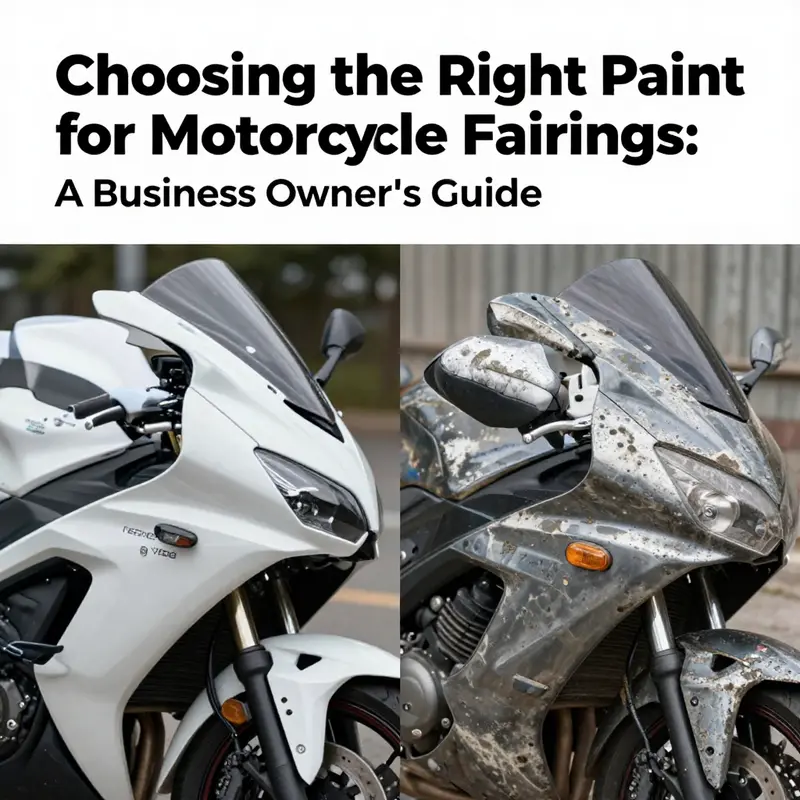
Beyond aesthetics, durability is the practical goal. The finish should resist chipping from stones and debris, hold its color through UV exposure, and remain easy to clean without dulling. The right top coat adds scratch resistance and helps seal the color layers from moisture. Routine care remains simple: wash with mild soap, dry promptly, and avoid harsh solvents that might attack the coating. If you ever plan decals or graphics, consider the project as a two stage or multi stage process so you can protect the artwork with a clear coat and maintain removable visibility for future updates.
Choosing between urethane and epoxy comes down to your ride and your willingness to invest. For most riders who demand longevity and showroom gloss, a dedicated urethane system, applied with proper surface preparation and controlled conditions, is the safest path to success. If budget constraints push you toward epoxy, frame the project as a repair or touch up rather than full panel application, and pursue a compatible top coat that preserves flexibility. In all cases, the goal is a uniform, glossy finish that stays faithful to color over years of use.
To connect with practical options, a reader can begin by looking at sources that specialize in motorcycle plastics and fairings, where a complete system is often showcased. For a practical starting point in exploring compatible offerings, explore the Honda fairings collection.
Finally, for a deeper, industry wide perspective on color retention, application parameters, and long term performance, refer to a comprehensive guide on motorcycle paint and bodywork. External reference: https://www.h-d.com/warranty
Plastic Motorcycle Fairing Paint: Prep to Polish for a Durable, Glossy Finish
Painting plastic motorcycle fairings starts with a clean surface and a plan.
Begin with a thorough wash using a dedicated automotive cleaner to remove wax, grease, and residues. Dry the part completely before inspecting for scratches. Lightly sand with 400 to 600 grit to create a micro roughness that the primer can bite into. Wipe with a tack cloth to remove dust.
Apply a plastic friendly primer to fill micro scratches and improve adhesion. Let it dry fully and lightly sand with 600 grit to produce a smooth, slightly rough surface. Remove dust again before base coat.
Choose a base color coat in thin even passes. Use a quality spray gun or a well maintained aerosol, keeping the gun moving and maintaining consistent distance. Apply multiple light coats rather than one heavy coat to avoid runs. Allow each coat to flash off before the next.
Select a compatible two component clear coat for protection and depth. Apply two to three light layers, watching for clarity and even coverage. Let each layer flash off and cure in a controlled environment.
After curing follow with polishing to remove imperfections and boost gloss. Use a dual action polisher and a finishing compound or polish that is safe for clear coats. Allow the finish to reach full cure before washing or handling.
Environment matters. Maintain a clean, dust free area with moderate temperature and low humidity. Track the time to cure and avoid exposures that can cause solvent trap or haze.
This approach emphasizes bond to plastic, proper layering, and careful curing to yield a durable, glossy finish that preserves the fairing shape and geometry.
null
null
Chromatic Velocity: Choosing Color, Finish, and Cohesion for Motorcycle Fairings
Color is not just a decorative choice; it is a language that speaks about a rider’s presence, the bike’s personality, and the way design elements flow from front to rear. When considering color for motorcycle fairings, the goal goes beyond picking a shade that looks good in a showroom catalog. The color must ride with the whole machine—its lines, its stance, its lighting, and even the cycle of reflections that dance across glossy panels as the bike moves through sun and shade. The recommended approach starts with a practical core: use motorcycle-specific plastic paint. This type of paint is engineered to bond with plastic and composite surfaces, resisting abrasion, UV damage, and moisture while keeping a durable, glossy finish. Yet even with the right chemistry, color and finish choices can make or break the sense of speed, balance, and cohesion that a well designed bike conveys. A strong color story blends personal style with an explicit understanding of how color interacts with form and environment, rather than existing as a single isolated swatch on a brochure page.
To begin with, a rider can map color intent to the bike’s design language. Bold hues like electric blues or vivid reds instantly draw attention and can heighten visibility on busy roads, a practical enhancement that pairs aesthetics with safety. But there is more to a bold color choice than a mere appetite for eye catching tone. When a bike uses a strong color, it simultaneously informs how light travels across the fairings. A high gloss on a dark base can turn the entire surface into a series of dramatic reflections, emphasizing sharp contour lines and the metalwork beneath. In contrast, a matte finish tames glare, softens edges, and gives a modern, understated vibe that can suit a minimalist build or a classic, streamlined silhouette. The decision between gloss and matte, then, is a negotiation between perception of depth, glare control, and the message the rider wants to send about speed and control.
An equally important part of the color conversation is how color interacts with chrome accents, trims, and the bike’s lighting system. A chrome pinstripe or silver panel can act as a reflective bridge between bold color and mechanical chrome, guiding the eye along the bike’s length and helping to unify components that might otherwise feel visually disjointed. The choice of finish—gloss, satin, or matte—changes the degree of that integration. Gloss adds a championship shine that highlights the bike as a performance machine; matte or satin reduces reflectivity and creates a more contemplative, grounded look. Each finish has a voice, and the rider can choose which voice best matches the bike’s overall temperament. The conversation between color and finish becomes a conversation about intention: what you want the rider to feel when they approach, what others notice at a glance, and how the bike reads from multiple angles while in motion.
Color theory offers a useful, concise framework without becoming an esoteric exercise. The values of hue, saturation, and brightness influence how a color sits against a bike’s geometry. A base color can be warm or cool, light or deep, and it often sets the stage for accent colors that define personality. A harmonizing scheme can be derived from analogous colors that sit side by side on the color wheel, which often yields a cohesive and elegant look appropriate for a factory-inspired or retro-styled fairing. Alternatively, a complementary scheme uses colors opposite each other on the wheel to create strong separation and a dynamic, high-contrast feel. In practical terms, a rider who wants a cohesive but lively appearance can pair a deep, cool base with a bright accent that punctuates edges or apertures, ensuring that the eye moves along the bike in a purposeful way. Neutral foundations—black, gunmetal, or silver—offer a versatile canvas for brighter accents, while metallics and pearlescents can convey speed and precision through their reflective properties.
The aesthetic philosophy of a color choice is deeply tied to the bike’s design language. If the profile leans toward aggressive, angular sculpting, a saturated, high-contrast palette can reinforce that stance and make the lines feel more forceful. If the bike emphasizes curves and a more relaxed silhouette, softer or more restrained tones can emphasize fluidity and elegance. A mismatched palette, meanwhile, can disrupt the visual flow and pull the eye away from the bike’s architecture, producing a sense of disconnection rather than intentional design. The balance is not about erasing identity, but about weaving identity into the fabric of the machine. A rider can express individuality through color while still honoring the bike’s frame geometry, wheel choices, and engine accents. When color, finish, and form align, the result is not just a coat of paint but a narrative that travels from the front fairing to the tail, a visual journey that promotes both presence and harmony on the road.
Choosing color is also a practical exercise in foresight. Bold colors may require higher maintenance and more frequent touch-ups to preserve gloss and depth, especially on plastic surfaces exposed to sun and road debris. Metallic and pearlescent finishes can reveal scratches more readily, though they also hide minor imperfections more gracefully when treated properly. Informed decisions about color should consider not only the mood a shade evokes but the realities of durability and upkeep, including the resin’s compatibility with the chosen pigment and the painting process itself. The right process begins with surface preparation: cleaning, sanding, and priming the plastic to create a receptive base for adhesion. The paint’s performance hinges on diligent preparation, meticulous mixing, and the correct thinner to control viscosity for even, atomized spray. Temperature and humidity also shape the final appearance and cure. These are not mundane steps; they are the invisible architecture that makes a color look right on the street.
Color also carries a psychological weight that nudges perception in subtle ways. Metallic finishes and bright chromatic shifts often convey speed and precision, a cue riders subconsciously read as performance potential. Flat or subdued tones project durability, practicality, and a grounded relationship with the road. The chosen palette can influence how a bike is perceived by others and how a rider feels while piloting it. A thoughtful color strategy can heighten confidence, enhance visibility where necessary, and still respect the aesthetic heritage of the bike’s model family. For riders who aim to connect with the brand language of their machine, an awareness of the maker’s visual grammar matters. The internal consistency of color and finish with the bike’s structural lines, the rake, the wheel size, and the engine accents becomes an implicit promise: this is a machine that understands its own body and voice.
In practice, these ideas translate into a method you can apply. Start with a base color that resonates with the bike’s silhouette and the rider’s personality. Consider whether you want the color to surge forward in the viewer’s eye or to recede and allow the form to lead the impression. Decide on an accent color or two that can highlight critical lines, air intakes, or panel gaps without breaking the unity of the fairings. Then choose a finish that corresponds to the intended mood and the bike’s function. If you are chasing visibility for safety, a high color saturation with a gloss finish can be effective, while if the aim is a modern, premium aesthetic, a matte or satin coat over a refined base may be preferable. Finally, pick a paint system that is designed for plastic and composite surfaces, and commit to a disciplined preparation and application process to ensure the color remains vibrant and the finish enduring. The result should feel like the bike is singing with its own color, a cohesive statement that communicates both style and purpose.
For readers who want to explore model specific color and fairing options while thinking through how a color strategy can integrate with an existing design language, a practical step is to review model families and their fairing shapes. A curated gallery such as the Yamaha fairings collection can provide a sense of how different color families work across varied shapes and sizes, helping a rider imagine color in context rather than in isolation. Yamaha fairings collection offers a sense of how color decisions translate across a range of models and geometries, illustrating how a single color or a small set of accents interacts with fairing geometry, air flow, and the bike’s stance.
For a deeper dive into color theory and finish selection beyond the practical scope of paint formulation, see a broader guide that details how to translate color knowledge into customization decisions. The article on color theory and finish selection for motorcycle customization provides a concise, accessible framework for aligning color choices with material finishes, lighting conditions, and the rider’s aesthetic goals. It helps to connect the dots between color psychology, visibility, and the tactile reality of a finish that must endure the road. You will find the discussion both practical and inspirational, offering a vocabulary to discuss color with painters, designers, and fellow riders. https://www.motorcyclecruiser.com/motorcycle-customization/color-theory-finish-selection/
Ultimately, color choices for motorcycle fairings are about more than fashion. They are about telling a story of speed, integration, and personal expression while honoring the integrity of the machine’s design. The best color decisions honor the bike as a sculpture in motion, a carefully engineered shape that responds to light, air, and road texture. They recognize that a finish is a predicate of durability and a canvas for identity. The right hue, the right finish, and the right level of cohesion create a visual language that communicates everything the rider wants the world to know about their relationship with the machine—and that is the essence of color in motion.
Guarding the Glow: Environmental, Safety, and Performance Realities in Painting Motorcycle Fairings

Painting a motorcycle fairing is more than applying color; it is selecting a protective, adaptable finish that survives heat, fuel vapors, and UV glare. Plastic and composite skins behave differently from metal panels: they flex, absorb solvents differently, and respond to temperature swings with distinct stress patterns. The right paint system bonds to plastic, accommodates movement, and resists yellowing or cracking under daily riding and washing. Automotive and motorcycle plastics-specific coatings offer adhesion, elasticity, and chemical resistance that generic paints cannot guarantee. These finishes work not just because of pigments, but because of the base, the clear, the thinner, and the cure chemistry working together.
Two-component coatings are widely used for plastic fairings; they cure through a chemical reaction that builds a resilient film. The result is a finish that maintains gloss, resists fuel contact, and tolerates temperature changes without excessive cracking. Proper curing also helps control solvent emissions during application, supporting a safer shop environment and lower environmental impact.
The workshop environment matters as much as the chemistry. Adequate ventilation, proper spray booth setup, and air movement reduce fume exposure for workers and improve long-term coating performance. Personal protective equipment—an organic-vapor respirator, eye protection, and chemical-resistant gloves—becomes a practical investment in health and comfort during long sessions. Waste handling is a shared responsibility: store and dispose used rags, solvents, and cans according to local regulations to prevent soil and water contamination.
Preparation sets the stage for durability: thorough cleaning to remove oils, scuffing to promote mechanical bonding, and a primer formulated for plastics to create a stable porosity map for subsequent layers. The color base should be chosen with the substrate in mind, followed by a clear coat that seals the finish and adds depth. Following manufacturer data for thinning, spray pressure, and cure times helps minimize runs and sags and reduces the risk of a soft cure under sun or fuel exposure.
Environmental stewardship runs through every step. Selecting coatings with lower VOCs, using proper waste management, and following EPA guidelines when handling solvents and air quality information keeps both riders and technicians safer. Referencing reputable resources—for example, EPA materials on air quality and health risks—helps align high-performance painting with responsible practice. The goal is a durable, radiant finish that endures heat, fuel, and UV while respecting the broader environment and the people who work with these materials.
Practically, test on scrap panels, document results, and build a finishing plan that balances aesthetics with durability. A well-chosen system designed for plastics, applied with controlled technique and adequate curing, will resist micro-delamination and maintain color clarity across seasons. The finished result should look as sharp as the bike performs, with a surface that remains attractive after rides, washes, and fuel exposure.
Final thoughts
Understanding what paint to use for motorcycle fairings is crucial for business owners seeking to combine durability with aesthetic appeal. By focusing on motorcycle-specific paints, employing the right application techniques, maintaining these finishes, selecting appealing colors, and considering environmental and safety standards, you can elevate your brand’s reputation and product quality. Investing time and effort into these considerations not only enhances your offerings but also fosters customer satisfaction and loyalty in a competitive market.