Motorcycle fairings serve as one of the most critical components in enhancing ride dynamics and aesthetics. For business owners in the motorcycle industry, understanding the intricacies of fairing fabrication can set your offerings apart and cater to a growing clientele eager for customization. This article navigates through essential stages: from meticulous design and planning, through mold creation, shaping techniques, to final finishing and installation. Each chapter will deepen your insights into creating bespoke fairings that not only meet but exceed customer expectations.
From Sketch to Shaped Shell: Designing and Planning a Motorcycle Fairing for Performance and Comfort

Accurate measurements anchor the plan. The designer notes the frame geometry, handlebar sweep, fork rake, and the position of critical components like headlights and instruments. A precise mock-up is shaped around the existing bodywork, ensuring the new shell complements the chassis rather than fights it. Fitment is more than a cosmetic requirement; it determines whether maintenance tasks become practical and whether the fairing stays anchored under load. Because the fairing interacts with the rider’s posture, the lines must respect seating height, wind buffet, and shoulder exposure. The planning stage therefore becomes a synthesis of geometry, physics, and human factors. The result is a blueprint that asks how the rider sits, how air moves, and how the bike responds when power and wind collide at speed.
Material selection sits at the crossroads of performance, cost, and manufacturability. Fiberglass provides an economical balance and forgiving shaping, while carbon fiber offers exceptional strength-to-weight ratios for performance builds, at a higher price. Thermoplastics, including ABS and polycarbonate, enable faster production and easier repairs, though their long-term rigidity under impact and heat can differ from layered composites. The chosen materials influence how the fairing responds to stress at the mounting points and how it ages in sunlight and heat. They also determine which fabrication methods will be simplest to execute, whether the builder relies on hand lay-ups, vacuum bagging, resin infusion, or preformed CNC-molded sections. In the planning room, these choices translate into a production rhythm: a slower, meticulous lay-up for a curved, hand-finished panel or a faster, repeatable process for a race-oriented fleet of shells.
Beyond material choice, the fabrication method sculpts the entire project timeline. Hand lay-up remains accessible to hobbyists, but it demands patience to achieve consistent thickness and sheen. Vacuum bagging improves resin distribution and helps pull a smooth surface, while resin infusion can produce parts with excellent fiber content and minimal voids. For rapid prototyping or mass production, CNC-molded shells from ready-made blanks offer repeatability and controlled tolerances. Each approach yields a different surface finish and post-processing requirement, yet all share a common goal: a fairing with predictable rigidity, a forgiving fracture path in a crash, and a finish that accepts paint and decals without excessive prep work. The plan therefore includes a clear schedule, a materials ladder, and an inspection routine that guards against hidden voids or misaligned edges.
Modern design practice increasingly relies on digital tools. CAD models establish a precise baseline for fit and form, and CFD simulations illuminate how air moves around a proposed silhouette. A few tenths of a millimeter change in a contour can influence where pressure peaks form, how streamlines wrap around the bike, and whether a high-speed downwash creates lift that unsettles the front wheel. The simulations guide the designer toward contours that minimize drag while preserving rider comfort and visibility of instruments. The virtual phase shortens development time, reduces material waste, and lets the team explore several forms before cutting a single piece of fiber. Yet the digital perspective remains tethered to reality through physical prototyping and real-world testing, because a perfect CAD render can still behave differently once it meets wind, heat, and rider movement.
Practical planning also means considering integration with the bike’s existing hardware. The fairing must clear handlebars, integrate or accommodate headlights, and avoid interfering with suspension travel or fuel access. Accessibility for maintenance is essential; if the fairing blocks airbox filters or makes radiator service awkward, the design will either fail in daily use or invite shortcuts that compromise safety. Regulations and standards quickly become a loom that threads the whole project. Lighting visibility, reflectors, and mounting strength are more than aesthetic concerns; they shape the fairing’s legality on the road and its off-road resilience on uneven pavement. The planner therefore creates a rider-centric checklist: can the rider reach the controls through the new profile, can it be serviced without removing the entire shell, and does it pass the local safety regime with room to spare?
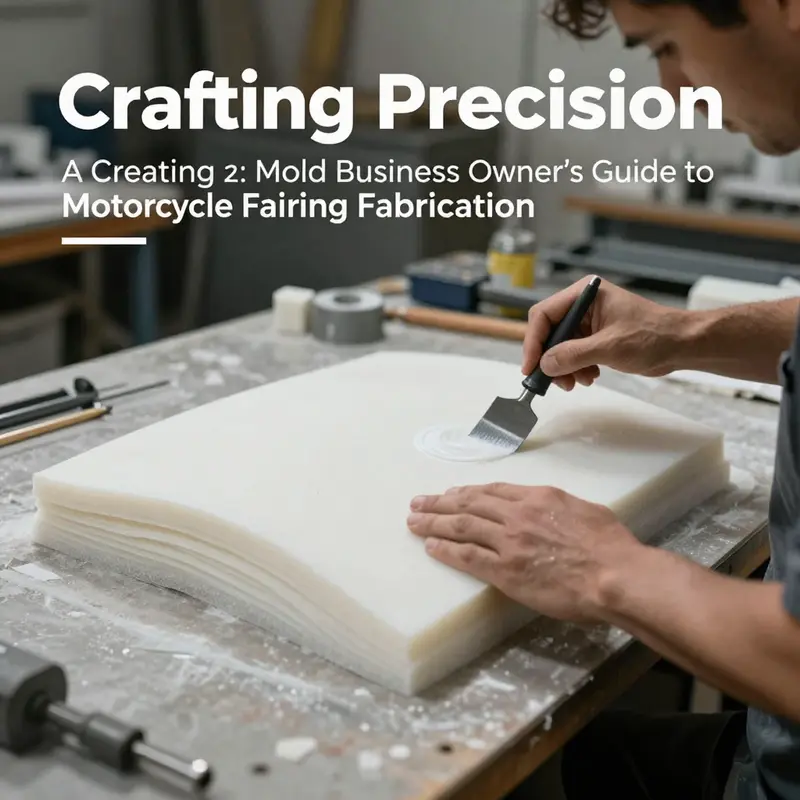
When the decision is made to move from concept to physical form, creating the mold becomes the next pivotal step. For complex shapes, a mold ensures the shell maintains a precise geometry across all sections. The mold can be carved from wood, shaped from foam, or cast from plaster to capture the rider’s silhouette and the bike’s lines. The smoothness of the mold directly affects the final surface texture, so craftsmen insist on a flawless base. The mold receives a base finish to reduce prints and blemishes on the resin or plastic layer and to guide even fiber distribution during lay-up. The mold is not merely a tool; it is a silent judge that many projects fear to misjudge. A well-prepared mold accelerates production, reduces waste, and yields a consistent exterior that looks right on every mile of road.
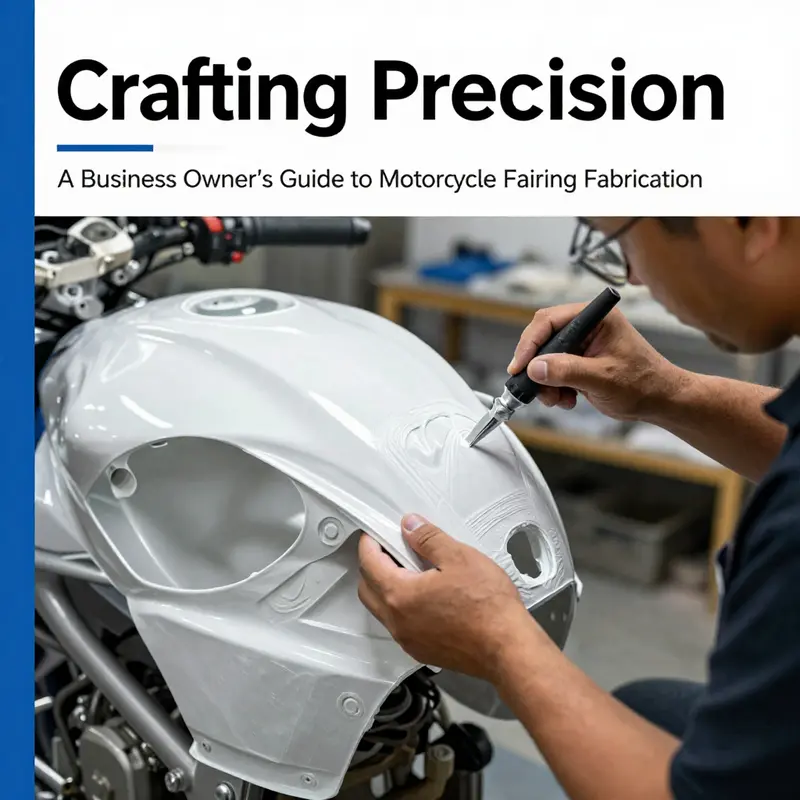
Shaping the fairing itself proceeds through layers and curing. In fiberglass or carbon fiber builds, technicians lay resin-saturated cloth over the mold, working from center outward to purge air pockets. They blend different weave fabrics to achieve a balance of stiffness and impact resistance, then seal the edges to control resin flow. After enough curing, the part is demolded with care to preserve the mold’s finish and the shell’s geometry. The surface requires removing flash, trimming excess material, and preparing it for finishing. The careful handling of each layer ensures the fairing doesn’t warp or sag after installation. The shaping stage is where the quiet math of earlier planning becomes tactile craft, a dialogue between resin, fabric, and the airfoil-inspired geometry imagined in the CAD files.
Finishing follows form. Sanding refines the transitions where panels meet, while primers establish a uniform base for paint. A good primer improves adhesion and highlights any remaining defects that must be filled before the color is applied. The paint itself should be chosen for durability in sunlight and heat exposure, with a clear coat to resist scuffs and chipping. A well-executed paint job also aids future repairs, because the outer layer can be stripped and reapplied with minimal disruption to underlying parts. In practice, the finish is the public face of the fairing and a silent ambassador for the rider’s intent—speed, control, and personal style. The aesthetic language of the shell speaks as loudly as its aerodynamic performance, and the finish must survive the shop, the road, and the sun without surrendering its character.
Installation completes the journey from concept to road-ready component. Test-fitting checks that every line aligns with the bike’s chassis and that mounting points match brackets, bolts, or adhesives appropriate to the chosen materials. The goal is a secure, nonintrusive fit that does not add fatigue to rider grip or cornering load. Fasteners and clips must tolerate vibration and temperature swings without loosening. Once the fairing sits as intended, it is prudent to review cable routes, wiring harnesses, and sensor placements to avoid interference with steering, steering lock, or electronic displays. The result is a cohesive, integrated shell that looks and behaves as a true part of the machine rather than an afterthought. The success of installation rests on thoughtful testing—road trials, fit checks, and a willingness to adjust mounting interface details so that the fairing remains serviceable and robust under real-world conditions.
Even with meticulous planning, the craft remains iterative. Small adjustments in curvature, edge treatments, or cutouts can produce meaningful gains in aero performance or rider clearance. A well-documented design process, including measurements, mold details, and test data, builds a knowledge base that can scale to future projects or variations for different bike models. The philosophy is to balance creativity with reproducibility, so a custom fairing can evolve from one build to another while preserving core principles: light weight, smooth airflow, robust mounting, and easy serviceability. In that spirit, designers often maintain a modular approach that supports different headlight shapes, air inlets, or panel configurations without starting from scratch. The chapter of planning ends where the fabrication begins, but the rhythm of thinking remains the heartbeat behind every cut and every curve.
For those who want a tangible window into how a real-world collection looks, reference points such as online galleries and part catalogues for common sport bikes can offer practical inspiration. A glimpse at the Honda fairings collection shows how aftermarket shapes weave aesthetics with airflow considerations, suggesting where contours may be accelerated by subtle edge reductions or softened by gentle fillets. This approach mirrors the planning phase’s intent: to translate aerodynamic theory and functional constraints into a shape that riders want to own and ride. It is not about imitation, but about identifying reliable design cues that can be adapted to a given bike. The result is a design language that resonates with performance and identity, guiding the next iteration toward even smoother lines and smarter integration.
As a final note, the literature on fairing fabrication emphasizes an integrated workflow. CAD and CFD are not separate from hands-on lay-ups; they live alongside mold-making, resin choice, and surface finishing. The goal is not to chase a single metric of performance but to harmonize drag reduction, rider comfort, structural integrity, and maintenance ease. A mature project embraces feedback from test fits, road trials, and even weather tests, allowing designers to refine contours, adjust mounting points, and improve serviceability without sacrificing the clean lines that define the bike’s character. To broaden the horizon, practitioners often consult industry guides and training resources that outline the practicalities of mold making, lay-up schedules, and post-processing. A comprehensive fairing design guide offers methodology, typical material stacks, and recommended inspection regimes that help transition from hobbyist experiments to reliable production-ready parts. The accumulation of practical know-how—from measurement discipline to finishing finesse—becomes the backbone of any future project, ensuring that the next build benefits from prior experience and a clear, repeatable workflow.
External resource: https://www.bmwmotorcycles.com/en/technical-information/s1000rr-fairings-guide
null
null
Chapter 3: Carving Air — The Craft of Shaping a Motorcycle Fairing
Shaping a motorcycle fairing is where aerodynamics meets sculpture, a quiet negotiation between air and rider that lives in the curves you can barely see and the structure you cannot ignore. In this phase, a designer’s intention becomes something tangible: a form that cuts through wind with less effort, offers shelter to the rider, and still carries the personality of the bike itself. The work begins before any resin is laid or any mold is pressed. It starts with a foam plug, a full-scale negative that acts as the canvas for the final aerodynamics. The foam is not merely a rough sketch; it is a working surface that must be carved, tested, and refined until the contours align with the bike’s geometry, handlebar reach, footpeg placement, and the rider’s posture. Every millimeter of curvature matters because the fairing’s job is to choreograph the air around the rider and the engine, reducing drag, taming buffeting, and improving stability at speed. In this way, shaping is less about decoration and more about performance, with aesthetics emerging from the same disciplined process that governs function.
The shaping process begins with a foam plug that mirrors the expected exterior shape. Craftsmen bring the blank into being by carving and sanding, constantly cross-checking the silhouette against the bike’s actual dimensions. The foam is easier to slice than final materials, which means it can be gradually coaxed toward an ideal profile. Tools range from sharp knives and rasps to hot wire cutters and flexible sanding blocks. The goal is a smooth, continuous surface where every transition between belly, chine, and shoulder reads cleanly to the eye and, more importantly, to the wind. It is common to test-fit the plug on the motorcycle during the shaping stage, making sure the lines flow with the rider’s line of sight, the fairing’s line of sight to mirrors, and the area around the cockpit is comfortable and unobstructed. The tactile feel of the plug—where finger and palm glide over a long, gentle curve or a sharp, purposeful edge—often guides the next refinement more convincingly than any measurement alone.
As the plug reaches its final form, the next move is to create a mold or to reinforce the surface in a way that preserves the exact shape while preparing it for the transfer to the final shell. In many cases, a protective coating is applied to the plug to create a release layer for the subsequent reinforcement. If the plan is to use carbon fiber, the plug serves as the master for a female mold, or for a direct layup depending on the technique. The reinforcement itself can take several paths. Carbon fiber is prized in high-performance applications for its extraordinary strength-to-weight ratio, which translates into stiffer panels that resist flex during high-speed airflow and cornering. The layup process typically involves laying up thin, resin-saturated fabric layers over the shaped plug or mold, then applying resin and removing air pockets with careful brushing or rolling. The curing stage may be ambient or assisted by heat and pressure, especially in more performance-focused builds where autoclave or vacuum bagging ensures a uniform resin distribution and minimizes voids. The emphasis is on achieving a smooth, uniform surface that will transfer accurately to the final shell and respond predictably to loads from wind and road conditions.
For builders prioritizing cost, durability, and repairability, fiberglass reinforced plastic FRP offers a robust middle ground. Fiberglass is easier to work with for many shops and hobbyists, and it tolerates a wider range of layup techniques, from hand-applied resin to more controlled infusion processes. The resulting shell is heavier than carbon fiber but remains strong and relatively forgiving when it comes to repairs after a collision or impact. The mold process for FRP often uses a female mold formed from the original foam plug, which keeps replication consistent across multiple units. The smoothness of the plug translates to the final surface through the mold’s precision, which is why attention to the plug’s finish is essential even before layup begins. In both carbon fiber and fiberglass routes, the plan is to sculpt a surface that breathes with the bike’s lines while providing a clean path for air to follow around fairing edges, melds with the rider’s posture, and houses fasteners and mounting hardware in a way that is accessible yet discreet.
After the reinforcement stage, a finishing coat is applied to the plug to capture the final shape and prepare it for transfer to the definitive mold or shell. This finishing coat is not simply a cosmetic layer; it is a thin barrier that helps reveal micro-contours and potential imperfections. Sanding then becomes a delicate art. The goal is a mirror-smooth surface free of pinholes, uneven grain, or dragon-scale ripples that can trap air. Priming follows, providing a uniform, dye-absorbent layer that makes subsequent paint and clear coats sit evenly and resist chipping or fading. The transition from plug to mold is a critical moment: it determines how faithfully the final shell will reproduce the sculpted aerodynamic form and whether its surface will accept paint and finishing materials evenly. The overall curvature and edge geometry must align with a predictable process for layups and releases, so the finished fairing can be produced repeatedly with consistent performance and appearance.
Material choices shape not only how the fairing feels to the rider but also how it behaves under load. Carbon fiber, with its rigidity and light weight, brings tangible gains to handling and acceleration by reducing energy wasted in flex. In a racing context, stiffness translates into more precise steering response and a more linear power delivery through the fairing’s relationship to the wind. Carbon fiber layups are often paired with resin infusion techniques that optimize resin content and weight, then cured under controlled heat and pressure. This adds cost and manufacturing complexity, but the payoff is a shell that stands up to high-speed air pressures and track-level stresses. By contrast, fiberglass, while heavier, offers excellent impact resistance, easier repair, and lower tooling costs. For most production or aftermarket contexts, FRP provides a practical balance between performance and affordability. The resin system—epoxy for carbon fiber, polyester or vinyl ester for fiberglass—also colors the behavior of the final shell. Epoxy tends to cure to a tougher, more heat-resistant matrix, which helps with long-term durability under sun and heat, while polyester resins can offer quicker cure times in simpler setups.
In the shaping studio, the gender of the mold—whether a positive mold from the plug or a negative from a master—guides the reproduction approach. A female mold, derived from the plug, is commonly used to yield a shell that matches a preselected surface geometry and seam layout. The transition from the plug to the mold involves careful surface finishing, sometimes including a release agent to guarantee clean detachment and no seam lines that would mar the final appearance. When a finished mold is ready, it becomes a working tool for multiple shells, allowing a factory-like consistency across units or a batch of aftermarket parts that share a common aerodynamic ethos. The finished product emerges as a seamless outer skin that can be sanded, primed, painted, and sealed with a protective clear coat. The quality of this surface is not merely about looks; it directly influences the fairing’s interaction with air, the rider’s comfort, and the bike’s perceived speed. A glossy surface can be visually striking but may reveal minor imperfections, while a well-prepared matte or satin finish can hide small imperfections and emphasize the sculptural lines. Either way, the surface quality must be consistent with the underlying frame geometry and mounting hardware, ensuring a precise fit and reliable attachment during the install.
The practical implications of material and technique choices become especially clear when considering half fairings versus full fairings. For motorcycles that emphasize balance between protection and weight, half fairings often favor lighter materials such as fiberglass or even certain ABS plastics, offering sufficient wind deflection at moderate speeds without imposing excessive mass. Full fairings, already more complex, benefit from carbon fiber’s stiffness and lighter footprint, provided the cost and manufacturing environment can support the more elaborate layup schedule and curing requirements. Beyond weight, the choice of technique affects serviceability and maintenance. A fiberglass shell can be easier to repair in the field or in a shop, while carbon fiber components may demand more specialized materials and fabrication steps but reward the rider with reduced inertial penalties when accelerating or braking. In industrial or large-scale contexts, properly shaped fairings contribute to fuel economy by guiding the airflow around the engine bay and underbody, reducing drag, and stabilizing the flow around the rider’s silhouette. The design intent is always to synchronize the aerodynamic profile with the motorcycle’s mechanical and human factors, producing a product that looks as if it belongs on the bike from the first moment of assembly to the last ride before the next redesign.
As modern fairings evolve, iconic examples continue to influence new designs. In recent redesigns such as the Road Glide’s Sharknose Fairing, the emphasis remains on integrating heritage cues with contemporary materials and manufacturing realities. The result is a shell that carries history while embracing advanced composites and refined surface finishes. This fusion of old and new is not a flourish—it’s a statement about how shaping and material choice dictate performance, aesthetics, and longevity. For builders seeking real-world reference points, a steady sourcing of reference shapes, symmetry checks, and fit verification is essential. A practical way to visualize and compare shapes is to study a broad catalog of fairings and assess how each contour interacts with airflow at different yaw angles and rider postures. The goal is not to imitate a single design but to understand the relationships between line, volume, and the air that flows over and around the body.
For readers who want to explore practical examples of production shapes and kits, see the fairings collection for a sense of how categories and contours translate into real-world pieces. This reference helps align theory with what you might install on a bike, ensuring your designed contours can be manufactured with repeatable results. fairings collection
External resources and further reading can deepen your understanding of broader standards and industrial benefits tied to fairing composition. A scholarly resource on the composition and standards of motorcycle fairings offers a rigorous backdrop to the hands-on work described here, highlighting how different materials respond under load, exposure, and long-term use. External resource: Understanding Chinese Motorcycle Fairings: Composition, Standards, and Industrial Benefits. https://www.sciencedirect.com/science/article/pii/S2666547825001234
Chapter 4: The Smooth Shell — Finishing, Sealing, and Seamless Installation of Your Motorcycle Fairing

Finishing a motorcycle fairing is where design intent meets practical reality. This stage turns carved shapes into a durable, aerodynamic shell that withstands weather, vibration, and miles on the road. It begins after the final shaping on the mold and ends with the fairing bolted to the bike and ready for a ride. The process follows a logical arc: material behavior, surface preparation, paint science, and precise mounting, each step building on the last. When done thoughtfully, finishing elevates performance and appearance and protects your work from the first spray of rain to everyday wear.
Materials and surface prep: whether fiberglass, carbon fiber, ABS, or polycarbonate, you work with layered, resin-saturated cloth or molded plastic that must finish smooth. A glossy or matte surface is fine, but the goal is uniform texture with no defects that would telegraph through paint or trap moisture. Even tiny air pockets or waviness become visible after primer and color. Early detection and careful repair pay off later. For fiberglass, extra sanding and micro-fillers may be needed; carbon fiber requires careful resin management to avoid grainy textures. The same rules apply to plastics: controlled heat, careful forming, and edge work so panels sit flush with the frame and with each other.
Surface preparation governs adhesion. Clean the surface to remove release agents, dust, and fingerprints. Address demolding ridges or flash with sanding. Progress through grits from 120 to 220 to 320 and then 400 and beyond for high-gloss finishes. The aim is to minimize mold marks while preserving a repeatable texture for primer bonding. Fill pinholes or resin pockets with compatible microballoon filler or spot putty, then sand smooth. Test a small area by applying primer and inspecting under raking light to reveal the smoothest area and guide the next pass. Seams between panels should be tight and uniform to avoid visible gaps after paint.
Priming reveals surface condition. Use a high-build epoxy primer for fiberglass and carbon fiber to fill minor imperfections and create a solid base for color. For plastics, select a compatible primer to improve adhesion. Apply multiple thin coats with curing between coats, and sand between coats to achieve a glassy surface. The goal is a uniform, defect-free base that shows no texture when seen at riding angles. Remove dust nibs or solvent runs before the final primer coat.
Color and clear coats come next. Use an automotive-grade base coat compatible with the substrate and primer. Apply thin, even layers in multiple passes to avoid sagging along curves. After color, apply a clear coat to protect and provide UV resistance, reduce micro-scratches, and improve water shedding. Apply in light coats to prevent solvent entrapment and orange-peel; if needed, wet sand after cure to restore gloss.
Sealing and assembly. Some builders seal seams along joints with a thin bead of silicone or a compatible sealant to prevent water ingress and dampen vibrations. Sealant should be applied only along joints not directly painted, and cured per the manufacturer. Install the fairing by mounting arms or brackets to the frame’s inner points, with loosely threaded fasteners for adjustment. Tighten in crisscross sequence to distribute clamping pressure evenly and avoid distortion. Torque values vary by kit; follow the installation guide or general best-practice torque references when available.
Alignment and fit are checked with the rider in mind. Panel gaps should be even; edges flush. The windshield, if present, affects airflow and visibility. Controlled riding tests help dial in angle and position, noting any interference with mirrors or controls, and small shims or micro-adjustments can fix issues without stressing mounts.
Maintenance keeps the finish pristine. Use mild cleaners and soft cloths. Dry with a microfiber towel to avoid micro-scratches. If scratches appear, polish with a mild compound; deep scratches may require re-clear coating and repainting. Periodic inspection of mounting points and seams helps prevent long-term misalignment or rattles.
Synthesis. Finishing is both craft and judgment: a well-finished fairing protects core materials, preserves rider comfort, and enhances aerodynamics. Keep a small kit of consumables handy: sanding paper, fillers, primers and topcoats, clear coat, and polishing compounds. The goal is a shell that looks purposeful, performs predictably, and endures miles of wind and weather.
References. If sourcing panels for compatibility, explore common Honda fairings interfaces to understand mounting geometries. For exact torque specs and mounting sequences, consult the official installation guide.
Final thoughts
Understanding the entire fabrication process of motorcycle fairings—from design to installation—equips business owners with crucial insights into customizing their offerings. This knowledge allows you to cater to specific rider needs while enhancing bike performance and aesthetics. By leveraging these insights, you can differentiate your business in the competitive market and meet the growing demand for personalized motorcycle experiences.