For business owners in the motorcycle industry, understanding the intricacies of painting motorcycle fairings with spray paint can significantly enhance both customer satisfaction and service quality. This guide presents essential preparation steps, precise masking techniques, an effective application process, and final touches that ensure a professional-grade finish. Each chapter is designed to build on the previous one, offering a holistic view of the painting process to elevate your craft and your business.
From Bare Plastic to Flawless Finish: Mastering Preparation for Spraying Motorcycle Fairings
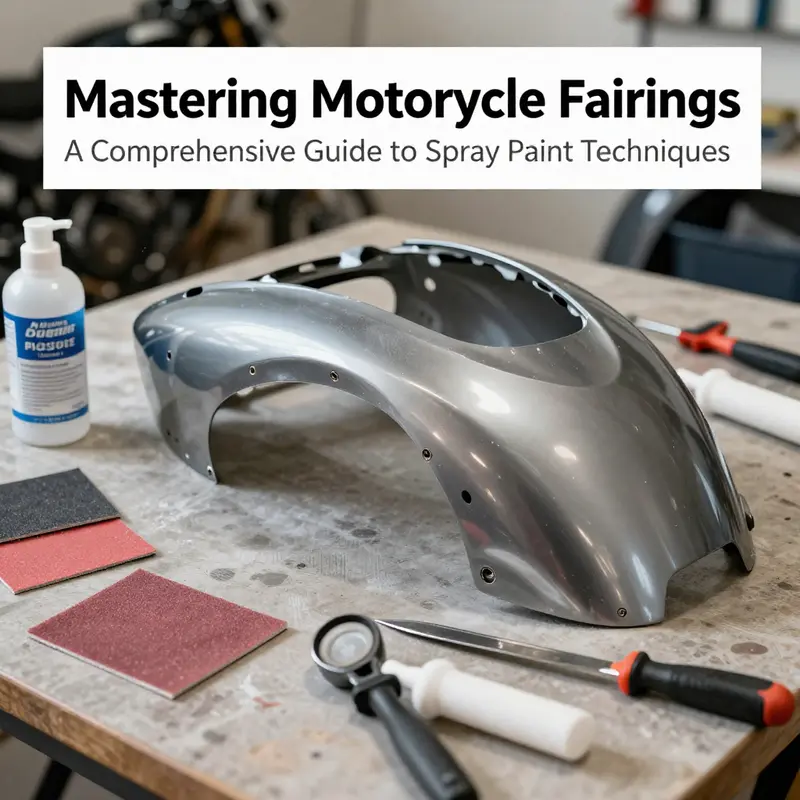
The moment you decide to repaint a motorcycle fairing with spray paint, you step into a quiet, exacting craft where every microstep matters more than the first brushstroke. The journey from bare plastic to a durable, showroom-ready finish begins long before color is sprayed. It starts with a clean slate, a controlled environment, and a mindset that preparation is the backbone of quality. The fairing is not simply a shell to be coated; it is a canvas that must accept paint with perfect adhesion, resist chipping, and maintain its gloss in the miles ahead. To honor the ride you want to project, you remove the fairing from the bike and set it on a stable, clear work surface. The decision to work in a controlled space has a simple, if not radical, payoff: fewer dust particles, steadier climates, and less chance of contamination that could undermine adhesion. Inspecting the surface for cracks, flex marks, or compromised areas becomes a diagnostic ritual. Some flaws are obvious, others subtle, but all have the potential to telegraph through the final finish. If cracks exist, they deserve repair with a plastic-appropriate adhesive, followed by a leveling fill. A two-part auto body filler smooths dents and scratches, and curing time is your friend here. Rigid, glossy finishes do not forgive unevenness. The moment you feel the surface with a gloved hand after sanding, you should sense readiness rather than doubt. The habit of taking a breath, then proceeding, is the quiet discipline behind a professional result. After the filler cures, you sand with progressively finer grits, moving from rough to smooth until the surface is uniformly flat. Begin with coarser levels to knock down the worst defects, then sweep across with fine grits to create a microtexture that the new paint can grip. A careful sequence—800 or so grit to begin, then up to 1200 and 2000 as you near the finish—ensures the fairing presents a uniform, paint-friendly surface. Between stages you wipe away dust with a clean, dry cloth and finally note every edge, seam, and corner that could harbor dust or oil traces. The technique is not simply about removing gloss in preparation; it is about creating the right microtopography so the primer and paint can lock in with lasting strength. A final wipe with a dedicated plastic cleaner or isopropyl alcohol removes residual oils and fingerprints that could undermine adhesion. Here the narrative becomes practical: a full repaint sometimes benefits from stripping away old paint entirely. If you choose this route, follow safety instructions with care and work in a ventilated space. The goal is a surface that behaves like new plastic, which means every layer that follows must be allowed to breathe and cure without interference. In this chapter the focus remains squarely on preparation, the invisible engine that makes subsequent spraying predictable rather than speculative. If you’re sourcing a fairing or planning to mix a color closely to the original, browse options that suit your bike model in the Honda fairings collection. This is not a plug, but a practical step to ensure fit and surface consistency once you reassemble. The choice of a new shell, or a well-prepped existing one, should be considered as part of the overall finish strategy, not as an afterthought. A well-prepared surface lies at the heart of every successful color application, and it is here that the learner’s patience transforms into predictable results. // Masking, too, is a ritual that demands care. When you mask, you commit to letting paint go where it should and staying away from areas that must stay clean. You cover mounting points, chrome trim, rubber seals, and any neighboring metal with painter’s tape and masking film, building a tight shield against overspray. The edges demand extra attention, because overspray knows where to creep if the seal is weak. The more meticulously you seal, the less you spend later on correction. A final wipe-down, using a lint-free cloth and a prep solvent or isopropyl alcohol, removes any remaining stray particles. This is not a ceremonial step; it is the practical security that ensures the base coats bond properly and the finish remains uniform. In the careful choreography of prep, the environment matters as much as the hands that apply the paint. A dust-free room with stable temperatures and manageable humidity supports consistency from panel to panel. You want the surface to be dry to the touch before you consider primer. The journey through sanding, masking, and wiping creates the canvas on which primer will work its magic. The primer is not a cosmetic layer alone but a chemical bridge that helps paint bond to the often challenging plastic substrates used on fairings. For this reason you select a plastic-specific primer and apply it in thin, even coats. The distance from the surface should be measured, not guessed, at roughly 15 to 20 centimeters from the panel. Two to three coated passes, with 15 to 30 minutes of flash drying between coats, builds a solid base without risking runs or swelling. Heavy coats tempt a finish that looks flat or uneven; thin passes help the resin settle and dry with integrity. When the primer cures, you wipe once more to ensure the surface is free of dust. The texture must be slightly dull, the way metal looks before color is laid. The primer’s only job is to hold fast, and it performs that job best when the underlying surface remains free of oils and micro-pills of old paint. With primer in place, the path to color begins. You then move into the base color, selecting a high-quality automotive spray paint designed for plastics and capable of staying flexible after cure. Shake thoroughly, test spray on a scrap piece, and then apply in overlapping passes that form a gentle, continuous film. A classic approach is to hold the can at a consistent distance, moving in a steady, somewhat deliberate Z pattern to avoid stripes or sags. The aim is transparency of the individual coats, not a heavy, opaque shell on the first pass. You consider the number of coats needed to reach full opacity, which typically lands around three to four. Each coat dries in a practical window of 15 to 30 minutes, so you plan your timing to avoid wet edges. Color matching is an art and a science. If you are aiming to reproduce a factory shade or achieve a precise hue, you may need a color-matching service; the effort is worth it when the final finish communicates a seamless, crisp color. You will likely repeat the thin-coat cycle until you are confident the color appears even across curves, contours, and flat planes. The depth and richness of the tone emerge as multiple layers accumulate, and the texture from the underlying primer continues to influence the final appearance. The base color, in many cases, becomes the primary expression of the fairing, so you cultivate patience in this stage as you would in any other craft. Once satisfied, you build a protective clear coat to seal in the color and add gloss and resilience. The clear coat should follow the same discipline as the base: thin, even layers with consistent passes. Two to three coats after the base has fully dried will deliver depth and protection against micro-scratches from air movement and road debris. Curing times of a few hours are common, but it is wise to give the finish enough time to harden before handling. The caveat is simple but crucial: never rush the drying process. Heat sources or fans can disturb the coat and cause waviness or trapping bubbles. The ultimate test is a finish that gleams with depth and remains resilient after exposure to sunlight and the elements. Drying in a climate-controlled space—ideally around 20 to 25 degrees Celsius with humidity between 40 and 60 percent—lets the layers cure evenly. A fairing requires at least 24 to 48 hours to achieve a stable cure before reassembly, and longer for show-quality depth. Direct sunlight should be avoided during curing to prevent premature solvent evaporation or heat-induced distortion. When the surface finally resists fingerprints and feels firm to the touch, you can begin finishing touches. If minor imperfections remain, a light 2000-grit wet sand through a gentle water flow can remove any specks or slight orange peel. A careful buff with a microfiber cloth restores luster, while a finishing wax or polish adds a final layer of protection and shine. The aim is a finish that invites touch and exudes confidence, a smooth surface free of edge anomalies and consistent across the entire panel. Reinstalling the fairings becomes the final act of the journey. Reattachment requires alignment checks and secure fastening, with attention paid to electrical connectors or any sensor or light assemblies that may connect to the fairing. The result is a cohesive exterior that not only looks better but also functions as intended in the broader aesthetic of the bike. Throughout the process you keep the narrative of preparation as a continuous thread. Preparation is where paint clarity emerges, where uniform texture supports color accuracy, and where the fear of failure gives way to a confident, repeatable procedure. When you approach this work as a sequence of deliberate decisions rather than a single moment, you begin to see that a professional result is less about talent and more about discipline, patience, and the willingness to slow down for the sake of durability and beauty. If you are looking for sources of reference and further guidance on the painting process, consult official technical resources that outline spray painting for motorcycle fairings. External resource: https://www.ppg.com/en-us/automotive/technical-resources/Pages/spray-painting-motorcycle-fairings.aspx. The journey from bare plastic to a flawless finish is not a shortcut; it is a craft that rewards precision and care. For ongoing inspiration and parts that complement a well-prepared frame, explore the options in the Honda fairings collection. (Internal link) Honda fairings collection: https://www.summitfairings.com/collections/honda-fairings
Edge by Edge: Mastering Masking for Flawless Spray-Painted Motorcycle Fairings

Masking is the quiet craft that decides whether a spray job looks professional or rushed. It sits between preparation and color, a hinge that carries the promise of sharp lines, pristine edges, and a finish that can withstand the ride and the weather. When you peel the tape and wipe away dust after the final clear, the work behind each line becomes visible: a testament to patience, planning, and the right tools. In painting motorcycle fairings with spray paint, masking is not an optional cosmetic step but a foundational technique that protects areas you do not want painted while guiding color exactly where it should go. The modern practice has evolved with materials and standards that make sharp edges more reliable than ever before. ISO-certified masking tapes, designed for automotive use, resist paint bleed and hold up under solvents encountered during spray painting. They are not a luxury but a necessity for anyone aiming for a showroom look on a daily rider or a show bike. The choice of tape is as deliberate as choosing a nozzle size; the wrong tape can crease, peel, or bleed at a subtle seam, undermining weeks of work. The decision to use such tapes becomes even more critical when contours, creases, and complex shapes define the fairing: the headlight housing, the radiator shrouds, the vents, and the pockets where cables kiss the surface. Masking in this context is both an art and a science, an intersection where the painter learns to read the geometry of the piece before a single spray is released into the air. The modern approach begins with a thorough assessment of the fairing surface and the geometry of every edge that might see paint. This is where the concept of layering begins to unfold. Rather than a single blanket of tape across the entire piece, the technique relies on multiple layers of tape and film to create a barrier that follows the contours with fidelity. The base is a strong, stable shield, while the subsequent layers refine the boundary, sealing edges with an additional thin strip of painter s tape or a specialized edge sealant. The aim is to prevent paint seepage at the seam where two planes meet and to reduce the risk of lifted edges later in the curing process. In practice, this translates to a careful pre-plan: tracing the lines with a light marking tool, mapping where color should end, and deciding where masking should begin and finish to create a crisp boundary. As 2026 standards emphasize, the best results come from masking that respects the variability of plastic shapes and the way paint behaves when sprayed through a can or a gun. Because fairings are often composed of polypropylene and ABS blends, tape adhesion must contend with surface oils, micro-phraging from wear, and the occasional gloss that remains from the factory finish. The first step is the most obvious: thoroughly clean and degrease the surface before masking ever goes down. A clean, dry surface allows the tape to bite properly without sliding, and it reduces the risk of adhesion loss once paint begins to cure. When you prepare to mask, you should consider the exposure area around moving parts and points that could trap moisture or dust. Even a small gap can become a locus for overspray if not addressed with precision. It is here that masking becomes an orchestration rather than a simple barrier. A precise run of tape along an edge becomes a guide for the spray, while a second layer can seal the edge and ensure that any paint that threads into a seam stops short of the next surface. For irregular shapes such as headlight housings, air intakes, and handlebar grip areas a blend of rigid plastic sheeting and foam tape can reproduce a clean, invisible boundary that holds up under the pressure of a spray can or a gravity fed gun. In many cases, manufacturers have responded with pre cut masking kits tailored to specific models. These kits reduce preparation time and improve accuracy by providing pieces that fit the contours of a given fairing. They are especially useful when dealing with complex geometry, where a general roll of tape would require extensive cutting and rearranging. The value of such kits rises when you consider the time saved and the consistency gained across multiple panels or projects. When masking, the discipline of time becomes part of the craft. Industry practice, updated in early 2026, encourages masking off the area at least one day before painting to allow the tape to adhere properly and to avoid peeling during the process. This step is not a mere prelude; it is a strategic move that reduces the risk of edge lift during the aggressive airflow of a spray, especially when you are applying multiple thin coats. The moisture in the air or a sudden drop in temperature can cause tapes to lose grip if they are pressed down when the surface is not fully settled. In that sense, masking is as much about patience as precision. It is a rhythm: lay down the tape, seal the edges, press with uniform pressure, and revisit the boundary as you step away to prepare for the color work. An essential part of modern masking practice is the role of masking tapes that resist solvent exposure. Automotive masking tapes are developed to withstand the solvents present in spray paints and primers, and they also minimize edge lift during the curing stage. The modern painter selects tapes with a slightly higher tack to anchor into the slight texture of the plastic without tearing through the surface. The sealing layer is equally important. A thin layer of painter s tape or a sealant along the edge can create an impermeable line, ensuring the base color stays inside its intended zone while the unpainted surface remains pristine. Such sealing becomes particularly significant around intricate borders where you might be tempted to rely on a single border line drawn with a marker or a rough measurement. Precision is achieved when you treat masking as a system rather than a stick and tape task. In practice, this system requires a combination of tools: rigid film for areas that cannot tolerate overspray, foam tape to fill gaps at curved transitions, and a delicate hand for aligning edges along the arc of a fairing. It is a mindfulness practice as much as a technical challenge. The best masking outcomes also benefit from model specific knowledge. For example, some fairings have sharp radii along the edges that can create a tendency for tape to curl away if not anchored properly. In those cases, a series of small, overlapping tape segments creates an edge that remains flat and tight throughout the spray process. The edge is then reinforced with a second layer in a slightly offset position, ensuring that the final line is crisp when viewed from the rider s eye line. For those who aim to achieve a particular aesthetic say a racing livery or a vintage replica the masking strategy might involve multiple color zones. Here, the sequence becomes important: mask the zones that will receive the darkest shade, apply the light color in the background, then re mask to lay down the second color with a new delineation. In such projects, it is common to see pre cut kits and model specific layouts that make it possible to achieve uniform gaps and consistent proportions across all panels. The painter s eye, trained from years of practice, will notice micro indentations or surface blemishes that masking cannot hide. If a seam is uneven or a corner shows a faint bleed, this is the moment to adjust the boundary before any paint is laid down. In addition to the tape and film, responsible masking involves an awareness of the surface s future protection. A reliable approach includes sealing the edge after masking with a light film of sealant to prevent micro leaks and to maintain a crisp boundary once the top coats are applied. It is not unusual to see a masking process that includes layering and then revisiting to re press edges and corners after a light wipe with a clean cloth. If you plan to build a color guitar pick or a two tone design, consider a masking plan that accounts for the interactions between colors. The sharpness of the line is not just a testament to the tape but to the entire workflow: how clean the surface is, how well the tape adheres, and how the edge is prepared for the next layer. For practical reference model specific discussions and resources can be found in the Yamaha fairings collection, which showcases a range of shapes and contours that demand careful masking to preserve their lines. This is a reminder that a beautiful finish begins with thoughtful product choice and a thoughtful masking strategy a reminder that your fairing is not merely a shell but a canvas that must be protected with respect for its geometry and the paint s behavior. When you consider the tools that support this work, the modern painter leans on a toolkit that includes pre cut masking kits, ISO certified tapes, edge sealing methods, and a patient, measured approach to timing. The result is a boundary that holds under the spray s lift and a final line that looks inevitable a testament to craft rather than luck. As you prepare to proceed, keep a mental map of the edges you want to define and the zones you want to preserve. The goal is clear a clean durable color boundary that survives exposure weather and countless rides. For readers seeking a deeper dive into advanced masking techniques and certified training resources, the International Automotive Painters Association offers a comprehensive guide that expands on these principles and provides actionable steps and visual aids. This resource complements the practical steps outlined here and helps minimize touch ups and rework. If you want to explore a model specific perspective on masking and painting, you can browse a model lineup such as the Yamaha fairings collection for context on contour and fit, and consider how masking strategy adapts to different shapes. For a direct link to model specific parts and visuals see the Yamaha fairings collection. https://www.summitfairings.com/collections/yamaha-fairings.
Primer and Paint Mastery: From Prep to Protection for Sprayed Motorcycle Fairings
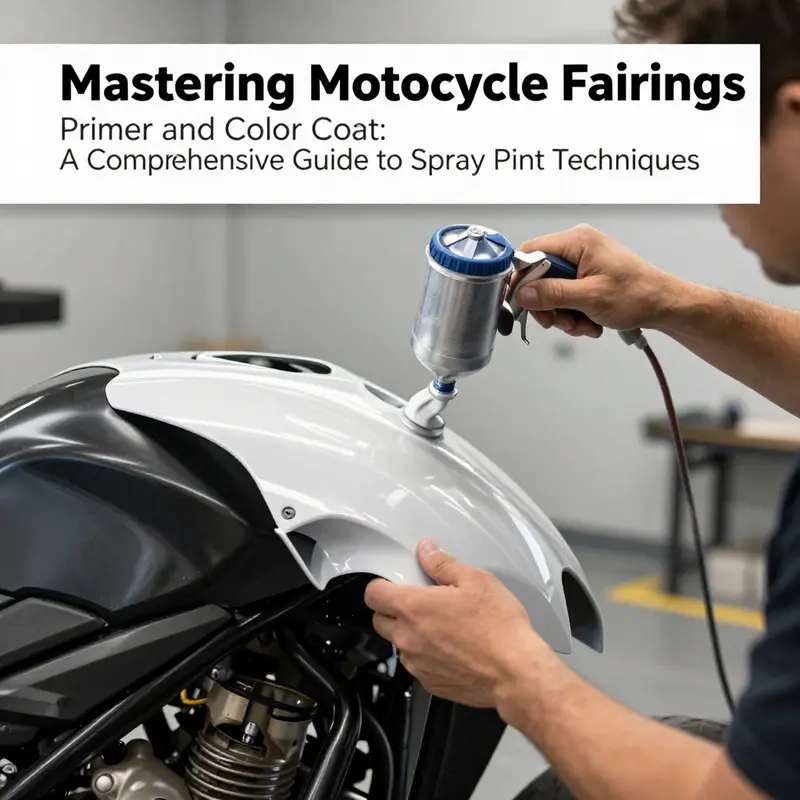
Prepare the plastic fairing by removing it from the motorcycle and working in a clean, dust-free area. Inspect for cracks and gouges; repair with a suitable automotive plastic adhesive if needed, then fill any imperfections with a two‑part auto body filler and sand progressively from 800 to 2000 grit until smooth. Clean with a plastic cleaner or isopropyl alcohol and let dry completely. Mask all areas that must remain unpainted with quality tape and film to prevent overspray. Use a primer formulated for plastics (especially polypropylene and ABS) and apply in thin, even coats; aim for two to three light coats with 15–30 minutes between coats and a distance of about 6–8 inches from the surface. Allow the primer to cure for 1–2 hours in a controlled environment before proceeding. For the base color, shake the automotive spray can vigorously for at least two minutes, test spray on scrap, and apply three to four thin coats with overlapping strokes to promote even coverage. Dry time between coats should be 15–30 minutes in a clean space, longer if the room is cool or humid. The color should be opaque and uniform across all curves and radii. If color matching is important, consider professional color matching or factory shade references. After the color coats, apply a clear coat designed for plastics in two to three thin coats with the same dry-time guidelines. Maintain a 6–8 inch distance and use overlapping passes; in dusty or humid environments, extend intervals to reduce impurities. Let the clear coat cure in a dust-free space at about 20–25°C (68–77°F) with 40–60% humidity for at least 24–48 hours before handling. If minor imperfections appear, wet-sand with 2000‑grit and water and lightly buff to restore gloss. Finally, reinstall the fairing and check for fit, gaps, and clearances. This sequence—prep, mask, prime, color, clear, cure, refine, reinstall—helps deliver a durable, showroom-worthy finish. For additional guidance, consult a dedicated motorcycle painting resource or tutorial.
Final Touches: Clear Coating and Finishing Motorcycle Fairings with Spray Paint
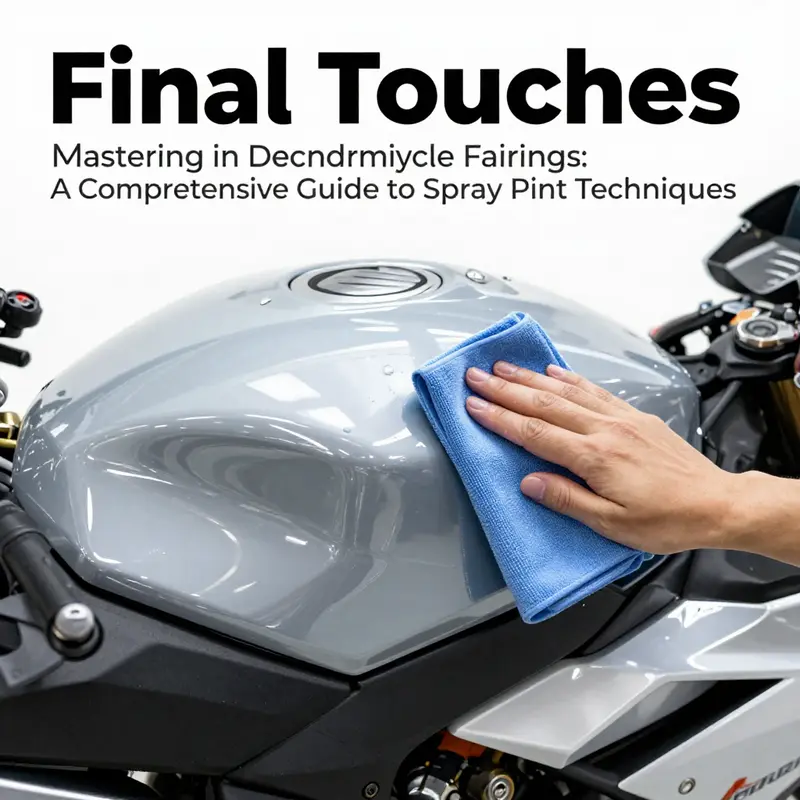
The moment the base color has dried and the surface sits clean and uniform, the repaint enters its final, decisive phase: the clear coat. This is the layer that transforms a solid color into depth and life, and more importantly, it is the shield that defends your work against UV rays, fuel spills, road grit, and the inevitable micro-scratches that pepper every ride. A high-quality clear coat on plastic fairings does more than add a glossy finish; it binds the color, enhances clarity, and provides the structural resilience that separates a showpiece from a good paint job. The approach is precise but forgiving when you respect the fundamentals—control your environment, respect the chemistry of two-component coatings, and allow proper cure times that let the resin cross-link fully and harden. The goal is a surface that not only gleams in the sun but also stands up to the rough realities of riding, weather, and maintenance without peeling or dulling.
Two-component, or 2K, clear coats are the gold standard for this work. They cure through a chemical reaction initiated by a hardener mixed with the clear, creating a durable film that resists UV damage and chemical attack much better than single-coat alternatives. When you apply a 2K clear, you’re investing in a long-term finish. But with that power comes responsibility: the setup must be clean, the air free of dust, and the temperature and humidity carefully managed so the hardener can do its job without defects forming. Clear coats are especially unforgiving of surface contaminants, so every stage leading up to this moment—the wash, the decontamination, the dry and tack-free surface—needs to be pristine. A lightly scuffed but clean panel accepts the clear better, and a uniform, dry surface helps the clear lay down evenly, minimizing orange peel and sags.
Application begins with the preparation of the surface texture. The fan pattern on a spray gun or a well-controlled aerosol spray needs the same discipline: thin, even layers that build a uniform film. Begin with a light tack coat to help the film flow without pooling. This is followed by two or three additional coats, each allowed to flash—evaporate solvents and begin curing at the surface—before the next coat is laid down. The time to flash can vary with temperature and air flow, but in typical shop conditions you would look for a pink, slightly tacky feel on the surface after a short hover of the air; in warmer, more humid environments the flash between coats may extend slightly. The objective is a smooth, level finish with no dust nibs and no depth of texture visible through the clear.
Distance and technique remain crucial. Hold the spray light and steady, moving your hand in overlapping strokes, much like you did with the base color. Keep the spray pattern narrow enough to maintain control but wide enough to cover the edge lines and seams seamlessly. A common approach is to apply multiple ultra-thin passes that build a film gradually, rather than attempting a single, heavy glaze. This minimizes the risk of sagging and reduces the likelihood that contaminants will be carried into the finish. Since fairings are curved and often feature complex profiles, work in sections and rotate the piece as you go to keep your angle consistent. If you see a small dust nib or minor debris during a pass, don’t chase it with a heavy hand; instead, feather in a lighter pass on the following coat to blend the imperfection away with the next layer.
Protecting the surrounding areas during clear application remains vital. Even minute overspray on edges or fasteners can be difficult to fix after the clear has begun to cure. When masking was done earlier, inspect the masking for lift or gaps before coatings go on. If edges show a little bleed, you can often correct it with careful re-masking and a light pat on the edge to re-close the boundary—being careful not to remove cured base or the newly applied clear. The finish itself should eventually reveal a glassy, glass-like depth as the film hardens and represses the light in a way that makes the color beneath feel more saturated and true. The depth of the gloss is not merely cosmetic; it acts as a protective barrier that reduces micro-scratches and makes future cleaning more forgiving.
Cure is the silent partner in this step. After the final coat, the part should remain in a dust-free environment with stable temperature and humidity. Do not rush to handle or reinstall. In most controlled environments, a full cure for 2K clear can take 72 hours or more before the surface reaches its maximum hardness. Early handling or exposure to warmth or direct sun can create tensile stress in the film, which may produce micro-cracks or shrinkage. The temptation to speed things up with heat is strong, especially when time is tight, but patience pays off with a tougher, more resilient finish. If you need the piece to cure while you work on other parts, consider a dry, shaded area with minimal air movement and no direct heat sources. These conditions promote even curing and minimize the risk of solvent entrapment, which can cause hazy spots or small craters in the surface.
As the film begins to take shape, the finishing stage moves from “beautifully smooth” to “mirror-like smooth.” Lightly sable the surface with a very fine grit—typically 2000 grit wet/dry—only if the clear shows minor imperfections or dust inclusions after the cure. Use water to wash away the slurry as you go, keeping the surface cool and lubricated. The goal is not to scuff through the clear but to refine the surface so it reflects light evenly and avoids visible micro-scratches that catch the eye under bright light. After this sanding, wipe the surface with a clean solvent wipe to remove any lubricants or residual dust, and allow a short, clean re-dry before the next step.
Polishing follows the scuffing and is the moment where the true depth emerges. A mild polish or a dedicated plastic-safe compound, applied with a soft foam pad or a microfiber wheel, can remove the faint hazing that sometimes accompanies 2K systems and reveal the full, vibrant gloss that lies beneath the surface. The process should be slow and consistent, with light pressure and even motion, moving across the entire panel to avoid creating a hot spot where the polish is concentrated. The optical properties of a good clear are such that the look of depth can be dramatic when the surface is uniformly polished, and you will notice the way light bends across reliefs, edges, and contours—the very reason for investing in a quality clear in the first place.
From a maintenance perspective, the clear coat layer also dictates how you care for the finish. Regular washing with mild soap, warm water, and a soft cloth will preserve the clarity and extend the life of the finish. Avoid harsh solvents or waxes that contain abrasives or solvents capable of softening the clear layer. Instead, use a polish or wax designed for plastics and automotive finishes, applied with a clean pad that won’t abrade the surface. The outcome should be a finish that not only looks pristine but also stands up to the daily grind of riding and cleaning without showing early signs of wear.
The final stage in the narrative of finishing is reassembly and inspection. After the clear has fully cured, reattach the fairings with care, ensuring that the alignment is precise and that there are no gaps at seams or around mounting points. The new finish should not only look good when the bike sits still but also perform well when the bike is on the move: reflections should be smooth, color match should be uniform, and there should be no edge peeling near high-stress areas like mounting tabs or fastener holes. If you notice a seam line that catches the eye, a light pass with polish and a careful touch-up in the color layer (only if needed and if fully cured) can help to harmonize the transition, but avoid aggressive grinding into the clear once it has cured.
For readers who want to see how these principles translate to real-world parts and lines, consider exploring a dedicated fairing collection that highlights the range of curves and contours typical of modern sport bikes. For example, you can browse the Kawasaki Ninja ZX-14R fairings collection to visualize how the finish interacts with sweeping surfaces and tight radii in a production environment: Kawasaki Ninja ZX-14R fairings collection.
In addition to practical guidance, it is valuable to consult broader, authoritative guidance on the topic to ensure your methods align with best practices and safety standards. An external resource that provides comprehensive, up-to-date information on clear coating and finishing motorcycle fairings is available here: https://www.motorcycle-mechanic.com/how-to-paint-motorcycle-fairings/. This reference can deepen understanding of environmental control, material compatibility, and step-by-step techniques beyond the scope of a single guide.
The outcome of the clear coat is a finish that glows with depth, resists the elements, and endures through miles and seasons. When done with patience, discipline, and respect for the material, the final result becomes a durable, showroom-like finish that enhances both appearance and protection for the motorcycle. Proper curing, careful sanding only when necessary, and disciplined polishing produce an enduring aesthetic that stands up to the realities of riding. Even small details—the even distribution of coats, the absence of dust nibs, the smoothness of edges, and the uniformity of gloss—collectively determine whether the finish feels factory-like or merely competent. This is the moment to honor the careful preparation that preceded it, because the clear coat is the verdict of the entire process.
Final thoughts
With careful preparation, attention to detail in masking, a systematic approach to applying primer and color, and meticulous finishing touches, business owners can produce motorcycle fairings that not only look impressive but also stand up to the rigors of the road. Mastery of these techniques will not only enhance the aesthetic appeal of motorcycles but also strengthen customer trust and your business reputation.