Painting motorcycle fairings requires a blend of skill, preparation, and the right materials to ensure not only aesthetics but also durability. As a business owner, offering high-quality paint services can set your brand apart in the competitive motorcycle sector. This guide delves into the five crucial chapters of painting fairings, covering preparation, priming, base coat application, clear coat techniques, and finishing touches—all essential components to achieving a professional finish that enhances customer satisfaction.
Laying the Groundwork: Preparation Essentials for a Pro-Grade Motorcycle Fairing Paint Job

Preparation is not the glamorous part of painting motorcycle fairings, but it is the stubborn truth behind every professional-looking finish. A proper start saves hours later and determines how well the color, texture, and durability hold up under sun, wind, and road grit. The goal is a surface that is clean, stable, and predictably receptive to primer, color, and clear. When you approach the task with patient, methodical care, you set yourself up for a result that looks factory-new after months of use rather than a quick, cosmetic cover-up that peels or chalks in a season. The foundation begins with thoughtful disassembly and proceeds through cleaning, conditioning, and careful texture work. It is a loop of checks and refinements designed to remove every variable that could compromise adhesion or finish quality.
The first step, removing the fairings, earns its place at the top of the list for a simple reason: it grants full access to every surface. With the panels detached, you can reach every nook, edge, and seam without risking overspray on the bike’s chassis, instrument clusters, or exhaust. It also makes inspection easier. You can spot stress cracks, warped mounting tabs, or lingering wax residues that would otherwise be missed if the fairings remained mounted. While the removal process can seem tedious, the extra minute spent here pays dividends in the long run. As you work, handle every piece with care, supporting mounts and keeping hardware organized so reassembly is straightforward. If you’re sourcing replacement panels or deciding on a color match, the option set for Honda fairings provides a practical baseline for fit and compatibility, helping to reduce surprises during reassembly and painting.
Once the fairings are off, a thorough cleaning follows. Use a degreaser or a mild automotive soap to strip away grease, wax, oils, and dust that have accumulated in seams and corners. The objective is not just cleanliness but radical surface purity. Any residual contaminants can create blooming or fish-eye defects in future coats. After washing, rinse them completely and let the parts dry completely in a dust-free area. In a shop environment, this drying phase is where you can also check for any leftover contaminants or residue that could trap particles beneath the primer. Do not rush this step; a surface that still feels slick or slightly oily will greet the primer with poor adhesion and an uneven finish. If you notice any film or film-like residue, wipe again with a clean cloth and a fresh degreasing solution.
With the surface dry, the next phase is to create the right mechanical key for the primer. This is where deliberate sanding begins. Start with a medium grit, typically in the 400–600 range, and focus on creating a uniform, slightly rough texture rather than removing all the material. This roughness is not an imperfection but a mechanical key that helps the primer bite deeply and evenly. Work across the entire surface, including edges and transitions, so the paint layer has a consistent base to cling to. After this initial sanding, wipe away the dust with a tack cloth to prevent tiny fibers from embedding in the surface. Then assess the fairing for any glossy areas that might still reflect light. If you find them, a light pass with a finer grit—moving up to the 800–1200 range—helps tame those reflections and establishes a smoother platform for primer. The key here is to keep the surface uniform in texture; streaks or uneven dullness will telegraph through the primer and affect color and gloss later.
Very often, riders encounter surface issues that require more than cosmetic attention. Deeper scratches, gouges, or dents that penetrate through the clear coat and base paint demand a corrective approach before primer goes down. In those cases, consider using a scratch-filling compound or a light filler designed for plastic substrates. The goal is not to camouflage the damage but to rebuild a consistent plane with the surrounding surface. Apply thin, controlled layers, allow each layer to cure as specified, and then re-sand flush with the surrounding contour. This step is essential to achieving a factory-like finish rather than a patchy repair. The remaining texture should mimic the rest of the panel, so take care to blend seamlessly with the adjacent areas. After addressing deeper imperfections, perform another round of light sanding with the finer grit range to assure a uniform texture before moving forward.
Final preparation culminates in a meticulous cleaning that eases the transition into priming. A tack cloth or similarly soft, lint-free cloth is used to remove all last traces of dust. Even tiny specks can cause pinholes or small craters after the paint has cured, so this cleaning is not optional but essential. At this stage, you should also re-check the fit and edge conditions. Any edge that appears sharp or chipped may need a tiny touch-up or protective masking after priming, but the bulk of the work is about ensuring that the base is clean, smooth, and congruent across all panels. This congruence matters when multiple parts are painted to match a single color system; it prevents one panel from appearing noticeably different when installed alongside others.
Throughout the process, adhere to best practices that protect you and the final result. Wear a respirator, gloves, and protective clothing to shield yourself from overspray and solvents. Avoid painting in direct sunlight, windy conditions, or temperatures outside the 60–75°F (15–24°C) range with moderate humidity. Temperature affects both evaporation rates and film formation, so a stable environment reduces the risk of solvent pinning, solvent pops, or wrinkling in the primer or base coats. If you are uncertain about your ability to achieve a flawless surface, consider enlisting a professional shop with experience in plastic bodywork. A skilled painter can bring a level of surface refinement that is difficult to replicate with DIY methods, especially on curved panels or highly contoured fairings.
The overarching objective of this preparatory phase is straightforward: transform the fairings from a weathered, contaminated, or scratched substrate into a clean canvas that promises durable adhesion and an even, glassy finish. When you view preparation as a strategic, almost meditative practice, the subsequent steps—primer, base coat, and clear coat—unfold with far less resistance. This approach also helps you maintain color integrity and consistency across panels. If you ever feel tempted to rush a step, recall how a single dust mote or a misaligned edge can ruin hours of meticulous work. This is the moment to slow down and double-check masking lines, edge protection, and surface uniformity.
In the same spirit of thoroughness, you can apply the same mindset to the broader project, recognizing that the prep stage is the backbone of the final result. The fairing’s condition, the degree of care you invest in cleaning and texturing, and the precision with which you address imperfections collectively determine how the paint behaves under heat, UV exposure, and road wear. The more consistent your prep, the more forgiving the later layers will be when you encounter weather changes or road debris. And because the fairings are plastic, the bond we are seeking is a true, interlocked adhesion rather than a superficial cling. That is why the steps described here—careful removal, thorough cleaning, controlled sanding, targeted repair, and meticulous dust removal—are not merely routine tasks but the essential sequence that makes every subsequent step predictable and successful.
For readers who want to broaden their practical reference, the visual guides and tutorials from the Motorcycle Mechanics Institute offer detailed demonstrations of these same fundamentals, including tool setup, surface preparation, and safety practices. Their guidance aligns with the spirit of this chapter: preparation as a disciplined, repeatable process that earns a professional finish. In the next stage, the surface prepared through these steps will meet primer and paint with a confident, lasting bond, translating the hours spent in preparation into a coating system that resists chipping, fading, and peeling. The result is not just color but a protective, enduring barrier that keeps fairings looking new for longer under sun and weather.
External resource for further depth: https://www.motorcyclerider.com/how-to-paint-motorcycle-fairings-like-a-pro/
Priming for Perfection: Mastering Adhesion and Surface Prep in Painting Motorcycle Fairings
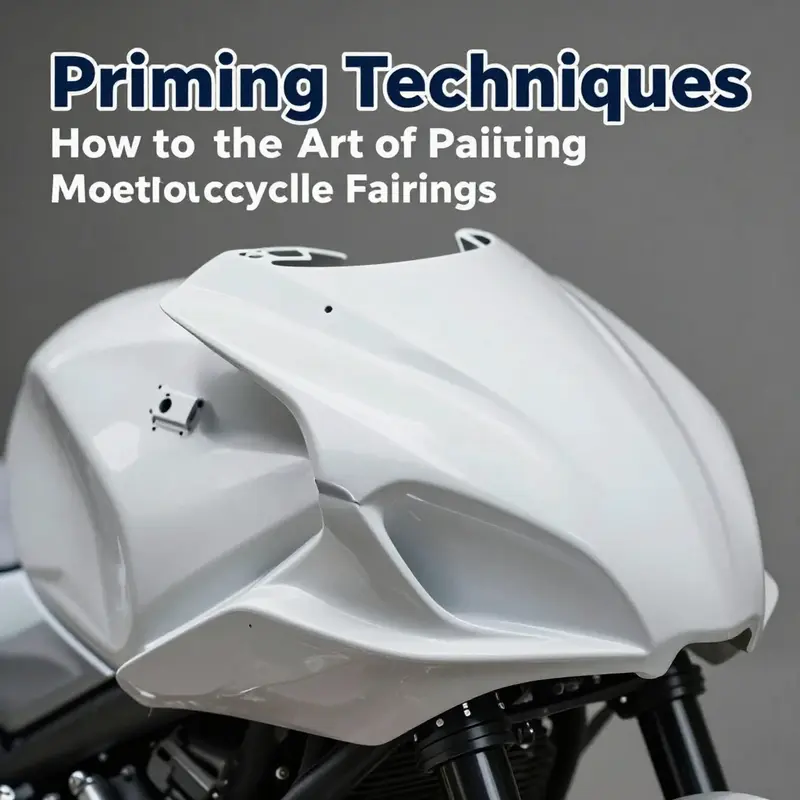
The primer is the quiet workhorse of any motorcycle fairing paint job. It may not grab the spotlight like the color or the clear coat, but without a sound priming foundation, even the most vibrant hue can peel, fade, or appear uneven in a matter of miles. Priming for perfection begins long before the spray gun fires. It starts with a deliberate, methodical approach to surface preparation that clears the way for adhesion, durability, and a pristine finish that stays true lap after lap.
Before any primer touches the plastic or composite of a fairing, meticulous cleaning and degreasing set the stage. Contaminants such as wax, oil, and road grime act like barriers, creating microscopic gaps that a primer cannot bridge. A quality automotive cleaner or a dedicated degreaser dissolves and lifts these residues. After washing, the surface must dry completely. Any remaining moisture can compromise adhesion and encourage ghosting or hazing once paint is applied. The goal is a surface that feels clean to the touch and looks uniform under bright light. This is the baseline from which everything else proceeds.
Once the fairing is dry, light sanding helps establish the microtexture the primer needs to grip. A gentle pass with 600–800 grit paper smooths out gloss without removing too much material, creating a subtle “tooth” that improves bonding. The sanding step also helps reveal any remaining imperfections that would otherwise telegraph through the primer into the base color. After sanding, wipe the surface with a tack cloth to remove dust. A clean, dust-free surface is not optional; it’s essential to a predictable priming result. If masking is needed for areas you don’t want painted, now is the time to do it with high-quality tape and masking film. The goal is to leave sharp, clean edges and avoid bleeding into adjacent areas once primer is applied.
Choosing the right primer is the next critical decision. For plastic or composite fairings, a high-quality automotive primer designed for plastics—often called a plastic primer or adhesion promoter—provides the best foundation for long-term adhesion. The primer is not merely a color base; it is a chemical bridge between the plastic substrate and the subsequent coats. A well-chosen primer improves coverage, helps prevent peeling, and contributes to a uniform surface that won’t reveal low spots or texture once the color goes on. The primer can be sprayed using a spray gun for the most even, controlled application, or, in small projects, with a quality aerosol can. In either case, the emphasis should be on thin, even coats rather than a single heavy layer.
The application technique is where many good primers earn their keep. Start with light coats that cover the entire surface without pooling in edges or curves. Hold the spray system at a comfortable distance—the exact distance depends on your equipment, but a typical range is around 6–12 inches from the surface. Use overlapping passes to maintain an even film. Thin coats dry faster and reduce the risk of runs. Drying times vary by product, but a typical plastic primer will require about 15–30 minutes before the next coat can be applied. Always follow the manufacturer’s instructions for drying times, as these guidelines impact sandability and adhesion. If you’re aiming for a flawless foundation, plan for at least two coats.
Between coats, light sanding can significantly improve the final appearance. A very fine wet-sand stage using 1000–1500 grit paper helps eliminate any orange peel or texture that would otherwise show through the topcoats. Wet sanding is delicate work: keep the surface damp, let the paper do the work with light pressure, and frequently wipe away residue to assess progress. After the final coat of primer has dried, a clean tack cloth removes any remaining dust, leaving a surface ready for base color. The smoothing work here pays dividends in the gloss and clarity of the color that follows.
A well-prepared primer layer has another immediate benefit: it creates a uniform base color that prevents pigment from migrating into the plastic or revealing color shifts on curves and edges. The curvature of a fairing, with its tight radii and complex lines, can magnify any inconsistency. A properly cured primer helps ensure that those lines stay crisp once the base color is sprayed. If you’re working on a bike with multiple fairings, a consistent primer across all pieces avoids tonal mismatches when the panels are reassembled. In practice, this means applying the primer in a well-ventilated area with stable temperature and humidity, avoiding direct sun and drafts that can cause uneven drying or premature skinning of the coating.
Temperature and humidity matter as much in priming as in any other stage of painting. The recommended conditions are typically moderate temperatures with low humidity to promote uniform drying and minimize solvent evaporation tricks that leave texture behind. A rugged shed, garage stall, or spray booth that maintains stable temperature within the ideal range helps produce repeatable results. Protective gear—respirator, gloves, and appropriate clothing—remains essential to safety during priming, as the solvents and aerosols involved can irritate the respiratory tract and skin.
As you progress, the goal is to arrive at a smooth, uniform foundation that is free of dust, pinholes, or texture that will telegraph through to the final finish. When the primer has cured and you’re satisfied with the surface, a light inspection under bright light will reveal any imperfections—tiny dust nibs, tiny dry spray, or slight orange peel. If you find minor issues, you can address them with a quick, targeted wet-sand on the affected area using a fine grit, followed by another tack wipe. The aim is to finish priming with nothing but a pristine, even plane that invites the color to settle in evenly and evenly across all curves and contours.
If a project involves swapping panels or upgrading to a different look, you can apply the same priming discipline to the new pieces. For example, a set of Honda fairings or other models can be prepared in the same way, ensuring color consistency when the parts are mounted together. For riders browsing parts or skins, the idea is to keep priming as a consistent, repeatable step so that the final assembly reads as a cohesive whole. In this context, the primer is not merely a preparatory layer; it’s the shared surface that unifies the entire appearance across all components. For further inspiration on panel choices and fitment, you can explore related options in the Honda fairings collection.
With priming complete, the transition to base color is smoother and more predictable. The primer serves as the true foundation, supporting the color’s brightness and the clear coat’s clarity. The careful sequence—cleaning, sanding, selecting the right plastic primer, applying thin coats, interleaving with wet-sand between coats, and finishing with tack cloth and cure—creates the conditions under which a fairing can maintain its beauty through sun, rain, and miles ahead. This is the craft behind a durable, showroom-worthy finish, and it sets the tone for what comes next: the color and the protective shield that will crown the project.
External resource for deeper study: for a comprehensive, photo-guided walkthrough of the full painting process, including priming, you can consult Motorcycle.com’s detailed 6-step guide. Motorcycle.com’s detailed 6-step guide.
Base Coat Mastery: Laying a Durable Foundation for Motorcycle Fairings
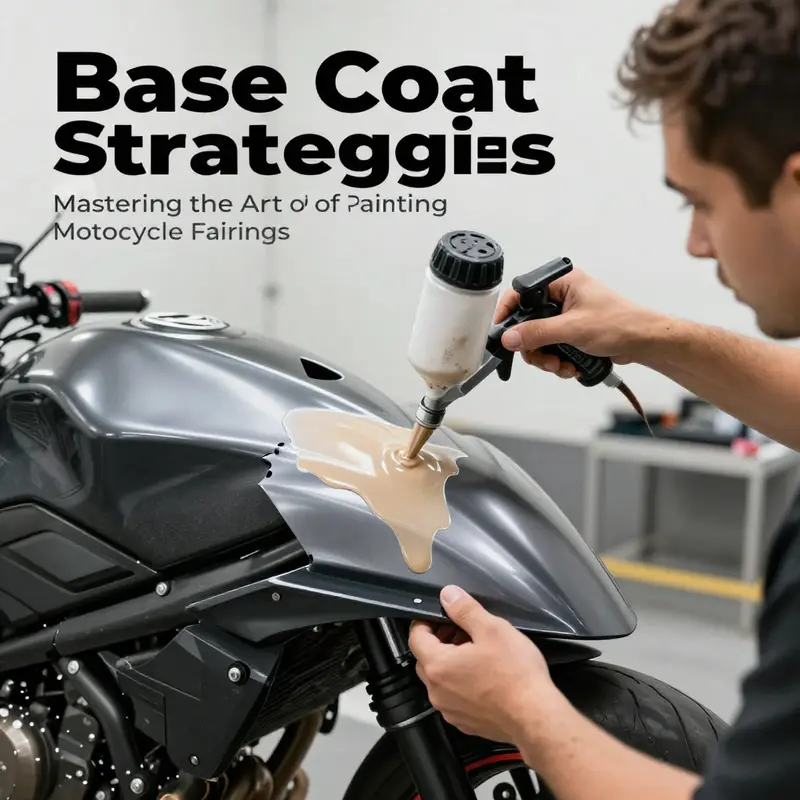
The base coat is more than just a splash of color on motorcycle fairings. It is the foundation that determines color fidelity, uniformity, and long-term durability. A well-executed base coat binds to the prepared surface, provides a smooth canvas for the clear coat, and helps resist UV fade and environmental wear. Treat it as the critical layer that translates your choice of color into a robust, ride-ready finish. To get there, the process hinges on meticulous prep, disciplined layering, and a controlled environment that minimizes dust and contaminants. When you respect these factors, the final appearance of the fairing will reveal depth, evenness, and a glassy sheen that turns heads on the street or track, while the coating remains resilient under sun, rain, and road grime over time.
Begin with thorough surface cleaning. The aim is to strip away any grease, oil, wax, or residue that could sabotage adhesion. A dedicated plastic cleaner or a gentle degreaser designed for automotive use works best. After cleansing, rinse away any cleaner residues and allow the surface to dry completely. Moisture on the surface during priming and painting invites issues from fisheyes to solvent entrapment, so dryness is essential before you proceed. Once dry, you can assess the surface for imperfections that might telegraph through the color. Minor scratches or uneven areas are best addressed during priming rather than trying to fix them after the base coat sets. You want the base to be as true a canvas as possible, with no hidden flaws that will reveal themselves after the gloss of the clear coat.
Sanding follows cleaning as the next crucial step. A light, controlled sanding with 800 to 1200 grit paper is sufficient to remove any remaining gloss and to create a micro-roughness that gives the base coat something to grip. The goal here is not to remove large areas but to establish a uniform tooth across the plastic or composite. After sanding, wipe down the surface with a tack cloth to lift and remove all dust. This tack cloth step cannot be skipped; even the finest dust can become embedded in successive coats and show up as tiny specks in the finish. It is tempting to rush, especially when you are excited to see color, but the base coat only looks as good as the surface it sits on, so precision in cleaning and dust removal pays dividends in the long run.
With the surface prepared, apply a high-quality primer designed for plastics or composites. The primer’s job is to seal the surface, improve adhesion, and provide a uniform foundation that color can cling to evenly. Plastic primers are formulated to flex with the substrate and to resist staining or solvent uptake that could otherwise cause micro-cracking later. Allow the primer to dry according to the manufacturer’s instructions, typically in the thirty- to sixty-minute range, then lightly sand with around 1500-grit paper to achieve a smooth base. A subsequent tack cloth wipe ensures the surface is pristine before you move on. The primer step may seem small, but it is the difference between a color that looks flat and one that bounces with depth once the clear coat is added.
Temperature and humidity are silent influencers at this stage. The ideal painting window sits in moderate warmth with low humidity, generally between 60 and 75 degrees Fahrenheit (15–24°C). In that band, solvent evaporation remains steady, and the film forms without blushing or trapping moisture. If your shop is chilly or humid, consider a portable radiant heater or a dedicated booth with controlled climate. These conditions reduce the risk of sags, orange-peel texture, or solvent pop that can spoil a base coat before the clear coat even takes shape.
Now the base color is ready to be laid down. Whether you are using a high-quality spray gun or reliable aerosol cans, aim for three to five light coats rather than one or two heavy layers. Thin coats dry more uniformly and reduce the chance of runs, sags, or “orange peel.” Hold the spray at a steady distance from the surface—typically around 8 to 12 inches—and use overlapping, even passes to build a consistent film. The surface should be kept moving to avoid pooling at any one point. Between coats, allow the color to flash off. In a well-regulated environment, this flash time may range from a few minutes to a longer interval depending on the solvent and the equipment used. The most robust approach, however, is to observe a drying window of at least three hours between coats to ensure each layer sets cleanly and to prevent the accumulation of too-thick material that can later crack or craze.
The choice of drying interval between coats is not merely a preference but a safeguard. If you short the window, you risk developing orange peel or runs that will require sanding and reapplication later. Extended intervals, while slowing the process, help each coat merge into the next with a uniform surface, especially when you are working in a dust-controlled booth. In practice, most painters who pursue a flawless finish treat the base coats as a staged dialogue rather than a single moment. The result is a smooth, even color field with a level of depth that reads correctly in varying lights and angles. If you are painting a color that requires careful tinting or layering, this patient, methodical approach becomes even more important because subtle color shifts can occur with each additional layer.
As you apply the final base coat, you should see a uniform hue distributed across the fairing. The final coat should be dry to the touch before you move to the next phase, which is clear coating. In most setups, you will wait until the color is dry enough that it won’t smear when you lightly run your gloved finger over the surface. Depending on the product and environmental conditions, this can take roughly two to four hours, though it can extend longer in cooler or more humid spaces. Do not rush to apply clear coat while the color is still soft, as the new layer could trap solvents, potentially causing solvent pop or solvent clouding in the finish. A fully dry-to-the-touch surface at the end of the base coat sequence provides a stable platform for the clear, ensuring a crisp transition between color and gloss.
With the base color thoroughly set, you can proceed to the clear coat. The clear coat acts as the protective shell for the color layer, sealing the pigment and giving a durable, UV-resistant gloss that makes the color come alive. A urethane clear is preferred for its durability and UV stability, but the application method remains consistent regardless of formula. You will apply two to three thin coats, carefully maintaining the same distance and overlap to avoid pooling. Between coats, you should again observe a flash period, typically several minutes in a controlled environment. Do not rush the cures; allow the final clear coat to dry to the point where you can handle the surface without any impression of tack or fingerprinting. The recommended curing time before handling or exposure to the elements is about 24 hours, though full chemical cure continues beyond that window and will improve gloss and scratch resistance over time.
The finishing touches after curing are the celebratory rewards of your patience. A light polish to remove minor imperfections and to heighten gloss can bring the color to a mirror-like finish, while a wax or sealant can add an extra layer of protection and long-term gloss retention. The combination of careful base coat layering and a robust clear coat results in a bike that not only looks great but holds up to sun, rain, and road grit. If you want to explore color options or compare fairing designs, you can find related components and fairings in the Honda fairings collection. This internal resource offers a pathway to compatible pieces and colorways that suit your project while staying mindful of fit and finish across similar models. Honda fairings collection.
For readers seeking a deeper, step-by-step visual reference that reinforces these practices, a comprehensive guide with photos can be a valuable companion. It provides visual cues for primer wets, coat flash times, and the subtle shifts in surface texture as the finish progresses. External resources such as the Motorcycles Mechanics Institute’s in-depth guide offer extended context to the principles described here, including setup, tool lists, and safety tips tailored to plastic fairings. Access to these visuals can help you visualize the exact sequence and refine your technique as you work. External resource: https://www.motorcycle.com/how-to-paint-motorcycle-fairings/ .
The approach outlined here emphasizes precision, patience, and a clean workspace. It is worth repeating that a well-prepared surface is the best insurance against future problems. If you are not confident in your ability to control environmental conditions or to manage a multi-coat process on plastic, consider practicing on a spare fairing or a test panel before committing to your bike. The investment of time and care in the base coat stage pays off in the uniform depth of color, the evenness of the finish, and the professional durability that you want from a modern motorcycle finish. And while the base color sets the stage, remember that the overall result will also depend on your subsequent clear coating and finishing steps, which together ensure the fairing remains vibrant and protected for miles to come. As you refine your technique, you may also explore related components and models in your preferred fairing line, using cross-reference resources to match color codes and finishes with confidence. In this way, the base coat becomes not just a color layer but a deliberate, strategic foundation for a long-lasting, showroom-worthy finish that respects both aesthetics and function.
Locking in the Shine: Mastering the Two-Component Clear Coat for Motorcycle Fairings

The final stage of painting motorcycle fairings is where protection and depth converge to create a finish that lasts as long as the ride. After the base color has cured, the clear coat acts like a shield, adding not just gloss but resilience against UV rays, chemicals, and the wear of road exposure. When done correctly, a two-component (2K) clear coat yields a hard, weather-resistant layer that can transform a great color into a lasting statement. The emphasis here is on precision, patience, and respect for the chemistry of the system. A well-executed 2K clear coat does more than shine; it seals the underlying color, fills micro-scratches, and create a depth that hints at depth and movement with every angle of light. Yet this depth is earned through careful preparation, correct mixing, and methodical application, all in a controlled environment that supports a flawless cure more than it supports a rapid finish. It is, in many ways, the culmination of everything that came before—the primer, the base, the masking, and the careful handling of plastics that make up modern fairings.
Preparation remains the foundation even as you move into clear coating. Before the first breath of clear coats touches the surface, ensure the base coat is fully cured. Any residual cure that is incomplete can trap solvent and cause issues like solvent pop or clouding later on. The surface should be impeccably prepared: any remaining imperfections from the base should be addressed with a light, controlled wet sand or a careful hand polish, followed by thorough degreasing and a wipe with a tack cloth to remove dust. Masking is not simply a courtesy step but a line that keeps the finish honest. The areas that will not receive clear—lenses, trim pieces, and any edge details—must be protected with precision, ensuring the edge lines stay crisp and the final gloss lands where intended.
When you move to the clear, the chemistry guides you as much as your technique. A two-component clear coat is a two-part system in which a resin base is mixed with a hardener or activator. The hardener kick-starts a chemical cure that yields a far tougher film than single-component or conventional clears. The result is a finish that resists cracking, yellowing, and hazing far more effectively over time. The general rule is to follow the manufacturer’s instructions for mixing ratios, pot life, and handling temperatures. In practice, this means preparing the mixing container, adding the correct amounts of resin and hardener, and then stirring evenly until there is no streaking or settling. Any discrepancy in ratio or incomplete mixing can lead to a finish that cures unevenly, with glossy patches appearing out of nowhere or with the coat remaining soft in the shadows of a curve. The moment you mix the two components, you commit to a finite working window. This is why the environment matters as much as the formula: a clean, dust-free, well-ventilated space becomes the invisible partner in your work.
The application itself benefits from a calm, deliberate approach. Use a high-quality spray gun configured for a smooth, even spray pattern, and set your compressor to a stable pressure that matches the gun and nozzle size you are using. The technique is to apply in ultra-thin, even coats rather than heavy blasts. With 2K clear, the goal is to lay down a film that gradually builds gloss without runs or sags. You should hear a slight tack between passes as the spray wets the surface rather than saturates it. Keep the surface at a consistent distance, typically within a comfortable 6–12 inches, depending on your equipment and the specific product guidelines. The concept of flash time—the momentary waiting period between coats to allow the solvent to evaporate and the film to set—remains critical. In the case of clear coats, the manufacturer often calls for longer flash times to prevent solvent entrapment, which can manifest as micro-blisters or texture irregularities rather than a clear, glassy finish.
A practical cadence emerges from experience and the literature surrounding professional practice. Expect to apply two to three coats for a robust, even film. Each coat should be dry to the touch before the next is laid down, with the overall process spread to allow for proper curing between layers. The recommended approach, as reflected in detailed care guides, is to space coats with a minimum tolerance of a couple of hours between them in a controlled environment. This interval helps to ensure that the solvent has fully dissipated and that the underlying layers have begun to set rather than remain tacky, which can lead to pinholes or orange peel if hurried. The goal of this layering strategy is to build a uniform film that can be polished smoothly after curing rather than chased by cosmetic defects in a rush to finish. In environments that are not ideal for spraying, this patience is even more crucial; a controlled space with steady temperature and humidity reduces the risk of buckling or sagging as the clear cures.
Curing is where the protective properties of the clear coat truly reveal themselves. The two-layer structure must finish its chemical dance in a stable atmosphere. After the final coat, allow the film to cure for a period that allows maximum hardness and solvent resistance to develop—typically a 24- to 48-hour window, depending on temperature and humidity. This curing window is not a suggestion but a practical requirement; it gives enough time for cross-linking to complete and for the film to harden to a point where polishing or waxing will not compromise the surface. Do not rush the process by handling the fairing too soon, as early contact can mar the surface or smear the gloss. During curing, maintain a dust-free space and avoid exposure to direct sunlight, which can cause differential heat buildup on the surface and lead to a micro-crack pattern that spoils the final look.
With the coat fully cured, the finishing touches bring the entire effort to life. A careful, gentle polish removes the tiniest imperfections that may have slipped through during spraying. Choose a fine abrasive compound and a soft pad, working in small circles and avoiding heavy pressure that can burn through the film or burnish dust into the surface. The polishing step should leave the finish with a smooth, glassy look that reflects light with depth rather than a flat sheen. After polishing, a protective sealant or wax can be applied to add an extra layer of UV resistance and to help keep the surface easier to clean. The overall aim is to preserve the clarity of the color beneath while maintaining the surface’s resilience against road grit, fuel splashes, and the occasional bird strike of tiny debris.
Beyond technique, a few mindful habits shape the stability and longevity of the clear coat. Temperature and humidity play a role not just in the spray booth but in your garage setup as well. The ideal conditions in the paint space—temperatures around 60–75°F (15–24°C) with moderate humidity—support even evaporation of solvents and a uniform cure. Direct sunlight, heat spikes, or high humidity can destabilize what you have just built, leading to blisters or a hazy finish. Respiratory protection and proper personal gear remain essential throughout the process, as does good ventilation. Clear coats contain isocyanates and other compounds that require careful handling to protect both health and the finished product. The rule is simple: prepare, protect, and proceed with patience. If you doubt your ability to manage these steps, consider professional help. A shop with plastic bodywork experience can often deliver results that are consistent with high-standards and time constraints.
For those planning their color journey, the road ahead can be made smoother by connecting with communities or resources that provide real-world insight. If you’re coordinating a project that involves specific fairing shapes or brands, you can explore compatible fairing options and parts at a trusted supplier’s Honda-focused collection to help you plan color and flow as a single design. For more context and inspiration on the painting journey itself, see the broader guidance offered by seasoned practitioners and enthusiasts who share step-by-step experiences and visuals. In the end, the clear coat is a technical finish that rewards meticulous attention to detail with a finish that holds color, resists the elements, and maintains its luster through miles of riding.
Internal link reference for project planning: Honda fairings collection.
External reference for further reading: The detailed guide on applying motorcycle fairings like a pro provides a comprehensive, image-supported walkthrough that complements this chapter’s emphasis on 2K clear coat and long-term durability. See the external resource here: Bike EXIF guide to painting motorcycle fairings.
Polishing Perfection: Finishing Touches that Turn Painted Fairings into Professional-Grade Surfaces
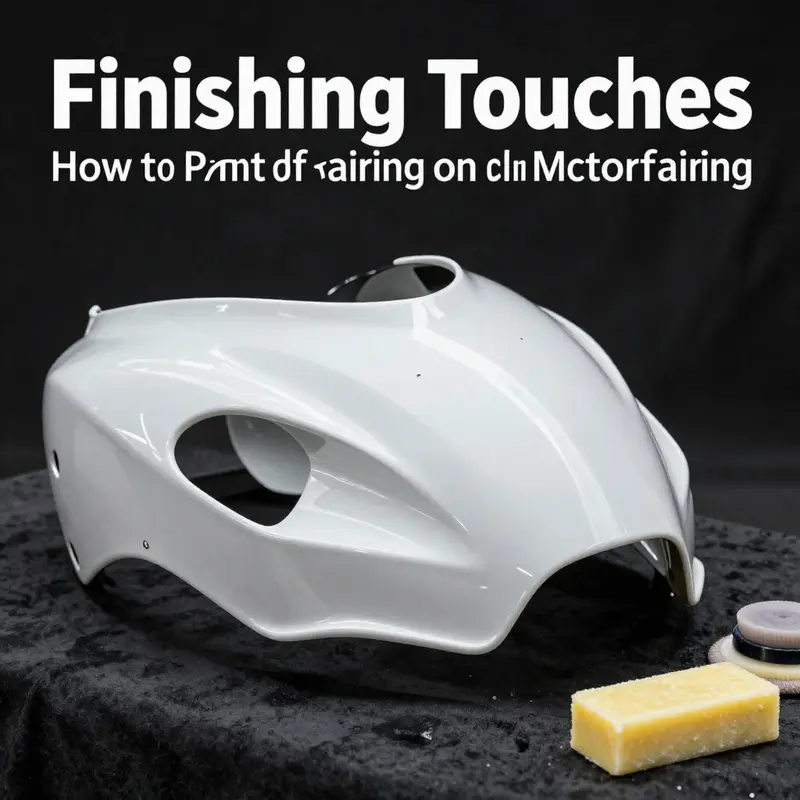
The final acts in painting motorcycle fairings are less about color and more about refinement. Once the base and clear coats have cured, the surface invites a deliberate, almost meditative, finishing phase. This is where the gloss becomes truly glassy and the ride-ready resilience of the finish is forged. Finishing touches are not mere cosmetic extras; they are a quality pledge to yourself and to the bike. The goal is a flawless, depth-filled surface that reflects light with minimal distortion, while maintaining durability against the elements. In this phase, the decisions you make—how you polish, how you protect, and how you inspect—determine whether the job endures through wind, rain, and sun or dulls with micro-scratches and micro-marring.
Polishing is the bridge between color and lasting luster. After curing, run your hands along a panel and then your eyes across it in bright, even lighting. You are listening for subtle imperfections—tiny hazes, micro-scratches, or a faint orange-peel texture that can catch the light like a rough shoreline. If the surface appears ultra-smooth and perfectly reflective, you may still choose a light polish to lift the final clarity and remove the last micro-mabrasions. Use a dedicated automotive polishing compound or a high-quality polishing paste, and apply with a soft foam or microfiber pad. Work in small sections to maintain control and avoid heat buildup. The pad should glide, not gouge, and you should observe a consistent, almost invisible, mist as you work. A slow, even hand enables you to feel the surface and judge when the pad is doing the work and when it’s time to move on.
As you approach the glaze of the finish, think in terms of gradual refinement. Start with a medium-cut polish on a low speed setting, moving in overlapping passes in a crosshatch pattern to avoid repeating the same micro-areas. When you reach the point of diminishing returns, switch to a finer polish and lighter pressure. The aim is not only removing the last blemishes but also enhancing the depth of the color and the clarity of the reflections. It’s common to finish with a very light touch of a finesse polish that brings the surface to a mirror-like finish. Always review your progress under consistent, bright lighting—ideally a combination of white shop lights and a portable LED light bar—so you can catch every fleeting haze or a stray swirl that may appear only at a certain angle.
Imperfections are often most visible along sharp lines or around edges. The curved planes that define a fairing can trap dust or micro-dust specks during the polishing stroke, which can become embedded if not treated with care. A practice you’ll learn with experience is to lift the pad and re-apply product rather than pressing hard in one spot. A firm, steady hand and a clean pad matter more than brute force. In some cases, you may encounter an orange-peel texture even after the clear coat has cured. If that happens, a conservative path is to perform color sanding with very fine grit paper on a wet block—typically 1500 to 2000 grit—applied with a light touch and steady water lubrication. This step should be approached with caution, as it removes a micro-thickness of the clear layer. After color sanding, you must re-polish the panel to restore clarity and remove any new hazing from the sanding residue. Always test on an inconspicuous area first to gauge how the film responds and to confirm that you are not thinning the clear coat too aggressively.
Once polishing is complete, a cleansing wipe with a clean microfiber cloth helps remove any polishing residue and oils that could interfere with the next protection step. A thorough wipe also reveals whether any marks remain that require a second pass. At this stage you should re-check every panel for uniformity of gloss, color depth, and edge-to-edge continuity. A consistent gloss across the entire fairing is the hallmark of a professional finish and communicates the level of care you invested in the project. If you notice any patchiness around the edges or along the seams where panels meet, address it with a careful, targeted touch-up polishing or, if necessary, revisit a light re-clear and cure—though this is a more involved step and should be contemplated as part of the broader project plan rather than a reaction to a single flaw.
Protection is the next essential chapter. After polishing, a wax or sealant helps to lock in the new shine and provides an extra shield against UV rays, airborne contaminants, and minor abrasions. The choice between wax and sealant can hinge on your priorities: wax offers a warm, traditional glow and eases application, but sealants usually deliver longer-lasting protection and easier cleaning. In either case, apply a thin, even coat and allow it to cure per the product’s instructions before buffing to a bright, glassy finish. Take care to avoid buildup on edges and fasteners, which can trap moisture or dislodge when a panel flexes or vibrates at highway speeds. A light, final buff with a clean microfiber will reveal a pristine sheen that looks almost alive under the sun, with depth that hints at the panel beneath rather than a flat color suspended on plastic.
Maintenance after the initial finishing pass is where the finish earns its longevity. Regular, gentle washing with a dedicated automotive soap and a soft mitt keeps the surface free from dirt without abrading the film. Avoid harsh brushes or abrasive drying towels that can scratch the clear coat during the cleaning process. When drying, a microfiber towel with a gentle pat and lift will minimize scratching yet remove water spots that would otherwise dull the gloss. For high-wear areas—such as around mounting points, lower edges, or the underside where debris is plentiful—consider more frequent inspection and shorter wash cycles to prevent the accumulation of grit that can eventually cut into the finish. In periods of intense sun or harsh climates, the protective layer benefits from periodic reapplication of sealant or wax, following the product’s suggested intervals. This discipline ensures the finish remains vibrant and minimizes the risk of UV damage that can degrade color and clarity over time.
A careful practitioner also keeps an eye on the fit of the panels. Misalignment between pieces can create micro-gaps that trap dirt and moisture, which in turn invites micro-scratches during cleaning and use. Take a moment to recheck the alignment at key points—edge lines, seams, and fastener gaps. If you find a discrepancy, a small adjustment or re-sealing at the seam with a compatible product can prevent future issues. The behavior of plastic under temperature changes is another subtle factor; plastics can expand and contract, which can affect the evenness of the color and the integrity of the clear coat at the edges. If you notice wobble, heat, or warping during curing, you can address these with careful blocking and controlled post-cure cooling, but these steps are best undertaken with a clear plan and, when in doubt, guidance from a professional who has handled plastic bodywork on motorcycles.
Throughout this journey, the finish you achieve becomes a barometer of your technique and your patience. The surface should read as a single, continuous skin rather than a patchwork of panels and coatings. A well-executed finish is more than a gleaming surface; it shields the fairing from UV damage, scratches, and environmental wear, extending both the beauty and the life of the piece. If you are sourcing replacement panels or considering an upgrade, a quick browse of the Honda fairings collection can help align your color story with existing panels and lines: Honda fairings collection.
For readers seeking additional, image-guided guidance on post-painting processes—including detailed polishing sequences, nuances of sealing, and protective tips tailored to plastic motorcycle fairings—the Motorcycle.com article “How to Paint Motorcycle Fairings – A Practical Guide” offers a thorough, visual companion to these steps. See https://www.motorcycle.com/how-to-paint-motorcycle-fairings/ for more depth on finishing techniques. The balance of caution and technique in that resource complements the discipline described here and can help you refine your own finishing routine to achieve a showroom-ready result that stands up to the road.
Final thoughts
Successfully painting motorcycle fairings is not just about aesthetics; it’s an integral part of motorcycle customization that can significantly impact customer loyalty. By understanding the comprehensive processes from preparation to the finishing touches, business owners can ensure they deliver high-quality, durable paint jobs that enhance the visual appeal and protection of motorcycle fairings. With the techniques outlined in this guide, you can provide exceptional results that elevate your business’s reputation and customer satisfaction.