Scratches on motorcycle fairings can detract from the appeal and value of any motorbike, impacting both rider satisfaction and profits for businesses in the motorcycle industry. With a range of techniques to address varying degrees of scratches, effective maintenance can significantly enhance customer loyalty and vehicle aesthetics. This guide will navigate you through methods for removing superficial scratches, along with strategies for addressing deeper damage and severe cracks. Each approach not only preserves the bike’s design but also reinforces your business’s reputation for quality care.
Gentle Restoration of Minor Surface Scratches on Motorcycle Fairings
Scratches on motorcycle fairings are a common ache for riders who value aesthetics nearly as much as performance. Fairings, often made from durable plastic or fiberglass, take a beating from road grime, weather, and the occasional careless lean or rock strike. When the damage is only superficial—confined to the clear coat and not breaking through to the paint layer—the goal is not to rebuild new panels but to restore the gloss and blend the blemish so it disappears from most angles. A careful, patient approach can do more than you might expect, and it can be accomplished with some everyday materials or simple automotive products that are widely available. The key is to respect the surface, work in small, controlled steps, and avoid introducing new scratches through haste or improper technique. This chapter focuses on minor surface scratches and offers a cohesive, hands-on path that emphasizes gradual correction, protection, and future prevention, a path that remains faithful to the overall aim of restoring the fairing’s appearance without escalating the repair into a more invasive job.
The first principle is to assess the depth of the scratch. You want to differentiate scratches that merely skim the clear coat from those that have pierced through to the underlying color or primer. If the scratch is shallow, there is a strong chance that you can restore the finish with a light touch, sometimes without any color correction at all. If you can see a color or primer exposure, the repair becomes more complex and may require a repaint or professional refinishing, depending on the area’s visibility and the bike’s value. In general, minor surface scratches respond well to polishing and mild abrasives, while deeper flaws demand progressive steps that may extend into repainting. With this context, a simple, methodical routine can be both effective and affordable, letting riders salvage the look of their bike without sacrificing time or money.
A practical mindset helps. When a scratch is noticed, the instinct is to scrub harder. That impulse, while understandable, often compounds the problem by creating additional micro-scratches or dulling the surrounding gloss. Instead, approach the repair as you would a careful polish on a gemstone: with intention, a clean workspace, and controlled pressure. Begin by cleaning the area thoroughly to remove any dust, dirt, or wax residues that could reinforce the scratch’s appearance. A clean surface is essential because lingering grit can turn a minor polish into a faintly hazy patch or leave new scratches behind. Before you start, wash the area with a mild soap solution, rinse well, and dry with a soft microfiber cloth. If you have access to a globe of UV light or natural daylight, check the scratch under bright light from multiple angles to gauge its depth. Some flags of danger appear under high-intensity light: halos around the scratch or a change in the surface brightness may indicate that the damage extends beyond the clear coat. If that is the case, the scope of repair may shift toward more advanced methods, possibly involving more than just a simple polish.
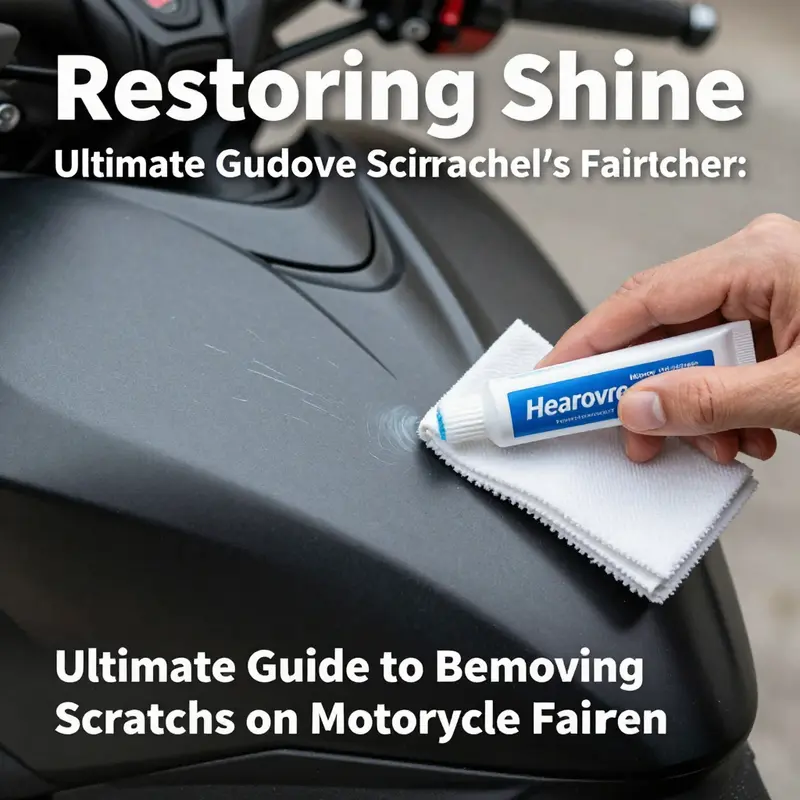
When the scratch is verified as minor and surface-level, there are two favored paths that riders often use with reliable results. The first is a toothpaste-based method, a time-honored DIY option that relies on the mild abrasive quality of non-gel toothpaste. The second is a purpose-built automotive plastic polishing compound designed specifically for plastics and clear coats. Both approaches share a philosophy: light grit, controlled motion, and frequent checks to ensure you are not overcorrecting. The toothpaste method, while simple, has a logic that resonates with many riders in a pinch. Choose a non-gel, white toothpaste that remains mildly abrasive but won’t leave a gritty residue behind. Apply a small dab to the scratched area or onto a soft, lint-free cloth, then rub in gentle, circular motions. The motion should be smooth and consistently pressured, not frantic. A typical duration is 30 seconds to a minute per patch when you are working by hand. The goal is to polish the tiny surface irregularities that scatter light and make the scratch appear more prominent. After the polishing, wipe the area clean with a damp cloth and dry it with a separate clean towel. Once the surface is dry, assess the change. If the scratch remains visible but less conspicuous, you can repeat the process gently. A second pass often yields diminishing returns, so proceed with measured patience. The final step in this sequence is to apply a high-quality wax or sealant to restore the gloss and provide a sacrificial layer against future micro-scratches. Waxing fuses the repaired micro-topography with the surrounding area, enhances water beading, and adds a layer of protection that helps your next ride stay pristine longer. For many riders, this simple regimen—toothpaste, light polish, wax—offers a practical, cost-effective solution that preserves the fairing’s look without requiring specialized tools.
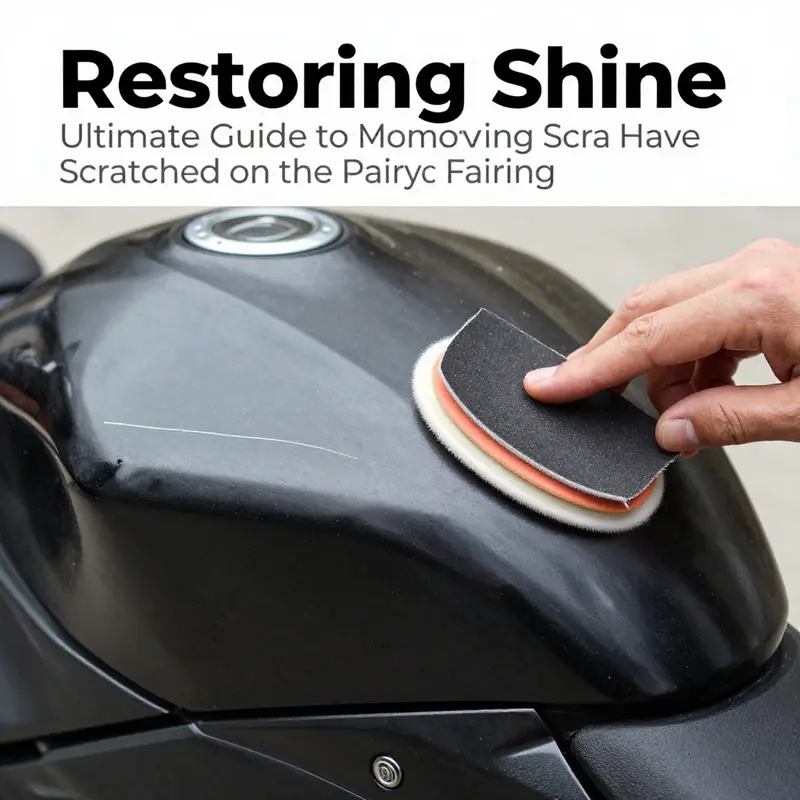
If the scratch proves resistant to toothpaste, a dedicated plastic polishing compound offers a more robust approach. These compounds are formulated to cut very fine abrasives into the surface in a controlled fashion, smoothing micro-swirls and removing light line scratches that dull the plastic’s clarity. The application is straightforward but demands a disciplined technique. Use a clean, soft microfiber pad or a dedicated polishing pad. Apply a small amount of the compound to the pad, then work it into the scratched area using light, circular motions. Move in small sections, maintaining a steady pace and ensuring you do not overwork any one patch. The objective is to blend the repaired area with the surrounding plastic by gradually reducing the scratch’s visibility. After a few passes, wipe away the residue with a clean microfiber cloth and inspect the finish under bright light. If the scratch remains and the surrounding area appears slightly hazy, you can repeat the process, again with light pressure, until the defect fades. Once you reach a satisfactory result, you will want to seal and protect the repaired area with a synthetic wax or sealant designed for automotive plastics. This step is crucial because it helps maintain the improved gloss longer and provides a protective barrier against dust, moisture, and minor abrasions that would otherwise settle into the corrected surface.
Both methods—toothpaste and a dedicated plastic polish—have advantages and are appropriate for different circumstances. The toothpaste approach is almost universally accessible, inexpensive, and free from aggressive chemistry, making it ideal for truely minor surface marks or for riders who prefer a quick fix. The plastic polishing compound, while still gentle, offers more control and is better suited for slightly deeper faint scratches or for riders who want a higher-gloss finish. The decision rests on how visible the scratch is after a basic cleaning and whether the surrounding area looks dull or clouded in comparison. A practical rule of thumb is to begin with the milder option and escalate only if the scratch remains stubborn after a full cycle of cleaning and light polishing.
It is essential to emphasize testing. Before applying any product to a visible area, test it on a small, inconspicuous patch of the fairing. The test area should be similar in color and texture to the scratched zone so you can judge whether the method improves the appearance without introducing new imperfections. If you cannot keep the test out of sight, consider performing the test on an underside panel or a portion of the fairing that is rarely visible during display. This practice reduces the risk of unwanted results on high-visibility surfaces and gives you a safer learning curve for more aggressive steps if needed.
For riders who prefer a more curated route, the notion of a shop-ready finish can be pursued without fully stepping into a repaint. A light polish and sealant may suffice to restore the brilliance of a minor scratch and to keep it from becoming more noticeable as the years roll by. If the surface has developed micro-marring across a broader area—the kind of dullness that makes the entire panel look oxidized or cloudy—the same polishing principle applies, but the scope expands. Work slowly across the entire affected region rather than concentrating solely on the scratch. The goal remains the same: remove haze, restore clarity, and reestablish a uniform gloss that blends with adjacent panels. In this broader context, you might allocate more time to careful, staged passes, ensuring you do not rush the process. The idea is not to chase perfection in a single session but to pursue a steady improvement that culminates in a natural, factory-like sheen.
One important aspect often overlooked is environmental control. The best results come from working in a clean, dust-free space. En cerrar, avoid direct sunlight or high heat, which can dry out the product unevenly and create new defects. A shaded, well-ventilated area with moderate temperature helps keep the solvents and polishing compounds from drying too quickly and producing streaks. A table or stand at a comfortable height allows you to manage the panel with both hands, maintaining consistent pressure and ensuring you do not inadvertently press harder at some points than others. The idea is to create a micro-environment where consistency is possible, even when dealing with the subtle topography of a curved fairing surface.
Beyond the polishing itself, consider a short-term protective step after the repair. A light wax or sealant adds gloss while creating a barrier to moisture and contaminants. For riders who ride in varied climates, a protective layer helps prevent the next layer of micro-scratches and creates a smoother surface for future cleaning. In addition to wax, you might consider a protective film or ceramic-like coating for vulnerable areas, especially on the leading edges or high-traffic zones of the fairing. While this falls into more advanced protection, the concept is simple: reduce exposure to dust, grit, and weathering that can dull new gloss or reveal a scratch more clearly as time passes.
It is also worth acknowledging the limits of DIY methods. Minor surface scratches respond well to patient polishing and careful finishing, but if the scratch has penetrated through the paint or primer, or if there is a visible crack, the recommended path changes. In such scenarios, the emphasis shifts toward more involved repair techniques that may require sanding, color matching, and refinishing. Those steps can restore the surface’s uniform color and gloss but demand more specialized tools, accurate color code matching, and, often, a controlled spray environment. If you encounter a scratch of this depth, consider consulting a professional body shop or a skilled technician who can provide a color-matched blend and a seamless finish. Even for those pursuing DIY repairs, recognizing when to stop is crucial; over-sanding or mistimed refinishing can lead to more visible inconsistencies than the original scratch.
In the broader context of a motorcycle’s aesthetic and value, prevention remains the best cure. After you achieve a satisfactory repair, think about protective strategies that can minimize future repairs. A clear, durable protective layer—such as a ceramic coating or a clear protective film—on the exposed areas helps repel moisture, reduces minor abrasions, and makes future maintenance tasks easier. Protective film is especially valuable on high-contact zones or on panels that are likely to encounter road debris. While applying a film can require some care to avoid air pockets or edge lifting, the payoff is a surface that is easier to clean and more resistant to small scuffs. The investment in protection, in turn, translates to less frequent need for corrective polishing and repainting, letting riders maintain a sharper appearance over longer periods.
If you are curious to see how these concepts translate into a fuller, step-by-step workflow, there are detailed resources that walk through similar processes with careful explanations and example scenarios. For riders who want to explore a broader range of fairing options or replacements, you can explore the Honda fairings collection at Summit Fairings, which provides an accessible starting point for panel upgrades or replacements when necessary. This interior link helps connect the notion of minor scratch repair to broader decisions about a bike’s appearance and its long-term protection: Honda fairings at Summit Fairings.
In sum, minor surface scratches on motorcycle fairings can often be addressed with simple, patient methods that honor the integrity of the plastic material. A careful combination of cleaning, polishing, and protective sealing can restore most superficial marks to near-original clarity. The toothpaste approach offers a low-cost, accessible entry point, while a dedicated plastic polishing compound provides a slightly more advanced option with stronger corrective power. In both cases, testing, moderation, and attention to the panel’s overall appearance are the guiding principles. For deeper scrapes or more conspicuous damage, progressive steps that may involve sanding, repainting, or professional refinishing become relevant. The overarching theme is straightforward: treat the surface gently, work in small sections, and finish with protection so that your fairing not only looks better now but stays protected for the miles ahead.
External reading can further illuminate the topic and provide a broader sense of technique and expectations. For a detailed, step-by-step discussion that mirrors the approach described here and expands on product categories and best practices, you can consult an external resource such as Car Bibles’ guide on motorcycle fairing scratch repair: https://carbibles.com/motorcycle-fairing-scratch-repair/.
From Grit to Gloss: Restoring Deep Scratches in Painted Motorcycle Fairings
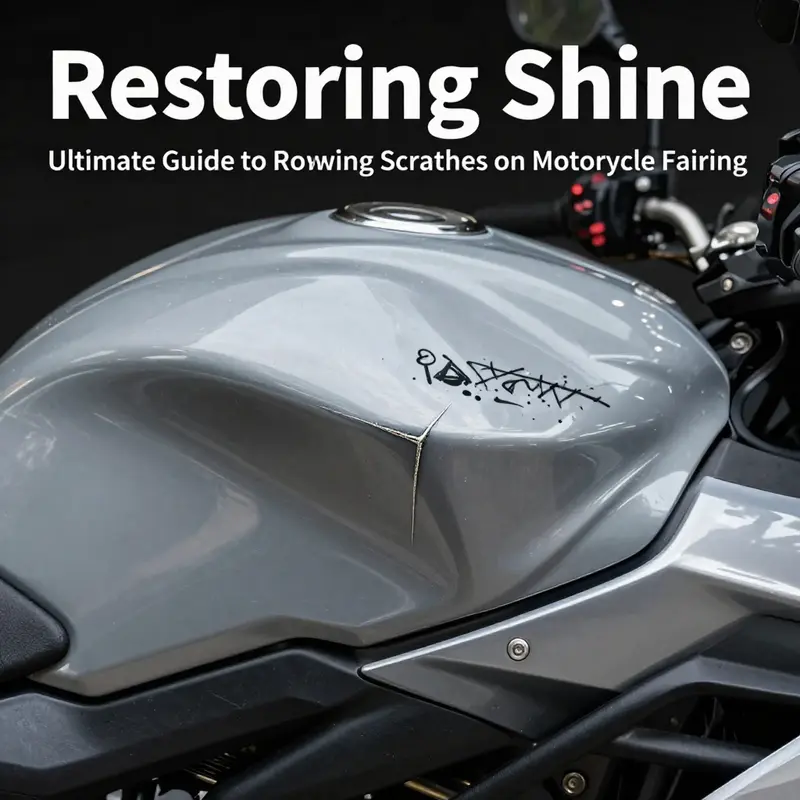
Deep scratches that breach the paint layer on a motorcycle fairing present a challenge that tests both technique and patience. They are not merely cosmetic marks; they reveal the clash between the harsh realities of the road and the delicate balance of materials that make up a fairing. Plastic and fiberglass fairings guard the bike, offer aerodynamics, and provide a canvas for identity and style. When a scratch penetrates beyond the clear coat and into the paint, it interrupts that glossy continuity and can threaten the surface’s integrity if ignored. Yet with a careful, methodical approach, you can restore a near factory look and preserve the ride’s aesthetics without resorting to a full respray or a costly replacement. The approach described here emphasizes an integrated, stepwise workflow that respects the material, reduces risk, and yields durable results that feel seamless to the eye and touch.
Begin with a clear understanding of what you are facing. A scratch that has only grazed the top clear coat behaves very differently from one that has penetrated the paint and perhaps even exposed bare substrate. The latter demands a more involved process because adhesion, color matching, and surface flatness become critical to achieving a uniform finish. The first decision point is whether the damage is still in the realm of paint and clear coat or if it has reached the underlying material. If the latter, do not rush to fill and paint as if the repair were superficial. A poor repair here can become almost as conspicuous as the scratch itself. If you are unsure, observe the scratch under good light; run your finger along the edge to feel the depth; count the number of layers that are disrupted. This tactile assessment helps determine the subsequent steps and ensures you allocate the right amount of time and materials to the job.
Before any tool touches the surface, preparation is essential. The area should be clean, dry, and free of oils and waxes that can sabotage adhesion. A dedicated cleaner or isopropyl alcohol helps remove the oils left by skin contact and any road grime embedded in the scratch. This preparation is more than cosmetic housekeeping; it creates a stable platform for every subsequent action. If the fairing has a complex contour, take care to protect adjacent paint with masking tape or low-tack film. You want to confine the repair to the damaged field while keeping the surrounding gloss pristine. A little restraint at this stage saves effort later. This is also a good moment to assess the overall color and whether you might need a color-matched touch-up during the process. If you have access to manufacturer data or a VIN-specific specification, you can confirm the exact color blend before you begin.
The process hinges on several tightly coordinated steps. Sanding the area carefully lays the groundwork for any filler and paint to adhere reliably. You begin with a relatively coarse surface, such as an 800-grit paper, to level any sharp edges along the scratch and to begin blending the boundary between damaged and intact material. The idea is not to remove a lot of material but to create a flat, uniform plane where the repair will sit. You then move progressively finer, stepping to 1500-grit and finally to 2000-grit. Each transition is deliberate; sanding in a single direction helps minimize cross-scratch patterns that would otherwise show through the final finish. And always keep the area wet during sanding. Wet sanding reduces dust, minimizes heat buildup, and ensures the abrasive grains cut more smoothly rather than dig into the surface. The key here is to maintain control. You want a surface that is uniformly smooth and flush with the surrounding area, not a perfectly flat plate that looks out of place with the contouring of the rest of the fairing.
If the scratch has reached bare metal in any portion of the repair, a rust-resistant primer becomes a prudent safeguard. Bare metal is especially prone to corrosion, and even a small patch of untreated metal can undermine the longevity of a repair. A light, even application of primer in the exposed area provides a barrier against oxidation and creates a uniform base for the subsequent filler. Allow the primer to cure completely according to the product instructions before continuing. Rushing this step increases the risk of trapping solvents or moisture beneath the subsequent layers, which can later cause blistering or lifted paint. A cautious approach here pays dividends in the long run and sets the stage for a more predictable color match.
With the base prepared, you can address the defect with a high-quality body filler designed for plastic and composite repairs. A two-part epoxy putty or a comparable automotive body filler is ideal for this task. The filler is mixed per the manufacturer’s directions and then applied with a plastic spreader, pushed into the scratch and surrounding low spots. It’s best to overfill slightly and then level the surface flush with the surrounding contour. This step is where patience matters. You want the filler to cure fully before you attempt to refine it, because any movement or shrinkage during cure will create a lumpy surface that defeats the goal of a seamless repair. Once cured, you begin the delicate stage of feathering the edge. You use the sandpaper in the 1500–2000 grit range to bring the filled area into flush alignment with the rest of the fairing. The objective is not perfection in the first pass but a gradual, incremental approach that minimizes high or low spots. It helps to regularly dry-fit with a finger or a soft cloth to assess how the repaired area blends with its surroundings. The surface should feel uniformly smooth to the touch, with no noticeable ridges or indentations that betray the repair.
Color is the next major variable. If you have an intact can of color-matched paint or a color-matched spray, you can apply the paint in light, controlled coats. The method is straightforward: spray in thin layers, allowing each layer to dry before applying the next. This approach reduces the risk of runs and ensures a more uniform color. In some cases, particularly with a deeper pigment or metallic flecks, you might need several coats to achieve a convincing color match. The final color coat should be dry to the touch and free of tack before you move to the finishing stages. A reminder here: this is a delicate operation. It is better to apply multiple very light coats than a single heavy one, which can obscure the repair or create a noticeable color depth difference. If you can, using a spray setup that offers even atomization helps. If you are working with a spray can, practice on a test panel first to dial in the pressure and distance to achieve a smooth laydown.
In many cases the repair includes a clear coat to reestablish gloss and protect the new color from UV exposure and micro-scratches. The clear coat also helps the repaired area match the surrounding gloss level. The application of clear should be done in light, even coats, allowing a full cure between passes. A final, careful polish after the clear has set brings back the blended look. It is here that you must pay close attention to the transition zone. Even a slightly unseen seam can ruin the overall effect. The polishing should be performed with a fine polishing compound and a soft foam pad, moving in small, controlled motions. The goal is to lift the gloss to match the adjacent surface without removing the new color or introducing new abrasions. If you notice any micro-scratches after polishing, a second final pass can be beneficial but proceed cautiously to avoid overworking the area.
The broader context of this repair is critical. Deep scratches that reach the paint layer demand that you respect both the structural integrity of the fairing and the visual harmony of the bike. If the scratch is large or the underlying geometry has been distorted, it can be worthwhile to step back and consider alternatives. Sometimes a professional assessment is the right path, especially if the repair would require color matching across a broad area, multiple panels, or if the finish needs to withstand the rigors of exposure to road grime, UV light, and weather. The decision to seek professional help is not a sign of weakness but a practical choice for ensuring a durable, high-quality finish. A professional body shop has access to spray booths, color matching technology, and airless spray systems that can produce a factory-like result that is difficult to replicate in a home workshop, particularly on larger or more complex fairing shapes.
As you progress through the repair, keep your working environment controlled and clean. A dust-free surface is essential in the final stages when you apply color and clear. Even a few specks of dust can become embedded in the finish, creating a flaw that undermines all the careful work that preceded it. If you cannot guarantee a dust-free space, consider protecting the area with a clean cover or moving the project to a location where dust is minimal. A clean environment reduces the likelihood of contamination and helps you achieve a smoother, more uniform appearance. The cleanliness discipline extends to tools as well. Microfiber cloths, wet sanding blocks, and properly prepared spreaders should be dedicated to the repair and kept free of contaminants. A simple habit of wiping tools with a tack cloth before each use can dramatically improve the final result.
At the end of the process, step back and evaluate the repaired area from multiple angles and lighting conditions. A good repair should be difficult to notice in ordinary lighting and should disappear under a gloss as you move around the bike. The color should be consistent with the rest of the fairing, and the gloss level should feel uniform across the repaired patch and its surroundings. In some cases you may still see a faint line of demarcation where the repair meets the original surface. In such situations you can perform a light, targeted polishing pass to minimize the seam, always taking care not to remove too much of the newly applied color or clear. The goal is a living finish that looks like it belongs, not a sticker that attracts attention for the wrong reasons. If, after all attempts, you still see an obvious mismatch or the surface remains tacky or rough, rechecking your steps to verify adhesion and curing is a prudent course. A reconstruction that relies on too many shortcuts tends to fail in more demanding riding conditions, where vibration and temperature fluctuations can reveal the fault lines.
The broader preventive advice is worth repeating. Deep scratches are more likely to reappear or worsen if the surface remains unprotected. Once you have achieved a satisfactory repair, consider applying a protective layer that resists micro-scratches and UV damage. A ceramic or clear protective film applied to high-risk areas—such as the lower edge of the fairing that tends to encounter debris—or even a full coverage if the bike style warrants it, can dramatically extend the life of the paint job. The protective layer not only guards against scratches but also eases future maintenance by providing a smoother surface to wash and wax. The intent is not to make the bike invulnerable to road hazards but to reduce the severity of future damage and preserve the repair’s integrity for as long as possible.
If the repair represents a sizable fraction of the fairing or deep structural concerns are present, exploring replacement options becomes part of the pragmatic calculus. A new or lightly used fairing can restore the original aesthetics with less risk of visible seams or color mismatches. For riders who want to maintain a consistent look across a line of machines or who personalize their bikes with specific decals or finishes, replacement components from reputable sources can be a sound investment. In this context, it can be useful to consider a resource that lists relevant fairings and replacements for popular models. For example, you can browse a dedicated catalog of fairings from manufacturers that align with your bike’s model family. This approach keeps the door open to the possibility of a near factory appearance whenever the repair seems unlikely to reach that standard.
In closing, a deep scratch repair is a careful orchestration of surface physics and color psychology. You must respect the material limits, manage adhesion precisely, and craft a finish that convincingly matches the surrounding gloss and depth. This is not a one-wish fix but a sequence of considered actions that, taken together, deliver a result that often exceeds expectations for a DIY restoration. The steps outlined here are designed to guide you through the most challenging scenario with a practical, repeatable method. They emphasize preparation, controlled material application, and patient curing, all anchored by a commitment to maintaining the fairing’s integrity and appearance over time. If you find yourself surprised by the complexity or uncertain about the color match, remember that a professional assessment is a viable and often wise option. After all, the goal is not just to hide a scratch but to restore the surface to a state where it performs as well as it looks, and where the bike continues to project the same level of pride you invest in owning and riding it.
For readers seeking further context on broader care and repair strategies, a comprehensive automotive care guide offers detailed explanations and product-neutral best practices. This additional resource can complement the steps described here and provide a broader framework for fairing maintenance and restoration. See the external resource for a broader perspective on fairing repair techniques and professional refinishing approaches.
Internal link for related parts: If you are considering replacement parts or a different look for your fairing, you can explore a range of replacements at the Honda fairings collection. This hub offers a variety of panels and shapes to match many model years and styles, ensuring you find something that aligns with your bike’s lineage and your aesthetic goals. Honda fairings collection.
External reference for broader context: For a broader overview of fairing repair tips and professional refinishing considerations, see the detailed guide from Motorcycle Cruiser. https://www.motorcyclecruiser.com/motorcycle-fairing-repair-tips/
null
null
Final thoughts
Keeping your motorcycle fairings free from scratches is not only essential for maintaining aesthetics, but it also represents a commitment to quality that customers appreciate. Understanding how to appropriately address different damage levels ensures that your repair services meet client expectations and reinforce trust. By implementing these methods, you can enhance your maintenance offerings and drive repeat business. Remember, a well-cared-for bike speaks volumes about the quality of service you provide.