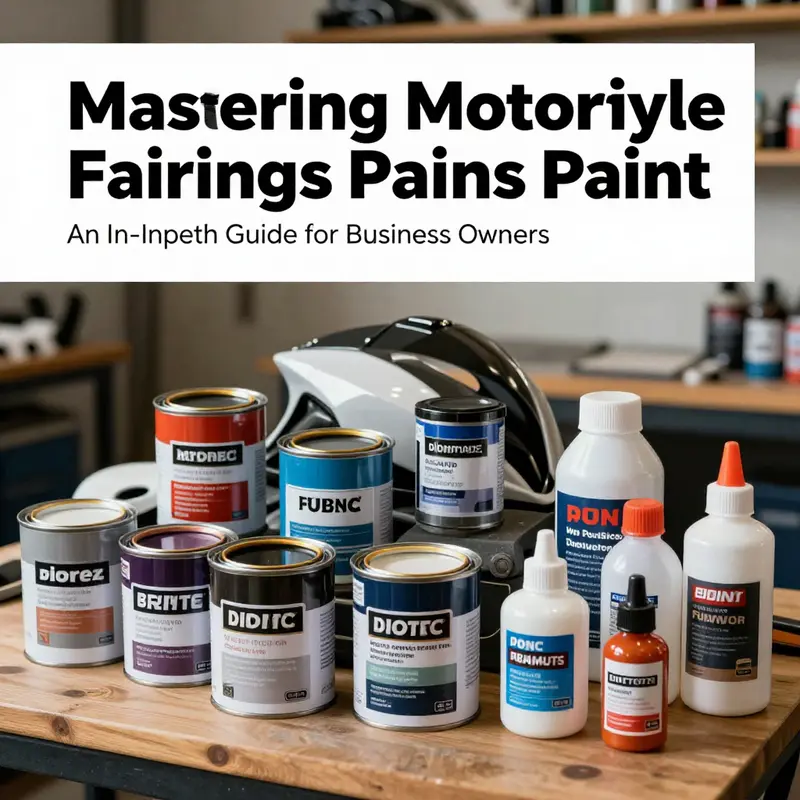
Painting motorcycle fairings is not just a cosmetic enhancement; it’s a crucial aspect of motorcycle restoration and customization that holds significant importance for business owners in the automotive sector. A professionally painted fairing can enhance both the aesthetic and resale value of a motorcycle. However, achieving a durable and visually appealing finish requires an understanding of the entire painting process, from surface preparation to the selection of materials and application techniques. The subsequent chapters will delve into each step, providing business owners with the tools needed to ensure high-quality results that can attract customers and enhance their service offerings.
Preparing Motorcycle Fairings: The Step-by-Step Surface Ritual for a Lasting Paint Job

Surface preparation determines the success of any motorcycle fairing paint job. Spend time here and the finish will last and look professional; rush it and flaws emerge later as peeling, orange peel, or uneven gloss. This chapter walks through the practical, workshop-proven sequence for removing, cleaning, sanding, and priming fairings so paint bonds well and endures weather, UV, and road debris.
Begin with removal. Painting fairings on the bike invites problems. Hidden surfaces remain unprepared and surrounding parts risk overspray. Remove each panel methodically and label fasteners and mounting points. Photograph or sketch connections if needed. Place bolts in labeled bags and keep small parts together so reassembly is effortless. Lay panels on padded, flat surfaces to avoid warps. Working with separate pieces gives full access to both faces and edges, and makes masking simpler when partial panels need different colors or decals.
Once off the bike, inspect each fairing closely. Look for cracks, deep scratches, or warped areas. Small cracks and stress fractures appear in thin plastic around fastener holes; address these before painting. Repair with appropriate plastic welding or structural adhesives designed for ABS or polycarbonate. Larger repairs deserve filler and light sanding before primer. If a panel is too far gone, consider a replacement rather than an extensive fix; sometimes new or replacement fairings save time and yield a better result. When shopping for replacements, verify fitment for your model — collections organized by make and model are helpful when sourcing a direct-fit or aftermarket piece; for example, a Kawasaki fairings collection can be used to find compatible panels.
With fit and repairs sorted, move to cleaning. Degreasing is not optional. Oils from hands, previous waxes, silicone polish, fuel residue, and road grime all interfere with primer and paint adhesion. Use a dedicated degreaser or a plastic-safe cleaner. Apply with clean microfiber cloths and scrub crevices, vents, and mounting pockets where grease accumulates. Rinse if the product requires it, then dry completely. For stubborn contaminants, isopropyl alcohol wipes remove remaining residue and evaporate quickly. Avoid petroleum-based solvents that can swell or soften some plastics. After degreasing, wear clean nitrile gloves to prevent recontamination while handling panels.
Sanding is the foundation of adhesion. The goal is to remove high gloss, scuff old paint if present, and create a consistent, slightly roughened surface so primer mechanically bonds to plastic. Start with a coarser grit only if you need to remove heavy paint or fill material. For most fairings, begin with 400 to 600 grit wet/dry paper to level the surface and knock down gloss. Work wet to reduce dust and keep the paper cutting evenly. Use a sanding block or flexible sponge to maintain even pressure across curves. After the initial pass, progress through finer grits — 800, 1000, and finish with 1500–2000 if you want a very smooth base. The finer the final sand, the less texture the primer must fill, but do not leave the surface glass-smooth; a slight tooth is required for mechanical grip.
When sanding around recessed areas, logos, or vents, switch to folded paper or abrasive pads sized for detail work. Avoid burning through thin edges; excessive pressure concentrates material removal and can deform plastic. For repaired areas with filler, feather the edges so transitions are gradual. When sanding thermoplastic repairs or glue joints, watch for differential hardness — the filler may sand faster than the substrate. Slow and even passes prevent gouges.
Dust control is essential after sanding. Use compressed air to blow out mounting holes and vent slots, but hold the nozzle at an angle and at a safe distance to avoid embedding dust into the surface. Follow with a tack cloth wipe to pick up fine particles that air leaves behind. Tack cloths are tacky fabric or paper healthily designed to trap dust; pass them lightly across the panel surface in one direction to avoid redepositing material. After a tack cloth, finish with a final wipe using a plastic-safe surface cleaner or isopropyl alcohol on a lint-free rag. This step removes any oils left by handling and any residual sanding oil. Keep fingers away from the cleaned surfaces; gloves are recommended.
Masking comes next and requires care. Use quality tape with safe adhesion for plastic. Mask edges you want to remain unpainted and where different colors meet. When masking vents, grills, or bolt bosses, apply tape smoothly without wrinkles and press edges down firmly to ensure a clean paint line. For curves, use short pieces of tape and overlap slightly instead of one long strip that can lift. Cover the backside of panels and bolt holes with paper or plastic to prevent paint from entering mounting points. When painting multiple panels of the same color, mask and group them to spray in batches. But avoid stacking wet panels; allow paint to cure between coats to prevent sticking and distortion.
Selection and application of primer are crucial. Choose a primer formulated for plastics, ideally one that advertises adhesion to ABS, polypropylene, or polycarbonate depending on your fairing material. Some primers contain adhesion promoters specifically designed to bond with plastic polymers. Apply primer in light, even coats. Thin coats build up better than one thick coat and reduce runs. Hold the spray can or gun 6 to 8 inches from the surface and use a steady, overlapping motion. Allow each coat to flash off as recommended by the primer manufacturer before applying the next. A typical build is two to three coats for uniform coverage; more coats may be needed to fill minor imperfections. Between primer coats, a very light scuff with 1500–2000 grit can even out any dust nibs or slight orange peel.
After primer cures, perform a careful inspection under good lighting. Look for pinholes, dust nibs, or uneven texture. Small defects can be addressed with light sanding using fine grit and spot-priming. For larger imperfections, sand the area to blend and apply targeted primer before moving on. The goal before color is a uniform, slightly satin base free of contaminants.
Environmental conditions affect primer and paint. Aim to work in a clean, dust-minimized space with stable temperatures and low humidity. High humidity can cause blushing or poor adhesion, while temperature extremes affect drying times and can trap solvents. Ventilation is important for safety and proper drying but avoid direct drafts that carry dust. If working outdoors, choose a calm, overcast day and set up a temporary shelter. If spraying outdoors, shield panels from wind and airborne debris.
Choosing the right application tool follows preparation. For small touch-ups, an airbrush or aerosol may suffice. For full resprays, a high-quality spray gun yields the most uniform finish and control. Regardless of tool, spray technique matters: keep motions smooth, maintain consistent distance, and begin and end each pass off the panel to prevent heavier starts and stops. Apply color in thin, even passes, building coverage gradually. Allow recommended flash times between coats to prevent solvents from trapping and causing wrinkling.
Between color and clear coat, allow the paint to dry to the manufacturer’s suggested stage. Some paints require a short flash before clear; others need longer cure times. Applying clear too soon can cause solvent lifting, while waiting too long may impede adhesion between layers. When in doubt, follow product instructions and err on the side of the recommended schedule.
Before clear coat, perform one more dust check. Use gentle air and a lint-free cloth to remove any final particles. If you find a small dust nib embedded in the color coat, let the paint cure sufficiently, then sand the nib level with wet 1500–2000 grit and re-clean the surface before clear. For large imperfections, block-sand the area and reapply color if necessary.
Clear coat application also benefits from preparation discipline. Use a two-part urethane clear for durability and UV resistance. Spray clear in light, overlapping coats to avoid runs and to build up a gloss finish. Typical application is three to five coats depending on desired depth and protection. After the final wet coat flashes off and becomes tack-free, allow a full cure in a dust-free area before handling. Initial handling is usually safe within 24 hours, but full chemical cure often takes several days to a week. Avoid installing panels until recommended cure time has passed to prevent marks from fasteners or mounting points.
Post-paint finishing can refine the result. Wet-sanding with ultra-fine grit and polishing compounds smooth minor imperfections and achieve a deep, mirror-like shine. For wet-sanding, use 2000–3000 grit and keep the surface lubricated. Follow with a progressively finer polish and a quality rubbing compound, finishing with a non-abrasive polish to restore gloss. Seal the finish with a maintenance-safe wax or paint sealant after full cure. Avoid silicon-containing polishes early in the finish process; they can cause adhesion problems if you ever need to repaint.
Throughout preparation and painting, keep safety foremost. Use respirators with appropriate filters for solvent vapors, nitrile gloves, eye protection, and protective clothing. Work in a ventilated area and dispose of solvent-soaked rags and used materials per local regulations. Clean tools and guns promptly to maintain consistent performance and prevent contamination.
Proper surface preparation is not glamorous, but it is decisive. It transforms a modest repaint into a professional restoration. Remove panels for full access; degrease thoroughly; sand progressively to create the right tooth; clean with tack cloth and alcohol; mask carefully; apply a plastic-specific primer; inspect and correct imperfections; then proceed to color and clear with disciplined technique and environmental control. This ritual ensures paint bonds well, resists peeling, and achieves the smooth, glossy finish that turns a set of fairings into a cohesive, protective, and attractive outer shell for your motorcycle.
For guidance that complements these steps with illustrated, step-by-step visuals, consult this practical online guide that covers the entire painting sequence in depth: https://www.motorcycle-mania.com/how-to-paint-motorcycle-fairings-a-practical-guide. For replacement panels or direct-fit parts when repairs aren’t practical, explore a focused selection of compatible parts in a Kawasaki fairings collection to ensure proper fit and finish.
Durable Canvas: Material Choices and Prep for a Pro-Grade Motorcycle Fairings Paint
Painting motorcycle fairings is both an art and a precise engineering task. The canvas you start with—ABS plastic, fiberglass, or even polycarbonate—sets the tone for durability, finish, and longevity. The choices you make about materials, primers, and topcoats ripple through the entire process, influencing how well the color adheres, how it responds to sun and fuel exposure, and how easily the finish can be repaired or refreshed in the years ahead. The goal is not merely a vivid color, but a finish that remains resistant to UV fading, chemical attack, and the small but relentless impacts that riding and weather can deliver. To approach this with discipline is to respect the substrate, the environment, and the chemistry that binds coatings to plastic and composite surfaces. You can think of this as a conversation between three partners: the material of the fairing, the primer that convinces the surface to accept paint, and the two-part system that finally seals in color and protection. When done with care, the result is a smooth, consistent finish that does not peel, crack, or dull under the demands of daily riding or long track sessions alike.
The foundation of a durable paint job begins with material compatibility. ABS plastic is the most common substrate for OEM and aftermarket fairings, valued for its balance of lightness and impact resistance. It tends to hold a paint film well when a proper plastic primer is used and when the subsequent coatings are selected to accommodate the surface energy of a plastic substrate. Fiberglass, while stiffer and capable of handling aggressive aerodynamic form, introduces a different set of considerations. It is more rigid and can transfer flex into the coating system if the primer and topcoats are not matched to accommodate that movement. Polycarbonate stands apart with exceptional impact resistance and a lower surface energy profile, which can make adhesion more challenging if the correct primers and surface preparation steps are not followed. Each material calls for specific primers and a carefully chosen two-component paint system designed for plastics and composites. The overarching message remains clear: the best finish comes from choosing materials that work together and from committing to a thorough prep routine.
The professional approach to a long-lasting finish centers on three core components: a high-quality primer optimized for the base material, a durable two-component paint system that can flex with the plastic, and a clear coat that finalizes the look while supplying UV protection and a robust barrier against environmental damage. A two-component urethane or urethane-based system is commonly recommended for fairings. This family of paints offers excellent adhesion to plastics, strong chemical resistance, and the flexibility needed to accommodate the slight movements that occur as the bike vibrates and as heat cycles occur during riding. Importantly, the primer is not a mere filler; it is a vital partner that creates a receptive surface for the color layer and helps prevent peeling, fading, or stain migration from the base through the clear coat. In practice, you must select a primer formulated for plastic or composite substrates and verify its compatibility with the chosen two-component color system. A mismatch here can erode adhesion and invite micro-cracking that becomes visible only after weeks of sun exposure.
Material compatibility also informs the shape and construction of the paint plan itself. ABS and fiberglass fairings often respond well to a standard sequence: a dedicated plastic primer that bonds to the substrate, followed by a two-component color layer, and finally a clear topcoat. For polycarbonate, the dynamics shift slightly because of its low surface energy. It frequently requires a specialized primer and sometimes an adhesion-promoting treatment or a tailored adhesion promoter to ensure the color remains intact under UV stress and fuel contact. The right primers for each substrate aren’t merely an additive; they act as an essential bridge that unlocks reliable adhesion and a durable film. As you read about these substrates, it is useful to visualize the everyday realities of riding: the clouds of road dust, the occasional fuel splash, and the sun’s unrelenting rays. The coatings you select must withstand these conditions without the fast failure modes of older, single-component schemes.
The process itself begins with the choice of surface care. It is impossible to overstate the importance of preparation. In a well-run shop or a well-organized home workshop, the fairings are removed from the motorcycle and subjected to a thorough cleaning with a degreaser to strip away oils, waxes, and particulate contaminants. Any surface contaminants that remain can create voids in the paint film or cause fish-eyes, where droplets bead up and refuse to level out. Once clean, you proceed to mechanical abrasion to create a slightly rough surface that will grip the primer. The recommended path is light sanding with very fine grit sandpaper—typically in the 1500–2000 grit range. This step is not about erasing the surface but about providing micro-mechanical keys for the primer to grab onto. It also helps dissipate any residual reflections from bends and curves that might otherwise show through the final coat as uneven sheen. After sanding, a tack cloth is essential to remove all dust particles, and it’s worth investing in a high-quality tack cloth designed for automotive finishes. The goal is a surface that feels smooth to the touch but has a microscopic tooth that the primer can grab onto without leaving visible fibers or lint behind.
With the surface prepared, primers begin the actual paint journey. A primer designed for plastic is not optional; it is the first line of defense against adhesion failures that can undermine a paint job long after the color has dried. The primer should be formulated to interface with the chosen topcoat system and to remain compatible with the substrate. In a typical sequence, you apply multiple fine passes of primer to provide a even, controllable base that will fill any minor imperfections and establish a uniform porosity for the color layer to adhere. The aim is a smooth, even plane across all fairing panels, with any recessed areas or details filled in a manner that preserves the sharpness of the fairing lines while avoiding heavy build-up that could alter the geometry of the panels. After the primer cures to a dry state, it is often lightly wet-sanded to remove any nibs or texture created during application. This step, although requiring careful control, yields a uniform base that helps the color coat flow and lay down evenly.
The color stage itself relies on a two-component system designed for automotive plastics and composites. Once the primer has been verified for adhesion and surface uniformity, the color coats are applied in thin, even passes. The practice of applying color in multiple light coats rather than a few heavy layers pays dividends in the final appearance. Each coat should be allowed a brief flash-off period before the next is applied. The length of this flash-off window depends on the ambient conditions and the specific formulation of the paint, but the underlying principle remains constant: thin coats reduce sag and orange peel and increase the evenness of color across complex curves and transitions. When the color layer has reached the desired depth of hue and uniformity, the clear coat is introduced. The clear should be a two-component product designed to protect the color while providing gloss and UV resistance. A well-judged clear coat adds life to the finish, yielding a film that resists yellowing, cracking, and chemical attack from fuels and road grime.
A number of subtleties can influence the outcome, and these matter more than most riders imagine. Temperature and humidity play a critical role in how coatings flow and cure. In the wrong conditions, solvents can evaporate too quickly, causing the film to dry with pinholes or a rough texture. In the right conditions, the spray pattern remains stable, and the color and clear coats replicate a glassy depth visible even on small panels. Temperature control is not merely a preference; it is a performance parameter. The workshop environment should maintain a stable temperature within the recommended range for the product line you are using, with adequate ventilation to manage solvent vapors. Concentrations of humidity should be within the window specified by the paint system, since high humidity can lead to film defects and slow cure times that stall the project. In routine practice, the painter develops a rhythm: pre-mix materials, check the nozzle size, verify the air pressure, and test spray on a sacrificial panel. This testing step, though seemingly small, catches issues before they affect the entire fairing set.
Adherence to the recommended curing times is another thread that binds the narrative of a durable finish. After the color coats, the clear must cure fully to perform as a barrier against UV rays and environmental assault. Curing can take several days, and depending on the product system used, a longer cure time may be recommended before handling or reinstalling the fairings. The advantage of allowing ample curing time is more than cosmetic. It reduces the risk of accidental denting or marring during reassembly and reduces the likelihood of solvent entrapment that can lead to blushing or cloudiness in the clear layer.
The decision to move forward on a particular substrate also influences repairability and long-term maintenance. If you anticipate the need to repair chips or scratches in the future, the material selection and the thickness of the color and clear coats can influence how easily you can feather out touched-up areas. Some riders opt for a finish that favors a little more flexibility in the color layer, especially on ABS and polycarbonate, to absorb a small impact without cracking. This mindset ties back to the fundamental concept of compatibility: if you choose a system known for UV resistance and chemical durability, you improve the chances that the entire coating system will stay intact across seasons of exposure and wear. The ability to maintain a showroom finish over time often comes down to how well the system is chosen upfront and how faithfully the preparation and application steps are executed.
As you work through the considerations of substrates and coatings, you may wish to explore a broader view of available options and how they look on typical fairing shapes. You can see a wide range of examples by exploring a curated selection of fairings that illustrate common substrates and configurations, such as the Honda fairings collection, which provides a representative glimpse of shapes and substrate variety commonly found in sport bikes.
For those who want to go deeper into the decision framework around paint systems for fairings, a practical approach is to treat material compatibility, prep quality, and coating system selection as an integrated set of decisions rather than isolated steps. Start with a clear assessment of the base material, confirm the primer compatibility, then plan your color and clear coat sequence around the expected service conditions—daily riding, weekend track use, or vintage restoration. The right choices will yield a finish that not only looks striking but stands up to the realities of riding and weather. The result is more than aesthetics; it is a protective and durable layer that maintains the fairing’s integrity and preserves the investment you have made in restoring or customizing your motorcycle.
In closing, the discipline of choosing materials for motorcycle fairings paint is a practical art. It requires understanding the substrate, selecting a primer that truly adheres, and embracing a two-component paint system with a robust clear coat. It is a process that rewards patience and precise execution, especially when you consider the long road ahead and the many miles of sun and road dust the finish will endure. By prioritizing material compatibility, meticulous preparation, and deliberate application, you set the stage for a finish that remains vibrant, flexible, and protective for years to come. For a more visual orientation, you can explore the Honda fairings collection to observe how different substrates translate into real-world results, and you can supplement your knowledge with broader practical guidance at the external resource linked below. External resource: https://www.motorcycleabc.com/paint-motorcycle-fairings/.
From Bare Plastic to Mirror Finish: Mastering Application Techniques for Motorcycle Fairings Paint

When you set out to transform a set of motorcycle fairings, the success of your project hinges not merely on the color you choose but on the art of application. The finish you end up with is a product of careful sequencing, clean execution, and discipline at every stage from removal to cure. A smooth, durable, factory-like look requires a precise dance of preparation, primer, pigment, and protection, where each step informs the next and a single lapse can ripple into texture, adhesion issues, or premature failure. This chapter follows that rhythm, weaving technical insight with practical guidance so the painter, whether hobbyist or restorationist, can approach each fairing as a single, coherent surface rather than a jumble of panels and edges. The overarching rule is straightforward: preparation is not optional, it is the backbone of durability and gloss, but the application techniques—how and when you lay color—determine the level of seal, the absence of imperfections, and the long-term behavior of the coating under sun, heat, rain, and road grit. With this understanding, you can pursue a finish that not only looks professional in the shop but continues to perform when exposed to the elements and vibration of real-world riding.
The journey begins long before a nozzle sweeps solvent into a static, controlled arc. It begins with the fairings themselves—their removal from the bike, their inspection for damage, and their preparation for a bond that will endure through countless miles. Detaching the fairings from the bike isn’t just a matter of accessibility; it protects components that are sensitive to overspray and ensures you don’t contaminate other surfaces with degreasers, waxes, or curing odors. Once off, you set the stage for a thorough cleaning. Degreasing removes the films of oil and wax that accumulate from long rides, maintenance, and ambient environmental exposure. Oils can seep into the porosity of plastics and create a barrier that hinders adhesion, so a dedicated degreaser, applied with a clean rag and followed by a rinse if the product requires it, becomes a prerequisite rather than an optional step. In the absence of this discipline, even the most robust primer can struggle to bite and hold, and the result is a color that peels or dulls prematurely.
After cleansing, the surface is readied for primer with a decisive but guarded approach to texture. Sanding is the bridge between bare plastics and paint. The goal is not to grind the plastic away or to remove critical details but to create a micro-roughness that provides a mechanical anchor for the primer and, subsequently, the pigment layer. The approach typically uses progressively finer grits, beginning with something in the 400–600 range when you are addressing deeper scratches or old paint wear, and moving toward 800, then 1000, and finally up to 1500–2000 grit for smooth, subsequent coats. This envelope of grits is chosen to strike a balance: enough texture to allow adhesion, yet fine enough to minimize the risk of visible sanding scratches that could telegraph through to the final finish. The sanding process, though it may seem tedious, is an investment in longevity and gloss that pays for itself with a more uniform, defect-free surface.
With the surface roughed and dusted, a tack cloth is the next, crucial step. The tack cloth removes fine dust that would trap itself between coats and create tiny pits or a dull look in high-gloss finishes. Dust removal before primer is non-negotiable in most professional workflows, and it becomes even more important in a shop environment where airflow is dynamic. When the surface is perfectly clean, you apply a high-quality primer—typically a two-part epoxy or a plastic primer designed for polyurethane or ABS plastics commonly used in fairings. The primer serves multiple roles: it seals the substrate, improves adhesion for the subsequent color layers, and provides a uniform base color and texture. Inadequate priming can lead to peeling and a failure to achieve a consistent color fill, especially on darker or more saturated hues. The primer must be allowed to dry completely before the next phase, and the precise curing time should be aligned with the manufacturer’s specifications as well as the ambient conditions of your shop, since temperature and humidity can dramatically affect cure times.
Color application demands equal attention to technique and environment. The recommended tools range from high-pressure airless spray systems to HVLP setups, chosen for their ability to deliver controlled, fine atomization that minimizes overspray and fosters an even, luster-rich coat. The guiding principle here is to apply thin, repeat coats rather than one heavy layer. Thick coats increase the likelihood of runs, sags, bridging over contours, and a texture that can ruin the intended smoothness. The distance between nozzle and fairing, the travel speed, and the overlap between passes must be consistent. A standard practice is to maintain a distance of about 6–8 inches from the surface and to execute passes with even, overlapping strokes. This distance helps achieve a balanced evaporative rate, which is especially important for plastics that can respond to heat with slight distortion if the coating is too thick or unevenly heated.
Each coat should be given time to flash off, which means the solvents begin to evaporate and the layer begins to set its surface, before the next coat is applied. A typical flash-off window is in the realm of 15–30 minutes, though this window shifts with temperature and humidity. In cooler conditions, you may extend the interval slightly; in a hot, dry environment, you may shorten it. The emphasis is on achieving a dry, tack-free surface that still contains enough solvent mobility to wet out subsequent coats. When you reach full coverage, the color layer should show even hue without patchiness. If you detect any orange-peel texture or fish-eye defects, addressing them at this stage—usually through a light reflow or a careful re-prime in affected areas—can save a complete rework later in the process.
The moment of truth arrives with the final color coat and the transition to clear. After the color reflects the intended tone and depth under the shop lights, you move to the clear coat that will protect the pigment, resist UV damage, and add the coveted gloss. A proper clear coat application mirrors the color-coat procedure: thin, controlled passes, appropriate flash times, and attention to cross-contamination. The clear is not merely a cosmetic layer; it is the first line of defense against abrasion from dust, stones, rain, and road grime. A thoughtful approach to curing is essential, as this layer needs time to level and harden in a protective manner. In many setups, a final wet-sanding step using 1500–2000 grit follows the clear coat. This step helps remove any micro-imperfections and enhances gloss, provided a lubricant is used to prevent heat buildup. Polishing afterward with abrasives and protective compounds can restore clarity and bring out a mirror-like finish. The philosophy here is to create a seamless blend between the color and the protective layer, so the final surface reads as one continuous field of color and shine rather than a layered, stitched appearance.
The environment in which you paint matters almost as much as the steps you perform. A dedicated paint booth, free from dust plumes and cross-draughts, offers a more predictable result than a makeshift workspace. Painting in direct sun or high humidity can invite defects such as orange peel, pinholes, or solvent popping. Temperature and humidity aren’t mere footnotes; they influence solvent evaporation rates, film formation, and adhesion. If you can, calibrate your sessions to a period with steady, moderate temperature and low humidity, allowing the coatings to cure in a stable environment that protects the surface while it hardens. The approach described here, when executed with patience, yields a long-lasting finish that stands up to UV exposure, weather, and the constant stress of riding vibrations. The result is more than color; it is durability, depth, and a finish that reads like factory quality when viewed under bright light and at close distance.
In practice, the sequence has a logic that repeats across projects but remains adaptable to the specifics of the fairing shapes and the chosen system. Some riders prefer a two-part urethane paint system for its superior durability and UV resistance, which makes sense for plastics that can degrade or chalk under sun and rain. When using such a system, it is especially important to follow the exact mixing ratios, pot life, and application window recommended by the manufacturer, because deviations can compromise chemical resistance or cure. The primer selection for plastic surfaces remains crucial; a primer designed for plastics adheres better and reduces the risk of peeling on ABS or polyurethane fairings. The entire operation, from the initial removal to the final cure, is built on a simple premise: each layer must be compatible with the one beneath it, and each layer must be given the opportunity to establish its bond before the next is introduced. This is not a race to finish; it is a careful construction of a resilient, aesthetically pleasing shell that protects the underlying structural panels and carries the rider’s expression into the wind.
As a practical matter, many builders incorporate a contingency plan for minor repairs and finish corrections. When a scratch or a chip appears during handling or storage, the typical remedy is localized sanding, re-priming, and touched-up color in the affected area. For more extensive blemishes, it may be simpler to feather back into the surrounding area with a combination of primer and color coats so that the transition is imperceptible. Wet-sanding and polishing are not just for the final stage but can serve as a diagnostic tool to assess the uniformity of the paint film across the entire surface. Subtle variations in gloss, color depth, or edge sharpness can betray inconsistencies that, in a finished, eye-level inspection, would stand out. Maintaining an ongoing routine of cleaning and inspection after cure can help identify potential issues early and allow for targeted corrective work before a rider takes the bike back to the road.
If you are exploring the practicalities of sourcing and working with fairings that will later receive this level of treatment, it helps to consider how the panel shapes influence your spray strategy. Contoured areas, deep recesses, and tight radii require careful angling and pass sequencing to avoid drips or uneven film thickness. Flying droplets are a real hazard if the surface is not adequately angled and the solvent balance of the mixture is not calibrated for the air pressure and nozzle size. The trade-off between speed and quality is most evident here: faster application may save time but at the cost of texture, while slower, deliberate passes can yield a more consistent film thickness and a more uniform color saturation. Those who commit to the longer, methodical approach frequently find that the result is not only visually striking but also more resistant to chipping and environmental wear over the bike’s lifetime. When you finally reassemble the fairings, you don’t just reinstall a painted shell; you reintroduce a protective, aesthetic layer that was earned through careful prep, disciplined technique, and respect for the materials involved. And while the process can be exacting, it is also profoundly rewarding to see the finished piece reflect the rider’s intention with clarity and durability.
For readers who want to connect this discussion to a broader resource that consolidates the step-by-step approach—removal, cleaning, sanding, priming, painting, and finishing—consider exploring related guidance that aligns with these application techniques. The roadmap outlined here is designed to be practical, repeatable, and adaptable to various fairing shapes and paint systems. If you’re curious about a detailed, visual walkthrough that complements this narrative, you can consult a comprehensive guide that illustrates these stages in a real-world context. This companion resource reinforces the core message: success in motorcycle fairing painting is built on clean surfaces, controlled application, and deliberate curing steps that respect the substrate and the finish alike. For enthusiasts who want to verify techniques or see them demonstrated in motion, the linked visual guide can serve as a valuable reference point to reinforce the concepts described above.
Internal link for further exploration: For enthusiasts looking to explore compatible fairings, see the Honda fairings collection.
External resource for additional depth: How To Paint Motorcycle Fairings Like A Pro (2023).
In summary, the art of applying paint to motorcycle fairings blends science with hands-on craft. It requires a disciplined approach to surface preparation, a steady hand and controlled equipment for color deposition, and a patient mindset that values proper cure and protection. When executed with care, the result is not just a color job but a durable, glossy, protective shell that communicates the rider’s personality while withstanding the daily challenges of weather and road.”
Final thoughts
Understanding the intricacies of motorcycle fairings paint provides business owners with a competitive edge in the automotive restoration and customization market. Each chapter has outlined critical aspects of the painting process, from meticulous surface preparation to selecting the right materials and mastering application techniques. By implementing these insights, businesses can offer top-notch service that not only enhances the appearance of motorcycles but also builds customer trust and satisfaction. Invest in quality practices for motorcycle fairings paint to ensure your business stands out and thrives in a competitive landscape.