Spray painting motorcycle fairings is not just an aesthetic choice; it’s a critical part of motorcycle care and maintenance that impacts longevity, market value, and rider satisfaction. As a business owner in the motorcycle industry, understanding the intricacies of spray painting can elevate your service offerings and enhance customer experiences. This guide delves into the meticulous preparations necessary before applying paint, the importance of primer, effective base coat techniques for achieving depth and vibrancy, the benefits of applying a protective clear coat, and the essential steps for proper curing and maintenance. By mastering these elements, you can ensure your motorcycle fairings not only look exceptional but also withstand the rigors of the road, thereby optimizing customer satisfaction and loyalty.
The Quiet Frontier: Mastering Prep to Make Motorcycle Fairings Shine
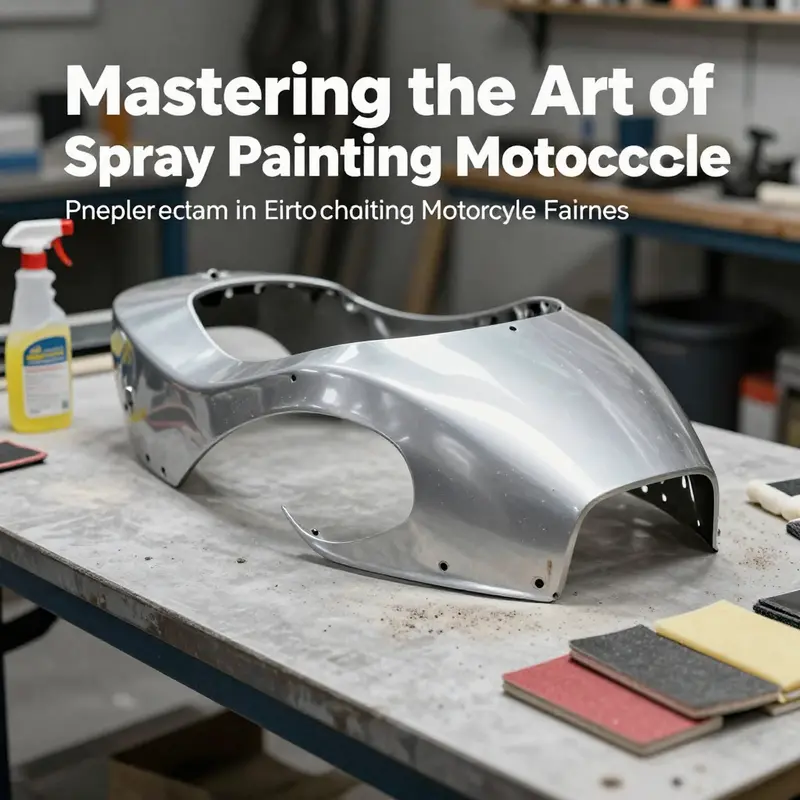
Before a spray of color ever leaves the nozzle, the fate of a motorcycle fairing rests on a single, quiet step: preparation. It is the part riders rarely see but feel every time the gloss builds and the edges stay sharp. Precision here translates into durability, even color depth, and a finish that resists the weather, fuel splashes, and the daily grind of the road. The process is not glamorous, but it is repeatable, logical, and surprisingly forgiving when done with patience. Think of it as laying a foundation so the paint can sing, rather than chasing a miracle after the fact. If you treat preparation as a ritual rather than a checklist, you will notice the difference in every layer that follows and in the way the final result holds up under sun, rain, and the inevitable stone strike on a dusty highway.
The first act of prep is surface cleanliness, because adhesion begins with a clean stage. Begin by inspecting the fairing for any film of oil, wax, or silicone—common residues from previous coatings, cleaners, or even hand oils. A dedicated automotive cleaner or degreaser is your first tool. Use it liberally, then wipe with a lint-free cloth until the surface looks matte and clear. Any film left behind can jeopardize adhesion, leading to peeling, fisheyes, or dull spots once the paint cures. After cleaning, a tack cloth comes into play. It traps microscopic dust and fibers, ensuring the surface is as pristine as possible before the first abrasion. You want a surface that feels almost velvety to the touch, not gritty or slick.
Sanding follows cleaning, but it is not a broad scuffing of the entire surface. The goal is to create a micro-roughness that the new paint can grab onto, without damaging the plastic beneath. Start with a middle-grit paper, such as 800 or 1000, and progress to finer grits, finishing around 1500. The grooves created by sanding form a network of tiny anchor points that improve adhesion for the primer and the base coat alike. The careful touch is essential here: you should abrade enough to create a capture for the new paint, but you must avoid cutting through the existing finish or into the plastic itself. Once sanding is complete, wipe again with a tack cloth to remove all dust. A clean, dust-free surface is non-negotiable if you want a film that lays down evenly and cures without texture irregularities.
Masking is the next quiet craft. The fairing is a complex object with curves, seams, vents, and edges that can trap paint if not shielded properly. Use high-quality masking tape and plastic sheeting to cover areas you do not want painted—lights, mirrors, fasteners, logos, chrome trim, and any attachment points. Apply the tape smoothly, without wrinkles or air pockets, and press it firmly along the edges to prevent paint bleed. A common mistake is leaving a gap where tape butts against the edge of a panel. In those spaces, even a thin line of aerosol can creep under and create a halo when you remove the mask later. It is worth taking an extra minute to re-check all edges and seams before you start spraying. The masking stage is where the work ethic of the painter reveals itself; shortcuts are visible in the final lines and the sharpness of the demarcations.
Environmental control underpins every subsequent step. Choose a clean, well-ventilated, temperature-controlled space. Ideal conditions hover around 20–25°C (68–77°F) with relative humidity in the 40–60% range. A stable environment reduces the risk of dust settling on the surface and helps the liquid coatings cure evenly. Avoid painting in dusty shops, in windy drafts, or in rooms that swing dramatically in temperature. Dust nibs—tiny specks that become embedded in the wet film—are the enemy of a smooth finish, while excessive humidity can blur edges and slow solvent evaporation, causing soft spots. If you do not have a dedicated spray booth, create a controlled corner with proper filtration and a gentle, steady airflow that does not disturb the surface during the drying steps.
Primer is the bridge between the prepared surface and the color you plan to lay down. Modern fairings are typically made from ABS or polycarbonate, plastics that require a primer formulated for plastics or composites. The primer’s job is twofold: to promote adhesion and to create a uniform base that hides the underlying texture and color variations. Apply the primer in thin, even coats, allowing adequate flash time between passes. The recommended drying window is usually a few hours, often about 3–4 hours depending on the product and ambient conditions. Do not rush this stage; a properly cured primer is the bedrock for a flawless base coat. As you near the end of priming, you should see a smooth, uniform surface that does not show pinholes or irregularities when viewed at grazing angles. If any imperfections appear, they can be corrected with a light reprime after a brief re-clean and re-sand, but this should be done with care to avoid compromising the cured areas.
With the primer cured, you step into base coating. The base coat is where color depth comes alive, and it benefits from multiple thin passes rather than a few heavy ones. Use the spray technique you are most comfortable with, whether that is a gun or aerosols, but the constant is restraint. Thin coats, evenly distributed from the same distance, yield even color layering and help prevent runs. The distance matters: a steady 6–12 inches from the surface usually strikes a good balance between atomization, coverage, and control. Between coats, maintain a consistent interval—often about three hours—so that each layer can set without dragging on the next. For a robust, opaque finish, shooters typically apply three to five coats, watching for even coverage with no obvious pathway of the underlying surface showing through. Patience here pays off: a base that looks flat and uniform under the shop lights will translate to depth and vibrancy once the clear coat seals it.
The transition from color to glaze happens with the clear coat, which adds gloss and protects the layer beneath from UV exposure, scratches, and weathering. The clear is not simply a topcoat; it is the shield that keeps the color from dulling in sun and scuffing on the road. After the base has cured for 24–48 hours, apply the clear in light, even coats, building up to the desired gloss and protection. A uniform surface free of sags and solvent pop is the mark of a skilled hand at this stage. The curing time for the clear can vary, but you should plan for a longer final cure—typically several days—to achieve maximum hardness and resilience.
Caring for the freshly painted fairings begins long before the reinstall. Allow the entire paint job to cure fully for at least seven days before handling or exposing the surface to harsh conditions. During this final phase, resist the urge to rush the reassembly. Any premature stress can cause micro-cracks or adhesion failures that will undermine the very effort you invested in preparation. Once you are confident the film has hardened, you can reinstall the fairings and return to riding with a finish that looks as though it rolled off a pristine production line. The satisfaction of a job well-prepared is not merely aesthetic; it is a durable investment in the bike’s appearance and longevity.
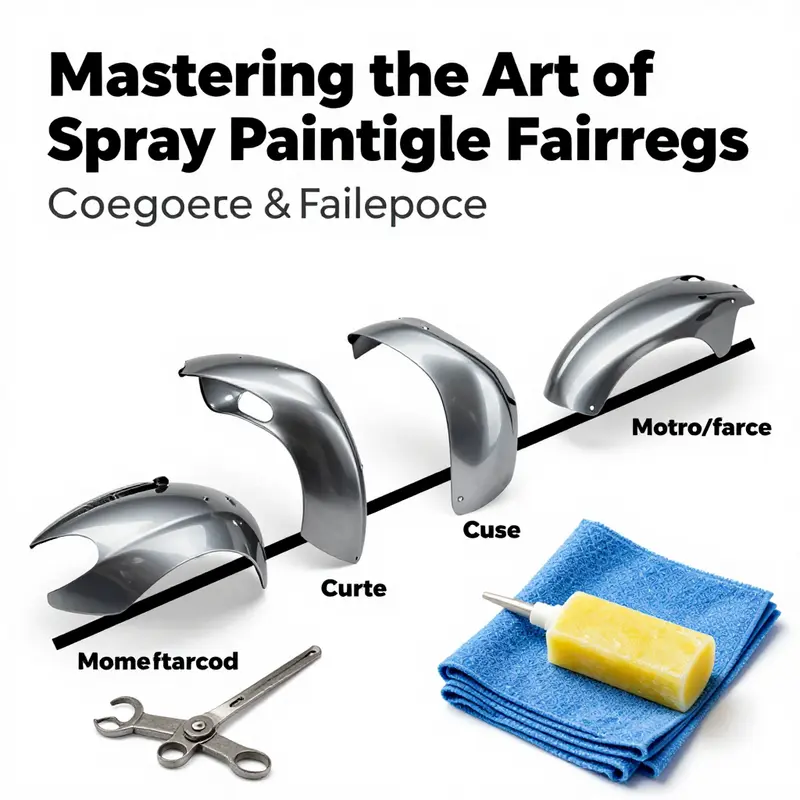
The discipline of preparation also invites practical, domain-aware decisions. For instance, you might choose to reference a broader library of examples and guidelines from established automotive finishes resources to tailor your approach to the plastic type you are working with. If you’re curious about specific body panels or fairings for certain makes, a quick look at relevant parts catalogs can guide your masking and edge choices. For example, you can explore a representative catalog of Honda fairings to understand typical panel shapes and attachment points, which informs how you mask and reassemble later. Honda fairings offers a sense of how different panels come together, which in turn influences where you allow edge lines and where you protect the surface from splashes or tape residue.
As you refine your technique, remember that preparation hinges on discipline and attention to detail rather than raw speed. The more consistently you apply the steps—cleanliness, abrading, masking, environment control, priming, layering, and curing—the more predictable and satisfying the finish will be. This is a craft that rewards practice: each project teaches subtle adjustments in spray technique, masking precision, and climate management that pay off in the next job. If you incorporate the principles of professional painters—leaning on reputable guidelines, maintaining clean workspaces, and honoring the sequence of steps—you will notice fewer imperfections and a longer-lasting final film that resists environmental challenges.
For those seeking broader context on the preparation standards that inform these steps, reputable automotive painting resources frequently emphasize the same core pillars: surface cleanliness, controlled abrading, careful masking, proper primers, measured layering, and appropriate curing. The guidance is not about chasing a single technique but about building a robust workflow that can adapt to different plastics, finishes, and color goals. When you bring this mindset to the garage, you begin to see preparation not as an obstacle but as the foundation of artistry. The glossy, smooth surface you aspire to achieve is less a product of luck and more the natural outcome of disciplined prep, a sequence that respects the material, the environment, and the craft.
External reading and deeper standards can widen your toolkit. Detailed tips and tricks from established automotive paint guidance discuss nuances like substrate compatibility, wash-down sequences, and humidity management that complement the steps outlined here. If you want to explore further, you can consult resources such as the comprehensive automotive painting tips and tricks guidance from a respected color and finish authority, which provides a deeper frame for your practice. This chapter builds on those fundamentals while keeping the focus on the specific challenges and opportunities of spray painting motorcycle fairings, where the combination of plastic substrates, curved geometry, and exposed surfaces demands a precise and patient approach.
With preparation completed, the road ahead becomes a canvas rather than a test. The fairing, now primed and ready, awaits color and protection, confident in a surface that is clean, smooth, and ready to receive the next layers. The result is not merely a color on a panel but a durable, showroom-worthy finish that endures through countless rides and weather cycles. This is the quiet frontier of motorcycle customization—where preparation sets the stage for the gloss everyone notices and the protection that keeps it looking new mile after mile.
External Resource: For more detailed, technique-focused guidance, see https://www.sherwin-williams.com/learn/automotive-painting-tips-and-tricks.
Sealing the Surface: Mastering Primer for Long-Lasting, Glossy Spray-Finished Motorcycle Fairings
Primer is the quiet workhorse of any spray-painted motorcycle fairing project. It’s the layer that bridges the gap between a plastic substrate and the color you want to display with pride. When you’re dealing with modern fairings made from ABS or polycarbonate blends, the stakes are higher, because a weak bond here can translate into peel, chalk, or micro-scratches that ruin the depth of your base coat. The goal, therefore, is not just to cover the plastic, but to invite the coating system to become one with it. That begins with meticulous surface preparation and a carefully controlled primer application that respects the material’s unique needs.
Start with a thorough cleaning. A degreaser does more than remove surface grime; it dissolves oils from previous finishes, fingerprints, and silicone residues that can silently sabotage adhesion. The plastic often looks clean after a wipe, but the molecular surface may still harbor contaminants. Once clean, proceed to light abrasion. A fine grit like 400 to 600 is a practical choice for plastic fairings. The intent is not to grind away material but to create a perceptible, micro-textured profile that gives the primer something to grip. After sanding, remove the dust with a clean, lint-free cloth dampened with isopropyl alcohol. The goal is to test the surface by touch: if you can feel a slick edge or a lingering powder, wipe again and give the surface a longer dry time before priming.
With the surface prepared, the next move is to activate the plastic’s bonding potential. An adhesion promoter formulated for plastics should be applied before the primer. This step is pivotal; it helps the primer bite into smooth plastic and reduces the risk of paint failure on glossy, clean surfaces. Allow the promoter to dry fully, following the manufacturer’s specified time. The promoter’s job is done when the surface feels dry to the touch and no tack remains. Only then should you mix your primer. In this chapter, the emphasis is on a two-component, or 2K, primer system. Pour the primer into the spray gun’s cup at the ratio defined by the product guidelines, then add the correct hardener. Two-component systems are more forgiving of minor surface imperfections and environmental shifts, but they demand accuracy in mixing so the curing chemistry behaves predictably.
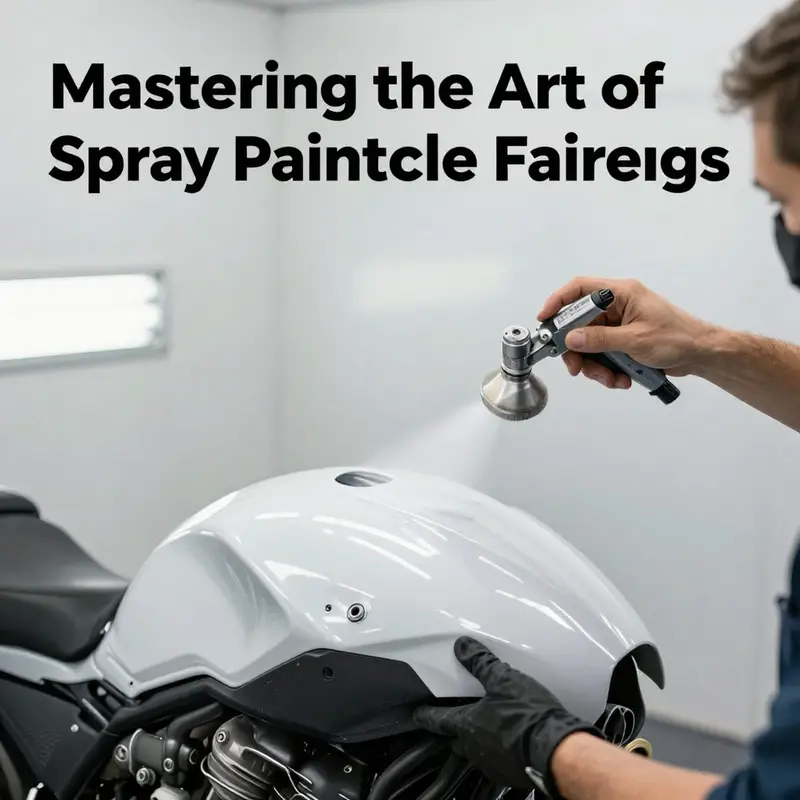
Spraying the primer requires technique as much as material. Begin with a light first coat, moving the gun in smooth, overlapping passes. A common error is to lay down a heavy layer, which invites runs, sags, and visible orange-peel that mirror the surface you hoped to disguise. Maintain a steady hand, a comfortable stance, and a consistent spray distance. For primers, a typical working distance mirrors what you’d use for base coats: around 6 to 12 inches from the surface. This distance helps balance atomization with coverage, ensuring a thin, even film rather than a wet glaze that pools in crevices. The solvent chemistry in the primer will carry a little longer than paint, so be mindful of airflow and ventilation to prevent solvent pooling or rapid evaporation that can trap solvent pockets beneath the film.
Patience matters as the coat dries. Allow the initial primer layer to dry according to the manufacturer’s instructions before evaluating the need for additional coats. If further build is necessary, apply one more coat in the same controlled fashion. Between primer coats, a short window—often 15 to 30 minutes—is enough for handling a second pass in temperate, well-ventilated conditions. Some shops lightly scuff the surface with a 600- or 800-grit pad between coats to help the next layer grip, but the key is to avoid creating deep scratches that would telegraph through the finish layers. After the final coat, give the surface time to cure to a stable film. A tack-free or slightly firm surface is a good sign that you can proceed to the base color.
The primer’s cure and performance hinge on the environment. A clean, well-ventilated space reduces humidity and dust intrusion while preserving your lungs. If you’re spraying in a makeshift area, approximate the benefits of a spray booth: controlled airflow, minimal contamination, and constant lighting to spot dust nibs and imperfections early. Temperature plays a role too; primers cure differently with heat. Cold or overly dry air can slow cure, while excessive heat can accelerate it too quickly, increasing the risk of cracking or pinholing as the film dries. You need to stay mindful of the conditions just as you are mindful of your technique. The result should be a uniform, flat surface with depth that will support the color layer to come.
An important nuance is the choice of primer system for plastics. The adhesion promoter works best when compatible with the subsequent primer chemistry; otherwise, you can experience imperfect adhesion or premature failure under UV exposure and weathering. The 2K primer’s curing mechanism requires proper ventilation and a clean spray pattern to avoid inconsistent film thickness. A general rule of thumb is to observe the manufacturer’s drying times for each coat and not rush the process. It is better to wait a few extra minutes for a given coat to dry than to attempt a second layer on a still-tacky surface. In practice, this means planning your work in a sequence that allows for drying windows, especially if you’re working on a complete fairing set.
If you’re working on a common ABS or polycarbonate fairing, you may want to reference a broader catalog of fairings to understand typical panel shapes and features that influence prep. For instance, you could explore the Honda fairings collection, which offers a wide range of plastics and finishes that illustrate how a well-prepared surface supports color depth and gloss. This contextual reference can help you plan your workflow on real-world shapes while staying focused on the core principles of surface preparation, adhesion promotion, and controlled primer application. Honda fairings collection can provide a practical touchstone for recognizing where your primer’s grip needs to be the strongest and where extra attention to detail pays off in the final finish.
As you transition from primer to color, remember that the primer is not a decorative layer but the foundation. The color coat’s ability to level, gloss, and resist scuffs depends on the primer’s uniformity, its adhesion, and the absence of trapped dust or solvent pockets. The experience of sanding back between coats or adjusting your flow rate during spraying becomes a reference tool that guides the rest of the process. If you notice the primer has pinholes, tiny craters, or an inconsistent film, inspect the preparation steps—dust control, degreasing efficacy, adhesion promoter coverage, and your spray technique. Addressing these factors before moving forward saves time and guarantees a smoother path to the final finish.
For readers seeking a deeper dive into the science and practice of plastic prep, there is a broader external resource that complements this chapter’s guidance. External resource: https://www.motorcyclepainting.com/prep-motorcycle-plastic-for-paint/.
In sum, primer application for spray-painted motorcycle fairings is a disciplined sequence of clean, textured preparation; a targeted adhesion promoter; precise mixing of a 2K primer; and controlled, even spraying that respects the material’s quirks and the environment’s influence. When done correctly, the primer becomes a predictable, stable platform that supports the base coat’s color and clarity. The result is not simply a new paint job, but a durable finish that resists the rigors of wind, weather, and the road while maintaining a showroom gleam that turns heads rather than revealing flaws on closer inspection.
Foundation in Color: Mastering Base Coat Techniques for Durable Motorcycle Fairings

The base coat is not merely the color layer that sits on top of the primer; it is the foundation that determines how vividly a design will emerge, how evenly it will wear, and how true the final piece will feel to the eye when the ride catches the light. For anyone aiming at a professional outcome, base coat technique is where intention and precision meet.
It begins long before the spray gun touches the plastic. It starts with the mindset that every thin layer is a step toward depth, uniformity, and adhesion. In the clean air of a spray booth or a well ventilated workshop, the rider depends on a finish that will withstand sun, rain, and daily grit of the road. The dialogue between primer and top color hinges on patience, control, and a disciplined routine that respects the material under the fairings as much as the color chosen for the first layer of the finish.
The preparation reads like a careful recipe for adhesion and smoothness. It begins with the basics: a thorough cleaning with a degreaser to remove oils, wax, and any film that could weaken the bond. After the surface is pristine, light sanding with fine grit paper — typically around 800 to 1200 grit — helps expose a micro roughness that the base coat can bite into without creating ridges. The aim is not to sand away the color or to roughen the surface into a frayed texture but to create a bonding plane that invites the primer to do its job and the color layer to lay down evenly. A tack cloth then follows to lift any last specks of dust. The moment the surface shines with that static clean feel is the moment the base coat preparation truly begins to pay off, because the paint will respond to the next steps with fidelity rather than rebellion.
Primer sits between the plastics or composites of the fairings and the color. On modern fairings fashioned from ABS or polycarbonate, a high quality plastic specific primer is essential. The primer fills micro pores, seals the surface, and provides a uniform bed for the base color to rest upon. It also begins the wearproofing of the finish by helping resist moisture ingress and temperature shifts that could otherwise cause delamination. The primer layer must fully cure before any color is applied. In typical conditions, this cure time runs about three to four hours, though the exact window can shift with humidity and temperature. When the primer has set to a hard, dry state, the stage is set for the base coat to begin. Skipping or rushing this step invites trouble in the form of poorly adhered color, micro blistering, or uneven gloss later in the life of the finish.
With the primer properly cured, the base coat application becomes a science of patience and precision. The recommended technique calls for three to five thin, even coats rather than a couple of heavy layers. Thin coats reduce the likelihood of runs, sags, and settling that can cloud color depth. They also help preserve edge definition on complex fairing shapes, where heavier coats tend to pool in creases and around mounting points. The goal is color that sits true from edge to edge and from panel to panel. Between each coat, a drying period of roughly three hours is standard. This interval gives solvents a chance to evaporate and the solvents in the subsequent layer to reflow evenly, which minimizes the risk of solvent pop later in the cure cycle. The painter’s rhythm becomes a cadence: spray, pause, inspect, spray again, with a careful eye for errant dust or tiny hairs that can mar a layer once it has begun to set.
Color depth and uniformity emerge from this disciplined approach. The value of multiple thin coats is more than aesthetic; it is functional. Each pass adds a layer of pigment that blends with the previous coat, reducing the chance of uneven color absorption and allowing the final finish to read as a cohesive whole rather than a patchwork. The layering also improves cover, so a color that might appear translucent on a single heavy coat becomes rich and saturated after several even passes. Practically, one should validate color consistency as coats dry, using the light to reveal any sheen variation, dust specks, or micro imperfections that can be corrected in subsequent passes.
Environmental discipline matters as much as technique. The work area must be clean and dust free, ideally a dedicated spray booth or an area with controlled airflow. Even small particulates can embed in a fresh coat and become visible in the gloss after clear coats are applied. A stable climate helps layers dry consistently; high humidity and dustier environments demand extra precautions and sometimes extended cure times. The painter must also guard against temperature extremes that can cause rapid solvent evaporation, leading to film that blocks or wrinkles. All of this matters because a base coat that dries unevenly will compromise cut lines and color matching. When the base coat is complete and dried to a uniform, true color across all panels, it is customary to allow a brief post-application moment before moving to the next stage, often with a careful visual check in neutral light to confirm evenness and depth across complex shapes and angles.
Timing the transition from base coat to clear coat is a subtle art. The base coats must be allowed to cure for a period of 24 to 48 hours before applying a clear coat. This waiting period is not mere formality; it ensures that the color has properly set and that solvents have left the pigment matrix, reducing the risk of wrinkling or solvent entrapment under the final gloss. The clear coat then serves multiple purposes: it enhances gloss, provides UV protection, and adds an additional layer of protection against scratches and weathering. The clear coat also benefits from a separate set of controls, with a careful approach to temperature, humidity, and spray technique to preserve the integrity of the base color beneath. When the finish finally cures in full, often stretching to seven days or more for the complete hardness and resistance, the fairings emerge with a resilience that matches their function on the road and their aesthetic intent in a rider’s eye.
To ground this discussion in practical terms, consider the ongoing dialogue between coverage, color depth, and the practical realities of real world shapes. A fairing is rarely a flat plane; it has parallel curves, sharp creases, hollows, and vents that demand a painter’s aware handling of distance and motion. The 50 percent overlap guideline, the six to twelve inch distance, and the three hour rest periods are not arbitrary rules but tuned responses to those shapes. The same methods hold, whether the panel is broad and flat or deeply contoured. When applied with consistency, these techniques translate into a finished surface that looks uniform under showroom lighting yet remains forgiving enough to withstand the daily exposure of riding. The value of a methodical, repeatable process becomes clear: it minimizes surprises, reduces waste, and yields a result that aligns with the rider’s expectations of performance and appearance. For context on how these practices fit into broader fairing work, consider exploring the Honda fairings collection as a reference point for a range of shapes and materials that demand careful base coat handling, such as https://www.summitfairings.com/collections/honda-fairings.
As a final note, the base coat is a living step in the painting sequence, one that benefits from both disciplined technique and an understanding of the materials at hand. The aim is not only color but reliability—color that remains true under sun, color that wears well, and color that remains consistent across every panel and every angle of the motorcycle. Those who master this layer will find that subsequent steps—the clear coat, polishing, and polishing again—become more predictable, and the overall finish becomes a true testament to the care invested in the process. For readers seeking a complementary visual guide that broadens the practical reference, an external resource offers detailed demonstrations of base and clear coat layering in action, which can help translate these principles into more nuanced real world results: https://www.motorcycle-technology.com/how-to-paint-motorcycle-fairings-like-a-pro/
The Final Veil: How Clear Coats Elevate Painted Motorcycle Fairings
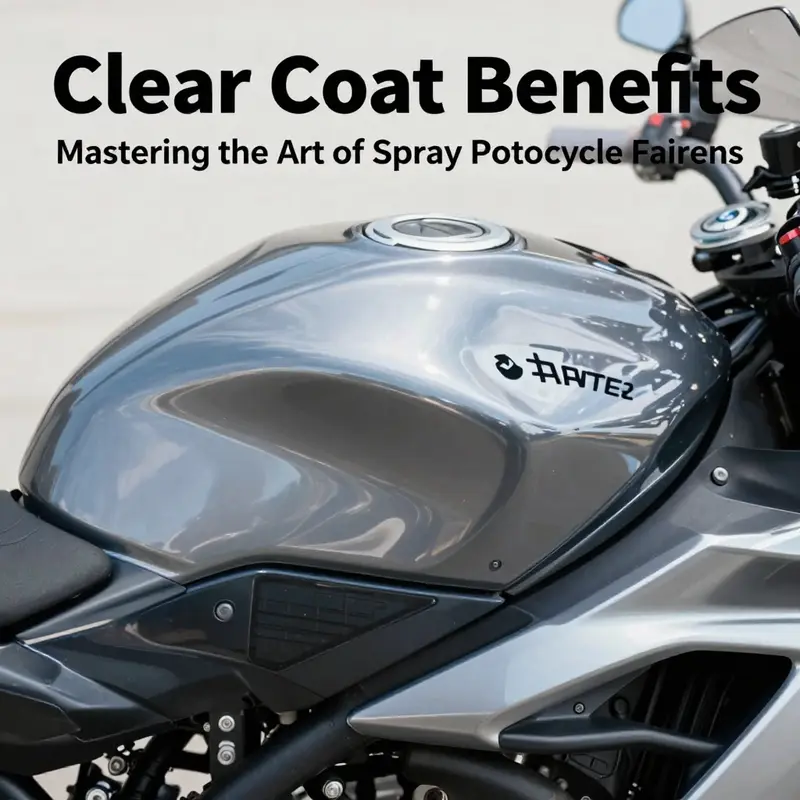
Clear coat acts as a durable protective layer and the final glaze that makes a base color come alive on sprayed motorcycle fairings. It creates depth, gloss, and resilience, turning a flat color into a living surface that responds to light, air, and weather. The clear layer seals pigment, smooths micro scratches, and forms a flexible film that can bend with the fairings as they flex under load. This is more than vanity; it is a pragmatic choice that determines how the paint holds up to riding realities such as sun exposure, road debris, and the occasional rain. The chemistry matters. Modern two component 2K clear coats cure to a cross linked network that yields hardness and improved chemical and abrasion resistance. Gloss is a measurable outcome of light interacting with a uniform, well adhered layer, creating a wet look that makes colors appear deeper. The same layer helps resist UV induced fading and color shift. Choosing a 2K clear coat is usually the right move for durability and performance, especially on plastic or composite fairings that benefit from a tough interlayer. These coatings cure to a hard yet slightly flexible film that accommodates thermal and mechanical stresses. Real world results show less yellowing, resistance to stone impact, and sustained gloss after long rides and track days. Application matters as much as the product. After the base has cured, typically 24 to 48 hours depending on conditions, apply the clear in multiple thin layers. Two to three coats build depth and protection without runs or sags. The goal is uniform coverage so light can pass through, bounce off the base colour, and return with clarity. Maintain proper ventilation, avoid moisture entrapment, and follow the recommended mixing ratios. Spray technique and distance influence the final finish by controlling orange peel and visibility of dust. Preparation and environment are critical. A clean, dust free workspace, steady temperature, and precise mixing lead to predictable curing and gloss. If contaminants or polishing marks exist on the primer, they will show through the clear coat as magnified flaws. The synergy between a flawless base and a pristine clear layer is what convinces observers that the finish belongs on a showroom bike or a race machine. Layer count and cure cycles influence depth and protection. Too few layers may look flat; too many can trap solvents and haze the finish. Allow proper dry times between coats and test the panel before full application. Real world testing indicates well cured clear coats maintain gloss through repeated wash cycles and UV exposure better than thinner coatings. Maintenance and refreshment follow the same logic. A light polish and a fresh clear layer can restore life to a worn finish, and a repaint or recoat can extend the life of the scheme. When selecting products, ensure compatibility with the primers and base paints used on ABS or polycarbonate fairings to avoid adhesion problems or solvent crazing. The best practice is to test on a small panel first. For those chasing long lasting gloss, 2K clears remain the standard, especially on plastics and composites that see flex and road abuse. If you are planning a color scheme, aim for a consistent clear across panels to preserve hue and gloss under different lights. Real world data shows well cured clear coats resist abrasion from washing and maintain their look across seasons. A durable clear coat also makes it easier to refresh by polishing and reapply clear when needed. In short, the clear coat is not just cosmetic; it is a critical part of protecting and presenting the paint job on any bike.
Cure, Brilliance, and Lifelong Care: The Lifecycle of Spray-Painted Motorcycle Fairings
Curing is the unseen step that follows paint. It determines how color sits, how tough the film becomes, and how well it resists weather and wear. In two-part (2K) clear coats, heat-assisted curing accelerates cross-linking, producing deeper gloss and a harder surface. Air-drying can work but often slows cure and leaves the finish softer in cooler or humid rooms. A controlled heat cycle in a booth or warmed room compresses the curing window and helps the film harden evenly.
Practical guidance: after painting, keep parts in a stable environment for 24 to 48 hours at room temperature without handling. Full cure typically completes in about seven days; in very cold or humid environments extend this timeline. Avoid hastening cure with improvised methods; stable heat and clean air matter more than speed.
Handling before full cure: even when surface feels dry, the film can be soft. Use soft gloves and padded surfaces when moving parts, and avoid placing them on edges or metal that could nick the finish. Patience here saves repairs later.
Ongoing maintenance: once cured, clean with mild soap and water, rinse, and dry with a soft microfiber. A urethane-friendly wax or sealant can add UV protection and gloss. Avoid harsh solvents and abrasive cleaners that can dull the finish. Protect from direct sun and environmental fallout, and inspect for micro-damage during storage to catch issues early.
For those considering aftermarket fairings, ensure compatibility with your bike and note that proper cure improves adhesion and longevity. A well-cured finish resists fading and maintains crisp edges through daily riding.
Final thoughts
Understanding the intricate steps involved in spray painting motorcycle fairings equips business owners with the knowledge to enhance their services significantly. From meticulous preparation to the final curing of the paint, each chapter of this guide emphasizes crucial techniques that lead to professional results. By applying these principles, not only can you deliver exceptional quality to your customers, but also foster long-term relationships built on trust and satisfaction. Investing in high-quality processes will reflect in your business’s reputation and profitability, ensuring that every motorcycle leaving your shop is not just a vehicle, but a masterpiece.