The 2008 Kawasaki Vulcan 1600 motorcycle stands out with its striking design and performance. For business owners in the motorcycle industry, understanding the various fairing options available for this model is essential for catering to customer demands. From exploring the types and features of fairings to evaluating aftermarket alternatives and installation procedures, this guide serves as a comprehensive resource. Each chapter unveils a critical dimension related to the Vulcan 1600 fairing, allowing business owners to make informed decisions that enhance product offerings and customer satisfaction.
The Batwing Shield: A Deep Dive into 2008 Vulcan 1600 Motorcycle Fairing Types and Features
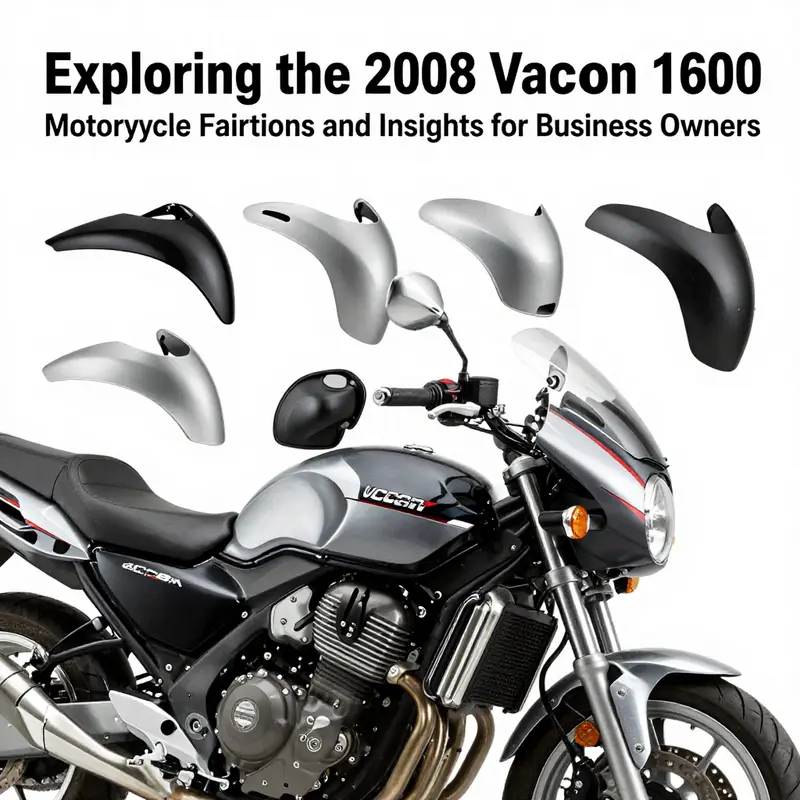
The 2008 Vulcan 1600 arrives in a way that invites a rider to experience cruising in a calm, composed arc of wind and road. Its Classic and Nomad variants carry a hallmark element that defines not just the silhouette but the whole riding experience: the batwing fairing. This design is more than a protective shell; it is a stylistic statement and a functional system rolled into one. The fairing wraps around the rider with a broad, curved windshield that anchors the bike’s presence while doing a serious job of managing wind at speed. In the saddle, the difference is palpable. The windshield’s curve and size are chosen to cut down wind pressure, reducing fatigue on longer trips and providing more stable steering feedback in crosswinds. The overall effect is a smoother ride, with less turbulence tugging at the rider’s upper body and hands, which translates into more comfortable hours spent behind the handlebars. The fairing, then, is the fusion of form and function that defines the era and style of these machines, a cradle that supports not only the rider’s comfort but the machine’s long-haul ambitions as a touring cruiser.
From a construction standpoint, fiberglass remains the material most commonly employed for OEM and aftermarket fairings of this era. Fiberglass offers a balance of rigidity, weather resistance, and workability that suits the demands of both stock components and aftermarket customization. It resists the elements—rain, sun, and road salt—well enough to maintain structural integrity over years of exposure. It also provides a forgiving surface for repairs or refinishing if a panel needs a touch-up after a low-speed incident or a color change to match a rider’s evolving taste. The durability of fiberglass aligns with the Vulcan’s long-run temperament: aimed at relaxed, confident cruising rather than extreme sport performance. While laminate and composite options exist in broader markets, the classic fairing used on the 2008 Vulcan 1600 leans into fiberglass for its predictable weight, ease of repair, and broad availability in the aftermarket ecosystem.
A distinctive and practical feature of the batwing fairing is the presence of speaker cutouts in many aftermarket configurations. For riders who want to add an audio layer to the ride, these openings—typically designed to accommodate standard 4×5.25 inch speaker footprints—offer a straightforward pathway for installing an on-marm audio setup. The idea is to blend convenience with an enhanced riding experience without resorting to intrusive, aftermarket mounting brackets that might compromise the fairing’s structure or aerodynamics. Even when a rider isn’t equipping speakers, the cutouts can streamline the internal routing of wiring and components, ensuring a cleaner installation that preserves the fairing’s lines and the bike’s overall aesthetic.
What makes the 2008 batwing fairing especially appealing is its compatibility footprint. These fairings were designed to be compatible not only with 2008 models but with a broader range of Vulcan 1600 configurations from 2002 through 2008, including the Classic and Nomad variants. That broader compatibility matters because it opens up a larger pool of potential replacement or upgrade parts for owners who maintain bikes that span a longer ownership timeline. It means a rider who discovers a fairing option mid-life can still find something that fits with minimal adaptation, reducing downtime and preserving the bike’s continued readiness for the road. Of course, compatibility is not purely about the shell. If a rider has painted or customized components, certain fork clamps may be required to ensure a proper fit, particularly for exposed fork setups. This nuance is essential because overlooking small mounting details can lead to fitment issues that would complicate installation or compromise the fairing’s performance at highway speeds. In practice, a careful fitment check—comparing mounting points with the bike’s fork assembly and confirming that the fairing can align with the fairing stays and headlamp hardware—helps ensure a clean, secure installation that preserves the riding experience rather than detracting from it.
The so-called aftermarket ecosystem around the Vulcan 1600 batwing is rich and varied, reflecting a rider community that values both the preserved classic look and the opportunity to upgrade. Complete batwing sets, side fairings, and radiator shrouds are commonly available, with finishes ranging from glossy black to more customized schemes. The stock look remains highly desirable for many riders who want a faithful reproduction of Kawasaki’s original styling, while others opt for painted or textured finishes that reflect personal taste or the bike’s overall color scheme. The available inventory typically spans both OEM-replacement parts and aftermarket alternatives, enabling someone restoring a higher-mileage bike to keep the look consistent with its original era or to refresh the bike with a more contemporary finish while preserving that beloved batwing silhouette. In this realm, buyers often rate listings for fitment and condition, and the descriptions tend to emphasize compatibility with Vulcan 1600 Classic and Nomad models across the 2002–2008 window, reinforcing the sense that these fairings are not merely cosmetic add-ons but integral components designed for a long relationship with the bike.
For riders who are navigating the landscape of upgrades, it’s helpful to think about the fairing as a modular system. The core shell provides wind protection and a defined aesthetic; the windscreen contributes to the cognitive sense of control at speed, and the speaker openings reflect a broader trend toward integrating rider comfort with multimedia options on the road. While the visual impact is clear—the batwing’s broad sweep visually anchors the bike—its functional footprint is equally important. The wind management is not just about bluffing the wind away from the rider; it’s about shaping the flow of air around the front of the bike so that the rider experiences less buffeting and more stable handling. The fairing, then, becomes a disciplined blend of aerodynamics, protection, and personal expression.
As with any major cosmetic or structural component, the choice of fairing should be guided by a careful appraisal of fitment, mounting requirements, and the rider’s long-term goals for the bike. Some fairings are designed to snap into place with a minimal set of brackets, while others require a more involved installation that may involve removing or reconfiguring parts of the bike’s front end. Depending on the year and the intended look—whether a stock replication or a bold, custom finish—the rider may need to consider hardware compatibility, including clamps that accommodate exposed fork setups or any additional bracing that helps maintain the fairing’s rigidity when riding at highway speeds. This is not merely about aesthetics; it’s about ensuring the fairing remains a stable, trustworthy part of the bike’s front-end architecture. When a rider considers a new fairing some years after the bike’s original production, the decision often comes down to a balance between preserving the bike’s heritage and embracing a fresh look that complements new paint or upgraded instrumentation.
Within this broader picture, the 2008 Vulcan 1600’s batwing fairing stands out as a defining feature. It is a design that does not merely shield; it frames the rider’s experience of the road. The windshield’s curvature, the shell’s breadth, and the overall mass of the fairing work together to deliver a sense of companionship on long-distance rides. The fairing’s presence on the bike is a signal that this is a cruiser built for comfort, capable of carrying a rider and their gear through miles of highway and backroads with a sense of calm assurance. It is, in short, a showcase of form following function without sacrificing the means to customize or upgrade as technologies and tastes evolve.
For riders who want to explore options further, a practical path is to peruse listings on major online marketplaces and catalogs that feature fairings for this model range. The key is to read fitment notes carefully and to verify that the product description aligns with the Vulcan 1600 Classic or Nomad years you own. A reliable description will typically reference compatibility with models from 2002 to 2008 and note whether the fairing includes a complete batwing assembly, side panels, or radiator shrouds, along with color options like black or other finishes. Buying decisions often hinge on the balance between price, condition, and the availability of mounting hardware and painted finishes that match the rider’s vision for the bike. Thoughtful buyers will also consider whether the fairing is designed for painted or unpainted forks and whether it requires any additional modifications to fit snugly and securely.
To broaden the sense of how these parts sit within the larger ecosystem of cruiser customization, it can be instructive to connect with a curated selection of cataloged fairings and related components that align with Kawasaki style lines. This helps maintain coherence with the bike’s inherent character while offering room for personalization. It also provides a sense of continuity with the bike’s lineage—how a 2008 model can be updated with modern conveniences without losing its classic voice. The batwing fairing, after all, is more than a protective shield; it is a narrative device that keeps the Vulcan’s identity intact as owners accumulate miles and stories along the road.
If you’re ready to explore the broader universe of fairings and related upgrades, a dedicated resource hub can offer insights into fitment, color options, and installation considerations. For context on related options and to see how different models approach fairing design across generations, you can visit a comprehensive collection of fairing categories that handles a wide range of motorcycles. This resource helps riders compare what a given fairing family can offer in terms of structural compatibility, wind protection, and aesthetic alignment with the bike’s lines. In doing so, it reinforces the sense that choosing a fairing is as much about shaping the rider’s experience as it is about shaping the bike’s exterior. As the discussion around fairings continues to evolve, the 2008 Vulcan 1600 batwing remains a touchstone—a reminder of a time when form and function aligned so elegantly that riders instinctively gravitated toward the silhouette that has become iconic in the cruiser segment.
For readers who want to see how these options translate into concrete choices, a direct starting point for exploring Kawasaki-associated fairing designs is the broader Kawasaki fairings catalog, which lays out the range of styles and configurations that have defined the brand over the years. This resource can help readers understand the spectrum—from faithful reproductions of original equipment to nuanced aftermarket revisions—that riders have used to tailor their bikes to personal preferences while preserving the bike’s vintage allure. The batwing fairing of the 2008 Vulcan 1600 thus sits at an intersection: it is both a protective element and a canvas for customization, inviting riders to invest in comfort, style, and a lasting connection with the road.
Internal link for further context on fairing families: Kawasaki fairings.
External reference for shopping options and listings: https://www.ebay.com/sch/i.html?_nkw=2008+Kawasaki+Vulcan+1600+Fairing
Wind as Sculptor: How Aftermarket Fairings Shape a 2008 Vulcan 1600
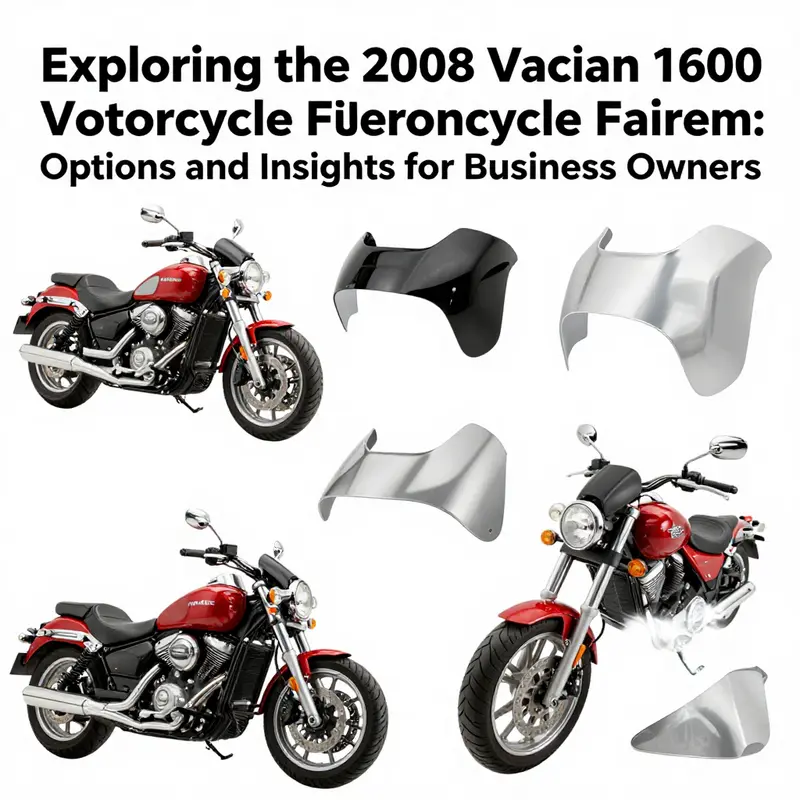
The 2008 Kawasaki Vulcan 1600 sits at a crossroads between classic cruiser form and modern, personal expression. Its stock silhouette emphasizes long, low lines and a calm, composed stance rather than aggressive wind deflection or eye-catching sculpting. Yet the world of aftermarket fairings offers a different set of possibilities, where wind becomes an ally rather than a resistance, and style becomes an honest extension of the rider’s taste. In this chapter, we wander through the landscape of aftermarket options for the Vulcan 1600, moving beyond mere aesthetic upgrades to consider how the right fairing can alter aerodynamics, protection, and the bike’s overall personality. The premise is simple but powerful: a fairing is not just a shell but a tool that can change how a machine feels and behaves on the road, season after season, mile after mile. The fairing choices of 2008 models and their successors share a common logic—compatibility, customization, and a path to personalize the ride while preserving the bike’s timeless cruising character.
In the archetype of cruiser design, a fairing’s first job is wind management. The Vulcan 1600, with its substantial mass and a rider seated in a relaxed, upright posture, benefits from a thoughtfully shaped shield that reduces fatigue on long highway stints. A well-chosen fairing can turn a crosswind from a nuisance into a manageable, predictable force, guiding air smoothly around the rider’s chest and arms. The material choice matters too. Fiberglass remains a popular option in the aftermarket because it balances strength with relative lightness and ease of fabrication. The result is a fairing that can be shaped to harmonize with the bike’s lines without overburdening the chassis with weight. For riders who crave a blend of protection and visibility, fiberglass batwing or contoured designs provide not only a windscreen function but also a visual anchor—an elegant silhouette that communicates a rider’s intent: to ride with confidence, to carve a personal space out of the open road.
Where the discussion often starts is with batwing-style fairings. The batwing concept—broad, sweeping curves that extend out toward the shoulders and wrap slightly around the upper arms—has a long association with cruisers because it offers substantial wind deflection while keeping the rider’s line of sight clear. On a 2008 Vulcan 1600, a fiberglass batwing can be tuned to sit flush with the existing mounting points, preserving the bike’s proportions while delivering more air control. The design language of this style is inherently at home on a bike that values a calm, cruising demeanor; it looks deliberate rather than aggressive, yet it communicates a willingness to explore larger highways with a secure silhouette. Some configurations even incorporate integrated spaces for audio equipment, a feature that opens up practical opportunities for riders who want to enrich the ride with sound without sacrificing the shield’s integrity. The balance here is delicate: more mass and a larger footprint can alter steering feel if the mounting hardware and weight distribution aren’t matched to the frame. A thoughtful installation respects the existing geometry and, where necessary, adds bracing or precision-fit brackets to maintain rigidity under load and vibration.
Beyond the batwing, complete fairing kits offer a more radical re-think of the bike’s face. For riders seeking a full transformation, these kits replace or overlay significant portions of the bike’s front and midsection, creating a coherent, cohesive look that can range from vintage-inspired to distinctly modern. The value proposition of a full kit lies not only in aesthetics but also in the potential for improved aerodynamics. When a kit is designed with attention to the Vulcan’s rake and chassis, it can streamline airflow around the engine and rider’s silhouette, reducing drag and giving the bike a more planted feel at higher speeds. It’s essential to recognize, though, that such a change alters the bike’s interfacing with the road. The added surface area increases wind resistance in some directions and, if not balanced by weight distribution and mounting rigidity, can alter steering response or feel at the handlebar. Properly chosen, a complete kit becomes a single, coherent statement—an exterior revision that respects the bike’s core proportions while elevating its cruising personality. The practical side of this option includes the ability to upgrade with clean lines and a painted finish that matches or accentuates the bike’s color scheme, making the exterior feel like a seamless extension of the rider’s intent.
For riders who prefer subtler interventions, side fairing battery cover guards and related components offer a more modest, yet highly functional, upgrade path. These pieces protect vital components—batteries, wiring, and electronics—without committing to a full fairing change. Available in left and right configurations for models around the 2003–2008 VN1600 Classic range, these guards help prevent cosmetic and functional damage from road debris, tips, and light collisions while contributing to a cleaner, updated look. The aesthetic payoff can be surprisingly strong. A pair of guards that mirrors the bike’s lines can reinforce a contemporary edge, particularly when paired with a carefully chosen color that ties into the fuel tank, fenders, and seats. The understated option allows riders to preserve the motorcycle’s classic silhouette while still benefiting from modern protective features, a pragmatic compromise for those who value originality as much as protection.
Alongside these external components, the fairing ecosystem includes replacement parts and smaller upgrades that keep the bike’s original ergonomics and style intact. Fuel tank caps, console trims, and other fascia pieces become available to match or refresh the bike’s exhibit of chrome, plastics, or painted surfaces. The appeal of these parts lies not in transformation but in tidying and refining. A well-chosen trim or cap can correct minor blemishes that accumulate with years of use, restoring a sense of newness without changing the bike’s essential character. For many Vulcan owners, that blend of restoration and enhancement is the sweet spot: a bike that looks fresh, rides confidently, and carries the rider’s sense of history with it.
The practical journey from concept to installation is where ride quality and satisfaction crystallize. Fitment is the critical variable. A fairing designed for a different year or a closely related model can certainly be adapted, but the most reliable path comes from choosing options that explicitly state compatibility with the Vulcan 1600 Nomad or Classic, including years around the 2008 model. This emphasis on correct fitment helps ensure that mounting points align, that the screen height yields the intended wind protection without lifting the rider’s line of sight, and that the fairing’s lower edges sit neatly above the engine’s side contours. When a buyer approaches these upgrades with a clear sense of the vehicle’s geometry, the result is a more predictable, confident riding experience. The process rewards patience: check the mounting hardware, verify the alignment of edges with the tank paint line, and anticipate the need for minor drilling or bracket adjustments only in cases where a kit requires it. With attention to detail, installation becomes a satisfying project that yields a visible and tangible upgrade in personal riding comfort and road presence.
A note on marketplaces and sourcing emerges as riders consider what’s available. Online marketplaces and specialty shops dominate the distribution channels for these parts, and many sellers emphasize fitment guarantees to simplify the purchasing decision. The emphasis here should be not merely on price but on fit and finish. Buyers should seek sellers who provide detailed diagrams or photos showing how the fairing lines up with the Vulcan’s chassis points, how lighting or audio cutouts align with the rider’s cockpit layout, and how paint-matching is handled for a seamless appearance. A careful approach reduces the risk of a mismatch that could require returns, refinishing, or even loss of mounting integrity. As a practical strategy, begin with a clear idea of your preferred balance between protection, wind management, and visibility, then compare kit options against the bike’s existing geometry and riding posture. The result is a personalized, well-integrated upgrade that respects the Vulcan’s cruiser heritage while embracing the rider’s evolving taste for form and function.
For readers who want to dig deeper into options that specifically fit Kawasaki cruisers, a curated Kawasaki fairings collection online demonstrates how parts are categorized and presented for compatibility with different models, including the Vulcan line. This resource helps translate the idea of fitment guarantees into a tangible shopping plan, guiding you toward choices that align with your bike’s year and config. A practical takeaway from this exploration is that the right fairing is less about chasing the newest look and more about achieving a cohesive relationship between the rider, the machine, and the open road. When the pieces align—fit, finish, and function—the Vulcan 1600 becomes not only a motorcycle but a platform for personal storytelling on two wheels. The journey from stock to screen and shell is as much about the riding experience as it is about the aesthetic of the machine.
As you map your path through aftermarket fairing options, the central question you should ask is how a new shell will interact with your typical rides: the long stretches with a strong headwind, the back-road twist, or the urban commute that demands both shelter and access to controls. A batwing-style fairing with integrated cutouts, a complete kit that redefines the front aspect, or modest guards that protect the battery and wiring—all of these choices contribute to a more expressive, capable, and confident Vulcan 1600. The best approach is to view the upgrade as a dialogue between the bike’s original design and the rider’s evolving needs. The result is a machine that remains unmistakably Vulcan in its spirit while wearing a new face that reflects your personal journey along the miles ahead.
For an interior sense of how these parts are organized and presented for Kawasaki cruisers, you can explore the Kawasaki fairings collection, which offers a practical sense of what categories and fitments exist for these machines. This resource helps you envision the spectrum—from subtle, protection-focused guards to dramatic, full-face reimaginings—and anchors your decision in the geometry and history of the Vulcan 1600.
External resource: https://www.amazon.com/Vector-Batwing-Fairings-Compatible-Kawasaki/dp/B07VZJQ9WY
Wind, Fit, and Finish: Mastering the Installation and Care of the 2008 Vulcan 1600 Fairing
The fairing on a 2008 Kawasaki Vulcan 1600 is more than a styling cue. It functions as a streamlined shield against wind blast, a weather barrier that protects rider and controls from the elements, and a chassis element that shapes the bike’s character. For a cruiser of substantial presence like the Vulcan 1600, the fairing’s silhouette can redefine every riding experience—quieting the wind at highway speeds, guiding airflow around the engine, and framing the rider in a look that blends classic lines with modern clarity. When you decide to install or refresh a fairing on this model, you are synchronizing several layers of the machine: the metal backbone, the plastic or composite skin, the electrical loom that powers lights and audio, and the rider’s own sense of control. The 2008 model year presents a particular set of mounting points and tolerances that diligent hands can honor to achieve a seamless integration. The process, while technical, rewards patience with a finished result that feels OEM in fit and as purposeful as the bike’s own Kansas wind and highway horizons. The careful observer will notice that a well-fitted fairing doesn’t merely sit on the frame; it aligns with the rider’s posture, mirrors, and headlights, so the whole machine reads as a single instrument rather than a collection of components bolted together. In this light, the installation becomes a performance task as much as a cosmetic one, and maintenance emerges as an ongoing discipline that preserves the fairing’s function and its visual statement over time.
Preparation is the quiet engine behind every successful installation. Before lifting a new front cowl, side panels, or rear section into position, gather the essential tools and consult the model-specific guidelines that accompany the fairing kit. A basic suite typically includes a set of metric wrenches, screwdrivers, and a torque wrench to honor the precise clamping force the manufacturer intends. It is wise to have a soft cloth and mild soap for a gentle surface pre-clean, along with a mild wax or polymer sealant to protect the finish after installation. The Vulcan 1600’s service manual, or a reputable aftermarket guide tailored to its era, will provide the torque specifications and sequence that keep the fairing from warping or stressing the plastic. Those details matter: overtightening can pinch mounting points, while under-tightening invites looseness that harms alignment and exhausts the rider’s confidence in the bike’s wind envelope. Safety starts at a disconnected battery, which is a prudent precaution if the electrical harness or headlights run through the fairing assembly. In the broader sense, the preparation step is about quieting potential variables—the mounting points must be clean, free of grit or corrosion, and free of any broken clips that could let the fairing breathe unevenly under load. A clean start makes the subsequent steps more forgiving and more predictable.
The removal of an existing fairing, if you’re replacing rather than upgrading, is a revealing diagnostic in itself. A careful rider will first ensure the battery is disconnected to preclude an inadvertent short when the skin of the bike is opened. The old components come away with a precise choreography: loose panels first, then the sub-assemblies that connect to the main frame and to the electrical harness. During this stage, it helps to label or photograph fastener positions and to note any incompatibilities introduced by prior repairs or aftermarket modifications. Sometimes, mounting hardware from an older kit won’t perfectly match a newer one; in those cases, you will need to source the correct screws, spacers, and clips that align with the Vulcan’s chassis geometry. The moment you start to reassemble, the aim shifts from removal to reassembly with a new sense of intent. Preparing mounting points becomes an act of craftsmanship: you wipe away debris, check for cracks in the mounting bosses, and ensure that each point presents a true, flat interface for the new panels. If the new fairing employs foam padding or an adhesive layer for vibration dampening, it should be placed with care so that it cushions the fairing without creating interference with the fuel vents, the steering head, or the instrument cluster.
Installing the new fairing requires a measured approach to seating each part in its intended position. The front cowl tends to anchor the visual and aerodynamic focus of the assembly, while the side panels frame the engine and frame geometry. The rear section completes the silhouette and can influence luggage compatibility or seat-tail alignment. Each component—front, sides, and rear—should be guided along its attachment points with a gentle, progressive seating that avoids forcing the piece into misalignment. Fasteners are tightened in a deliberate sequence, often following a crisscross pattern that helps distribute clamping forces evenly. Where clips or quick-release fasteners are used, you should ensure they engage with a light, audible click that confirms proper seating. The torque values you apply matter, and you should adhere to the spec to preserve the plastic’s long-term resilience. It is here that alignment becomes more than a feeling; you want to verify that the fairing does not bind the handlebars, obstruct the mirrors, or cast uneven shadows on the lights. A misalignment in one area can propagate tension, altering the bike’s aerodynamics and diminishing rider comfort. During this phase, it is useful to step back from the bike, view it from multiple angles, and test the clearance of the fairing against the tire sidewalls when the front wheel is purposely turned to its limit. Any contact indicates the need for tiny tweaks, often in the form of repositioning a clip, adjusting a spacer, or re-seating a panel with a slightly different alignment. The end goal is a cohesive assembly whose lines are symmetrical and whose fit is clean to the eye and reassuring to the hand.
Once the fairing is in place, the final checks become a welcome ritual of reassurance. You inspect every connection point for proper alignment and verify that every screw, bolt, and clip sits in its intended groove without forcing a fit. It is crucial to confirm that the wiring harness remains routed clear of moving parts, and that the headlights, turn signals, and any audio or accessory cutouts do not interfere with mirror angles or the reach of the handlebars. A practical, but sometimes overlooked, detail is the condition of the under-fairing surfaces and mounting bosses. Clean surfaces reduce the risk of corrosion and ensure the fasteners bite cleanly into the intended material. A light wipe with a wax or polymer sealant after assembly helps preserve the finish and creates a gentle barrier against road salt, UV exposure, and abrasion from wind-driven debris. Regular checks are essential—after long highway stints, after riding through heavy rain, or in the wake of a minor tip or brush with an object. If you observe hairline cracks, cracking around mounting holes, or looseness that reappears shortly after re-tightening, the issue may require a plastic repair technique or professional refinishing. In practice, the most satisfying maintenance is proactive: a schedule of periodic inspections, a routine for gentle cleaning, and a simple, honest appraisal of the panel’s integrity after every major ride.
Maintenance, in particular, is not merely cosmetic or reactive. Regular cleaning of the fairing with mild soap and water is a reliable habit that keeps grime from embedding in seams and fasteners. Harsh chemicals or abrasive cleaners should be avoided because they can dull the surface finish and, over time, erode the protective layer that keeps UV damage at bay. After cleaning, a light application of a quality wax or polymer sealant adds a sacrificial layer that resists road grime, water, and UV rays. It also makes future cleaning easier by ensuring dirt sheds rather than adheres. Periodic inspections should become part of the routine of every Vulcan rider who wants the fairing to retain its pristine look and its structural integrity. Check for cracks in the panels, warping from heat exposure, or any loosening of the mounting hardware—especially after extreme weather, off-road excursions, or a minor impact that would not necessarily shift the bike’s geometry but could loosen hidden fasteners. In cases of damage, plastic welding kits or refinishing services may be called upon to restore the panel’s strength and smoothness. A well-maintained fairing not only preserves the bike’s aesthetic but also contributes to predictable aerodynamics, reducing buffeting and maintaining the rider’s confidence on a long, straight stretch or through a winding backroad.
For riders who want to expand their knowledge beyond basic care, reliable, model-specific guidance is invaluable. The official service manual remains the gold standard for precise torque specs and sequence guidance, but aftermarket resources can also illuminate the process with diagrams and troubleshooting tips tailored to the Vulcan 1600’s fairing system. A respected reference that covers fairing removal, installation, and troubleshooting procedures is the Haynes Motorcycle Repair Manual for the Honda V45 and Vulcan 1600 series, which, while oriented toward a closely related family, reinforces general principles that apply to captive plastics, vibration management, and panel alignment across the Vulcan line. When consulting such materials, treat them as a complementary map rather than a substitute for the model-specific manual, and always cross-check torque values and sequence with the official documentation for the 2008 Vulcan 1600 to avoid mismatches.
In the spirit of shared knowledge, it is also useful to consider where to source compatible parts when the time comes to upgrade or replace. The landscape of aftermarket fairings presents a broad spectrum of choices, including front cowl options, side panels, and rear sections that are designed to fit the Vulcan 1600 lineage. When you search for a replacement or upgrade, you’ll find options that span classic Batwing styles to more streamlined silhouettes. If you are chasing a faithful aesthetic that honors the bike’s retro-modern vibe, you can often find assemblies that maintain proper wind protection while aligning with the model’s geometry. As you explore, keep in mind the importance of fit guarantee and return policies, because a fairing that does not align cleanly can undermine both the bike’s performance and its safety. It is worth noting that reputable sellers frequently offer fit guarantees for the 2008 Vulcan 1600, which can give you confidence when selecting a kit that promises an exact match.
For riders seeking a clear path through the options, a practical step is to start with a recognized catalog of Kawasaki-compatible fairings from a trusted supplier. This approach helps ensure you are choosing parts designed to meet the Vulcan 1600’s mounting points and electrical routing. One navigable starting point is the Kawasaki fairings collection, which compiles a range of panels and supports that can simplify the decision-making process and reduce the guesswork involved in a retrofit project. By aligning your choice with the bike’s frame geometry and electrical harness routing, you minimize the steps needed to achieve a clean, true-fit installation. This alignment matters not only for aesthetics but also for handling, an essential aspect of a rider’s confidence when diving into a long ride or a challenging road profile. After installation, a short test ride that includes a few miles of highway cruising and a quick examination of the mirrors and lights confirms that the fairing has integrated into the bike’s dynamic system rather than competing with it.
If you want to dive deeper into hands-on guidance or verify part compatibility, you can explore the Kawasaki fairings catalog or related resources that compile model-specific fitment notes. The key is to approach the installation as a cohesive project rather than a sequence of isolated tasks. When you do, you’ll discover that a well-fitted fairing on the 2008 Vulcan 1600 enhances not only the rider’s comfort but also the bike’s stance and presence—an instrument that balances wind management, protection, and aesthetics in a way that mirrors the road’s rhythm. For those who want to augment their understanding with additional visuals and step-by-step diagrams, reliable sources that map the fit and alignment principles to the Vulcan 1600’s geometry can provide a practical complement to the written instructions. External resources and manufacturer guides reinforce the best practices and help ensure that every bolt is snug and every seam sits flush, so the fairing remains as steady after a rain shower as it is after a long highway run.
Internal link for further exploration: Kawasaki fairings
External reference: https://www.haynes.com/us/en/automotive/motorcycle-repair-manuals/honda-v45-vulcan-1600-series-2007-2011-repair-manual
Winds of Definition: Situating the 2008 Vulcan 1600 Batwing Fairing Within Kawasaki’s Lineup

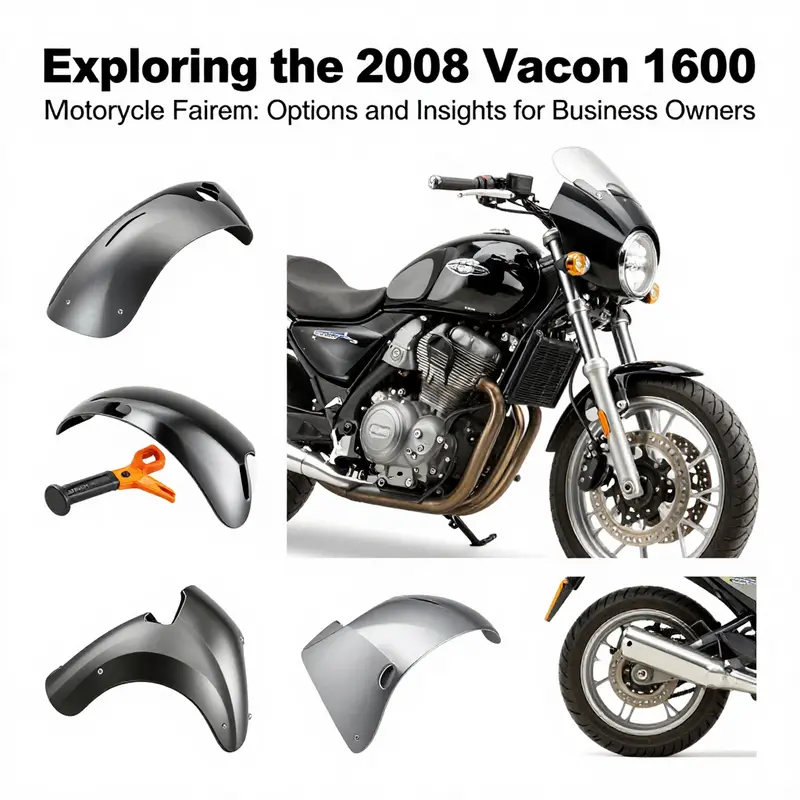
The 2008 Vulcan 1600, positioned between the Nomad and Classic trims, marks a pivotal point in Kawasaki’s cruiser lineup. Its batwing fairing is a defining visual and functional element, shaping the bike’s silhouette and front-end character. More than a windscreen, the fairing establishes a design language that conveys confidence and purpose at highway speeds.
The fairing’s broad geometry improves wind protection and reduces helmet buffeting, contributing to a more composed ride across long stretches. Its scale also gives the bike a commanding street presence, signaling touring intent while retaining cruiser proportions. For many riders, that balance of protection and style helps define the model’s personality.
Context within Kawasaki’s lineup shows that the Nomad and Classic variants share mounting points and cockpit geometry, making fitment and accessory compatibility important considerations. The 2008 batwing is intentionally calibrated to work with both trims, offering a stable front-end feel and clean integration with the bike’s chassis. Whether used with OEM-style fairings or aftermarket shells, the 2008 batwing emphasizes a unified look and reliable performance.
From an owner’s perspective, the fairing is easier to upgrade and customize than earlier, smaller designs. Aftermarket speakers, weatherproof wiring, and reinforced fiberglass shells are common upgrades, while OEM-inspired fairings preserve the factory silhouette. In short, the batwing is not merely a cosmetic feature but a central design element that informs wind management, ergonomics, and the bike’s touring ethos.
For readers exploring broader Kawasaki options, the 2008 fairing sits alongside a family of fairings that share mounting philosophies and proportional cues. This context helps explain why fitment checks and model-year specifics matter when sourcing replacements or upgrades.
Final thoughts
In essence, the 2008 Vulcan 1600 motorcycle fairing offers a blend of aesthetic appeal and performance enhancement. For business owners, understanding the types, aftermarket options, and installation processes is crucial for providing value to customers. By staying informed about the features and comparing fairings with other models, you can better cater to your audience’s needs, driving sales and enhancing customer satisfaction. The right fairing can elevate not only the motorcycle’s look but also its functionality, making investment in quality fairings essential.