Applying decals to motorcycle fairings is not just a task; it’s an art that can enhance your brand image and appeal to your customers. As business owners, understanding the nuances of decal application can significantly impact the quality of your service and the satisfaction of your clientele. This guide outlines essential preparation steps, techniques for achieving a bubble-free finish, best practices for maintaining decals, and troubleshooting common challenges in decal application. By following this holistic approach, you can ensure professional results that stand the test of time, thus boosting your business credibility and customer loyalty.
Laying the Groundwork: Essential Prep for Flawless Decals on Motorcycle Fairings

The art of applying decals to motorcycle fairings begins long before the first piece of vinyl touches the surface. Preparation is the main act, and a clean, dry, and even substrate sets the stage for a bubble-free finish. Begin with surface cleanliness: dirt, grease, wax, and silicone residues hinder adhesion. Use a mild soap solution or dedicated automotive cleaner, scrub gently, and dry thoroughly. Inspect the fairing for imperfections; minor scratches can be addressed with light buffing, while deeper damage should be repaired before decals are applied, followed by a fresh cleaning to remove buffing residues. Create a dust-free environment by minimizing air flow and debris in the workspace. Temperature and humidity matter: aim for a stable room temperature and moderate humidity to keep the surface predictable. For curved surfaces, the wet method is the most forgiving: mist the surface lightly with soapy water to create a lubricating film that allows repositioning. Align by eye, then press from the center outward with a soft tool, working small areas at a time. Remove water and air gradually with smooth, deliberate strokes, keeping the film centered as you go. Allow the material to settle before final adhesion. Finally, treat decals as a craft: the preparation discipline is what makes a professional finish. A well-prepared surface, environment, and mindset define the quality you can achieve, and the steps you take here will influence every panel you work on. If you need broader context, consider related sections on fairing configurations and installation techniques to see how different shapes influence decal behavior.
Wet-Method Decaling: Bubble-Free Graphics for Motorcycle Fairings

Decals on motorcycle fairings are more than decoration. They are a careful craft that demands clean surfaces, patience, and a method that minimizes air pockets. The wet method uses a light spray of soapy water beneath the decal and on its backing, allowing repositioning until the moment of final squeegee pressure. The surface should be clean, dry, and free of wax or oils. Use isopropyl alcohol to ensure a residue-free finish. Work in a dust-free environment with moderate warmth. Begin by laying the decal on a slightly wet surface, align it along edges and contours, then press from the center outward using a soft cloth or squeegee to expel water and air. If bubbles appear, puncture with a fine needle and guide the air to the edge. Allow the adhesive to cure for 24 to 48 hours, avoiding direct sun or hot jets of water during the initial period. For long-term durability, consider a clear laminate after full cure, and avoid harsh solvents during maintenance. The result should read as an integral part of the fairing rather than a separate sticker.
null

null
Flawless Adhesion: Mastering Decal Application on Motorcycle Fairings for a Bubble-Free, Durable Finish
Applying decals to motorcycle fairings is more than a cosmetic choice; it is a craft that blends preparation, technique, and patience to achieve a finish that looks as durable as it performs on the road. Personalization through decals can transform an otherwise uniform shell into a statement of style, but the process demands a careful sequence of steps that protect the surface and honor the material. The surface you choose to adorn becomes the canvas for color, texture, and the rider’s identity, yet it also represents a delicate frontier where a small misstep can translate into visible flaws. The journey to a flawless application begins long before the decal meets the fairing. It begins with surface readiness, the quiet discipline of cleanliness, and the discipline to create an environment that supports precision over speed. The fairing deserves a clean slate, free of oils, wax, dust, and stray lint. A dedicated automotive cleaner or a gentle soap-and-water wash can remove the initial layers of grime that would otherwise sabotage adhesion. After washing, allowing the surface to dry completely is not a casual step; it is the foundation that determines whether subsequent layers will cling or peel at the first exposure to heat or moisture. When the fairing is dry, the path toward a smooth, even bond becomes possible, not guaranteed. The fact that it is possible does not make it effortless, but it does make it repeatable when the process is adhered to with attention to detail.
The wet method, widely recommended by professionals, introduces a thin lubricating film that gives you precious latitude. Lightly mist both the decal backing and the fairing surface with a mixture of water and a few drops of dish soap. The water film serves as a mediator, allowing you to reposition the decal without dragging or tearing. It reduces the friction that would otherwise bind the vinyl to a single position and makes alignment adjustments possible without damaging the print or stretching the material. This refers not only to the center alignment of the decal, but to those tricky curves and edges that often invite trouble. When you place the decal, do not rush the process. Take a breath and position it with the care you would give to a fine craft piece. Once in place, the work shifts from placement to precision: the removal of trapped water and air bubbles becomes the next crucial phase. A squeegee is a common tool, but a soft cloth or the edge of a clean finger can work just as well if used gently. Begin at the center and push outward toward the edges. The center-out technique helps evacuate air pockets before they can balloon into visible bubbles. For larger decals, consider applying them in segments. This approach preserves control, especially on complex shapes where the fairing curves tighten or the surface angle changes abruptly.
Curves pose a deceptively tricky challenge. The fairing’s geometry—whether it slopes, arches, or wraps around edges—exerts a constant influence on how the vinyl behaves. Where the decal must bend along a contour, it will tend to resist if forced. The solution is to work slowly and selectively, using your fingers to coax the vinyl into the contour while maintaining tension that prevents warping. A gentle, patient hand is more valuable than brute force here. The goal is a uniform lay, without wrinkles or creases that can trap moisture or create weak points. If a wrinkle appears, lift the decal slightly from the affected area and re-smooth, allowing air and water to escape before reclosing the surface. It is this dynamic between restraint and flexibility—the restraint to avoid tearing and the flexibility to mold to the shape—that differentiates a good application from a professional job.
The environment in which you work matters as much as the technique itself. Plan the job in a clean, dust-free room with a comfortable, moderate temperature. Excess heat can cause the adhesive to set too quickly, curtailing your ability to reposition and potentially creating premature adhesion that traps air or moisture beneath the surface. Direct sunlight is to be avoided, not merely for comfort but because heat can lead to rapid drying. When the decal dries too fast, it becomes stiff and brittle, making micro-wrinkles more likely and reducing the decal’s ability to settle evenly. Once the decal is in place, the removal of the wet film continues as you work toward a completed lay. After you have pressed out the water and air, let gravity do its part and resist the urge to disturb the scene. Allow the decal to dry undisturbed in a cool, shaded environment, ideally for a full 24 to 48 hours before exposing the vehicle to serving conditions or the washing action of the elements. Rushing this phase is a common source of trouble, and a small amount of foresight here can spare you days of regret later.
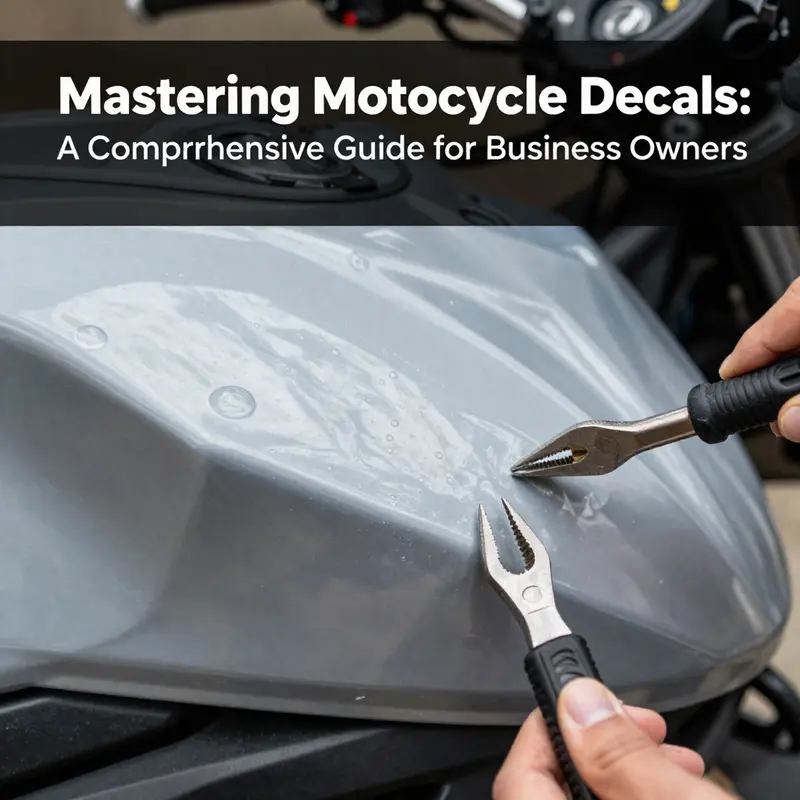
Despite the best preparations, challenges can still arise. Bubbling is the most common symptom of an imperfect lay. It occurs when air becomes trapped between the decal and the fairing. The cure is prevention—proper alignment, sufficient smoothing, and patient application during the initial lay. If a bubble appears after the fact, you can often address it by lifting the edge of the decal gently at the bubble’s center, releasing the trapped air, and re-smoothing from the center outward. Peeling is a more daunting problem and typically signals insufficient adhesion. This can occur in areas of high exposure, such as the front fairing or side panels, where heat and wind acceleration intensify the stresses on the vinyl. It is a reminder that surface preparation was not just a precursor but a continuing commitment. If you notice signs of peeling, re-check the surface cleanliness and dryness, consider re-laying the decal, and, if needed, apply a small amount of additional adhesive promoter if the vinyl you are using supports it (and you have tested it in an inconspicuous area). Ghosting—where a faint outline lingers after removal or over time—is often linked to degraded vinyl and UV exposure. To mitigate ghosting, choose high-quality vinyl designed for outdoor and automotive use with UV resistance. The resin and ink system must endure sunlight and temperature swings; a cheaper option may provide initial brightness but fade and ghost under the sun’s long watch. This is not merely an aesthetic concern; ghosting is a proxy for the material’s long-term durability and signifies a risk that the decal will not perform as intended over seasons of riding.
If the decal has a chance to perform as intended over the long term, the route to resilience lies in a careful selection of materials and a disciplined approach to application. The choice of vinyl matters. A higher-quality, UV-resistant vinyl that is explicitly designed for outdoor use tends to hold up better against the sun, rain, and heat of the open road. Cheaper options frequently suffer from premature peeling or fading, and the ghosting effect becomes more pronounced after a year or two of exposure. Material choice must be paired with clean, consistent application conditions; even the most robust vinyl cannot compensate for a poor substrate or a compromised surface. This synergy between substrate and material is at the heart of a durable finish. In many cases, riders discover that the extra cost of premium vinyl translates into more uptime riding and less downtime during maintenance, a trade-off that is worth considering when planning a long-term customization project.
A note on the scale of the work: you should approach large decals by breaking the task into manageable sections. The same principle applies when working around complex fairing shapes. By anchoring the decal from the center and moving outward in measured strokes, you can maintain tension along the entire surface and avoid the pull that creates edges or curling at the perimeter. This method also helps when you encounter a corner or a sharp bend. The center-out approach encourages the vinyl to meet those transitions gradually, with fewer opportunities for wrinkling or misalignment to take hold.
The chapter of your ride’s life that involves decals is not merely a one-off event; it is an ongoing conversation between the rider, the art, and the machine. After the decal has dried, you may discover small imperfections that were not visible during application. The decision to address them depends on your standards for finish and the decal’s intended use. A bubble caught near a bend might be still recoverable with a careful lift and re-smoothing, while a stubborn wrinkle may require a more meticulous re-lay in a controlled setting. In high-stakes areas, such as the front fairing where impact and heat are common, you may consider reapplication or reinforcement. If you plan to ride in diverse climates, leave room for seasonal checks that may reveal issues not evident during the initial install. The temptation to micro-manage every minute detail should be balanced with the practicalities of road use; the aim is a finish that looks intentional and resilient rather than perfect in a single moment and fragile under pressure.
To weave all these considerations into a seamless practice, a few guiding questions can sharpen your approach. What is the fairing’s current level of cleanliness, and have you confirmed it is completely dry? Is the work area truly dust-free, and is the lighting sufficient to reveal subtle imperfections? Have you allowed enough time for the decal to cure before riding? Do you have the right tools—soft cloths, a proper squeegee, and a measuring implement for alignment? The answers to these questions can transform the decal process from a set of instructions into a disciplined routine that consistently yields a bubble-free, durable finish. The discipline extends to the choice of environment: a cool, shaded space not only protects the integrity of the adhesive but also reduces the risk of heat-induced problems during the cure period. The rider’s patience becomes an underrated virtue, one that preserves the aesthetic and the structural performance of the decal in the long run.
For readers seeking practical, model-specific contexts, a curated catalog of fairings can be a useful companion. If you are scouting compatible panels for a particular model or trim, a broader collection of fairing options can illuminate which shapes and contours your decals will encounter. For example, the Honda fairings collection provides a variety of shapes that illustrate common curves and angles you may face when applying decals. Looking through a catalog like this can help you anticipate challenges and plan your technique accordingly, even if your own project uses a different brand. This kind of research—matching decal technique to the geometry of the surface—helps you develop a mental map of the work before you touch the vinyl. As you grow more confident, you’ll notice that the smallest decisions—the rate of pressure, the angle of your squeegee, the sequence of smoothing—accumulate into a finish that feels precise and intentional rather than improvised.
In conclusion, the path to a successful decal application on motorcycle fairings is a blend of careful preparation, controlled technique, and materials that can withstand the test of time. It is a practice that rewards patience, attention to detail, and a willingness to learn from mistakes. The wet method provides a forgiving framework that invites experimentation with position and alignment, while the center-out smoothing technique helps maintain even tension and reduce the risk of air pockets. The environment matters as much as the hand that wields the squeegee and the surface it glides upon. When these elements align, what emerges is a finish that adheres with confidence, remains durable through sun and rain, and speaks to the rider’s commitment to both form and function. If you approach decal work with respect for the surface, a steady hand, and the right material, you will likely find yourself repeating the process with increasing ease and consistently impressive results. And as your familiarity grows, you can expand your repertoire—experimenting with new colors, textures, and graphic combinations—while maintaining a standard of quality that honors the integrity of the motorcycle’s profile.
Internal link suggestion: explore model-specific fairings to anticipate contour challenges and planning considerations in advance, such as the Honda fairings collection. Honda fairings collection.
External resource: for a broader understanding of vinyl materials and their behavior under UV exposure, see https://en.wikipedia.org/wiki/Vinyl
Final thoughts
Incorporating high-quality decals onto motorcycle fairings is a significant aspect of motorcycle customization and brand enhancement. By mastering the preparation steps, applying techniques, and best maintenance practices, business owners can elevate their customer offerings. Understanding common challenges and having strategies to troubleshoot these issues ensures that both the business and customers enjoy a professional outcome. This comprehensive approach not only highlights your commitment to quality but also helps build a lasting relationship with your customers through superior service.