Maintaining a fleet of motorcycles for your business demands attention to detail, especially when it comes to cleanliness and presentation. Motorcycle fairings are susceptible to dirt, grime, and road film, which can detract from the visual appeal and potentially harm the finish. Selecting the right motorcycle fairing cleaner can significantly impact your brand’s image and customer satisfaction. This article outlines top recommended products that will effectively clean and protect motorcycle fairings, alongside techniques for their use, and highlights key safety considerations for your team’s well-being. By integrating these insights, business owners can ensure their motorcycles always look their best, enhancing not just aesthetics but also the durability of the fairings themselves.
Shine Without Compromise: The Art and Science of Cleaning Motorcycle Fairings
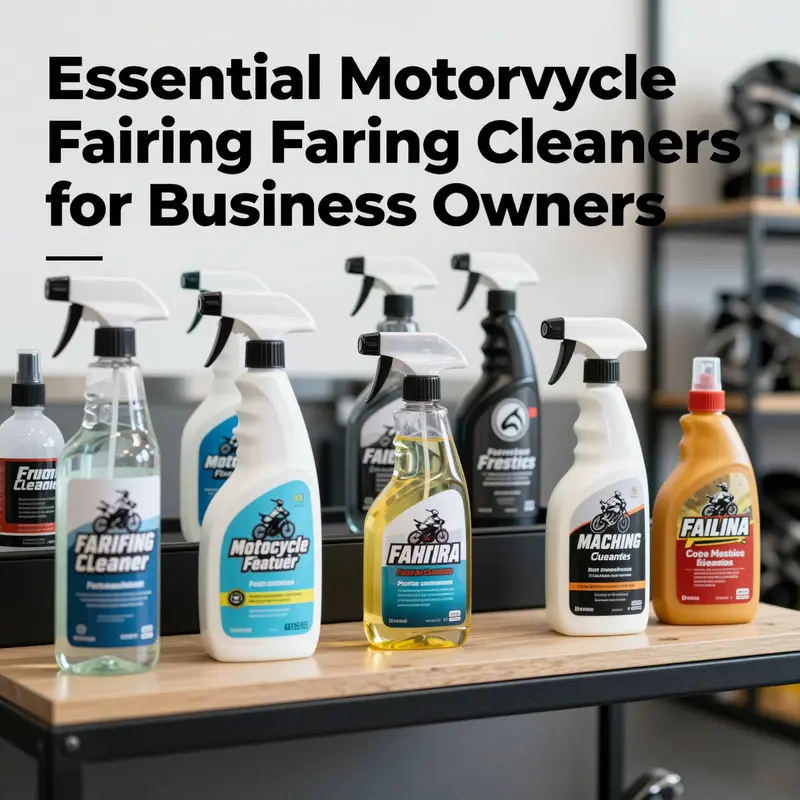
The fairings that crown a motorcycle are more than a protective shell; they are a statement of style, aerodynamics, and care. Cleaning them well is not a chore to be rushed but a ritual that preserves both form and function. A good cleaner lifts contaminants without scratching delicate paint or breaking down protective coatings. It should be gentle on plastics and compatible with waxes, sealants, or ceramic coatings. The aim is a finish that gleams with depth and stays that way under sun and streetlights.\n\nA practical approach starts with finish type and coating status. Painted fairings, clear coats, and matte surfaces respond differently. Look for pH-balanced, paint-friendly formulas that lift tar, bug residue, and environmental fallout without stripping protections. A versatile cleaner should work on glossy and matte finishes, avoiding haziness or texture changes.\n\nBeyond the cleaner, the routine matters: a two-bucket wash, a soft microfiber wash mitt, and a plush towel for drying. Work in small sections, rinse thoroughly, and dry completely to prevent residue. If you apply coatings, choose products designed to respect their chemistry; if not, a high-quality paint cleaner with a neutral pH is a safe default.\n\nIn practice, the best fairing-cleaning kit is plural: a premium paint cleaner for painted surfaces, a coating-cleaner for ceramic finishes, a versatile detailer for quick protection, and a simple pH-balanced cleaner for maintenance. This framework supports gloss, clarity, texture, and durability without compromising plastics or coatings. The result is a fairing that looks sharp when parked and ready for the road.
Polish, Protect, and Preserve: Mastering the Techniques of Using the Best Motorcycle Fairing Cleaners
Clean, shiny fairings don’t just look good; they tell a story about how well a rider cares for their machine. The surface on a modern motorcycle is a canvas that endures sun, rain, road salt, insect debris, and the constant friction of wind and speed. To keep that canvas looking new, the right cleaner becomes more than a simple detergent. It becomes a partner in restoration and preservation, a carefully chosen step that respects the materials and finishes while lifting away the film of everyday use. When you approach this task with a clear method and the right expectations, you transform a routine wash into a maintenance ritual that extends the life of painted surfaces, plastics, and seals. The goal is not just a momentary shine but a finish that resists future dirt buildup, stays clear, and maintains the integrity of protective coatings, be they glossy or matte. This is where the techniques surrounding the best motorcycle fairing cleaners come into play, turning a straightforward cleaning task into a deliberate, repeatable process that honors both the craft of the finish and the rider’s pride in their bike.
A critical starting point is understanding that not all cleaners are created equal. Some are designed for painted surfaces and are gentle enough to lift contaminants without abrading the clear coat. Others are optimized for high-performance finishes, offering gloss restoration while preserving protective layers. There are also options that strike a balance between affordability and effectiveness, especially for riders who want reliable results without paying a premium. The overarching principle is to choose a product that is compatible with the specific materials used on your fairings—ABS plastic, fiberglass, or painted surfaces—and to use it in a way that maximizes its strengths while minimizing any potential risk. The safe, patient path is to apply cleaner to a cloth or foam applicator rather than directly onto the fairing. This approach helps control the flow of product, reduces overspray onto sensitive areas, and keeps you in command of the amount of cleaner you’re using. It also sets a tone for the entire process: calm, deliberate, and attentive to the life of the finish rather than a rushed, splashy approach.
Preparation is more than a casual step; it’s the foundation of a successful outcome. Park the bike in a shaded area where the sun won’t rapidly heat the panel. Direct sunlight can cause a cleaner to dry too quickly, leaving streaks or water spots that vanish only after repeated effort. A moderate shade provides a stable environment in which the product can work its magic without racing the clock. The next move is to give the fairing a thorough rinse with clean water. This initial wash loosens loose dirt, road grime, and any loose debris that could scratch the surface during deeper cleaning. If your ride is particularly exposed to heavy grime or bird droppings, a pre-rinse can be a wise investment, even if it means taking an extra minute or two before the main cleaning phase. The goal here is to minimize friction and to set up the cleaner for a smoother lift of contaminants rather than a harsh scrape that could mar the finish.
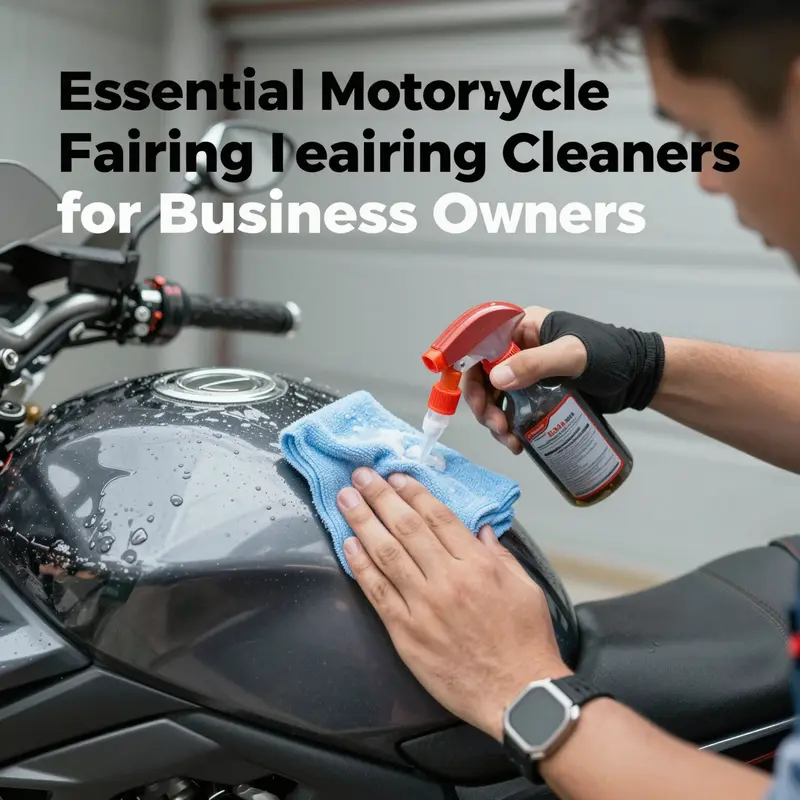
When you move to apply the cleaner, the technique matters as much as the product itself. The sensible choice is to apply the cleaner to a microfiber cloth or a foam applicator rather than spraying directly onto the fairing. Direct application can lead to overspray that finds its way onto adjacent surfaces such as chrome, trim, or other painted panels, possibly creating an uneven appearance or requiring more cleanup time. A small amount on the cloth is often enough; you want a damp, not a soaked, surface to work with. With the cloth in hand, begin to work the cleaner into the surface using gentle circular motions. Focus on the areas where grime tends to accumulate—around seams, the lower edges of the fairing, and any concave sections that trap dust and water. The circular motion helps lift and suspend contaminants rather than grind them into the finish. It’s not about brute scrubbing; it’s about controlled agitation that respects the integrity of the paint and the plastics beneath.
The concept of dwell time is simple but powerful. After you’ve worked the cleaner into the surface, give it a brief pause—usually a minute to two, depending on the label guidance and the level of soiling. This dwell period lets the cleaner penetrate the film of dirt and road grime, loosening it from the surface without requiring excessive force. The exact timing should be checked against the product’s instructions; if you’ve chosen a clear coat-safe cleaner, you’ll likely find a recommended dwell period that’s short enough to prevent drying out and long enough to let the chemistry do its job. During this dwell, resist the temptation to rush. Time spent in a calm, controlled manner is time well spent, because it reduces the likelihood of streaks and leaves a more uniform finish once you wipe away the residue.
Wiping off is where the routine becomes intuitive. Use a clean, dry microfiber towel and a light touch. Excess pressure can cause micro-scratches or swirl marks, especially if the fibers have picked up abrasive particles during the cleaning process. Wipe with the grain of the panel when possible, and switch to a fresh section of the towel as soon as you notice residue transferring. This practice helps prevent smearing that can obscure gloss or create an uneven appearance. If stubborn spots persist after the initial pass, you can reapply a touch of cleaner to the cloth and repeat the circle-work with careful attention to the area. Perfection is rarely achieved in a single pass; most riders will find that dedicated, patient revisions yield a surface that looks closer to showroom quality with each pass.
Beyond the visible results, the inspection under natural light is a subtle art. Natural daylight reveals swirl, micro-marring, and remaining film that artificial lighting can mask. A quick, methodical pass over each panel with the naked eye in bright daylight helps determine whether any areas require additional attention. If you see water spots or faint streaks, you know exactly where to reapply and rework. In some cases, it may be worth performing a light second round on the most soiled zones to ensure evenness across the fairing surface. The aim here is uniformity; nothing should jump out as an obvious blemish when the bike is moving or when it sits gleaming under the sun.
After you’ve achieved the level of cleanliness you seek, consider the longer-term maintenance plan. A protective finish can significantly extend the time between full cleans and contribute to a more durable shine. A wax or sealant designed for painted surfaces will add a protective layer against UV rays, moisture, and environmental contaminants. This step is especially valuable for riders who park their bikes outdoors or ride in regions with harsh weather. The protective layer not only enhances shine but also helps repell dirt so that the next cleaning session begins with a lighter lift of grime. For riders with matte finishes, protectants should be chosen with care; some products can alter the surface texture or sheen, defeating the purpose of a matte look. In these cases, select a finish-safe sealant or a dedicated matte-safe product that preserves the diffuse reflection characteristic of matte fairings while still offering the protective benefits of a sealant.
A practical, often underrated dimension of this practice is the ongoing compatibility check with your fairing material. ABS plastic and fiberglass—common substrates for motorcycle fairings—respond differently to cleaners and protectants. The key is to follow the manufacturer’s guidelines or the product label regarding compatibility with painted surfaces, plastics, and coatings. If your fairing is a composite or includes metallic accents or chrome trim, you’ll want to avoid cleaners with strong solvents that could degrade chrome or discolor metal finishes. It’s here that the art of choosing the right cleaner becomes a science of balance: you want the cleanser to be effective at lifting film and road grime while remaining gentle on the materials that give your bike its character. A well-chosen product can lift surface contaminants and leave behind a faint protective film that helps resist the next round of grime, creating a cycle of easier maintenance over time rather than a constant uphill struggle against stubborn buildup.
In the day-to-day rhythm of maintenance, the process remains anchored in a few core practices: clean from clean to dirty, and rinse thoroughly to prevent residue. If you do not rinse off all residue, you risk a hazy finish or a tendency for dust to cling more to the surface. Thorough rinsing also helps to remove any cleaner remnants that might otherwise attract new dirt. The ultimate objective is a surface that reflects light cleanly and evenly, without micro-particle trails or telltale smudges, and that shows a consistent level of gloss or a uniform matte texture across all fairing panels.
For riders who enjoy deep dives into the nuances of material care, there is value in understanding how your choice of cleaner interacts with the climate and the road environment. In dry, dusty climates, the film of road grime can dry quickly, leaving a chalky residue that requires more careful lifting. In humid or rainy areas, water spots and mineral deposits may form if rinsing is not thorough. In either scenario, the technique described here—careful application, controlled agitation, mindful dwell time, and patient wipe-off—remains the same. The difference is that you may opt for a slightly longer dwell for stubborn grime or a more frequent rinse to keep the surface free of particulate matter that can scratch during the wipe phase.
An essential aspect of this practice is staying within the guidelines of the cleaner’s label and respecting the nuances of your fairing’s finish. If your bike features a high-gloss clear coat, you may wish to lean into a cleaner that emphasizes gentle lifting of contaminants while leaving a delicate protective layer. If your fairings are treated with a specialized coating or if you enjoy a very high-gloss appearance, a cleaner designed to preserve gloss and clarity without removing protective coatings can be especially appealing. In all cases, a test on a small, inconspicuous area is a prudent precaution. This tiny test helps you verify that the product does not cause any adverse reaction like discoloration, softening, or haze before you commit to a full-panel cleaning.
As a broader point of practice, the relationship between cleaning and appearance is deeply tied to the routine maintenance of the finish. A well-executed cleaning not only restores a faded or dulled surface but also reinforces the protective layer that keeps the finish from deteriorating under UV exposure and environmental stressors. The combination of a high-quality cleaner, careful technique, and a protective sealant yields a finish that resists the next round of grime and maintains a bright, uniform appearance. In this sense, the act of cleaning becomes an investment in the bike’s aesthetic and longevity, rather than a one-off cosmetic touch-up.
For readers who want to connect this discussion to practical, local shopping options, consider exploring collections that feature a range of fairing materials and styles. For example, you can browse the Yamaha fairings collection to see how different plastics and painting approaches are represented across a popular lineup and to gain a sense of how maintenance routines may align with specific fairing shapes and finishes. This exploration helps you fine-tune your cleaning approach to the particular bike you ride and the design choices that define its appearance. Yamaha fairings collection
In keeping with the spirit of careful, informed care, it’s also helpful to engage with external perspectives that expand the context around how cleaners function in real-world environments. A notable resource discusses windshield cleaner standards, composition, and industrial use, offering a broader understanding of how cleaners are formulated and tested for performance and safety. This external perspective can deepen your appreciation for the science behind the products you choose and encourage a thoughtful approach to any maintenance routine. For those who want to explore further, that resource is available at the following external link: https://www.motorcycle-accident-lawyer.com/motorcycle-windshield-cleaner-standards-composition-and-industrial-use/
The practice outlined here integrates a practical, repeatable method with a respectful approach to the materials that make your bike unique. It’s a reminder that the best care is not just about achieving a momentary gleam, but about sustaining the finish so it can stand up to the next ride, the next spray of road spray, and the next sunny day when a rider stops to admire the work. The result is a fairing surface that looks as good as the moment you first rolled out, and that continues to project the pride of ownership through consistent gloss, clarity, and a finish that feels as durable as the bike itself. The technique becomes a rhythm rather than a checklist; a slow, deliberate dance between product, cloth, and panel that honors the craft of motorcycle finishing while keeping pace with the practical realities of ride-ready maintenance.
In sum, the best motorcycle fairing cleaner is less about a single magical product and more about a disciplined approach to cleaning, protection, and longevity. It is about choosing a cleaner that respects the materials, applying it with care, allowing it to dwell when appropriate, and wiping it away with the kind of precision that avoids micro-scratches. It is about testing first, inspecting under good light, and finishing with a protective layer that helps resist future dirt. It is about recognizing that a clean fairing is the first line of defense against the elements and the first impression your bike makes when it catches the eye of a fellow rider or a curious passerby. And perhaps most important, it is about building a routine that makes the care of your bike a small but meaningful ritual—one that keeps your fairings looking bold, fresh, and ready for the road ahead.
Guarding Shine and Surface: Safety-First Practices for Cleaning Motorcycle Fairings
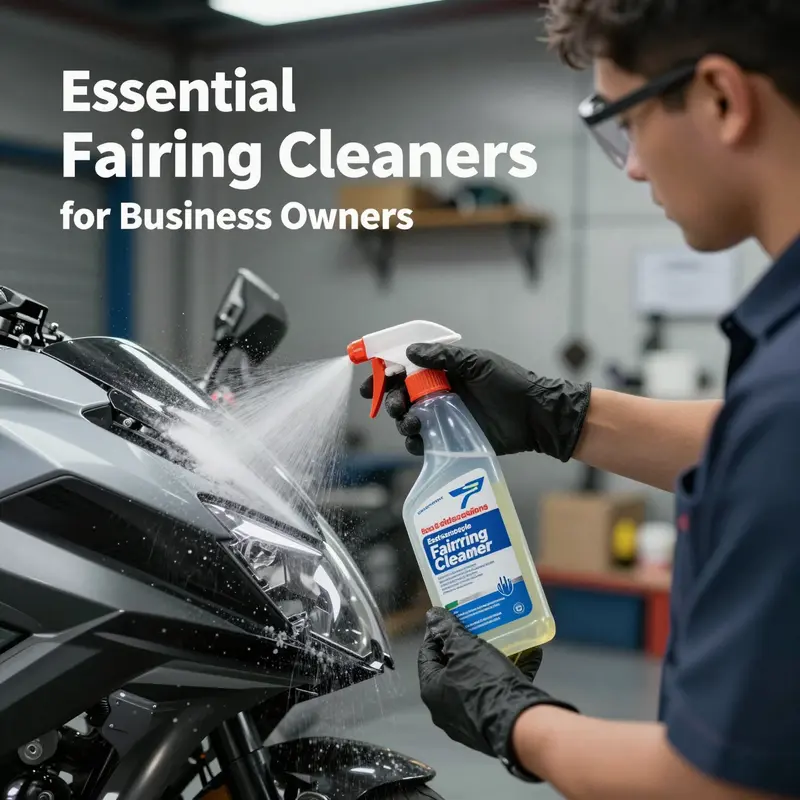
Maintaining the pristine look of motorcycle fairings requires more than a quick wash. It demands a careful, safety-forward approach that protects both the rider and the delicate finish exposed to road grit, weather, and UV. When selecting a cleaner for fairings, the goal isn’t merely removing dirt; it is choosing a formulation that respects gel coat, plastics, painted surfaces, and any protective coatings that may be present. The safest cleaners are non-abrasive, designed for automotive paints and plastics, and capable of lifting contaminants without leaving behind residues that can attract new dirt or dull gloss over time. This mindset—prioritizing safety and finish—shapes every step of the cleaning process and helps ensure that the ride remains as visually striking as it is performance-driven. In practice, safety begins long before the nozzle ever touches the surface. It starts with reading the label, noting any warnings about skin or eye contact, ventilation requirements, temperature limits, and recommended dilution ratios. This meticulous habit reduces the chance of accidental splash exposure and helps you tailor the cleaning process to your particular environment, whether you’re at home, in a garage, or on a dry, open parking lot after a ride.
Personal safety is the foundation of any effective cleaning routine. The chemicals in fairing cleaners can irritate skin or eyes, and some formulations release fumes that may be more noticeable in confined spaces. Wearing proper protective gear is a simple yet essential precaution. A pair of chemical-resistant gloves protects hands from prolonged contact, while safety goggles shield the eyes from splashes or mist. If you are sensitive to fumes or you’re using stronger formulations, a lightweight respirator or a ventilated area can make a meaningful difference. Even when the cleaner’s odor is mild, good ventilation remains important. This is particularly true after you finish cleaning, when you rinse and dry the surface and the area around the bike, preventing any lingering vapors from accumulating. In addition, keep a bowl of clean water nearby to rinse your gloves if they become contaminated, and wash hands thoroughly after you finish. The goal is to minimize risk while ensuring the finish receives the care it deserves.
The environmental and personal safety dimensions extend to storage and disposal as well. Store cleaners in a cool, dry place away from direct sunlight and out of reach of children and pets. Many cleaners are designed to be water-based, but even then, it is important to respect the manufacturer’s guidance on concentration and usage. When disposing of rinse water or excess solution, you should follow local regulations. Some jurisdictions require capturing wash runoff to prevent contaminants from entering storm drains or the environment. If you have a SDS (safety data sheet) available from the manufacturer, review it for hazard classifications, first-aid measures, spill response, and emergency procedures. Keeping the SDS on hand is a practical habit for any rider who values safety as much as performance. As you move through the cleaning process, you will create some wastewater, and handling it responsibly is part of maintaining a responsible riding practice.
The finish on fairings matters just as much as the rider’s safety. Most fairings are made from gel coat or high-grade plastics and may be painted, matte, or gloss finished. The cleaners you choose should be gentle enough not to abrade, strip, or dull these surfaces. A non-abrasive formula is crucial, as is one that does not contain solvents strong enough to degrade the clear coat, plastics, or protective sealants that may be present. A cleaner that lifts contaminants without removing beneficial coatings helps preserve gloss, clarity, and UV resistance. The difference in finish can be subtle, but it is persistent; a well-cleaned surface repels dirt better and ages more gracefully. If you happen to know you have a matte finish in some areas, it’s essential to select a cleaner explicitly stated as safe for matte surfaces. Matte finishes can be more susceptible to streaking or a change in texture if treated with a harsher solvent, so the precaution extends beyond aesthetics to long-term surface integrity.
A careful cleaning routine begins with a small, disciplined test. Before committing the cleaner to the entire fairing, apply a small amount to a discreet area—perhaps under the lower edge or behind a fairing clip—where it is less visible. Wait a moment, then wipe away with a clean microfiber cloth. Look for any changes in color, haze, or texture, as well as any interactions with decals or trim. If you see any adverse reaction, rinse the area thoroughly and reassess. This testing step is a simple, proven safeguard that can prevent larger problems later. It is especially important when you are working with a used bike or one that has a non-standard finish, as even seemingly minor chemical interactions can become visible once they are spread across the surface and exposed to sunlight.
The method you use to apply the cleaner matters as much as the product itself. Microfiber cloths are prized for their softness, their ability to lift dirt without scratching, and their capacity to hold moisture to avoid running liquid. When applying cleaner, use a light, even touch in small sections rather than pressing hard and scrubbing aggressively. A common but effective approach is to mist a small amount of cleaner onto the cloth or directly onto a clean area of the fairing, then wipe in smooth, deliberate motions. Avoid dragging cloths across edges and seams with excessive force, as this can transfer grit into the finish. Work methodically from one panel to the next, and maintain a consistent pace that allows the cleaner to work without drying too quickly, especially in warm or sunny conditions. If the surface heats up in the sun, pause and move the bike to a cooler shade to prevent quick drying that could cause streaks or uneven residue. For those who ride with mixed finishes—gloss panels interspersed with matte sections—the same principle applies: respect the finish, and switch to a different cloth if necessary to prevent cross-contamination between finishes.
Rinsing is not a luxury; it is a crucial part of the process. After you apply the cleaner and perform the initial wipe-down, rinse the area with clean water to remove all residues. Residue left behind can attract dust and road film, especially in humid or dusty environments, turning cleaning into a cycle of recontamination. A thorough rinse should wash away both the cleaner and the dissolved contaminants. In a workshop setting, you might use a gentle spray of water, followed by a second wipe with a fresh microfiber cloth to ensure there is no lingering film. If you work in open air, ensure that your rinse water does not spray into joints, fasteners, or gaskets where it could seep into seams. The moment you notice any pooling near rubber seals or around trim, redirect the water flow and wipe away the pool. This careful attention to rinsing is a quiet form of maintenance that protects not only the finish but the hardware that keeps the fairings intact.
Protection of rubber, vinyl, and trim is a recurring caveat, and it deserves a dedicated focus. Some cleaners, especially those with stronger formulations, can degrade rubber seals or fade vinyl trims over time. To minimize risk, apply the cleaner with a microfiber cloth rather than spraying directly onto the surface and avoid letting the product pool in any recessed area. If your fairings include plastic or rubber components near the cleaning zone—such as weatherstripping, gaskets, or edge trims—consider masking these areas with painter’s tape or simply avoid targeting them altogether during the cleaning pass. After you finish cleaning, inspect edge joints, fasteners, and trim openings for any signs of swelling, cracking, or color change. If you notice any sign of damage, pause and consult the SDS or the manufacturer’s guidelines for compatibility. The longer you delay addressing even minor changes, the greater the risk of irreversible damage, especially for exposed edges that encounter the most sunlight and temperature variation.
A robust approach to safety integrates environmental responsibility with careful cleaning. The disposal of used cloths, rinse water, and any leftover solution should be aligned with local regulations. Reusable microfiber cloths can be laundered and used again, reducing waste, but only when they remain free of sharp grit that could later scratch the finish. If your environment makes it difficult to manage runoff, consider a containment method to collect rinse water and dispose of it through proper channels. This dual focus on ecological stewardship and rider safety reflects a broader commitment to responsible maintenance. In the same vein, store your cleaning supplies in a well-ventilated area, away from heat sources and direct sunlight, and ensure that lids are sealed tightly to prevent evaporation and accidental spills. A little organization goes a long way toward preventing accidents and preserving finish quality.
As you build a routine around safety, it is helpful to consider compatibility with your bike’s overall care plan. For example, after cleaning, many riders apply a protective layer—such as a wax, sealant, or dedicated coating—to help repel road film and extend the interval between deeper cleanings. While these post-cleaning products are not cleaners themselves, their interaction with the base finish matters. Choose protectants that are compatible with your fairing materials and the cleaner you used, and always allow appropriate curing time before exposing the surface to rain or spray. A thoughtful sequence—clean, rinse, dry, and protect—creates a synergy that not only looks good but lasts longer, reducing the risk of wear and the need for aggressive efforts later.
For those who are new to the practice, it is useful to remember that safety is not a one-size-fits-all approach. Every bike, every finish, and every environment present unique challenges. Your experience will grow as you observe how different cleaners interact with your specific fairings, how long they take to dry, and how well they resist repelling dirt after treatment. The key is to stay curious and cautious. If something feels wrong—an unusual smell, a sensation on the skin, or unexpected discoloration—step back, rinse thoroughly, and reassess before continuing. A slow, thoughtful approach yields the best results and minimizes the risk of costly mistakes.
In terms of practical steps you can weave into a routine, consider establishing a gentle checklist for each cleaning session. Start with personal safety gear and ventilation, then verify the surface temperature is comfortable and not hot to the touch. Confirm you have a clean, dedicated microfiber cloth for each phase of the process and that the area around the bike is free of bystanders or pets who might inadvertently come into contact with cleaning solutions. Test a small area, then proceed in a controlled, panel-by-panel fashion, keeping an eye on any changes in appearance. Rinse thoroughly, dry with a separate clean cloth, and inspect under bright light to confirm the finish has returned to its intended clarity. Finally, apply a protective layer if desired and allowed by the product’s instructions. Document any observations about finish behavior with the particular cleaner you used so you can refine your technique over time. This structured, safety-first mindset ensures both the bike and the rider come away from each cleaning session in better condition than before.
For riders seeking practical sources of information about compatible fairing options and parts, the broader ecosystem offers a wealth of options to explore without compromising safety or finish. For example, you can browse reliable collections that focus on authentic or compatible Honda fairings to maintain proper fit and appearance across generations. These sources provide context for how different finishes interact with various materials and coatings, helping you plan a cohesive care strategy that respects both aesthetics and structural integrity. See the Honda fairings collection for more on compatible panels and accessories. Honda fairings collection.
In closing, the cleanest and safest fairing comes from a well-considered approach that marries the right cleaner with careful technique and a respect for the finish. Prioritizing safety does not slow you down; it protects the very investment you ride every day. By wearing protective gear, ensuring proper ventilation, testing on inconspicuous areas, avoiding hot surfaces and sensitive trims, rinsing thoroughly, and disposing of waste responsibly, you create a cleaning routine that preserves gloss, color, and surface integrity. The habit becomes second nature, allowing you to enjoy the look of your bike as much as its performance on the road. For further practical safety guidance, you can refer to a widely respected safety guide on fairing cleaner use, which offers detailed procedures and emergency steps. External resource: Motorcycle.com safety guide on motorcycle fairing cleaner use. (https://www.motorcycle.com/motorcycle-maintenance/1032579/motorcycle-fairing-cleaner-safety-guide/)
Final thoughts
In the competitive landscape of motorcycle sales and maintenance, image matters. The right motorcycle fairing cleaner not only enhances the aesthetic of your fleet but also protects your investment in the long term. By implementing the best products and ensuring your team is well-trained in effective cleaning techniques, you can uphold the highest standards of cleanliness and presentation. Prioritizing safety during the cleaning process will safeguard your team and improve operational efficiency. As you engage in regular maintenance and cleaning, remember that a well-kept motorcycle attracts customers and builds trust in your brand.