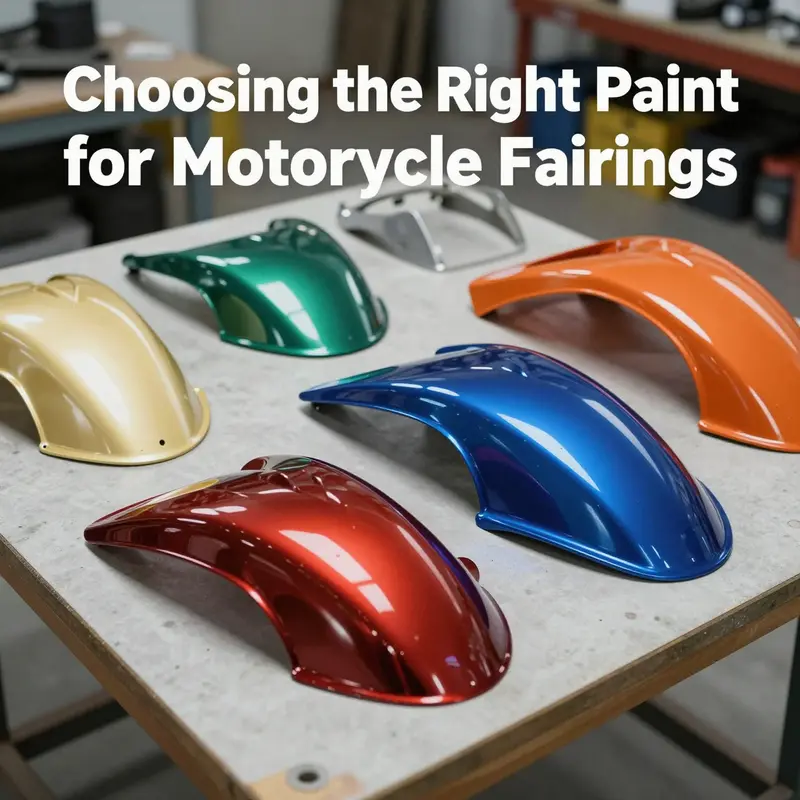
Selecting the right paint for motorcycle fairings is crucial not just for aesthetics but also for longevity and performance. Motorcycle fairings, made from plastics, require special coatings that offer superior adhesion and resilience against environmental factors. This article provides business owners with comprehensive insights into the advantages of motorcycle-specific paints, the benefits of 2K systems, and essential considerations for selecting the best products. Each chapter builds on the importance of using the correct paint, ensuring your motorcycle continued excellence on the road.
From Plastic to Pin‑Gloss: Why Motorcycle-Specific Paint Is Essential for Fairings
The fairing is the bike’s calling card and its weathered, glossy skin faces the same harsh mix of sun, rain, road grit, and temperature swings as the rider does, but with a more unforgiving timeline for wear. Plastic bodywork, while light and aerodynamically advantageous, behaves differently from metal when it comes to paint. It expands and contracts at a different rate, absorbs and releases moisture in a way that metal does not, and can sit under a heat of the sun that would soften or degrade ordinary coatings. The result is that the route to a durable, factory‑like finish lies not in the most common automotive system, but in a paint program built for plastic. In this chapter, the argument unfolds not as a series of tips but as a synthesis of material science and practical craft, a seamless narrative about why motorcycle‑specific paints matter and how to wield them to protect and beautify fairings for the long haul. The point is not merely color or gloss but resilience: against chipping from stones, fading from UV rays, moisture ingress, and the daily thermal cycling that accompanies ride and stop alike.
Motorcycle‑specific plastic paints are engineered around a core truth: plastic bodywork requires a resin matrix, pigment system, and adhesion chemistry that speak the language of plastic, not the language of metal. These paints typically employ high‑performance resins that remain flexible enough to absorb tiny impacts and micro‑flexing without cracking. They also feature enhanced adhesion promoters, which act like tiny bridges between the plastic substrate and the coating layer, ensuring that the color stays put when the fairing flexes or when the temperature swings. The pigments are designed to resist fading under harsh UV exposure and to remain stable under moisture and road grime. When you look at a high‑quality finish on a motorcycle, you’re seeing a chemistry that anticipates the substrate’s quirks: the tendency of certain plastics to outgas, the need for good chemical resistance to deter fuel and solvent exposure, and the desire for a hard yet slightly forgiving surface that can resist shallow chipping without turning brittle.
A deeper layer of the argument centers on the two‑part systems that many professionals reach for with fairings. Two‑component epoxy‑based paints and high‑build urethane coatings are the workhorses here. In a two‑part system, a precise hardener or catalyst is mixed with a resin base, kicking off a chemical cure that yields superior hardness and excellent adhesion. The resulting film is resilient, with a toughness that protects against the curbings and impacts that threaten fairings during a ride through city traffic or a weekend canyon run. The curing chemistry also contributes to a glossy, uniform film that can resemble the original OEM finish more closely than a one‑part paint. The trade‑off is that these systems demand careful handling: accurate mixing ratios, controlled environmental conditions, and an appropriate curing protocol to realize the full potential of the coating. Some installations benefit from a heat‑assisted cure, whether through a dedicated baking booth or a heat gun in a garage setup, which can significantly increase surface hardness, improve chemical resistance, and reduce tackiness during the final cure. The performance difference is not merely theoretical; it’s observable in the way the paint resists chipping at the edges, holds color over years of sun exposure, and demonstrates a depth of gloss that reads as factory‑new rather than “just painted.”
The cautionary tale here is not anti‑automotive paints in general but misaligned choices. General‑purpose paints, even those that are excellent on metal, often falter on plastic. They may not wet the surface properly, leading to poor adhesion, or they may cure in a way that doesn’t accommodate plastic’s micro‑movement. As a result, you can end up with peeling along panel joints, microcracks that trap moisture, or a topcoat that hazes over time. In the worst cases, the coating delaminates from the plastic primer layer, a failure mode tied to the mismatch of surface energy, substrate chemistry, and the coating’s elasticity. A careful painter chooses a system that recognizes all those variables and treats them as design constraints rather than afterthoughts. The payoff is not merely aesthetic; it is a sustained protective barrier that stays pristine through sun exposure, rain, salt spray in coastal rides, and the inevitable uplift of road debris.
An essential step in achieving that durable finish is your surface preparation. Plastic surfaces are more demanding than metal in this respect. They must be clean of oils and residues, free of surface waxes, and abraded enough to give the primer something to bite into without creating deep scratches that telegraph through the paint. Degreasing with a solvent that evaporates cleanly is standard, followed by a light mechanical abrasion with a fine, non‑embedded abrasive to create a profile the primer can cling to. In many professional workflows, an adhesion promoter or plastic‑specific primer is applied first. These primers are formulated to bond strongly to plastics with minimal surface energy and to present a robust base for the subsequent color coats. The primers themselves may include minimal solvents and be designed to resist shrinkage as the paint builds up, preserving the fairing’s contour fidelity. The idea is to craft a multilayer sandwich where each layer contributes something unique: the primer provides adhesion and barrier properties, the midcoat (if used) builds color depth and density, and the topcoat delivers hardness, gloss, and weather resistance.
Preparation extends beyond the surface. Environmental control matters. Even the best plastic paint systems can be compromised if humidity, dust, or temperature drift intrude during the cure. A clean, dust‑free environment with stable temperature helps the base and clear coats level without trapping defects. When you don’t have a full spray booth, a purpose‑built paint space or a well‑ventilated, enclosed area with air movement can mimic some of the benefits of a controlled climate. The painter’s eye becomes essential here: a consistent environment reduces variations in film thickness and optical clarity, which translates into a more uniform finish across every fairing panel.
In the actual application, the process moves from primer to base color and then to clear coat, with attention paid to film thickness at each stage. The base color is not simply a cosmetic layer but a functional one, contributing to hide minor substrate imperfections, providing color depth, and establishing the hue that will be protected by the final clear. The color coat is often built up in multiple thin passes rather than a single heavy spray. This practice reduces run risk and ensures a more uniform, lusterful result across curved surfaces. The final clear coat adds the high‑gloss shield that helps the color stay vibrant and resist yellowing and moisture ingress. In high‑build urethane systems, the clear coat can itself act as a barrier against cracking due to flexing plastic, while also offering excellent hardness and a scratch‑resistant surface. The interplay between base and clear coats is subtle but crucial: the base may contribute color stability and depth, while the clear locks in that depth and supplies the protective sealing matrix that guards against the elements.
The conversation about primer compatibility is not mere paperwork. OEM processes and modern repair workflows rely on primers that are formulated to play nicely with both the resin system in the paint and the particular plastics used in popular fairing designs. If a primer is not compatible, you risk poor adhesion, micro‑blisters, or delamination under temperature cycling. The most robust programs use a plastic‑specific adhesion promoter, then an appropriate primer, followed by the base and clear coats. This stack is designed to harmonize with the substrate so that the coating system moves as one with the plastic under real‑world conditions. The integration with primers and clear coats is not merely a matter of color safety; it is a deliberate strategy to reduce the risk of delamination and to create a seamless, factory‑like finish that resists the wear and tear of highway speeds, wind chill, and road grime.
All of this translates to a practical set of expectations for riders and builders. The two‑part epoxy or high‑build urethane systems deliver superior hardness and chemical resistance, yet their performance hinges on meticulous preparation and disciplined curing. In the hands of a skilled painter, the result is a finish that not only looks spectacular but remains stubbornly resilient through years of sun, rain, and heat. The finish can be polished to a mirror gloss, with micro‑abrasion marks gone and a uniform sheen across the entire fairing surface. The result is not merely a new color; it is a renewed protective shell that has the look of a factory repair rather than a cosmetic alteration. It is a finish that endures.
If you’re piecing together a project and want to see how professionals approach the purchase and selection side, there is a practical route to information that balances theory with real‑world experiences. Expert reviews and application tips for motorcycle finishes can be found through established industry resources that regularly update their guidance to reflect evolving formulations and application techniques. For readers curious about specific product directions and consumer reviews, an authoritative reference that summarizes many different fairing finishes and their performance under different riding conditions can be invaluable. In this light, the resource provides a benchmark against which private label or shop choices can be weighed, helping ensure the selected system harmonizes with the fairing’s design, color strategy, and future maintenance plan. While the guide covers a broad range of scenarios, its core messages about adhesion, curing, and finish quality remain evergreen in the world of plastic fairings.
For those who are charting a course toward a project that prioritizes both durability and professional aesthetics, the emphasis should stay on motorcycle‑specific plastic paints and the two‑part or high‑build urethane systems designed for plastic substrates. The substrate demands and the coating’s cure chemistry must be aligned. You should plan for a thorough surface preparation, a carefully controlled application process, and a proper cure regime, including potential heat treatment if the system calls for it. The payoff in resilience and beauty justifies the extra planning and effort, especially when a fairing shell represents a substantial investment in both appearance and protection. It is not merely about choosing a color; it is about choosing a complete, substrate‑aware coating strategy that respects the material and the mission of the bike itself. The result is a fairing that looks like it belongs on the bike straight from the factory, with a finish that can withstand the elements and the imperfect realities of road life.
For readers who want to see what a plastic‑specific system looks like in practice and to visualize how a final finish sits on a fairing once cured, the journey can be as informative as the destination. A dedicated paint approach for plastic fairings underscores the importance of materials science in everyday customization. It reminds us that the best appearance is inseparable from the best protection. When done correctly, a motorcycle’s fairings reveal not just a color but a story of careful choices, precise technique, and a respect for the plastic substrate that carries the spirit of the ride. When you stand back to admire the result, you’re seeing a confluence of chemistry, craft, and a rider’s devotion to preserving the machine’s form and function for miles to come.
If you’re exploring fairings for a specific model and want to see what the aftermarket has to offer in terms of panel styling, you can explore dedicated collections such as Honda fairings, which provide a sense of the shapes and contours you’ll be painting and the opportunities for color and finish interplay. These reference points, while not a substitute for the paint system itself, can help you anticipate panel alignment, edge sharpness, and the surface textures you may encounter when you pull a fairing from the mold and prepare it for coating. Honda fairings collection serves as a practical lens to understand the scale and geometry you’ll be treating when you pursue a plastic‑specific coating strategy. In practice, the paint system remains the same core philosophy—adhesion‑promoting primers, plastic‑friendly resins, and the disciplined bite of a two‑part or high‑build urethane forming a tough, glossy shield across every contour.
The broader narrative of choosing the right paint is ultimately the story of aligning substrate realities with coating capabilities. Plastic fairings demand a willingness to work with materials that behave differently under heat and solvent exposure, and to respect the fact that the correct finish is achieved through a deliberate, integrated system rather than a single, convenient spray. The goal is a long‑lasting, factory‑like finish that defies the wear and tear of road life while delivering color depth and an edge that gleams as brightly as the bike’s chrome accents. The best paint for painting motorcycle fairings therefore is not a generic solution but a substrate‑aware system built around plastic, engineered to endure, and executed with care. In the end, you don’t just paint a fairing; you extend its life and its presence on the road, preserving the visual appeal that drew you to the machine in the first place.
External reference: Motorcycle.com offers expert reviews, application tips, and product recommendations tailored to different fairings and riding conditions, which can be a valuable supplement to hands‑on practice. https://www.motorcycle.com
The Surface That Rides: Mastering Two-Component Plastic Paint for Motorcycle Fairings
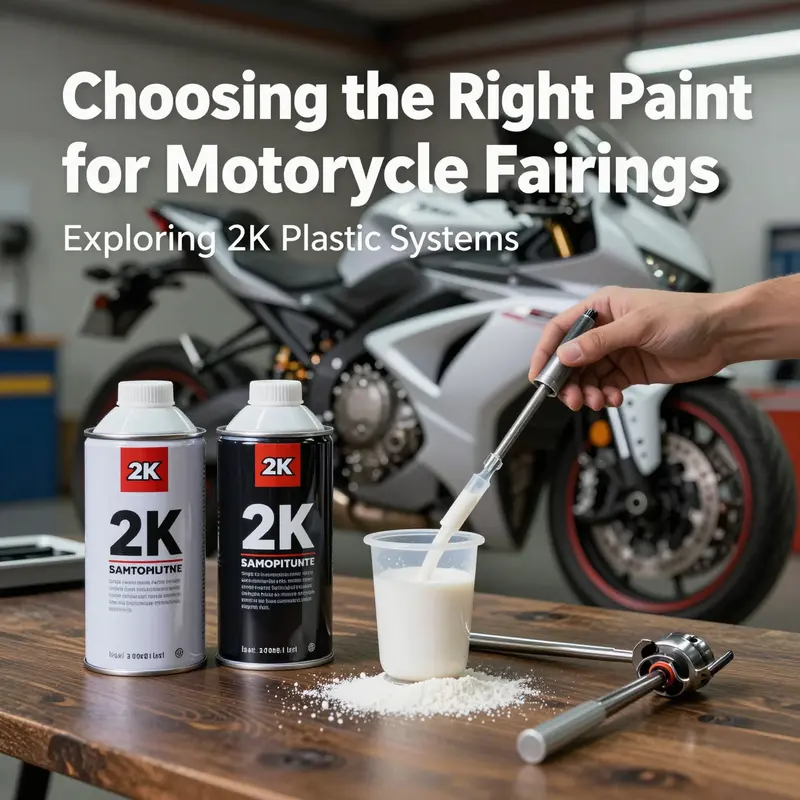
The look of a motorcycle is more than color; it is a statement welded to plastic, a surface that moves with the bike’s heartbeat through heat, rain, and the daily grind of road and track. When you set out to paint fairings, the choice of paint is not merely a matter of shade or gloss level. It is a decision about adhesion, flexibility, weather resistance, and how the coating will behave as the plastic itself expands and contracts with temperature swings. In the world of plastics, a two-component plastic paint system—commonly referred to as a 2K system—offers a practical blend of chemistry and physics that aligns with the demands of modern motorcycle bodywork. These paints come in two parts: a base color and a hardener (or catalyst). When combined, they undergo a chemical cross-linking reaction that yields a finish with higher hardness, improved abrasion resistance, and a more durable shield against UV radiation, moisture, and the occasional impact from rocks and debris. The result is a ride-ready surface that can endure the elements without sacrificing the look that riders cherish. This is especially important on fairings, which are not only cosmetic but also functional, shielding engine components and guiding airflow. The plastic surface itself does not respond to coatings the same way metal would; its coefficient of expansion, its tendency to flex, and its susceptibility to solvents mean that a traditional automotive paint, even if it looks spectacular in a showroom, may not hold up over time. A 2K plastic paint system is formulated to address these realities head-on. The base layer binds intimately to the plastic or composite substrate, while the catalyst and finishing layers build a resilient, weatherproof film with excellent adhesion. The chemistry is designed to tolerate the micro-movements of the fairing during riding, the flex that occurs as you lean into curves, and the temperature shifts from sun-warmed plastic to the chill of night rides. In practice, the advantages show up in the finish: a smooth, glassy surface that resists dulling from UV exposure, a hardness that resists minor chips, and a resilience that keeps color from fading in sunlit hours and damp, humid mornings. The emphasis is not only on aesthetics but on durability that matches the demands of daily use, whether you are scrubbing bugs off after a long ride or cornering at speed on a damp road. The 2K approach also tends to yield a more uniform color and better clarity in the finish, which matters for riders who want a clean, OEM-like appearance or a vivid custom look. The trade-off is that 2K systems require more careful handling, controlled mixing, and, often, a curing environment that supports the material as it hardens. Yet for most riders who want a long-lasting upgrade or a high-quality OEM-style repair, the benefits outweigh the extra steps. The crucial first step, before any aerosol or spray gun flame meets plastic, is surface preparation. It is here that the integrity of the entire project begins. The fairing surface must be clean and free of oils, waxes, and other contaminants that could undermine adhesion. A degreasing agent is used to strip away the oils that accumulate from sweat, fingerprints, or the residues left behind by previous coatings. The cleaning step is not merely a wipe-down; it is a controlled process that ensures the surface is ready to accept the coating. Following cleaning, a light sanding creates a micro-mechanical key for the paint to grip. A gentle pass with fine-grit paper is enough to roughen the surface without introducing deep scratches that would later telegraph through the finish. Then comes priming, which is where the discussion becomes more nuanced. Plastics and composites require primers designed for their unique surface chemistry. The primer should promote adhesion to the base coat while also offering a uniform tone that helps the color lay down evenly. The primer also plays a pivotal role in blocking stains and preventing any plasticizer bleed from migrating into the topcoat, which could cause adverse reactions such as yellowing or softening over time. With the primer cured and the surface properly prepped, the painting itself becomes a controlled process of application and curing. The base coat is applied in a series of thin, even coats, each coat building the color and providing a uniform foundation for the hardener to work with. The way the base coat is applied matters as much as the color choice. Consistency in spray technique—distance from the surface, steady movement, appropriate overlap—helps prevent issues like orange peel, sags, or runs. Each layer is allowed to flash off to the point where the next layer can be applied without disturbing the previous one. The next phase is the crucial step of mixing and applying the hardener with the base coat. The correct ratio is essential; too much hardener can lead to brittleness or faster curing that traps solvents and causes defects, while too little can result in a softer finish that wears more quickly. The working time, or pot life, is a practical constraint that dictates how long you have to apply the mixture before it becomes unworkable. A well-tuned 2K system demands careful handling: the temperature and humidity of the workshop influence both the speed of the chemical reaction and the way the film dries. A higher ambient temperature can accelerate curing, which might seem favorable but can also increase the risk of surface defects if the coating cures too quickly before you have finished your application. The same is true of humidity, which can affect the way solvents leave the film and create subtle imperfections. As the base coats are built up, the finish begins to reveal its depth and clarity. The look you aim for—whether OEM-like or a bold custom design—depends not only on color but on the uniformity of the gloss and the absence of blemishes. A well-prepared base layer sets the stage for the final clear coat, which seals and protects the color while contributing additional gloss, UV resistance, and abrasion protection. The clear coat in a 2K system is a separate component that also cures through a chemical reaction, forming a hard, protective shell that resists scratches and environmental damage. The interplay between the base color and the clear topcoat determines the final appearance. A properly executed clear coat enhances depth, reduces color tone variation, and improves the plate-like flatness that makes reflections crisp instead of hazy. The result is a finished surface that looks polished and feels solid to the touch, with an ability to maintain its beauty under sun exposure, rain, and the occasional encounter with petrol vapors and chemical cleaners on a roadside service stop. Finishing is more than polishing; it is a controlled ritual that brings out the intended aesthetic while honoring the coating’s structural integrity. Wet sanding, followed by meticulous polishing with appropriate compounds, removes the very micro-imperfections that remain after the clear has cured. The goal is a surface that looks as smooth as glass but remains hard enough to resist micro-scratches from everyday riding. In this part of the process, the decision to use a multi-step polishing regime becomes important. Fine grits progressively refine the surface, and a final polishing compound reveals the depth that makes the color come alive. The final stage—the maintenance mindset—focuses on how to keep the finish looking fresh for years. Cleaning practices should respect the coating’s chemistry, avoiding abrasive cleaners that can dull the glaze or degrade the clear layer. Soft cloths, mild cleaners, and water with controlled temperatures help preserve the film. The color stability is one of the quiet advantages of a well-applied 2K system. Even through harsh sunlight and repeated exposure to rain, the pigment and clear layer resist fading, chalking, and micro-cracking that can mar an otherwise pristine look. Yet the onus remains on the painter to follow best practices from the first touch of the surface to the last wipedown after a ride. In this sense, the finished fairing becomes a portfolio piece, a tangible expression of the rider’s identity that must withstand the rigors of life on the road. For those who navigate through different riding environments, a practical consideration emerges: the compatibility of the paint system with the plastic being treated. Some fairings use high-density polyethylene, others use ABS or composite blends; each material has its own response to solvents, primers, and topcoats. The 2K approach provides a framework that can be adapted to these differences, but it does not erase the need for surface testing and small-area trials prior to full coverage. When you select a color, you also select a performance profile. You are choosing a finish that resists UV degradation, a color that retains its depth, and a film that remains flexible enough to resist micro-motions in the plastic. If you are aiming for a faithful restoration of a particular bike’s original livery or pursuing a custom palette that turns heads at the next meetup, the decision to use a 2K plastic paint system anchors the work in a space where aesthetics meet engineering. The process, in its essence, rewards patience and precision. It rewards those who invest in proper surface preparation and correct mixing, and who resist the temptation to rush through the final steps. As with many skilled crafts, the outcome is a story told through the sheen of the paint, the evenness of the color across curves and edges, and the ride-away confidence that comes with a finish designed to endure. If a reader wants a concrete reference point that aligns with a broad market landscape without getting lost in brand names or specific product lines, consider exploring a centralized collection that showcases compatible components and aesthetic options for popular models. Within the motorcycle community, there are many pathways to achieving this dream, including dedicated sections that focus on Honda fairings, which often serve as a touchstone for color and finish compatibility in this segment. For a direct look at a broad range of Honda fairings, you can browse the Honda fairings collection at Summit Fairings. This resource offers a sense of how different shapes, textures, and surfaces respond to color and finish in practice, helping you envision how a 2K system could perform on a specific fairing shape and under real-world lighting conditions. Honda fairings collection For more information and to explore a practical example of fairing options, see: https://www.summitfairings.com/collections/honda-fairings. As you plan your project, remember that the goal is not just to apply color but to create a durable, ride-ready shell that complements the bike’s lines while withstanding daily use. The 2K plastic paint system delivers that balance by combining controlled chemistry with disciplined technique, turning prep and patience into a truly lasting finish. When you consider the broader ecosystem of products and suppliers that support this approach, it is natural to seek reliable sources for sets and components that are specifically designed for highly stressed parts such as motorcycle tanks and fairings. The emphasis remains on plastic-specific formulations, which work with the substrate rather than asking it to behave like metal or another material. If you are curious about where enthusiasts source these specialized materials, a widely used marketplace for professional-grade sets provides a pathway to the kinds of products designed for rugged, daily riding. The key takeaway is to choose a system that is explicitly formulated for plastics, includes a robust base and a hardener that react to form a tough, durable film, and supports the level of gloss, color, and UV resistance you want for your project. The journey from bare plastic to a durable, showroom-quality finish is a measured sequence. It begins with surface preparation, passes through careful layering, and culminates in a cured, polished surface that speaks to both craft and function. For riders who approach painting as a disciplined, repeatable process, the 2K plastic paint system is more than a technique; it is a framework that respects the material and the road alike. External resource: https://www.alibaba.com/product-detail/TRISTARcolor-Motorcycle-Paint-2K-Spray1600745974834.html?spm=a2700.galleryofferlist.normaloffer.dtitle.2d9e7f1aLQjWqX&fsb=y&productid=1600745974834
Finishing the Ride: Mastering Plastic-Specific Paint Systems for Motorcycle Fairings
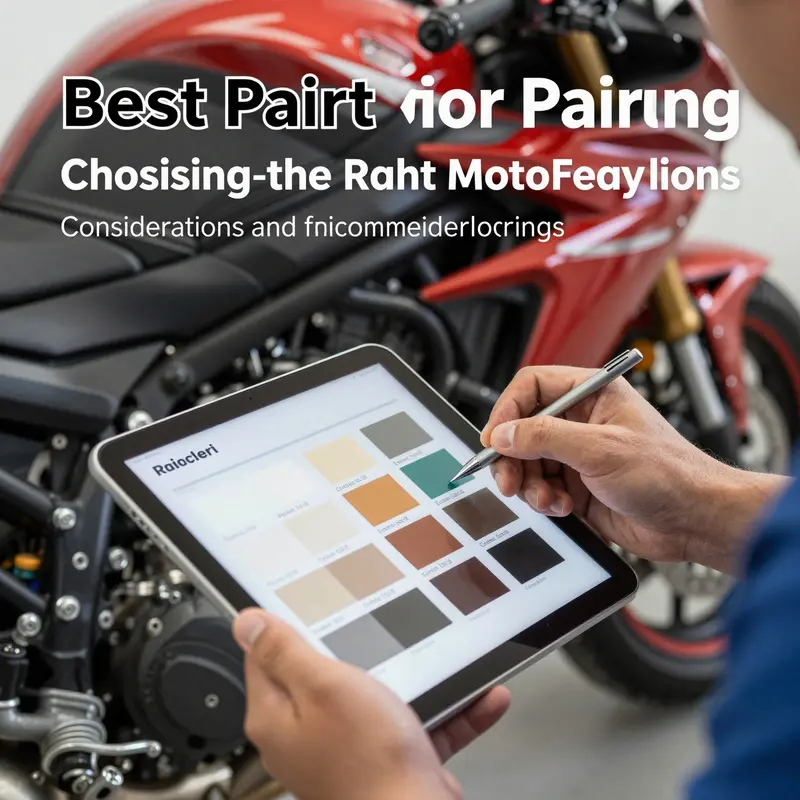
Painting motorcycle fairings is more than choosing a color; it is a careful dialogue between material science, environmental resilience, and the artistry of a flawless finish. Modern fairings are predominantly made from ABS plastic, a material that offers light weight and impact resistance but presents adhesion challenges that traditional automotive paints can struggle to overcome. The most dependable path to a durable, high-gloss, and weather-resistant finish is to use a plastic-specific two-component system. These systems are designed from the ground up for plastics, balancing strong adhesion with the flexibility plastic requires. They blend high-performance resins with weather-resistant pigments and carefully chosen additives so the color can endure sun, rain, and light abrasions without fading, cracking, or peeling. In practice, this approach often yields a longer-lasting result with fewer repairs than standard single-component paints, particularly on surfaces that experience daily exposure to sun and temperature changes. While the temptation to rely on universal automotive paints exists, the unique thermal and mechanical behavior of ABS plastic makes a dedicated plastic paint system not just a preference but a necessity for serious DIY projects and professional work alike. The goal is a finish that remains vibrant and smooth through the miles, with a film that resists chipping and a clear layer that protects against UV damage while preserving depth and clarity. The decision to invest in a two-part plastic system pays dividends in the longevity of the finish and the ease of maintenance over time. A well-chosen plastic paint system provides an adhesion foundation, a flexible but hard final surface, and an aesthetic that stays true far longer than generic coatings could manage. For readers who want to see concrete demonstrations in practice, the broader community of riders and builders often points to plastic-focused tutorials and discussions that emphasize the compatibility between plastics and two-component coatings, along with the critical importance of proper preparation and curing conditions. In this context, the journey from bare fairing to showroom shine becomes a disciplined sequence rather than a single spray of color. To ground this discussion in practical reality, it helps to think through each phase as a cohesive, carefully executed process rather than a series of disjointed steps. The results depend on a consistent surface profile, clean materials, and an understanding of how the film behaves when exposed to sun and heat. If you are exploring fairing options and paint pathways in real-world terms, the Yamaha fairings collection provides a useful context for how shapes and surfaces can present different adhesion challenges and finish expectations. Yamaha fairings collection.
Moving beyond the general principle, the recommended approach concentrates on a two-part epoxy-based or polyurethane-based paint system designed for automotive and motorcycle plastics. These formulations are prized for their adhesion strength, their ability to flex without cracking, and their resistance to chipping and weathering. A single-component acrylic, while easier to apply, often cannot match the long-term performance on flexible plastics subjected to vibration, flex, and temperature cycling. The two-part architecture typically involves a resin-rich base and a reactive hardener or catalyst that, when combined, creates a cross-linked network with superior hardness and chemical resistance. The result is a film that stays intact through the daily grind of riding, air pressures, stone strikes, and the sun’s rays. In practical terms, painters and builders who adopt this route usually insist on materials that are specifically labeled for plastics and compatible with ABS. This compatibility is not a mere preference; it is the foundation for reliable adhesion and predictable aging. The color layer sits atop a properly prepared plastic substrate, and a clear topcoat seals the color, adds gloss, and provides additional UV protection and scratch resistance. The layering is not a cosmetic luxury but a functional architecture that helps the fairing resist the small imperfections introduced by movement and weather. When you look at a finished fairing that retains its gloss even after a season of sun and rain, you’re seeing the built-in resilience of a system designed to move with plastic rather than resist it. The best practice is to select a system with a dedicated plastic primer, a compatible color coat, and a compatible clear coat, all formulated to bond and endure on plastic, not metal or composite alone. The upshot is clear: choosing a plastic-specific two-component system is not merely about color; it is about establishing a durable, flexible, and aesthetically stable foundation for the entire finish. If space and budget permit, working with a two-part system that has clear, manufacturer-backed guidance on mixing ratios and cure times reduces guesswork and increases the odds of a flawless outcome on the first attempt. For readers who want to understand the rationale behind these choices, manufacturer documentation and professional guides emphasize that primers for plastic surfaces improve adhesion by creating a micro-roughness that helps the subsequent layers grip and distribute stresses evenly. The primer also serves as a barrier to any residual contaminants that could undermine the bond between the plastic and the coating layers. Following primer, the base color is applied, usually in thin, even coats, with light, controlled passes to avoid sags and solvent entrapment. The color layer benefits from an environment that minimizes dust and airflow irregularities, ensuring an even film that dries consistently. Finally, a clear topcoat is applied to deepen gloss, enhance scratch resistance, and shield the color from ultraviolet degradation. The clear layer is an essential part of the system; without it, even the best color could look dull after repeated exposure to sunlight. The clear also helps seal minor pinholes and imperfections that may have formed during the base color stage, smoothing the surface before final polishing and buffing. The degree of gloss and the depth of color depend not only on the pigment but on the quality of the base and the clarity of the final layer. The overall effect is a finish that looks as good as it is durable, with a professional-grade appearance that stands up to the elements and to the occasional encounter with road debris. In the real world, people often combine this approach with a final, light mechanical polish to remove any micro-marring and to restore the high-gloss look. The polish should be compatible with the cured clear coat to avoid any chemical interaction that could cloud or haze the surface. A thoughtful approach to polishing includes testing a small, inconspicuous area before proceeding to the entire surface, ensuring that the polish brings out the depth of the color without harming the clear coat. The essence of this process is living in the details: meticulous surface preparation, compatible two-component plastics paints, precise application, and careful curing. Surface preparation is unglamorous but crucial. Begin with a thorough cleaning using a degreaser to remove oils and any wax residues. Oils left on the surface interfere with adhesion, especially on ABS plastics where surface energy is a critical factor for bonding. After cleaning, light sanding with a fine grain, typically around 600 to 800 grit, creates a micro-roughness that allows the primer to anchor a little better. The goal is not to gouge the surface but to expose a fresh, slightly roughened texture that catches the primer’s first bite. Once sanding is complete, wipe away the dust with a tack cloth, then inspect for any remaining contaminants or imperfections. If the surface feels greasy or slightly waxy in any area, repeat the cleaning step to ensure a clean, receptive substrate. The next step is priming, with a primer formulated specifically for plastics. A plastic primer provides an ideal surface energy for the subsequent base coats and enhances adhesion across the entire fairing, including seams and edges. It also serves as a moisture barrier, helps even out minor texture differences, and reduces the likelihood of residual pinholes, which can mar the final appearance when a high-gloss clear coat is applied. After priming, the surface should be allowed to cure according to the manufacturer’s instructions. Rushing this stage or applying color coats over incompletely cured primer invites adhesion failures and a compromised finish that can peel or lift over time. The painting process itself follows a disciplined rhythm. A base coat is applied in thin, even passes, maintaining a steady distance and a consistent sweep across the curves and recesses. The aim is to build color gradually while minimizing runs, sags, or orange-peel textures. Each layer should dry before the next is applied, ensuring the color depth builds in a controlled fashion. In environments where dust or humidity is a factor, additional measures such as masking or a temporary spray enclosure may be necessary to protect the fresh color from microcontaminants. After the color coats have achieved the desired coverage and depth, a clear topcoat seals the work. The clear not only adds depth and brightness but also introduces a resilient barrier that resists UV radiation and micro-abrasions. The combination of base color and clear coat produces a finish that remains vibrant and smooth across a broad temperature range, from cool nights to the intense heat of direct sun. The layering is a balancing act; too much of any one layer can create issues such as bridging or solvent entrapment, so the recommended practice is to apply multiple thin coats rather than a few heavy ones. This approach favorably affects the final gloss level and minimizes defects that can compromise the surface over time. For those who are price-conscious, there are consumer-grade spray-on systems marketed for plastics that promise an accessible entry point. They can be viable for hobbyists or short-term projects, but they typically cannot match the longevity of professional two-component plastic systems. Achieving durable results with consumer products requires extra care in surface preparation, including more aggressive sanding, multiple ultra-thin coats, and a meticulous, dust-free environment to prevent defects such as pinholes or orange peel. The cost of time and effort often rises with consumer products, and the long-term value tends to fall short of what a genuine plastic-specific two-part system can deliver. At the heart of the decision is the assessment of your goals, skill level, and willingness to invest in the right materials. A professional-grade two-part plastic system, despite a higher upfront cost and a more complex mixing procedure, should deliver superior adhesion, flexibility, and outdoor durability. For many riders who want a finish that survives daily riding, a long-term color stability, and a polished look that remains consistent with minimal maintenance, the two-part plastic route is the most efficient path to the outcome. It is essential to verify material compatibility with your fairing’s construction, especially when ABS is the primary substrate, though some blends and fiberglass components can also benefit from similar plastic-specific systems. While the fundamentals described here are robust, the exact product selections and curing times vary by manufacturer and climate. Following the official guidelines for mixing ratios, pot life, cure times, and recommended cure temperatures is critical to success. If you are unsure about the specifics, consult the product datasheets or seek guidance from experienced painters who routinely work with plastic substrates and two-component systems. In addition to the technical considerations, practical workflow aspects matter. A clean, dust-free workspace with stable temperatures within the recommended range makes a tangible difference in the final result. Temperature controls, proper ventilation, and proper masking for areas that should not be painted are integral to a smooth process. Consistency in technique—steady, uniform passes, balanced air pressure, and correct nozzle sizing for a given spray gun—contributes to a uniform film thickness and a seamless finish. A common guideline is to choose a spray nozzle within a moderate range and tailor the air pressure to achieve a powder-like atomization that minimizes runs while preserving color brightness. The combination of preparation discipline, material choice, and controlled application is the difference between a fairing that looks good in good light and one that endures through a season of riding without requiring frequent touch-ups. Finally, the final considerations are practical and strategic. The best paint choice hinges on your skill level, your budget, and the result you want to achieve. For long-term value and professional-grade results, investing in a plastic-specific two-part system is strongly advised. Always verify that the system is compatible with ABS or the specific plastic used in your fairing, and follow each manufacturer’s instructions to the letter. The time spent in preparation and the precision of your application pay dividends in the form of a finish that remains vibrant and intact, year after year, with the kind of depth and clarity that makes a fairing look almost sculpted rather than merely painted. In summary, the path to the best possible finish on motorcycle fairings runs through plastic-focused, two-component paint systems, careful surface preparation, disciplined application, and thoughtful curing. When done correctly, the result is a finish that resists UV damage, weathering, and minor impacts, while preserving a high-gloss, custom appearance that supports the rider’s personal style for miles to come. External resource: https://www.permafix.com/
Final thoughts
Investing in quality paint specifically designed for motorcycle fairings is vital for maintaining performance and aesthetics over time. Motorcycle-specific paints and 2K systems not only enhance durability but also provide a striking finish that stands out. As a business owner, understanding these aspects can greatly affect your product offerings and customer satisfaction. Make informed choices to ensure your motorcycle restoration or customization projects achieve results that excite and endure.