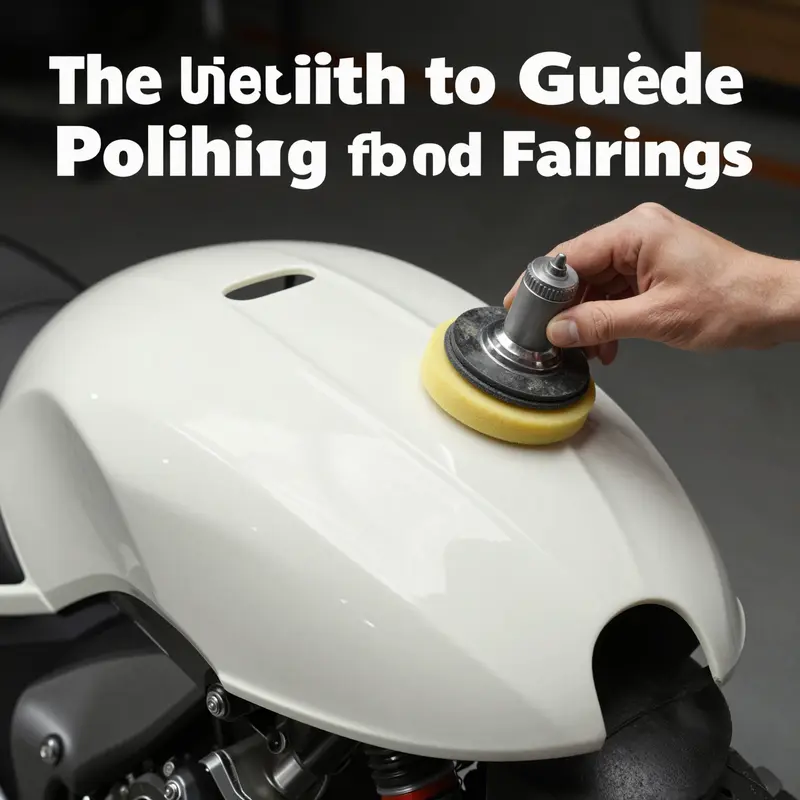
Polishing motorcycle fairings is essential for maintaining the bike’s aesthetics and prolonging the life of its components. With many riders investing in high-quality ABS plastic or fiberglass kits, knowing how to properly polish these materials becomes crucial for business owners in the motorcycle industry. This guide details the best polishing products and techniques specific to ABS plastic and fiberglass fairings. Additionally, maintenance tips will ensure that both the finish and fairing longevity are preserved. As we delve into this subject, each chapter will equip you with the knowledge needed to provide exceptional service in fairing care and polish, ultimately benefiting your business and improving customer satisfaction.
Shine and Shield: Mastering ABS-Plastic Motorcycle Fairings for Deep Gloss and Lasting Protection

Polishing ABS plastic motorcycle fairings is more than a cosmetic ritual; it’s a careful restoration that balances depth of gloss with long-term surface defense. ABS plastic, widely used in OEM and aftermarket fairings for its light weight and resilience, responds best when treated with products designed specifically for thermoplastics. The aim is to erase oxidation, tiny scratches, and swirl marks without removing material or dulling the plastic’s clarity. When done right, the fairing looks almost mirror-like, yet remains durable against UV exposure and road grime. The approach is not a single-step miracle; it’s a deliberate sequence that respects the material, the finish beneath, and the ride you have in mind. The payoff is a finish that enhances color and contour, making bikes feel newer, even after miles of sun, rain, and tarmac.
Before you reach for polish, preparation is essential. Begin with a thorough wash using a non-abrasive cleaner to lift dirt, brake dust, and road grime without scouring the surface. Avoid harsh solvents that can dry or craze the plastic. If the fairing is heavily contaminated or has embedded grime, repeat a gentle wash and rinse to ensure the surface is clean and free of grit. Work in a shaded area to prevent quick drying that can leave water spots or hazing when you wipe. A common pitfall is neglecting the edges and recessed panels, where dirt can trap and later become microabrasions if disturbed during polishing.
Once clean, inspection matters. Look for oxidation that steals clarity, tiny scratches from wash mitts or debris, and any color fading that might hint at UV damage. ABS responds well to controlled abrasion, but aggressive cutting can thin or heat the plastic, so select a polish with fine abrasives and no heat buildup. The most effective ABS-focused approach blends a plastic-safe compound with a soft pad—ideally a dual-action polisher for even, consistent correction, or careful by-hand technique with a microfiber applicator. The key is to work in small sections, keeping the pad flat to avoid gouging any contours and maintaining light, overlapping passes. Throughout, maintain a cool surface; if the plastic gets warm, pause and wipe away residue before continuing.
A two-step philosophy serves most ABS jobs well. The first step uses a fine-cut, plastic-specific polish or compound to lift oxidation and refine minor scratches. The emphasis is on controlled correction rather than aggressive material removal. The second step introduces a plastic gloss enhancer or sealant designed for ABS to lock in the corrected finish and add a shield against UV rays and environmental contaminants. This two-step cadence minimizes the risk of hazing and ensures a durable look that lasts beyond a single wash cycle. With the right products, the finish emerges with a depth of color and a clarity that makes the bike’s lines pop rather than recede behind a dull film.
Practical technique matters as much as product choice. Apply polish in small, overlapping sections using a dual-action polisher at a low to moderate speed, or by hand with a supple microfiber pad. Work with light pressure and let the compound do the work, avoiding circular or back-and-forth motions that can create new swirls. Frequently inspect your progress under natural light to catch hazing or high spots early. Remove residue with a clean, dry microfiber cloth, wiping in a consistent direction to reveal the true clarity of the surface. If you notice heat buildup, back off and pause; heat can cause micro-melting in some plastics and may compromise the gloss later.
Post-polish care is where the surface gains durability. After the corrected area shines, follow with a dedicated UV-protective sealant or wax designed for plastic surfaces. The right UV protection is not a vanity layer; it shields the restored finish from the sun’s rays that would quickly fade or re-oxidize the surface. For ABS, a sealant that adheres well to plastics and resists water spotting offers the best balance of glow and protection. Apply according to the product’s directions, typically in a thin, even coat, allow it to cure briefly, then buff to a high-luster glow using a fresh microfiber cloth. The result is a finish that not only looks striking but remains easier to maintain over time.
When you’re working with a modern ABS fairing that might have an OEM clear coat or factory-treated finish, compatibility becomes a guardrail. The polish and sealant should be compatible with clear coats, ensuring you don’t disrupt the underlying layer while you refine the plastic’s surface. If the fairing sports a satin or matte texture in some areas, aggressive glossing can ruin the texture. In such cases, a matte-finish restorer can be used to preserve texture and prevent unwanted gloss while restoring vibrancy to the color beneath.
A broader perspective on ABS care reveals the value of a consistent routine. Regular light cleaning with non-abrasive products prevents the buildup that leads to deeper scratches. When you detect micro-swirls or crazing, address them sooner rather than later; small improvements compound with each maintenance cycle. Avoid abrasive cleaners or high-alkaline solvents that can strip protective coatings or alter the plastic’s surface tension. Instead, opt for purpose-made plastic cleaners and polishes that are formulated to mitigate heat transfer and minimize friction on thermoplastics. This disciplined approach helps your fairings resist the usual culprits—sun exposure, road salt, brake dust, and chemical fallout from fuel handling—so the gloss lasts longer and the color stays vibrant.
The practical sequencing matters also for riders planning upgrades or custom schemes. If you are maintaining a full race kit or a sharply styled street fairing, the goal remains to restore clarity plus shield the finish. In this context, the use of a dedicated plastic gloss enhancer—one that seals and adds UV protection—becomes a logical capstone to the restoration. It’s not merely about a bright look; it’s about maintaining the integrity of the plastic over countless sessions, including the heat of summer rides and the grime of daily commutes. The right combination yields a surface that gleams under showroom lighting yet remains resilient when the elements come calling.
To connect this practice to real-world choices, consider browsing a wide range of fairing options from trusted sources that emphasize compatibility and quality with ABS plastics. For riders exploring specific bodywork lines, a curated collection such as Honda fairings offers tested, compatible options for a variety of models. Finding a collection that aligns with your bike’s design language can help you choose a polish strategy that respects the shape and finish of each panel, ensuring a cohesive result across the entire bike. You can explore relevant options here: Honda fairings collection.
For riders who want a more top-down understanding of the process, the core ideas are universal. Clean, correct, and protect. Begin with a careful wash that removes grime without scratching. Proceed with a plastic-safe polish to address oxidation and micro-scratches, using controlled motions and mindful heat management. Conclude with a UV-protective sealant or wax to lock in the gloss and shield against future damage. Maintain the finish with routine cleanings and quick touch-ups as needed. With patience and the right approach, ABS fairings can look nearly as fresh as the day they left the showroom floor.
From a broader maintenance perspective, consider how these steps integrate with your bike’s overall care. A well-polished fairing enhances color depth and contour, which can influence how you perceive the bike’s aerodynamics and line. It also creates a protective barrier that helps resist early wear from sun and weather. While the gloss may fade gradually with time, a disciplined approach to refinishing can push that timeline further, preserving a sharp, high-definition look that complements the bike’s performance heritage. If you’re planning a more aggressive aesthetic—perhaps a bold, glossy red or a deep metallic blue—polishing becomes part of the design language, coordinating with wheel finishes, frame paint, and exhaust heat shields.
In discussing finishes and finishes alone, it’s important to keep in mind that some ABS fairings may include areas with special textures or coatings. Matte zones, satin sections, or textured decals require specific handling. Do not polish those areas aggressively; instead, rely on a matte finish restorer or gentle maintenance steps that preserve texture while maintaining color depth elsewhere. This balanced approach ensures the entire fairing reads consistently and remains faithful to the rider’s intended look.
For enthusiasts who want to deepen their knowledge, there is a broader ecosystem of care resources available. While this chapter emphasizes ABS plastic applications, the underlying principles—proper cleaning, controlled polishing, and protective sealing—translate across plastics and composites. The emphasis on using products designed specifically for thermoplastics helps ensure you are choosing materials that won’t soften, craze, or abrade the surface under normal use. With the right technique, even an older fairing can regain a nearly-new clarity, helping the bike’s lines read clearly in sunlit shots or track-side lighting.
Finally, consider how this craft fits into a broader DIY ethos that many riders embrace. Polishing ABS fairings is part science, part art. The science is the chemistry of plastics and the physics of heat and abrasion. The art is in choosing the level of gloss that suits your model and your climate, in coordinating color depth with the rest of your bike’s finish, and in performing the process with patience. A well-polished fairing is more than a surface; it’s a statement that the bike, much like its rider, values precision, care, and longevity. When done with intention, the result is a vision of gloss and clarity that stands up to time and the road, a testament to both the material and the hands that brought it back to life.
External resources can further illuminate best practices for those who want to explore a broader range of techniques. For deeper insights into professional-grade care and maintenance, consult established care guides from recognized authorities in automotive detailing. They provide practical details on pad choices, polishing speeds, and cure times that can help you tailor the approach to your specific fairing shape and color. External reference: https://www.meguiars.com
Shine and Shield: Mastering Fiberglass Motorcycle Fairings for a Showroom-Gloss Finish
Fiberglass fairings carry a distinct, almost sculptural presence on a bike. Their smooth curves and crisp angles are a canvas, but they also demand respect because gelcoat and cured fiberglass respond differently than painted plastic or metal. The goal when polishing fiberglass fairings is not merely to erase a few swirls; it is to coax a deep, showroom gloss while preserving the integrity of the gelcoat and protecting the surface from the elements. The best approach blends careful cleaning, a light touch, and products specifically formulated for gelcoat and fiberglass, rather than generic automotive polishes that can lift, haze, or dull the finish over time. When done correctly, you’ll notice a fuller, more vibrant look that enhances color depth and clarity without creating micro-scratches or compromising the underlying material. The process also creates a durable shield against UV rays and environmental contaminants, helping the fairings resist chalking, yellowing, and micro-abrasions that accumulate from riding and washing alike.
Begin with a mindset of patience and precision. Fiberglass is forgiving in some respects, but its gelcoat layer is a delicate surface that deserves respect. The first contact should be a thorough clean, using a non-abrasive cleaner that can lift brake dust, grime, road grime, and bird fallout without introducing new scratches or etching. This initial step serves a dual purpose: it reveals the true condition of the surface and prevents embedded debris from grinding into the gelcoat during polishing. Perform the wash away from direct sun or heat, and in a shaded area where the surface won’t dry too fast and form hazing or water spots. A generous rinse removes loose matter, while the cleaner, applied with a soft microfiber or foam wash mitt, gently dissolves the grime without aggravating the surface.
Once the fairing is dry, the real work begins. The recommended polish process for fiberglass hinges on a two-part philosophy: a fine, gelcoat-safe polishing compound to smooth out minor scratches and swirl marks, followed by a sealant or wax that provides durable protection against UV exposure and dirt adhesion. The emphasis should be on products designed for gelcoat or fiberglass surfaces, rather than all-purpose automotive polishes, which can contain abrasives or aggressive solvents that may degrade the gelcoat over repeated applications. When used correctly, these fiberglass-specific polishes work by removing micro-marring and slight hazing while leaving a transparent, clear layer that mirrors light and showcases color depth. The polish should be applied in small sections to maintain consistent pressure and heat, with light, circular motions using a soft foam pad or a microfiber applicator. It’s important to limit heat buildup, so avoid leaning into the pad with heavy pressure or using high speed on a DA polisher. A gentle touch is often more effective than brute force, especially on older gelcoat that may have started to oxidize but still retains a strong base.
In terms of technique, the fiber-resin nature of gelcoat means you’ll want to work the product with a dual-action polisher set to a slow, even pace or apply by hand with a microfiber pad. The aim is to abrade away only the micro-scratches and mild oxidation that dull the surface, not to melt or gum up the surface with heat. After each pass, wipe the area with a clean, lint-free microfiber to monitor progress and evaluate whether additional passes are necessary. The goal is a uniform, glassy look across the entire fairing, with no lingering hazing or uneven gloss. If you encounter areas that refuse to respond after a couple of gentle passes, consider moving to a finer grade polish or taking those spots more conservatively—gelcoat can respond differently from panel to panel, and some regions may have different levels of oxidation or micro-scratch patterns.
Once the correction step yields an even sheen, the surface is ready for protection. This is where the fiberglass finish truly earns its value. A purpose-built sealant or ceramic coating designed for gelcoat or cured fiberglass will seal the newly refined surface, increasing resistance to moisture, UV rays, and environmental fallout. The protective layer serves two essential roles: it locks in the gloss achieved during polishing and makes future maintenance easier by preventing dirt and grime from bonding as aggressively as before. When applying a sealant or coating, follow the manufacturer’s directions closely and ensure the surface is dust-free and completely dry. A light, controlled application over small sections helps prevent streaking and allows you to observe how the coating interacts with the surface under ambient light. After curing, wipe off any residues with a clean microfiber cloth. The surface should feel slick to the touch and emit a crisp, high-definition glow that makes the color pop while the finish remains even and consistent.
If you ride a fiberglass fairing with a matte, satin, or textured finish, the approach shifts slightly. Polishing aggressively can erase the texture you chose or the factory matte look, so you’ll want to avoid aggressive compounding and instead opt for a matte-finish restorer or a product designed to preserve texture while reviving subtle gloss only where intended. In many cases, you’ll apply a minimal amount of product with a light hand, focusing on restoring clarity to the gelcoat without crossing the boundary into a glossy finish. This preserves the intended aesthetic while still offering the protective benefits of a coating. It’s a nuance that requires a keen eye and a willingness to test a small area before committing to the entire panel.
A practical cadence emerges from these guidelines. Start with a thorough, shade-filtered wash, then assess the gloss and clarity. If the gelcoat shows fine swirl marks or oxidation, introduce a fine-grade, gelcoat-safe polishing compound. Work in small quadrants, using a soft pad and a light touch, and check work frequently with a clean microfiber to judge uniformity and shine. After restoring the underlying gloss, move to a sealant or ceramic coating, ensuring an even, streak-free finish with no high spots or gaps. The end result is a surface that not only gleams but also repels water and loosens dirt before it can cling to the gelcoat. This combination of proper technique and purpose-built products yields results that endure through rides, washes, and the capricious weather of the road.
For enthusiasts who own fiberglass fairings from different manufacturers, the question of compatibility often arises. The safe rule of thumb is to test any product on a small, inconspicuous area first, especially if a panel has been previously repainted or repaired. Gelcoat that has yellowed or chalked over time may require a more cautious approach, with incremental steps and perhaps a longer cure time for protective coatings. When selecting a polish or sealant, look for terms like “gelcoat-safe” or “fiber-glass compatible” on the label. Such descriptors indicate formulations that are gentler on the resin matrix and more forgiving to the cured surface than general resurfacing compounds. The aim is to restore depth and clarity without introducing new blemishes or dulling the gelcoat’s natural resilience.
In discussing the broader ecosystem of fairings, it’s worth noting how the I/O of a modern bike interacts with the fairings’ surface. A well-polished fiberglass panel can dramatically affect perceived color richness and the bike’s overall presence. It creates the optical effect of a deeper pigment and a more uniform reflection, which makes the fairing appear as if the color extends beneath a flawless glaze. That sense of depth adds to the rider’s confidence and pride in their machine, translating to a more satisfying riding experience. At the same time, the protective layer reduces the risk that UV exposure, rain, or road salts will degrade the gelcoat, helping the finish maintain its punch longer into the bike’s service life. A consistent, well-maintained surface also helps when selling or trading the bike, since potential buyers are drawn to the sheen and the sense of care reflected by the finish.
If you’re curious about where fiberglass fairings sit in the broader ecosystem of sportbike customization, you can explore specific collections that address particular models or brands. For example, certain manufacturers and aftermarket suppliers offer fiberglass-based fairings that can be polished using the same gelcoat-focused approach described here. When embarking on a project or refresh, consider starting with the general principles of cleaning, gentle correction, and protective sealing, then tailor the steps to the exact surface you’re working with. This ensures a consistent baseline of quality and a finish that remains faithful to the original design while elevating its visual impact.
As you consider the next steps, you might want to see how others have organized their upgrades and what fairing kits are available for different makes. For example, you can explore the Kawasaki fairings collection for a sense of how fiberglass components are integrated with modern frame geometry and styling. The link to that collection offers a way to contextualize your polishing practice within the broader landscape of fiberglass components and their installation, ensuring you’re not only achieving the best finish but also understanding how the finish interacts with fasteners, mounting points, and edge treatments that can influence polish longevity. Kawasaki fairings“
In closing, fiberglass fairings demand a measured, surface-aware approach to polishing that respects the resin matrix and the gelcoat that protects it. The right sequence—clean, gentle correction, and thoughtful protection—transforms a tired panel into a vivid, durable surface that seems to pulse with color and clarity whenever light catches it. The routine becomes less about chasing perfection in a single session and more about creating a long-term habit that keeps the finish bright, washable, and resilient. By focusing on gelcoat-safe products and avoiding aggressive abrasives that can erode the surface over time, you’ll enjoy a finish that not only looks vibrant but also stands up to the wear and tear of real-world riding. For the enthusiast who wants real-world results without the guesswork, this approach offers a reliable, repeatable path to showroom gloss that respects fiberglass and preserves it for miles to come.
External resource: https://www.meguiars.com/product/g1027-ultimate-finishing-co m
Gloss That Stays: Mastering the Art of Polishing ABS and Fiberglass Fairings for Peak Shine and Protection
A motorcycle’s fairings are more than a shield for the rider; they are a surface that speaks to the machine’s character, a canvas that reflects the care invested in it. When you ride a modern bike with high-gloss ABS plastic or composite fiberglass fairings, you want the finish to be deep, glassy, and resilient. The goal is not merely a bright surface but a durable one that resists the sun’s UV rays and the everyday scuffs that come with redline bursts and parking-lot stares. The best polish for motorcycle fairings is the one that respects the material under its gloss. ABS plastic, a common choice for OEM and performance kits, responds best to a deliberate, two-step correction followed by a sealant that enhances clarity while shielding against environmental assault. Fiberglass, often used on more aggressive, race-oriented kits, benefits from a finer polish that respects the resin matrix and a sealant formulated for composites. The difference in approach matters because the surface chemistry of ABS and fiberglass is not identical, and a one-size-fits-all session can leave behind micro-scratches or hazing that detracts from the final look.
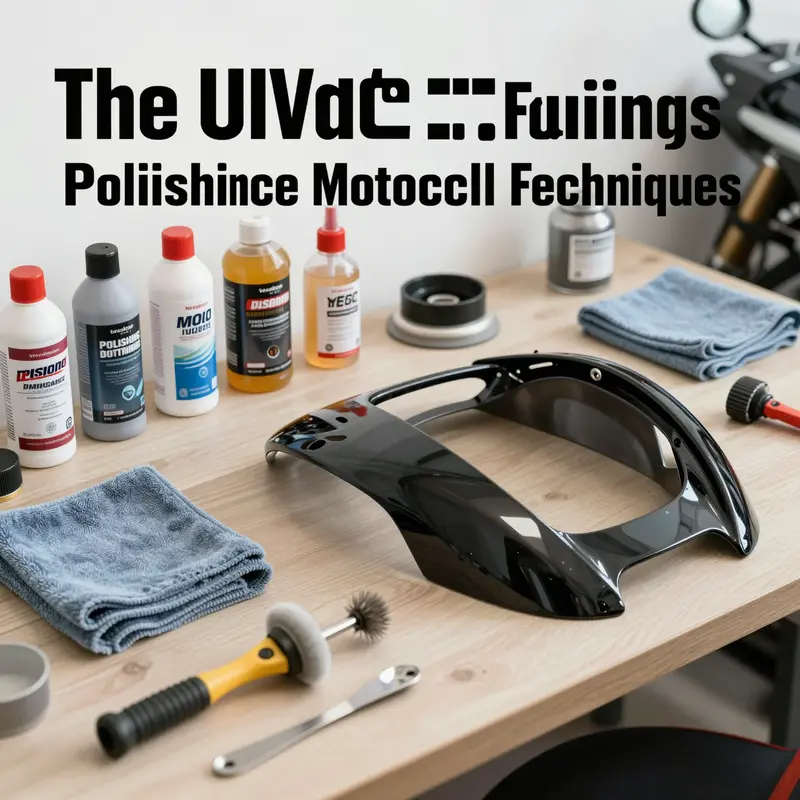
The cleaning phase is not glamorous, but it is foundational. A thorough, patient wash clears away dirt, brake dust, and road grime that can embed itself in micro textures during the polishing process. Start with a bucket fitted with a grit guard. This simple device keeps dirt at the bottom where it belongs, reducing the chance that jangling particles will drag across the surface during washing. Use a motorcycle-safe cleaner and a soft sponge or microfiber wash mitt, and rinse completely. Soap residue left behind after polishing is a recipe for hazing or streaking, especially when the light hits the surface at the wrong angle. In shaded conditions, this step can be more forgiving, but shade is not a substitute for meticulous technique. The aim is to arrive at a surface that feels smooth to the touch and looks uniform in a wide range of lighting, from garage lamps to late-afternoon sun.
After cleaning, the decision how to proceed depends on the material you’re treating. ABS plastic fairings typically benefit from a two-step correction on oxidation, swirl marks, and minor scratches. The first stage is a corrected cutting compound that removes the fine layers of oxidation and the faint imprint of scratches without penetrating too deeply. The second stage involves a lighter polish that refines the surface and prepares it for the protection step. For the gloss finish, a dedicated plastic gloss enhancer is applied. This enhancer serves a dual purpose: it seals in the corrected look and adds a durable sheen that resists UV fading and micro-abrasion from road debris. If your kit uses a matte or satin finish, you should adjust the approach. Aggressive polishing can erase texture that the finish is designed to maintain. In those cases, you want a matte finish restorer that stabilizes the texture while preserving the intended appearance.
Fiberglass fairings require a slightly different rhythm. Because the resin and gel coat in composites can be more sensitive to marring, a fine-grade polishing compound is a prudent choice. The goal is a gentle refinement that reduces micro-scratches without creating new blemishes or overheating the surface. Follow with a fiberglass-specific sealant. These sealants are formulated to bond with composite surfaces, offering longevity and resistance to UV and moisture without compromising the integrity of the resin. The process remains a careful, small-steps journey: work in sections, avoid heavy pressure, and allow each layer to set as needed before moving on. When done correctly, fiberglass panels reveal a clarity that makes the rest of the bike seem to glow, as if the finish has been lifted by a notch’s worth of light.
A practical, must-remember rule guides every step: never rush. Heat and friction can micro-scratch or haze plastic and resin surfaces, especially when you push too aggressively with a pad or an abrasive compound. Instead, use a dual-action polisher with a light touch or apply polish by hand with a microfiber applicator pad. The key is to work in small sections, maintaining an even pressure and overlapping strokes to avoid creating swirls that only become evident when the sun hits the panel at the wrong angle. In practice, you should buff off residue with a clean microfiber cloth after a short dwell time, allowing the polish to set just enough to offer protection but not so long that it dries into a stubborn film. A damp cloth used between passes can help keep the surface free of grit that could scratch the finish as you work along the curves and recesses of fairings.
As you plan the overall maintenance cadence, picture a monthly checkup that combines a quick visual inspection with a tactile feel. Look for new hazing, dull spots, or micro-scratches that catch your fingernail. If any of these signs appear, a light touch-up polish can help restore uniformity without requiring a full correction. A bi-monthly clean is equally important, especially in environments where sunlight, rain, or road salts are common summonses to the bike’s face. Regular cleaning is more than aesthetics; it is a prophylactic measure that protects sealants and maintains the integrity of the finish over time. UV exposure, salt spray from coastal roads, and the constant flux of temperature can degrade coatings if they are not refreshed or topped up with a proper protective layer. A consistent routine, therefore, helps prevent the buildup of stubborn contaminants that can etch or dull the surface after repeated exposure.
When confronted with deeper damage, the conversation shifts toward the appropriate level of intervention. Deeper scratches or wear that penetrates beyond the clear coat or gel coat may require professional detailing. In many cases, a skilled detailer can restore the original gloss by reconditioning or reapplying the protective layers in a controlled environment. It is not a failure to seek professional help; rather, it is a recognition that the fairing is a significant investment and deserves the right steps to preserve its structural and aesthetic integrity. For riders, that assurance matters: a finished fairing is not just a showpiece but a durable shell that shields the rider from the weather and helps maintain the bike’s streamlined profile. This is particularly true for high-end or race-oriented builds, where every curve is part of the bike’s aerodynamic identity and every reflection an indicator of care.
The context of modern sport bikes adds a layer of nuance that makes the right approach even more critical. For machines built with full race fairings or kit options that emphasize both performance and aesthetics, compatibility with existing finishes must be a guiding consideration. Some kits arrive with factory-matte or satin surfaces designed to minimize glare or sustain a particular texture. In those cases, aggressive glossing can defeat the intended effect, so the approach shifts toward preserving texture rather than amplifying gloss. Matte finish restorer products are designed for this purpose, offering a path to maintain texture while preventing the gloss from creeping into areas where it should not appear. Balancing gloss and texture is a nuanced skill, one that requires awareness of the surface’s baseline design and the outcome you desire. For many riders, the best result is a surface that reads with quiet depth under street lights and the sun, a finish that stays honest to the bike’s design while resisting the inevitable exposure to the elements.
The practical wisdom distilled from professional practice becomes a philosophy you can carry into your own garage. Cleanliness first, polish second, protection third, and maintenance ongoing. The sequence is a form of care ritual, a way to connect with the bike and understand how routine habits influence the long-term look. In this light, every wipe becomes a choice: a choice to safeguard the finish, to extend its life, and to enjoy the shine without reservation. The approach also translates to different materials and finishes within the same bike family. ABS plastics, fiberglass, or composite panels each respond to a tailored routine, yet the underlying discipline—clean, polish, protect, maintain—remains the common thread. When you apply this mindset, you are not merely chasing a momentary gleam; you are nurturing a finish that grows in character with every ride.
For riders who want further guidance, it is useful to consider the broader ecosystem of fairing care. Official maintenance manuals and manufacturer recommendations provide a baseline for what is advisable with your particular model and finish. They often specify compatible cleaners, safe polishing practices, and the right kinds of sealants that won’t compromise the underlying layers or the laminate structure. This is why the conversation around care often returns to respect for the surface and attention to detail. The surface is the most accessible part of the machine; safeguarding it is a direct line to preserving the bike’s overall value and identity. When done correctly, the fairing gleam is not merely cosmetic but a signal of steady stewardship, a sign that the bike’s owner understands the value of precision in maintenance as well as performance.
The practical takeaway from the maintenance framework is simple: start with a clean slate, choose the right tool for the material, respect texture where it exists, apply protective layers, and stay consistent with routine checks. If you ride a modern sport bike with full race fairings, you may face a slightly more demanding challenge in protecting fresh paint or clear coats over composite panels. In those cases, a cautious approach that emphasizes surface-friendly products and controlled polishing pressure helps preserve the finish without compromising the kit’s design intent. The route to consistent results begins with the right mental map and the willingness to invest a little time into the process. The payoff is a surface that looks as good after a season as it did on day one, a finish that resists dulling, and a protective layer that eases future maintenance.
Internal resources can guide you further as you build a maintenance plan. For those who want to explore compatible fairing lines and kits while keeping care practices in view, the Kawasaki fairings collection provides a useful context for how modern bikes approach styling and finish choices across a range of models. You can explore the Kawasaki fairings collection here: Kawasaki fairings collection.
In addition to practical steps, it helps to anchor your method in authoritative guidance when you face more complex situations. The Hayabusa, a benchmark in fast, carbon-conscious design, has a published maintenance manual that outlines approved care practices for composite and painted surfaces. Consulting official manuals reinforces the care principles described here and reminds riders that sound maintenance is a dialogue between the rider and the bike’s original design intent. For readers seeking an external reference to deepen their understanding of fairing maintenance and surface care, see the Suzuki Motor Corporation – Official Hayabusa Maintenance Manual (2026). External resource: https://www.suzukimotor.com/support/hayabusa-2026-maintenance
Final thoughts
In summary, polishing motorcycle fairings is a vital aspect of motorcycle care that enhances both appearance and durability. For ABS plastic applications, using a combination of the right compounds and protection products can revitalize these surfaces effectively. Fiberglass kits, while requiring different considerations, can also shine beautifully when treated with the appropriate materials. Regular maintenance ensures that the finish remains flawless and can delay the need for future resprays or repairs. By implementing the techniques and recommendations discussed, motorcycle business owners can reinforce their service quality, build customer trust, and ultimately contribute to the ongoing enjoyment and performance of riders’ machines.