Exploring the world of motorcycle customizations, particularly for the Honda CMX 500, reveals a pivotal component in enhancing both performance and style: the motorcycle fairing. The quest for the right fit leads us to ABC Auto Part, a name synonymous with quality, although direct product information remains elusive. However, by delving into fairings crafted for the CMX 500 from various reputable sources, we uncover significant aspects critical for business owners in the motorcycle parts sector. From material composition to installation techniques and the visual allure that fairings provide, each chapter serves to equip you with comprehensive knowledge, ensuring that your inventory meets the expectations of discerning customers seeking the best for their rides.
Between Style and Shield: Navigating CMX 500 Fairings in the Aftermarket Landscape
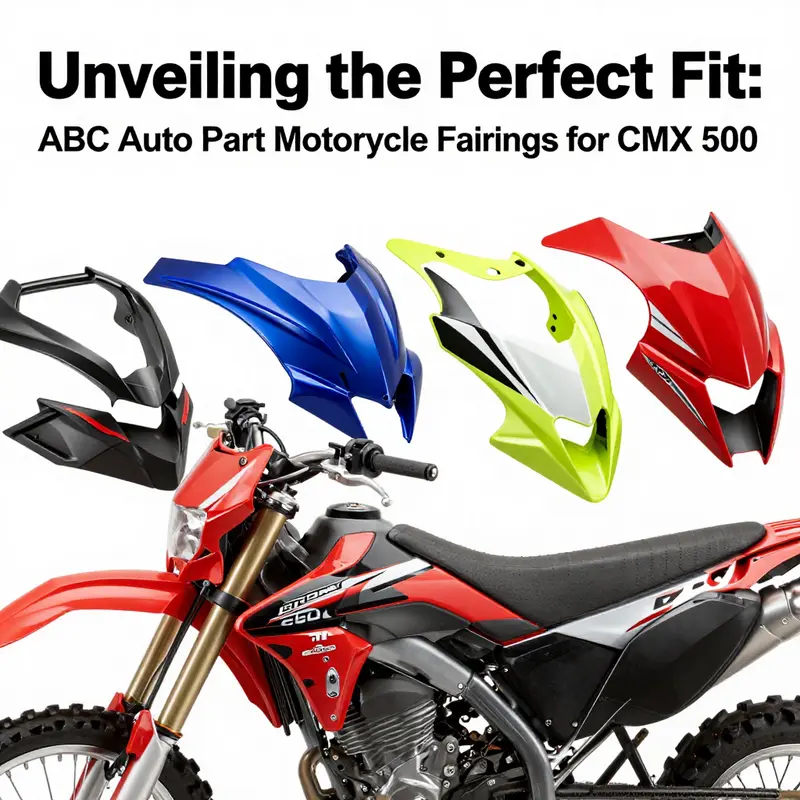
Riding a CMX 500 invites a careful balance between naked character and protective shield. The aftermarket world around this motorcycle is a tapestry of shapes, finishes, and mounting theories, every option promising a slightly different relationship between rider, wind, and road. The knowledge base you provided confirms something important: there isn’t a direct listing for a brand named ABC Auto Part in relation to CMX 500 fairings. Yet it also sketches a clear pattern that matters for any rider who wants to customize the bike. The dominant reality is that most aftermarkets for this model are built from ABS plastic, designed to fit 2017 through 2024 variants, and offered as various configurations that range from subtle engine covers to more ambitious, full or partial body kits. This is not merely a quest for cosmetics; it is a practical exploration of how a small change in the bike’s exterior can alter its weight perception, its aerodynamics, and, ultimately, the rider’s confidence on the road. In that sense, choosing a fairing is almost a negotiation with wind and space, an acknowledgment that your bike will spend more time with open air around it than tucked away in a showroom display. The decision process is influenced by how much of the machine you want to conceal, how you ride, and the degree to which you’re willing to invest in hardware that can promise years of service without demanding constant refinishing.
The types of aftermarket fairings commonly encountered for the CMX 500 reflect a straightforward philosophy: you can add or subtract coverage, you can emphasize the motorcycle’s lines, and you can tune the balance between protection and weight. A belly pan, often marketed as an under fairing or engine guard, is a popular choice for riders who want a sleeker, more integrated look without enclosing the entire engine area. A belly pan does more than look good; it protects vulnerable components from road spray, debris, and, in some cases, minor impacts. The structure is typically engineered to resist flex under normal riding conditions, with mounting points designed to align with existing brackets on the frame and engine cases. The materials are usually ABS plastic because it offers a forgiving mix of stiffness and impact resistance, a lightweight footprint, and ease of molding into curved shapes that echo the bike’s contours. Even when the belly pan arrives with steel mounting hardware included, the overall weight impact remains modest, preserving the CMX 500’s agile feel while delivering a cleaner lower silhouette. The visual effect is not merely Hollywood gloss; it is about creating a cohesive picture where the front and rear sections visually speak to one another, making the bike appear as if it were designed that way from the factory.
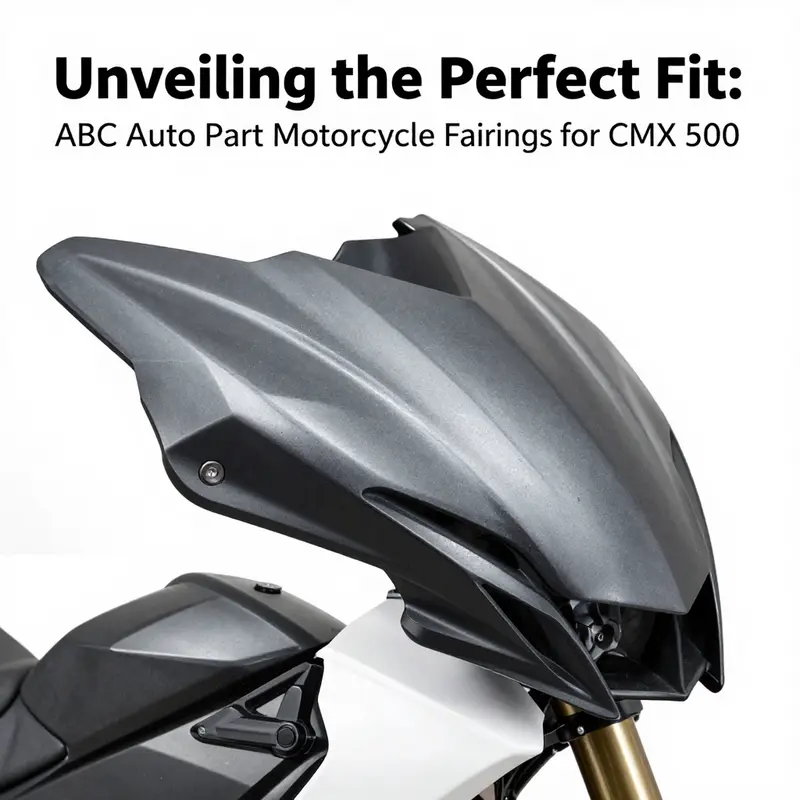
Front headlight fairing covers form another axis of customization. These pieces reframe the bike’s face, lending a contemporary or aggressively streamlined appearance while also contributing a modest aerodynamic benefit. The hooded look comes with practical considerations: ABS plastic stands up well to everyday riding, and finishes often include a glossy black or high-contrast tone that complements chrome, aluminum, or matte surfaces on the exhaust and engine covers. Installation typically involves aligning mounting holes with stock brackets and, in some cases, reusing existing fasteners. The process can be straightforward enough for a weekend project, yet it rewards careful alignment. The aesthetic payoff is immediate: a front fairing that harmonizes with the bike’s headstock and fender profile can instantly alter its perceived speed and stance. For riders who want a more integrated appearance without the mass of a full fairing, a front fairing cover provides a balanced solution that preserves the CMX 500’s iconic stance while signaling intentional modification.
Windshield fairing kits present another dimension of customization—wind protection and rider comfort—without burying the bike under a full half-shell. These kits typically include a front windscreen, deflectors, and sometimes visor protectors, designed to direct airflow over and around the rider. The compatibility notes emphasize models from 2017 to 2024 and the Rebel 300 and Rebel 500 variants, reflecting the fact that the underlying frame dimensions and mounting points across these machines share enough similarity for aftermarket parts to be interoperable. A properly chosen windscreen can markedly reduce fatigue on long rides, especially at highway speeds, while maintaining a balance between protection and visibility. The finishes range from clear to tinted, and some riders prefer a darker shade that visually anchors the headlight assembly to the bike’s broader silhouette. The more understated approach tends to prioritize function and maintain the bike’s original character, while the more expressive option invites the eye to travel along the lines created by the fairing’s profiles. Either path can be effective, but it’s essential to confirm the specific year and trim of your CMX 500 before committing to a particular windshield kit, to avoid misalignment with mounting points or interference with the instrument cluster.
Then there are side engine covers and complete under fairings. These components offer deeper protection and a more dramatic reshaping of the bike’s exterior. The side covers serve to conceal portions of the engine and left-right airflow channels, producing an appearance that feels more enclosed and cohesive. A full under fairing, while heavier and more elaborate to install, can deliver a striking visual overhaul, giving the CMX 500 a café-racer or sportier vibe depending on the chosen styling language. The objective here is not simply to change the look but to offer a shield against road grime, moisture, and the occasional splash from wet conditions. When correctly engineered for a 2017–2024 Rebel CMX 500 platform, these kits maintain access to service points and maintainance hatches while presenting a factory-grade finish. The decision to pursue side covers and under fairings often aligns with a broader plan for a bike that travels in mixed conditions and remains a daily rider as well as a weekend showpiece. Finishes can include gloss black, satin tones, or sprayed finishes to better blend with or contrast against the bike’s existing paint, and some riders choose to color-match their fairings to the tank and fenders for a seamless, single-surface look.
In this ecosystem, color and finish are more than a mere preference. They communicate a rider’s intent: a glossy surface may suggest a penchant for showroom polish and a sense of speed that reads well on glossy showroom floors; a matte or satin finish may convey practicality, ease of maintenance, and a desire for a rugged, understated aesthetic. The variety of finishes often includes the option to have the fairing pieces spray-painted or pre-finished by the manufacturer, with the caveat that touch-up and maintenance might be more involved when color systems diverge from the factory palette. These choices matter because they influence maintenance routines, the likelihood of visible scratches, and the ease with which a rider can touch up a scuff in the field. At their core, each component—the belly pan, the front fairing cover, the windscreen kit, and the side covers—serves a dual role. They are both protective elements and visual tools, guiding the observer’s eye along the bike’s lines and shaping how the bike sits in space when parked or on a turn. A thoughtful combination can transform a CMX 500 from a straightforward commuter into a personal statement on the road.
If you want to explore established catalog options, you can browse the Honda fairings catalog, which gathers a range of compatible designs and finishes in a unified resource. This approach helps riders compare options side by side and assess fitment against their year and model. It can also provide a clearer sense of whether a particular look aligns with their riding style, whether it’s a clean street-ready surface or a more aggressive, performance-oriented silhouette. When considering fitment, it is essential to check the specific model year because even small changes in mounting points or engine layout can influence how a fairing fits. The CMX 500’s compact engine and exposed mechanicals benefit from fairings that offer protection without constraining access for maintenance. A well-chosen belly pan or set of side covers should leave the oil drain plug, timing marks, and cooling fins accessible without undue disassembly. Likewise, a windshield kit should leave space for the instrument cluster and turn signals to remain visible and functional. These checks are simple in principle but critical in practice because a misfit can result in rattling hardware, alignment issues, or gaps that collect water and dirt.
The practical realities of sourcing and installing aftermarket fairings for the CMX 500 involve a few honest considerations. First, compatibility is rarely declared in broad, universal terms. Even though many products declare support for years 2017–2024, riders should confirm that their exact bike configuration and accessories do not conflict with the mount points, exhaust routing, or crash bars. Second, the installation experience varies. Some kits come with instructions that promise a straightforward, do-it-yourself process, while others require a bit more mechanical confidence, a set of hand tools, and perhaps some mounting brackets or adapters. Third, the finish and color options matter. Gloss black is common, but some riders want a color-matched look that flows with the tank’s color or with the chrome accents on the exhaust system. In the final tally, the value of a fairing is a function of fit, finish, and the rider’s willingness to invest in installation time. A well-executed upgrade can feel and ride like a natural extension of the motorcycle, as if the bike had rolled off the showroom floor with that exact silhouette in mind.
As you weigh these choices, consider a broader sense of customization that includes not only the look but the tactile experience. A fairing that touches the rider with a careful edge, a mounting system that feels secure rather than rickety, and a surface that resists scuffing after city rides or gravel-strewn back roads—all contribute to the sense that the CMX 500 has been tuned for personal use rather than left as a stock platform. In this sense, the fairing becomes a language by which the rider tells a story about how they ride, where they go, and how the machine should be perceived by others. It is possible to blend the practical with the aspirational, to choose a treatment that keeps the bike functional for daily commutes while infusing it with a distinctive personality that stands out in a line of similar motorcycles at a stoplight.
For readers seeking an overview that aligns with established aftermarket ecosystems, the links to catalogs and collections can be helpful. One such resource presents a curated range of options in a way that makes side-by-side comparisons accessible. If you click through to the Honda fairings collection, you will encounter a spectrum of forms and finishes that illustrate how modular designs can be combined to achieve different looks while preserving the underlying geometry of the CMX 500. The idea is to allow the rider to build a coherent aesthetic without sacrificing the bike’s practical capabilities. The catalog approach can help you avoid overpaying for features you do not need, while letting you identify a model that already fits your intended riding context—commuting, weekend touring, or light sport riding.
When contemplating the broader aftermarket landscape, it is useful to think about the balance between an exact fit and an adaptable system. Some fairing pieces are designed to be precise, with quick-release fasteners and exacting tolerances that require little in the way of custom modification. Others are more flexible, using universal mounting points and adjustable brackets that can accommodate a range of bikes with similar chassis. The CMX 500, with its compact frame and relatively simple engine architecture, benefits from both a neat, tightly integrated look and the possibility to swap out components as needed. The choice often depends on how much the rider values a minimal, almost factory-clean appearance, or a more expressive, high-contrast style that draws attention on city streets and at motorcycle meets. In this context, thinking about maintenance access, weather exposure, and long-term durability becomes inseparable from the aesthetic equation. A well-chosen fairing sequence stays attached through seasons, resists cracking after a few accidental drops, and remains pleasant to live with through routine cleaning and polishing.
To close, the journey toward selecting fairings for the CMX 500 is not a single decision but a series of small, well-considered steps. It begins with a clear sense of how you want the bike to feel and how you want it to present itself to the world. It then proceeds to verify fitment against your model year, confirm that the mounting points and hardware are adequate, and assess the finish for color, gloss, and longevity. Finally, it resolves the practical questions of installation time, maintenance needs, and whether the kit preserves service access without compromising the bike’s appealing silhouette. In this framework, ABC Auto Part as a brand is not the sole locus of value; rather, the broader aftermarket ecosystem—constructed around ABS plastic components, sensible mounting, and year-specific compatibility—provides the toolkit you need to craft a CMX 500 that speaks with your voice on the road. For readers who wish to explore options beyond the immediate scope of this chapter, the Honda fairings catalog remains a useful starting point. It offers a structured catalog of compatible designs and finishes, enabling riders to compare, contrast, and ultimately decide which combination best fits their riding style and aesthetic preferences. Access to such catalogs can empower riders to move beyond generic impressions toward a tailored solution that integrates form, function, and personality in a single, cohesive package. And as the narrative of this bike continues to unfold, the right fairing becomes less a product feature and more a chapter in the ongoing story of how a rider and machine travel through weather, traffic, and time together.
External resource for reference: https://www.amazon.com/dp/B0B6QY8WJZ
From Mold to Machine: Material Journeys in Aftermarket Fairings for a Mid-Displacement Cruiser
The saddle of a motorcycle tells a story before the rider twists the throttle. The fairing, more than a cosmetic shell, is a study in material choice, manufacturing craft, and the nuanced relationship between form, function, and fit. When a mid-displacement cruiser adopts an aftermarket fairing, the journey from raw polymer to finished surface unfolds across a landscape of design intent, precision engineering, and supply-chain choreography. This chapter traces that journey, weaving together the practicalities of ABS plastics, the realities of Guangdong’s manufacturing ecosystems, and the tacit knowledge builders acquire when the fairing meets the bike in the real world. It is a narrative that moves beyond the sightlines of a glossy online catalog to the hands-on decisions that determine whether a piece of plastic will withstand a summer commute, deflect a stray stone, or align perfectly with the engine and frame geometry over years of riding.
First comes material selection, and the logic is not solely about color and texture. ABS, or acrylonitrile butadiene styrene, has become the workhorse material of aftermarket fairings because it blends toughness with processability. The plastic’s impact resistance helps it survive the inevitable bumps and scrapes of urban riding and gravel roads alike. It also offers a straightforward path to a smooth, aerodynamic surface, which is essential for a piece designed to wrap around the engine’s contouring and the bike’s frame rails. ABS’s compatibility with thin-wall injection molding keeps wall sections compact while preserving rigidity where it matters most, such as around mounting tabs, engine guards, and edge radii. The result is a shell that can be produced in relatively thin gauges, allowing designers to achieve those sculpted lines that catch the eye without bloating the overall weight.
In practice, the manufacturing environment matters as much as the resin itself. The most relevant hubs for high-quality, OEM-like fairings cluster in a region known for precision engineering and a robust tooling ecosystem. This concentration of capability makes it feasible for aftermarket suppliers to push the boundaries of what used to be considered mere replicas. The process begins long before plastic enters the mold. Engineers work backward from the intended geometry—how the fairing interfaces with the bike’s frame, how the emission routing beneath the engine is preserved, and how the fairing’s inner surfaces will accommodate mounting hardware and fasteners. Through rapid prototyping and iterative tooling, a digital design evolves into a physical form with the tolerances necessary to achieve a snug, secure fit. The emphasis on fit is not cosmetic; it governs how the fairing will interact with the bike’s airflow, how it might contribute to heat management, and how it will respond to vibrations and temperature swings on the road.
The journey from CAD to a tangible part in a factory floor is aided by a robust tooling infrastructure. In Guangdong’s specialized clusters, factories maintain a continuum of capability—from computer-aided design and virtual testing to multi-cavity molds and precision injection equipment. This proximity reduces cycle times and enables rapid iterations when a client requests a change in geometry—perhaps a tighter corner radius to improve clearance with the handlebars, or a revised headlight cutout to align with a different lighting module. The tooling becomes an ever-adjusting instrument, a kind of bridge between the conceptual and the tangible. Because fairings must mirror the bike’s original frame geometry while offering some latitude for aftermarket articulation, the molds’ tolerances are calibrated with care. The result is a product that not only looks similar to OEM styling but also sits with harmony against the bike’s lines, preventing gaps that would let wind and rain intrude or vibrate loose under riding conditions.
From there, the quality assurance stage begins, and it often centers on fitment. Reputable suppliers—those who bring more than a sheet of plastic to the table—tend to operate with in-house design teams that can reverse-engineer fitment specifications. They measure reference points on the bike chassis, check the path of emission lines, routing channels, and how the fairing interfaces with the exhaust system and the undercarriage protections. The measurement discipline is not merely about dimensions; it is about ensuring that the exterior shape accommodates the bike’s acoustic and thermal realities as well. A well-fit fairing flows with the rider’s perception of control and protection. The rider feels shielded from wind pressure and debris, yet the sensation remains natural rather than stiff or mismatched. The best aftermarket pieces achieve a balance: they’re visibly close to the OEM silhouette, while remaining sturdy enough to resist the fatigue that comes from road vibration.
This is where the manufacturing ecosystem pays dividends. Proximity to suppliers of ABS polymer and related additives reduces lead times and enables faster production cycles. In a market where demand can surge in response to seasonality or changing styling preferences, being near the source of raw materials translates into shorter wait times for customers and more nimble support for retailers. Typical lead times for standard orders in this network have developed into a rhythm that suits both distributors and end users: deliveries arrive within a window of a few weeks, usually measured in weeks rather than months. Such reliability matters when a rider has decided that a fresh look is worth the cost and the temporary absence of the bike while the fairing ships and is fitted. Importantly, the supply chain’s efficiency is not only about speed. It also reflects a disciplined approach to quality control, with in-house testing that checks for consistency in color matching, surface finish, and the integrity of mounting points.
Color, texture, and surface finish complete the transformation. Even when the raw material’s mechanical performance is solid, the final appearance must convince a rider that the fairing belongs on the bike. Manufacturers often apply an initial primer and base coat before a topcoat and clear layer, akin to the finishing sequence used in manufacturing original components. The surface can then be polished to a high gloss or given a matte treatment depending on the design language the customer desires. Although the colored exterior is primary for aesthetics, the paint system must also endure exposure to sunlight, rain, and temperature fluctuations. UV stability and colorfastness become determinants of long-term satisfaction; untreated ABS can suffer color shift or gloss loss if the finish is not engineered for outdoor use. A good finish resists micro-scratches that accumulate through daily riding and washing, maintaining the fairing’s appearance without requiring constant restoration.
The practical implications of these material and process decisions extend into how a rider actually experiences maintenance and upkeep. Installation is a moment where design choices reveal their true value. A fairing that fits snugly with clear mounting points and tabs reduces the risk of gaps and misalignment after a long haul or a rough parking lot maneuver. People who perform their own installation appreciate clear, repeatable steps and hardware that aligns with common mounting patterns. Some pieces are designed to share fastener locations with other protective components, so owners can swap in a new shell without reconfiguring the entire fastening system. In other words, the fairing becomes a modular part of the bike’s protective ensemble rather than a brittle add-on that requires a toolkit and a weekend of frustration to install.
But the story does not end with the first ride or the first wash. The lifecycle of an aftermarket fairing hinges on its resilience and adaptability. ABS devotees point to repairability as a practical virtue. When a minor crack appears at a mounting tab or near a cutout, resin-based repair techniques or adhesive bonding can extend the life of the piece. The repairability dimension is not merely about fixing damage; it is also about preserving the appearance and the aerodynamic integrity of the shell. A repaired surface should remain visually cohesive with the rest of the bodywork, with little to no perceptible color mismatch after touch-up. The better the initial design for repair—thicker walls at critical stress points, accessible fastener routes, and a forgiving shape around sharp corners—the easier the subsequent maintenance becomes. Riders with a passion for customizing their machines understand this nuance, as it means the fairing remains a living component rather than a disposable cosmetic item.
Beyond the individual part, the broader market dynamics reveal a quiet, steady shift toward value-driven choices. The regional manufacturing network’s advantage lies in the combination of cost-effectiveness, consistent quality, and the ability to adapt to a growing range of styling directions. This balance matters because a rider’s appetite for aesthetic variation can be intense; the fairing is an emblem of personal identity as much as it is a shield against wind and weather. Manufacturers respond by offering a spectrum of finishes—from high-gloss to satin textures—and a palette of color-matching options designed to harmonize with a bike’s existing tone. The result is a product category that sits at the intersection of engineering pragmatism and creative expression. The forward-looking supplier recognizes that today’s rider may want a kit that echoes classic street-bike lineage or one that leans into modern, aggressive contours. The same ABS material, molded with precise tolerances and finished with durable coatings, can realize either vision while maintaining the necessary structural and aerodynamic integrity.
Internal and external considerations further shape the market’s response to rider needs. On the internal side, collaborative workflows between designers, tooling partners, and paint shops help ensure that every fairing can be finished to a consistent standard. This collaboration reduces variance across batches, which matters for color matching and fitment when customers order multiple components or replacements over time. The external dimension involves looking outward to how these parts influence riding safety and reliability. For instance, when a fairing is designed to maintain the airflow around the engine and radiator, it can support more efficient cooling or reduce intake noise, depending on the routing channels and vent placements. In addition, well-executed fairing design can contribute to reduced drag without compromising rider protection or comfort, a subtle but meaningful performance characteristic that many riders come to value over time.
The synthesis of material science, manufacturing prowess, and rider-centric design is what elevates aftermarket fairings from simple cosmetic upgrades to robust, lasting components. A high-quality ABS shell is more than a surface finish; it is a carefully engineered system that interacts with the bike’s frame, plastics, metal hardware, and the rider’s experience. The best examples reflect a willingness to embrace both the precision of a mold-maker and the artistry of a designer. In a landscape where customization has become a core aspect of motorcycling culture, such pieces offer a practical way to refresh a bike’s appearance while preserving or enhancing its functional qualities. Riders who choose these upgrades often weigh ease of installation, long-term durability, and the look they want against the cost and potential trade-offs in weight or wind behavior. The most satisfying outcomes come from a harmonious alignment of these factors, where the fairing’s surface gleams after a wash, the lines between panel edges read clean in the sun, and the component sits with the certainty of a factory part—even though it was produced in a parallel track of commerce and craft.
For readers seeking a concrete sense of how a catalog-level selection translates into a real-world choice, an exploration of a typical aftermarket catalog can illuminate the flow from concept to completion. A catalog entry for a mid-size cruiser’s fairing usually begins with fitment notes, clarifying model compatibility and any alterations required for specific production years. It then presents a materials and finish section, outlining the ABS base resin, the surface treatment, and the available colorways. The installation instructions often emphasize the need to verify attachment points against the bike’s frame and to check clearances near critical components like the exhaust shield and engine bay covers. Some listings will also note the paint finish’s compatibility with UV protection and the expected longevity of the color under regular sun exposure. In an ideal scenario, the user can select a kit that aligns with their bike’s silhouette while maintaining the vehicle’s overall aerodynamic balance. The attention to detail in these descriptions is not merely descriptive—it’s a practical framework for achieving a satisfying, long-lasting upgrade.
If you want to explore similar offerings in a structured catalog format, you can reference the collections page that presents a range of fairing options and configurations. The catalog approach exemplifies how the same base material and front-mounting philosophy can support a variety of aesthetic and functional outcomes. For those who want to see how the broader family of fairings is organized—how each kit is categorized by fitment, finish, and mounting geometry—the online catalog serves as a guide to understanding the decisions behind a given design. To give readers a concrete touchpoint, one can browse the dedicated collections page that aggregates fairings in a single, navigable space, offering a window into how different styling directions translate into physical parts that can be installed on a mid-sized cruiser. For those who want to dive directly into the catalog, follow the link to the collections page labeled collections/honda-fairings. This reference point provides a straightforward way to visualize the design language and the practical constraints involved in aftermarket fairings, without requiring readers to navigate a maze of unrelated products.
At the same time, the chapter’s discussion remains mindful of the broader ecosystem. The region’s focus on precision engineering, the use of ABS plastics, and the emphasis on fitment and surface finish illustrate a mature market that balances cost with quality. This balance matters because riders expect more than a superficial change; they want a part that behaves consistently across seasons, will not degrade quickly under sun and rain, and can be repaired or replaced without excessive downtime. In this light, the material insights discussed here are not merely about chemistry. They are a reflection of the baked-in discipline that characterizes a supply chain specialized in motorcycle fairings: a discipline that harmonizes the speed and efficiency of modern manufacturing with the care and attention to detail that riders value most.
External resource for further reading: for a broader perspective on how OEM-equivalent parts are sourced and managed within the supply chain, readers may consult the 2025 OEM Replacement Parts Supplier Guide, which provides a detailed look at procurement practices, supplier capabilities, and lead-time considerations that underpin the aftermarket ecosystem. https://www.supplychaininsights.com/2025-honda-oem-parts-supplier-guide/ (External reference)
To close the loop on practical exploration, consider navigating to the catalog section that curates fairing options for mid-sized cruisers—specifically the collections page that consolidates fairings by model class and compatibility. This page serves as a tangible entry point into how manufacturers segment offerings by fitment and finish, and it helps readers visualize how a kit can harmonize with a bike’s lines and stance. See the collections page linked here as a direct reference to how a catalog organizes options and communicates essential fitment information.
From Fit to Flair: Installing an Aftermarket Fairing on the CMX 500 — A Practical Guide to Seamless Integration
Installing an aftermarket fairing on a mid-size cruiser like the CMX 500 is a study in balance. It is as much about preserving the bike’s silhouette and ergonomics as it is about upgrading aesthetics and protection. The objective is not merely to bolt a shell onto the frame, but to achieve a cohesive assembly where the new panels, mounting points, and wiring harmonize with the bike’s original geometry. When the kit is designed for a broad class of bikes that share a similar frame layout, the installation becomes a careful process of alignment, compatibility checks, and respectful handling of the bike’s kinetic and mechanical systems. In the absence of brand-specific instructions, the most reliable path is to anchor your work in the same fundamentals that govern successful installations on comparable platforms: verify fit, prepare the hardware, align the components with precision, seal where necessary, and test comprehensively before the ride. This approach yields results that feel factory, or close to it, while still delivering the altered look and added protection that aftermarket fairings promise.
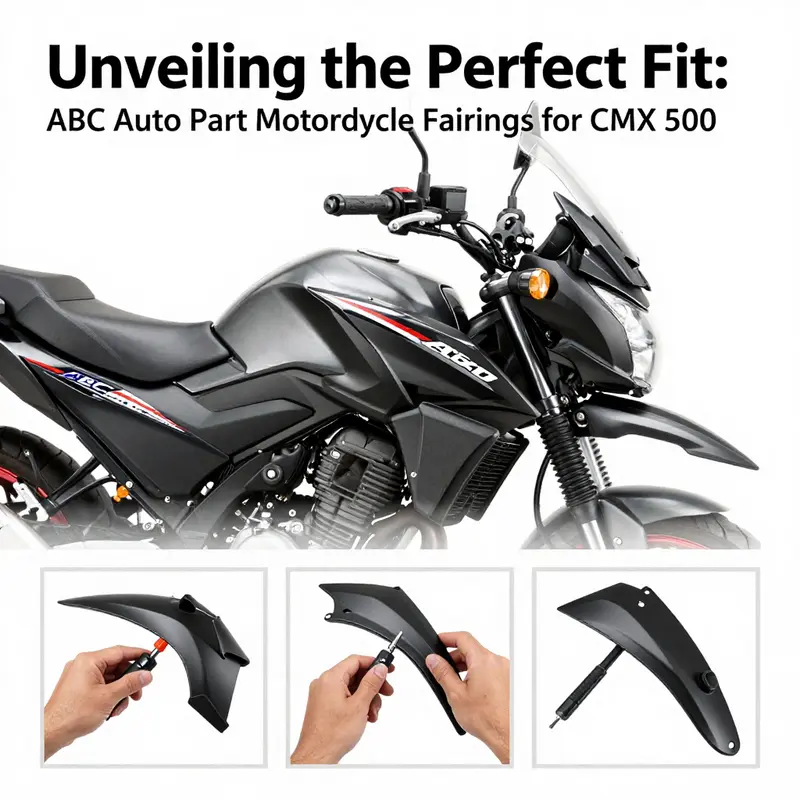
Before you touch a single bolt, the mental map of the task should be clear. The CMX 500, like many bikes in its class, presents a traditional frame layout with mounting tabs along the upper fairing line and reinforced points near the radiator area, along with hidden anchors that come into view only when the parts are separated from the shipping carton. With that mental map in place, the actual work becomes a sequence of controlled decisions rather than a guesswork exercise. The goal is to preserve the bike’s existing geometry while adding a new layer of form and function. This starts with the simplest questions: Is the fairing compatible with my year and model variant? Do the mounting points line up with the bike’s frame or subframe? Are there any electrical connectors, cooling ducts, or throttle/hand control clearances that could be affected by the added panels? Answering these questions early reduces the chance of misalignment and the frustration that follows a misfit install. If in doubt, consult the instruction manual that accompanies the kit, and verify that the kit is intended for a model with a similar frame geometry. You can also use the manufacturer’s showroom or catalog as a guide to understand the general approach to mounting, while keeping in mind that on-the-ground fit can vary slightly from printed diagrams. For a broader reference on how fairings are organized across a range of similar models, exploring related catalog pages can provide a useful visual language. See, for example, the fairings catalog of a well-known aftermarket supplier, which presents common mounting schemes and hardware layouts that are compatible with multiple mid-size bikes. The catalog offers a sense of how the clamping points and alignments typically evolve from unmounted to fully seated panels. If you want a practical, hands-on sense of how a fairing integrates with a bike’s bodywork, take a look at the fairings collection page that collects these parts in one place and outlines typical assembly logic.
The pre-installation phase is more than a ritual. It is a diagnostic procedure that reveals the subtle incompatibilities that can derail a project before it begins. Begin by confirming compatibility at a granular level: the kit should specify the model year range it supports, and the mounting points must match. The shields, brackets, and side panels must align with the frame bosses. If the kit uses a clip-and-bolt system, inspect every clip for cracks or stiffness that could indicate aging or manufacturing fault. Make sure the hardware—bolts, spacers, washers, and fasteners—are present in the correct quantities and dimensions. Count them, lay them out in a logical order, and pair each fastener with its specified torque range. This step is essential because overtightening or under-tightening compromises both seal integrity and structural stability. A small set of torque values often governs these assemblies; a common, safe range for many fairing mounts is in the vicinity of 12–14 Nm for lightweight brackets. Always consult the instructions for the exact numbers, but use the principle as a guide. Tighten in increments, never in one pass. The goal is even distribution of clamping force across the mounting points, preventing the risks of stress concentration that could crack plastic panels or deform brackets.
As you move from pre-installation to the actual mounting, a quiet, patient approach pays dividends. The initial assembly stage is about creating a mock configuration. Place the panels near the bike, align the openings with the headlight cutouts, radiator ducts, and windscreen geometry, and check for any interference with moving parts. If the fairing utilizes a multi-piece framework, begin with the main structural piece that anchors to the bike’s primary frame. That panel often serves as the anchor for secondary pieces such as side skirts or belly pans. When you attach the main bracketry, use the correct hardware and ensure the threads are clean and dry. A tiny note of anti-corrosion protection on the threaded interfaces can help preserve the integrity of the install over time, especially in humid climates where metal-to-plastic interfaces are exposed to damp conditions. Don’t apply sealant in places where the hardware needs to be removed for servicing; use a lightweight anti-seize compound or a small dab of lubricant on metal-to-metal interfaces only if the instruction manual calls for it.
With the main frame anchors ready, the next phase is alignment. Alignment is more than lining up the outer edges; it means conscientiously checking the gaps and sightlines that define the bike’s visual balance. Start by carefully seating the main fairing pieces, but do not fully tighten anything yet. As you progressively fasten, step back and visually inspect how the panels sit in relation to the front wheel centerline, the headlights, and the tank groove line. The goal is a uniform, symmetric look on both sides, with air gaps that equalize to the eye. If you notice asymmetry, do not force the panels to fit. Instead, loosen, reposition, and re-seat. A misaligned panel can rub against the tire, the fork leg, or the brake lines, producing vibration or, worse, chafing that could escalate into a safety hazard on the road.
A pivotal moment in the install is how you handle the clips and brackets that hold the fairing to the bike. Some kits rely on a combination of bolts and clips, others use a plug-and-play bracket system. In every case, the clips must be fully seated without any play. Tap them gently with a rubber hammer to encourage a snug fit, but never strike hard enough to distort the panel or bend the frame. Bearing in mind the weight of the panels, secure the positions with only hand-tightened fasteners at first, then progressively tighten to the specified torque as you confirm alignment, clearance, and lack of interference. The clamping sequence matters: some kits benefit from a diagonal approach, gradually bringing opposite corners into alignment to avoid skewing the panel shape. If the instruction sheet prescribes a tightening order, follow it precisely; that guidance exists to prevent unintended bending as the system compresses around the frame, an outcome that would be visible as an irregular edge line once the fairing is fully mounted.
Wiring can be the most intricate part of the process when the fairing integrates lighting, turn signals, or additional sensors. Plan the routing early. Create a clean pathway along the frame, behind the side panels, and toward the battery compartment or the fuse box, depending on the bike’s layout. Use wire looms and grommets to protect cables from abrasion and heat, and shield any wires that pass near hot components such as the exhaust or engine cases. If the kit includes integrated lights, plan for plug-and-play connections if available. Otherwise, you’ll need to splice into harness lines with color-coded, weather-sealed connectors. Ensure you leave enough slack for compressive movement and vibrations while avoiding loose loops that could snag at the wheel or brake components. In any electrical work, disconnect the battery before you begin, and make sure all connections are sealed against moisture. After you route and secure the wiring, bundle it neatly with nylon ties and reposition any cables when you re-check the fit. The goal is to have the electrical harness disappear behind panels, not protrude into airflow paths or contact any moving parts.
Sealing and water ingress prevention deserve careful attention. The fairing kit sits near several potential ingress points—interior joints, lower belly pans, and the interface where panels meet the frame. A light application of anti-rust treatment or manufacturer-approved sealant on threaded interfaces can stop moisture from creeping into the hardware, extending the life of fasteners and preventing corrosion. Use sealant sparingly. Excess sealant can migrate and foul mating surfaces, making panel removal more difficult in the future. Where the installation requires gaps for airflow, aim for a balance: enough seal to guard against water intrusion, but not so much that heat builds up behind the panels. For some configurations, weather stripping or rubber seal gaskets are included; these items should be placed along the edge lines where panels butt against each other to reduce wind noise and to improve the visual seamlessness of the assembly. If you are new to sealants, test a small inconspicuous sample on a spare piece of plastic before applying to the bike.
Once the panels are in place and the hardware torqued to specification, perform the functional test. A careful test involves several checks that you might otherwise overlook in a hurry. With the ignition off, gently move the handlebars through their full sweep and listen for any contact between the fairing and components such as turn signals, the grip heaters, or brake lines. Start the engine and idle with the bike on level ground; observe for vibrations that might reveal loosened attachment points. A few initial road tests are valuable; they reveal how the fairing behaves under real-world conditions. Listen for rattles, squeaks, or fluttering within the wind stream. If you notice any movement, re-check the mounting points and adjust the torque values as needed. It is common to discover that a subsequent test ride calls for a minor realignment or the addition of a small spacer to keep a gap consistent along a joint.
After the initial test session, the riding experience often suggests a few refinements. Aerodynamics, even perceived improvements, can be affected by micro-adjustments in angle and rake of the panels. A common outcome is that slight modification to the side panel angle can reduce wind buffeting at highway speeds or improve the line of sight to the rider’s feet for comfort during longer rides. This refinement process should be gradual. Make a single adjustment at a time, re-tighten to the prescribed torque, and test again. Do not over-tighten or over-correct; plastics can crack or warp if forced beyond their designed tolerance. If the kit includes a belly pan or lower shield, verify it does not interfere with the chain, crankcase, or exhaust heat shield. A properly installed belly pan can improve underbody protection and give the bike a more cohesive, finished look, yet it must not confine airflow or trap debris against critical components. In all cases, the goal is balance: the fairing should add protection and aesthetics without compromising function, serviceability, or safety.
An honest installation yields longevity and satisfaction. The absence of brand-specific manuals is not a barrier when you anchor your approach in universal principles of fit, alignment, securing hardware, and testing. The installation is, at its heart, a dialogue between the bike’s native geometry and the new panels. When done with care, the result is a fairing assembly that seems to belong with the bike from the factory floor. The finished look should be uniform, symmetrical, and unmistakably purposeful in its function as a shield against wind and road spray, while enhancing the bike’s silhouette rather than overpowering it. If you want to cross-reference the general principles behind this approach, you can explore related installation guides that cover similar kits for other mid-size models. The practical essence is the same: confirm compatibility, prepare meticulously, align with discipline, seal where necessary, test thoroughly, and adjust thoughtfully.
For readers who would like to see additional context or a different example, consider browsing the broader fairings catalog to compare mounting approaches across brands and models. The catalog presents multiple fairing configurations, helping you build a mental map of how various parts relate to the bike’s frame. It can also prove useful when choosing brackets or reinforcement pieces that may improve stiffness or alignment in your specific installation scenario. If you are seeking an online resource to supplement your understanding of the process, a widely used shopping guide for similar kits offers a practical, hands-on walkthrough of the steps described here, complemented by visuals and user notes that echo the experiences many riders report after completing a first-time install. A link to a related installation guide is provided below for readers who want to observe the methodology in action and correlate it with their own project timeline. See this external reference for a real-world walkthrough: https://www.aliexpress.com/item/1005003789576282.html
The experience of installing a fairing on a bike in the CMX 500 class is a meaningful blend of art and engineering. It invites a patient, methodical approach that respects the machine and the rider’s comfort. When the kit is well matched to the bike, the result is a noticeably improved aesthetic that does not come at the expense of ride quality. A thoughtful installation turns the fairing from a simple accessory into an integrated bodywork system, capable of withstanding the vibrational demands of a daily rider and the occasional spirited highway test. It is this balance, lived through careful measurements, deliberate assembly, and a willingness to revisit and revise, that turns a freestanding shell into a coherent extension of the motorcycle. The rider benefits through reduced fatigue from wind buffeting, a cleaner visual profile, and added protection against road spray and debris, while the machine benefits from preserved clearance, reliable mounting, and durable hardware. In other words, the installation becomes a conversation with the bike, one that yields a result both functional and visually compelling, a true upgrade that respects the original design while offering new possibilities for personal expression on the road.
Internal link reference: You can explore a broader range of fairings in the catalog with a general collection page that groups compatible options and mounting approaches. This resource helps you see how different shapes and bracket systems adapt to mid-size bikes while maintaining essential alignments and clearance. Visit this page to compare general fairing configurations and mounting strategies: https://www.summitfairings.com/collections/honda-fairings
Wings, Lines, and Personal Style: Upgrading a Midweight Cruiser with Aftermarket Fairings
The transformation that comes with adding aftermarket fairings to a midweight cruiser is less about chasing an abstract sense of speed and more about curating a personal statement on two wheels. When you walk past a bike wearing a thoughtfully chosen fairing, the first impression is visual: a silhouette that reads cohesive, modern, and unmistakably purposeful. The fairings act as a kind of architectural skin, smoothing the bike’s lines into a single, deliberate gesture rather than a patchwork of add-ons. In practice, these panels are not merely cosmetic.
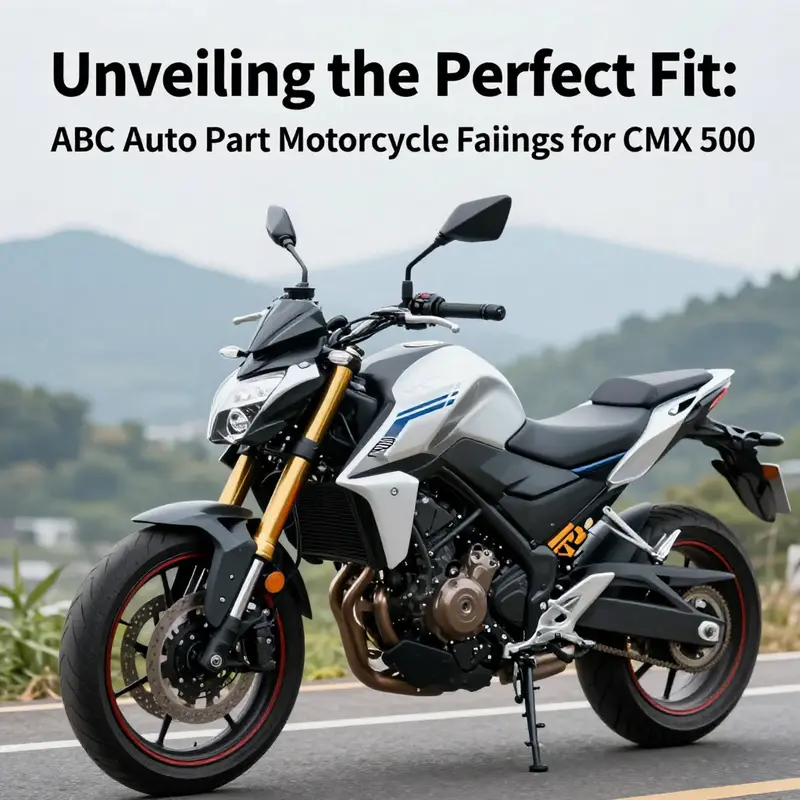
What makes the visual shift so compelling is how the lines of the fairing interplay with the bike’s existing geometry. The curves and edges of the original bodywork are complemented by the new panels, creating a unified look that can make an older chassis appear newer, or a stock build feel deliberately engineered from the factory. The result is a sense of speed and sophistication even when the engine is idling. The perception of performance, often described by riders as a feeling of confidence or readiness, is reinforced by the way the fairings carry the eye along the bike’s length. When the eye travels from the front to the tail, it encounters a continuous rhythm of planes and intersections. That rhythm is what makes the transformation feel intentional rather than tacked on. A well-chosen set of panels can pull together various components—fork tubes, headlights, side covers, engine casings—into a single, integrated sculpture. The effect is more than surface-level polish; it is a new visual language for the motorcycle, one that communicates modernity and refinement without sacrificing the identity of its heritage.
Material choice plays a central role in this visual language. The most common material in aftermarket fairings is ABS plastic, prized for its balance of light weight, impact resistance, and ease of manufacturing. ABS takes paint evenly, resists UV-induced fading reasonably well, and can be molded into complex shapes that mimic high-end composite parts without the complexity or cost. This combination allows for sharp edges, smooth transitions, and a finish that can range from satin to high gloss. Even where the panels are designed to echo classic cruiser aesthetics, the modern sheen or subdued matte finishes can update the bike’s persona without erasing its lineage. The tactile evidence of quality—the way a door or panel clicks into place, the crispness of a seam, the uniformity of a painted surface—contributes to the rider’s overall sense of control and pride. When a rider slides behind a fairing that fits cleanly and feels sturdy, it’s not only about wind management or aerodynamics; it is also about the care taken in shaping the bike’s face to reflect the rider’s tastes.
The aesthetic possibilities are substantial, and they begin with the palette. aftermarket fairings commonly arrive in a spectrum of colors and finishes, including matte and glossy options, so builders can align the bike’s new look with their personal style. Matte finishes, with their understated texture, emphasize a rugged minimalism, while gloss finishes catch light and emphasize depth, making curves look more pronounced. Some kits offer two-tone schemes or subtle graphics that echo classic cruiser motifs, letting the rider nod to heritage while signaling contemporary taste. The ability to mix and match components—front fairing with a headlight housing, side panels, and a full windscreen—magnifies the customization. When a front fairing encloses the headlight in a way that looks integrated rather than tacked on, the bike communicates a stronger sense of purpose and a more complete, factory-inspired silhouette. The windscreen, if included, can extend this effect, guiding the eye along a line that begins at the front edge of the fairing and travels back across the bike’s profile with a confidence that feels engineered rather than cosmetic.
Beyond the surface, the integration of these panels into the overall frame and mounting points matters as much as the color and finish. A well-matched fairing not only enhances appearance but also sits in harmony with the bike’s existing geometry. The goal is to create a seamless transition from the tank’s shoulder to the tail, with the fairing acting as a bridge rather than a barrier. When installation is handled with care, the joints are nearly invisible and the panels align with factory gaps and mounting holes. The bike’s stance—its height, weight distribution, and the angle at which it sits when parked—can shift subtly as a result of the added mass and altered aerodynamics, and this is part of the aesthetic narrative as well. A properly integrated fairing does not appear to be an aftermarket afterthought; it reads as though it belongs to the machine from the outset, as if the bike had always looked this way.
The practical dimension of aesthetics cannot be separated from form. The most compelling fairing setups provide an elegant balance between beauty and function. A streamlined shape can funnel air in a way that reduces the buffeting that sometimes accompanies midweight cruisers at higher speeds, contributing to a calmer riding experience. While the primary benefit of a fairing is often wind protection, the secondary payoff—gaining a more purposeful, wind-driven stance—feeds the ride’s character. The rider becomes more than a passenger; they become a part of the sculpture the bike presents to the world. The fairing’s presence can encourage longer, more comfortable rides by smoothing the air cushion around the rider, diminishing fatigue, and enabling a steadier upper-body posture. These functional improvements, in turn, reinforce the sense of refinement and commitment—the rider is not merely cruising; they are commanding a thoughtfully engineered machine.
Choosing the right fairing is an act of storytelling. It is not only about copying a modern aesthetic, but about translating a personal vision into a physical form that integrates with the bike’s tension and proportion. Some riders favor a minimalist approach: a compact front fairing that tightens the lines of the chassis and preserves the bike’s classic silhouette. Others lean into a more aggressive stance, selecting a larger front assembly and broader side panels that push the visual weight forward and give the bike a more assertive profile. The versatility of aftermarket options means that narrative can be adjusted in steps: a discreet, low-key update today, a bolder transformation later as the rider’s mood and riding demands evolve. In this ongoing dialogue between rider and machine, the fairing becomes a tangible extension of rider preference—a canvas on which to project personality, taste, and intent.
Installation, while conceptually straightforward, deserves a thoughtful approach. Many aftermarket panels are designed to be user-friendly, with clear mounting points and hardware that align with the bike’s existing structure. A well-executed installation preserves the integrity of the original components and avoids the perception of a temporary, DIY fix. For enthusiasts who enjoy the hands-on aspect of customization, the process can be a satisfying project that deepens the connection to the bike. For others, professional installation is a sensible choice that ensures precise alignment, durable weather sealing, and a finish that resists chips and scratches. Either path emphasizes the idea that aesthetics and practicality are not at odds; they reinforce each other. When the fairings are mounted with care, the bike not only looks sharper but feels more composed, as if the entire chassis has a newly tuned balance that supports both urban commutes and longer, open-road rides.
The literature and community discussions around fairings consistently reaffirm a core point: the impact is as much about perception as it is about physics. While wind deflection and drag reduction are real, tangible benefits, the most enduring effect is the enhancement of identity. A rider who invests in a well-chosen set of panels often describes a renewed sense of pride and a stronger emotional connection to the motorcycle. The bike feels like an instrument of self-expression as much as a machine for transport. This alignment between form and feeling is what makes fairing upgrades feel lasting; they do not merely change how the bike looks, but how the rider experiences the ride. The bike becomes a reflection of the rider’s priorities—clean lines, a modern edge, or a nod to tradition—without surrendering the bike’s authentic spirit.
For readers curious about broader options and variations, a convenient way to explore is to review the wider catalog of fairings available for motorcycles. A curated collection that focuses on compatible configurations within the midweight cruiser category can offer a practical overview of fit, style, and finishing options. This approach helps riders assess what shapes and finishes might best suit their bike’s geometry and their personal aesthetics. If you’re looking for a starting point, you can browse the Honda fairings collection to see how different brands interpret similar silhouettes and how color and finish choices influence the overall impression of the bike. This reference point is useful not only for comparing price and materials but also for understanding how designers balance visual impact with aerodynamic efficiency and structural compatibility. See the Honda fairings collection for a broader sense of common profiles and mounting approaches that have proven reliable across multiple models and years. (Honda fairings)
In discussing the aesthetic possibilities and practical implications of aftermarket fairings, it’s worth acknowledging the broader ecosystem that makes these upgrades feasible. The market often features sets designed to align with particular model years and chassis layouts, with attention paid to the mounting points, clearance for exhaust systems, and the integrated look with headlight assemblies and instrument clusters. This alignment ensures a cohesive appearance and minimizes the risk of misfit or rattling during operation. The incremental value here lies not only in the panels themselves but in the certainty that the upgrade won’t compromise reliability or daily usability. When the fit is right, the rider experiences a seamless blend of form and function that feels like a natural evolution of the original machine rather than a temporary refurbishment.
For readers who wish to delve deeper into options and finishes, an external resource offers a broader context for what’s possible, helping to calibrate expectations about price, weight, and longevity. If you are exploring the lifecycle of a fairing upgrade—from selection to installation to daily use—the external listing can serve as a practical point of reference, illustrating how manufacturing choices translate into longevity and aesthetics on the road. Alibaba listing provides a window into how suppliers present configurations, finishes, and compatibility information, helping buyers navigate materials, color options, and finish quality across a spectrum of offerings.
To summarize, the aesthetic and experiential uplift from adding aftermarket fairings to a midweight cruiser is multi-dimensional. It starts with a refined silhouette that reads as cohesive and contemporary, moves through color and finish choices that express personal taste, and culminates in a sense of integration that enhances both perception and ride quality. The panels are more than decorative armor; they are a storytelling device—an opportunity to align form with function, heritage with modernity, and individual style with a machine that remains true to its roots while embracing a forward-looking posture. If you are contemplating a fairing upgrade, consider not only how the panels will look from a distance but how they will feel up close, how they will wear over time, and how the upgrade will fit into your ongoing relationship with the bike. In the end, a well-chosen fairing is not a one-time aesthetic decision but a continuous dialogue between rider, machine, and road—a dialogue that starts with lines, finishes with a new rhythm, and endures as a quietly ambitious statement about who the bike is and who you are when you ride it.
Final thoughts
In summary, the options available within the realm of motorcycle fairings for the Honda CMX 500—particularly those associated with ABC Auto Part—present numerous advantages ranging from enhancements in rider experience to aesthetic improvements that appeal to a wide consumer base. Whether focusing on the material characteristics, installation strategies, or the overall style enhancements, it’s evident that fairings contribute significantly to the motorcycle experience. For business owners, staying informed about these elements not only aids in providing quality products but also ensures alignment with the desires of modern motorcycle enthusiasts.