Repairing motorcycle fairings, especially those made from ABS plastic, is crucial for maintaining both functionality and aesthetics. Properly using ABS cement can greatly extend the life of these fairings, ensuring they withstand the rigors of road conditions. Understanding best practices for application, selecting the right products, and preparing surfaces effectively are key components that collectively enhance the repair quality. This article will delve into each of these areas to equip business owners with the knowledge needed for successful motorcycle fairing repairs.
From Crack to Confidence: Mastering ABS Cement for Motorcycle Fairing Repair
Cracks and nicks on motorcycle fairings are more than cosmetic defects; they can alter the aerodynamics, compromise structural integrity, and invite moisture and dirt into the core materials. When the fairing is made from ABS, a thermoplastic known for its toughness and resilience, the repair strategy shifts toward adhesives and curing systems that are specifically formulated to bond ABS plastics. The aim is not merely to fill a gap but to restore the part’s strength, flexibility, and appearance so that it can withstand the vibration, temperature fluctuations, and road spray that every rider experiences. In this context, an ABS-specific cement—carefully chosen, properly applied, and fully cured—becomes the anchor of a repair that can endure more than a season of riding. The approach blends chemistry with craft, science with subtle technique, and the patience to allow the material to return to its intended performance after the repair is complete.
The decision to rely on an ABS cement is grounded in the material properties of ABS itself. ABS is a terpolymer composed of acrylonitrile, butadiene, and styrene. Each component contributes to the overall performance: the polystyrene phase provides stiffness and surface finish, the acrylonitrile boosts chemical resistance and heat resistance, and the butadiene imparts toughness and impact resistance. When a joint fails in an ABS fairing, a robust adhesive designed for engineering plastics does more than hold edges together. It creates a bond that can absorb micro-movements, distribute loads over a larger area, and resist moisture penetration that could otherwise undermine the joint over time. The goal is a repair that mirrors the original flex and resilience of the plastic, rather than a brittle, paint-sealed patch that cracks again at the first jolt.
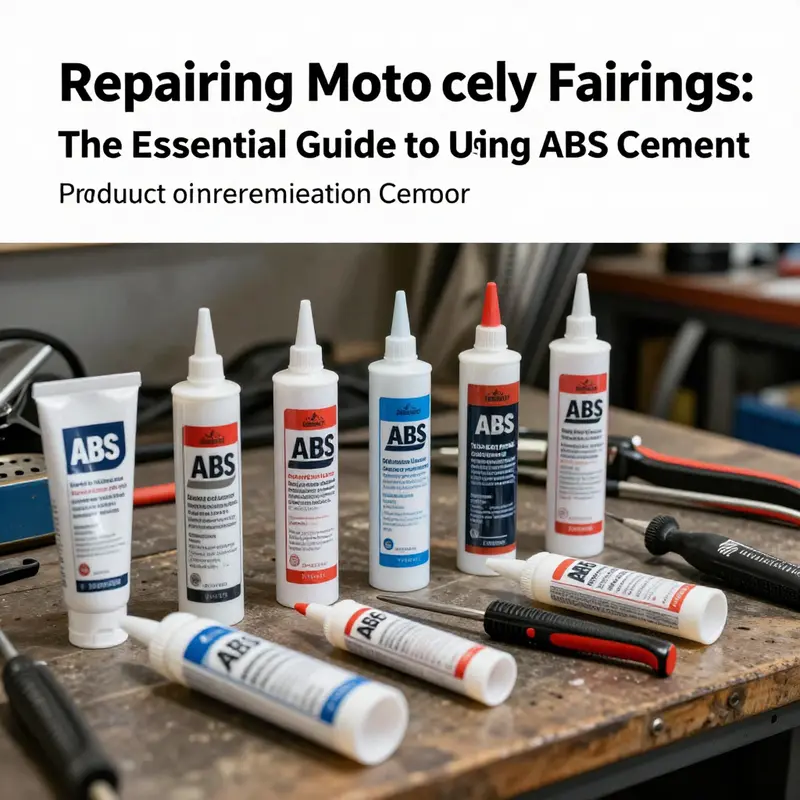
To achieve such a result, practitioners lean on a two-component epoxy cement or a plastic-specific fast-curing adhesive. The two-component system has the advantage of higher bonding strength and excellent resistance to environmental challenges, including humidity, temperature swings, and vibration. The plastic-specific adhesive offers rapid initial tack and a flexible final bond, which can be advantageous for fairings that may experience repeated flexing as the bike encounters rough roads or aero wakes. In practice, the choice depends on the size of the crack, the degree of deformation, and the rider’s tolerance for downtime. Regardless of the chosen system, the fundamentals remain the same: clean the surface to a pristine state, create a micro-roughness to encourage mechanical interlock, apply the adhesive in a controlled manner, and allow a generous cure period to reach full strength before the repair is subjected to any load.
To connect this guidance with real-world options and to align with the practical needs of riders who want to salvage stock appearance, many riders turn to a compatible ABS primer and a finishing process that respects the original surface. A primer designed for ABS plastics can improve adhesion by sealing the surface, balancing the porosity of the plastic after sanding, and providing a uniform base for subsequent paint. The finishing touches matter as much as the repair itself. After the cement has cured, careful sanding smooths the joint line so it disappears under paint. When color-matching, the goal is not a perfect color; it is a seamless blend that makes the repaired area virtually indistinguishable from the rest of the fairing under highway lighting and sun glare. Then a protective clear coat seals the finish and helps preserve gloss and color across the life of the bike.
The repair begins long before any cement touches the broken joint. Preparation is the quiet, disciplined work that often determines success or failure more than the repair itself. Start with a thorough cleaning of the repair area. Remove all dirt, oil, wax, and residues that would hinder bonding. A degreasing step is essential; wipe with a solvent compatible with ABS plastics and followed by a rinse of clean water. Once dry, inspect the joint for remaining paint or coatings that could impede adhesion. If old paint remains on the edges, a light abrasive with a fine grit can be employed to remove it. The next step—roughening the surface with a light sanding—serves a crucial purpose. The ABS surface is smooth by design, which is excellent for aerodynamics but not ideal for bonding. A micro-roughness increases the surface area available for the cement to grip, enabling a more secure mechanical interlock. A brief pass with P80 to P120 grit sandpaper, followed by a clean wipe with a solvent, prepares the surface for the next stage. The sanding should be uniform and restrained; aggressive abrasion can create deep grooves that are difficult to fill later and can leave visible tracks after finishing.
If the manufacturer of the repair system recommends a primer for ABS, apply it after roughening. The primer’s job is to improve wet-out, which means it helps the liquid cement spread evenly across the surface and penetrate microscopic pores rather than forming a thin film on top of a smooth surface. The primer also helps to equalize the surface energy across the joint and surrounding areas, so the cement does not pull away at the edge as it begins to cure. Priming is especially important if the repair sits in a highly visible area or if the fairing is subject to frequent exposure to sun and weather, which can accelerate differential aging between the repair and the rest of the panel.
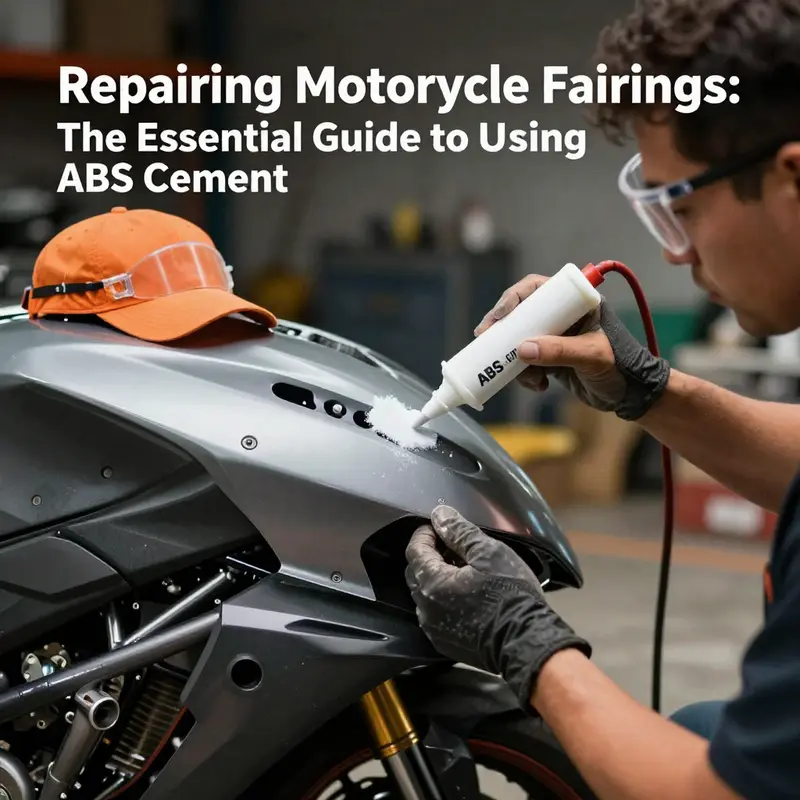
With the surface prepared, the actual adhesive application follows. A critical practice is to apply the ABS cement sparingly and evenly along the joint rather than building a thick bead. A thin, continuous layer ensures that the bond forms along the entire contact area without creating excess material that could squeeze out and mar the surface or, worse, create a blob that can crack later. When two pieces are aligned, they should be pressed together firmly and maintained in place for several minutes. The curing time begins with the initial set but extends into hours where the bond continues to strengthen. Even as the material becomes tacky, avoid disturbing the alignment. The more precise the positioning from the start, the less post-cure finishing is required.
Curing time is a deciding factor in when the fairing can be exposed to stress or weather. In most cases, a 24 to 48-hour window is advisable before the repaired area is subjected to torque, vibration, or direct wind load. This interval allows the solvent and monomer components to reach their final chemical state, achieving maximum strength and good impact resistance. When the repair is needed in a hurry, one can opt for a fast-curing adhesive designed for plastics, but it is essential to confirm that the formulation remains compatible with ABS and is designed to endure the stress of a motorcycle’s travel atmosphere. Regardless of the system chosen, the cure profile should be respected. Rushing beyond the recommended time invites the risk of a brittle bond that could fail under load, or a patch that still feels soft to the touch, inviting later damage.
Safety is not a cosmetic concern but a practical requirement. ABS cements and primers can release fumes that irritate the eyes and respiratory system. Work in a well-ventilated space, ideally with fans or outdoors where cross-ventilation can dilute fumes. Wear protective gloves to prevent skin contact and safety goggles to shield the eyes from splashes or accidental spray. During mixing, it is common to encounter a potent odor that signals the release of solvents; never work in a confined space without protective equipment. The same ventilation principle applies whether you are using a two-component epoxy system or a faster plastic adhesive. The safety measures extend to clean-up; keep a dedicated, well-labeled container for any unused mixed cement and dispose of residue according to local regulations. The discipline of safety also covers handling and storage: keep components away from heat and direct sunlight, and store them in accordance with the manufacturer’s guidelines.
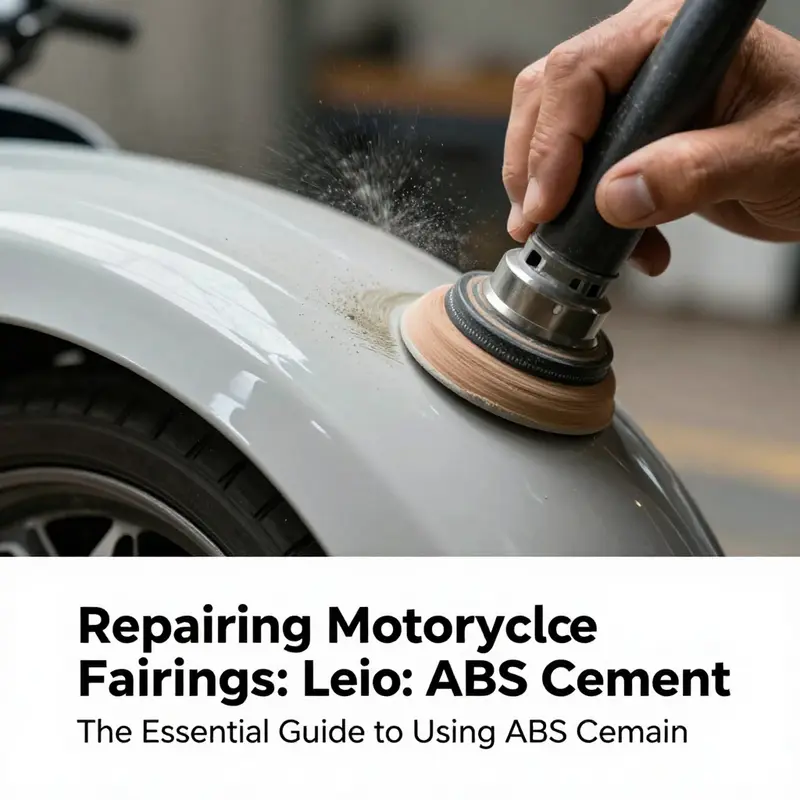
As the repair progresses toward finishing, the focus shifts from structural integrity to aesthetics. Once the cement has fully cured, the joint line often remains visible to the eye. The evenness of the repair depends on how carefully the joint was aligned and how well the cement filled the seam. A light sanding with a very fine grit can level any small ridges along the seam. After smoothing, it is time for color matching. Automotive paints designed for ABS plastics are available in polymer-based systems that can be color-matched to most factory finishes. The painter’s approach should emphasize thin, even coats that build color gradually rather than heavy, single coats that can creep into the joint and highlight the repair. Between coats, a short flash-off period helps reduce solvent bloom and decreases the risk of lifting the color at the edges. The goal is a seamless blend where the repaired area looks like an intentional part of the original design rather than a patch.
When the color match is achieved, a clear coat is applied to protect the finish and provide the same level of gloss and resilience as the rest of the fairing. The clear coat not only guards against UV light and moisture but also adds a final layer of hardness that resists minor abrasions, typical of road use. A careful technique is essential here as well; apply in thin, even passes, allow adequate curing between coats, and finish with a final curing period that ensures the finish hardens fully before the bike is put back into service. The final inspection is as much about the surface as the bond. One should examine the repaired area under different lighting conditions to catch any subtle imperfections that would otherwise go unnoticed in the shop but would be conspicuous during a ride. Small adjustments with additional, thin coats can refine the appearance without sacrificing the integrity of the bond.
An important practical note concerns the limits of repair. ABS plastics can be remarkably resilient, but a severely cracked or deformed fairing may require more extensive intervention than a patch can sustain. In cases where a large area is compromised or where structural features such as mounting tabs are damaged, it may be prudent to consider a replacement panel or a reinforced repair strategy. The reinforcement might involve incorporating a backing plate or a structural insert that distributes load away from the repaired seam. Such enhancements are more likely to produce long-term reliability and peace of mind for riders who depend on their fairings for both comfort and aerodynamic efficiency. While reinforcement adds complexity and time, it can be a wiser investment than redoing a fix that might fail under stress.
For riders who want a practical path that respects the realities of shop time and riding wear, it helps to view ABS repair as a two-stage process: the first stage restores bond strength and surface integrity, and the second stage restores visual uniformity. The bond stage focuses on adhesion, curing, and mechanical durability. The finish stage focuses on color and gloss matching, as well as a protective top coat that shields the repair from the sun, rain, and trail grit. Even though these two stages are logically distinct, they are inseparable in function because a perfect bond that shows through a poor finish will still disappoint the eye, and a brilliant finish that hides a weak bond will disappoint the rider when the fairing flexes or sustains impact. In practice, they are threaded together as a single, deliberate craft workflow that blends material science with painterly technique.
Riderly wisdom also comes into play. The way a rider handles the bike after repair can influence the long-term durability of the fix. Avoid unnecessary stress on the repaired section during the first rides after curing. Check mounting hardware for proper torque and alignment. Even a small misalignment can create micro-movements at the seam that stress the bond and create a vulnerability that undermines the repair’s life. The work becomes a cycle of careful use, periodic inspection, and, when needed, minor touch-ups that maintain the fairing’s aesthetics and performance. This mindset mirrors the broader ethos of motorcycle maintenance: small, deliberate, well-informed steps taken consistently across the life of the bike yield the most reliable outcomes.
To provide a sense of how these practices fit into a broader maintenance and repair ecosystem, consider the value of consulting reputable sources that address helmeted, methodical maintenance. For additional guidance on repair procedures and best practices, a respected authority in motorcycle maintenance and repair offers detailed explanations and step-by-step insights that can complement hands-on experience. A practical read from Cycle World can broaden understanding of how professional repair professionals approach similar tasks in a shop environment and can illuminate considerations that inform home-based repairs, especially when time, materials, and environmental conditions intersect in complex ways. You can explore their insights at Cycle World’s website: https://www.cycleworld.com.
For riders seeking to source compatible parts or to explore a platform that showcases a broad range of fairing designs and replacement panels, there is value in visiting specialized retailers that curate components for a wide spectrum of motorcycle models. A well-structured catalog can help you identify options that best align with your bike’s make and model, ensuring a more precise color match and fit when you return to the finishing stage. A practical example of this approach can be seen in the Honda fairings collection on a popular parts platform, which consolidates multiple SKUs by model and year, making it easier to plan color-matched repairs and replacements. See the Honda fairings collection for reference and potential fitment considerations when selecting a matching panel: https://www.summitfairings.com/collections/honda-fairings. This internal resource is not a substitute for professional assessment, but it can support the repair planning process by providing model-specific context and confidence in purchase decisions.
In considering the larger picture, the ABS repair workflow described here is a model for responsible, durable maintenance that respects the original design intent of the fairing. It acknowledges ABS materials’ strengths and limits, leverages adhesive technology tailored to engineering plastics, and recognizes the importance of surface preparation, curing, finishing, and protective coatings. It also emphasizes safety, practicality, and a measured approach to post-repair handling. The end goal is a repaired fairing that not only looks right but also behaves as intended under aerodynamic load and road stress. When executed with care, the repair becomes a credible alternative to replacement, preserving the aesthetic and functional integrity of the motorcycle while extending the life of the fairing and the rider’s confidence in the bike’s performance.
In sum, ABS cement for motorcycle fairing repair represents a synthesis of material science and craft. It requires respect for the chemistry behind the adhesive, discipline in surface preparation, precision in application, patience in curing, and care in finishing. It rewards those who approach the task as a careful, iterative process, rather than a quick patch. For riders who value both performance and appearance, mastering these steps offers a practical path to keep the bike’s lines clean, its finish uniform, and its aerodynamics unimpaired. The repair, when done correctly, becomes more than a fix; it becomes a reaffirmation of the rider’s commitment to the machine and to the craft of keeping it roadworthy for miles to come.
Solid Bonds: Mastering ABS-Based Cement for Motorcycle Fairing Repair
Repairing motorcycle fairings made from ABS plastic is a careful blend of material science, practical technique, and long-term durability planning. When a gloss-covered shell cracks after a tumble or a speed bump, riders want a repair that not only looks right but holds up under the relentless vibrations, temperature swings, and exposure to the elements that come with riding. ABS, with its balance of toughness and lightweight properties, responds well to modern adhesive chemistries that are designed to bond plastics securely without sacrificing rigidity or elasticity where needed. The goal is a repair that behaves like the original panel under stress, yet can be trusted to withstand years of exposure to sun, rain, road grime, fuel vapors, and occasional impacts. This is not simply about filling a void; it is about restoring structural integrity and ensuring that the fairing continues to shield the rider and channel airflow as intended. In this sense, choosing the right cement for ABS is a decision that touches on safety, aesthetics, and ride comfort as much as it does on the do-it-yourself ethos that many riders embrace when they work on their own machines.
ABS, short for acrylonitrile butadiene styrene, is favored for fairings because it absorbs and dissipates energy better than many alternative plastics, yet remains relatively easy to thermoform and finish. Its surface chemistry presents a challenge: plain surface adhesion can be insufficient in high-stress zones where the fairing experiences continuous vibration or where a repair must carry through to a mounting point. The most robust repairs occur when the adhesive system is chosen with the same care you give to the patch itself. The recommended approach centers on two broad strategies that complement one another. First, a high-strength, two-component adhesive that creates a durable, cross-linked bond capable of standing up to temperature changes and humid conditions. Second, a plastics bonding system that includes a dedicated surface primer or adhesion promoter designed to optimize the bond between ABS and the adhesive, especially in cases where the repair covers a joint, a crack, or a panel seam that has to flex slightly during operation. This dual strategy—structural adhesive plus targeted surface preparation—readies the repair for the next ride with a confidence that comes from engineering-grade bonding rather than quick fixes.
In practice, the repair begins long before any glue is applied. Preparation is the most critical phase of any ABS repair. The surface must be thoroughly cleaned to remove oils, waxes, dust, and remnants of old coatings. A multi-step approach usually yields the best results: first degrease with a solvent that evaporates cleanly, then wipe the area with a clean rag. Following that, light mechanical abrasion—gentle sanding with a medium grit like P80 to P120—helps create a slightly rough surface that increases the adhesive’s mechanical grip. The aim is not to gouge or carve the plastic but to provide micro-anchors for the resin or cement to grip. After sanding, a second wipe-down removes the loose particles and dust that the paper may have left behind. The surface should appear matte rather than glossy, a telltale sign that it is ready to receive adhesive.
Once the surface is prepared, the choice of adhesive becomes a decision about the load path and the expected performance envelope of the repair. A high-strength two-component epoxy adhesive is at the heart of the most durable repairs. When mixed in strict adherence to the manufacturer’s ratio, these systems cure to a hard, impact-resistant bond with excellent resistance to temperature cycling. They fill gaps effectively and form a continuous bond that can resist the shear forces generated by vibration and flexing. For larger cracks or full-depth panel repairs, an adhesive with good gap-filling properties can bridge the crack and distribute the load across a broader area, reducing the likelihood of a crack propagating again at the same location. In situations where the repair is in a joint or seam that experiences frequent removal and reattachment, a plastic bonding system—comprising a primer or promoter plus a compatible adhesive—can be a practical choice. The primer improves adhesion on ABS by modifying the surface energy of the plastic, allowing the subsequent adhesive to flow and wet the surface more completely. In combination, these two approaches deliver a bond that is not only strong but predictable, with a cure profile that fits typical workshop schedules.
The practical workflow for a robust ABS repair often unfolds as a sequence of disciplined steps. After surface preparation, the repair area may benefit from clamping or a positioning fixture to hold the pieces precisely in place during cure. Glue application should be uniform but restrained; excessive adhesive can squeeze out as a bead that later interferes with paint or creates a visible lump under clear coats. For two-component epoxies, mix thoroughly according to the recommended ratio, scraping the sides of the mixing cup to ensure a homogeneous blend. It is crucial to apply the bond lines to both surfaces rather than only one, as this distributes stress more evenly. When bonding larger panels or areas near mounting points, consider reinforcing the joint with a lightweight patch or a backing plate of ABS or compatible composite. This reduces the risk of crack initiation at the edge of the repair and adds a measure of redundant safety.
Curing is the other half of the equation. Most high-strength adhesives require a cure period that can range from 12 to 24 hours at moderate temperatures, with longer times or higher temperatures needed for maximum performance. The environment during cure matters just as much as the materials themselves. A clean, stable, and moderately warm workspace helps achieve consistent results; cold or high-humidity conditions can slow cure and alter the final properties of the bond. During the cure, it is advisable to avoid applying pressure to the repair or subjecting it to flexing. In situations where the fairing continues to be exposed to vibration during cure, a temporary clamp that does not apply uneven pressure is ideal. Once cured, inspect the joint under light to look for any micro-movements or gaps. A fully cured bond should feel solid to the touch, with no soft or tacky spots. If any uncertainty remains about the strength of the bond, the prudent step is to apply a conservative load test in a controlled environment before resuming normal riding.
After curing, the repair often transitions into finishing. The epoxy or plastic-bonded joint may require careful trimming of excess adhesive and minor planing of the surface to restore a smooth contour. Sanding should proceed with progressively finer grits, ending with a fine finish that resembles the surrounding ABS surface. In some cases, spot-filling with a compatible ABS-reinforced filler may be appropriate to restore a uniform surface before priming. Priming is a pivotal step because it improves paint adhesion and provides a sealed underlayer that reduces the risk of microcracking in the finish. Choose a primer formulated for ABS and compatible with the topcoat system to ensure long-term color stability and abrasion resistance. Finally, the repaint and clear coat should be chosen with UV resistance and chemical exposure in mind. The fairing is not merely a cosmetic panel; it is a component that endures the sun’s rays and the road’s chemicals, and the finishing system should be engineered to stand up to those conditions without chalking or peeling.
The choice between repair strategies often hinges on repair location, the severity of the damage, and the rider’s priorities. For a clean, full-coverage repair on a large panel, a two-part epoxy approach with a compatible plastic bonding system can deliver superior long-term strength and cosmetic integrity. For smaller or more cosmetically sensitive repairs—where the goal is to maintain an invisible seam and preserve the surface’s original aesthetic—a plastics bonding system guided by a surface primer can sufficiently restore bond strength while simplifying finishing work. Either path benefits from careful surface preparation, controlled curing, and a finishing sequence that respects the ABS’s tendency to resist moisture ingress while embracing the flexibility needed to avoid brittle failure under load.
When considering the broader ecosystem of aftermarket parts and repairs, it helps to recall that ABS fairings come in many shapes, sizes, and mounting philosophies. Some riders are dealing with full fairings that must withstand constant wind load and road spray, while others are addressing smaller sections around vents or mounting points that see less stress but require high cosmetic fidelity. In either case, the underlying principle remains the same: build the bond with attention to surface readiness, select an adhesive that matches the material properties and the expected service life, and manage the cure and finish with discipline. The bike’s ongoing performance owes as much to the post-repair handwork—sanding, priming, and painting—as to the glue itself. It is the sum of these elements that determines whether the repair will fade into the background or become a durable feature of the bike’s silhouette.
For riders who want to explore repair options tied to the most common ABS fairing profiles, the available aftermarket resources highlight a practical point: many of these panels share a common set of base materials and attachment strategies. This means that the same core principles—thorough preparation, controlled curing, and a properly balanced adhesive system—apply across a wide range of models. Whether you are patching a Honda-era fairing or addressing a sport bike from another manufacturer, the approach remains to optimize the bond while preserving the panel’s shape and function. When it comes to selecting a repair pathway, it can be helpful to consult resources that detail the types of ABS alloys and PC/ABS blends typical in modern fairings, and to consider how those materials respond to solvents, primers, and adhesives. In some cases, blending a repair with a small piece of backing material or a patch will provide additional strength and help ensure the repair remains integrated with the panel’s geometry. This is not merely a patch job; it is a reconstitutive process that seeks to restore the fairing’s original performance envelope while maintaining the visual continuity that riders expect on their machines.
Practical wisdom from field experience emphasizes a few non-negotiables. Always prioritize clean surfaces, proper bonding agents, and a rational cure plan. Do not rush the cure; the adhesive’s full strength emerges only after the recommended time has elapsed. Do not overlook the hinges and mounting zones, as these are often the first points of failure when a repair gets stressed by wind at speed or by rough terrain. When in doubt, add an extra bite of contact area or use a backer plate to spread the load more evenly across the repair site. If you intend to repaint, ensure the repaired area accepts the finish uniformly; the wrong primer or an incompatible topcoat can reveal the repair after the first wash or prominent sunlight exposure. In short, treat ABS repair as a small engineering project rather than a simple cosmetic patch, and the result will be a fairing that continues to perform as reliably as the bike itself.
For riders who want to explore compatible parts and models that align with these repair principles, a good starting point is to consider the broad family of ABS-based fairings and the aftermarket options available for popular brands. Riders frequently seek guidance on compatibility with specific panels, fitment, and color options, especially when a repair needs to be color-matched or blended with the rest of the bike’s shell. A representative reference in the aftermarket domain highlights several model families and the related fairing variants, giving repair enthusiasts a sense of the commonality in repair strategies across different bikes. If you are looking to browse parts and accessories that align with these repair principles and ABS material compatibility, you can visit the Honda fairings collection for a streamlined overview of commonly encountered shapes and attachment zones and to understand how the piecework of patching might align with the overall design language of these panels. Honda fairings collection at Summit Fairings.
As you move from the workshop bench to the road, the reliability of an ABS repair rests on a balance between material behavior and adhesive performance. The best outcomes emerge from choosing a robust, two-component adhesive system whose chemistry is tuned for ABS and PC/ABS blends, complemented by a plastics bonding system where bond strength needs to be augmented at critical interfaces. The systems are designed to perform under vibration, heat, and moisture, which are the everyday realities of riding. They are not merely the tools of repair technicians; they are enablers of rider confidence, turning a damaged shell into a durable shield that protects both rider and machine. In this way, the repair becomes a narrative of engineering judgment, where every step—from surface prep to cure to finish—contributes to a single, cohesive result: a fairing that continues to perform, protect, and look right on the road.
External reference for broader adhesive context and technical depth can be found at a leading structural adhesive resource, which outlines the properties, curing behavior, and application considerations for ABS-compatible bond lines. This external material complements the pragmatic approach described here and can be used to deepen understanding of how different chemistries perform under varying temperature and vibration regimes. External resource.
null
null
Final thoughts
Repairing motorcycle fairings with ABS cement requires attention to detail and a thorough understanding of materials and best practices. By following the guidelines outlined in this article, business owners can effectively enhance their repair services, ensuring a solid bond and prolonged lifespan for motorcycle fairings. The right product selection combined with proper surface preparation will not only provide a quality finish but also strengthen customer satisfaction and loyalty.