Adding vents to motorcycle fairings has emerged as a crucial modification for enhancing performance and comfort while riding. Motorcycle enthusiasts and business owners alike recognize the significant benefits that vents offer, which include improved airflow, reduced wind noise, and better engine cooling. This comprehensive guide explores the nuances of selecting the right vent type, the installation process, customization options, and expert tips, ensuring a well-rounded understanding of how to elevate the riding experience through strategic modifications to motorcycle fairings.
Breathing Space: Choosing the Right Vent Type for Fairings

Airflow management in a motorcycle fairing is a balance of pressure, direction, and rider comfort. When adding a vent, think of it as a shaped conduit that channels air to cooling paths, reduces turbulence, and minimizes wind noise. The goal is to integrate the vent with the fairing geometry, rider posture, and climate while avoiding buffeting. Start with a clear objective for cooling and comfort rather than a cosmetic cut. Consider high‑performance options that blend with the fairing profile, seal against water and spray, and minimize noise and buffeting. Compatibility matters: fitment can vary between models and model years, so verify the vent works with your specific fairing and check with a professional installer if needed. Practical steps include marking the location, testing airflow with a lightweight indicator such as paper, drilling with care, and using a proper sealant to prevent water ingress and air leaks. The best installations disappear into the fairing’s lines while delivering cooler temperatures, reduced torso drag, and improved rider comfort. Finally, align your vent choice with your riding goals, whether you seek maximum performance gains or a subtle factory-like look, and consider how maintenance and materials such as UV stability, seals, and mounting hardware affect long-term reliability. External references and model-specific fitment guides can help you choose a vent that truly integrates with your bike.
Venturing Ahead: Integrating Air Vents into Motorcycle Fairings for Performance, Comfort, and Longevity
Adding a vent to a motorcycle fairing is more than a cosmetic tweak; it is a measured, engineering-informed step toward better breathing for the machine and more comfort for the rider. When air is directed thoughtfully through a vent, it creates a path of least resistance for heat and turbulence, reducing pressure buildup under the fairing and helping the engine and electrical components shed heat more efficiently. The rider, meanwhile, benefits from a calmer cockpit at speed, with less wind roar and fewer gusts that tug at the helmet or collar. The technique requires care, but with a steady hand and a plan, a simple vent can complement the bike’s aerodynamics rather than disrupt them. The goal is to balance intake and exhaust in a way that harmonizes with the bike’s existing silhouette and the rider’s posture, letting airflow do the heavy lifting rather than fighting against eddies or buffeting.
Planning the vent location begins with an understanding of how air behaves around a fairing at speed. The top edges and the sides of the fairing are natural funnels for incoming air, which can carry heat away from critical components while also reducing negative pressure that can pull water and detritus into gaps. The optimal placement is near the top or along a side facet where the vent can feed a steady stream of cooler air toward the engine bay or the rider’s torso without creating a stark visual break that clashes with the fairing’s lines. A well-placed vent also helps prevent heat pockets under the panels that can soften the resin or composite over time and accelerate wear on nearby hardware. When marking the cut area, a light template or masking tape guide ensures symmetry. If the bike has a companion fairing or a full-kit body, aim for a balanced pair of vents that mirror each other to preserve the bike’s aesthetic and the rider’s sense of center.
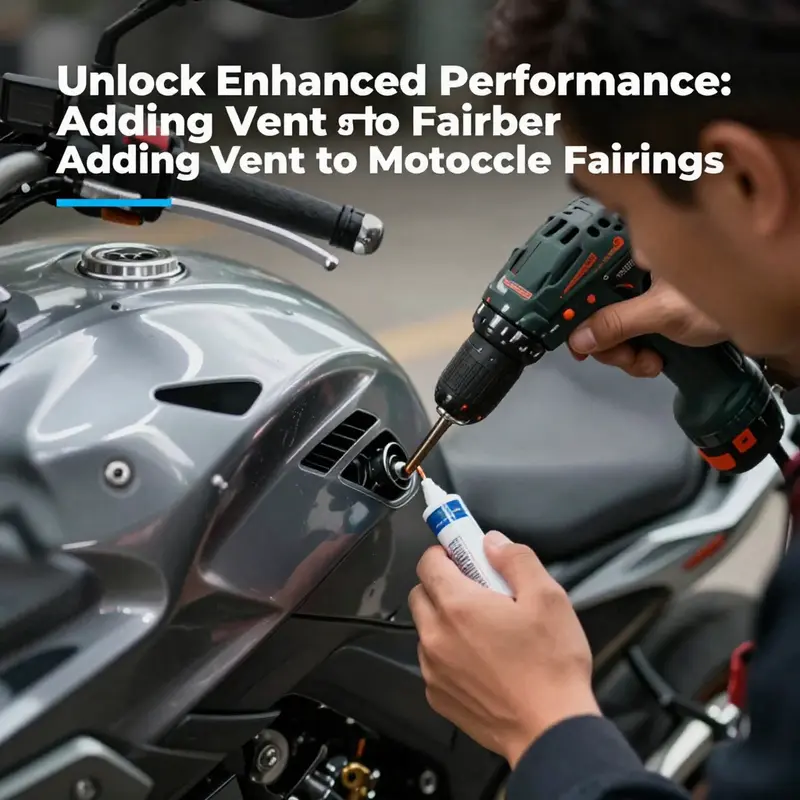
Cutting the opening is where the work often feels most intimate. The tools chosen must respect the material in the fairing—whether it’s painted plastic, fiberglass, or a composite shell. A fine-toothed saw or a router designed for plastics yields clean, controlled cuts. The key is to steady the work and avoid forcing the tool. Start with a pilot hole in a corner, then gradually enlarge the cut, checking the shape against the vent’s outline repeatedly. As the opening takes form, keep the surface nearby unblemished by protecting it with masking tape or a soft clamping method. During this stage, it’s wise to work in a well-lit space and to wear eye protection; small chips will fly, and keeping them contained prevents scratches on the surrounding finish. The cut must be precise; any wobble in the cut line translates into gaps that undermine sealing and airflow control. The goal is to achieve a smooth, true edge that can accept the vent with a snug fit.
After the opening is prepared, attention should turn to finishing the edges. Sanding is not merely cosmetic; it is a functional step that ensures a continuous, smooth surface for sealing and for the vent to seat flush with the fairing. Begin with a medium-grit abrasive to knock down any high spots, then switch to a finer grit to attain a glassy edge feel. A raspy edge can become a site for water intrusion and for wind turbulence if left unchecked. The smoother the edge, the more predictable the joint between vent and fairing becomes, which translates into better long-term performance. While you sand, test-fit the vent repeatedly. If the edge reveals any micro-cracks or stress lines when pressed, halt the process and reassess—small flaws here can propagate into bigger issues after a ride. The smoother and more precise the opening, the more reliable the overall seal will be when you install the vent.
Sealing the opening is the waterline of this undertaking. The vent requires a perimeter seal that resists water intrusion, wind gusts, and the relentless vibrations of a high-speed ride. Use an automotive-grade sealant that remains pliable in temperature swings and resists UV degradation. Silicone- or epoxy-based sealants can be effective; the choice should reflect the shared demands of weather exposure and the material of the fairing. Apply a continuous bead around the entire edge, then press the vent into place with even, gentle pressure. A light cure time is essential to prevent moisture entrapment under the seal as the vent and fairing settle together. After the vent is mounted, run a careful check along the seam for gaps that could loosen under vibration, and apply a second pass of sealant as needed. The seal is not merely a barrier to water; it’s a tool that helps maintain the vent’s predictable performance under riding conditions.
The vent cover or duct that you attach must fit like a hand in a glove. Compatibility matters because a poorly matched cover can alter airflow paths in ways that produce unwanted buffeting or noise, negating the intended cooling benefits. When selecting a cover or duct, confirm fitment with your bike’s fairing profile, and check whether the piece allows the vent to sit flush against the surface. Some designs rely on a clamping system that locks around the fairing edge; others depend on an adhesive bond plus mechanical fasteners. In all cases, the goal is a secure installation that does not shift during acceleration, braking, or hitting highway gusts. If you encounter a mismatch, the prudent move is to source a different cover or alter the mounting method rather than forcing a component into a space that isn’t naturally suited to it. A careful test fit before the final seal prevents costly mistakes downstream.
An optional but practical consideration is whether to incorporate a fan-assisted vent. A small electric fan can actively move air across the fairing’s interior, improving cooling when the bike is stationary or traveling at modest speeds that don’t generate enough passive airflow. If you decide to add such a device, plan the wiring with the same respect you give to any motorcycle electrical modification. Use a dedicated fuse and a relay so the vent cannot overload the main circuit or drain the battery when the bike sits idle. A separate control switch or a temperature-activated sensor can keep the system from running when it isn’t needed, preserving electrical margins and battery health. Neat wiring and proper harness routing also prevent chafing and heat buildup near hot components. Even with a passive vent, you gain from thoughtful duct routing that channels air toward heat-dissipation zones rather than toward empty space behind the fairing.
Testing the installation is the moment of truth. A careful ride at multiple speeds—urban throttle, steady highway cruising, and brisk winds—reveals whether the vent is doing what you intended. Listen for new noises, especially at mid and high speeds where the air interacts with the vent path. Feel for any unexpected drafts that tug at the rider’s helmet or clothing, and check for drafts through the lower edges of the fairing where water intrusion might occur after a rain or wash. If you detect vibration, reassess the mounting points to ensure the vent and ducting are secured firmly and that the edge still sits flush with the fairing. This is not a one-and-done step; it’s an iterative process. Small tweaks—repositioning the vent slightly, resealing a seam, or adding a shim to improve contact—can yield meaningful, rideable improvements.
In terms of philosophy, this modification sits at a crossroads between utility and aesthetics. The fairing is part of the bike’s identity, and a vent should complement rather than compromise its design language. A well-integrated vent reads as a natural extension of the fairing’s contours, almost invisible at first glance but doing meaningful work when the speed climbs. If you pursue a factory-style path, you’ll find that pre-engineered vent kits are designed to harmonize with many bike shapes and rider postures. They emphasize a clean silhouette and predictable airflow, offering predictable performance with less guesswork. For riders who enjoy a more bespoke look, custom vents crafted from ABS or composite materials can be shaped to echo the bike’s character while delivering the same cooling and noise-management benefits. In either case, the underlying principle remains: venting is a tool to manage air as carefully as you manage fuel and lubrication, not a bandage for a design flaw.
To connect this approach with practical resources, model-specific fitment and options can be explored with the Honda fairings collection, which provides an entry point into compatible shapes and mounting considerations. This reference can help you gauge how your chosen vent concept might integrate with a particular fairing family, ensuring that the project remains aligned with the bike’s lines and electronics layout. See Honda fairings collection for context and inspiration. While the path to success is hands-on and project-by-project, the core idea endures: venting, when executed with care, can improve cooling, reduce wind noise, and bolster riding comfort without compromising the integrity of the fairing or the rider’s experience. The best installations reflect a blend of engineering discipline, respect for the bike’s original design, and a willingness to iterate until the airflow behaves the way you want it to behave under real-world conditions. For those who want a broader perspective on the principles behind these choices, an external resource on aerodynamics offers deeper explanations of how pressure, flow separation, and boundary layers interact with vehicle bodies and ducts. This broader context helps riders understand why careful vent placement matters as much as the vent itself. External resource: https://www.sciencedirect.com/topics/engineering/aerodynamics
Breathing Space: How Venting Transforms a Motorcycle Fairing Into an Active Airflow System

A motorcycle fairing is more than a shield against wind; it is a carefully shaped conduit that directs air, pressure, and heat around the rider and engine. When you add vents, you are not just poking small holes into the plastic; you are giving the fairing a controlled breathing pattern. The result is a ride that feels lighter in the hands at speed, cooler when the sun is high, and more composed as you chase long miles or tight corner sequences. Vents work by creating pathways for high-pressure air to escape and for cooler air to enter specific zones. The effect is a cascade of improvements that, when done thoughtfully, reframe the relationship between rider, machine, and environment. This is not a gimmick or a single-factor tweak; it is a design change that unlocks a distribution of forces that work in concert with the bike’s geometry and the rider’s posture. The bigger picture is an aerodynamics-informed cooling strategy that also quiets the ride, reduces lift tendencies from the fairing, and supports sustained performance through the heat of a hot day or a demanding ride.
From an aerodynamic perspective, vents address a fundamental issue: pressure differentials accumulate under the fairing as speed climbs. The air that flows over the surface can create a low-pressure pocket beneath, which, if left unmanaged, contributes to drag and occasional lift. A vent introduces a deliberate release valve for this trapped air. The effect is not merely less drag; it is a stabilization of the entire flow field around the fairing. With the air escape path in place, the boundary layer can reattach more predictably and the downstream wake becomes more orderly. The riding experience reflects that order: the bike feels more planted, less darting or buffeted by stray eddies as you roll through sweeping bends or lean into a straight line at highway speeds. The vent becomes a quiet partner in the aerodynamics story, working with the fairing’s contours rather than fighting them.
A closer look at rider comfort reveals another layer of benefit. Vents channel and expel hot air that often collects around the rider’s core and legs during longer rides. In sport-touring and track-focused configurations, the rider’s posture tends to place heat into tight zones where it can sap concentration and comfort. When hot air is redirected toward the outside, air exchange near the legs, hips, and lower back improves. The result is a cooler cockpit, reduced fatigue, and a more consistent riding temperature, especially on warm days or during sustained pace. This is not about blasting cold air directly at the rider; it is about improving air movement to where heat wants to accumulate and allowing that heat to exit the body’s working zone. The cognitive benefit of a cooler ride—less discomfort, steadier grip, steadier breathing—translates into more confident cornering and longer rides without a premium on energy.
Wind noise is another facet of the overall comfort equation. A well-placed vent helps equalize pressure differences between the inside and outside of the fairing. When air flows in and out in a managed way, the high-frequency whistling and the characteristic “whoosh” that can develop at speed dampen. The ride becomes quieter, and the rider’s ears can better discern road texture, tire feedback, and engine rhythm. It’s not about eliminating every sound but about reducing the harsh, intrusive tones that tend to dominate on long, high-speed stretches. The quietened interior atmosphere supports sustained focus and reduces the sensory fatigue that can creep in after hours on the road.
Beyond comfort, ventilation quietly shoulders a more technical obligation: engine and electronics cooling. Engines and radiators, especially in air-cooled or partially air-cooled designs, depend on a steady, directed flow of air to shed heat. Vents are not brute cooling devices; they are targeted channels that bias airflow toward critical components. When vent locations are chosen with thermal maps in mind, the pathways can assist cooling during demanding riding scenarios—heavy acceleration, sustained high speeds, or stop-and-go traffic in hot weather. The electronics tucked under the fairing, sensors, ECU housings, and power electronics all share a heatsink-like relationship with the airstream. Even modest gains in cooling capacity can help preserve component life and performance, reducing the risk of heat soak that can accompany long sessions in the saddle.
A practical benefit often overlooked is how vents influence fairing security and stability at speed. The dynamic pressure changes that accompany wind flow can occasionally pull on fasteners or provoke minor flutter in the paneling if the pressure distribution is highly uneven. By providing an escape path for air, vents reduce suction under the fairing and help maintain a more uniform load transfer across the entire structure. The result is a more stable ride, with less perceived lift or flutter that might otherwise demand last-minute tightening or inspection after a long ride. The effect can be especially noticeable on bikes with larger, full-fairing configurations where the scale of the profile makes pressure management even more consequential.
When considering the design of a vent, the goal is to harmonize function with aesthetics. A vent should be integrated in a way that respects the fairing’s lines and the rider’s posture. In practice, this means choosing vent shapes and placements that complement the existing contours and do not create sharp transitions that could trap water or debris. The installation philosophy matters just as much as the vent’s geometry. A well-integrated vent is sealed to protect against water intrusion, uses a secure mounting method, and maintains the fairing’s original strength characteristics. A poorly placed or poorly sealed vent can become a source of water ingress, wind noise, or structural weakness. For riders who want a cleaner, factory-style upgrade, there are engineered vent kits designed to align with typical fairing geometries, offering an integrated approach that minimizes guesswork while preserving aesthetics. For riders who prefer a more bespoke look, custom vents give the opportunity to tailor both function and form to a particular bike’s silhouette, but they require careful measurement, material choice, and finishing. ABS plastic and composite options can be selected for their impact resistance, thermal stability, and compatibility with common paints and clear coats, ensuring the vent doesn’t become a visual disruptor as speeds rise.
The decision-making process around venting also bends toward fitment discipline. It begins with model-year compatibility and fairing configuration, because even small changes in the fairing profile can shift the ideal vent size and location. The next step is to map the vent’s path to practical realities: how water drains away, how debris might accumulate at the inlet, and how the vent’s edge seals will interact with the surrounding weather seals. Tools and materials matter; a careful hand with marking, a slow drill approach, and a reliable sealant are essential to prevent leaks and wind noise. A well-executed installation yields a lasting improvement—quiet, cooler, and more stable operation—without compromising the fairing’s integrity or the rider’s confidence in the bike’s balance at speed. The process rewards patience and a measured approach.
For riders who want to explore a more structured path toward vent adoption, a look at compatible fairing families can be instructive. If a rider is considering a vent on a fairing configuration that shares common geometry with certain sport-touring or performance lines, a broad catalog of fairing shapes can provide a useful starting point. There is value in referencing established fitment guides and consulting a professional if there is any doubt about alignment. In practice, a vent’s benefits multiply when integrated with a deliberate approach to airflow management, thermal management, and noise control. When these elements come together, the fairing ceases to be a passive shell and becomes a dynamic component that contributes to the bike’s overall behavior.
For readers seeking practical direction in the broader ecosystem of fairing designs and vent integration, a visit to the Honda fairings collection can be instructive. This resource offers a sense of how vent-related adaptations can be harmonized with standard fairing lines while preserving the aesthetic and structural integrity of the bike. This chapter has focused on the functional advantages of vents, but the design conversation remains anchored in the fact that form and function are inseparable when it comes to high-speed airflow. The vent is not an afterthought; it is a design element that, when placed with care, unlocks a smoother ride, a cooler engine, and a calmer cockpit. As the discussion across chapters unfolds, the takeaway is clear: adding a vent to a fairing is not a mere add-on, but a deliberate rebalancing of aerodynamic forces, thermal realities, and rider comfort. For those who want a deeper technical view on how fairings manage airflow, temperature, and noise, a broader technical overview is available in the industry literature and can be consulted to ground practical choices in established aerodynamics principles. External reference: Motorcycle.com’s comprehensive explainer on motorcycle fairings offers a broad, accessible frame for understanding the design logic behind these components. Read more here: https://www.motorcycle.com/tech-features/motorcycle-fairings-explained/
Vent Craftsmanship: Customization as Performance and Presence in Motorcycle Fairings

When riders decide to add a vent to a motorcycle fairing, they discover that customization is more than a bolt-on decision. It becomes a design philosophy that balances airflow, acoustics, weight, and the machine’s visual language. A vent is not just a hole in plastic; it is a carefully considered portal that can channel air where it is most effective while harmonizing with the fairing’s lines so the bike looks purposeful from every angle. The art of customization emerges from listening to how air behaves around a bike at speed and how the rider experiences that movement at the saddle. The fairing already frames the machine as a sculptural object; adding a vent invites you to tune that sculpture so it breathes with intention rather than leaking or roaring into the wind. In practice, this means choosing a vent design that suits the bike’s character, selecting materials that deliver strength without sacrificing weight, and aligning vent placement with cooling and aesthetic goals. It also means recognizing that a vent can be an homage to engineering prudence, a statement of personal taste, or both.
Breeze by Design: Strategic Ventilation for Motorcycle Fairings

When riders chase comfort on long stretches or in hot climbs, the fairing becomes more than a shield against wind. It is a horizontal engine room, a draft tunnel, and a stage for airflow management. Adding vents to a motorcycle fairing is not simply about letting more air in; it is about steering that air with intention so it cools the rider and the engine without turning the ride into a wind tunnel experiment. The best implementations emerge from a calm dialogue between form and function. They respect the fairing’s original contours while threading a precise path for air that balances cooling, aerodynamics, and noise. The result is a smoother ride at speed, less fatigue on hot days, and a cockpit where engine and rider coexist with an even, purposeful breeze rather than a chaotic gusting that stings the face shield or stirs loose fabric on the dash.
Strategic placement anchors the whole idea. Front intake vents placed near the lower front edges of the fairing can usher cooler air into the cavity while the bike is still in a low-pressure regime as it slices through the atmosphere. Exhaust vents, conversely, belong toward the rear—often at the top of the fairing or along the sides—where the air, having warmed and picked up moisture from the rider, can exit the enclosure cleanly. The magic happens when those two elements form a continuous corridor: air enters, travels along the rider’s torso and helmet, and exits, leaving behind a calmer environment inside the cockpit. When done with care, this front-intake–rear-exhaust concept mirrors the efficient cooling patterns found in modern ventilated helmets and can be adapted to many fairing shapes without sacrificing the bike’s aesthetics.
Material choice and sealing matter as much as the layout itself. Vents built from durable ABS plastic or lightweight aluminum strike a practical balance between rigidity and weight. The inclusion of robust seals—a small rubber gasket that sits between the vent and the fairing surface—helps keep water out when riding through spray or rain. The seal isn’t simply an anti-leak feature; it preserves the integrity of the airflow path. A vent that seals well maintains consistent pressure differentials, which in turn stabilizes the intended draft across the rider’s shoulders and chest. It is this consistency that makes the difference between a refreshing breeze and a gusty interruption that can ripple through a headset or helmet vents.
Aerodynamics remains a central concern, even when the goal is to improve cooling. Vents cannot be an afterthought; poorly designed openings can disrupt the fairing’s smooth flow, introducing drag and unexpected wind noise that erodes the very comfort the modification seeks to enhance. If possible, leverage basic CFD insights or wind-tunnel testing insights to compare a proposed vent geometry against the stock fairing. Even small changes in vent angle, edge radius, or the degree of flange that channels air into or away from the rider can produce measurable shifts in drag and buffeting. The aim is not to maximize open area but to optimize the path of air through the vent system. When a vent can be adjusted by hand, you gain a practical edge: you can tune the balance between cooling and comfort as weather shifts from northeast heat to a damp evening chill.
The cooperative relationship between fairing ventilation and helmet ventilation is a detail that riders often overlook. The best wind-management strategies view the helmet as part of the system, not as a separate piece of equipment. When the rider’s own helmet vents draw air in, the fairing vents should harmonize with that intake-exhaust cycle. A well-planned system can pull fresh air from the front, push it over the crown of the head, and draw it out at the back, creating a continuous, low-turbulence flow that reduces wind roar and helmet fog. This synergy is especially valuable during long highway stints or city-to-hill climbs, where small improvements accumulate into a noticeable rise in comfort and alertness.
Adjustability introduces a welcome degree of control. Removable or adjustable vents, secured with magnetic covers or snap-on flaps, empower riders to adapt to changing weather and riding regimes. In cooler mornings, the vents can be closed to preserve warmth and reduce drafts; in the heat of afternoon, opening them can liberate a steady breeze across the torso. The ability to tailor the venting setup without committing to a fixed installation makes the upgrade accessible to riders who value versatility as much as performance.
Condensation and fogging are practical realities that must be anticipated. In humid conditions, enhanced airflow can inadvertently drive moisture into the fairing cavity or onto the windscreen. Adequate exhaust flow helps prevent stagnation, but riders may also explore passive dehumidification elements such as desiccant packs placed in strategic pockets within the fairing’s interior, or very small, purpose-built micro-fans that circulate moisture-laden air toward the exhaust path. These options require careful placement to avoid introducing new noise sources or vibration that could distract the rider. The overarching principle is simple: ensure that air movement does not trap humidity in the wrong pockets while preserving the clean, quiet draft you want near your helmet.
No plan is truly complete without field testing. After installation, ride under a spectrum of conditions—low-speed city traffic, high-speed highway, rain, and cool mornings. Note any changes in wind noise, draft direction, or unexpected air leaks around edges. A minor tweak—altering a vent’s angle, widening or narrowing an intake, or adding a slim deflector to guide flow—can dramatically alter the perceived comfort. The goal is not a perfect, static solution but a dynamic system that remains predictable across riding scenarios. In some cases, riders discover that a factory-style, pre-engineered vent kit is the best route. Such kits are designed with attention to both aerodynamics and aesthetics, offering a turnkey path to a balanced venting solution while preserving the bike’s lines and finishing details.
For riders who wish to explore the realm of options without compromising the fairing’s character, a curated catalog of pre-engineered vent solutions can provide a reliable baseline. When evaluating these options, consider how well the kit’s contours align with your particular fairing geometry, the ease of installation, and the availability of seals that keep water out and air streams clean. A well-designed kit is not a gimmick; it is a carefully integrated extension of the fairing’s original design language, created to deliver a measured improvement in cooling and rider comfort without shouting adaptations.
As you contemplate a vent upgrade, it is useful to touch base with resources that sketch the broader field of fairing ventilation design. For riders pursuing deeper technical grounding, published design guides emphasize material properties, fitment considerations, and the balance between airflow, noise, and drag. They remind us that a successful vent is the product of thoughtful geometry, robust seals, and validated performance. If you are seeking a reference point that slices through theory and practice, a respected industry guide provides a pragmatic overview of how ventilation systems can be integrated into complex fairing shapes while maintaining ride quality across speeds and weather. In parallel, consider exploring related catalogues and collections that showcase contoured fairing designs and compatible mounting approaches. For instance, the Yamaha fairings collection offers a range of shapes that can inspire practical ideas about vent placement and seamless integration with existing aerodynamic features, helping riders imagine how venting could sit within the language of a bike’s silhouette. Yamaha fairings collection.
All of these threads converge on a simple, actionable approach. Start with a clear cooling and comfort objective, map an intake-exhaust path that respects the fairing’s existing aerodynamics, select vents with durable seals, and maintain the option to adjust as conditions change. Test in real-world riding, observe the impact on wind noise and draft, and refine. If you find the modifications compelling but complex, a pre-engineered vent kit can offer a ready-made, aerodynamically tuned solution that preserves aesthetics while delivering measurable comfort gains. The ride that follows—cooler air at your core, a more relaxed helmet seal, and a calmer cockpit—speaks to a design philosophy that treats ventilation as a coordinated system rather than a single add-on. This is ventilation as an element of craft, not a last-minute patch, and it invites riders to see the fairing not just as a shield but as a controlled-air channel that makes every mile more comfortable.
External reading: For a comprehensive overview of how fairing ventilation design is analyzed and applied in practice, see Cycle World’s ventilation design guide. https://www.cycleworld.com/motorcycles/technology/motorcycle-fairing-ventilation-design-guide-2025/
Final thoughts
Enhancing your motorcycle fairing with vents is a strategic investment in both performance and comfort. By carefully selecting the right type of vent and following proper installation techniques, not only will you ensure improved airflow and rider satisfaction, but you will also elevate the overall aesthetic and functionality of your motorcycle. As modifications become more common among motorcycle owners, embracing this upgrade can set your offerings apart in a competitive market. Remember, investing time in customization and installation pays off in a superior riding experience, allowing all riders to enjoy their journeys fully.