Aftermarket motorcycle front fairings have emerged as a vital component for enhancing both the aesthetics and the performance of bikes. As a business owner in the motorcycle industry, understanding the significance of these components is crucial. This article is designed to provide insights into the multifaceted benefits of aftermarket fairings, addressing key considerations such as compatibility, material types, design and aerodynamics, fitment and installation, and supplier reliability. By diving into each chapter, business owners can better navigate the complexities of aftermarket fairings and ultimately offer superior products to their customers.
The Right Fit: Mastering Compatibility in Aftermarket Front Fairings
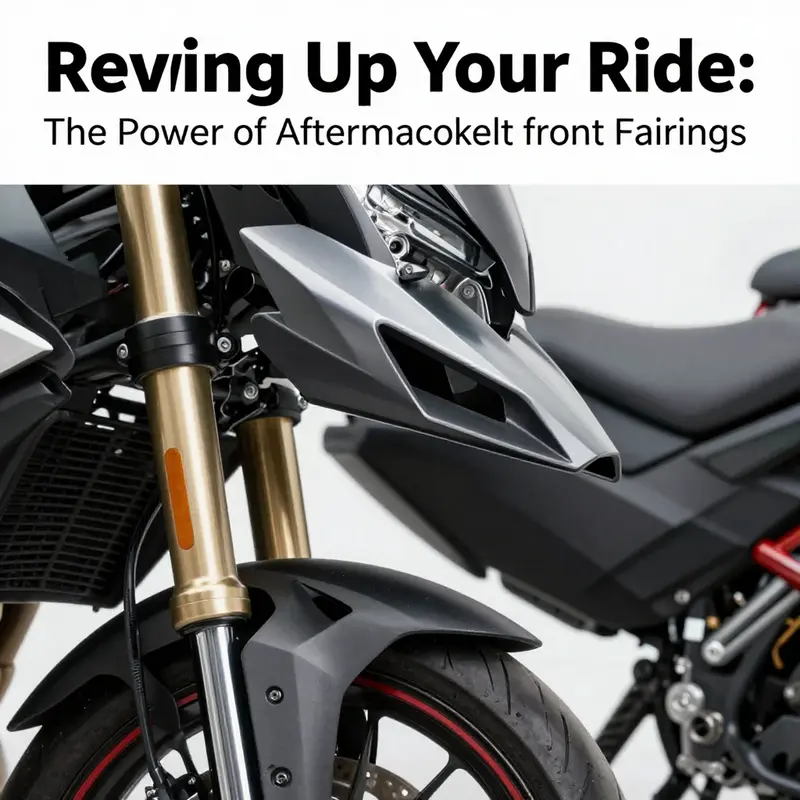
Compatibility stands as the gatekeeper of aftermarket front fairings. It is not the flashiest feature, yet it determines whether the benefits you chase—reduced drag, improved rider comfort, and weather protection—ever come into play. A fairing is more than a shell; it is a system that must align with a bike’s geometry, mounting points, and existing components. When fitment is off, even the best design can feel out of place, causing rubbing, vibration, or compromised safety at speed. For riders seeking a clean look and real ride quality gains, starting with compatibility is the smart move. That means looking beyond aesthetics and price to the installation language written into the product information—how it mounts, where it attaches, and which frame features it assumes exist beneath the surface.
At its core, compatibility is about fitment design, not just cosmetic shape. A front fairing engineered for one bike’s frame geometry will not bolt onto another chassis with a different headlight housing, fork turning angle, or windscreen line. Differences small in appearance can create large misalignments where panels collide with forks, instrument clusters, or radiator shrouds. The mounting points are the script, the drawings that tell a technician where every rivet, bolt, and bracket must land. When those scripts diverge, technicians must improvise with modifications that can weaken the structure or disrupt the aerodynamics the fairing promises to deliver. The risk is not only an imperfect look, but also potential loss of designed protective barriers and the wind pressure that can amplify fatigue and noise for the rider.
To navigate this terrain effectively, riders should begin by confirming that the fairing listing explicitly includes their motorcycle’s make, model, and year. Compatibility is rarely an afterthought; it is a stated specification, often reinforced with diagrams and part numbers that cross-reference mounting points and hardware. A well-documented product page will show a fitment map that pinpoints the bike’s frame outlines, headlight assemblies, and radiator geometry. It will also note any common variations, such as optional windscreen heights or revisions that impact fit. When a listing is vague or silent on fitment, the prudent choice is to pause and seek a more precise match. Verification is essential.
Practical verification tools help turn a hunch into a confident yes or no. Manufacturer specifications are the most authoritative source because they reflect the design intent of the parts team. Reliable online fitment tools, curated by trusted retailers, can be a quick way to check compatibility across models. These tools cross-reference the bike’s year and model with the fairing’s mounting patterns and cutouts. The result is a straightforward yes, no, or a note about required modifications. Community wisdom from forums and user reviews adds real-world insight, revealing if a particular kit required minor trimming, rewiring, or radiator shroud adjustments. This social proof helps separate theoretical fit from practical reality and can illuminate edge cases that product pages do not reveal.
A practical approach to confirming fitment is to use a blended set of sources. Start with manufacturer specifications to confirm the intended model coverage. Then, run a fitment check with an online retailer’s tool, which cross-references multiple models. Finally, consult community feedback for installation notes or cautions. The synthesis of these sources yields higher confidence and reduces the likelihood of discovering a misfit after delivery. The aim is not to curb enthusiasm but to align it with the bike’s actual dimensions and mounting realities.
Riders who adopt this approach often find subtle but meaningful differences even within the same family of bikes. A sport-oriented fairing kit may align with steering head geometry but conflict with a particular exhaust layout or radiator shroud shape. A touring-oriented kit may fit the frame but affect the instrument cluster’s visibility angle. In both cases, the difference is not just cosmetic; it is about how the assembly interacts with rider position, air flow, and thermal management in everyday riding. A misfit can create drag anomalies that disrupt balance at speed or alter the rider’s wind envelope, turning a quiet highway cruise into a headache of buffeting and wind noise.
For riders exploring compatible options without committing to a single brand, start by browsing broad collections grouped by mounting style and design philosophy, then filter by year and model. When ready to narrow, rely on an explicit compatibility claim tied to your exact model year. This approach balances variety with reliable, safe upgrades. If you want a direct starting point, seek a curated assortment that keeps compatibility front and center, then filter by bike family and year.
Beyond fitment, the broader process of choosing aftermarket front fairings extends into material choices, aerodynamics, and installation practicality. Decisions must follow careful confirmation that the selected panels truly fit the bike. The lifecycle of a front fairing kit includes the initial purchase, the mounting hardware, and the alignment checks after the first ride. The disciplined rider builds in a small margin for adjustment, checks clearances, and ensures that any aftermarket wiring or fog light integration does not compromise the bike’s electrical system. In this way, compatibility becomes a guide, steering toward a final configuration that feels integrated, sturdy, and responsive to the rider’s inputs.
In the broader arc of selecting aftermarket front fairings, recognizing compatibility as a foundational criterion helps unify riding goals with the engineering realities of the bike. It ensures that the pursuit of a custom look or a performance edge does not outpace the bike’s design constraints. It also fosters a disciplined procurement process that protects against misfit parts, returns complications, and unsafe installations. While the journey toward the ideal fairing may require diligence—checking fitment guides, consulting official specifications, and perusing community feedback—the payoff is a more confident, comfortable, and controlled riding experience. As you expand your knowledge about compatibility, you unlock the ability to evaluate other attributes—material, design, installation ease—with a clear understanding of how they integrate with the bike’s base architecture. The result is not just a better-looking front end but a more harmonious relationship between rider, machine, and the road ahead.
External resource: https://www.carinterior.com/how-to-choose-aftermarket-motorcycle-front-fairings/
Material Matters: How Front Fairing Materials Shape Performance, Protection, and Style
Riders looking to upgrade or customize their front fairings quickly learn that the material beneath the paint is more than a cosmetic choice. It is the anchor of function, affecting weight, stiffness, impact resistance, long-term durability, and even the way air flows around the bike at speed. In the aftermarket world, three broad families dominate: ABS plastic, fiberglass, and polycarbonate. Each brings a distinct set of strengths and trade-offs, and the decision often boils down to how you balance daily practicality with the demands of track performance or high-mileage touring. Understanding what each material offers—and what it costs in terms of weight, repairability, and finish—helps riders select a fairing that doesn’t merely look right but behaves right at the limit of speed and weather.
ABS plastic is the workhorse of aftermarket front fairings. It is lightweight, relatively affordable, and highly moldable, which makes it ideal for the complex contours needed to shape smooth air flow around the rider and the engine. The ease with which ABS can be formed translates into fairings that fit well enough to maintain predictable handling characteristics, while still allowing designers to carve out aerodynamic gains such as integrated lips, venting paths, and sculpted undercuts that reduce drag and buffeting. For most daily riders, ABS offers a practical blend of value and reliability. Paint adheres well to its surface, delivering a factory-like finish when the right primer and clear coat are used. The downside—UV exposure—shows up as fading or chalking if the plastic is left unprotected. A UV-resistant coating or a dedicated clear with UV inhibitors is a small step that pays off in color stability and gloss longevity, especially on bright sun-soaked rides or bikes stored outdoors for long periods.
Fiberglass, by contrast, is prized in builds that demand a stiffer, stouter structure without pushing the price tag over the edge. Its resin-rich matrix yields a rigid shell that resists flexing under load, which can translate into a crisper fit and a more deliberate shape alignment with the bike’s frame and windscreen. The strength-to-weight ratio is favorable enough for those who chase performance or want a kit that can be massaged into a precise, professional-grade finish. Fiberglass generally tolerates impact, deformation, and minor repairs better than carbon fiber when cost is a concern, and it holds paint well after careful prep. However, fiberglass is not as light as carbon fiber and can be heavier than ABS for similar sizing. It also demands more meticulous fabrication and finishing work—careful sanding, controlled resin application, and patience during painting—to achieve a flawless surface that resists cracking when knocked by road debris or careless mounting. The upshot is that fiberglass often serves riders who want a robust, performance-minded shell that remains accessible on a mid-range budget, with the flexibility to customize geometry and aesthetics more aggressively than ABS typically allows.
Polycarbonate occupies a niche role that shines where visibility, impact resistance, and clarity matter most. This material is the standard for windshields and certain headlight covers, where optical quality, transparency, and toughness under impact are critical. Polycarbonate is famously tough against shattering and can sustain minor impacts without cracking, a feature that provides confidence on high-speed rides or in unpredictable weather. Yet it is more prone to scratching than ABS, underscoring the need for protective coatings or layered finishes, especially on windshields that face gravel, sand, or the occasional contact with branches while riding through backroads. It also tends to come at a higher upfront cost, reflecting its performance edge in clarity and toughness. When a rider prioritizes weather protection and uninterrupted visibility during long trips, polycarbonate components can deliver tangible benefits that translate into safer, more confident riding at speed.
Beyond raw material properties, the intended riding style and environment guide the final choice. A weekend track enthusiast who values every gram of weight and the cleanest possible aero might lean toward lighter, stiffer composites with a carbon fiber look or fiberglass shells tuned for maximum stiffness. The track, after all, is where even small aerodynamic gains compound into higher stability and more precise handling through corners and straightaways. For a daily commuter or touring rider who spends hours exposed to sun, rain, and grit, ABS with a UV-protective finish represents a sensible blend of durability and repairability. ABS parts are easier and less expensive to repair after a minor impact, which matters when entering the cost considerations of a bike’s maintenance life. Enthusiasts who require absolute transparency in windscreen areas or headlight covers may favor polycarbonate for those specific components, trading off some reliance on careful maintenance against the comfort of crack resistance and long-term clarity.
These material choices intersect with design and aerodynamics in meaningful ways. The fairing’s shape and its surface finish influence how air flows around the rider, what buffeting occurs at high speed, and how efficiently the bike cuts through wind. A well-designed ABS shell can accommodate intricate, high-precision contours that guide air toward the engine and around the rider, reducing drag and turbulence. Fiberglass offers a more rigid canvas for aggressive geometries, enabling sharper lines and more robust winglets or vents that require precise alignment with the bike’s profile. Polycarbonate’s transparency strengthens the case for dedicated windshields or visor-like panels that must remain optically clear, enabling riders to meet the demanding visibility criteria at highway speeds. The interaction between these materials and paint systems, sealants, and coatings also matters. UV-protective clear coats preserve color and gloss, and careful surface preparation—sanding, priming, and base coats—helps ensure long-term adhesion and a factory-like finish that doesn’t degrade under sun or rain.
Fitment and installation, often overlooked as a separate concern, closely mirror the material conversation. The best-performing shell on the market can underperform if it cannot mount cleanly to a specific bike model. Even minor differences in frame geometry or mounting point locations can produce misalignment, gaps, or mismatched gaps that worsen aerodynamics rather than improve them. This is particularly true for popular sportbikes with tight tolerances and interdependent fairings that rely on precise alignment to avoid rubbing or interference with the tank, radiator, or handlebars. For this reason, compatibility checks are not cosmetic steps but functional prerequisites. The kit’s design must match the bike’s year, model, and trim level, and the supplier’s proven track record for precise fitment becomes part of the value proposition. The easiest route is to select a kit that explicitly documents model-specific fitment, uses familiar mounting points, and ships with hardware and instructions tailored to that bike. The complexity grows when a rider seeks a more aggressive posture or adds wind deflectors, air ducts, or integrates venting that interacts with the rider’s body position. In those cases, the willingness to perform light frame or wiring modifications varies with the rider’s skill, tools, and patience. For riders who demand reliability, choosing a reputable supplier with documented fitment success across many models reduces the risk of misalignment and the need for mid-project tweaks.
Supplier reliability emerges as a practical pillar in the decision process. The global supply chain for motorcycle parts, especially from Asia, offers a broad spectrum of quality and price. This is not a warning against sourcing abroad; it is a reminder to evaluate the producer’s track record, QC processes, and after-sales support. A kit that arrives with missing hardware, misaligned mounting points, or inconsistent fit is not a bargain even if the price is attractive. Buyers should look for suppliers with stable production capabilities, transparent QC steps, and positive feedback from the riding community. A well-chosen aftermarket front fairing can deliver consistent performance across years of use, ensuring that the upgrade remains an asset rather than a liability as other parts wear or evolve with a model’s lifecycle. The net effect is that material choice becomes a practical ecosystem decision—weight, durability, aero behavior, and repairability must all align with the rider’s budget, skill, and ambitions.
Within this broader landscape, model-specific considerations still matter. Even with a universal-looking exterior, the underlying panel geometry must respect the bike’s frame, radiator outlets, and steering head and must not conflict with the tank or fuel lines. A well-constructed ABS shell can be forgiving in the hands of a diligent installer, while fiberglass’s rigidity rewards a careful, measured approach to shaping and finishing. A rider who wants a windscreen with supreme clarity may gravitate toward polycarbonate for those panels, provided they are treated to guard against scratching. The design and engineering team behind a kit calibrates these choices to balance performance with durability, cost, and ease of maintenance. This is why the best aftermarket front fairings aren’t just about how they look but how they hold up under the real conditions of riding, washing, and winter storage. The conversation around material types ultimately narrows to the rider’s priorities—ease of repair, weight and stiffness, or optical and protective performance—while always circling back to the fitment that ties the entire upgrade to the bike you own.
For readers seeking model-relevant guidance and examples of how these materials manifest in different lineups, model-specific collections often provide a practical reference point. For those who want a broader model-agnostic sense of fitment and style across brands, a curated entry like the Yamaha fairings collection can be a useful starting point to compare how different materials perform within the same mounting philosophy and design language. Yamaha fairings collection is a useful resource to see how companies balance material choice, fitment accuracy, and finish across several generations of bikes. This approach makes it easier to translate general material advantages into concrete expectations for your own ride, especially when you are searching for a fairing that can withstand long miles, rough roads, and the occasional track day without sacrificing aesthetics or performance.
Ultimately, the material you select for an aftermarket front fairing should reflect a clear-eyed assessment of your riding realities, maintenance expectations, and the bike’s unique geometry. ABS delivers value and broad repairability, fiberglass offers stiffness and customization potential, and polycarbonate provides exceptional impact resistance and clarity where those traits matter most. The right mix gives you a shell that respects the bike’s airflow, protects the rider and engine from weather and debris, and supports a finish that stands up to sun, rain, and road grime. When professionals discuss these options, they are not merely debating raw numbers; they are mapping a path to a better, safer, and more enjoyable riding experience. The material choice, layered with considerate design and reliable fitment, becomes the unsung backbone of the upgrade—one that often determines whether a modification feels cohesive, durable, and worth the investment over time.
External reading can deepen this understanding, offering practical criteria for evaluation beyond the immediate project. For riders who want to explore how to assess a front fairing’s construction, finish, and long-term resilience, a detailed guide provides helpful benchmarks for comparison and decision-making: https://www.carinterior.com/motorcycle-front-fairing-guide-what-to-look-for/ . This resource complements the hands-on experience of mounting and testing, helping riders connect the dots between material science, aerodynamics, and everyday riding realities.
Word-for-word, the choice of material is a decision that reverberates through performance, protection, and aesthetics. It is not only about what looks right in a gallery or on a showroom page; it is about what endures when the weather turns and the miles accumulate. The most satisfying aftermarket fairing project is one that respects the bike’s core geometry, preserves or enhances ride quality, and still offers the creative outlet that drew you to the upgrade in the first place. Material, fit, and finish converge to turn an ordinary part into something that feels engineered, personal, and enduring.
Shaping Wind and Speed: How Aftermarket Front Fairings Sculpt Aerodynamics and Rider Experience
A front fairing does more than alter a motorcycle’s look. It reshapes airflow, changes rider comfort, and shifts how the bike behaves at speed. The best aftermarket front fairings are the result of careful aerodynamic thinking. Designers use tools and test data to turn ideas into shapes that reduce drag, tame turbulence, and add useful downforce. This chapter traces that process and explains how design choices affect performance, stability, and personalization.
At the core of modern fairing design is the goal of managing airflow around the bike and rider. Air behaves predictably in some ways and surprisingly in others. When a fairing is added, it becomes the first interface between the moving machine and the surrounding air. A smoothly sculpted nose and integrated windscreen guide the flow over the rider and tank. The intention is to reduce separated flow and wake size behind the bike. Smaller wakes mean less pressure drag, better fuel economy, and higher top speed. Designers adjust curvature, cross-sections, and panel junctions to keep the air attached for as long as possible.
Computational Fluid Dynamics (CFD) has transformed how aftermarket fairings are developed. Rather than relying solely on wind tunnel hours, engineers build digital 3D models of the motorcycle and rider posture. CFD runs reveal pressure zones, flow separation points, and vortices in rich detail. Iterations happen quickly. A narrowed taper here, a rounded edge there, and the pressure distribution shifts. These simulations are often performed starting from a base, like a small-displacement street bike silhouette, then scaled and refined for sport machines. The result is a fairing that balances low drag with stability across realistic yaw angles—the angles at which crosswinds and banked turns disturb the flow.
Stability matters as much as outright drag. A design that reduces frontal area but creates lift or yaw sensitivity can be dangerous. That is why modern kits incorporate subtle shaping to control lateral flow and generate benign pressure forces. Winglets and small spoilers are no longer exotic features. When placed at the right height and angle, these elements produce downforce where needed. They help keep the front wheel planted during high-speed runs and aggressive braking. On race-oriented fairings, downforce targets focus on improving tire contact and steering precision. On street-focused kits, the same features reduce wobble in crosswinds and smooth high-speed lane changes.
Air management extends beyond the outer shell. Intakes, ducts, and vents integrated into the fairing play multiple roles. Cooling ducts channel ambient air toward radiators and brakes without creating large drag penalties. NACA-style inlets and tapering outlets manage mass airflow quietly and efficiently. Thoughtful venting also relieves pressure build-up inside the fairing. Unchecked internal pressure can create buffeting and lift. Cutouts near the headlamp or within side panels let high-pressure pockets escape, reducing vibration and wind noise for the rider.
The interaction between fairing shape and rider ergonomics is often underrated. A taller windscreen that simply blocks wind will reflect turbulence back onto the rider’s helmet or shoulders. Designers aim for a smooth flow envelope that envelopes the rider with a low-gradient pressure field. That makes for less helmet buffeting and lower fatigue on long rides. For sport riders, a more aggressive tuck profile reduces projected frontal area and improves straight-line aerodynamics. For touring riders, a relaxed configuration that reduces neck strain and limits wind intrusion is preferred. Aftermarket kits sometimes offer multiple screen heights and adjustable winglets to let riders tune the balance between protection and aerodynamic efficiency.
Material choice and construction precision feed directly into aerodynamic performance. Panels must hold their designed contours under load. Flexible or poorly formed plastic can deform at speed, altering flow and reducing the intended gains. High-quality ABS and molded composites provide repeatable shapes that maintain aerodynamic intent. Where weight matters, carbon fiber replicas or true carbon fiber components maintain stiffness while saving mass. Manufacturers that control tooling and tolerances produce fairings with reliable fitment, which reduces unintended gaps. Even small gaps at seams can trip boundary layers and create turbulence, negating meticulous surface shaping.
Lighting and accessory integration also influence airflow. Modern LED arrays are compact and can be embedded flush with the fairing surface. Placing lights in sculpted recesses reduces bluntness at the nose and maintains cleaner streamlines. Mirrors, when mounted on rigid stalks and faired into the bodywork, add minimal drag and avoid creating strong vortices. Some aftermarket kits include aerodynamic mirrors that channel air instead of interrupting it. Wiring and mounting hardware should be routed behind panels to avoid adding exposed protuberances that disturb the flow.
Crosswind and yaw behavior are critical in real-world riding. A fairing optimized solely for zero-degree yaw often performs poorly on the highway, where side winds and passing vehicles introduce variable angles. Designers use CFD and track testing to ensure predictable responses across a range of yaw conditions. This includes shaping the side profile to control pressure gradients that might otherwise pull or push the bike laterally. The aim is to minimize steering correction while keeping the rider confident in gusty conditions.
Customization and aesthetic choices must align with aerodynamic intent. Because aftermarket fairings are often chosen for visual impact, the best designs marry form and function. Bold sculpting can be aerodynamic when it guides flow deliberately. Color and graphics do not affect airflow, but the placement of vents, lips, and stage lines does. Riders who choose custom paint or decals should be mindful not to add hardware or trim that protrudes into the airstream. If personalization is extensive, keeping the core aerodynamic silhouette intact ensures performance is maintained.
Installation and fitment are the final links in the aerodynamic chain. A precise fit keeps panel seams tight and aligns inlet and outlet ducts. Loose or misaligned components create noise and spoil aerodynamic gains. Many well-engineered kits include strategically placed mounting bosses and reinforcements to hold panels firmly. Some installers add internal bracing or quick-release fasteners to preserve shape under high speed while making maintenance easier.
Testing validates design decisions. Wind tunnel work, track laps, and instrumented road tests confirm CFD predictions. Pressure taps on the fairing surface show where modifications improve or worsen the flow. Rider feedback about buffeting, visibility, and comfort refines final tuning. On race bikes, telemetry ties aerodynamic changes to lap times. On street bikes, fuel economy and stability metrics provide pragmatic measures of success.
When choosing an aftermarket front fairing, look beyond styling alone. Evaluate how a design handles airflow, how it integrates ducts and lights, and whether it offers adjustability for rider posture and wind conditions. Ask about tooling tolerances and material stiffness, since those affect how close the real part matches the digital model. If you want a real-world reference for a large-displacement platform known for high-speed behavior, consider checking a focused collection like the Hayabusa fairings collection for shapes tuned to stability at speed.
For riders and builders who value both performance and individuality, the interplay of aerodynamic science and creative design makes aftermarket fairings a compelling upgrade. The right fairing reduces drag, calms turbulence, and channels air where it helps most. It also gives the rider control over comfort and confidence on every ride.
For deeper technical details, including CFD case studies and morphological analysis of race motorcycle kits, see the peer-reviewed study: https://www.mdpi.com/2076-3921/11/2/247
Precision Fit: Installing Aftermarket Front Fairings for Safe, Clean Results

Precision matters when fitting an aftermarket front fairing. A visually good fit is not the same as a safe, functional fit. The fairing ties into the bike’s aerodynamics, its structural mounting points, and sometimes its wiring. A correct installation keeps panels tight, maintains airflow, and prevents rattles or stresses that lead to fatigue. Approach fitment as a process rather than a single task: verify compatibility, prepare tools and parts, dry-fit components, resolve any small mismatches, seal electrical and mounting interfaces, and then torque fasteners to spec.
Start with compatibility checks. Confirm the part is designed for your model and year. Even small differences in frame geometry or headlight shape can produce gaps, misaligned mounting holes, or contact between panel edges and moving parts. Use the seller’s fitment list and cross-reference part numbers and diagrams. If the manufacturer provides alignment guides or printable templates, compare those to your bike before removing OEM parts. If the kit is a half fairing or model-specific conversion, note what brackets are included and which factory pieces are reused. When in doubt, call the supplier and ask about any reported fit issues for your year and trim.
Organize the workspace and tools. A clean, well-lit bench and a padded surface protect painted panels during handling. Gather metric sockets, torx bits, plastic trim tools, a torque wrench, thread locker, and quality fasteners. Have soft rags, rubbing alcohol, and a small file or deburring tool for finishing edges. For fairings that route wiring through the headlight area, include electrical tape, heat-shrink tubing, and dielectric grease. If surgery is anticipated—minor trimming of a mounting tab or relocation of a bracket—ensure you have a steady Dremel, a cutting disc, and a respirator. Patience here prevents mistakes that compound later.
Begin vehicle prep by documenting the OEM layout. Photograph mounting points, brackets, and where wiring harnesses pass through the frame. Label any bolts you remove and stow them with the parts they came from. Removing the original fairing or headlight assembly is often straightforward but do it gently. Support the assembly to avoid stressing connectors. Inspect brackets and fasteners for corrosion or wear. Replace any weakened clips or bolts. If the replacement kit includes new brackets, compare thickness and hole patterns to the originals before bolting anything up.
Dry-fitting is the most important phase. Mount each panel loosely, leaving all fasteners finger-tight. This lets you adjust panel position for even gaps and correct alignment around the headlight, forks, and tank. Tighten one area slightly to check how other panels respond. A few millimeters of misalignment can cause rubbing against the frame or fork tubes under steering motion. Check for contact when turning the bars fully left and right. Listen for any scraping or tightness—those signals mean a repositioning or slight trimming is required.
When small adjustments are needed, measure twice and remove a little material at a time. For plastic panels, light sanding or chamfering a corner often resolves interference without weakening the part. For mounting holes that are off by a few millimeters, consider using slotted washers or elongated rubber grommets to allow for controlled movement. Never force panels into position by overtightening; that creates stress risers that will crack over time. Use compliant fasteners where the fairing meets the frame to absorb vibration and preserve alignment.
Wiring and lighting are another area where fitment can go wrong. If the aftermarket fairing relocates a headlight or indicator, ensure the connectors match and the wiring length is sufficient without tension. Secure all harnesses with zip ties and route them away from hot pipes and moving parts. If splicing is necessary, use soldered joints with heat-shrink and protect them with loom tubing. Test all lights, switches, and indicators before finalizing panel installation. A quick wiring check avoids removing panels a second time to chase a fault.
Fastening strategy matters as much as placement. Use the proper torque for any OEM bolts that are reused. For new fasteners into plastic, choose thread sizes and lengths that do not bottom out or pull through. Medium-strength thread locker is wise on bolts that connect metal-to-metal. Avoid thread locker on captive or flanged nuts that require periodic service. When tightening, work in a star pattern where feasible so stress is distributed evenly across the fairing. Recheck torque after the first short ride because vibration will seat parts and can loosen initially snug bolts.
Address legal and safety requirements before you re-ride. Many regions regulate headlight height, aim, and visibility. If your fairing alters the headlight position, aim the beam to the specification required by local law. Ensure turn signals remain visible and that reflectors or side markers are not obscured. Some jurisdictions require that replacement parts retain certain crash protection features—verify compliance to avoid a failed inspection. Keep documentation of the part’s fitment list and any modifications you performed; this helps in resale and in answering questions from inspectors.
Half fairings deserve special mention because they balance protection with access. They reduce rider buffeting and improve aerodynamics while keeping the lower engine area more accessible. Because they typically attach to fewer points than full fairings, securing them properly is essential to prevent flutter. Use vibration-damping washers and rubber grommets at each mounting point. If you commute or tour, consider adding small liners or wind deflectors to increase comfort. Those additions can usually be integrated with the half fairing’s mounting framework without major alterations.
If unexpected gaps or tolerances remain, think systematically about where forces travel. Panels should not transfer steering or suspension loads to flimsy fasteners. If a bracket seems marginal, reinforce it with a small backing plate or replace it with a thicker steel part. Rubber isolators at mounting points reduce fatigue. Do not bond fairings directly to welded frame parts unless designed for it. Properly engineered mounting points allow the fairing to flex independently under load.
Deciding between a DIY install and professional fitment comes down to confidence and complexity. A rider with solid mechanical experience, a good toolset, and patience can install many kits successfully. However, complicated kits that alter lighting, cooling ducts, or frame mounts benefit from a professional shop’s fixture and expertise. A shop can also paint-match panels precisely and resolve subtle fit issues that take a novice many hours to adjust.
After installation, carry out a staged testing plan. First, recheck every fastener and electrical connection. Start the bike and observe airflow around the fairing at idle and varied revs. Look for vibration, rubbing, or loose edges. Next, perform a low-speed ride test to confirm steering clearance and that no panels flex into suspension or moving parts. Finally, take a steady, higher-speed run on a safe road to test stability and buffeting. Recheck fastener torque once the bike is cooled.
Maintenance keeps the fit lasting. Periodically check fastener torque, inspect grommets for UV degradation, and touch up edge seals to prevent water ingress. If paint chips occur, repair them to prevent plastic crazing. For track use, inspect mounting points after every session because repeated high loads accelerate wear.
A methodical approach to fitment and installation pays dividends in safety and longevity. Treat the fairing as both a cosmetic and structural element. Verify fitment before purchase, prepare carefully, dry-fit, secure wiring, and use the right fasteners and isolation hardware. If any step feels beyond your skill set, seek professional help. Detailed manufacturer fitment guides can help avoid mistakes during purchase and installation. For an extended practical walkthrough, refer to the guide from an industry resource here: https://www.carinterior.com/motorcycle-front-fairing-guide-what-to-look-for/.
For parts and model-specific options, check the supplier’s model collections such as the Honda fairings collection for compatibility checks and parts lists: Honda fairings collection.
Trusting the Supply Line: How to Vet Reliable Sources for Aftermarket Front Fairings
Finding a reliable supplier for aftermarket motorcycle front fairings is a practical skill. It blends technical judgment with commercial due diligence. For riders and procurement teams alike, reliability means the fairing fits precisely, arrives on time, and performs as expected under real-world conditions. That reliability begins with an understanding of where consistent quality is produced and what performance indicators to demand before placing a bulk order.
Manufacturing clusters in southeastern China have become synonymous with fairing reliability. Regions such as Guangdong and Zhejiang developed specialized ecosystems. Guangdong suppliers excel at scale, integrated finishing, and logistics. Zhejiang firms lead in precision tooling and mold-making. Each cluster offers strengths you can use to match your priorities—speed, cost, durability, or fitment accuracy.
Proximity to ports, bonded warehousing, and integrated finishing lines matter more than many buyers realize. A factory that combines polymer injection molding with automated painting, UV-resistant coating, and post-paint inspection will consistently produce parts that match sample standards. When a supplier controls these steps in-house, the risk of color mismatch, uneven coating, or variation in thickness drops significantly. Bonded warehouses near major ports enable smooth export under DDP terms, simplifying customs and reducing unexpected delays for international shipments.
Precision tooling is the other half of the equation. Front fairings must align with mounting points, fastener holes, and headlight cavities within tight tolerances. Suppliers that invest in OEM-grade molds and CNC-verified tooling will deliver parts that bolt onto frames without excessive trimming. That capability is common in Zhejiang, where mold makers specialize in repeatable accuracy. When a supplier can produce consistent first-fit parts across a production run, installation times fall and return rates shrink.
Assessing a supplier starts with data and observable performance. Lead time consistency is the first metric to watch. Ask for historical lead time data by quarter and product line. A supplier may claim a short lead time, but what matters is how often they hit it. Request the supplier’s on-time delivery rate for the previous 12 months. A reliable manufacturer should provide a clear percentage and be willing to explain any deviations.
Material traceability and certification is next. For ABS fairings, verify the polymer grade and impact-resistance properties. Ask for raw material certificates and batch numbers. Reputable suppliers can trace the ABS back to resin suppliers and provide test reports showing tensile strength, heat deflection, and UV resistance. If you prioritize weight and stiffness, request material data for carbon fiber layup and proof of curing cycles and resin systems. Material certificates reduce surprises and support warranty claims if parts fail prematurely.
Quality control systems tell you how consistent a supplier will be. Look for documented inspection plans that include in-line inspection during molding, dimensional checks using calipers or CMM devices, and final visual inspection after painting. Photographic QC records for each batch are a strong sign of discipline. If a manufacturer uses automated painting lines with color spectrophotometers, color variance across batches will be minimal. Ask for SPC charts, defect rates, and corrective action logs when possible.
Sampling protocols are a practical way to verify claims. Begin with pre-production samples molded on the intended tool, painted, and assembled. Test these samples for fit on a bike or on a jig that replicates chassis mounting points. Conduct drop and flex tests to check for cracking under stress. For painted parts, inspect under consistent lighting for orange peel, runs, and sanding marks. Proper sampling removes assumptions and provides a physical standard for future production.
Factory audits and third-party inspections are not optional when volume or brand reputation is at stake. A short virtual tour is helpful, but an on-site audit or third-party inspection offers a true picture of capacity and controls. Audits should confirm mold storage practices, paint booth ventilation, and oven curing processes. They should also review labour skill levels and training records. Audit reports with corrective actions show the supplier can identify problems and implement fixes.
Logistics and shipping terms can make or break reliability. Suppliers that can ship DDP from bonded warehouses near major ports reduce the buyer’s customs burden and exposure to unexpected fees. Fast access to consolidated shipping schedules and reliable carrier partnerships minimize transit surprises. Ask suppliers about their standard packaging for fairings. Sturdy, reusable cartons with internal bracing reduce damage in transit and cut replacement costs.
Communication and responsiveness indicate how a supplier will perform under stress. Rapid responses to technical queries and clear escalation paths are essential. A supplier who provides a dedicated account manager, regular production updates, and weekly status reports will be far easier to work with than one that replies sporadically. Verify response times early by asking technical questions and noting the turnaround. Consistency in communication reflects underlying process discipline.
Pricing is only one axis. The lowest unit price without proof of consistent quality can cost more over time. Evaluate total landed cost: price, shipping, duties, rework rates, and warranty claims. A slightly higher-priced supplier with superior QC, reliable lead times, and predictable logistics often delivers lower total cost of ownership. Negotiate trial-run contracts that allow for performance reviews before committing to long-term orders.
For model-specific sourcing, such as for early-2000s sportbikes, insist on fitment checks to the target frame and hardware. Suppliers familiar with these bikes maintain detailed CAD libraries and test-fit records. If you intend to stock fairings for a legacy model, ask for documented fitment samples and compatibility confirmations tied to specific model years. For retailers, linking the part to a model-specific listing reduces returns and improves customer satisfaction. For example, when sourcing for a 2003 GSXR 1000, choose suppliers that can demonstrate repeatable fitment to that generation’s mounting points and headlight geometry. See a selection of compatible parts for reference with the GSXR-1000 K3 fairings (2003–2004).
When scaling from single orders to larger runs, verify production capacity and changeover procedures. A supplier may excel at small-batch custom colors but struggle with high-volume runs. Ask about maximum daily molding output, paint-line throughput, and lead time for mold revisions. Confirm whether multiple tool sets exist for the same model to avoid single-point failures that stop production.
Warranty, returns, and corrective action practices complete the picture. Determine the supplier’s warranty terms, repair policies, and whether they accept returns for dimensional issues. Reliable partners offer clear processes for non-conforming parts, including replacement timelines and cost allocations. They will also have a documented corrective action process to prevent repeat failures.
In practice, a procurement manager will combine these checkpoints into a supplier scorecard. Weight items—lead time consistency, material certification, QC systems, logistics, communication, and capacity—according to your priorities. Use sample testing and audits to validate claims. Negotiate trial production runs and map out escalation steps for issues. This methodical approach reduces surprises, improves margins, and protects brand reputation.
Working with established manufacturing clusters in China gives buyers access to mature capabilities. But reliability is not automatic. It stems from disciplined suppliers and informed buyers working together. Demand transparency, verify through testing and audits, and structure contracts to reward predictable performance. That approach ensures the fairings you sell or fit will meet riders’ expectations for fit, finish, and durability.
External source: https://www.alibaba.com
Final thoughts
Understanding the intricacies of aftermarket motorcycle front fairings is essential for business owners aiming to enhance their offerings. By focusing on compatibility, material choices, aerodynamic design, installation ease, and supplier reliability, you can significantly impact rider safety and performance. With the right selection, aftermarket fairings can transform a motorcycle while meeting diverse rider needs. Stay ahead of the competition by ensuring your inventory includes quality aftermarket parts that cater to the evolving preferences of motorcycle enthusiasts.