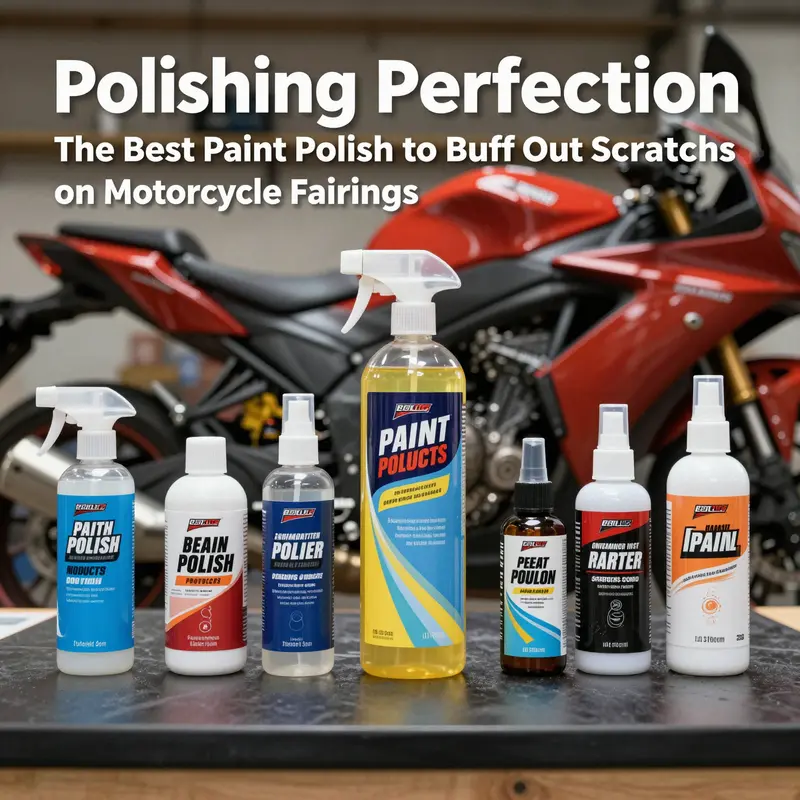
Maintaining the aesthetics of motorcycle fairings can significantly enhance their lifespan and performance. Scratches and blemishes not only impact the visual appeal but can also lead to more severe issues if ignored. For business owners in the motorcycle repair sector, understanding the best methodologies for buffing out scratches is essential. Through this article, you will explore recommended paint polish products, effective application techniques, the limitations of polish options, and emerging trends within the paint polishing industry. Together, these insights aim to equip you with the knowledge to elevate your service offering in motorcycle care.
The Mirror-Back Promise: Mastering Paint Correction Polishes to Erase Scratches from Motorcycle Fairings
A motorcycle’s fairings are the canvas of its personality as much as they are the armor protecting the bike’s innards. Scratches there are not just cosmetic nuisances; they scatter light, dull color, and reveal travel maps along the surface. The right approach is a dedicated paint correction polish used with a DA or rotary polisher, paired with the proper pad and a controlled technique. The goal is to remove only a thin layer of damaged material, then refine the surface until reflections are crisp and color depth is restored. A protective sealant or wax seals in the results and guards against future wear.
Preparation is non-negotiable: start with a clean, dry surface, remove embedded contamination with clay if needed, and degrease before polishing. Choose a polish designed for automotive finishes with a suitable abrasive level for the scratches. A medium-cut pad on a DA polisher at low-to-moderate speeds provides a safe balance; always work in small sections, keep the tool flat, and avoid staying in one spot too long to prevent heat buildup. Start with a test area to dial in product amount, speed, and passes; it’s better to perform several light passes than one heavy cut that can haze or burn through the clear coat.
After correction, apply a finishing polish to remove micro-marring and restore gloss, then seal with a polymer wax or dedicated sealant to protect the new shine. If a scratch penetrates beyond the clear coat, polishing alone may not restore full color depth and could require repaint or touch-up. The essence is patience, a measured approach, and respect for the material: plastic and painted fairings respond best to controlled abrasion rather than brute force. This discipline yields a repaired, showroom-gloss appearance that lasts longer under UV and road grime.
Polishing the Shield: Mastering Paint Correction Polish to Buff Scratches from Motorcycle Fairings
When a rider pulls into the sun and the glossy curve of a fairing catches the light, the scene is almost cinematic. Then a faint line, a dull impression, or a scratch breaks that mirror-like surface. Scratches on motorcycle fairings can feel personal, a reminder of every close pass at a curb, a low-slung branch, or a careless wipe. The instinct to restore that pristine look is powerful, but the method matters as much as the desire. In the realm of cosmetic repair for bike bodies, the most effective approach to removing scratches from fairings is often a paint correction process using a purpose-built polish rather than a generic wax. This isn’t about blasting the surface with abrasive claims to glory; it’s about controlled, micro-abrasive work that levels the very top layer, eliminates micro-marring, and slowly brings back depth and clarity. Paint correction polish, when applied with the right tools and technique, can reduce the visibility of shallow to medium scratches and erase the oxidized haze that dulls color and clarity. The goal is not to erase every mark in a single pass but to rebuild the finish in a measured sequence, revealing the saturated color beneath the compromised glaze and returning the fairing to a look that feels fresh, almost showroom new, yet built on deliberate, repeatable steps.
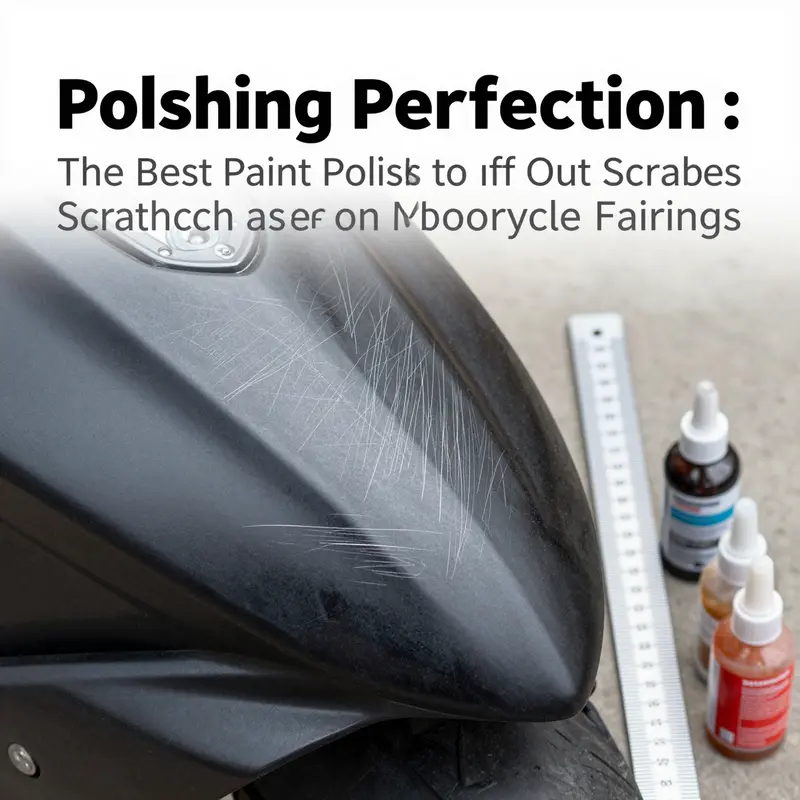
To begin, the surface must be clean and free of any grime that could act as an abrasive pillow during polishing. A simple wash with mild soap and warm water, followed by a rinse that leaves no soap residue, is the foundation. The surface should be dried with a microfiber towel to avoid lint or water spots that could obscure your progress. This is not a cosmetic step; it’s the actual screen through which you will judge the condition of the paint and the effectiveness of your polishing. When the area is pristine, you can inspect the scratches with a critical eye, noting their depth, length, and distribution. Shallow, surface-level micro-scratches and hazing are the typical targets of a single, well-executed pass, while deeper gouges may require a more deliberate, staged approach. It’s tempting to jump to aggressive methods, but patience pays in results that endure and in a finish that remains free of holograms and swirl marks that can betray haste.
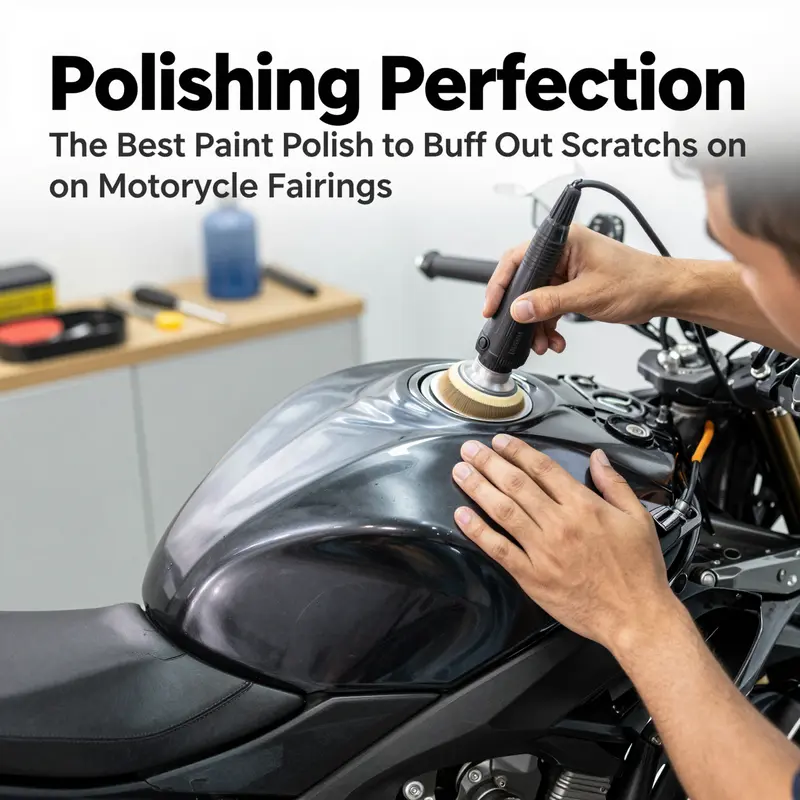
The choice of tools and products is the next decisive moment. A dual-action (DA) polisher with a soft foam pad is a friend here. The DA design reduces the risk of burning or overworking the surface because its random, orbital action minimizes heat concentration and avoids the rotational abuse that can cause further damage. The pad should be soft—something that hugs the curves of the fairing without digging into its edges. The polishing compound itself should be fine-grade and tailored for plastic or composite materials, which are common in modern fairings. These compounds work by micro-abrasive chemistry that can delicately shave away a microscopic layer of the affected surface, smoothing out micro-marring and removing the oxidized film that dulls color and clarity. It’s not a magic potion; it’s a measured, repeatable corrective step that, with discipline, reveals the underlying color and gloss that have been masked by time and exposure.
As you begin, apply the compound in small, well-defined sections. This approach keeps you focused on one area at a time and reduces the chances of missing spots or allowing product to dry out in the sun. A pea-sized dab on the pad, spread at a low speed before you begin the polishing motion, creates a thin, even layer that won’t overwhelm the surface with product or heat. Work in slow, overlapping circular motions. The goal is a calm, controlled action that keeps the pad in contact with the finish without pressing hard enough to leave digging or heat rings. Consistent, moderate pressure matters; too much pressure can slow the pad and generate localized heat that blurs the finish, while too little pressure may fail to carry the abrasive far enough to address the scratch. In practice, you will likely experience a faint haze emerging as the polish starts to break down the surface. That haze is a sign that the micro-abrasives are doing their job, breaking down the oxidized film and leveling the surface. When the area starts to look clearer and more reflective, you know you’re on the right track.
The process must also account for the risk of glazing, a smooth, glassy surface that comes from overworking a single area or letting the compound dry with the pad in one place. Breathe and move. Keep the polisher in motion, maintaining a steady rhythm and a consistent orbit. If the surface feels very warm, take a break. Cooling pauses aren’t a sign of weakness; they’re a sign that you’re protecting the integrity of the plastic substrate. In this stage, you should expect to repeat the procedure several times, especially if the scratches vary in depth. Start with a finer polish if you notice heavy hazing, and progress toward the finishing polish as the gloss returns. Each cycle should reveal more depth, more color, and less visible scratch lines. The key is to evaluate the area after every cycle, stepping back to compare with adjacent panels. If the color looks charcoal or dull on the repaired section, you likely need additional passes or a finer refinement step to bring back the vibrancy of the original paint.
Deeper or more stubborn scratches demand a slightly different sequence—one that reconciles the need to remove material with the risk of compromising the overall appearance. You might begin with a coarser polishing step to physically remove more of the damaged layer, then switch to finer grades to refine the finish. This approach mirrors a medical analogy: remove the visible scarring with a careful incision, then polish the wound so the scar is less noticeable and integrates with the surrounding skin. In practice, you would perform a calculated number of passes with a coarser compound to reduce the depth of the scratch, then step through progressively finer grades until the line becomes indistinguishable under the light. You should also consider finishing with a dedicated finishing polish that is designed to reopen the depth and clarity of the paint and to lay down a smooth, glassy top layer. The finishing polish should remove any minor micro-marring that may have been introduced during the prior steps and should bring out a rich, even gloss that matches the rest of the fairing.
After achieving the corrective work, the final, critical phase is protection. Even the best scratch removal can fade quickly if the surface is left unprotected. A high-quality wax or sealant provides a protective shield against UV rays, road grime, and environmental contaminants. The protection layer acts as a sacrificial barrier that keeps the corrected surface from rapidly returning to dullness and keeps the color vivid for longer. The protective layer should be selected with an eye toward durability and ease of maintenance. A sealant that provides a hydrophobic effect can help shed water and contaminants more readily, reducing the likelihood of future micro-marring. The protection step is essential not only for preserving the work you’ve done but also for helping maintain the gloss you restored during polishing.
All along this journey, it helps to remain mindful of the materials used in modern motorcycle fairings. Many fairings are made from plastics or composites that respond differently to abrasion and heat than metal does. This makes the choice of pad density, pad shape, and polishing grade even more important. Some areas of a fairing are curved or have edges that require careful maneuvering with the pad to avoid digging or edge wear. The operator learns to adapt the hand speed and the pressure in response to how the surface feels under the pad, listening to the blend of mechanical action and the surface’s feedback. There is also a mental discipline involved: resist the impulse to rush, even when you are eager to see the finished surface. If you feel uncertain about a particularly deep scratch or chip, you might step back and consider a more conservative approach, or consult a professional for a repaint or a panel replacement. The car-like logic of paint correction applies equally to bikes: respect the substrate, apply measured corrective steps, and protect the result with reliable sealants.
For riders who are ready to explore beyond the purely cosmetic—those who want to understand how to maintain a sharp, scratch-free finish over the long haul—there is value in considering how this work aligns with the broader ecosystem of fairing maintenance. When you keep the surface clean, avoid harsh cleaners, and reapply protective layers on a periodic basis, you extend the life of the corrected finish and reduce the frequency of corrections. It’s a practical loop: clean, polish, protect, and re-clean, with each cycle reinforcing the next. It is also worth noting how these concepts translate into practical decisions about accessories and upgrades. If you’re considering a broader refresh beyond polishing—such as a panel repaint or substitution—you can use this same disciplined approach to ensure any new finish will be uniform and non-disruptive to the overall look of the bike. In this sense, the repair work becomes part of a larger project to keep the bike looking as good as it performs, with a finish that stands up to sun, rain, and a life lived on winding roads.
To anchor this practice in a real-world context while avoiding prescriptive brand names, rely on the fundamentals described above and consult manufacturer guidelines for your chosen polishing system. The core ideas—surface preparation, controlled application, careful progression through polishing grades, effective finishing, and robust protection—remain consistent across reputable products. The exact steps can be adapted to different fairing materials and depth of scratches, but the sequence and the discipline do not change. If you want a practical reference to deepen your understanding, look to the general guidance offered by established sources that discuss scratch removal on plastics and composites, and that emphasize tool selection, technique, and post-polish protection as the pillars of a successful repair.
For readers aiming to explore specific content related to the broader ecosystem of motorcycle fairings, a curated selection of available parts and upgrades can be found at Honda fairings collections, among others, which provide a sense of how panel shapes and materials can influence maintenance choices. Honda fairings collection offers pathways to authentic panels and compatible components that can complement a meticulous polish job when a replacement panel becomes desirable. This connection to the larger world of fairing upkeep helps anchor the polishing process in a practical, ride-ready philosophy rather than a purely cosmetic exercise.
In sum, buffing out scratches on motorcycle fairings with paint correction polish is a disciplined, iterative craft. It hinges on clean preparation, the right tool and pad, a measured sequence of polishing steps, and a protective finish that guards against UV and environmental wear. When done with attention to surface type, scratch depth, and the humane pace of each pass, the repaired area can regain a depth and brightness that rivals the original gloss. The result is not merely the disappearance of a scratch but the restoration of a shield—one that keeps the bike looking as commanding as it feels when you twist the throttle and ride into the horizon.
External resource for further reading: https://www.meguiars.com/products/ultimate-scratch-remover
Beyond Gloss: Why Paint Correction Polishes Fall Short on Deep Scratches and What Really Restores Motorcycle Fairings
Paint correction polish is not a magic fix for deep scratches on motorcycle fairings. It removes micro layers of clear coat and hazing to restore gloss, but its depth is limited. Shallow scratches can be improved with proper pad choice and technique, but deep scratches that cut through the clear coat require a different path: sanding, filler, repaint, and re-clear coat. Polishing can restore surface clarity when damage is superficial, but once the base color is exposed, you must rebuild the layer with repaint. The material of the fairing (ABS plastic or fiberglass) and the depth of the scratch are key factors. A practical rule of thumb: if you can catch a groove with a fingernail or the scratch shows base color through the clear coat, polish alone will not fix it. In such cases, plan for sanding, filler, repaint, and re-clear. If the damage is minor and the surrounding area is intact, a careful polish can restore a dramatic level of gloss with minimal downtime. The process begins with thorough cleaning and decontamination, inspecting under bright light, then choosing a mild abrasive polish and a suitable pad. Work in overlapping passes with light to moderate pressure, wipe residue, and evaluate progress. If needed, repeat with progressively finer abrasives. For deeper damage, sanding the affected region to feather the edge, applying a leveling filler, repainting to match, and applying a fresh clear coat is the more durable route. The final result should be a uniform finish and restored gloss. External resources can help compare methods, but depth assessment guides the approach. If replacement is more practical, consider exploring catalogs of fairings to match style. The overarching takeaway: polishes are useful for surface clarity, but deep scratches require a repair path that goes beyond polishing, including sanding and repainting for durable results.
Shine with Purpose: The Next Wave of Paint Polishing Solutions for Motorcycle Fairings
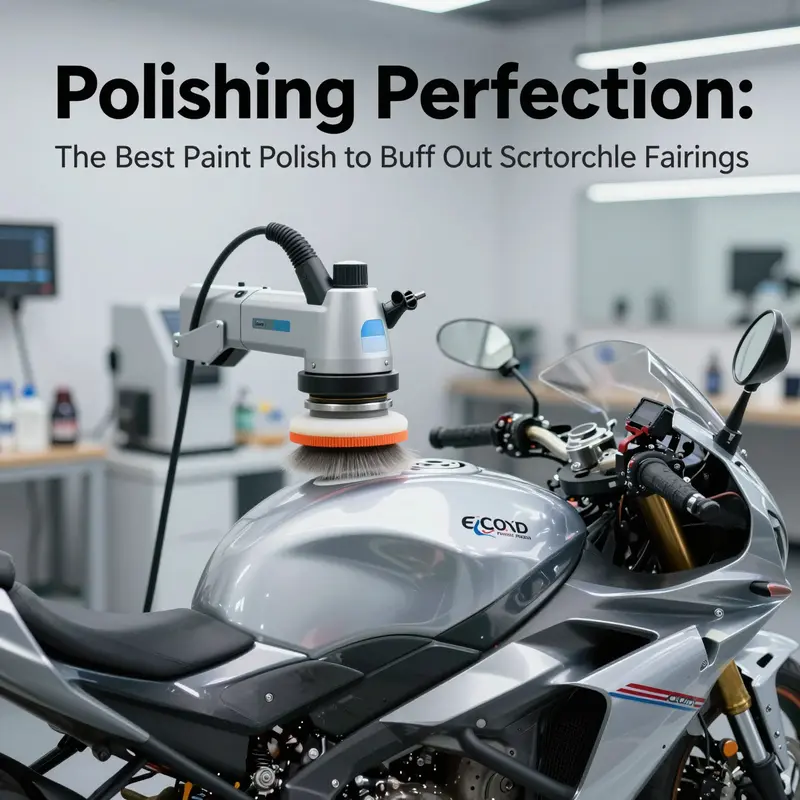
Scratches on motorcycle fairings are more than cosmetic blemishes; they are entries in the narrative of a bike’s life on the road. A well-kept fairing tells a story of careful maintenance, of rides carved through wind and weather, and of a rider who values performance as much as appearance. The conventional wisdom around repairing those scratches centers on paint correction polishes, a class of products designed to micro‑abraid the surface with controlled precision. These polishes aren’t mere wax substitutes; they are calibrated steps in a restoration process that can remove shallow to moderate scratches, erase fine oxidation, and coax a dull coat back to a vivid gleam. The aim is not to create a new finish from thin air but to reveal the original depth of color and clarity hiding beneath a weathered layer. In practice, this means a deliberate sequence: a thorough cleaning of the surface to remove dirt and oils, selecting a compatible polishing instrument and pad, applying the polish in measured passes, and then protecting the revived gloss with a durable top layer. The surface preparation matters as much as the polish itself; a neglected prep yields uneven results, while a disciplined approach yields a uniform, glassy finish that can look almost factory new. It is also important to recognize the limits of the method. When scratches cut deep into the base coat or penetrate composite layers, polishing alone cannot repair the damage. In those cases, repainting or panel replacement becomes the practical route. Yet for the majority of mid-depth blemishes that riders encounter in daily use or after a fall that didn’t break the structure, paint correction polish provides a meaningful, cost‑effective return to form. What matters is choosing the right family of products and applying them with proper technique rather than relying on brute force or generic “polish” that lacks the subtle abrasives needed to level a clear layer without sacrificing depth. The distinction between true paint correction polish and ordinary wax is not ceremonial; it is a decisive difference in the longevity of the shine and the consistency of the gloss across complex curves and edges. When used correctly, these polishes can remove micro-scratches, flatten micro‑scuffs, and reduce the appearance of micro‑oxidation that dulls the fairing’s color and clarity. The process becomes a careful dialogue between material science and skill: a conversation about how much abrasion is needed, how fast to work on contoured surfaces, and how to protect the newly revealed finish from future exposure to sun, rain, and road salt. In the near term, riders who want the best possible outcome on a budget will benefit from a staged approach that respects the geometry of fairings. The flat panels, radiused edges, and tight compound curves all demand different handling. The polishes themselves are designed with layers of micro‑abrasives and polishing agents that work in harmony with cushioning pads, soft foams, or fiber cloths. The operator’s hand is still essential, but the tool becomes a precise extension of that hand, translating intention into measurable material removal. This is where the discipline of surface care begins to mirror the broader shift toward smarter maintenance practices in motorsport and on‑two‑wheel travel. The movement away from generic waxes toward paint correction polishes reflects a deeper recognition that gloss and protection must be earned through deliberate maintenance. It is not enough to sweep on a layer of shine and hope for longevity; the rider must engage the process with attention to order, consistency, and timing. The fairing’s finish thrives when the surface is free from contamination, the correct pad and speed are chosen, and the polishing sequence respects the substrate’s thickness and the finished look desired. In the context of the broader industry, this approach aligns with a philosophy of durable beauty: aesthetics that are earned, restored, and maintained with material science that respects the structure of modern coatings. The chapter you are reading sits at the intersection of practical, hands-on care and the horizon of what is possible as technology evolves. It is a bridge from today’s proven methods to a future where polish is more than an aesthetic step; it becomes a protective, functional layer that contributes to performance and reliability over the bike’s life cycle. The idea of polish as a temporary cosmetic overlay gives way to the notion of a finishing system that supports long‑term durability. Think of the shell of a fairing as a canvas that can be refreshed repeatedly, with the surface chemistry adapting to the rider’s climate, riding style, and maintenance habits. The cycle of clean, polish, protect becomes, in effect, a maintenance ritual that preserves the original design intent while extending its life. There is an important practical cadence to this approach. Start with a clean, dry surface to minimize the introduction of grit that could embed into the polishing pad. Use a dedicated paint correction polish that is appropriate for the depth of the scratches and the state of the clear coat. Work in small sections, allowing the pad to maintain a consistent contact with the surface. Apply light to moderate pressure, and monitor the work by wiping frequently to assess progress. Move through progressively finer stages of polishing and finish with a protective layer that complements the polish and resists environmental challenges. It is in this respect that the future of paint polishing sits at a crossroads: the craft of human intervention remains essential, but the tools, coatings, and concepts around the process are rapidly expanding. The promise is not merely to restore shine but to enhance performance in subtle, meaningful ways. A more intelligent approach to polishing could one day integrate surface scanning with automated parameter optimization, guiding the operator to the ideal combination of speed, pressure, and product selection for each fairing section. In a factory setting, robotics and automated feeding systems already enable consistent results and higher throughput for complex shapes. For riders and small shops, aspirational visions point toward smarter handheld devices that map the surface by depth and curvature, offering a recipe-like guidance system that translates a model of the scratch into a tailored polishing plan. While this may seem distant, the trajectory is clear. The emphasis is shifting from simply making a surface look good to ensuring that the finish behaves well under real‑world conditions. The final gloss becomes a functional attribute, contributing to hydrophobicity, UV resistance, and wear resistance. In turn, protective coatings that once served as mere barriers to moisture and chemicals are evolving into multi-functional layers, often nanoscopic in thickness, that contribute to longevity without compromising the allure of the polish. The next generation of fairing finish will likely embrace coatings that pair with the polished layer to form a coherent guardianship against the elements, while maintaining the clarity and depth that riders expect. This integrated approach is particularly relevant for rural markets where bikes may endure harsher exposure to sun, dust, and seasonal moisture. The material science underpinning these coatings emphasizes abrasion resistance, hydrophobic behavior that sheds water and grime, and a chemical resilience that reduces the staining effects of road salts and pollutants. In practice, the implementation of such durable systems will begin with careful selection of the base polish and the protective top layer. The polish will continue to address scratches and micro‑defects, while the coating serves as the long‑term shield, reducing the frequency with which riders must re‑polish to maintain a vibrant finish. The environmental footprint of these solutions is not neglected. An accelerating trend in the industry is toward water-based formulations, low VOCs, and recyclable packaging. This aligns with broad regulatory goals and with consumer expectations for responsible manufacturing. The polish and its companion coatings will therefore be designed to minimize emissions, to be easier to apply in a casual workshop setting, and to offer safer disposal or recycling options for the products used in routine maintenance. In the broader design language of motorcycle aesthetics, this evolution opens doors to personalization and customization without sacrificing protection. Riders increasingly seek finishes that reflect their identity—subtle color shifts, dulled or enhanced metallic flake, or textured effects that catch light in a way that mirrors their riding style. Digital printing and precision replication on fairings could enable limited runs of holographic or directional patterns applied in concert with polishing and sealing steps. The result is not a temporary flourish but a durable signature that survives daily use while remaining faithful to the rider’s vision. The practical question for enthusiasts remains: what can be done today that sets the stage for these advances tomorrow? Start with a disciplined routine: clean, correct, and protect using dedicated paint correction polish and a compatible protective layer. Avoid generic waxes that can fill in or dull micro‑scratches without addressing the actual level of the clear coat. Treat mid-depth scratches with a measured polishing plan, and recognize when deeper repair is necessary. Maintain awareness that fairings with intricate curves demand a patient, methodical approach rather than a rushed, uniform pass across the surface. The hands that guide the polisher must balance sensitivity with control, knowing when to stop and re-evaluate the surface in good light. And as the field advances, keep an eye on the evolving ecosystem of coatings and smart applications designed to extend the life of the finish while preserving the clarity that makes color and shape sing under daylight and streetlights. For those who want practical touchpoints beyond the theory, consider exploring the broader ecosystem of fairing options and restoration resources that can support model-specific needs. For instance, if you are sourcing OEM replacements or replica panels for a particular model, a reliable place to start is the Honda CBR600RR fairings collection. This reference can help you compare the geometry, the edge profiles, and the compatibility of new panels with your existing finish, ensuring that the reparative work you perform on the original fairing aligns with the design language of the bike. The aim is to keep the narrative coherent: the scratch repair you perform today informs the foundation for tomorrow’s smarter, tougher, and more tailored finishing systems. In that sense, the discipline of polishing becomes a living thread in the lifecycle of the motorcycle, connecting the craft of restoration to the possibilities of future materials, automation, and customization. This is the path where care for a single fairing mirrors the larger movement toward finishes that are not only beautiful but also resilient, interactive, and aligned with evolving safety and performance ecosystems. It is a journey from the intimate, tactile practice of hand‑applied polish to a future where intelligent systems augment judgment, where durable coatings protect the color and clarity for years, and where rider personalization is supported by materials that respond to light, weather, and wear. For now, the practical road lies in mastering the fundamentals while staying open to incremental upgrades that will steadily raise the bar for what a scratched, sunlit piece of plastic can become. External resource: For broader context on evolving trends in polishing technologies and their implications for vehicle finishes, see https://www.sohu.com/a/759823456_120000446.
Final thoughts
In conclusion, the journey of restoring motorcycle fairings requires a strategic approach involving the right products and techniques. The recommended paint polishes provide an effective solution for surface-level scratches while recognizing the limitations for deeper blemishes helps manage customer expectations. As trends evolve, embracing advanced polishing solutions ensures you stay ahead in the competitive motorcycle repair market. Understanding these facets allows business owners to deliver exceptional value, enhancing customer satisfaction and fostering brand loyalty. Equip your workshop with this knowledge today, and watch the transformation in your service delivery.