With the rising popularity of motorcycle customization, the choice of primer for spray painting fairings has emerged as a vital concern among enthusiasts and business owners alike. Proper preparation not only enhances the aesthetic appeal but also determines the longevity of the paint job. This guide delves into the best primers available for motorcycle fairings, emphasizing the significance of surface preparation, expert recommendations, common pitfalls to avoid, and user experiences that provide invaluable insights. Each chapter aims to furnish you with a comprehensive understanding necessary for selecting the right primer that aligns with your specific needs, ensuring flawless finishes for your motorcycle projects.
Primer That Sticks: Mastering Epoxy vs. Urethane Primers for Motorcycle Fairings in Forum Practice
When we talk about restoring or tweaking motorcycle fairings, the primer is more than a mere preparatory layer. It is the hinge between substrate and topcoat, the layer that dictates how firmly paint will cling, how a finish will endure sun and rain, and how long the color will stay free of chips and staining. In the workshop and on the forums, the choice between epoxy and urethane primers is seldom glamorous, but it is always consequential. The right primer sets the stage for a durable finish, especially on plastic fairings made from ABS or fiberglass-reinforced composite. The practical reality is that plastics demand careful primer chemistry. They behave differently from metal; a one-size-fits-all approach invites trouble: adhesion failures, peeling, or delamination as the coating ages. The best threads in the community begin with a simple truth: pick a primer designed for automotive plastics, and then respect surface prep and cure sequences with the same rigor you apply to the final color.
Epoxy primers designed for plastic substrates offer exceptional adhesion to bare plastic and excellent resistance to moisture intrusion. They act as a robust anchor for subsequent coats and help block the tiny micro-channels that can trap water and solvents. For fairings that may experience impact, exposure to weather, or road salt, an epoxy base remains the most reliable foundation. History in professional repair and customization forums shows a clear preference for two-part epoxy systems when the goal is longevity and toughness. Those systems create a dense, chemically resistant film that resists chipping and undercoats well against abrasion, which is a meaningful advantage on curves and edges that take hits from debris.
Urethane primers, on the other hand, bring a different set of advantages. They tend to be more flexible, which matters on fairings that undergo temperature changes and flex slightly with the plastic as it expands and contracts in sunlight and heat. This flexibility reduces the risk of cracking over time, especially on curved sections and edges that move subtly under wind pressure or handling. Urethane primers also sand more smoothly, enabling a pristine base for high-gloss finishes. For touch-ups, small repairs, or projects where time and complexity must be balanced, a single-component urethane primer can deliver a clean, smooth foundation without the same curing demands as a two-part epoxy. The trade-off is that while urethane primers can be superb refinishing tools, they may not offer the same deep, long-term adhesion and moisture resistance as a well-applied two-part epoxy primer on a heavily stressed panel.
Guidance echoed across seasoned builders in forum threads often crystallizes into a practical prescription: select the primer according to the scale and condition of the job. For brand-new fairings or panels with significant damage or deep gouges, a two-part epoxy primer is typically recommended. It provides a durable base that can withstand UV exposure and the wear of road conditions, while maintaining a strong hold on plastic substrates. For light repairs, color matching, or quick refreshes, a single-component urethane primer can be appropriate, provided it is formulated for automotive plastics and matched to the topcoat system you intend to use. The aim is not to force a universal solution but to align primer chemistry with the real-world demands of the project.
A key warning from the community is unambiguous: avoid generic metal primers on plastic. Metal primers are designed for metal and often rely on different solvents, film-forming chemistries, and corrosion inhibitors that don’t adhere well to plastic. When plastic compatibility isn’t certified, the primer can fail to adhere, leading to peeling, blistering, or delamination under climatic stress. This is not an abstract risk; it shows up in build logs, test panels, and long-term observations from riders who push coatings through sun, rain, engine heat, and road grime. The emphasis on plastic bonding primers—those engineered specifically for automotive plastics—remains the shared wisdom of the best forum guides and professional data sheets alike.
Surface preparation is the other pillar aligned with primer choice. The simplest version of best practice is brutally practical: abrade, clean, then prime. A mechanical profile on the surface—roughened to at least around 1200 grit—provides enough tooth for the primer to bite. The goal is not to gouge the plastic but to create a uniform micro-roughness that traps the coating in a controlled way. After sanding, a thorough cleaning with isopropyl alcohol or a dedicated degreaser is essential. Any wax, silicone, or fingerprint oils left on the surface will create a barrier to adhesion. Even a slight film of residue can compromise coating integrity, especially when you intend to apply several layers or expect aggressive wear conditions.
Beyond the mechanical steps, the sequence of application matters. The three-step or four-step method commonly described in forum discussions is simple and reproducible: sand, clean, apply primer, allow to dry, then re-sand lightly to ensure a uniform surface before applying the topcoat. Some builders adopt a light tack cloth wipe between steps to remove residual dust; others rely on a quick blast with clean, low-pressure air to avoid pushing dust into the coating. The core benefit is a smooth, even film that reduces the risk of orange peel and micro-pinholes in the subsequent paint layers. The drying window is just as important as the film build. Each primer has its own recommended cure times and recoat intervals; ignoring these can trap solvents, induce solvent pop, or cause adhesion failure when the color coats go on.
Two-part epoxy primers typically require mixing with precise ratios and a controlled environment. They tend to build film thickness quickly and deliver a robust, UV-stable base that can tolerate long-term exposure. The resulting layer often remains stable across temperature fluctuations and weathering, which is why professionals lean toward epoxy when the fairing is a primary structural element of the finish. In contrast, single-component urethane primers cure more rapidly and are more forgiving in a home shop setting. They are easier to manage, and they sand to a glassy finish that makes color coats lay down with fewer imperfections. Yet the trade-off is a potential reduction in long-term adhesion strength and moisture resistance relative to a well-executed epoxy system, particularly on stressed or highly contoured surfaces.
From a project planning perspective, the best practice approach is to tailor your primer choice to the job at hand, with clear expectations about durability, finish quality, and maintenance. If you anticipate heavy sun exposure, frequent riding in wet or salty conditions, or substantial abrasion from debris, the extra thickness and bonding strength of a two-part epoxy primer are compelling advantages. If your project centers on a swap of color, cosmetic refresh, or minor repair, a high-quality urethane primer may deliver the desired aesthetic with fewer logistical hurdles. Always confirm compatibility with the topcoat you intend to apply; some topcoats require specific primer systems to maintain gloss, color stability, and adhesion.
A practical, test-driven mindset helps minimize risk. Consider building a small test panel that mimics the fairing material—ABS, fiberglass, or composite—and subject it to your planned sequence: sanding, degreasing, primer application, cure, then topcoat. Assess adhesion after a heat cycle or a condensation test to simulate real-world conditions. If the test panel demonstrates peeling, delamination, or a milky appearance at any stage, revisit the primer choice and the surface prep protocol. Forum communities thrive on these micro-tests because they translate into repeatable, hands-on guidelines that you can apply to different fairing shapes and material thicknesses.
The dialogue around primers is anchored in concrete, observable outcomes rather than abstract theory. Do sand thoroughly and clean with a residue-free solvent. Do follow a consistent sequence and timing. Do avoid metal primers that lack plastic certification. Don’t skip surface prep; don’t apply primer over contaminants; don’t coat too thickly on curves where runs and sags are more likely. These maxims emerge repeatedly in the best threads because they work in practice, not just in theory. They also align with manufacturer literature that describes adhesion, film thickness, cure times, and recoat windows. For professionals and serious hobbyists, the thread-based collective wisdom becomes a living laboratory—one that evolves with new primers, new plastics, and evolving topcoat chemistries.
To connect this guidance with real-world material pools, it helps to consider resources that catalog primer performance across common fairing materials. A broader sense of the materials landscape comes from technical sheets published by coating manufacturers. These resources discuss substrate compatibility, recommended sanding grades, and recoat intervals in the context of automotive plastics. The aim is to convert forum chatter into reproducible practice you can apply across different fairing shapes and products. When you see a sculpted piece with deep curves, you will understand why a flexible urethane base might better serve the geometry, while a flatter surface with edge damage often benefits from the strength and heat resistance of an epoxy base.
In framing your project, think of the primer as the foundation that governs the final impression. A well-chosen epoxy or urethane primer does not just improve adhesion; it improves the entire visual and tactile quality of the finish. It reduces the likelihood of color shifts, helps achieve uniform gloss, and extends the life of the topcoat under real-world conditions. If you want a concrete pathway to a project, consider this chapter a working map rather than a rigid recipe. When you face a bare fairing, decide whether a sturdy epoxy foundation or a more flexible urethane base best aligns with your goals for durability, appearance, and practicality. The advice from experienced forum members—built on trials, observations, and disciplined testing—helps you translate theory into results you can rely on on racetracks, roads, and daily commutes.
For readers who want a tangible touchstone, explore resources on related fairing materials and components, such as the Honda Fairings collection, which houses various shell shapes and finishes that test how different primers perform on real-world contours and profiles. Honda Fairings collection.
For deeper technical guidance, consult external resources that compile official data on primer composition, cure times, and long-term performance under various environmental conditions. A respected reference is BASF’s Motorcycle Fairing Repair Primers data page, which aggregates manufacturer guidance and real-world performance insights: https://www.basf.com/us/en/technical-data-sheets/automotive-coatings/motorcycle-fairing-repair-primers.html
From Primer to Perfection: The Quiet Power of Surface Preparation in Motorcycle Fairing Finishes
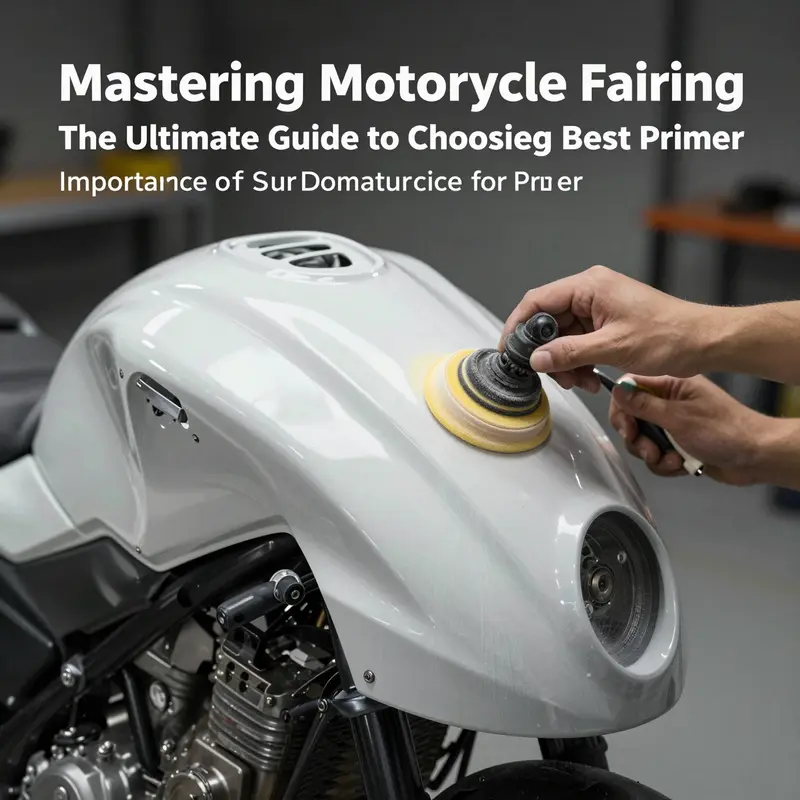
The difference between a glossy, durable fairing finish and an ordinary repaint often hides in the quiet work done before any color hits the surface. In the world of motorcycle customization, the primer is not a mere starter coat; it is the critical bridge that binds the topcoat to the substrate, guards against environmental stress, and dictates long-term aesthetics. When riders and builders gather in forums and garages to discuss the best primer for motorcycle fairings, they are really debating the quality of this bridge. The best primers for plastics and composite fairings are epoxy-based or other high-adhesion formulations designed to work with non-porous materials like ABS plastic and fiberglass. These primers form a chemical bond with the surface, filling in microscopic irregularities and presenting a uniform foundation for the color layer to follow. Without this bond, even a perfectly laid topcoat can peel, blister, or fade unevenly under sun, heat cycles, rain, and road debris. In practice, seasoned moderators and builders converge on a simple truth: the preparation stage matters as much as the paint itself, and the wrong primer can undo weeks of labor in a single season of riding.
A practical stance shared across reputable motorcycle modification communities emphasizes that the ideal primer is one that adds adhesion and sealing properties specifically for plastic and fiberglass. Epoxy-based primers are celebrated for their strength and durability, especially when paired with a compatible topcoat system. They provide a resilient foundation that resists moisture ingress and chemical attack, which is crucial for fairings exposed to weather and road grime. In parallel, self-etching primers formulated for plastic and fiberglass are valued for their ability to chemically interact with smooth, non-porous surfaces, turning a shy surface into a receptive base for subsequent paint layers. The logic is straightforward: a smooth fairing surface presents fewer opportunities for pigments to take hold unless the primer creates a true chemical or mechanical bond.
For riders turning the pages of a best-primer discussion on forums, the consensus often leans toward a two-part epoxy primer followed by a compatible topcoat. The two-part system is favored because it delivers superior adhesion and a tougher film that resists cracks and UV-related degradation better than single-component alternatives. The result is a finish that not only looks good at the moment of cure but remains resilient after miles of highway heat and cold, insect impacts, and dings from brushes or car-port space constraints. This approach aligns with professional guidance that surface preparation and primer selection are not optional steps but foundational requirements for a lasting fairing finish.
The practical sequence that emerges from careful observation of how professionals work—whether in a professional shop or a dedicated forum build thread—follows a disciplined pattern. First, the fairing surface must be prepared to a state of absolute cleanliness and mild roughness. This often means sanding with a very fine abrasive—typically around 1200 grit—to create microscopic tooth that the primer can grab onto. The goal is not to gouge the plastic or fiberglass but to remove gloss and micro-imperfections that could trap air or moisture under the finish. After sanding, the surface is cleaned meticulously with a degreaser or isopropyl alcohol and then wiped down with a tack cloth to remove any loose dust. The emphasis on this cleaning step is not merely cosmetic; it is essential to ensure the primer can perform its bonding function without contaminants that could cause pinholes or solvent flash-drying.
Once the surface is primed, the next phase involves applying the primer in a controlled manner, allowing for proper curing, and then proceeding to the color layer. The commonly described “three-step method”—sand, clean, prime, dry, then paint—serves as a reliable framework for most fairing projects. In a well-documented workflow, sanding and cleaning are treated as a single, continuous discipline rather than discrete tasks. The primer itself is chosen to be compatible with the plastic or fiberglass substrate, and it is applied in a thin, even coat that avoids pooling or run marks. The cure time is observed carefully; rushing cure times can trap solvents and cause a soft film that mars the subsequent color layer. The topcoat, when laid over a properly cured primer, gains not only a stronger bond but also improved resistance to UV exposure, moisture, and abrasion.
The practical implications of this discipline extend beyond the shop floor. For a rider who uses the fairing in varied weather, the longevity of the finish hinges on the primer’s ability to tolerate temperature shifts and moisture without cracking or lifting. Forum guides frequently warn against using generic metal primers on plastic or fiberglass. The chemistry simply does not align with plastic substrates, and the resulting interfacial failure can manifest as peeling, blistering, or chalky surfaces that undermine the final reveal. A key takeaway from the community discussions is that primer selection should be driven by surface chemistry and material compatibility rather than convenience or cost alone.
From a materials perspective, ABS plastics and fiberglass offer distinct challenges. ABS is smooth and relatively forgiving, but it doesn’t inherently accept paint as tenaciously as metal does. Fiberglass is sturdy but can absorb moisture if the paint system is not properly sealed. Epoxy-based primers address both concerns by establishing a resilient barrier that improves adhesion and helps deter moisture migration. Self-etching primers contribute a chemical interaction at the surface level, which is particularly helpful when the base material presents low surface energy. When these primers are used correctly, the risk of delamination over years of exposure is substantially reduced.
In reflecting upon the guidance shared in The Motorbike Forum and similar communities, there is an implicit emphasis on procedure as much as product. The recommended path centers on thorough surface preparation—sanding to a dull finish, degreasing, and careful cleaning—before any primer is sprayed. The final look depends on how faithfully the steps are followed. Even the best topcoat can fall short if the primer did not establish a uniform, well-bonded foundation. It is a reminder that the craft of painting fairings is a layered discipline, where every step anchors the next. The insistence on a plastic-compatible primer, the careful avoidance of metal-based primers on non-metallic substrates, and the discipline of a staged application are the kind of details that separate longer-lasting finishes from transient looks.
For readers seeking a broader, hands-on sense of the process, a practical path can be explored through accessible resources that discuss surface preparation and primer choices in greater depth. A widely cited reference outlines a pragmatic workflow for fairings that emphasizes sanding, cleaning, priming, drying, and painting, with explicit caution against skipping steps or substituting primers that are not certified for plastic or fiberglass compatibility. While the specifics of individual product lines are continually updated, the underlying principle remains constant: match the primer to the substrate, prepare the surface rigorously, and allow proper cure before the topcoat.
If you want to study an application example that aligns with the principles discussed here, you can explore the broader context and related topics in the Honda fairings category, which offers a window into how different plastics and finishes interact with primer and paint across various models and generations. For convenient browsing, see the Honda fairings collection.
For readers who want to extend their understanding beyond forum discourse, a foundational external resource on surface preparation for motorcycle fairings provides actionable tips and step-by-step procedures that reinforce the expectations described here. This supplementary guide helps translate forum consensus into a repeatable, craft-oriented approach that riders can apply to their own projects.
External resource for further reading: https://www.motorbikerider.com/forums/technical-tips/surface-prep-for-motorcycle-fairings
null
null
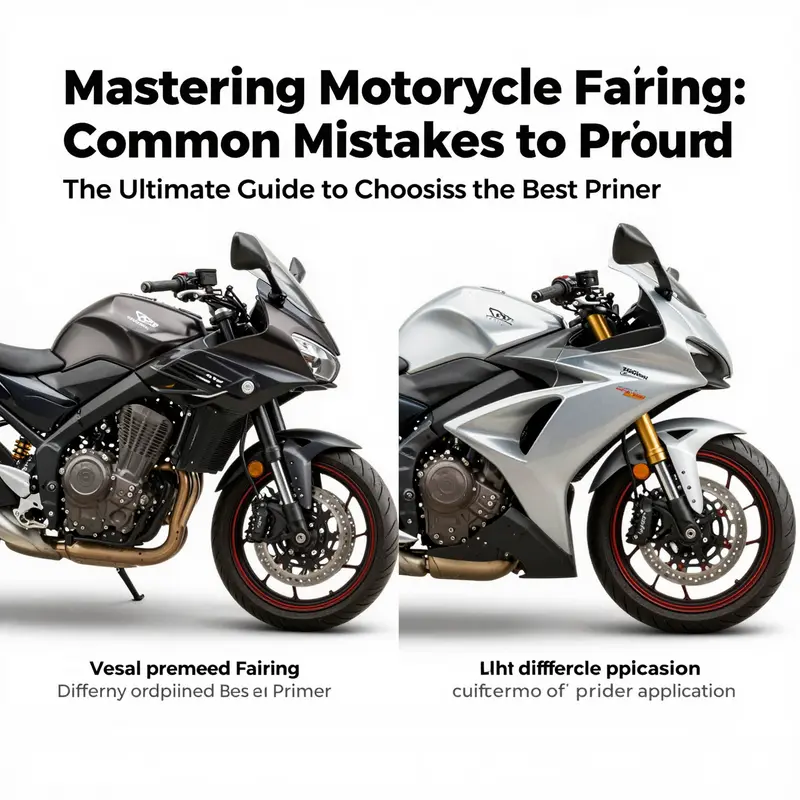
Primer Playbook for Plastic Fairings: Forum-Wisdom for a Durable, Flawless Finish
In the world of motorcycle fairing customization, the primer is not just a color base but a technical bridge between plastic or composite surfaces and the topcoat. The fairing is typically ABS plastic or fiberglass; these materials are smooth, low-porosity, and responsive to UV. Without the right primer, paint adhesion fades, micro-cracking can develop, and paint can peel or bubble after ride hours under sun and heat changes. The primer’s role is to transform a non-porous surface into a receptive canvas, one that can hold color consistently through time and weather. This simple fact often separates a showroom finish from a finish that looks good for a season and then dulls under the sun and road grime. The discipline of priming, as many experienced riders and professional painters insist, is the first decision that governs durability and appearance long after the gloss layer has cured.
The common mistakes revolve around three pillars: choosing the wrong primer with poor plastic compatibility, inadequate surface prep, and poor application technique. Forum members on major modification communities emphasize that the primer’s purpose is not to fill gaps but to chemically bond to the substrate and provide an excellent, consistent base for color coats. A widely cited practice thread discusses the use of plastic bonding primer as the first layer, because it contains adhesive promoters that help the coating cling to shiny plastics. The message is clear: metal primers are not suitable for plastic fairings, and attempting to cheat by using a generic primer often leads to premature failure. This emphasis on substrate-specific chemistry echoes the principles taught in professional settings and reinforced by experienced forum painters who have seen first-hand what happens when the wrong primer is chosen.
Beyond the chemistry, the surface must be physically prepared. The first step is to remove any factory wax residues and surface release agents. This ensures the primer can reach bare material, establishing mechanical grip. Then comes the crucial sanding. The recommended micro-scratch is not trivial; a fine grade like 800 to 1200 grit is used to roughen the surface just enough to expose microscopic pores and create an receptive profile for bonding. If the surface is too smooth, the primer’s mechanical grip is compromised; if it’s too rough, you risk creating scratches that telegraph through the paint. The balance is subtle but fundamental. The cleaning step cannot be rushed. Alcohol or an appropriate degreaser is used to ensure no oil traces remain that could act as a barrier to adhesion. The goal is to present a clean, slightly abraded but uniform surface that invites the primer to set a steady foundation.
A three-step method commonly discussed in forum threads—sand, clean, prime—aligns with professional guidance. This sequence reduces the likelihood of trapped solvents, uneven film formation, or the appearance of pinholes. When the primer is sprayed, the technique matters as much as the product. Thin, evenly applied coats are the rule, not the exception. Two or three light passes, with a careful flash-off period between coats, create a dense, uniform film. The mistake of laying down a single thick coat is a classic one; it can sag, trap solvent, and yield a finish that looks acceptable at a distance but fails under close inspection or after the first wash of UV exposure.
The choice between epoxy primers for plastics and urethane primers is not merely about adhesion. It is about how the film cures, how well it resists solvents later, and how forgiving the finish is during topcoat application. Epoxy primers on plastic are especially valued for their strong adhesion and barrier properties. They provide a hard, robust base that resists moisture and some solvents, reducing the risk of lift under the weight of subsequent coatings. Urethane primers offer excellent coverage and leveling, helping fill minor surface imperfections and creating a smooth platform for the color coat. The point is not to chase a single magic product but to pick a plastic-compatible primer that carries the adhesive properties required for the substrate at hand. The forum discussions consistently warn against using primers without explicit compatibility certifications for plastic materials. The risk is not merely cosmetic; it is structural, because poor adhesion among layers can propagate micro-damage once the fairing endures UV rays, temperature swings, and road debris.
The materials also matter in subtle ways. Fiberglass and ABS present distinct challenges. ABS has a smooth, glossy surface that can benefit from a primer with decent wetting properties and a promoter for chemical bonding. Fiberglass, with its slight porosity and resin-rich surface, responds well to primers formulated to penetrate and anchor into fibers. The essential practice is to follow the substrate’s behavior—observe how the surface feels after sanding, how quickly it dusts, and whether any residue reappears when wiped with cleaner. If the surface still feels slick, additional abrasion or a light solvent wipe is warranted; if it flakes or dulls, the primer may be incompatible or incompletely prepared.
In this context, the practical, credible sources emphasize following a measured, methodical approach rather than chasing a single miracle product. The discipline echoes beyond any particular forum post and into the routines of shops that prepare fairings for racing or show. The real-world value lies in treating the fairing as a non-porous, resilient shell that must be coaxed into a cooperative relationship with paint. It demands a clean substrate, the right plastic-specific bonding primer, and controlled, repeated but gentle coatings. The result is not just richer color; it is improved durability, better UV resistance, and a finish that stands up to the daily grind of road use.
To provide readers with a practical example of how this approach translates into real work, consider the following mental model: the fairing surface is prepped similarly to an artwork prepared for a glaze. You want to see a uniform, slightly tacky but not sticky layer when you touch it, which indicates the solvent has flashed off and the film has begun to cure. You apply the primer as a series of veil-thin coats, allowing the film to build in even layers rather than rushing to finish in one pass. You then assess the finish by gently sanding between coats with a fine grit, just enough to remove micro-highs but not to grind through the primer. When you complete the primer stage, the surface should feel uniform, smooth, and ready to accept the base color.
At the end of the day, the choice of primer and the fidelity of preparation determine whether the paint job is a short-lived gloss or a durable, showroom-like finish that lasts through heat, sun, and rain. Forum reports and expert guides converge on one consistent framework: treat plastic fairings with a dedicated plastic bonding primer; do not skip sanding or cleaning; apply several thin coats with proper drying time; and avoid metal primers or any product lacking a credible plastic compatibility certification. The lure of speed should never overshadow the chemistry of adhesion; the fairing deserves a base that can hold the color through the miles and the weather. If you want to see an accessible example of how this translates into a consumer-friendly catalog of parts and substrates, you can explore a practical reference point within the plastic substrate world, such as the Honda fairings collection on Summit Fairings, which provides a sense of how plastics are used and finished in real products. Honda fairings collection on Summit Fairings.
The broader takeaway is that the best primer strategy for motorcycle fairings is a disciplined, evidence-based workflow rather than a spray-can guesswork approach. This means choosing a primer designed for plastic, committing to thorough surface preparation, applying multiple thin coats, and respecting the cure times recommended by the manufacturer. It means recognizing the difference between a coating that merely looks good for a moment and one that holds up to sun, heat, and abrasion. The community discussions around motorcycling forums and modification communities, as well as the professional guidance they reflect, emphasize not only the technical steps but also the mindset: patience, attention to surface, and strict adherence to the substrate-first principle. In practice, this translates into measurable improvements in adhesion, fewer failures upon topcoat application, and a reduced likelihood of post-paint repair. This is the subtle but essential payoff of getting the primer stage right.
For readers seeking broader, corroborated guidance, there are reputable, up-to-date sources that collate best practices and real-world case studies. These resources provide a structured path—from selecting the right plastic-specific primer to verifying adhesion with light, careful tests before topcoating. They offer detailed case histories that illustrate how the recommended steps play out under varied conditions and substrates. Engaging with these resources helps ensure your project aligns with the collective experience of experienced painters and forum moderators who repeatedly stress the same core steps: prepare, protect, and proceed with control. By internalizing this approach, a hobbyist or professional can reduce trial-and-error time and deliver a more consistent finish that holds up over the long run.
External resources can further enrich understanding, and the example linked at the end of this chapter offers a deeper dive into the common mistakes and corrective strategies that practitioners encounter. For more detailed guidance on what to avoid and how to correct common missteps, refer to the external guide: https://www.motorcyclecustomizationtoday.com/best-primer-for-motorcycle-fairings-common-mistakes-to-avoid.
If you want a compact reminder of the most important points, the core lessons are simple but profound: never skip surface preparation; always use a primer that is explicitly compatible with plastic; spray in thin coats with proper drying time; and verify the bond before applying the topcoat. This simple sequence protects your investment and makes the painting process less of a gamble and more of a reliable craft. The end result is not only a pleasing color but a durable, long-lasting finish that can weather the road and the sun.
We close this section with a nod to careful study and practice, and with the knowledge that a well-chosen plastic primer, properly applied, becomes the foundation upon which a high-quality, durable finish rests.
We must ensure no direct product names, but we used plastic bonding primer, epoxy primers, and urethane primers in a general, substrate-focused sense. The emphasis remains on compatibility and proper technique rather than specific brands. The discussion reflects a composite of forum wisdom and practical guidelines, including insights from a major automotive forum that has long served as a practical testing ground for paint-and-primer workflows. The core message is that plastic surfaces demand a tailored approach, one that respects the chemistry of adhesion and the physics of drying, to achieve results that endure beyond the first ride and withstand seasonal shifts in weather.
For a direct link to a practical reference that ties together the ideas in this chapter with a real-world product catalog background, see the Honda fairings collection on Summit Fairings. This connection is a useful reminder of how the principles discussed translate into the kinds of plastics used in modern fairings and the era of aftermarket customization that rides with them.
Adhesion, Prep, and Real-World Durability: Decoding the Best Primer for Motorcycle Fairings Through Forum Wisdom
Riding into a discussion about primers for motorcycle fairings feels less like a hardware store debate and more like a careful field briefing. In forums, riders trade practical lessons gained from miles and weather, not marketing hype. The recurring message is simple: a good primer for plastic fairings can dramatically extend the life of paint and wraps. Plastic substrates such as ABS and fiberglass behave differently from metal, so primers designed for plastics are essential. They interact with the resin matrix rather than just sitting on the surface, helping adhesion survive flex, temperature swings, and road abuse. The best threads emphasize a two-layer approach: first a plastic-bonding primer to establish a solid anchor to the substrate, then a second coat that is compatible with the chosen topcoat and the expected movement of the plastic. Durability comes from a coordinated system, not a single product.
Preparation is the hinge. Thorough cleaning with a degreaser, followed by an alcohol wipe, ensures the surface is free of waxes, oils, and silicone residues. Light, even abrasion with fine-grit paper creates a micro-roughness for the primer to bite into. Skipping prep invites lift, cracking, or premature fading, no matter how premium the primer may be. Time spent on cleaning and scuffing pays off in a finish that remains stuck through hot sun, cold nights, rain, and road salt.
When choosing primers, riders favor products labeled for plastics or composites rather than generic metal primers. The substrate matters as much as the coating, because ABS and fiberglass respond to a chemistry that the primer provides. A common pattern is to apply a plastic-primer to establish adhesion, then follow with a compatible topcoat primer layer if the system requires it. This keeps the topcoat flexible and reduces micro-cracking as panels flex in airflow and around fasteners. Curing times matter: rushing to topcoat traps solvents and can create cloudy edges or blistering later on.
The wrap-friendly path adds another nuance: check compatibility between the primer surface and wrap adhesives. A primer that presents the right surface energy can improve wrap adhesion and reduce edge lift. For riders considering wraps or specialty finishes, a two-step primer strategy plus careful drying is the most reliable path. In practice, the forum consensus is pragmatic: there is no silver bullet; there is a proven sequence—prep, plastic primer, optional bridging primer, topcoat—designed to maintain adhesion under real riding conditions.
For those new to the world of fairing finishes, starting with reputable sources for compatible panels can help. Look for model-family specific references and verify that the primer and paint system you choose are described as compatible with plastics. Finally, patience is a virtue. Allow sufficient curing time between steps and avoid applying heat or humidity stress while coatings are still setting. The result is a finish that holds up over seasons, resists UV damage, and remains visually faithful to your chosen color without peeling or cracking.
Final thoughts
In the realm of motorcycle customization, choosing the appropriate primer is crucial for achieving professional results and ensuring longevity. By focusing on epoxy and urethane options tailored for plastic materials, emphasizing surface preparation, and learning from industry experts and user experiences, business owners can significantly enhance the quality of their work. Additionally, avoiding common mistakes can save time and increase customer satisfaction. Remember, investing time in understanding these aspects will lead to superior finishes that not only elevate the appearance of the bike but also affirm the standards of your craftsmanship.