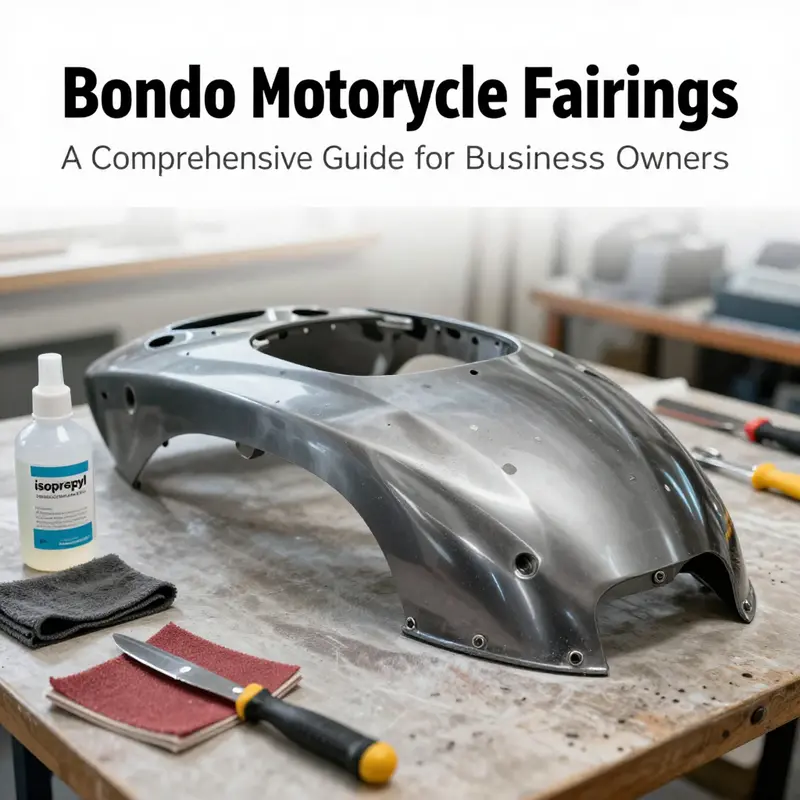
Understanding how to effectively bond motorcycle fairings is crucial for business owners in the automotive repair and customization industry. Motorcycle fairings not only enhance aesthetics, but they also contribute significantly to aerodynamic efficiency and protection. Proper bonding techniques can reduce the risk of damage, save costs on replacements, and enhance customer satisfaction. This article will delve into essential aspects of bonding motorcycle fairings using Bondo, exploring surface preparation, adhesive selection, application techniques, and finishing touches that are all vital for achieving a durable and appealing result.
Roughness That Holds: Mastering Surface Preparation for Durable Plastic Motorcycle Fairing Bonds
In the world of modern motorcycle construction, the way a fairing is bonded to itself or to a replacement component determines how well it will perform under vibration, wind, and heat. Surface preparation is not a ritual to pass through on the way to the adhesive stage; it is the bedrock that makes every subsequent step reliable. When you’re repairing or attaching pieces such as intake duct covers or trim panels, you are not simply gluing two bits of plastic together. You are creating a joint that must flex with the bike, resist moisture ingress, and stand up to the harsh climate that comes with riding. The first impression of a successful bond is often not visible, but it is there in the durability of the repair after a few thousand miles, in the way the edge remains clean, and in the absence of cracks or delamination during cold starts or after a long day at the track. With plastics and reinforced composites, the preparation work is not optional; it is the difference between a quick fix and a lasting repair that can survive the test of time and temperature fluctuations.
The journey toward a strong bond begins with a clean slate. Contaminants such as grease, oil, wax, or silicone can sit on the surface like a tiny barrier, preventing adhesion from forming a true mechanical or chemical grip. A dedicated plastic cleaner or a practical degreasing agent does the heavy lifting here. Wipe thoroughly until the surface feels dry and neutral to the touch. Rinse if the product requires it, and never skip the drying phase. Any hint of moisture at the bonding interface can compromise the intimate contact the adhesive needs to achieve a long-lasting cure. This is particularly important on sensitive fairing materials like ABS plastic and fiberglass-reinforced composites, where even a thin film of residue can become a weak point once heat and vibration begin to work on the joint.
After cleaning, the surface needs to be prepared to accept an adhesive. The goal is to create a micro-roughness that gives the adhesive something to bite into—without cutting into the material itself. A light abrasion with a plastic-safe abrasive is the standard approach. The choice of grit matters: too coarse and you risk gouging or creating stress risers that can propagate cracks; too fine and you may not give the adhesive adequate surface texture to grip. The middle ground is a gentle scuff with a moderate abrasive, often in the range that yields a mild, uniform tooth without removing material beyond necessity. The textured surface acts like tiny anchors for the adhesive, while the underlying substrate remains intact and strong. When you work with a damaged fairing, pay special attention to the bonding areas on both pieces—the damaged area and the replacement component must be treated to the same standard so the joint forms a balanced bond across both surfaces.
As you work the surface, thoughtful attention to the substrate matters. Whether the panel is ABS plastic or a fiberglass-reinforced composite, you are creating an interface that must stay intact under stress. For many plastic or composite substrates, a dedicated primer designed for plastics is a prudent precursor to bonding. This primer does not simply color the surface; it modifies the surface chemistry and improves the interfacial strength of the subsequent adhesive. Primers formulated for plastics often incorporate chemistry that helps the adhesive wet out more effectively and reduces the risk of future delamination when temperature swings or moisture changes occur. Skipping primer can shorten the life of the bond, especially in the demanding environment of a motorcycle fairing where the joint endures teenage temperatures in the sun and subfreezing conditions in the rain and night riding.
The heart of the preparation, however, lies in the adhesive choice itself. When you’re bonding plastics such as ABS or reinforced composites, you want a high-strength, flexible adhesive that is specifically compatible with plastics. The right adhesive can tolerate small dimensional changes and slight flexing without cracking, a common issue with rigid, non-flexible bonds on curved surfaces. Choose a system that offers good elongation, some shear strength, and a cure profile that fits the project pace. Two-part systems are often favored for their robust performance on plastics, delivering strong adhesion when mixed and applied according to the manufacturer’s instructions. If you are using a one-part option, ensure it is explicitly designed for plastic bonding and is capable of remaining somewhat flexible after curing. The chemistry matters: the adhesive should be able to form bonds with plastics without relying solely on surface chemistry that can deteriorate with heat or moisture.
Application is the moment when all the careful prep translates into real strength. Apply a thin, even layer to both bonding surfaces, with enough coverage to ensure a complete seal but not so much that squeeze-out becomes a mess to manage. Over-application can trap air or create a blob that will require more finishing work and can obscure a clean joint line. Precision is the ally here. When you press the two parts together, do so with deliberate control, aligning them carefully and maintaining the correct orientation. A misaligned beam on a fairing can not only look unsightly but also introduce geometric stresses that the bond must withstand. If you have the option, support the joint with clamps, tape, or masking film to maintain pressure and alignment as the adhesive begins its cure. The aim is steady, uniform contact while the adhesive flows and begins to set, forming a continuous, gap-free bond across the interface.
Curing is a quiet, patient phase that rewards restraint. The adhesive’s strength emerges as it cures, and the time it spends under restraint matters as much as the time spent pressing the pieces together. Room temperature curing is the common path, but always follow the product’s specific guidance. In many cases, a full cure may require up to 24 hours or more. Do not expose the joint to moisture, heat, or load during this period, since even small disturbances can impact the final bond quality. It can be tempting to rush ahead to finishing once the surface looks dry, but the molecular bonds inside the adhesive continue to mature, and it is this maturation that grants the joint its endurance. A well-curing bond will resist peeling at the edges, tolerate some flex, and maintain its integrity across weather and daily riding vibrations.
After cure, the finishing phase can begin. Any excess adhesive that squeezed out along the seam should be carefully removed with a sharp scraper or a solvent recommended for the adhesive system. Lightly sand the joint area with a fine grit to smooth edges and prepare the surface for paint or clear coats if you intend to restore the original look. Primer and paint must be compatible with plastic and be chosen to stand up to sun and heat without easily lifting at the bond line. The finish should not fight against the joint; it should flow over the surface to create a seamless appearance that belies the strength of what lies beneath.
There is a critical boundary to respect in this work. Bondo and similar body fillers have a different role in repair work. They excel at filling gaps and restoring shape after a fairing has been damaged, but they should not serve as the primary structural bond. In other words, if you are making a larger repair or replacing a significant component—like an intake duct cover—the adhesive system and proper bonding technique described here are what carry the joint; Bondo can fill and shape after bonding for a smooth finish, but it should not be relied upon as the sole mechanism for joining material to material. For substantial repairs or full panel replacements, rely on a purpose-built plastic adhesive and a sound bonding process rather than treating filler as the structural anchor. This approach protects the integrity of the fairing through use and time, particularly on high-stress sections where a tiny crack can propagate if the bond is not properly designed to handle flex and vibration.
The quiet truth behind a durable bond is that fit matters as much as chemistry. A replacement component that aligns well with the existing structure reduces stress concentrations at the bond line and minimizes the likelihood of failure. When you are swapping a trim cover or a small intake duct piece, confirm fit before you apply any adhesive. A precise fit means less stress, fewer tolerance issues, and a more predictable cure. If you are sourcing a replacement panel, a quick check with a relevant catalog or collection can help ensure compatibility. For example, exploring a dedicated collection of fairing parts can help you verify what fits your model and generation, supporting a smoother bonding process. For instance, you can consult the Honda fairings collection to check fitment across common model years and variants. This step is practical and reduces the risk of mounting a non-compatible component that will fail at the bond line later.
As you reflect on the sequence—from meticulous cleaning to careful priming, precise sanding, thoughtful adhesive selection, controlled application, patient curing, and refined finishing—you realize that the success of any fairing bond is a story of attention to detail. The surface you prepare is the story’s foundation, and the adhesive you choose is the narrative’s hinge. The best outcomes come from a balanced approach: respect for the material, embrace of proper priming, and commitment to a bond that remains flexible enough to accommodate the bike’s dynamic environment while strong enough to resist separation under load. If you are curious about more technical guidance, you can turn to reputable sources that publish plastic-specific data sheets and application notes. These documents lay out the nuances of surface energy, substrate compatibility, and cure profiles in a way that helps you chart a reliable path from bare part to finished bond.
In practice, the steps blend into a cohesive workflow rather than a checklist that must be memorized in isolation. You start with cleaning, then move to surface texturing, followed by priming, and then adhesive bonding. You monitor alignment during curing, and you finish with careful trimming and paint to restore aesthetics. The process is repeatable and scalable, whether you are repairing a small crack along the edge of a fairing or replacing a larger panel. The principles stay the same: clean, roughen, prime, bond, cure, finish. The goal is a bond that remains strong and a surface that looks seamless, as if the repair never happened. For riders and hobbyists alike, achieving this level of craft elevates the work from a mere patch to a durable integration of form and function.
If you need a resource to explore broader repair options and part availability, the site’s fairing collections offer a practical entry point to find compatible pieces while keeping the workflow consistent with the prepping and bonding approach described here. You can explore a specific brand’s fairing collections to review fitments and options that align with your model, thereby reducing guesswork and ensuring you start with a component that will bond cleanly.
External resource: For a more technical perspective on the role of surface preparation and bonding chemistry, see the general reference data sheets that accompany plastic adhesive systems, which can provide deeper insight into surface energy, primer compatibility, and curing behavior. https://www.bondo.com/en-us/technical-data-sheets/
Choosing the Right Adhesive for Bondo Motorcycle Fairings: Durability, Flexibility, and Precision
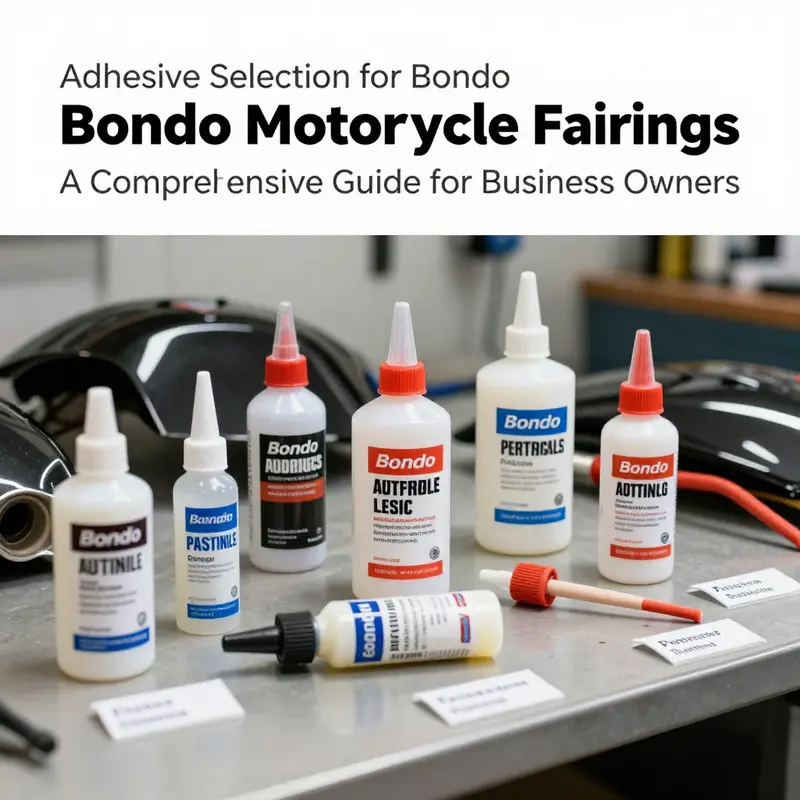
Bonding Bondo-finished motorcycle fairings requires understanding plastics and composites, selecting a bond that endures vibration and temperature changes, and preparing surfaces properly. For ABS, fiberglass, and fiberglass-reinforced composites, choose high-strength, flexible adhesives designed for automotive plastics. Start with a precise fit, clean the surfaces with a degreaser, lightly roughen with 800–1200 grit, and wipe clean. Two main families work well: two-part epoxies and polyurethane-based adhesives. Epoxies offer high strength but can be stiff; select formulations with some toughness for flex. Polyurethane-based adhesives provide adhesion with elasticity and better resistance to thermal cycling. Avoid generic glues and cyanoacrylates for long-term bonds on panels that flex. Follow manufacturer mixing ratios, apply thin even layers, align parts, clamp, and cure fully before exposure to moisture or heat. After curing, finish by removing excess adhesive and priming with plastics-compatible primer and paint. Test fit before color work to verify alignment and airflow. For larger repairs, opt for an adhesive that balances strength and elasticity. Consult manufacturer data sheets for substrate compatibility and curing times. The key is a clean surface, proper roughening, appropriate adhesive choice, careful application, and patient curing. Additional guidance is available from official product resources and model-specific catalogs.
Adhesive Craft and Feathered Edges: Mastering Bondo on Motorcycle Fairings
The challenge of restoring a motorcycle fairing is more than cosmetic. When you’re working with plastics and composite materials, the bond between filler and skin must be both strong and forgiving. Bondo, a long-standing filler in auto body work, can be a valuable tool on fairings when used as a shaping and smoothing layer rather than a sole structural bond. The goal is a repair that remains true to the bike’s aerodynamics, resists cracking under vibration and heat, and blends seamlessly with the surrounding panels. Achieving that starts long before the filler goes on. It begins with preparing the surface so the adhesive and the filler can do their jobs without fighting moisture, oils, or waxes. It continues through careful layering, careful curing, and finally the feathered, finished appearance that makes the repair invisible to the eye at riding speed and wind pressure alike.
Surface preparation is the foundation of a durable repair. Start by removing as much contamination as possible from the repair zone. This means stripping away paint, wax, and any protective coatings that may have accumulated on the surface. A grinder or sanding disc can be useful here, but the key is to reach a clean, raw surface. Once the damaged area is exposed, extend your cleaning zone at least an inch beyond the perimeter of the damage. Small primer edges or surface sheen can prevent the filler and adhesive from biting into the material properly, and a one-inch buffer zone helps ensure a robust bond that won’t fail at the first bump or flex from road vibration. After cleaning, wipe the area with a solvent that evaporates quickly and leaves no residue. A wipe-down with a plastic-safe cleaner is ideal, followed by a thorough air-dry. Any moisture left on the surface will compromise adhesion, so patience at this stage pays off in the long run.
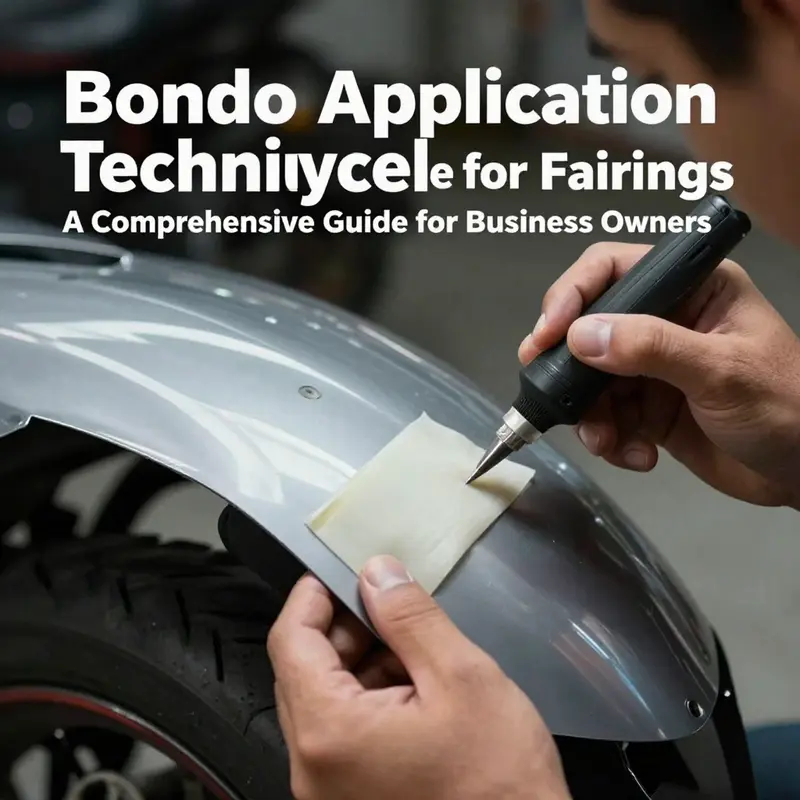
Surface roughening follows, but it must be done with care. Lightly abrade the bonding surfaces to create a micromechanical bite that adhesives can grip. The typical range is deliberate, gentle abrasion with medium-grit paper that leaves a dull, uniform texture. The goal is not to remove material, but to disrupt the surface’s smoothness enough for good bonding. After roughening, remove the dust with a clean tack cloth or a dry microfiber, and ensure the area is completely free of fibers or residue. Do not over-sand and induce unnecessary thinning of the plastic or composite skin; fairings are often only a few millimeters thick in critical areas, and overdoing the sanding can weaken the panel or create new stress points. With the surface prepared, the next step is selecting the adhesive system designed for plastics and composites.
For bonding Bondo to ABS plastics or fiberglass-reinforced composites, the adhesive choice matters as much as the filler. The ideal approach uses a high-strength, flexible adhesive that is formulated for plastics. In practice, this means an epoxy-based system or a two-part adhesive specifically designed for plastic substrates. The emphasis is on compatibility with plastic and the ability to tolerate some flexing without cracking. It is not the time for ordinary hardware-store glues; the bond must be able to handle the heat of sun exposure, engine heat, and the constant flexing of fairings during riding. Follow the manufacturer’s mixing ratios and cure guidelines to the letter. Apply a thin, even layer to both surfaces and then press the parts together with steady, precise alignment. The contact area should be as continuous as possible; uneven gaps invite stress concentrations that can propagate cracks or allow moisture to intrude beneath the bond line.
Clamping or holding the bonded parts in place during cure is essential. Use clamps, painter’s tape, or masking tape to hold the pieces together while the adhesive sets. The cure time can vary, but a typical room-temperature cure runs around a full day; some systems require longer or shorter times depending on temperature and humidity. Do not rush this stage by stressing the joint or exposing it to water or heat. If you must move the bike, protect the repair with a light wrap or a soft barrier to prevent accidental contact that could disturb the bond. Once the adhesive has fully cured, you can begin shaping the repair. This is where the line between repair and art blurs. A smooth, blended transition between old and new material makes the repair almost disappear when viewed from any typical riding position.
Finishing the repair involves careful trimming and leveling of the fused surface. A light touch with fine-grit paper is required to remove any adhesive squeeze-out and to refine the shape. Progress through progressively finer grits—from around 120 to 400 or higher—until the surface is uniformly smooth. A tack cloth is crucial at this stage to remove all dust before any primer or paint is sprayed. The primer chosen should be plastic-compatible and tuned for the exact type of fairing material you’ve treated. Plastic primers are designed to adhere to ABS and fiberglass composites while providing a uniform base for paint. With primer in place and fully cured, the color coats can begin. At this stage, match and blend are critical; a well-applied primer and paint job will obscure the repair and maintain the bike’s original lines.
Even when the bond is strong, the repair may still benefit from the disciplined use of Bondo as a filler, especially on larger repairs or where the repair needs to be feathered into the adjacent panels. The layered approach helps distribute stress and reduce the chance of a new crack forming along the repair seam. When applying Bondo, work in thin, even layers. Allow each layer to cure fully before applying the next. For larger areas, incorporating fiberglass mesh within the first layer of Bondo can provide additional reinforcement and resistance to cracking under flex. The mesh acts as a scaffold that holds the filler together, distributing loads more evenly across the repair site. After the final layer cures, you re-enter the finishing phase with progressive sanding. Start with a coarser grade like 120 to shape and remove excess material, then move through 180, 240, and finally 400 grit to achieve a glass-smooth surface. A tack cloth after each stage helps keep the surface clean and ready for the next step. The feathering of edges is critical; you want a gradual blend from the repaired area into the surrounding fairing so the eye reads it as a single surface rather than a repaired patch. A well-feathered edge reduces the likelihood of visible edge lines after painting and minimizes stress concentrations that could undermine the finish.
One practical consideration is the fit of any replacement components, such as intake duct covers or trim pieces. A perfect fit minimizes the amount of filler required and reduces stress on the bond line. Before committing to adhesives, test-fit the replacement parts to confirm alignment with the surrounding panels. If a piece binds or sits high, adjust the fit in a controlled manner rather than forcing it into position. This principle holds especially true when dealing with complex curves or tight radii common to modern fairings. A precise fit supports a longer-lasting bond and a cleaner final appearance. For riders who want to explore options, a broad view of available fairings can be found in the Honda fairings collection, which offers a range of shapes and fits to suit different models and riding styles. This resource helps ensure that the chosen replacement aligns well with your existing panels, further reducing stress on the repair. Honda fairings collection.
Beyond the bond and the filler, there is a broader philosophy to repairing fairings. It is not only about making a seam disappear but about preserving the structural integrity and aerodynamic performance of the bike. The right adhesive provides a flexible, durable bond that accommodates the inevitable flex and vibration of riding. The right filler provides a smooth, seamless surface that can take primer and paint without cracking or peeling. The finishing steps—careful sanding, meticulous feathering, and the correct priming—are what convert a temporary fix into something that looks as if it was manufactured in one piece. The process encourages a patient, methodical mindset rather than a quick, hurried repair. This mindset—slow, careful preparation, measured layering, and deliberate finishing—delivers results that withstand miles of road and the elements.
If you are new to Bondo and plastic bonding, a steady pace is essential. Do not rush through the layers, and never attempt to “hide” a bad bond with more filler. The harsh truth is that a bond that isn’t prepared to flex with the panel will fail, often at a vulnerable edge or corner. Respect for the material, the geometry of the fairing, and the physics of wind and vibration will guide you toward a repair that looks good and lasts. The art here is in the details: ensuring the bond adheres to the substrate, layering with reinforcement where needed, shaping with control, and finishing with consistency. With patience and a disciplined approach, you can restore the fairing’s appearance and preserve its performance.
For readers seeking deeper, expert techniques on Bondo application and finishing, further reading offers a detailed exploration of smoothing and durability. This resource dives into feathering, priming, and the nuances of tool selection for optimal results. External resources can provide additional perspective on professional-grade workflows and troubleshooting. For more on these advanced practices, see the guidance linked here: Mastering Bondo Application: Expert Tips for Smooth and Durable Repairs. Additionally, exploring related repair literature can help you align your approach with broader automotive restoration standards and ensure that your fairing repairs meet or exceed factory expectations over time.
Polished Perfection: Finishing Touches After Bonding Motorcycle Fairings
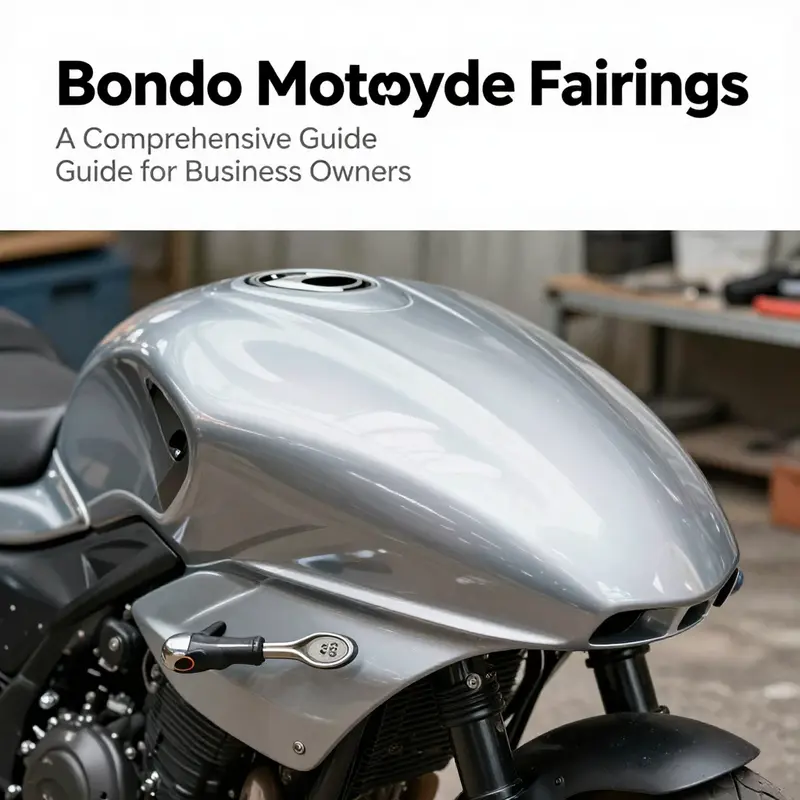
When the bond has cured and the panels have been joined, the work is far from over. The finishing phase is what separates a temporary fix from a durable, showroom-ready repair. The goal is a surface that looks as if the fairing always belonged there, with no telltale seams or imperfections that betray the repair. This requires respect for the materials you’re working with, a disciplined approach to priming and painting, and the patience to let each layer build evenly. The journey from a repaired joint to a seamless surface begins with one simple principle: prepare, protect, and perfect.
Priming is more than a first coat. It is the chemical seal that keeps moisture out of the repaired area and provides a uniform canvas for paint adhesion. Plastic and fiberglass fairings respond best to primers formulated specifically for those substrates. A primer that can flex with the panel while maintaining a strong bond to resin and plastic is essential. Apply it in light, even coats, allowing each layer to set before the next. The aim is to create a surface that is slightly bitey to future paints, not a thick crust that hides misaligned edges. If you’ve reinforced a joint with a plastic-appropriate adhesive, the primer will also help to mitigate any micro-movements that occur as the bike vibrates on the road.
Color matching what you see on the rest of the bike beckons a careful, methodical approach. The most reliable route is to use a basecoat that matches the surrounding paint, then top it with a clear layer that seals in the color and adds gloss. If you’re doing this yourself, the safest path is to practice on a spare panel or a test strip before you commit to the repaired area. Lighting matters here. The shade you see under fluorescent shop lights can differ from daylight, so check colors in natural light as you approach the final tint. If you’re near a professional painter, a pristine color blend can be achieved by blending the repaired area into the adjacent panels, ensuring the transition is invisible from a normal rider’s vantage point. For riders sourcing replacement trim or duct covers, there’s value in exploring compatible parts from established fairing collections; the Honda fairings collection, for example, can be a useful reference point for fitment and color compatibility. Honda fairings collection.
A basecoat and clearcoat system is often the preferred route for most plastics and fiberglass composites. The basecoat provides the color, while the clearcoat adds depth, UV resistance, and a protective layer against abrasion. In practice, this means applying several thin coats of color, allowing each to level and dry, and then moving to a clear coat with careful, even passes. Do not rush this stage; heat, humidity, and overspray can cause cratering or orange peel if the paint isn’t given time to cure. A steady hand, controlled airflow, and consistent patter are the ally of a flawless finish. If the weather or shop environment is outside ideal conditions, consider using a booth or a controlled area to minimize dust and temperature fluctuations. The results are worth the extra attention, because a well-applied base and clear coat will help the finish resist yellowing, cracking, and UV damage for years to come.
Even with an immaculate color, the repair can show through if the edges aren’t properly sealed. The clear coat is not just for shine; it locks in the pigment and provides a protective barrier against moisture and airborne contaminants. Multiple thin layers beat a single thick coat for several reasons. A thin, uniform application dries more evenly and reduces the chances of runs. It also helps to minimize dust entrapment and orange peel. After the final clear layer cures, it’s time for the finishing touches that bring back the gloss and the smooth, glass-like feel that makes a fairing look factory-fresh. The first post-cure step is to assess the surface for texture irregularities. Any orange peel or subtle blemishes can be addressed with very fine sanding and polishing. It is during this stage that many riders begin to appreciate the value of patient, incremental work over quick fixes.
The final sand-and-polish stage should be approached with respect for the underlying material. Start with a grit around 2000 to gently address minor texture concerns without cutting into the color layer. This is not the time for aggressive material removal; you want to preserve the integrity of both the color and the protective clear. A succession of progressively finer polishing compounds follows, moving from a light cutting compound to a high-gloss finish. The objective is to restore the surface’s reflective quality while maintaining a uniform depth of color. When done correctly, the repaired area will blend so well that the eye cannot detect a boundary between the old paint and the new work.
Even the best-looking finish requires ongoing care. A wax or paint sealant adds a hydrophobic layer that helps shed water and contaminants as you ride. This protective layer also makes future cleaning easier and less abrasive. When you wash the bike, use a mild soap and soft cloth, avoiding abrasive pads that can dull the gloss. Regular care extends the life of the finish and reduces the likelihood of micro-scratches that can accumulate around repaired joints. The balance between aesthetics and durability is achieved through this subtle regimen of protection and maintenance, rather than a single, heroic but fragile effort come springtime.
Beyond the cosmetic, you’ll want to confirm the repair’s structural resilience as you field-test the bike. A properly bonded panel should remain stable under the stresses of cornering, braking, and the vibration of pavement. If you notice any flex or movement around the repaired area after riding, revisit the bond with a critical eye. Re-check the surface prep, adhesion, and curing environment. It is not uncommon to adjust the finishing approach if the panel experiences unexpected stress. A truly successful repair is not just about how it looks; it is about how it behaves under real-world conditions and how long it continues to perform without failure.
The process of finishing after a bond is also a chance to reflect on the fitment of the entire kit. Sometimes a pair of panels or a replacement trim piece doesn’t align perfectly with the surrounding curvature. In those moments, the finishing steps can help mask minor misalignments, but the best outcome begins with a precise initial fit. If you’re replacing a trim cover or duct piece, ensure the new component sits flush against the mounting points and follows the panel line as closely as possible. The more accurate the underlying join, the easier the finishing work becomes, and the less stress points you’ll introduce into the bond over time. For riders who want to explore compatible parts that maintain continuity with the bike’s overall styling, the Honda fairings collection is a helpful reference point for matching curves and aesthetics. Honda fairings collection.
In documenting this workflow, it is important to reiterate a fundamental precaution: never rely on generic filler as the primary structural bond. A durable repair depends on a plastic-appropriate adhesive for joints, with filler used only to address surface irregularities after bonding. This distinction is critical for long-term durability. Filler alone cannot compensate for improper adhesion or poor surface preparation, and attempting to hide a weak bond under a thick layer of filler will only invite future failures. A layered approach—clean, roughen, bond with a flexible plastic adhesive, clamp, cure, then fill, finish, and protect—yields the most reliable results. It is a disciplined workflow rather than a single trick that yields resilience against the vibrations, airflows, and weather that define riding.
As you close this phase and step back to view the finished work, you gain a sense of how a small, carefully executed sequence can transform a repaired panel into a seamless part of the bike. The joint might be invisible to the casual observer, but the confidence it affords the rider is tangible. The finish resonates not just with the eye but with the sense of the bike’s unity—how the panels, once separated, now speak a single language of form and function. The commitment to precision in priming, color matching, clear coating, and polishing translates into a finish that resists the elements and holds up under the demands of riding. And when the work is truly done, the bike is not merely repaired; it is restored to its original statement of design, with a reliability that invites the next ride rather than the next repair.
External resource on plastic-specific finishing techniques can offer deeper insights into the nuances of adhesion, priming, and coating processes. For further reading, see the external reference: https://www.aliexpress.com/i/4000485416280.html
Final thoughts
Successful bonding of motorcycle fairings requires a systematic approach, from meticulous surface preparation to thoughtful adhesive selection and application techniques, culminating in careful finishing touches. By following the strategies outlined in this guide, business owners can enhance their repair services, provide high-quality results for customers, and ultimately foster long-lasting relationships with bike enthusiasts. Mastering these skills not only improves the finished product but also positions businesses as leaders in quality motorcycle repair and customization.