Introduction
Fiberglass motorcycle fairings are essential for both function and style, offering aerodynamic benefits and a sleek appearance. For business owners in the motorcycle customization and repair industry, mastering the process of DIY fiberglass fairing fabrication and repair can lead to significant cost savings, customization opportunities, and enhanced service portfolios. This guide breaks down the process into five critical chapters, starting with surface preparation methods that ensure strong adhesion and durability. Next, it explores precise material selection and layering techniques vital for creating structurally sound fairings. The fabrication chapter covers mold creation and building from scratch, offering insight into custom designs. After fabrication, the finishing processes highlight sanding and painting to achieve a professional aesthetic. Finally, maintenance strategies ensure fairings retain their quality and longevity, maximizing customer satisfaction and repeat business. Each chapter is designed to equip business owners with detailed knowledge to execute fiberglass fairing projects effectively and profitably.
Tables of Contents
Chapter 1: Preparation and Surface Treatment in DIY Fiberglass Motorcycle Fairing
- Optimizing Your Workspace and Cleaning Methods for Flawless Fiberglass Adhesion
- Mastering Fiberglass Layering and Resin Application for Durable Motorcycle Fairings
- Refining Fiberglass Surfaces: Sanding, Filling, and Finishing Techniques for Durable Motorcycle Fairings
- Essential Environmental and Safety Practices During Resin Curing and Surface Treatment
- Achieving a Flawless Finish: Sanding, Priming, and Painting Your Fiberglass Fairing
Chapter 2: Choosing Optimal Fiberglass and Resin Combinations for DIY Motorcycle Fairings
- Mastering Resin and Fiberglass Selection for Durable and Lightweight Motorcycle Fairings
- Optimizing Surface Preparation and Fiberglass Layering for Superior Adhesion and Strength
- Mastering Fiberglass Layering and Resin Curing for Durable DIY Motorcycle Fairings
- Enhancing Durability and UV Resistance Through Strategic Fiberglass Layering and Protective Finishes
- Optimizing Materials and Layering for Lightweight, Durable, and High-Performance Fiberglass Fairings
Chapter 3: Fabrication Process and Mold Creation for DIY Fiberglass Motorcycle Fairing
- Mastering Design and Pattern Crafting for Flawless DIY Fiberglass Fairing Molds
- Mastering Mold Making: Essential Techniques for Crafting Durable Fiberglass Motorcycle Fairings
- Seamless Fiberglass Layup and Finishing for Durable, Custom Motorcycle Fairings
- Balancing Innovation and Safety: Essential Technological and Protective Measures in DIY Fiberglass Fairing Fabrication
- Navigating the Economic, Geopolitical, and Social Dimensions of DIY Fiberglass Fairing Fabrication
Chapter 4: Finishing, Sanding, and Painting Processes in DIY Fiberglass Motorcycle Fairing
- Mastering Fiberglass Application and Resin Curing for Durable Motorcycle Fairings
- Mastering Sanding and Surface Preparation for Flawless Fiberglass Fairing Finishes
- Mastering Surface Perfection: Filling and Smoothing Techniques for Fiberglass Fairings
- Essential Techniques for Priming and Painting Durable DIY Fiberglass Motorcycle Fairings
- Mastering Protective Finishes and Maintenance for Lasting Fiberglass Fairing Appeal
Chapter 5: Maintenance and Longevity Considerations for DIY Fiberglass Motorcycle Fairing
- How Initial Fabrication Excellence Extends the Life of DIY Fiberglass Fairings
- Gentle Cleaning and Effective UV Defense for Lasting DIY Fiberglass Fairings
- Enhancing Durability: The Essential Role of Protective Coatings for DIY Fiberglass Fairings
- Proactive Damage Assessment and Prompt Repairs: Keys to Lasting DIY Fiberglass Motorcycle Fairings
- How Environmental and Mechanical Stresses Shape the Care and Durability of Your DIY Fiberglass Fairing
Chapter 1: Preparation and Surface Treatment in DIY Fiberglass Motorcycle Fairing
1. Optimizing Your Workspace and Cleaning Methods for Flawless Fiberglass Adhesion
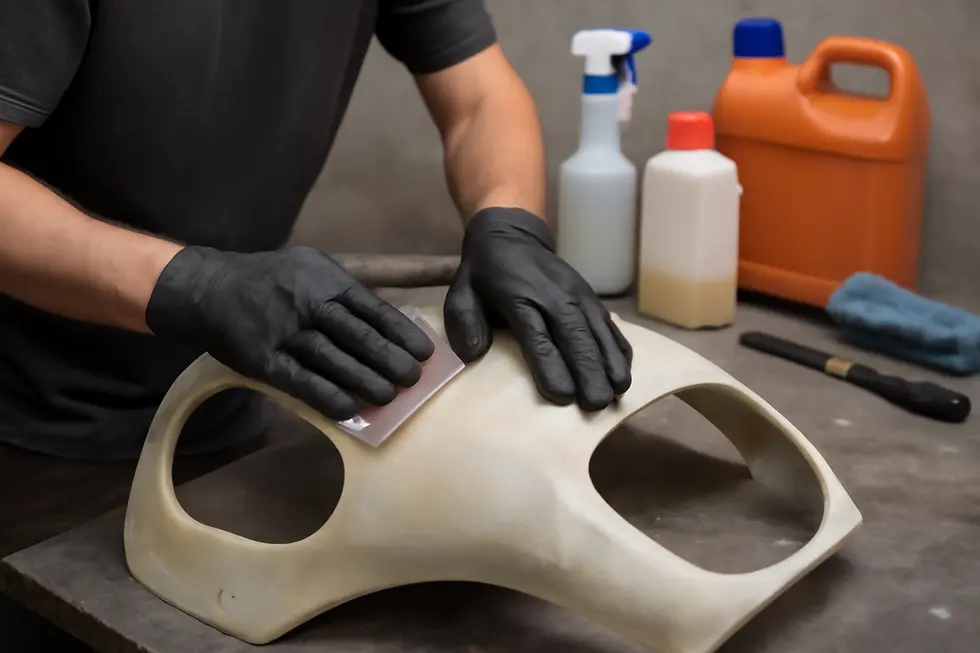
Creating the ideal workspace and mastering initial cleaning are vital for successful fiberglass motorcycle fairing projects. Choose a clean, well-ventilated area with ample space to maneuver comfortably. Protect surfaces with disposable coverings to catch resin drips and sanding debris. Always wear protective gear like gloves and respirators to guard against fiberglass dust and resin fumes. Begin preparation by washing the fairing with mild soap and lukewarm water, using soft cloths to avoid scratching. Avoid harsh chemicals that can harm the surface. Once dry, lightly sand the area with coarse grit sandpaper until the glossy sheen disappears, ensuring the resin bonds strongly to the surface. Thoroughly remove dust by vacuuming or wiping to prevent imperfections in the final finish. These careful steps help build a durable, smooth foundation for fiberglass application, minimizing flaws like air bubbles or weak spots. For further practical insights into workspace setup and cleaning, you can follow this detailed video guide. Additionally, exploring the comprehensive motorcycle fairings blog offers valuable context on fairing customization and care.
2. Mastering Fiberglass Layering and Resin Application for Durable Motorcycle Fairings
Achieving a strong and smooth DIY fiberglass motorcycle fairing hinges on meticulous layering and resin application. After cleaning and sanding the surface to enhance adhesion, cut fiberglass cloth slightly larger than the damaged or shaped area. Begin with smaller patches for cracks, layering progressively larger pieces to feather edges seamlessly. Fully saturate each fiberglass layer with polyester resin using a brush, carefully avoiding air bubbles that weaken strength. Depending on repair needs, multiple alternating layers of cloth and resin are applied to build durability. Allow each resin layer to fully cure before adding the next, ensuring structural integrity. Once cured, sanding refines the surface for a flawless finish, transitioning smoothly into filler and primer stages. The choice of marine-grade polyester resin is favored for its workability and non-sag properties on vertical parts. For detailed guidance, consult comprehensive video tutorials such as How Do You Repair Fiberglass On A Motorcycle? to perfect your technique.
3. Refining Fiberglass Surfaces: Sanding, Filling, and Finishing Techniques for Durable Motorcycle Fairings
Once the fiberglass cloth and resin layers have fully cured on your motorcycle fairing, attention shifts to refining the surface for both strength and aesthetics. Sanding begins with coarse grit to smooth out excess resin and level any uneven patches, progressively advancing to finer grits to achieve a seamless surface blending with the surrounding areas. Small flaws like pinholes or microcracks are then addressed using specialized body fillers made for fiberglass, which, once hardened, are sanded flush to ensure uniformity. The next critical step is applying a primer formulated for fiberglass to prepare the surface for painting. Multiple coats of automotive paint follow, often finished with a clear coat for added protection and gloss. Maintaining this finish requires shielding the fairing from prolonged sun exposure, gentle cleaning without harsh chemicals, and occasional protective waxing, which altogether preserve the structural integrity and appearance over time. For a detailed visual guide on this complete process, refer to How Do You Repair Fiberglass On A Motorcycle? – YouTube. For deeper insights on fairing preparation steps, explore this comprehensive guide on motorcycle fairings.
4. Essential Environmental and Safety Practices During Resin Curing and Surface Treatment
Proper ventilation is crucial during resin application and curing, as volatile organic compounds and styrene vapors can harm respiratory health. Always work in a well-ventilated space or outdoors to minimize exposure. Equally important is wearing appropriate personal protective equipment: respirators rated for organic vapors, gloves, eye protection, and protective clothing shield against chemical irritation and airborne dust. Sanding cured fiberglass generates fine dust that can irritate skin and lungs, so employ dust masks and clean the work area thoroughly after sanding. Environmental factors like temperature and humidity influence resin curing times and adhesion quality; adhering to manufacturer guidelines ensures optimal results. Finally, responsibly disposing of resin waste and sanding dust prevents environmental contamination. These safety and environmental practices complement proper surface preparation techniques, fostering a secure workspace and durable, high-quality fairing outcomes. For practical guidance, explore this comprehensive motorcycle fairing resource.
5. Achieving a Flawless Finish: Sanding, Priming, and Painting Your Fiberglass Fairing
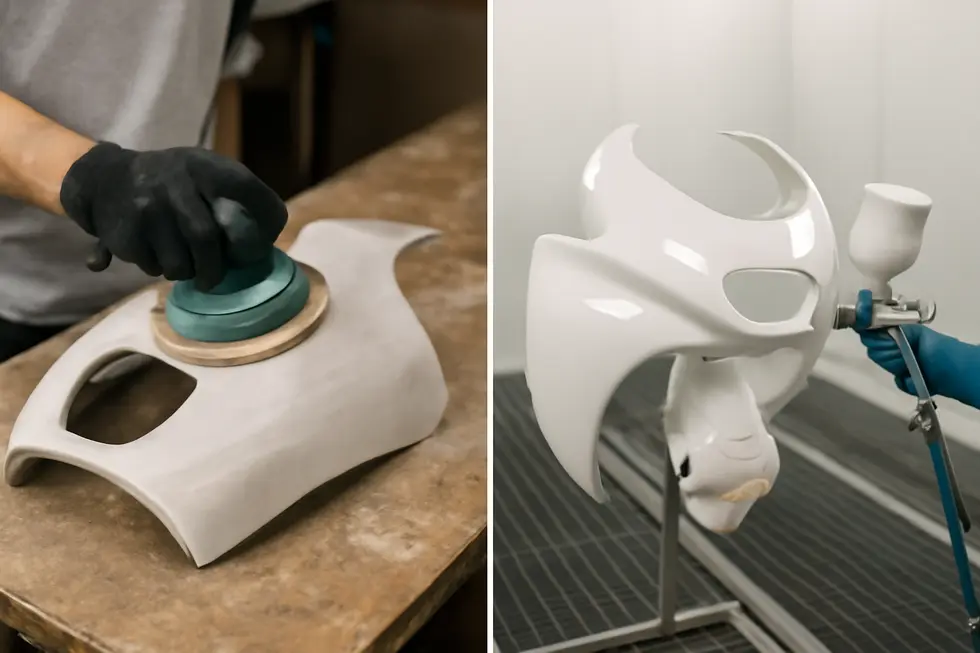
After the fiberglass resin fully cures, meticulous sanding is essential to create a smooth base for finishing. Begin with coarse grit sandpaper (80-120 grit) to level uneven areas, then gradually progress to finer grits up to 400 or more, ensuring an even, polished surface. Carefully inspect for minor flaws like pinholes or scratches, filling them with body filler or glazing putty. Once hardened, sand these spots until they blend seamlessly. Applying a fiberglass-compatible primer evenly over the entire surface ensures strong paint adhesion and an even base color. After drying, lightly sand the primer to eliminate texture, preparing the fairing for paint. Use quality automotive or motorcycle-specific paints, applying multiple thin layers to avoid runs, allowing each coat to dry thoroughly. For enhanced durability and shine, a clear protective topcoat is recommended. Regular gentle washing and periodic waxing help maintain this finish over time, preserving both color and gloss. For comprehensive guidance on these finishing techniques, detailed practical demonstrations are available here, offering step-by-step visual support to master these critical final steps. For additional insights on motorcycle fairings and projects, explore this resource.
Chapter 2: Choosing Optimal Fiberglass and Resin Combinations for DIY Motorcycle Fairings

1. Mastering Resin and Fiberglass Selection for Durable and Lightweight Motorcycle Fairings
Selecting the right fiberglass and resin is crucial to crafting a durable, lightweight motorcycle fairing. Commonly, E-glass offers an affordable yet reliable option, providing good strength suited for most DIY builds. For enhanced rigidity and weight savings, S-glass serves high-performance projects with superior tensile properties. Resin choice significantly impacts adhesion, flexibility, and curing characteristics. Polyester resin is budget-friendly and cures fast but emits strong fumes and can be brittle. Alternatively, epoxy resin yields stronger bonds, lower shrinkage, and less odor, albeit at higher cost and mixing complexity. For balance, vinyl ester resin offers improved chemical resistance with easier handling. Incorporating lightweight core materials like foam or balsa can increase stiffness without bulk, benefiting premium builds. Employing proper layering techniques and resin saturation ensures a robust bond and smooth finish, setting the foundation for a professional-quality fairing. For deeper insights into quality fairing materials, explore this comprehensive guide to motorcycle fairings.
2. Optimizing Surface Preparation and Fiberglass Layering for Superior Adhesion and Strength
Achieving a durable, high-quality DIY fiberglass motorcycle fairing hinges on meticulous surface preparation and strategic layering. Begin by roughening the substrate with coarse sanding to eliminate gloss and promote mechanical bonding, then thoroughly clean to remove dust and contaminants. Selecting the right fiberglass cloth—typically a combination of uni-directional layers oriented at ±30-40° and woven roving—ensures a robust cross-hatch pattern that enhances flexibility and resistance to stress. Epoxy resin, favored for its strong adhesive properties and environmental durability, is carefully applied and squeegeed to saturate each layer fully, avoiding air pockets or excess that weaken the laminate. Allowing every layer to cure completely before adding the next secures optimal interlayer adhesion. Using these techniques, combined with controlled resin application and cross-oriented layering, produces a lightweight, resilient fairing primed for finishing. For deeper insights into advanced layering methods, see detailed layering strategies. For broader context, explore our comprehensive motorcycle fairings resource.
3. Mastering Fiberglass Layering and Resin Curing for Durable DIY Motorcycle Fairings
Selecting suitable fiberglass material and resin sets the foundation for a strong motorcycle fairing. Woven fiberglass cloth offers flexibility and reinforcement, while chopped mat adds bulk and rigidity. Polyester resin is a budget-friendly choice, but epoxy resin provides superior adhesion and chemical resistance for a longer-lasting bond. Proper layering begins with applying a release agent on the mold, then a gelcoat layer ensures a smooth finish. Fiberglass cloth or mat is carefully laid over each resin-coated layer, with fibers oriented alternately to boost structural integrity. Even resin application via brushes or rollers removes air bubbles that could weaken the composite. After all layers are completed, curing in a stable environment—often at room temperature or slightly elevated heat—allows the resin to harden fully without distortion. This gradual curing phase is essential to achieve maximum strength and durability, preventing surface imperfections or cracks during demolding. For comprehensive guidance on these techniques, exploring detailed composite manufacturing resources can be particularly instructive.[4] For further insight into customization, visit this detailed blog on affordable motorcycle fairings at Summit Fairings.
4. Enhancing Durability and UV Resistance Through Strategic Fiberglass Layering and Protective Finishes
Selecting the right fiberglass cloth or mat and resin type is pivotal for durable DIY motorcycle fairings. Using epoxy or polyester resin combined with layered fiberglass arranged at alternating ±30-40° angles creates a cross-hatch pattern that boosts strength and flexibility. Starting with a UV-stable gel coat as the initial layer significantly improves long-term sun resistance, preventing yellowing and material degradation common to untreated fiberglass. Applying resin-impregnated fiberglass layers over the gel coat, followed by careful resin removal ensures consistent bonding without weak spots. High-stress areas benefit from additional reinforcement with extra layers or heavier fiberglass cloth, enhancing impact resilience. After curing, sanding smooth the surface before applying a high-quality primer and finishing with UV-resistant clear coat or paint to complete protection. This balanced approach integrates strength, flexibility, and UV stability, vital for lasting custom fairings. For further insights on professional techniques, aerospace composite fabrication guides provide valuable parallels.
Explore comprehensive strategies at Summit Fairings blog.
Reference: Aerospace and composite fabrication layering techniques.
5. Optimizing Materials and Layering for Lightweight, Durable, and High-Performance Fiberglass Fairings
Selecting the ideal fiberglass and resin combination is crucial for crafting lightweight yet robust motorcycle fairings. Woven fiberglass cloth provides superior strength and a smooth finish, while fiberglass mat adds bulk and easier resin absorption. For performance-focused projects, premium fibers like S-glass enhance stiffness but demand careful handling. Polyester resin offers affordability and ease, but epoxy resin excels in mechanical strength and adhesion, making it preferred for structural or racing applications. Applying a UV-resistant gelcoat as the exterior layer ensures long-lasting protection and a flawless finish. Layering techniques emphasizing alternating fiberglass orientations at ±30-40° create a cross-hatch pattern that maximizes flex resistance and strength, often requiring 3 to 5 layers depending on stress points. Ensuring thorough resin wet-out and proper curing optimizes bonding and durability. Advanced fairings may integrate carbon fiber or aerospace-grade epoxies to boost performance, balancing weight and resilience. This approach aligns with industry standards and enhances both durability and appearance for DIY fabricators. For more on choosing the right fairing options, explore affordable motorcycle fairings.
Chapter 3: Fabrication Process and Mold Creation for DIY Fiberglass Motorcycle Fairing

1. Mastering Design and Pattern Crafting for Flawless DIY Fiberglass Fairing Molds
Creating custom fiberglass motorcycle fairings begins with precise design and pattern crafting. Start by sketching your fairing’s shape or using CAD tools to visualize contours tailored to your bike. For hands-on DIY work, physical plugs formed from foam, clay, or wood offer tactile shaping that directly translates into molds. Ensuring the plug’s surface is smooth and accurate is vital because it determines the final fairing’s finish. After perfecting the plug, apply a release agent to prevent resin adhesion, then build the mold by layering fiberglass cloth soaked in polyester or epoxy resin. Once cured, this mold serves as the female form for producing the actual fairings. Reinforcing the mold with extra fiberglass layers enhances durability and precision. Aligning mold features with motorcycle frame points during design guarantees seamless installation. This integrated approach lets hobbyists capture custom aesthetics and structural integrity in every fairing, blending creative design with composite fabrication techniques. For more insights into durable resin choices and finishing tips, explore detailed guides on marine-grade polyester laminating resins that optimize wet-out and adhesion for DIY composite projects. Also, discover a variety of motorcycle fairing options that match your custom fabrication aspirations through this resource.
2. Mastering Mold Making: Essential Techniques for Crafting Durable Fiberglass Motorcycle Fairings
Creating a reliable mold is fundamental in fabricating custom fiberglass motorcycle fairings. Typically, a master pattern—crafted from sculpted foam, an existing part, or a precise 3D model—serves as the base for mold construction. Applying a gel coat creates a smooth, glossy surface, followed by layered fiberglass saturated with resin to build strength and durability. This mold can be one-piece or segmented, depending on the fairing’s complexity. DIY fabricators often use hand layup methods, manually placing fiberglass cloth and saturating it with resin to capture intricate details, mindful to prevent air bubbles for optimal strength. More advanced techniques like vacuum bagging enhance fiber-to-resin ratios and surface finish by compressing layers under vacuum pressure. For even lighter, high-strength parts, resin infusion—where resin is drawn through dry fiberglass by vacuum—is an option for skilled DIYers. This balance of accessible mold making and strategic layup methods equips enthusiasts to produce strong, functional, and aesthetically pleasing fairings. For practical guidance, tutorials such as the YouTube video “How to Easily Make a Flawless Fiberglass Mold Template” offer invaluable insights into these processes. Explore more fabrication tips at your ultimate source for affordable motorcycle fairings.
External resource: https://mwfiberglass.com
3. Seamless Fiberglass Layup and Finishing for Durable, Custom Motorcycle Fairings
Achieving a durable, high-quality DIY fiberglass motorcycle fairing begins with meticulous mold preparation, ensuring a smooth, clean surface treated with an effective release agent to enable easy demolding. The fiberglass layup combines carefully cut cloth layers with saturating resin—typically polyester for affordability or epoxy for superior strength. Applying resin evenly with brushes or rollers while laying fiberglass cloth builds the shape and structural integrity, repeated in multiple layers for strength. Curing solidifies the composite, with timing and temperature tailored to resin type. Once cured, the part is gently separated from the mold, trimmed, and sanded progressively using fillers to perfect smoothness. The final finish involves priming and coating with UV-resistant paints and clear coats, enhancing both protection and aesthetics. This integrated process balances strength, precision shaping, and refined surface quality, providing an accessible method for fabricating custom motorcycle fairings. For deeper insights, visit the guide to affordable motorcycle fairings. Additional technical details on resin options and layup can be found in the TotalBoat Polyester Laminating Resin resource.
4. Balancing Innovation and Safety: Essential Technological and Protective Measures in DIY Fiberglass Fairing Fabrication
Creating durable fiberglass motorcycle fairings demands thoughtful material choices and strict safety measures. Polyester and epoxy resins combine with fiberglass cloth to define strength and finish quality, with molds crafted from smooth, release-agent-treated surfaces ensuring consistent shapes. While professional techniques like vacuum bagging improve fiber consolidation, DIY builders often balance complexity with available resources. Safety remains paramount—protective gloves, respirators, and clothing guard against resin fumes and fiberglass dust. Working in well-ventilated areas reduces harmful VOC inhalation, and correct storage of chemicals prevents fires and injuries. Maintaining suitable curing temperatures ensures resin bonds form properly, avoiding weak spots in the fairing. Using sharp tools carefully and controlling dust mitigate physical risks and contamination. These integrated technological insights and safety practices help hobbyists achieve reliable, high-quality results while protecting themselves. For advanced composite material insights, consult expert sources such as Hexcel Composites. For more tips on fairing choices and customization, explore affordable motorcycle fairings.
5. Navigating the Economic, Geopolitical, and Social Dimensions of DIY Fiberglass Fairing Fabrication
The DIY fabrication of fiberglass motorcycle fairings intertwines complex economic, geopolitical, and societal factors that shape its viability and appeal. Economically, it lowers costs by reducing dependence on costly OEM or imported parts, stimulating local suppliers of fiberglass materials and tools. Yet, the labor-intensive nature demands specialized skills, contrasting with industrial ABS fairings produced via automation. Geopolitically, reliance on petrochemical-based resins links fabrication to global oil markets and trade regulations; import tariffs or disruptions can affect material availability. However, local production offers partial insulation from these risks compared to importing complete fairings. Socially, this craft fosters community engagement and skill sharing through online platforms, cultivating creativity and technical expertise among enthusiasts. While encouraging repair and reuse aligns with sustainable values, attention to environmental impacts of resin use remains important. This multifaceted interplay highlights how DIY fiberglass fairing fabrication balances global challenges with local empowerment and innovation. Explore more about motorcycle fairing options and customization at Summit Fairings.
Chapter 4: Finishing, Sanding, and Painting Processes in DIY Fiberglass Motorcycle Fairing
1. Mastering Fiberglass Application and Resin Curing for Durable Motorcycle Fairings
Applying fiberglass cloth with resin is the core of creating a strong, shaped motorcycle fairing. Polyester or epoxy resin is brushed onto the prepped surface before carefully laying fiberglass cloth, ensuring no air pockets form to maintain structural integrity. Multiple layers are typically built up, each requiring appropriate curing time—a chemical process that hardens the resin, which varies based on resin type, temperature, and catalyst levels. Full curing produces a tough, sandable surface essential for subsequent finishing steps. Once solidified, sanding begins with coarse grit to remove irregularities, transitioning to finer grits for a smooth finish ready for primer and paint. Applying multiple thin coats of automotive-grade primer, base, and clear paint achieves a resilient, glossy appearance that withstands road conditions. This meticulous layering, curing, and finishing sequence ensures your DIY fiberglass fairing is not only robust but visually refined. For detailed techniques on spray painting and achieving optimal results, reference resources on fiberglass finishing and painting.
2. Mastering Sanding and Surface Preparation for Flawless Fiberglass Fairing Finishes
Achieving a smooth, durable finish on a DIY fiberglass motorcycle fairing begins with careful sanding and surface preparation after the resin fully cures. Start with coarse grit sandpaper (80-120 grit) to eliminate rough spots and blend repairs seamlessly. Progressively refine the surface using finer grits (220-400 grit), which primes the fairing for filler and primer application. Filling minor defects with body filler or glazing putty ensures an even surface; once hardened, sand these areas smooth using fine sandpaper. Removing all sanding dust with vacuuming and wiping down using a suitable solvent is essential before priming to promote strong adhesion. Primer not only seals the surface but reveals hidden imperfections, which can be corrected with additional sanding. Final sanding using very fine grit (400-600) readies the fairing for paint, giving it a professional, flawless appearance. Consistent sanding pressure using blocks helps avoid uneven low spots, while protective gear is necessary to prevent inhaling fiberglass dust. Ideal environmental conditions further support clean finishes. For more guidance, explore detailed sanding and finishing techniques in fiberglass motorcycle repair. For related insights on fairing options and enhancements, visit Discover Affordable Motorcycle Fairings at Summit Fairings.
3. Mastering Surface Perfection: Filling and Smoothing Techniques for Fiberglass Fairings
Achieving a flawless finish on a DIY fiberglass motorcycle fairing hinges on meticulous filling and smoothing of imperfections. After applying multiple fiberglass layers and allowing complete curing, sanding begins with coarser grits to level uneven spots, gradually progressing to finer grits to blend repairs seamlessly. Minor imperfections such as pinholes or small dents are expertly filled using body fillers or glazing putty specifically designed for fiberglass or plastics. Once hardened, these fillers are sanded down to create a uniform surface that mirrors the surrounding area. A carefully applied primer then seals and further smooths the surface, ensuring optimal paint adhesion and durability. Final painting follows, often in multilayer coats, capped with a clear protective finish that guards against UV damage and enhances gloss. This process not only reinforces the structural integrity of the fairing but also elevates the aesthetic appeal, delivering professional-grade results for DIY enthusiasts. For step-by-step visual guidance, consider watching this detailed fiberglass repair tutorial. Additionally, exploring resources like Summit Fairings’ blog can expand your understanding of fairing options and refinishing methods.
4. Essential Techniques for Priming and Painting Durable DIY Fiberglass Motorcycle Fairings
Achieving a professional-quality finish on a DIY fiberglass motorcycle fairing hinges on precise priming and painting techniques. After the fiberglass cures, thoroughly clean the surface to remove dust and oils, then apply a high-quality automotive or epoxy primer formulated for fiberglass. Multiple thin primer coats ensure even sealing of the porous surface and enhance paint adhesion. Sanding between primer and paint layers using progressively finer grits, starting from 320-400 and moving up to 600-800, smooths imperfections and refines the surface. Wet sanding is highly recommended to minimize dust and achieve a crystal-clear finish. Use automotive-grade paint compatible with the primer and apply several thin coats, allowing proper drying time to avoid runs. Finish with clear coats to add gloss and protect against environmental damage. For ongoing protection, automotive wax or polymer sealants can help guard against UV exposure and extend the fairing’s lifespan. This systematic approach balances durability with aesthetic appeal, ensuring your DIY fairing looks sharp and holds strong. For more detailed finishing guidance from expert sources, visit Explore the Best Motorcycle Fairings at Summit Fairings.
Reference: https://www.longezpush.com/chapter-9-main-gear-landing-brake/
5. Mastering Protective Finishes and Maintenance for Lasting Fiberglass Fairing Appeal
Achieving a flawless finish on your DIY fiberglass motorcycle fairing extends beyond painting; protective finishing and ongoing maintenance are essential to preserve durability and appearance. After sanding to a smooth surface and applying primer and color coats, sealing the fairing with a clear coat provides crucial UV resistance and gloss depth. Once cured, applying motorcycle-specific waxes or ceramic coatings creates a resilient barrier against environmental wear, grime, and minor abrasions. Regular gentle cleaning with mild soaps and soft cloths prevents surface degradation, while occasional reapplication of protective waxes restores shine and maintains defense against elements. Inspecting the fairing routinely for chips or cracks and addressing them swiftly prevents moisture damage beneath the surface. These steps, combined with careful finishing techniques, ensure your custom fiberglass fairing remains both visually striking and structurally sound for years to come. Learn more about maintaining a pristine finish at Summit Fairings’ blog.
For detailed steps and tips on protective finishing and maintenance, see News | Kings Motorcycle Fairings.
Chapter 5: Maintenance and Longevity Considerations for DIY Fiberglass Motorcycle Fairing
1. How Initial Fabrication Excellence Extends the Life of DIY Fiberglass Fairings
The durability and upkeep of a DIY fiberglass motorcycle fairing hinge greatly on the quality of its initial fabrication. Selecting premium fiberglass cloth and resin sets the foundation for a structurally sound fairing that resists cracking and warping. Precise layup techniques and thorough curing ensure uniform strength, while an accurately shaped mold guarantees a perfect fit to your motorcycle’s frame, reducing stress that might lead to premature failure. Additionally, proper surface finishing, including meticulous sanding, sealing, and painting, shields the fairing from moisture and UV damage, preserving both function and aesthetics. Skimping on these steps typically results in increased repair frequency and cosmetic degradation. Ultimately, committing to high fabrication standards alleviates long-term maintenance effort and expense, sustaining the fairing’s integrity and appearance for years. For comprehensive insights on fairing quality and durability, see this detailed resource.
2. Gentle Cleaning and Effective UV Defense for Lasting DIY Fiberglass Fairings
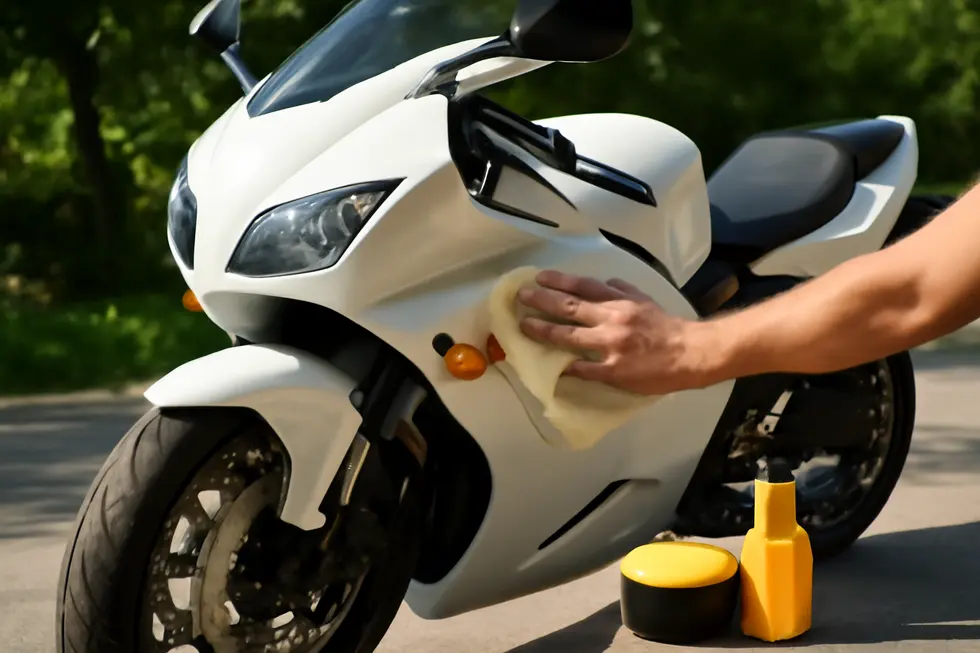
Maintaining the appearance and durability of DIY fiberglass motorcycle fairings hinges on careful cleaning and robust UV protection. Regular washing with mild soap and lukewarm water using a soft microfiber cloth prevents surface scratches and removes dirt, grease, or debris without harming the finish. Avoiding harsh chemicals, especially ammonia-based cleaners, preserves the integrity of the fiberglass and paint. To shield against ultraviolet damage, it’s essential to minimize prolonged sun exposure by parking in shaded areas or under cover. Using motorcycle covers with UV protection adds a vital barrier against fading and brittleness caused by environmental elements. Applying a protective wax layer after cleaning enhances the fairing’s glossy appearance and guards against UV rays and contaminants. These combined practices significantly extend the life of fiberglass fairings while maintaining their visual appeal. For more on selecting and maintaining high-quality motorcycle fairings, explore Summit Fairings’ expert insights.
3. Enhancing Durability: The Essential Role of Protective Coatings for DIY Fiberglass Fairings
Protective coatings are vital for preserving and extending the life of DIY fiberglass motorcycle fairings. They form a robust barrier that shields the fairing from UV rays, environmental wear, and minor abrasions, preventing fading and material breakdown. Applying a well-prepared surface with automotive-grade primer, followed by quality paint and a UV-resistant clear coat, ensures strong adhesion and lasting protection. Regular maintenance through gentle cleaning with mild soaps and soft cloths avoids damage to these layers. Additionally, periodic application of motorcycle-safe wax or polymer sealants adds a supplementary protective shield against moisture and dirt. To minimize UV damage, parking in shaded areas or using covers can be highly effective. These combined strategies help retain both the structural integrity and appearance of fiberglass fairings, significantly enhancing their longevity. For more on selecting the right fairings, explore this ultimate source for affordable motorcycle fairings.
Reference: Kings Motorcycle Fairings – Tips for keeping fairings looking fresh with multi-layered paint and clear coat protection.
4. Proactive Damage Assessment and Prompt Repairs: Keys to Lasting DIY Fiberglass Motorcycle Fairings
Careful and regular damage inspection is essential to uphold the strength and aesthetics of DIY fiberglass motorcycle fairings. Cleaning the surface thoroughly before inspection helps reveal even subtle cracks, chips, or loose fragments that may otherwise go unnoticed. Addressing damage promptly by sanding and reinforcing worn or cracked areas from the inside with fiberglass cloth and resin restores structural integrity and prevents further deterioration such as moisture penetration. Early intervention also helps maintain the fairing’s protective role against environmental factors and preserves its appearance, avoiding costly repairs down the line. Additionally, gentle cleaning, UV protection, and occasional wax application complement timely repairs to extend the fairing’s service life and visual quality. For those aiming to deepen their DIY expertise, exploring resources like this detailed step-by-step fiberglass repair guide can provide valuable practical insights. This proactive approach ensures your custom fairing remains a durable and striking component of your motorcycle.
5. How Environmental and Mechanical Stresses Shape the Care and Durability of Your DIY Fiberglass Fairing
DIY fiberglass motorcycle fairings endure both environmental and mechanical stresses that impact their lifespan and maintenance needs. Prolonged UV exposure fades paint and deteriorates resin, making UV-resistant storage or covers essential. Weather shifts—including rain and humidity—can cause moisture absorption that weakens the resin matrix, leading to surface damage or delamination. Mechanically, vibrations from riding and the occasional impact by debris challenge the structural integrity, potentially causing cracks if layers lack reinforcement. Thermal cycling from heating and cooling further strains the composite, risking micro-cracking or warping. To combat these effects, consistent care involves gentle cleaning with mild soaps, applying protective waxes, and inspecting for early signs of damage. Using high-quality resins and reinforcing fabrics during fabrication enhances resistance against these pressures. Minimizing exposure to harsh elements and adhering to regular maintenance extends your fairing’s durability and appearance for years. For further practical insights on maintaining motorcycle fairings, explore this source on affordable motorcycle fairings.
Final thoughts
Crafting and maintaining DIY fiberglass motorcycle fairings is a precise, rewarding endeavor that balances technical skill with creative customization. For business owners, understanding the detailed preparation, material choice, fabrication methods, finishing touches, and ongoing maintenance ensures delivery of high-quality, durable, and visually appealing fairings. This expertise not only enhances customer satisfaction but also opens new revenue streams through bespoke fairing services. By investing in proper training and adopting these best practices, businesses can stand out in the competitive motorcycle parts market while offering cost-effective, durable solutions for their clientele.
Ready to elevate your ride? Summit Fairings delivers premium, custom-fit fairings that blend style and durability. Whether you’re chasing speed or turning heads, we’ve got your bike covered. Don’t wait—transform your machine today. Click, customize, and ride with confidence. Your perfect fairing is just a few clicks away. Act now!
About us
undefined