Introduction
Motorcycle fairings are crucial not only in defining a bike’s aesthetic appeal but also in protecting its mechanical components. For business owners in the motorcycle repair or customization sector, mastering fairing repair is essential to delivering quality service that boosts reputation and profitability. This guide covers the critical stages of fairing repair: from initial cleaning and reinforcement to sanding and filling techniques that restore damaged surfaces. It then addresses expert painting methods emphasizing airbrushing and accurate color matching, pivotal for professional finishes that meet customer expectations. Finally, the proper installation and alignment of fairings ensure longevity and functionality, while curated resources offer practical insights for refining repair processes. Each chapter builds toward a holistic understanding of motorcycle fairing repair, equipping your business with the expertise to stand out in a competitive market.
Tables of Contents
Chapter 1: Fundamentals of Fairing Repair Motorcycle: Cleaning, Preparation, and Reinforcement
- Essential Cleaning Techniques for Effective Motorcycle Fairing Repairs
- Mastering Surface Preparation and Structural Reinforcement for Motorcycle Fairing Repairs
Chapter 2: Techniques for sanding and filling in fairing repair motorcycle
- Mastering Surface Preparation and Sanding Methods for Flawless Motorcycle Fairing Repair
- Mastering the Art of Filling and Finishing in Motorcycle Fairing Repairs
Chapter 3: Mastering Airbrushing and Color Matching for Impeccable Motorcycle Fairing Repairs
- Achieving Flawless Fairing Finishes: Essential Airbrushing Techniques and Surface Preparation
- Seamless Color Matching in Fairing Repair: Expert Mixing and Finishing for Flawless Motorcycle Paintwork
Chapter 4: Installation and Alignment Essentials for Fairing Repair Motorcycle
- Mastering Preparation and Mounting Point Inspection for Flawless Fairing Installation
- Precision Positioning and Secure Fastening: Essential Steps for Flawless Fairing Installation
Chapter 5: Resources and Practical Guides for Effective Fairing Repair Motorcycle
- Mastering Removal, Alignment, and Installation: Essential Steps for Motorcycle Fairing Repair
- Mastering Material Handling and Component Protection to Safeguard Fairings During Repair
Chapter 1: Fundamentals of Fairing Repair Motorcycle: Cleaning, Preparation, and Reinforcement
1. Essential Cleaning Techniques for Effective Motorcycle Fairing Repairs
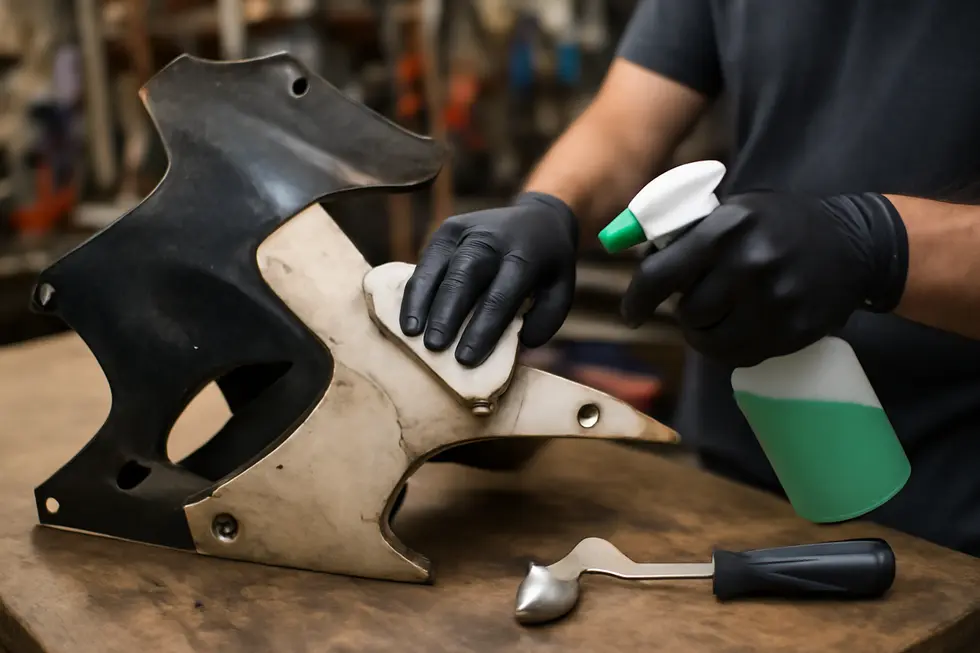
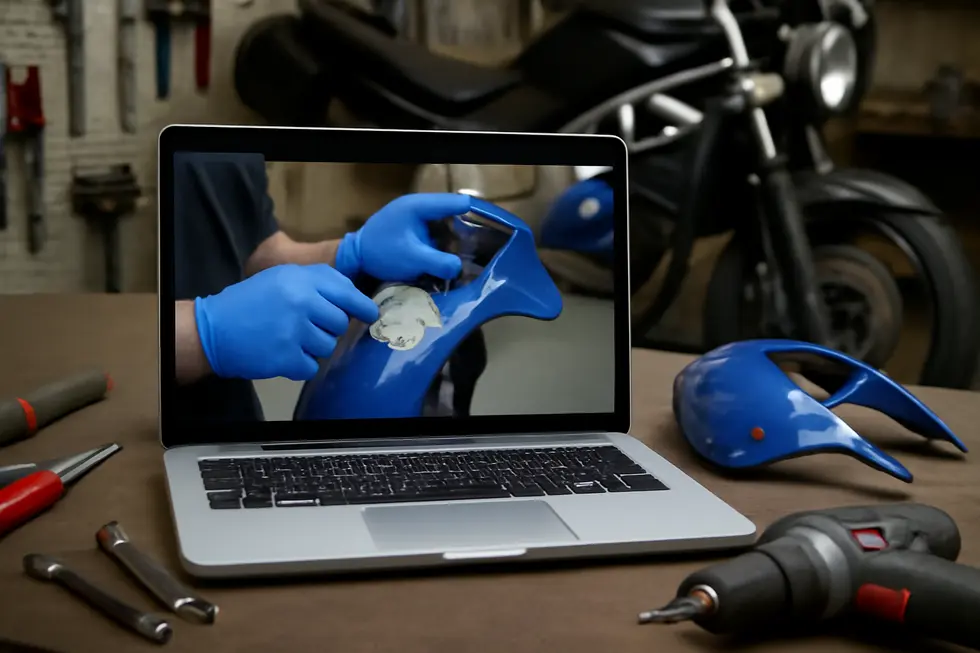
Cleaning serves as the indispensable starting point in repairing motorcycle fairings, establishing the foundation for all subsequent restoration steps. Any trace of dirt, grease, or contaminants must be meticulously removed to guarantee that adhesives, fillers, and paints bond securely to the surface. Typically, this involves washing the damaged area with a suitable degreaser or specialized cleaner, followed by thorough drying. Residual oils and grime can undermine the effectiveness of repair materials, compromising both durability and finish.
Once cleaned, the surface undergoes gentle sanding using fine grit sandpaper, often between 1500 and 2000 grit. This step subtly roughens the area, improving adhesion for fillers, primers, and paints, while smoothing minor scratches and imperfections. Wet sanding is preferred here, as it limits dust production and contributes to a more even finish that is vital for seamless repairs. Masking off adjacent undamaged sections during this phase helps prevent accidental sanding or contamination.
Beyond the cosmetic, proper cleaning and preparation are critical when addressing structural damage. Reinforcement materials like fiberglass cloth or mesh, combined with resin, can then be confidently applied to cracks or weakened spots. This procedure restores the fairing’s strength and resilience, securing it against future stress or impact.
Together, these meticulous cleaning and preparation steps set the stage for high-quality repairs that not only revive the fairing’s appearance but also enhance its longevity. Understanding this process underscores the importance of patience and attention to detail in achieving professional results. For visual guidance on this foundational stage, detailed tutorials such as the one found at https://www.youtube.com/watch?v=h_jzqmYNQK8 provide valuable support.
For further insights into quality motorcycle fairings and repair advice, explore additional discussions at Summit Fairings blog.
2. Mastering Surface Preparation and Structural Reinforcement for Motorcycle Fairing Repairs
Effective preparation and reinforcement are critical steps that ensure motorcycle fairing repairs are both durable and visually seamless. After thorough cleaning removes oils, dirt, and any contaminant residues, attention turns to preparing the damaged surface. This begins with sanding the affected area to create a texture that promotes better adhesion of repair materials. Sanding also smooths and feather-edges cracks or chips, blending transitions between the original surface and repair zones.
Structural reinforcement addresses the underlying weakness that could cause recurring damage. For fairings made from plastic or fiberglass composites, embedding reinforcing fabrics such as fiberglass cloth or carbon fiber within a resin matrix significantly enhances strength. This technique involves carefully applying resin-soaked fabric over cracks and weak points, then allowing it to cure fully to form a tough, resilient layer. Proper curing is essential before applying fillers or primers to avoid compromising the repair.
These reinforcement steps prevent future cracking by redistributing stress and restoring the fairing’s rigidity. Following reinforcement, fillers can be used to restore shape, then sanded smooth for a flush finish. Adhering to these preparation and reinforcement principles helps maintain the structural integrity of the fairing across varied riding conditions.
By integrating meticulous cleaning, precise sanding, and strategic reinforcement, you set the foundation for a professional-quality repair that lasts. For a practical visual demonstration of these techniques in action, consider exploring specialized tutorials such as the guide on repairing paint cracks and reinforcing fairings. This resource complements the repair process by showing how proper reinforcement supports long-term durability.
For more insights on motorcycle fairings and repair strategies, the Explore the Best Motorcycle Fairings at Summit Fairings blog offers valuable information tailored for enthusiasts and professionals alike.
Chapter 2: Techniques for sanding and filling in fairing repair motorcycle
1. Mastering Surface Preparation and Sanding Methods for Flawless Motorcycle Fairing Repair
Successful motorcycle fairing repair hinges on meticulous surface preparation and sanding. These processes are vital to securing strong adhesion for fillers, primers, and paint, ultimately producing a smooth, long-lasting finish that restores both strength and appearance.
The first step is thorough cleaning to eliminate dirt, grease, and residues from previous paint layers. This critical action prevents contaminants from undermining the bond between repair materials and the fairing. After cleaning, the repair area undergoes initial sanding with coarse grit sandpaper (often between 80 and 120 grit). This aggressive abrasion removes damaged paint, roughens the surface, and blends the edges of cracks or chips, creating an ideal profile for fillers to adhere.
Once fillers cure, sanding continues with progressively finer grit papers, typically ranging from 220 to 320 grit. This phase ensures the repaired section smooths into the original contours without visible blemishes or sanding marks. Approaching the final stage, sanding with very fine grit—around 400 to 600 grit—is performed, sometimes wet, to perfect the surface before primer and paint application. Using sanding blocks or pads during this process maintains flatness and reduces the risk of uneven surfaces or overheating, especially important when working with plastic or fiberglass fairings.
After sanding, dust removal using tack cloths or suitable solvents is essential to prevent imperfections beneath the primer. Applying primer next seals the surface and produces a consistent base color, helping mask repair transitions and enhancing paint adhesion.
These detailed sanding and preparation techniques align closely with methods utilized in composite repairs and automotive finishes, adapted to suit the delicacy and flexibility of motorcycle fairings. For visual guidance and practical demonstrations, instructional videos such as the repair and reinforcement tutorial at https://www.youtube.com/watch?v=bxRE5LyBfw4 provide invaluable insight.
For further understanding of quality fairings that complement meticulous repairs, exploring a comprehensive source for affordable motorcycle fairings can be beneficial.
2. Mastering the Art of Filling and Finishing in Motorcycle Fairing Repairs
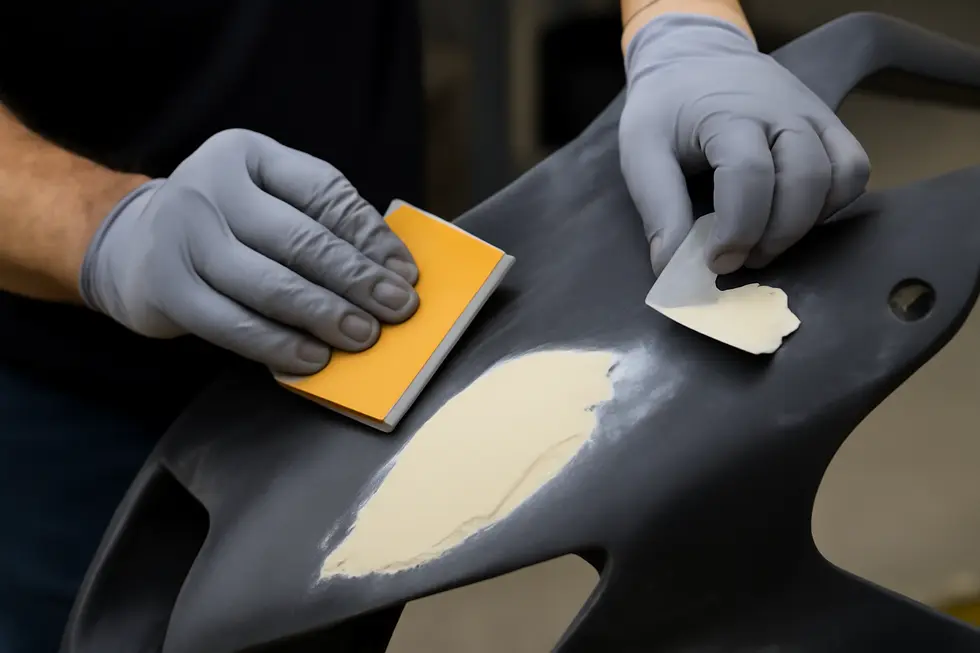
Achieving a flawless finish in motorcycle fairing repair hinges on meticulous filling and finishing techniques that restore both form and function. It begins with a clean, grease-free surface to ensure fillers and paints adhere properly. Damaged cracks, dents, or scratches receive carefully applied plastic fillers or epoxy putties, which not only fill voids but also reinforce vulnerable zones when necessary. Patience is key as these fillers cure into a stable base, ready to be refined.
Sanding transforms the filled areas, starting with medium-grit papers around 240 to 400 grit to shape and smoothen irregularities. Progressively, finer grits up to 2500 grit are employed, often using wet sanding to minimize dust and create an ultra-smooth surface. This graduated sanding removes imperfections and blends the repair seamlessly into the original fairing contours.
Once smooth, a primer layer is applied to unify surface textures and reveal any subtle flaws for final correction. Painting requires precision; airbrushing allows thin, even coats that perfectly match factory colors and maintain the fairing’s aesthetic integrity. After color application, a clear coat seals and protects the finish, followed by a delicate sanding step with very fine grit sheets to merge repaired areas invisibly.
The final polish with a fine compound and application of wax or sealant restores shine and durability, completing the restorative process. Throughout, attention to preventing stress on repaired spots and protecting adjacent components from overspray ensures lasting results. Those seeking visual guidance on these techniques can find detailed demonstrations on reinforcing cracks and airbrushing finishes in this comprehensive repair tutorial.
For enthusiasts aiming to maintain their bike’s pristine appearance, understanding these delicate filling and finishing steps is essential to professional-quality fairing repair. Explore additional insights and resources on enhancing motorcycle bodywork at Summit Fairings’ informative blog.
Chapter 3: Mastering Airbrushing and Color Matching for Impeccable Motorcycle Fairing Repairs
1. Achieving Flawless Fairing Finishes: Essential Airbrushing Techniques and Surface Preparation
The cornerstone of an exceptional motorcycle fairing repair lies in meticulous surface preparation followed by expert airbrushing techniques. Before any paint touches the surface, the fairing must be thoroughly cleaned to eliminate dirt, grease, and residual paint that could compromise adhesion. This step ensures a pristine base for paint application, critical to long-term durability. Sanding the surface smooths out imperfections, creating a uniform texture that helps the paint bind evenly. Equally important is precise masking to safeguard areas not intended for painting; this prevents overspray and achieves sharp, professional-looking edges.
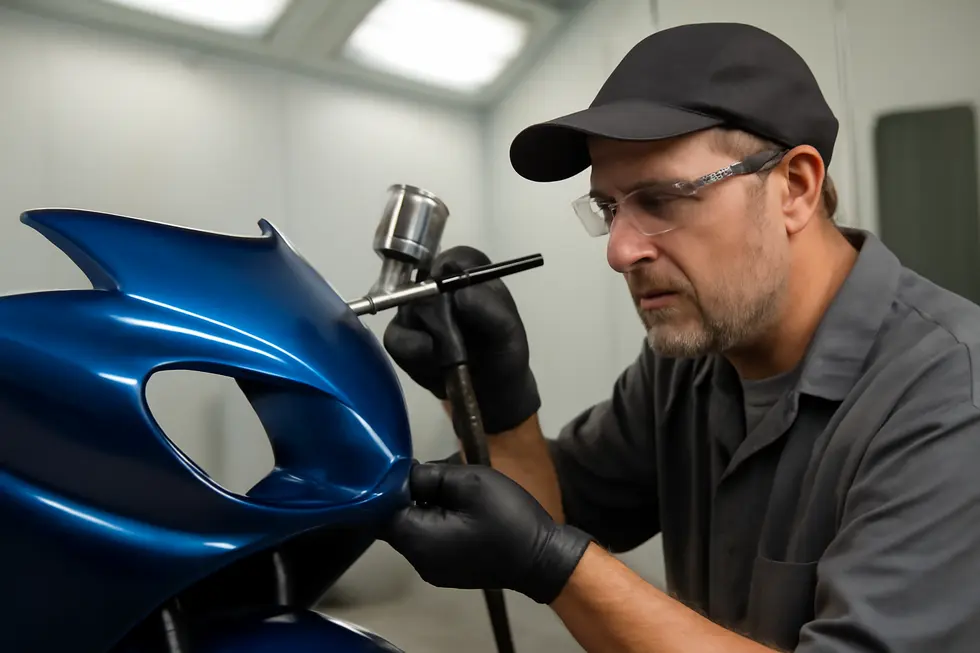
Airbrushing shines as the method of choice due to its unparalleled control over paint delivery. By carefully regulating air pressure and paint flow, painters can apply delicate, even layers that avoid runs or drips common with conventional spraying methods. The technique of layering multiple light coats builds depth and uniformity, preserving fine details and contours of the fairing. This makes airbrushing ideal for color matching, allowing seamless blending of fresh paint with the original finish, which is especially important when replicating factory colors or intricate designs. Final clear coats are applied with equal care, enhancing gloss and shielding the repair from environmental wear.
Once the paint has dried and cured, buffing and polishing elevate the finish, erasing subtle texture inconsistencies and imparting a radiant shine that integrates flawlessly with the motorcycle’s overall appearance. These finishing touches affirm the repaired fairing’s professional quality and visual harmony.
Though tutorials specifically focused on fairings are limited, fundamental airbrushing and preparation practices demonstrated in motorcycle rim painting guides provide valuable, transferable insights. For those seeking a practical visual guide, an effective demonstration of these techniques can be found at https://www.tiktok.com/discover/how-to-paint-motorcycle-rims. For further resources and materials related to motorcycle bodywork, exploring the collection at Summit Fairings blog can offer comprehensive support and inspiration.
2. Seamless Color Matching in Fairing Repair: Expert Mixing and Finishing for Flawless Motorcycle Paintwork
Achieving a flawless finish in motorcycle fairing repair demands meticulous color matching combined with expert painting techniques. The cornerstone of this process lies in custom paint mixing, where precision becomes essential to replicate the factory color exactly. By analyzing the original paint’s hue, saturation, and brightness—often with digital color matching tools—professionals blend pigments to duplicate every nuance, including delicate metallic flakes or pearlescent sheens unique to premium finishes.
Before any paint touches the repaired surface, thorough preparation ensures adhesion and smoothness. The area is cleaned, lightly sanded, and primed, setting a receptive base for subsequent layers. Painting is then executed in carefully controlled stages: a base coat establishes the primary color, followed by multiple color coats that build depth and vibrancy. A clear coat not only intensifies the gloss but also protects the finish from environmental wear.
Blending the freshly painted section into the original fairing is critical to eliminating visible transitions. This requires fine spraying control and layering to feather the edges naturally into adjacent panels. Once dry, polishing and buffing restore the uniform shine and smoothness of the factory finish, further masking any repaired zones. Using OEM-grade or premium aftermarket paints contributes to the longevity and color fidelity necessary for a professional outcome.
This integrated approach ensures the motorcycle’s aesthetics remain uncompromised, returning repaired fairings to their factory-standard appearance. For riders and repairers alike, understanding these nuanced steps is vital to preserving style and value. For detailed visual guidance on reinforcing and painting, comprehensive tutorials such as the one demonstrating advanced fairing paint crack repair offer invaluable insights (source).
For insights on sourcing quality motorcycle fairings suitable for repair and customization, explore this detailed resource on affordable motorcycle fairings.
Chapter 4: Installation and Alignment Essentials for Fairing Repair Motorcycle
1. Mastering Preparation and Mounting Point Inspection for Flawless Fairing Installation
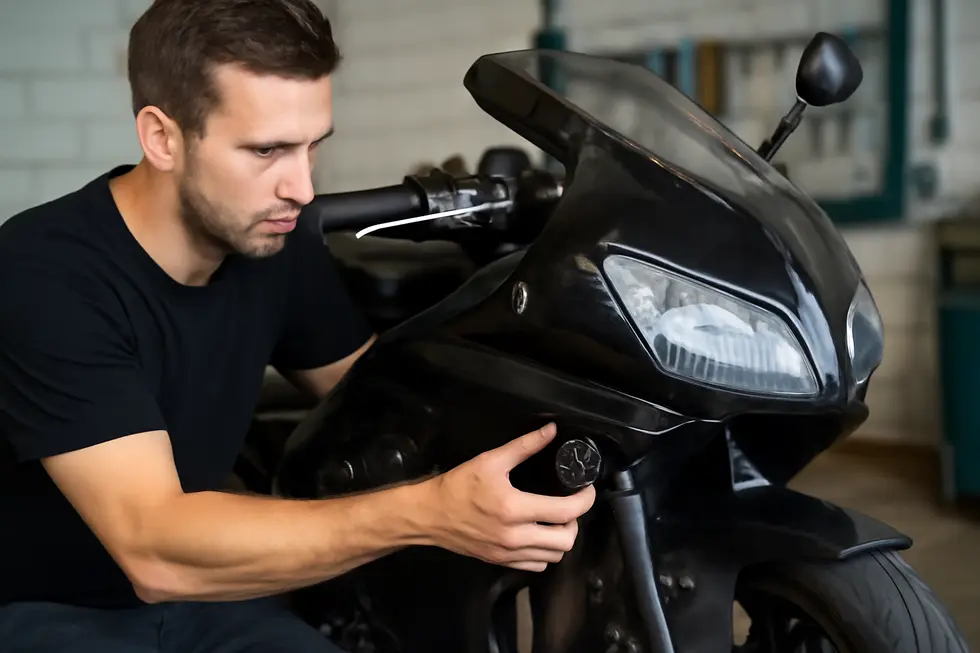
Achieving a seamless fit during motorcycle fairing installation begins with meticulous preparation and careful mounting point inspection. The initial step involves the gentle removal of existing fairings and all related hardware. Using the right tools, like screwdrivers, minimizes unintended damage. Setting removed parts on a soft surface helps preserve their condition for reuse.
Once fairings are removed, inspect each mounting point on the motorcycle frame with precision. Many fairing systems utilize existing holes, but some require drilling new ones to accommodate fittings. To protect the bike’s finish during drilling, placing a magnet wrapped in cloth underneath catches metal shavings and prevents scratches. This attention to detail ensures structural integrity and protects against future damage.
Next, mounting brackets—essential to securing the fairing—are installed loosely at first. This flexibility offers room for necessary adjustments to achieve perfect alignment. When positioning the fairing onto brackets, grooves and slots guide precise placement, ensuring a tight, flush fit with the frame and nearby components. Adjustments continue until the fairing integrates smoothly without gaps or pressure points.
Upon confirming alignment, fasteners are tightened securely. Incorporating washers or rubber grommets at attachment points absorbs vibrations and reduces stress, preventing cracks or premature wear. Some installations may require reinforcing supports like pop rivets or backing plates for added stability. Additionally, any detached components such as mirrors, headlights, or air ducts are reinstalled carefully. It is critical to verify these elements are properly positioned and fully functional to avoid interference with motorcycle operation.
A final comprehensive inspection verifies the fairing’s alignment does not obstruct steering, suspension, or controls and that every fastener is secure. This thorough approach guarantees both the aesthetic and functional excellence of the reinstalled fairings.
For further practical guidance, the video “How Do You Install Motorcycle Fairings? – The Racing Xpert” provides detailed visual steps on preparation and inspection during fairing installation. Explore more expert insights on selecting and installing motorcycle fairings at our blog dedicated to the best motorcycle fairings.
2. Precision Positioning and Secure Fastening: Essential Steps for Flawless Fairing Installation
Achieving a flawless motorcycle fairing installation hinges on meticulous positioning, careful fastening, and thorough final inspections. The process begins by loosely attaching the mounting brackets and bolts to allow slight adjustments during fitting. Positioning the fairing involves aligning it precisely on these brackets by locating grooves or slots designed to guide the parts into their correct places. It’s vital to ensure the fairing nestles snugly against the frame and adjacent components, avoiding gaps or interference with crucial controls like steering and suspension. This careful alignment protects both the structural integrity and aerodynamic efficiency of the motorcycle.
Once the fairing’s position is fine-tuned, securing fasteners demands a delicate balance. Bolts, screws, nuts, and clips must be tightened firmly to keep the panels stable without over-torquing, as excessive pressure can crack plastic or fiberglass sections. Incorporating washers and rubber grommets at mounting points helps distribute pressure evenly, shielding the fairing from stress cracks often caused by vibrations or overtightening. Replacing any worn or damaged clips with durable, high-quality parts ensures long-lasting security.
Final checks are indispensable to confirm the installation’s success. Each fastener should be inspected to verify correct tightness without strain. The entire assembly must be scrutinized for alignment, ensuring no components obstruct the steering range, suspension travel, or electrical wiring. Additional elements such as mirrors, headlights, and air ducts are mounted afterward, with careful attention to their proper positioning and full functionality. Cleaning the mounting areas prior to installation also improves fit and avoids common mistakes like misplaced clips or wiring interference.
Tools including screwdrivers, Allen wrenches, and spanners facilitate these steps, while sometimes a drill is needed for careful adjustments. This methodical approach not only secures the fairing but also preserves the motorcycle’s styling and performance by preventing vibrations or damage during operation. For a visual guide on these techniques, consult the detailed tutorial on How Do I Install Motorcycle Fairings? – Ride or Die. Additionally, exploring Explore the best motorcycle fairings at Summit Fairings offers insights into selecting well-designed fairings that simplify installation and alignment.
Chapter 5: Resources and Practical Guides for Effective Fairing Repair Motorcycle
1. Mastering Removal, Alignment, and Installation: Essential Steps for Motorcycle Fairing Repair
Successful motorcycle fairing repair hinges not only on restoring the damaged surface but also on expertly managing removal, alignment, and installation. These stages are critical to ensure the repaired fairing fits perfectly and functions without compromising safety or aesthetics. The process begins with careful removal of all bolts, screws, and connected components such as headlights, turn signals, mirrors, or air ducts. This step demands patience and attention to detail to prevent further damage and to provide clear access for repairs. For example, tutorials on models like the Honda VFR750 meticulously demonstrate removing lower front side panels, rear cowls, and fuel tank elements, illustrating the precision needed for effective dismantling.
Once removed, reinstallation is equally intricate. The mounting brackets should initially be fitted loosely, allowing adjustments to achieve optimal alignment. Holding the fairing shell firmly in place while checking clearances around handlebars, wiring, and controls ensures no interference with operation. Using grooves or slots designed for positioning helps guide accurate placement. The process involves iterative adjustments until the fairing snugly matches the frame’s contours and maintains symmetry with adjoining parts.
Securing fasteners requires both care and the right materials. Employing rubber grommets or washers in bolt holes cushions the fairing against stress and vibration, preventing cracking common in fiberglass or plastic surfaces. It is vital to tighten bolts gently to avoid overtightening, which can damage mounting points or the fairing itself. In some settings, pop rivets or backing plates offer additional reinforcement for stability. After fastening, all removed components such as headlights and windshields should be reattached carefully, verifying their correct positioning and full functionality.
A final comprehensive check guarantees the fairing does not impede steering or controls and remains firmly in place during use. Common tools include screwdrivers, hex keys, wrenches, and occasionally drills for fine adjustments. For those seeking clear visual instructions, video guides like “How Do You Install Motorcycle Fairings?” and “VFR750 Remove fairings, tank, airbox” provide invaluable step-by-step demonstrations.
For detailed insights into repair methods and advice on sourcing quality parts, explore Summit Fairings’ expert resources.
Reference: https://www.youtube.com/watch?v=bxRE5LyBfw4
2. Mastering Material Handling and Component Protection to Safeguard Fairings During Repair
Handling motorcycle fairings with care throughout repair and replacement stages is pivotal to maintaining their structural integrity and appearance. Effective material handling starts the moment fairings are removed, requiring gentle detachment from mounting points to avoid stressing clips or introducing new cracks. Using soft padding or cloths beneath the fairings while working prevents scratches and accidental impacts, preserving the surface finish. When sanding damaged sections, selecting the right materials—typically ultra-fine grit sandpaper ranging between 1500 and 2500 grit—ensures that original paint and plastic substrates are minimally affected, allowing for smoother, more professional surface preparation.
Protection continues with careful cleaning using degreasers that remove contaminants without damaging the surface. This step is critical to guarantee strong adhesion of repair compounds and paint. Specialized tools like airbrushes deliver precise, even paint application, avoiding overspray and enabling seamless color blending that matches factory finishes. Following painting, applying clear coats not only restores gloss but also shields the fairing against environmental wear and minor abrasions.
Structural vulnerabilities, such as cracked or weakened mounting points, require reinforced treatment with composite materials like fiberglass patches. Such reinforcements maintain the fairing’s strength during handling and reinstallation, reducing the risk of recurring damage. Throughout installation, moderate torque and proper use of rubber grommets at mounting brackets help absorb vibration and stress, protecting the fairing from cracks caused by over-tightening.
Adopting these integrated material handling and component protection strategies ensures fairings retain their original fit, finish, and durability after repairs. For in-depth demonstrations and step-by-step guidance, comprehensive visual resources offer invaluable support. One noteworthy tutorial illustrating crack repair, surface preparation, and protective techniques can be found here. Additionally, exploring expert tips on motorcycle fairings is encouraged via this dedicated resource, which complements practical repair knowledge with quality parts and advice.
Final thoughts
Successful motorcycle fairing repair demands a strategic approach that integrates thorough preparation, precise sanding and filling, expert painting, and meticulous installation. Business owners who invest in understanding and applying these detailed processes not only improve the quality and durability of repairs but also elevate customer trust and satisfaction. Harnessing available resources and tutorials further refines technical skills, ensuring repairs meet professional standards and extend the life of fairings effectively. This comprehensive mastery enables repair shops to differentiate their services, increase profitability, and strengthen their position in the motorcycle maintenance market.
Ready to elevate your ride? Summit Fairings delivers premium, custom-fit fairings that blend style and durability. Whether you’re chasing speed or turning heads, we’ve got your bike covered. Don’t wait—transform your machine today. Click, customize, and ride with confidence. Your perfect fairing is just a few clicks away. Act now!
About us
undefined