Introduction
The durability and aesthetic appeal of motorcycle fairings is crucial for both performance and appearance. Cracked fairings can detract from a bike’s visual charm and lead to increased repair costs if not addressed promptly. Understanding how to repair fairings made from either fiberglass or ABS plastic is key for any business involved in motorcycle maintenance or manufacturing. From identifying materials to employing effective repair techniques, this guide will explore actionable steps to help you maintain the integrity of your motorcycles and please your clientele. Each chapter will delve into specific methods for considering fairing material types, step-by-step repair processes, the value of specialized repair kits, and additional tips to ensure long-lasting fixes.
Tables of Contents
Chapter 1: Diving into ABS Plastic: Understanding Its Role in Motorcycle Fairing Repairs
- The Versatility of ABS Plastic in Motorcycle Fairings: A Key to Successful Repairs
- Practical Repair Techniques Tailored to Motorcycle Fairing Materials
- Understanding Long-Term Durability: Key Materials for Optimal Fairing Repair
Chapter 2: Mastering the Essential Materials for Fiberglass Fairing Repair in How to Fix Cracked Motorcycle Fairings
- Gathering Essential Tools and Materials for Repairing Fiberglass Fairings in Your Motorcycle
- Essential Surface Preparation Techniques for an Impeccable Bicycle Fairing Repair
- Achieving a Pristine Finish: Essential Techniques for Fiberglass Fairing Restoration
Chapter 3: Repair Techniques for ABS Plastic Fairings: Mastering the Process
- The ABS Cement Method: A Reliable Approach to Fixing Cracked ABS Plastic Fairings
- Mastering Plastic Welding Techniques for Resilient Repair of Cracked ABS Fairings
- Mastering the Sprinkling Technique: A Seamless Repair for Cracked ABS Plastic Fairings
Chapter 4: Mastering Material Identification to Enhance Specialized Motorcycle Fairing Repairs
- Crucial Steps in Identifying Motorcycle Fairing Materials for Repair Success
- A Hands-On Approach to Repairing Cracked Motorcycle Fairings with Specialized Kits
- Precision and Reliability: Advanced Installation Techniques for Repaired Motorcycle Fairings
Chapter 5: Navigating the Nuances of Material Repair in Cracked Motorcycle Fairings
- Choosing the Right Repair Strategy: Material Insights for Cracked Fairings
- Maximizing Repair Durability: Strategies for Long-Lasting Motorcycle Fairing Fixes
- Essential Surface Preparation Techniques for Flawless Fairing Repairs
Chapter 1: Diving into ABS Plastic: Understanding Its Role in Motorcycle Fairing Repairs
1. The Versatility of ABS Plastic in Motorcycle Fairings: A Key to Successful Repairs
When it comes to motorcycle fairings, ABS plastic stands out as a primary material used for its blend of durability, flexibility, and repair potential. Understanding this material is crucial for anyone looking to fix cracked fairings effectively and restore their motorcycle’s aesthetic and functionality. Also known as Acrylonitrile Butadiene Styrene, ABS combines three significant components that offer unique benefits, making it a preferred choice in the motorcycle manufacturing industry. The strength of ABS lies in its excellent impact resistance, which guards against drops and collisions, ensuring vital internal components like wiring harnesses and radiators remain protected.
One of the standout features of ABS plastic is its dimensional stability. Unlike certain other materials, which may warp or flex over time, ABS maintains its shape under stress, providing riders with the assurance that their fairings will not deform easily. Additionally, ABS possesses outstanding paint adhesion properties, allowing for simple cosmetic repairs or custom paint jobs without significant risk of flaking or bubbling.
However, it is essential to acknowledge that ABS is not devoid of drawbacks. While it is less brittle than fiberglass, it is also heavier than some other composite alternatives, which can be a consideration for performance-driven riders. Moreover, prolonged exposure to sunlight without UV protection can lead to yellowing, which detracts from an otherwise sleek appearance. In particular, the optimal thickness for ABS used in fairings, such as those for the Suzuki Katana GSX 600 F, should ideally range from 2.5 to 3mm. This thickness strikes a balance between rigidity and weight, ensuring that the structural integrity of the fairing is preserved without undue burden on the motorcycle’s overall performance.
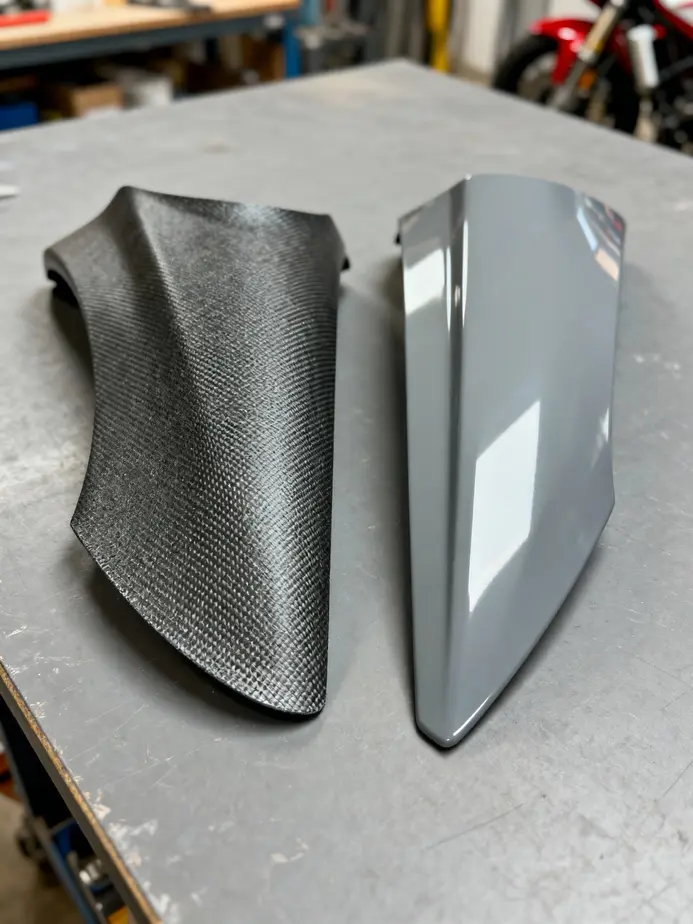
Identifying ABS plastic is a tactile endeavor, especially when contrasting it with other common materials used in fairing construction. For instance, polycarbonate—while more flexible—lacks the scratch resistance and paintability of ABS, making it unsuitable for vibrant, long-lasting aesthetics. Meanwhile, fiberglass, though often lauded for its lightweight nature, can be more susceptible to cracking upon impact, often requiring more intensive repair procedures. In contrast, carbon fiber, though providing exceptional strength, comes with a heftier price tag and demands special care during repairs, both in terms of expertise and materials needed.
When faced with a crack in an ABS fairing, the path forward for repair is relatively straightforward. The material allows for multiple repair methods to restore and strengthen the damaged area. This includes utilizing ABS cement for quick fixes or engaging in plastic welding techniques that meld new material seamlessly into the crack. Compared to its competitors, repair strategies for ABS can be more flexible and enduring, which means riders can regain their fairing’s integrity with less hassle.
Navigating the repair landscape means not overlooking the coverage options for new parts. If a damaged fairing is still under warranty, documenting the damage and alerting the seller is critical, as many reputable suppliers will replace compromised parts. For existing damage, it’s also helpful to consult repair experts or guides, as indicated in specialized resources like buying guides for motorcycle plastics.
In conclusion, understanding the properties of ABS plastic is instrumental in managing cracked motorcycle fairings effectively. Employing the right repair techniques related to ABS can not only restore the current damage but also enhance the longevity and appearance of the motorcycle’s bodywork, allowing riders to enjoy their bikes without detracting from their aesthetic appeal. Recognizing the distinctions between ABS and alternative materials enables riders and mechanics to make informed decisions during repairs, yielding results that enhance performance and safety seamlessly.
2. Practical Repair Techniques Tailored to Motorcycle Fairing Materials
When it comes to repairing cracked motorcycle fairings, understanding the material composition is crucial for any effective fix. Motorcycles commonly use ABS plastic, fiberglass, or carbon fiber for their panels, each requiring targeted techniques to ensure a robust repair that can withstand the rigors of riding. Failing to match the repair method to the material type can lead to premature failures that mar the aesthetic or functionality of the fairings.
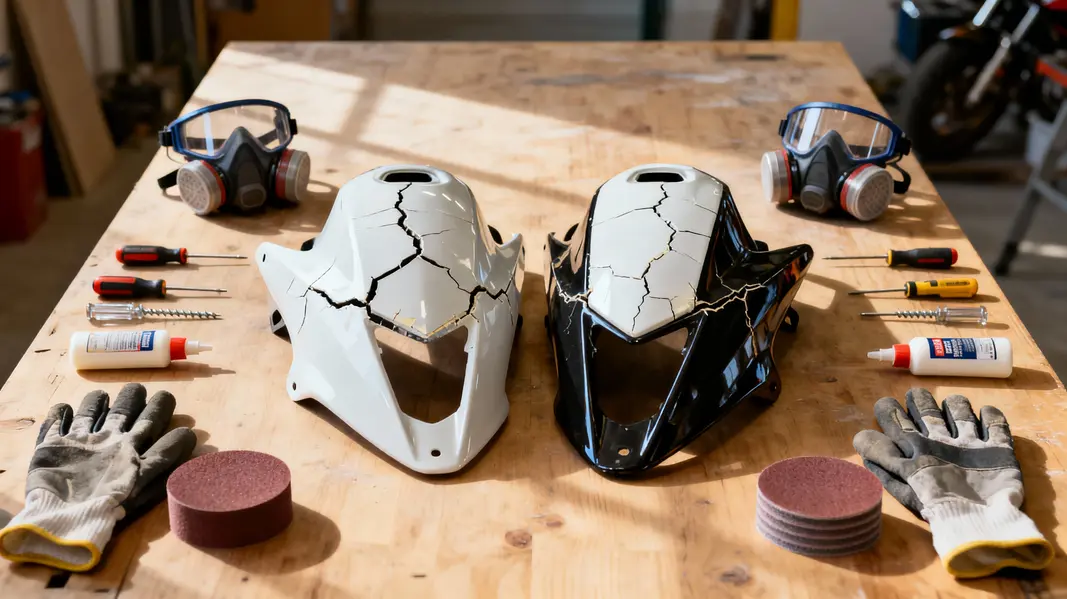
To start the repair process, accurate identification of the fairing material is imperative. Begin with a visual and tactile inspection: ABS plastic tends to be lightweight and slightly flexible, almost rubbery to the touch; fiberglass is generally more rigid, heavier, and conveys a woven texture; while carbon fiber is characterized by its ultra-lightweight and distinct matte weave. If there’s any doubt, a flame test can provide clarity: a small edge can be burned—ABS will melt to a black gooey substance, fiberglass chars without significant melting, and carbon fiber resists burning but emits an acrid smell. Always exercise caution and perform this test outdoors with safety equipment at the ready.
If magnetic properties are in question, a magnet test can indicate the presence of metal contaminants. Pure plastic such as ABS will not react to magnets; however, if a magnetic attraction is noted, this may suggest reinforced composites. For those who have the manual or part markings, checking these sources can be beneficial—some manufacturers print material information directly onto the base of the fairing.
Once the material is confirmed, the corresponding repair technique should be employed. For ABS plastic, which tends to be the most common, chemical welding using single-part ABS resin works remarkably well. This method melts the original plastic at the edges, creating a bond akin to the original material. In cases of larger cracks, the ‘sprinkling technique,’ which applies solvent consistently across the cracks for quick bonding, can be used effectively. Avoid using traditional epoxies for these repairs, as they tend to fail under flex and vibration.
On the other hand, fiberglass repairs necessitate a more hands-on approach. Firstly, the crack should be sanded down to prepare for a patch. A mix of fiberglass cloth and resin is then applied, harmonizing multiple layers to achieve a robust finish. Finally, a gelcoat may be added to protect and aesthetically blend the repair with the original surface.
For those repairing carbon fiber, it’s advised to utilize professional-grade epoxy alongside matching pre-preg fabric. A DIY approach could risk delamination if the repair is not conducted with precision and care.
Regardless of the material, all repairs should begin with thorough cleaning. Washing with soapy water or a degreaser lays the groundwork, followed by scuffing the surface with sandpaper (around 400-600 grit). This process creates a necessary ‘tooth’ that promotes adhesion without removing too much base material. Progressing to wet sanding using 320-800 grit aids in achieving a smooth finish before drying the area completely.
After repairs, when it comes to painting, apply primer and spray the finish in thin, even coats. This method allows each layer to cure fully, ensuring durability. Taking these preparation steps will allow for a successful bond, capable of enduring the vibrations and stresses encountered while riding.
For many motorcycle enthusiasts, plastic welding represents a strong alternative to replacement for ABS cracks. By heat-fusing matching rods, the end result is not just sleek but incredibly durable, yielding advantages that traditional repairs can’t match. With a practical understanding of these techniques, riders can ensure that their fairings are not just repaired but restored to their original form, ready for the road ahead.
3. Understanding Long-Term Durability: Key Materials for Optimal Fairing Repair
When it comes to maintaining the integrity and aesthetics of motorcycle fairings, understanding the fundamental materials involved is crucial for achieving long-term durability. Motorcycle fairings, primarily fashioned from ABS plastic or fiberglass, are often the first line of defense against environmental factors and impacts. However, distinguishing between these materials can significantly affect repair methods and the resultant longevity of the fix. This section delves into the characteristics and strengths of each material to enhance decision-making during repairs and restore your bike’s visual appeal and effectiveness.
ABS Plastic: Known for its versatility and ability to withstand harsh conditions, ABS plastic is the predominant material used in motorcycle fairings. Its robust nature allows it to resist impacts and flex without fracturing, a quality especially beneficial in the event of a minor accident. This resilience is paired with excellent weather resistance, effectively avoiding the brittleness and fading commonly seen in other materials after prolonged sun exposure. When evaluating fairings, look for the rigidity that hints at ABS’s dominance; this material can handle the vibrations and environmental exposure typical during rides, thereby presenting little risk of future cracks or breaks.
Moreover, repairing ABS fairings is relatively straightforward and cost-effective. Common techniques such as using ABS cement provide a strong bond, matching the material’s properties and ensuring longevity. Specialized repair products designed for ABS can further enhance the repair, establishing flexibility that’s crucial for enduring day-to-day riding conditions. For those initiating repairs, a well-executed process that includes cleaning, applying filler, sanding, and painting will yield results that withstand the test of time, making ABS a preferred choice within the motorcycle community.
Fiberglass: In contrast, fiberglass offers lightweight advantages alongside superior airflow characteristics. While this makes it favorable for performance-oriented bikes where weight savings is paramount, it comes at a cost. Fiberglass tends to be more brittle compared to ABS and is susceptible to cracking under heavy impacts, rendering it less effective for daily street use. When repairing fiberglass fairings, it’s vital to adopt a cautious approach, utilizing layering techniques with resin and cloth to reinforce the repaired area. However, the intricacy and potential cost associated with fiberglass repairs can deter many DIY enthusiasts.
Carbon Fiber: Carbon fiber is celebrated for its strength-to-weight ratio and aesthetic appeal, particularly in high-end bikes. Yet, its high performance comes with significant drawbacks, especially regarding repairability. Damaged carbon fiber generally requires professional attention due to the complexity involved in its restoration and the necessity for specialized equipment to perform effective repairs. Additionally, it’s vulnerable to UV damage if unprotected, demanding extra diligence to maintain its structural integrity over time.
Polycarbonate: Another contender, polycarbonate is less common but worth mentioning for weather resistance and clarity. Though variations reinforced for durability exist, they often lack the widespread application found in ABS and fiberglass fairings. Identifying such materials can sometimes require a bit of experimentation, such as applying a plastic filler to see compatibility.
Understanding the durability and repairability of these materials is paramount for motorcycle owners. For instance, replacing cracked ABS fairings with OEM components ensures that you uphold the original specification and performance of the bike. Remember, investing in quality parts ensures you’ll avoid frequent repairs and replacements.
For further information on specific models and their fairing kits, refer to the detailed guides available here.
This foundation establishes critical considerations as you engage in the repair of your motorcycle fairings, enhancing both your skills and the bike’s longevity.
Chapter 2: Mastering the Essential Materials for Fiberglass Fairing Repair in How to Fix Cracked Motorcycle Fairings
1. Gathering Essential Tools and Materials for Repairing Fiberglass Fairings in Your Motorcycle
To successfully repair cracked fiberglass motorcycle fairings, understanding and gathering the right materials is crucial. Each material plays a unique role in achieving a durable and visually appealing repair, and selecting them thoughtfully can significantly impact the outcome. Let’s delve into the components you’ll need for a successful repair process.
Fiberglass Cloth is perhaps the most fundamental material in this endeavor. This reinforcement material comes in various weights and weaves, allowing you to select based on the specific strength and flexibility required for your repair. A heavier cloth offers greater strength but may be less flexible, which might be critical depending on the fairing’s location and design specifications.
Resin, when combined with a catalyst, forms a strong adhesive that bonds the fiberglass cloth to the fairing. There are several types of resin to consider: polyester resin is the most cost-effective, suitable for general repairs; vinylester resin adds durability and moisture resistance; epoxy resin, while often more expensive, provides superior strength but requires careful mixing. Each choice carries its benefits, with the right application depending on the fairing’s specific needs.
The catalyst is equally important, as it activates the resin and initiates the curing process. Following the manufacturer’s proportions is essential; too much or too little can lead to an unsuccessful repair, weakening the overall structure of the fix.
Next, a small roller becomes invaluable. This tool is vital for ensuring that the fiberglass cloth adheres properly—pressing down uniformly eliminates air pockets, promoting a strong bond between layers. The uniform application is key to avoiding weak spots that could compromise the repair during prolonged use.
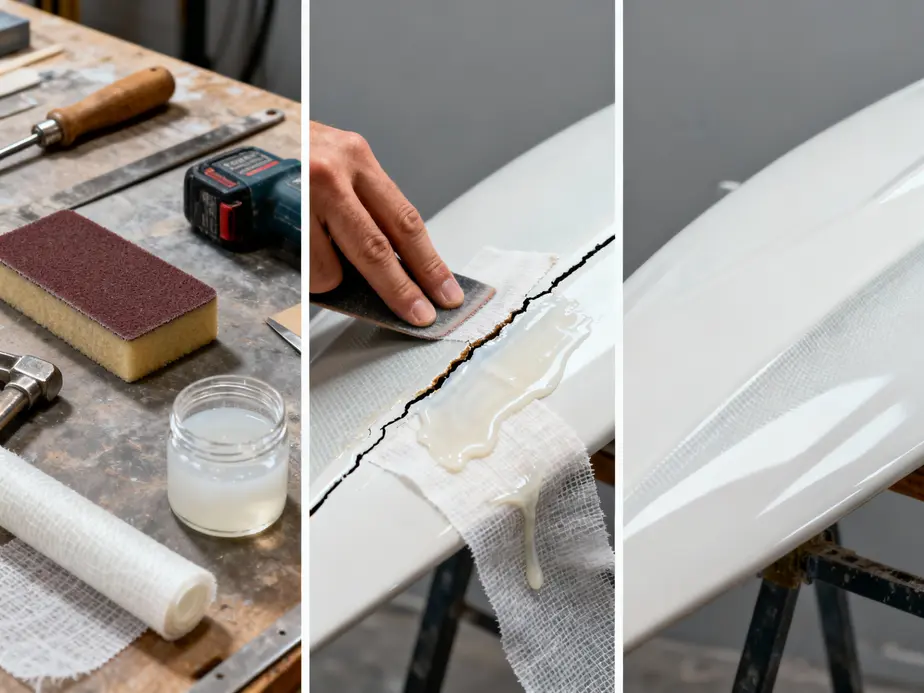
To prepare the area for repair, sandpaper is indispensable. This will be used to smooth out the crack’s edges and create a rough surface for better adhesion of the resin. After sanding, any loose debris must be meticulously cleaned to guarantee a clean surface. Following this, filler is essential for treating imperfections. This material helps to smooth out the surface of the fairing, creating an even finish before applying the fiberglass cloth.
Masking tape should not be overlooked. It protects areas surrounding the repair site from accidental resin spills. A careful application of tape around the edges of the repair area helps retain a clean line, which is especially important if aesthetics are a concern.
Once all these materials are gathered, the repair process can begin. Start by sanding the cracked area to remove old paint, dirt, or debris, ensuring proper adhesion. Next, apply the masking tape to protect adjacent areas. Then, fill any imperfections while smoothing the surface to prepare it for the fiberglass reinforcement.
Once the surface is prepped, mix the resin with the specified amount of catalyst, observing the proper ratio to ensure a successful cure. After cutting the fiberglass cloth to size, apply the resin mixture generously over the crack before laying the cloth on top. Use the roller to press down, ensuring no air pockets remain trapped beneath the cloth.
Finally, allow the repair to cure completely, following the manufacturer’s instructions. This thorough preparation and execution will yield a seamless repair, restoring both functionality and aesthetics to your motorcycle fairings.
For additional resources and visual demonstrations on fiberglass repairs, you can check out helpful guides and videos on platforms dedicated to motorcycle maintenance. Affordable options like these can provide you with tips and tricks to fine-tune your repair techniques, making for a successful and enjoyable repair experience.
Investing time in understanding these essential materials and their respective functions arms you with the knowledge necessary to approach fiberglass repairs with confidence. It’s not just about fixing a crack – it’s about renewing the integrity of your motorcycle’s fairings.
2. Essential Surface Preparation Techniques for an Impeccable Bicycle Fairing Repair
Surface preparation is a crucial yet often underestimated step in fixing cracked fiberglass motorcycle fairings. A well-prepped surface ensures a bond that withstands the rigors of both time and stress, ultimately leading to a smoother finish and longer-lasting repair. To achieve this, a meticulous approach is necessary, one that starts well before you apply any filler or resin. The process begins with a clean foundation.
First, you must thoroughly clean the cracked area. This involves removing dirt, grease, and any loose materials that might inhibit proper adhesion of the repair products. Ideally, perform this step in a clean, dry environment. Working in such conditions minimizes the risk of dirt re-entering the preparation process. Utilizing a degreaser can enhance your cleaning efforts, ensuring that there are no residues that could compromise the integrity of the bond.
Once you’re satisfied with the cleanliness of the area, the next step is to scuff the existing gelcoat or paint surface. The objective is to create a mechanical “tooth” for better adhesion. Here, you can reach for 400-600 grit sandpaper or a Scotch-Brite pad, being cautious not to over-sand and weaken the fiberglass beneath. This light scuffing is essential, as it prepares the surface to hold the repair materials effectively.
With the surface scuffed, the focus shifts to repairing any cracks or imperfections. Fillers, particularly epoxy-based fairing putties, play a critical role in this phase. When selecting a filler, ensure that it is not harder than the surrounding fiberglass; otherwise, it may complicate the sanding process later. Mix the filler appropriately as per the manufacturer’s instructions and apply it generously to the damaged areas, smoothing it out to create an even surface before allowing it to set fully.
After the filler has dried, it’s time to move onto progressive sanding. Start with coarser sandpaper, around 320-400 grit, to address any irregularities, and then transition to finer grits, 600-800, for that necessary smooth finish. Utilizing an appropriate sanding block or long board is advisable to prevent shaping irregularities into the fiberglass itself. This process not only prepares the fairing for a smooth finish but also ensures that any remaining imperfections are addressed.
Once satisfied with the smoothness of the surface, the last major step of preparation involves applying a primer suitable for plastic. Using a plastic-specific primer is crucial, as it ensures that the paint adheres properly while maintaining flexibility. Apply 2-3 light coats, allowing for adequate drying time in between each coat. Should imperfections remain visible after priming, lightly sand the area once more to maintain the integrity of your repair efforts.
With these surface preparation techniques, your fiberglass motorcycle fairings will be ready for the application of resin or additional patches without the worry of poor adhesion. Following these steps will significantly enhance the quality and durability of your repairs, paving the way for a flawless finish that can rival a factory look. As you take these precautions, remember to work methodically and allow each step the attention it deserves, which ultimately pays off when your motorcycle hits the road once again.
For those seeking specific motorcycle fairings tailored to various models, you might explore additional resources detailing fairing options that cater to specific brands such as Honda or Suzuki.
3. Achieving a Pristine Finish: Essential Techniques for Fiberglass Fairing Restoration
To successfully restore cracked fiberglass motorcycle fairings, achieving a pristine finish is vital, transforming a simple repair into a professional-grade restoration. This final stage encompasses meticulous steps that enhance durability, aesthetic appeal, and ensure long-lasting results after the repair process.
The first essential step in this finishing phase involves sanding the repaired area. Once the fiberglass cloth and resin have completely cured (this typically takes several hours), the initial task is to remove any adhesive tape carefully. Start working the surface with coarse grit sandpaper to eliminate excess resin and blemishes from your repair. This step not only smoothens the surface but also prepares it for further refinement. Transitioning to finer grit sandpaper is necessary to meticulously buff out any remaining imperfections, such as air pockets or minor scratches. The goal is to achieve a flawless, smooth surface that is ready for the next stages of restoration.
After painstakingly sanding the surface, applying a fairing compound is crucial in filling any low spots or dings that may have resulted during the sanding process. Using a marine-grade filler or specific fiberglass compounds is highly recommended for this step. Apply the fairing compound generously yet thoughtfully, ensuring it effectively fills in any uneven areas. Allow this compound to dry fully – patience during this drying stage pays dividends later in the outcome. Once dried, repeat the sanding process with fine grit paper to refine the profile of the fairing to a smooth finish.
With the surface now levelled and sanded to your satisfaction, it’s time to add a protective final layer. You have options when it comes to this step—either applying gelcoat or a premium topcoat paint. The use of gelcoat provides a thicker protective finish. When applying, it’s essential to be aware that additional sanding and polishing will be required to restore its glossy appearance and prevent future oxidation. On the other hand, opting for Awlgrip paint as a thinner topcoat also offers excellent durability and provides a wide array of color choices, making it easier to match the bike’s original aesthetic. This paint’s easy maintenance is a bonus, with simple washing and occasional waxing keeping it looking fresh.
As you finalize the finishing touches, ensure your workspace is clean and dry, as any dust or contaminants can ruin the immaculate finish you’ve worked so hard to achieve. Pay close attention to the mixing of your resin, stirring carefully to avoid introducing bubbles that could compromise the repaired area’s integrity. Utilizing a roller during the application process is an excellent way to minimize air entrapment, further ensuring a high-quality result.
Once all finishing processes have been successfully completed, it’s time to reinstall the fairings and admire your labor’s fruits. Achieving a professional finish on your fiberglass fairings enhances not only their aesthetic appeal but their performance as well. From cosmetic refinements that boost the look of your motorcycle to repairs that extend the fairings’ lifespan, mastering these finishing techniques is essential for any motorcycle enthusiast dedicated to repair. For a detailed overview of different motorcycle models and the fairings suitable for them, visit the vast collection available through related online sources, which can offer great insight into specific needs for your bike.
Chapter 3: Repair Techniques for ABS Plastic Fairings: Mastering the Process

1. The ABS Cement Method: A Reliable Approach to Fixing Cracked ABS Plastic Fairings
Repairing cracked ABS plastic fairings can be a daunting task, but utilizing the ABS cement method offers a reliable and effective solution. This technique stands out because it chemically bonds the cracked surfaces, creating a solid and durable repair. Unlike standard glues or epoxies, which often fail under stress or vibration, ABS cement is specifically designed to fuse with the ABS material, ensuring a long-lasting and robust fix.
The process begins with careful preparation. To achieve a successful repair, first, clean the damaged area meticulously. Use sandpaper to remove any dirt, grime, and gloss from the surface. A roughened surface helps ensure better adhesion, allowing the cement to grip effectively. Take time to inspect the crack thoroughly and determine whether it requires further stabilization, particularly if the crack is large or structural in nature.
Next, you move to the application of the ABS cement. This specialized adhesive, made for ABS plastic, should be applied directly into the crack and along both edges of the broken pieces. The unique formulation of ABS cement contains solvents that soften the plastic, promoting a fusion effect as the solvents evaporate. When spread generously, the cement should fill the crack adequately, setting the stage for a strong join.
It’s essential to maintain alignment during the curing process. To accomplish this, tape the pieces together firmly. This temporary holding mechanism not only keeps the crack aligned but also prevents any movement that could compromise the bond as the cement dries. Depending on the specific product you use, the initial set time may be quick, but it is advisable to allow a full 24 hours for complete curing to achieve the cement’s maximum strength. Patience here is critical; rushing this part could lead to an inadequate repair.
Once cured, the final finishing touches can transform a rough repair into a polished one. Sand the area smoothly using progressively finer grits of sandpaper, starting from around 220 grit up to 600 grit. This step is vital for both aesthetic and functional purposes; a smooth surface helps blend the repair with the original fairing while ensuring no sharp edges are present that could cause injuries or further damage.
After sanding, consider adding paint if desired. If the original finish was glossy, choosing an appropriate color match can provide a factory-like appearance, enhancing the overall look of the motorcycle once again.
Why does this method work so effectively? The key lies in the structural integrity created through the chemical interaction between the cement and the ABS material. Unlike PVC cement or regular epoxies, which often create weak bonds that can easily fail under vibration or stress, ABS cement ensures a reliable join that remains waterproof and resistant to the challenges faced during rides.
For those looking to boost the strength of their repair even further, consider combining the ABS cement method with plastic welding: after taping the crack, plastic rods can be melted into the gap, adding additional integrity to the repair. Some commercial kits simplify this integration process, providing all necessary components for a professional-level repair without requiring extensive tools or skills.
Remember, successful repairs may extend beyond fairings alone—components like tabs and fenders also benefit from this versatile method. However, always be cautious when dealing with fiberglass; ensure that the dual-materials are correctly identified before attempting to fix mixed components.
Ultimately, by employing the ABS cement method, riders can restore the integrity of their motorcycle fairings, ensuring durability against the rigors of the road—an essential step for maintaining both appearance and safety on any ride. For those searching for specific fairings or parts, checking various collections available, such as those for Honda or Yamaha models, can be incredibly beneficial.
2. Mastering Plastic Welding Techniques for Resilient Repair of Cracked ABS Fairings
Plastic welding stands out as an effective method for repairing cracked ABS plastic motorcycle fairings, offering a level of durability and structural integrity that often surpasses that of the original material. This technique involves the careful melting of compatible plastic rods or strips into the cracks of the fairings, creating a bond that, when executed properly, can maintain the original strength of the fairing. This process not only restores the fairing’s aesthetic appeal but also ensures longevity, especially under stress during rides.
To embark on a successful plastic welding venture, preparation is key. Begin by thoroughly cleaning the area around the crack to eliminate any dirt, grease, or old paint that could interfere with the welding process. It’s essential to align the cracked edges carefully to ensure they fit snugly together. Once aligned, securing them with painter’s tape on the exterior side can help maintain the desired shape during the repair and allow for a smoother finish.
For the welding process, selecting the right tools and materials is crucial. An 80W plastic welding iron with a teardrop tip is highly recommended due to its efficiency in melting the plastic without causing excessive damage to the surrounding areas. Additionally, having ABS-compatible welding rods or FiberFlex rods on hand is vital. These rods are specifically designed to fuse well with ABS materials, ensuring a solid repair. For users seeking added reinforcement, stainless steel mesh can be integrated during the welding process for extra strength. In some DIY setups, a basic soldering iron can be substituted along with plastic strips made from old tubes, but the results may not equal those achieved with specialized tools.
During the actual welding phase, heat your welding tool and gradually melt the rods into the crack. Apply a small amount of pressure as needed to ensure the melted plastic adequately fills the void and bonds with the existing material. If you are utilizing reinforcing mesh, it should be inserted while the plastic is still molten to enhance the strength of the repair. Be methodical in building up layers, continually covering the area with melted plastic to secure a robust bond that can withstand vibration and stress once the fairing is back in use.
After the welding is complete, it is crucial to allow the repair to cool completely, ensuring the plastic solidifies and the bond strengthens. Once cooled, sanding down the area to achieve a smooth surface is often the next step, blending the repair seamlessly into the surrounding fairing. If there are gaps visible after sanding, applying a filler can create a flush finish. Painting the area to match the original color will help camouflage the repair, maintaining the visual appeal of the motorcycle.
Alternative welding methods such as hot staple guns can also be explored for repairs, particularly for creating quick, robust solutions for tears or breaks in fairings and bumpers. These tools effectively embed specialized staples into the plastic, providing a rigid and lasting hold. For minor cracks, ABS cement can serve as a backup solution; however, it is crucial to remember that welding remains the recommended option for high-stress areas due to its superior durability.
In summary, mastering plastic welding techniques offers motorcycle owners a cost-effective and professional-grade repair method for ABS fairings, often extending their life without necessitating full replacements. For best results, practice on scrap ABS material first; getting comfortable with heat control is essential since improper technique can lead to further damage or ineffective repairs. For reliable kits and tools, resources like Polyvance provide helpful materials for achieving superior results in your repair endeavors. To explore various fairing options, check Honda Fairings.
3. Mastering the Sprinkling Technique: A Seamless Repair for Cracked ABS Plastic Fairings
The sprinkling technique represents an innovative approach for addressing significant cracks in ABS plastic motorcycle fairings. This method utilizes a specialized liquid resin that enables a chemical bonding process, effectively uniting the fractured plastic material. This technique is particularly effective because it capitalizes on the nature of ABS, ensuring that the repair maintains both strength and flexibility, similar to the original fairing composition.
To begin, it’s essential first to clean the cracked area meticulously. Any dirt, grease, or loose fragments can compromise the integrity of the repair. A clean surface is vital for optimal bonding. Sandpaper is a useful tool here; it can help scuff the edges around the crack to enhance the adherence of the resin.
Once the crack is clean, you can proceed to the next step: applying the liquid ABS repair resin. It’s recommended to use a single-part solvent-based formula, which has proven effective for repairs. Simply sprinkle or directly apply the resin into the cracks, ensuring it fills every gap adequately. One should allow some time for the solvents in the resin to evaporate. This evaporation process is critical because it facilitates the fusion of the new ABS material with the existing plastic, creating a seamless repair that can withstand the stresses of riding.
For repairs involving larger cracks, additional reinforcement may be necessary. This can be effectively achieved by incorporating ABS plastic welding rods alongside the sprinkling technique. Using a heat tool, you can melt these rods and fill the cracks before or during the application of the resin. This approach combines the benefits of both welding and chemical bonding, ensuring a robust and durable repair that can last through the rigors of everyday use.
After applying the resin and allowing it to cure completely—usually requiring a few hours—it’s time for the finishing touches. The repaired area can often look rough or uneven, so sanding the surface is often necessary to achieve a smooth, aesthetically pleasing finish. Optionally, once sanded, painting the repaired area can help match the factory finish of the motorcycle, making the repair nearly invisible. The final product is a repair that is not only hard and shiny but also waterproof and flexible, maintaining the quality and function of the original ABS fairings.
One of the most compelling reasons to adopt the sprinkling technique over traditional methods is its effectiveness in dealing with structural repairs as opposed to mere aesthetic fixes. Traditional epoxies or glues may seem like convenient options; however, they often fail because they do not account for the differing thermal expansion rates of the materials involved. This risk of failure is virtually eliminated with the chemical bonding that occurs during the sprinkling process, leading to a singular, solid structure that can endure the vibrations and impacts typical in motorcycle operation.
While alternatives such as crack welding or touch-up paints may serve well for minor cosmetic imperfections, the sprinkles approach excels in situations requiring serious structural integrity. By following each step carefully, motorcyclists can effectively restore the functionality and safety of their fairings, avoiding costly replacements. When in doubt about specific repairs or product selections, resources like Easy ABS Repair can provide additional guidance to ensure optimal results. The more adept one becomes at using this technique, the more reliable and lasting the repairs will be, contributing to a safer and more visually appealing motorcycle. For those looking to browse various fairing options, try checking out collections on brands such as Honda and Yamaha for quality fairings that might suit individual motorcycle repairs.
Chapter 4: Mastering Material Identification to Enhance Specialized Motorcycle Fairing Repairs
1. Crucial Steps in Identifying Motorcycle Fairing Materials for Repair Success
Understanding the material composition of motorcycle fairings is a foundational step that can determine the success of any repair job. Motorcycle fairings, which serve as protective shells for various motorcycle components, come in different materials, including ABS plastic, polycarbonate, fiberglass, and carbon fiber. Each material has unique properties and repair characteristics, and using the right techniques and products tailored for that specific material is crucial for achieving lasting results.
ABS plastic, the most prevalent material in OEM parts and aftermarket components, is known for its impressive impact resistance and dimensional stability. Its rigidity makes it ideal for street use, and many specialized repair kits are designed specifically for ABS. Recognizing ABS is straightforward; it feels solid to the touch and resists cracking under normal riding conditions. If your motorcycle fairing seems to flex slightly without breaking, it is likely ABS. The compatibility of specialized repair kits with this material ensures strong adhesion and durability, making ABS the most recommended choice for at-home repairs.
Polycarbonate, on the other hand, offers enhanced flexibility and is incredibly tough. While it excels at resisting cracks, it can scratch more easily than other materials, complicating repair efforts. When considering repairs, it is important to use flexible fillers specifically designed for polycarbonate. Using an ABS kit on polycarbonate parts, for example, can lead to degraded structural integrity over time. Check for visual cues like a bendy nature or a smooth surface indicative of polycarbonate, which sets it apart from more rigid materials.
Next is fiberglass, often encountered in sports models or custom bikes. While it provides lightweight characteristics and customization options, it is more brittle compared to other plastics. Fiberglass fairings generally have a rough finish and can be repaired using fiberglass cloth and resin. Repairs involving fiberglass require careful handling, as they can crack under heavy impact. This material can be identified by its composite-like texture and is suitable for a range of specialized repair kits tailored for fiberglass, emphasizing the correlation between identifying the material and selecting the correct repair technique.
Lastly, carbon fiber represents a premium choice for high-performance motorcycles. Extremely light and strong, carbon fiber fairings excel in both durability and aerodynamics. However, they often require professional installation due to their complex repair needs and higher costs. Identification typically involves recognizing the woven pattern left by the strands of resin-bonded fibers. For carbon fiber, specialized kits may include advanced adhesives capable of returning structural strength without adding weight.
Proper identification of fairing materials is paramount for the selection of repair strategies. A mismatch between the repair product and the material can not only reduce the longevity of the fix but may also risk the overall performance of the motorcycle under stress, vibration, or UV exposure. To assure optimal results, always check for OEM markings, perform visual inspections, and leverage manufacturer resources. If uncertain about your fairing’s material, consult detailed motorcycle guides to clarify common materials used for specific models.
Additionally, conducting simple physical tests can yield insightful results. For instance, pressing on the fairing can help determine its flexibility, while observing how it bends or flexes under gentle pressure will give clues about whether it’s polycarbonate or ABS. Moreover, examining the weight can indicate whether the material is fiberglass or carbon fiber, as the latter is characteristically lightweight. If the uncertainty persists, testing smaller repair patches on scrap pieces can help ensure the appropriateness of selected techniques before committing to repairs.
For additional insights into common fairing materials, explore more resources that dive deeper into specific motorcycle models and their characteristics, enhancing your ability to make informed repair choices. Knowing how to identify the correct fairing material is, after all, the gateway to utilizing specialized repair kits effectively for lasting motorcycle joy and safety.
2. A Hands-On Approach to Repairing Cracked Motorcycle Fairings with Specialized Kits
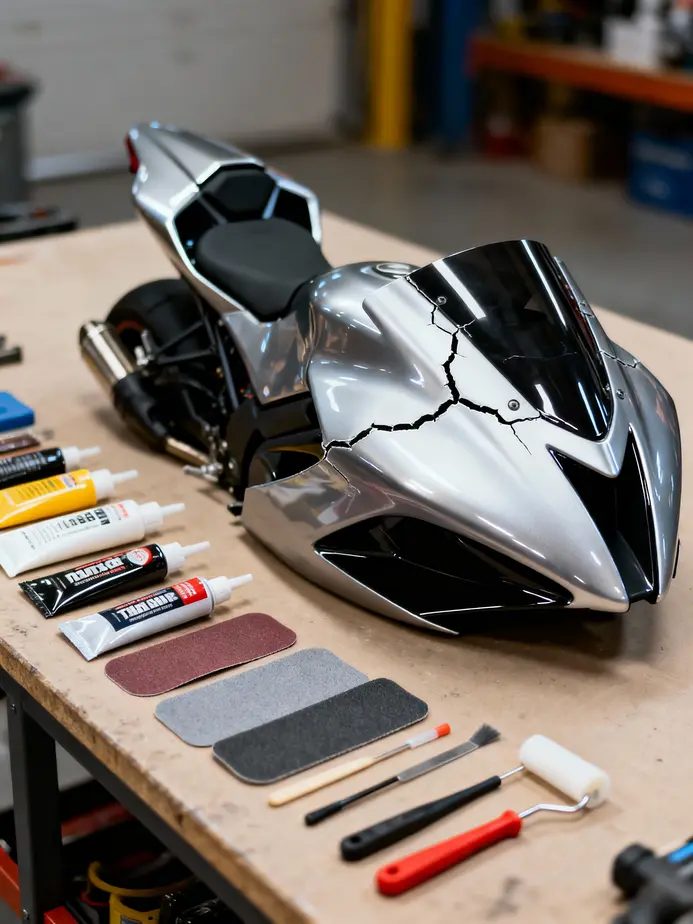
When it comes to restoring cracked motorcycle fairings, employing specialized repair kits tailored for ABS plastic can provide an efficient and cost-effective solution. These kits are designed to bond directly with the existing material, ensuring that the integrity of your fairing is preserved without the need for expensive replacements. The process for utilizing these kits can be methodical yet straightforward, allowing motorcyclists to achieve professional-grade results at home.
The journey to repairing your cracked fairings starts with the right preparation. If the fairing is currently affixed to your motorcycle, you may want to consider removing it to ensure a thorough and manageable repair process. Once you have access to the damaged area, it’s essential to clean it meticulously. Any dirt, grime, or remnants from previous repairs can compromise the adhesion of the specialized kit. Use some sandpaper to gently abrade the surface around the crack, exposing a fresh layer of plastic that promotes better bonding.
After preparing the area, it’s important to assess the severity of the damage. For particularly severe cases, you may need to remove fragments of plastic or old pegs that could hinder a proper repair. Simplifying the work area makes the subsequent application of the repair kit more effective and straightforward.
Once the surface is ready, it’s time to delve into the specifics of application. Carefully read and follow the manufacturer’s instructions provided with the specialized repair kit. Most kits will require you to mix components together to create an optimal bonding solution. Once mixed, apply the formula directly into the crack or damaged area. Unlike traditional adhesives that sit atop the surface, the formula in these kits is designed to permeate and bond with the existing ABS plastic, creating a formidable connection that enhances the panel’s original strength and flexibility.
After applying the mixture, allow it to cure fully. Curing time varies by product, but it’s crucial to adhere to the specified duration to ensure a robust repair. Most quality ABS repair kits offer a shelf life of about three years, so having one on hand can be helpful for future repairs without the need to purchase additional supplies.
Once the curing phase is complete, you can proceed to finishing touches. Sand the repaired area smoothly to ensure it blends seamlessly with the rest of the fairing. At this point, if your fairing’s original color or finish matters to you, consider applying a touch-up paint as needed. This not only improves the appearance but also protects the repair further from the elements.
Utilizing specialized repair kits offers numerous advantages: they are versatile, capable of addressing cracks, broken tabs, and split panels on various models. Additionally, they are a cost-effective alternative to forking out on replacement parts. This method is particularly valuable for riders looking to address cosmetic damage without needing a full replacement, reviving the aesthetics of the bike without the hefty price tag.
In conclusion, a hands-on approach to repairing cracked motorcycle fairings using specialized kits allows you to tackle repair needs head-on, restoring your bike’s appearance and functionality while enhancing your skills as a motorcycle enthusiast. Embracing this method not only revives damaged fairings efficiently but also preserves the riding experience you cherish, enabling you to spend more time enjoying the open road. For further resources and insights on fairing restoration, check out options available at Summit Fairings to explore a variety of motorcycle fairing collections.
3. Precision and Reliability: Advanced Installation Techniques for Repaired Motorcycle Fairings
After successfully repairing cracks in motorcycle fairings using specialized kits, the focus shifts to the crucial phase of installation. Precision in alignment and secure fastening is vital to ensure that the repaired fairings withstand the rigors of riding. Fairings, typically made from fiberglass or ABS plastic, demand careful attention during reinstallation to prevent future damage and enhance their longevity.
The first step in the installation process is thorough preparation. Before attaching repaired fairings, it is essential to remove any remnants of old fairing hardware. Cleaning the motorcycle frame and the mounting surfaces of the fairings plays a critical role in achieving a robust bond. This cleaning process involves scraping off any old adhesive, grease, or dirt using appropriate solvents and abrasives. Ensuring that these surfaces are free from contamination enables the repair materials to properly adhere, setting the foundation for a long-lasting installation.
Next, proceed with a dry fit of the repaired fairing pieces before securing them. Begin with the main sections, such as the upper and lower fairings, and align them accurately to detect any potential interference with critical components like the steering mechanism or the suspension. Utilizing soft surfaces during the dry fit prevents scratching or further damaging the fairings, particularly important in the case of ABS plastic, which is prone to scuffs.
Once you confirm the alignment is correct, the next step involves secure attachment. Fastening the fairings requires precision; utilizing OEM-spec bolts, clips, or screws ensures compatibility and optimal support. It’s crucial to avoid overtightening, which could lead to further cracks or damage to the repaired areas. For any welded repairs, it’s wise to allow the full curing time as specified in the repair kit instructions—typically around 24 hours—as this maintains the integrity of the bonding.
As a part of the final checks, inspect that all components are securely attached, with no signs of rattling or movement. This step is essential to confirm that the fairing can handle the vibrations encountered during rides. Performing a low-speed test ride can also help verify if any adjustments are necessary; should rattling occur, a re-tightening of fasteners may be needed. To assist with the breakdown of post-repair issues, it’s wise to review common pitfalls, such as poor fitment, which can often be traced back to obstructions at mounting points.
Material characteristics also play a role when selecting the appropriate repair kits. For example, plastic welding techniques are optimal for ABS fairings, while fiberglass patching is recommended for composite materials. Personal limitation in expertise might warrant professional installation, as this minimizes the potential for misalignment or safety hazards. Moreover, confirming the compatibility of materials with your motorcycle model is crucial. Sections like the Suzuki GSXR 1000 K7 and others may have specific requirements that could affect repair techniques.
To enhance the aesthetics post-installation, utilizing touch-up paints that match the OEM color will restore the appearance of the fairings, maintaining the bike’s visual appeal. Handling repaired fairings gently during installation will also reduce the risk of scratches that could diminish their surface quality. In conclusion, following these precise installation techniques not only restores the motorcycle’s appearance but also ensures that renewed fairings contribute to safe and smooth riding experiences. By prioritizing correct alignment and secure fastening, you can ensure long-lasting repairs that endure both the elements and the vibrations of the road ahead. For more helpful resources on motorcycle fairing options, explore the selections available at Summit Fairings.
Chapter 5: Navigating the Nuances of Material Repair in Cracked Motorcycle Fairings
1. Choosing the Right Repair Strategy: Material Insights for Cracked Fairings
When addressing cracked motorcycle fairings, understanding the material from which they are constructed is paramount to achieving a robust and lasting repair. Fairings are predominantly made of two materials: ABS plastic and fiberglass, each necessitating distinct repair techniques due to their unique properties. By distinguishing these materials and applying tailored repair strategies, motorcyclists can effectively restore their fairings back to optimal condition, enhancing the bike’s aesthetics and functionality.
ABS Plastic Fairings
ABS plastic is prevalent in many contemporary motorcycles, especially among OEM (original equipment manufacturer) models. The solidity and flexibility of ABS make it an ideal choice for fairings that must endure vibrations and minor impacts. However, traditional repair methods, such as using epoxies or super glue, often fall short when it comes to restoring ABS plastic. These adhesives do not bond well with the material and may not withstand thermal expansions, leading to compromised durability over time.
Instead, utilize ABS-specific repair resins designed to chemically adhere to the plastic at a molecular level. These resins have a consistency similar to yogurt, allowing them to seep into the crack and effectively fill gaps while becoming part of the fairing itself. Once cured, these resins are not only strong but also sandable and paintable, seamlessly integrating into the original fairing’s finish. Alternatively, ABS cement offers an effective method for repairing cracks by applying it to the edges of the broken pieces. Once set, the joints can be sanded smooth, yielding a clean restoration that matches the fairing’s surface texture.
For more severe cracks, consider plastic welding. This method involves fusing the edges of the crack by taping them together and using a soldering iron to melt compatible plastic strips into the gap. This process not only fills the crack but also forms a bond as strong as the original material, rendering the repair invisible and nearly imperceptible.
Fiberglass Fairings
In contrast, fiberglass fairings are particularly common on sport and racing bikes, where aerodynamics and weight play a critical role. The repair of fiberglass requires a different approach, primarily using fiberglass cloth, resin, and a hardener. Before beginning the repair, meticulously prepare the damaged area by sanding it down to ensure a smooth application surface. After cleaning and taping the exterior side of the crack, apply a filler to even out the surface. This step is crucial for achieving a solid base for the subsequent layers.
Next, mix fiberglass resin with the proper catalyst according to the manufacturer’s instructions. This mixture should be applied over the cracked area, then covered with fiberglass cloth. To eliminate any air bubbles, use a roller gently across the cloth. The curing process of fiberglass repairs should not be rushed. Allow sufficient time for the resin to harden completely before sanding down the area for an even finish, which can then be painted to match the bike’s original color.
While most motorcycle owners may feel comfortable undertaking ABS and fiberglass repairs, working with advanced composite materials like carbon fiber or hybrid constructions often necessitates professional help because of their complexity and specialized repair requirements.
In summary, choosing the right repair material is imperative for restoring cracked motorcycle fairings effectively. ABS and fiberglass each offer unique strengths and requirements for repair, so understanding their distinctions is essential for any motorcycle enthusiast. For simple cosmetic issues, touch-up paints can also provide a quick solution without the need for extensive repairs. Ultimately, tailoring the repair approach to the material can help maintain the integrity and look of your motorcycle.
For guidance on selecting appropriate fairing kits and repair materials, visit relevant collections from industry leaders for comprehensive resources.
2. Maximizing Repair Durability: Strategies for Long-Lasting Motorcycle Fairing Fixes
The durability and longevity of motorcycle fairing repairs hinge on various factors, including the chosen repair method, material compatibility, and ongoing maintenance. Understanding these aspects allows for more reliable fixes, ensuring that your motorcycle’s aesthetics and functionality remain intact over time.
When fixing cracked fairings, it’s essential to consider the material from which the fairing is made—ABS plastic or fiberglass—as each type necessitates a distinct approach for optimal repair. For ABS plastic fairings, methods like plastic welding or using ABS-specific repair products are deemed the most effective. Unlike traditional adhesives, such as superglue or epoxy, which merely adhere to the surface, these techniques create a bond that flexes and expands with the material, leading to a more durable fix that can withstand the stresses of riding.
Plastic welding involves melting edges of both the fairing and compatible plastic strips to fuse them effectively. This process not only repairs the crack but also reinforces the structural integrity of the fairing, providing a lasting solution that can endure the rigors of consistent vibration and impact. For minor cracks, ABS-specific repair kits are also an excellent alternative—these kits offer a simple, no-fuss solution suitable for quick fixes. They bond on a molecular level, establishing a long-term relationship with the plastic, making them far superior to conventional epoxies.
On the other hand, fiberglass fairings require a meticulous approach involving resin and fiberglass matting. While more time-consuming, this method can yield a strong, well-integrated repair if done correctly. The key to success with fiberglass repairs is ensuring the resin is mixed accurately with the catalyst and allowing sufficient curing time, generally around 24 hours, to reach full strength. Once cured, the exterior should be sanded and, if needed, painted to ensure a seamless appearance.
Beyond the method of repair, several factors influence the longevity of repairs. Material compatibility emerges as a crucial element; using adhesives not suited for ABS can lead to cracks re-emerging, especially under fluctuating temperatures or vibrations encountered during rides. This is particularly true for two-part epoxies, which expand and contract differently than the plastic, making them prone to failure. Therefore, it is vital to invest in materials specifically designed for the type of fairing being repaired, as they yield the best long-term outcomes.
The location and extent of the damage play a significant role as well. Cracks near mounting points, for instance, are notoriously susceptible to failure because they endure consistent flexing. Repairs in these areas may require professional intervention to ensure that they can withstand the mechanical stresses of daily use. It is also essential to consider regulatory implications; fairings with compromised integrity may lead to non-compliance during inspections like the UK MOT, which can pose safety risks.
Regular maintenance of repaired fairings is paramount to sustaining their durability. For those with carbon fiber fairings, routine cleaning, applying UV protection, and education on proper repairs can extend repair effectiveness. This vigilance is especially important after long rides or track days, where wear and tear are more pronounced.
While DIY repairs are achievable with the right materials and techniques, one must recognize when to seek professional assistance, particularly for more severe structural damage. A reputable repair service can provide reassurance that the motorcycle meets safety standards and operational integrity, ultimately contributing to a better riding experience. Effective repairs not only maintain aesthetics but also enhance usability, allowing riders to hit the road confidently. To explore more about fairing solutions, check out specialized collections available at Summit Fairings.
3. Essential Surface Preparation Techniques for Flawless Fairing Repairs
When setting out to repair cracked motorcycle fairings, one might underestimate the importance of thorough surface preparation. However, this foundational step is essential for achieving not only a durable repair but also a visually appealing finish that can withstand the rigors of the road. Understanding the nuances of effective surface preparation transforms a quick fix into a meticulous restoration process that enhances the longevity of your motorcycle’s fairings.
The first step in any successful repair process is cleaning. Motorcycle fairings accumulate dirt, grease, and old paint that can prevent repair materials from adhering properly. It is vital to meticulously clean the affected area using a mixture of soap and water, supplemented with a degreaser such as acetone or a designated prep solvent. This combination ensures that all residues are eliminated, thereby leaving a clean slate for the subsequent repair work. After cleaning, allow the fairing to dry completely. Any residual moisture can weaken the bond of the repair materials, resulting in compromised integrity.
Once cleaned, the next phase is inspection and repair of the damaged areas. Carefully examine the fairing for cracks, gouges, or other imperfections. If you spot significant structural damage, applying a body filler can be crucial to restore the fairing’s shape and create a uniform surface suitable for sanding. This filler not only supports the integrity of the fairing but also sets the stage for a smoother finish that will enhance the aesthetics of the bike once the repair is complete.
Sanding is a pivotal part of the preparation process and should be approached with care. Start with a coarser grit sandpaper, typically around 320 to 400 grit, to address rough imperfections and flatten the surfaces. As the areas begin to smooth out, transition to finer grits, such as 600 and 800 grit, to achieve a polished finish. One effective technique is wet sanding, which involves using water to minimize dust. This approach not only alleviates mess but also prevents the surface from becoming contaminated during the sanding process, ensuring a clean finish that is ready for the next steps.
Attention to detail during the sanding and preparation stage cannot be overstated. It is essential to layer fillers and primers meticulously, as this directly influences the final appearance and durability of the repair. After completing the necessary sanding and applying fillers, consider using a UV-protected topcoat once repairs are final. This preventive measure safeguards against further cracking caused by environmental factors, thus improving the longevity of your repairs.
Moreover, when dealing with plastic fairings, particularly those made of ABS, be aware of their unique properties such as thermoformability and impact resistance. Understanding these characteristics aids in selecting appropriate repair materials that match the original properties of the fairing. When applying adhesives or repair products, ensure that they are specifically designed for the material to sustain flexibility and strength, which are vital for repair success.
By meticulously following these surface preparation steps, the adhesive bond will be far more robust, enhancing the overall durability of your motorcycle’s fairings against external conditions. A well-prepped surface directly correlates to repair longevity, contributing to your motorcycle’s performance and aesthetic appeal for years to come. For those new to fairing repairs, following best practices and taking extra time during this preparation phase pays dividends in the final outcome. When embarking on this repair journey, always strive for precision and care, ensuring that your motorcycle remains a source of pride and joy on the road.
For more insights on motorcycle fairing repairs, check out Summit Fairings’ extensive collection of fairings tailored for various makes and models, such as Honda, Yamaha, and Suzuki.
Final thoughts
Repairing cracked motorcycle fairings not only enhances the aesthetic appeal of the bike but also preserves its structural integrity. By mastering the techniques discussed, business owners can offer valuable repair services that ensure customer satisfaction and loyalty. Identifying the material, following methodical repair procedures, utilizing specialized kits, and adhering to safety practices are integral steps that every business should implement. In doing so, you not only contribute to the longevity of motorcycles but also to the overall satisfaction of your clientele, creating a more sustainable business model for the future.
Ready to elevate your ride? Summit Fairings delivers premium, custom-fit fairings that blend style and durability. Whether you’re chasing speed or turning heads, we’ve got your bike covered. Don’t wait—transform your machine today. Click, customize, and ride with confidence. Your perfect fairing is just a few clicks away. Act now!
About us
We are one of the leading motorcycle fairing export sites, with over 3,000 styles across almost all motorcycle models. Buy from summitfairings.com, and pay 10-40% less than the prices on other sites. If you have any questions, we promise we will have your answer within six hours.