Introduction
Fairings are essential for both the performance and aesthetic appeal of motorcycles. For business owners in motorcycle repair, customization, or sales, mastering the process of fixing fairings can significantly improve customer satisfaction and operational efficiency. This guide breaks down three critical stages in the fairing repair process. The first chapter focuses on thorough preparation and the systematic removal of old or damaged parts. The second emphasizes the correct installation of mounting brackets and careful assembly of panels, ensuring a proper structural foundation. The final chapter highlights precise installation techniques, alignment strategies, and practical repair methods for cracks and surface damage. Together, these insights equip business owners with actionable knowledge to deliver visually appealing and durable motorcycle fairings, fostering lasting client trust and business growth.
Tables of Contents
Chapter 1: How to Fix Fairings on a Motorcycle: Preparation and Removal of Old Fairings
- Safely Preparing Your Motorcycle: Identifying Fasteners and Electrical Connections Before Fairing Removal
- Mastering Gentle Techniques for Removing Motorcycle Fairings Without Damage
- Thorough Cleaning and Mounting Point Inspection for Secure Motorcycle Fairing Reinstallation
- Mastering the Art of Organizing and Handling Removed Fairing Parts for Seamless Reinstallation
Chapter 2: How to Fix Fairings on a Motorcycle: Mounting Brackets and Panel Assembly
- Careful Removal of Old Fairings and Preparing Mounting Brackets for Secure Assembly
- Mastering Mounting Bracket Installation for Secure, Aligned Motorcycle Fairings
- Mastering Panel Alignment and Assembly for Secure Motorcycle Fairing Installation
- Essential Tools and Proven Techniques for Secure Motorcycle Fairing Assembly
Chapter 3: How to Fix Fairings on a Motorcycle: Final Installation, Alignment, and Repair Techniques
- Mastering the Final Fit: Essential Preparation and Installation Steps for Motorcycle Fairings
- Mastering Fairing Alignment: Precise Techniques for a Flawless Motorcycle Fit
- Mastering Repair and Realignment: Restoring Damaged and Misaligned Motorcycle Fairings
- Ensuring Perfect Fit and Security: Final Alignment, Tightening, and Stability of Motorcycle Fairings
Chapter 1: How to Fix Fairings on a Motorcycle: Preparation and Removal of Old Fairings
1. Safely Preparing Your Motorcycle: Identifying Fasteners and Electrical Connections Before Fairing Removal
Successfully removing motorcycle fairings begins with careful preparation and thorough identification of all fasteners and electrical components attached to the panels. Start by ensuring the bike is securely positioned on a stable stand, providing steady access to the areas around the fairings. A quick warm-up can soften some parts but always confirm the engine and surroundings are cool enough to work on safely. Next, methodically inspect every mounting point where fairings connect to the frame or brackets, spotting bolts, screws, nuts, clips, and protective rubber grommets that cushion against cracking. Using appropriate tools like hex keys and screwdrivers, familiarize yourself with the fastener types you will need to loosen. Equally crucial is locating and gently disconnecting electrical connections integrated into the fairings—for instance, wiring harnesses for headlights, turn signals, or indicator lights—which often require cautious handling to avoid damage. Loosening fasteners gradually in a proper sequence helps support the fairing during removal and prevents undue strain on delicate attachments. Throughout the process, keep all removed hardware organized to streamline future reassembly. When reinstalling, placing washers behind rubber grommets helps distribute pressure evenly and avoid stress on brittle fiberglass or plastic parts. Prevent overtightening to safeguard fairing integrity. For additional insights and step-by-step visuals, service videos focusing on models like the Honda VFR750F illustrate effective identification of hidden fasteners and electrical elements beneath panels such as airboxes and fuel tanks, thereby enhancing safety and efficiency during maintenance. This meticulous approach lays the foundation for a smooth, damage-free disassembly and prepares you for secure reinstallation later.
For further expert tips on maintaining your motorcycle’s exterior, visit this comprehensive guide on motorcycle fairings.
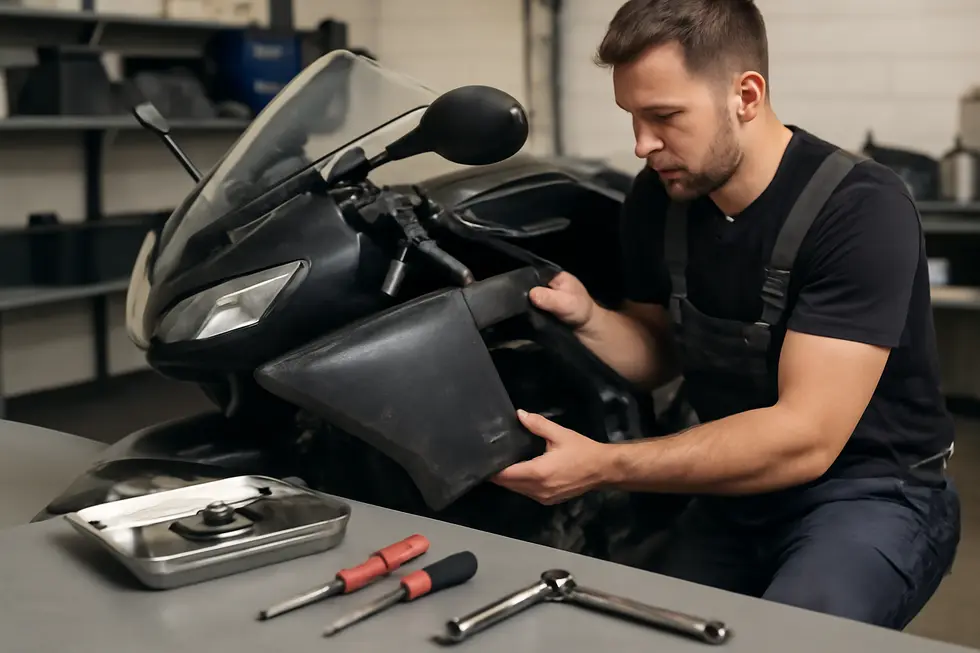
2. Mastering Gentle Techniques for Removing Motorcycle Fairings Without Damage
Successfully removing old motorcycle fairings without causing damage requires a patient, methodical approach paired with the right tools. Start by gathering the essential screwdrivers, hex keys, and wrenches necessary to carefully loosen the bolts and screws securing the panels. It’s vital to gradually loosen these fasteners, paying attention to their exact location and type to ensure a smooth reinstallation later.
Equally important is identifying any hidden plastic clips or tabs that fasten the fairings. Using plastic trim tools or a flathead screwdriver wrapped in tape helps pry these gently without scratching the surfaces. Before fully detaching panels, remove any electrical components or mounted accessories such as mirrors and headlights to prevent accidental damage.
Throughout the process, supporting the fairings to avoid bending or snapping is crucial. Applying even, controlled pressure rather than force prevents cracks and breaks in the plastic. By loosening fasteners in a logical sequence—often from front to rear—and working slowly, you maintain control over the delicate fairings while preserving their alignment.
Additionally, when reassembling, consider using rubber grommets or washers to cushion the panels and reduce stress on mounting points. Following these strategies minimizes damage risk and simplifies the restoration of your motorcycle’s visual appeal. For a step-by-step visual guide tailored to models like the 2024 Yamaha R3, detailed video tutorials are invaluable, reinforcing these careful removal techniques.
For further insights on selecting and handling replacement components, explore comprehensive resources like the Explore the Best Motorcycle Fairings at Summit Fairings blog.
External tutorial reference: https://www.youtube.com/watch?v=3YTuEWH770U
3. Thorough Cleaning and Mounting Point Inspection for Secure Motorcycle Fairing Reinstallation
After carefully removing the old fairings, the next essential step is a meticulous cleaning and detailed inspection of all mounting points to ensure a secure and lasting reinstallation. Begin with washing the fairing pieces and the motorcycle frame’s mounting areas using mild soap and water to gently remove dirt, grease, and residues. Avoid harsh chemicals that could damage plastic or fiberglass surfaces. Once clean, inspect every bracket and bolt hole attentively, looking for cracks, corrosion, or wear that could compromise the fit or cause vibrations.
Pay particular attention to the bolt holes and mounting brackets on the frame. These must be free of debris and corrosion to avoid uneven pressure that might stress or crack the fairings when reattached. If mounting holes on the fairings or frame show damage or misalignment, minor touch-ups like careful grinding or filling may be required to improve the fit.
When reinstalling, start by loosely attaching front panels to allow room for adjustment. Use rubber grommets in bolt holes to cushion stress on the fairing material and distribute the clamping force evenly. Consider washers behind the grommets to protect the fairing edges and ensure bolt heads press firmly against the frame rather than deforming plastic parts. This staged tightening method also helps avoid overtightening, which can cause cracks in fragile fiberglass or plastic parts.
Additional components such as headlights, turn signals, and mirrors should be reattached only after the fairings are securely aligned. Finally, verify that no cables or hoses are pinched and that the fairings do not impede steering or suspension movements. Double-check each fastener’s tightness for safety and durability.
For a detailed visual guide on these steps, a video walkthrough examining fairing removal and inspection on a Honda VFR750F offers clear, practical insight. To explore more about quality motorcycle fairings and maintenance tips, check out this comprehensive guide on explore the best motorcycle fairings at Summit Fairings.
4. Mastering the Art of Organizing and Handling Removed Fairing Parts for Seamless Reinstallation
Careful organization and thoughtful handling of removed fairing parts are fundamental to ensuring a smooth and precise reinstall on your motorcycle. As you disassemble, keep all bolts, screws, brackets, and electrical components meticulously grouped and labeled. This prevents confusion and mix-ups, especially when many fasteners look alike but differ in length or thread pitch. Using clearly marked containers or resealable bags enhances efficiency when reassembling later.
When reinstalling, begin by loosely fitting all bolts and brackets. This approach allows you to align the fairings precisely and maintain proper clearances around critical elements such as handlebars, cables, and controls. Employ rubber grommets and washers to cushion mounting points, which prevents cracking and evenly distributes pressure, protecting fragile fairing material. Sometimes bolt holes may not align perfectly; in these cases, slight modifications like careful grinding or drilling new holes might be necessary to achieve a perfect fit.
After the main panels are secure but still adjustable, reattach auxiliary components like headlights, mirrors, and turn signals, verifying they sit properly and function correctly. An organized, well-planned workspace with the right tools—screwdrivers, hex keys, wrenches, and possibly a drill—further streamlines this process. Installing fairings prior to assembling other mechanical parts can simplify adjustments and reduce the risk of damage.
Following a methodical organization and handling strategy ensures your fairings not only fit precisely but also maintain structural integrity and smooth operation. For additional detailed guidance on aligning and installing motorcycle fairings, this comprehensive video tutorial offers valuable insights: https://www.youtube.com/watch?v=DntLkF8Feik. To discover a wide selection of quality fairings that complement these repair techniques, explore our extensive resources at Explore the Best Motorcycle Fairings at Summit Fairings.
Chapter 2: How to Fix Fairings on a Motorcycle: Mounting Brackets and Panel Assembly
1. Careful Removal of Old Fairings and Preparing Mounting Brackets for Secure Assembly
Removing old fairings is a critical first step when fixing motorcycle fairings, requiring patience and a methodical approach to protect both components and wiring. Begin by systematically loosening and removing all visible bolts and screws that hold the panels in place, noting that some fasteners may have partial threads or keepers to prevent loss. Careful handling is essential to avoid straining cables or wires attached to clips or connectors, such as those securing headlights or indicator units. Plastic clips and rubber grommets commonly hold fairings; gently pressing or twisting these connectors frees the panels without damage. Once fasteners and connectors are detached, the panels can be carefully pulled away, sliding edges out of rubber grommets and releasing any hidden clips. After removal, the mounting brackets demand thorough inspection for signs of corrosion, deformation, or dirt buildup. Clean these areas meticulously to ensure a smooth, solid fit when new or repaired fairings are installed. If bracket damage exists, repairing or replacing these parts before reassembly guarantees structural integrity. Applying sanding, priming, or protective paint to brackets can further prevent corrosion and improve the bike’s visual appeal. Temporary bolts or supports can help secure cables during this process, preventing undue tension or damage. These practices are broadly applicable across various motorcycle models such as the Harley Street Glide and Honda NC750X, which may differ slightly in fastener types and panel designs. For step-by-step visual guidance on removing fairings and preparing mounts effectively, viewers can refer to comprehensive tutorials like the Harley Street Glide inner fairing removal video. For additional insights on fairing options and maintenance, explore our detailed resources on exploring the best motorcycle fairings.
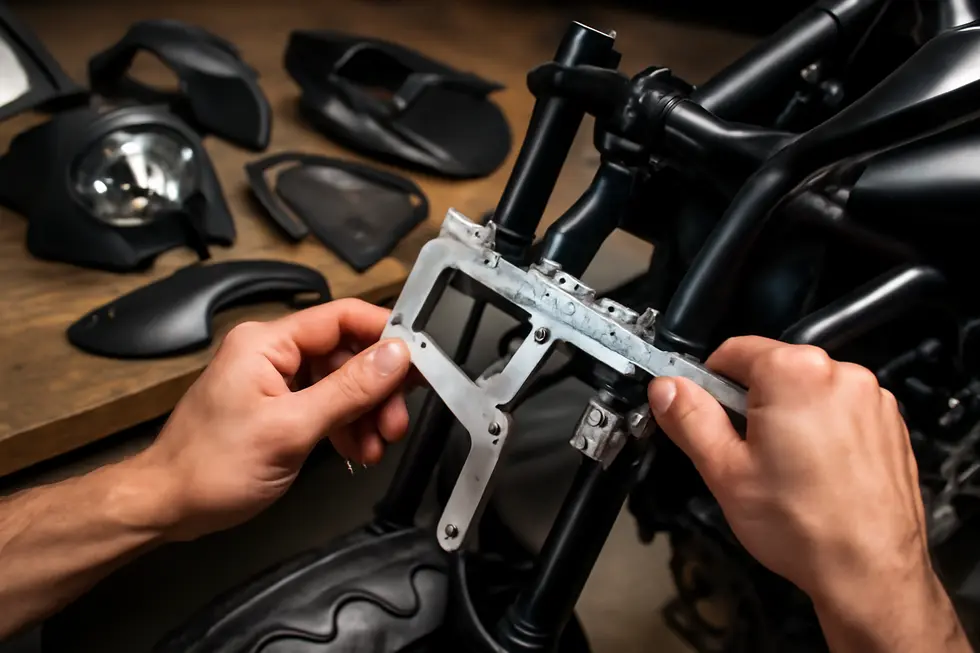
2. Mastering Mounting Bracket Installation for Secure, Aligned Motorcycle Fairings
Installing mounting brackets effectively is critical for achieving a secure and well-aligned motorcycle fairing assembly. Begin by loosely attaching the brackets to the frame using appropriate bolts and nuts; this preliminary step allows flexibility for alignment without binding the components prematurely. Holding the fairing in place, you can then gauge its fit against the brackets, making sure to maintain clearance around sensitive areas like handlebars and wiring harnesses to avoid interference or damage. Adjusting the brackets and fairing to achieve a snug, vibration-resistant fit is essential, and incorporating rubber grommets in the bolt holes protects the fairing material from stress fractures while distributing pressure evenly. Once alignment is satisfactory, carefully tighten the fasteners without overtightening—particularly when working with plastic or fiberglass fairings—to prevent cracking or deformation. Using washers behind the grommets can enhance support during this final tightening phase. After securing the main fairing panels and brackets, any additional components such as headlights or turn signals can be installed, ensuring they integrate seamlessly without impeding motorcycle controls or wiring. Finally, verify that steering and control movements remain unhindered to maintain safe operation. For those interested in a visual guide, detailed tutorials provided by expert creators offer step-by-step demonstrations, helping to solidify this crucial process. This practical approach safeguards both the motorcycle’s structural integrity and aesthetic appeal while enhancing rider safety. For more insights on top-quality fairing solutions, explore our best motorcycle fairings guide. You can also find comprehensive video resources on bracket installation techniques through trusted external channels like The Racing Xpert.
3. Mastering Panel Alignment and Assembly for Secure Motorcycle Fairing Installation
Mastering the alignment and assembly of motorcycle fairing panels is essential for a durable, professional finish. Begin by carefully removing the old fairings while keeping all bolts, clips, and mounting hardware organized. Thoroughly clean the mounting surfaces with mild detergent and a soft cloth to prevent dirt or residue from interfering with the fit. When starting the reinstallation, loosely fit the larger front panels first, allowing flexibility to align mounting holes and edges without forcing tight fits. Follow this by loosely positioning side panels and finally the rear or tail sections, maintaining a logical sequence that supports proper alignment.
Proper mounting bracket installation is critical, as these brackets provide the structural foundation for the fairings. Ensure brackets are securely fastened and correctly positioned to correspond with the fairing attachment points. In cases where original mounting holes do not align, carefully drill new holes to avoid stress on the panels. Use tools suited for each fastener, including screwdrivers, Allen wrenches, and socket sets, and employ plastic pry tools as needed to prevent scratches during adjustments.
During panel fitting, many motorcycles incorporate detent pieces or rubber grommets that require gentle handling to avoid damage. For example, some models feature detent clips that must be disengaged and repositioned delicately. A slow, patient approach is vital; avoid forcing panels into place to prevent cracks or misalignment. After all panels are loosely positioned, gradually tighten fasteners in sequence, ensuring an even distribution of pressure that prevents warping or gaps.
Throughout the process, monitor that no cables or hoses are pinched or obstructed. This method applies broadly, from sportbikes to cruisers, adapting slightly per model. For a detailed step-by-step example, refer to the GSXR 2006 fairing installation guide, which highlights the importance of loose fitting and sequential tightening to achieve a clean, secure assembly.
4. Essential Tools and Proven Techniques for Secure Motorcycle Fairing Assembly
Fixing motorcycle fairings begins with gathering the right tools and applying precise techniques to protect the components and achieve a secure fit. Essential tools include screwdrivers (both Phillips and flathead), hex keys, wrenches or socket sets, and rubber grommets and washers designed to cushion fasteners. Occasionally, a drill is needed to adjust mounting holes for perfect alignment, while optional backing plates or pop rivets can add structural support where necessary.
During bracket installation, it’s important to first loosely fit all mounting bolts and nuts. This step allows adjustment to accommodate the fairings’ contours and to ensure they align with frame points without straining wiring or controls. Fingertightening the fasteners lets you fine-tune the fit before fully securing the bolts, preventing cracks in fragile plastics or fiberglass. Rubber grommets inserted into bolt holes evenly distribute pressure, avoiding stress points that could cause warping or damage, with washers behind them helping bolts secure firmly against the frame.
Once the main fairings are mounted securely and correctly aligned, additional components like headlights, turn signals, mirrors, windshields, and air ducts are installed. If holes do not match perfectly, subtle modifications such as careful drilling or grinding help achieve a seamless fit. Final checks must ensure that no part obstructs steering or suspension and that all fasteners are tight without overtightening which can compromise material integrity.
For further guidance and visuals on bracket installation and panel assembly, the video “How Do You Install Motorcycle Fairings? – The Racing Xpert” offers detailed, step-by-step instructions that complement these techniques.
Discover more insights and options at explore the best motorcycle fairings at Summit Fairings.
Chapter 3: How to Fix Fairings on a Motorcycle: Final Installation, Alignment, and Repair Techniques
1. Mastering the Final Fit: Essential Preparation and Installation Steps for Motorcycle Fairings
Achieving a flawless finish when fixing motorcycle fairings hinges on precise preparation and careful final installation. Begin by thoroughly cleaning all mounting surfaces to remove any dirt, grease, or debris, ensuring the components align seamlessly. Proper cleaning is vital as contaminants can compromise the fit and cause fasteners to loosen over time.
With clean mounting points, loosely attach the larger fairing panels first. This initial fitting allows you to align bolt holes accurately before tightening, providing flexibility to correct positioning. Typically, installation starts with mounting brackets secured firmly to the frame near the neck or existing bolt locations. If the fairings don’t match up perfectly, cautiously drill new holes, using protective methods such as a magnet wrapped in cloth to catch metal shavings and prevent frame damage.
After loosely bolting panels, progressively tighten all fasteners in stages, checking for uniform gaps and proper alignment. This method avoids warping or stress on the plastic, which could lead to cracks or misfits. Throughout the process, ensure no cables or hoses are pinched between fairing sections, preserving both functionality and safety.
Finally, verify that all attachments, such as windshields and headlights, are securely installed and operational. This comprehensive approach ensures not only a visually appealing result but also maintains the motorcycle’s aerodynamics and protection.
For a more detailed step-by-step visual guide, consider viewing instructional videos from authoritative sources like The Racing Xpert, which highlight these techniques in action. To explore further insights into motorcycle fairings, the Summit Fairings blog offers a wealth of resources and tips.
2. Mastering Fairing Alignment: Precise Techniques for a Flawless Motorcycle Fit
Achieving a flawless fit when fixing motorcycle fairings hinges on careful alignment and methodical adjustment. Begin by loosely attaching the mounting brackets to the frame, which allows room for crucial fine-tuning before full tightening. Position each fairing panel using built-in grooves, slots, or alignment tabs that help guide precise placement. It’s essential that panels sit flush against the frame and adjacent parts without forcing or creating gaps, as this ensures structural integrity and enhances visual appeal.
As you adjust, verify that the fairings do not interfere with steering, suspension, cables, or control mechanisms. Incremental shifts in bracket positioning may be necessary, sometimes requiring drilling new mounting holes if the fit is imperfect. Use appropriate hardware such as washers or rubber grommets to absorb stress and prevent cracking during tightening. Fastening the front panels loosely first, followed by side and rear sections, provides flexibility in achieving uniform spacing and seamless joints.
Once alignment satisfies both functional and aesthetic needs, securely tighten all fasteners, continually checking that no cables or hoses are pinched. Adding backing plates or pop rivets can offer extra support in areas prone to stress. Finally, reinstall additional elements like mirrors and headlights, confirming they align well with the fairings and do not cause obstruction.
Mastering these alignment strategies results in a sturdily mounted, aerodynamically efficient, and visually harmonious fairing setup. For practical step-by-step visuals, the Ride or Die YouTube tutorial offers excellent guidance.
For more in-depth insights on selecting and installing quality panels, explore explore the best motorcycle fairings at Summit Fairings.
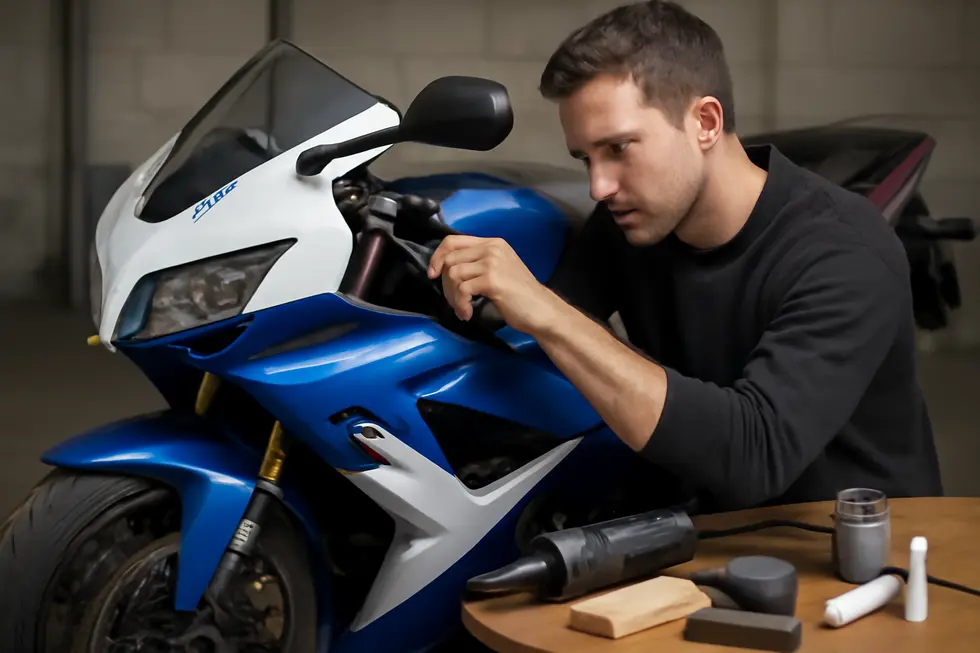
3. Mastering Repair and Realignment: Restoring Damaged and Misaligned Motorcycle Fairings
Repairing motorcycle fairings effectively requires addressing both structural damage and aesthetic imperfections to restore their integrity and appearance. Begin by carefully assessing any cracks, deep scratches, or broken mounting points. Structural cracks often need reinforcement through plastic welding, epoxy bonding, or fiberglass repairs, which ensure the damaged areas regain strength and durability. Reinforcing worn or broken mounting tabs is crucial for proper alignment and secure fitting during reinstallation.
After reinforcing, sanding the damage smooth with fine-grit sandpaper prepares the surface for filling and finishing. Apply plastic filler or putty over scratches or gouges, then sand again to achieve a seamless, even surface. A smooth foundation is vital for professional-looking repainting, which restores the fairing’s visual appeal. Use paint that matches the original color, applying thin layers followed by a clear coat for protection and gloss. Wet sanding between layers and finishing with polishing and waxing will help blend repairs perfectly with surrounding surfaces.
Misaligned fairings often result from bent brackets or damaged mounting points. Inspect all bolts and screws, tightening them properly and replacing any stripped fasteners. Adjust mounting brackets or tabs carefully to realign panels; if bolt holes are stripped, thread repair kits or helicoils provide secure fastening solutions. During curing phases, avoid stressing repaired areas, and use masking tape to protect adjacent surfaces when repainting. Degreasing before painting ensures better adhesion, and for minor scratches, applying a small amount of super glue before painting can fill imperfections efficiently.
Combining these repair and realignment techniques ensures your fairings regain both their structural function and aesthetic quality. For detailed visual guidance, consider watching step-by-step repair tutorials like those found in external video resources, which demonstrate processes such as reinforcing attachment points and addressing paint cracks with precision. This hands-on approach complements the comprehensive tips and ensures a lasting, professional finish.
For further insights on fairing options and related maintenance, explore this comprehensive resource on affordable motorcycle fairings.
4. Ensuring Perfect Fit and Security: Final Alignment, Tightening, and Stability of Motorcycle Fairings
Achieving a secure and stable fit for motorcycle fairings hinges on a delicate balance of careful alignment and precise tightening of fasteners. Start by loosely attaching the mounting brackets using bolts and nuts, allowing room for small adjustments before locking everything in place. Position the fairings onto these brackets, making use of any engineered grooves or slots to guide the panels into their correct angle and position, ensuring a snug and seamless fit against the motorcycle frame and adjoining parts.
Once aligned, methodically tighten all fasteners, including bolts, screws, and nuts. Employ washers or rubber grommets to absorb vibrations and reduce stress on the panels, safeguarding against cracks and long-term damage. For added durability, supplementary supports like pop rivets or backing plates can be used when necessary. After securing the panels, attach any auxiliary components such as mirrors or headlights, ensuring they don’t alter the fit or alignment.
A thorough final inspection is indispensable. Confirm the fairings are firmly fixed without wobbling, check that no cables or hoses are pinched, and verify that steering and controls operate unobstructedly. Proper installation not only enhances the bike’s protection and aerodynamics but also maintains its visual appeal and functional integrity. Tools typically needed include screwdrivers, hex keys, wrenches, and occasionally a drill if new mounting holes must be created.
Patience and precision throughout this stage prevent damage and support the longevity of the fairings. For additional insight and model-specific guidance, exploring detailed video tutorials can prove invaluable, as they visually demonstrate the nuances of final inspection and securing methods.
For more resources on selecting and fitting quality fairings, visit Explore the Best Motorcycle Fairings at Summit Fairings.
Reference: Motorcycle fairing installation guides and tutorials available online.
Final thoughts
Effectively fixing fairings on a motorcycle demands a structured and detail-oriented approach. Business owners benefit from understanding the importance of each stage—from thorough preparation and removal of old fairings, through precise bracket installation and panel assembly, to careful final installation and repair techniques. Paying attention to these key aspects not only ensures the durability and visual appeal of motorcycle fairings but also builds customer confidence and supports long-term business success. With the right tools, preparation, and repair skills, any shop can deliver professional results that elevate the performance and look of motorcycles, setting themselves apart in a competitive market.
Ready to elevate your ride? Summit Fairings delivers premium, custom-fit fairings that blend style and durability. Whether you’re chasing speed or turning heads, we’ve got your bike covered. Don’t wait—transform your machine today. Click, customize, and ride with confidence. Your perfect fairing is just a few clicks away. Act now!
About us
undefined