Creating custom motorcycle fairings is an essential skill for business owners looking to enhance the performance and aesthetics of motorcycles. These fairings not only improve aerodynamics but also protect riders from the elements, providing a competitive edge in today’s market. This article will delve into the crucial aspects of designing fairings that focus on aerodynamics, selecting the right materials that ensure durability and safety, employing advanced shaping and assembly techniques, and applying professional finishing touches that make fairings not only functional but visually appealing. As we explore these important chapters, you will gain insightful knowledge that can elevate your motorcycle customization business and meet the diverse needs of your clients.
Aerodynamic Craft in Motion: Crafting Motorcycle Fairings That Trim the Wind Without Trimming Performance

The moment a rider leaves the city streets behind and the road unfurls into a long, ribboned stretch, the fairing on a motorcycle reveals its true purpose. It is not simply a shell for shielding components or a decorative skin; it is a tuned surface that interacts with air to shape stability, efficiency, and the rider’s comfort at speed. Designing motorcycle fairings with aerodynamics in mind is a discipline that blends artistry, material science, and precision engineering. It demands a holistic view where form follows the constraints of airflow, rider posture, and the mechanical realities of mounting, maintainability, and durability. When approached in this way, a fairing becomes a conduit for smoother air, a partner in handling, and a subtle amplifier of the bike’s character rather than a blunt add-on.
To begin with, the aerodynamic goal is elegantly simple in theory but exacting in practice: minimize drag while guiding air so that the flow attaches, remains laminar as long as possible, and reduces the formation of turbulent wakes behind the rider. This translates into a front silhouette that splits air cleanly, a lower contour that shields the rider from buffeting without inducing lift, and a rear profile that lets wake vortices dissipate gradually rather than clashing with the tail end of the bike. The outcome is not merely less wind noise. It is a more stable ride at high speeds, reduced fatigue over long miles, and the potential for better fuel efficiency by lowering the overall drag coefficient. All these benefits emerge from careful contouring, material choices that respect shape integrity, and a manufacturing approach that preserves the intended geometry.
The first frontier in this design journey is airflow understanding. It begins with a mental map of how air behaves as a fast-moving river skims the bike’s form. The nose of the fairing must carve a path through the oncoming air, splitting the flow to avoid creating a strong stagnation point that would produce pressure drag. The side sections then guide air around the rider’s torso and legs, keeping the boundary layer from separating prematurely and generating form drag. Finally, the rear taper serves a dual purpose: it prevents a dramatic surge of turbulence behind the rider and helps the trailing wake rejoin the free stream with less energy loss. Modern designers often supplement intuition with Computational Fluid Dynamics (CFD). This technology lets engineers simulate dozens, sometimes hundreds, of contour variations without touching a single sheet of plastic. CFD helps identify where high-pressure pockets form, where low-pressure zones encourage suction, and where subtle changes in curvature can push the flow toward a smoother, attached state. The payoff is a mounting menu of potential shapes and a data-driven path from concept to prototype.
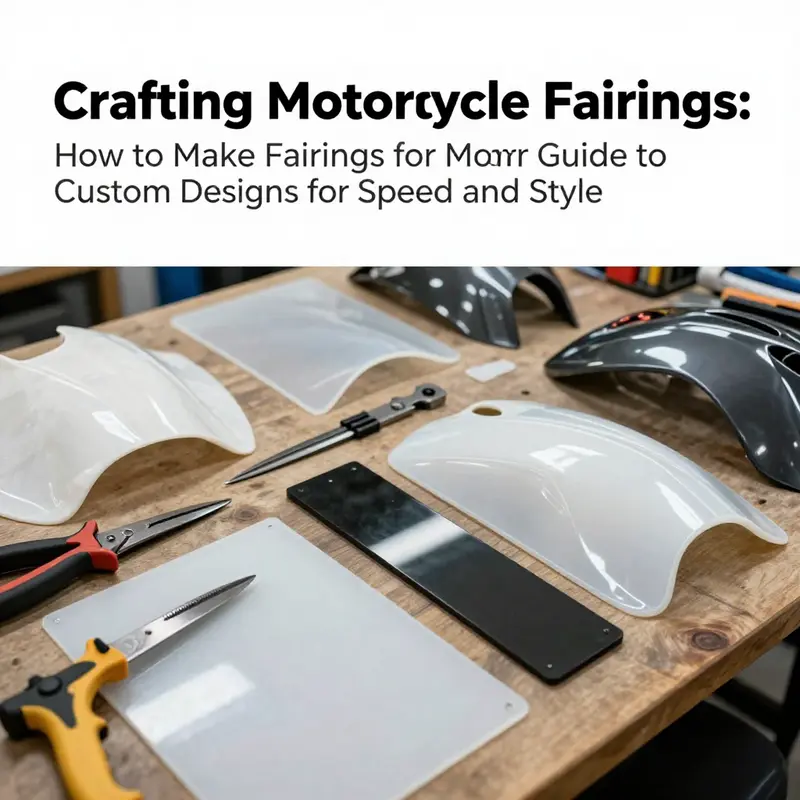
But CFD is not a silver bullet. The real world introduces imperfections—rider posture shifts, helmet shapes, wind gusts, and crosswinds—that CFD can approximate but never fully replicate. That is where material science and construction methods come into play. The choice of material influences how faithfully a designed surface preserves its intended curvature under real-world loads. Polycarbonate offers excellent clarity and impact resistance, making it a preferred choice for windshields and headlight covers that must remain optically clear even after years of exposure to sun and road grime. Fiberglass remains a staple for many builders due to its rigidity and relative lightness, but it demands meticulous molding to preserve tight tolerances that keep airflow smooth. ABS plastic represents a balance: it is easy to mold, reasonably stiff, and cost-effective. Each material carries a weight penalty, a stiffness profile, and a process requirement that can subtly tilt a final design away from its pristine CFD-derived form unless the transition from model to mold is executed with care.
The shaping stage is where the dream starts meeting the shop floor. In the simplest, most accessible form of DIY work, a skilled maker might heat bend or vacuum form sheets to approximate a fairing’s silhouette. This approach often yields a temporary solution rather than a perfectly aerodynamically tuned piece, but it gives a tangible sense of how air interacts with a surface. For a more permanent, performance-oriented result, designers lean on molds and cured composites or thermoplastics. A traditional route uses fiberglass or carbon-impregnated fabrics laid into a female mold, then built up with resin and protective coatings. The result, when finished with a paint system and a clear topcoat, behaves as a single, coherent aerodynamic shell that can withstand the road’s punishment. Thermoplastics, sometimes injected or thermoformed, allow complex curves and rapid production while maintaining surface smoothness. In all cases, maintaining the designed curvature through the cure and post-processing stages is critical because any deviation can cause a ripple in the airflow and degrade performance.
The shaping process flows into the assembly phase, where the fairing’s geometry encounters mounting realities. The fairing must not only look the part but also fit the motorcycle’s frame, engine, suspension, and radiators without forcing intrusive modifications. The attachment hardware—brackets, screws, and automotive-grade adhesives—must be chosen for stiffness, vibration resistance, and environmental endurance. The interface between the fairing and the bike’s body is more than a mechanical connection; it is a seam through which airflow can slip if not carefully sealed and aligned. A well-designed fastener pattern ensures that the fairing remains true to its intended contour across a spectrum of speed and road conditions while remaining serviceable for maintenance or repair. The edge treatment matters, too. Sharp transitions can provoke unwanted separation; smooth radii encourage a progressive flow that stays attached to the surface longer. Finishing steps—sanding, priming, painting, and clear coating—not only enhance aesthetics but also seal the surface against UV damage and micro-scratches that could disturb the surface’s slickness over time.
Designers who treat aerodynamics as a living discipline also consider the rider’s position and the bike’s intended use. A fairing optimized for a sport-oriented posture may look different from one tailored to touring, even if the two share a common chassis. A sport-oriented design tends to generate more aggressive shaping near the handlebars to guide air around the rider’s arms and torso while maintaining a clean separation line behind the rider’s back. A touring-oriented fairing might emphasize broader coverage and smoother flow around the rider’s legs, with a slightly gentler taper to minimize buffet in crosswinds and reduce wind fatigue over long hours in the saddle. The art here is to harmonize the rider’s velocity, posture, and breathing space with the fairing’s own aerodynamic speech. It is a conversation among geometry, stiffness, and human factors, where each design choice nudges the bike toward a different balance of drag, lift, and control.
From the outset, a designer also debates the trade-offs between open cooling and aerodynamic envelope. Some engines benefit from forward-facing intakes that require carefully positioned ducts within the fairing. Others demand a more sealed approach that reduces turbulent jets near the engine bay. The question is never answered in a vacuum; it is resolved through iterative cycles of modeling, prototyping, and real-world testing. In this cycle, a simple wind tunnel test or high-fidelity CFD run can reveal whether a particular intake geometry triggers separation, or if a modest reshaping of a cheek panel reduces an eddy that would otherwise rob stability at high speed. The most successful designs couple aerodynamic efficiency with practical maintenance, ensuring that filters are accessible, that there is enough clearance for hands and tools, and that the fairing can be removed with a reasonable amount of effort when repairs or updates are necessary.
A critical but sometimes underappreciated part of the design conversation is the integration with lighting, instrumentation, and visibility. The windscreen’s transparency and curvature affect not only the rider’s field of view but also the way light streams across the surface, influencing glare and nighttime visibility. The headlight cover must maintain optical clarity while preserving the fairing’s clean lines. In some designs, the tail and lower sections are sculpted to reduce ground clearance issues and to channel air away from the rider’s knees and boots, which carry their own layer of drag through proximity to the bike’s legs. Such considerations often drive the evolution of a composite layup or the selection of a polycarbonate sheet with a precise thickness that holds its contour under vibration without warping. The point is to balance air with accessibility and rider experience; aesthetics must never overshadow the physics, but they should complement it, giving a cohesive package that looks and feels as purposeful as it performs.
Beyond pure aesthetics lies the practical reality of aftermarket customization. Riders who aim to modify their machines for improved aerodynamics should recognize that after-market fairings exist along a spectrum. Some offerings prioritize sharp, race-inspired lines with a pronounced silhouette that slices air aggressively; others emphasize broader coverage and smoother curves that deliver calmer airflow at lower speeds. The best approach, for practical enthusiasts, is to select a shape compatible with the motorcycle model and to verify that the design has been engineered with airflow in mind, ideally supported by data from CFD or wind-tunnel testing. When choosing aftermarket pieces, consider how well the new fairing preserves or improves the bike’s aerodynamic characteristics rather than simply changing the look. Compatibility with the specific motorcycle model is essential to ensure that the airflow dynamics are preserved and enhanced, not disrupted. For riders who want a direct route to parts that align with their bike’s geometry, the Yamaha fairings collection provides a broad spectrum of shapes that have been designed with-fit in mind. This path allows a rider to maintain consistency of line and performance while exploring aesthetic and functional variations. Yamaha fairings collection.
The whole enterprise is a reminder that form and function are inseparable when it comes to fairings. A beautifully sculpted surface that looks aerodynamic but performs poorly is of little practical use; conversely, a fairing that behaves well in simulations but breaks the rider’s sense of speed and proportion can erode confidence and enjoyment. Great aerodynamic design respects both body and machine: it accommodates the rider’s posture, reduces drag without creating new drag-inducing features, and remains robust through the rigors of weather, vibration, and maintenance cycles. The end result is a piece that lets the bike feel lighter to the air, despite its mass, while delivering a quieter, steadier ride at speed. The rider experiences this as a smoother transition from the wind’s push to the chassis’s give, a perceptible decrease in fatigue, and a sense that the bike responds more predictably when steering input changes direction or when crosswinds push at an angle. In short, aerodynamic fairings are about control as much as they are about speed.
For those who wish to dig deeper into the science behind these effects, broader articles in the field of motorcycle aerodynamics illuminate the path from wind tunnel concepts to everyday riding experience. They explain how a well-designed fairing can reduce drag and lift while guiding air to minimize separation and turbulence. The interplay of curvature, surface finish, and mounting stiffness becomes a carefully choreographed system rather than a series of isolated decisions. The result is a fairing that contributes to a bike’s stability at high speed, a more efficient ride, and a rider who can focus on the road rather than bracing against wind pressure. This is not merely theoretical knowledge; it is a practical framework that guides designers and builders from sketch to road, ensuring that each hand-made contour is a deliberate contribution to performance rather than a cosmetic concession.
To stay rooted in practical practice, it helps to study successful design and manufacturing workflows. A good workflow begins with concept sketches that illustrate airflow direction and rider envelope. From there, CFD runs or simplified aerodynamic models guide early iterations, followed by scaled or full-size prototypes. In parallel, a material plan is defined—whether laminates for fiberglass, resin systems for composites, or thermoplastic sheets that can be formed with moderate tooling. Each stage feeds back into the next, ensuring that the final part not only meets geometric targets but also survives the realities of road wear, UV exposure, and the mounting site’s constraints. When this loop is well managed, the result is a fairing that remains true to its original aerodynamics narrative while delivering durability, serviceability, and a legible sense of the bike’s character.
In closing, designing motorcycle fairings with aerodynamics in mind is a disciplined craft that asks us to balance precision with practicality. It invites designers to look beyond mere beauty and toward a surface that interacts with air as a collaborator, not an adversary. The rider benefits from calmer airflow, reduced fatigue, and stronger handling; the bike gains efficiency, stability, and longevity. As you explore the continuum from sketch to road, remember that every line on a fairing is a decision about how air will move, how the rider will feel, and how the machine will perform under a wide range of conditions. The best designs emerge when aerodynamic insight meets manufacturing sensibility, yielding a fairing that looks as purposeful as it moves.
External reading: For a deeper dive into aerodynamic principles, see https://www.motorcyclecycling.com/motorcycle-fairings-aerodynamic-design-principles/.
Material Matters: Selecting the Right Substances to Shape Aerodynamics and Durability in Motorcycle Fairings
A motorcycle’s fairing is more than a smooth exterior; it is a carefully chosen ally in the bike’s overall performance. The material you select affects not just how it looks, but how it protects, how it breathes with the wind, and how it ages under sun, rain, and fast miles. When you start from a design sketch and a purpose, material selection becomes as critical as the shape itself. For riders who want a fairing that balances weight with stiffness, resilience with ease of fabrication, and a finish that endures, a clear map of material options helps translate aerodynamic intent into practical, shop-floor reality. The decision begins with questions about use: Is this a race-focused build that prioritizes weight and stiffness, or a street-oriented project that values cost and repairability? Do you plan long-distance tours, where UV exposure and weather resistance are essential, or a weekend show bike, where aesthetics and finish quality take precedence? Each scenario nudges you toward different material families, and the clues lie in the qualities those materials bring to the table.
ABS plastic sits at the center of modern OEM fairings and many aftermarket offerings. Its strengths are immediately practical. It can be molded into complex contours with excellent surface quality, which makes it ideal for aerodynamically contoured sections and integrated vents. ABS handles impact relatively well, so a collision or a tip-over won’t deform it as readily as some softer plastics. It also shows good thermal stability, so rapid temperature swings and sun exposure won’t warp the panel as quickly as other plastics might. The finish on ABS—whether you’re painting or applying decals—holds well with proper surface preparation. The downside is cost and weight. For a custom, high-end piece, ABS remains pricier than some alternatives, and it doesn’t quite match carbon fiber in stiffness or the ultimate weight savings. Still, for a durable, production-grade look and a material that responds well to common fabrication methods, ABS is the workhorse of the careful DIYer who aims for reliability and a showroom finish.
Polypropylene (PP) offers a different set of trade-offs. It is lighter than ABS and includes excellent moisture and chemical resistance, which makes it appealing for components that must endure weather and cleaners. It tends to be stiffer in certain thicknesses and more forgiving in impact. However, PP does not always achieve the same rigidity or surface quality as ABS, especially on highly aerodynamically sensitive sections. For a builder who wants a budget-friendly route or wants to explore flexible, semi-rigid panels for decorative or semi-structural pieces, PP can be a smart choice. It also processes well in various forming methods, which keeps tooling costs down. While PP may not crown itself as the premium choice for front faring that faces major loads, it excels in cost-conscious customization where you still crave a clean appearance and reasonable durability.
Carbon fiber represents the pinnacle of strength-to-weight. If the primary goal is to shave grams without sacrificing rigidity, carbon fiber delivers. The weave and the stiffness of carbon fiber help reduce flex under high-speed pressure, contributing to a crisp, stable feel in airflow. The aesthetic of carbon fiber—its modern, technical look—fits well with performance-focused builds. The big caveat is cost and the manufacturing technique. Carbon fiber fairings typically require a mold, a careful lay-up process, and precise curing conditions, often in a controlled environment. The result is a panel that can perform exceptionally in racing or track-inspired contexts, but the upfront investment, specialized processes, and repair challenges must be weighed. For riders who value performance and are prepared to invest, carbon fiber can redefine the perception of a bike’s wind profile and handling, especially at higher speeds where every gram counts.
Fiberglass offers a compelling middle path. It is more affordable than carbon fiber and can be molded into complex, aerodynamic shapes with relative ease. Fiberglass is forgiving in shop settings and supports rapid prototyping and custom designs without the need for expensive equipment. The strength of fiberglass is sufficient for many fairing applications, but it is less impact resistant and can suffer from moisture ingress and surface cracking if not properly sealed and finished. With proper sealing, hydration of the composite and a sturdy paint job, fiberglass fairings can be both durable and visually striking. For builders who want to combine form with a manageable price point, fiberglass provides a versatile canvas for unique shapes and aggressive lines that still perform well in everyday riding.
Fiberglass’s close cousin in some workshop circles is reinforced plastics that blend glass fibers into resin matrices. This family offers a broad range of stiffness and toughness, enabling custom shapes, integrated features like air intakes, and a look that can be tuned with different finishes. However, the brittleness that can accompany certain fiberglass layups means good sealing and careful finishing are essential to keep moisture from creeping into the laminate. When approached with a mindful hand—proper layup sequences, airflow considerations in the mold, and a protective clear coat—these materials can deliver striking, one-off fairings that maintain their shape under practical loads and wind pressures.
Aluminum alloys occupy a slightly different niche. They are often used for structural elements rather than the outer shell, especially in components like supports, brackets, or integrated air-ducts. Aluminum aids heat dissipation, which can be advantageous in engine-integrated fairing setups or radiator-shrouding areas where heat loads are tangible. The benefits include good strength and predictable behavior under varying temperatures. Aluminum, however, tends to be heavier than carbon fiber and more costly than plastics on a per-volume basis. For functional add-ons—like brackets, frames, or small aerodynamic fins—aluminum can be a practical choice that preserves performance while offering robust mounting options and heat management.
PVC plastic sheets present a different context altogether. For DIY projects, prototypes, or artful, temporary builds, PVC is surprisingly accessible. It’s easy to cut, shape, and join, and it can accept coatings with proper surface preparation. The drawbacks are durability and UV resistance; without a coating or laminate, PVC can degrade under high-speed exposure and weather. Its role in real-world, long-term fairings should be considered as a stepping stone rather than a final, production-grade solution. Yet for hobbyists who want to explore form quickly or present a visually striking, short-lived concept, PVC sheets offer a low-cost, forgiving platform to test ideas and refine shapes before committing to more durable materials.
The decision framework for material selection is not a mere catalog of properties. It is a synthesis of weight considerations, stiffness requirements, impact resistance, cost, and finishing aesthetics. For high-speed or track-oriented builds, weight reduction and rigidity often tip the scale toward carbon fiber or similarly tailored composites. For street bikes or projects emphasizing budget and repairability, ABS and fiberglass provide a robust mix of price, ease of fabrication, and durability. PP can be a viable intermediate choice when weight savings are desirable but where final tolerance and rigidity are less critical. Aluminum shines when structural integrity and heat management are the priorities, especially for functional components rather than full shells. In any case, matching the material to the design intent reduces the risk of warping, cracking, or rapid degradation and makes the final finish more predictable.
Beyond the raw materials, the manufacturing path you choose also shapes the fairing’s performance. Vacuum forming, thermoforming, hand lay-up, resin infusion, and CNC routing each open different doors for shaping airflow and achieving precise contours. A mold-driven process can capture tight tolerances and repeatable finishes, but it demands investment in tooling and a longer lead time. A hand lay-up with fiberglass offers flexibility for bespoke shapes and rapid iteration, though it requires careful control of resin content and cure conditions. For plastic sheets like ABS or PP, heat-forming allows rapid shaping into aerodynamic profiles, especially when combined with design features such as air channels and subtle undercuts. No matter which route you pick, the finishing phase—sanding, priming, painting, and sealing—must be aligned with the material’s chemistry and the expected environment. A well-chosen primer and topcoat not only enhance color and gloss but also improve adhesion and UV resistance, extending the life of the panel under sun and wind.
The practicalities of installation tie the material choice to the rider’s daily experience. Adhesive kits and automotive-grade brackets provide reliable mounting, but you must account for thermal expansion, vibration, and load transfer. A fairing is not a stand-alone shell; it is a participant in the bike’s dynamic system. If you’re using composite panels or thermally formed plastics, ensure the adhesive system you choose remains compatible with the substrate. For metal components, consider coatings and sealants that resist corrosion in the same way the fairing resists UV. Alignment is crucial; a panel that sits proud or hollows in at a single point can create drag, misalign headlight cutouts, or distort the rider’s line of sight. The integration process benefits from careful measurement, modular mounting design, and tolerance buffers that accommodate a range of frame flex and ride conditions. Even the best-looking panel loses its impact if it rattles, warps, or rubs a fuel line during a lean angle. So, any material choice should be tested in a realistic fit, with attention paid to both cosmetic alignment and aero integrity.
From an aesthetics perspective, different materials respond to paint and finish in distinct ways. ABS accepts paints with excellent adhesion and produces a high-gloss surface that highlights curves and edges. Carbon fiber often wears a clear coat to protect the weave and reveal its distinctive texture, providing a modern, high-performance aesthetic that many riders covet. Fiberglass finishes can be perfectly smooth after body filler and primer, giving a more classic, hand-built look that still carries modern performance. PP may require additional treatment to achieve a flawless surface, especially if you’re aiming for a glass-like finish. PVC, while forgiving, demands careful surface prep and a protective topcoat to resist UV-induced yellowing and cracking under sun exposure. The finish choice, like the material choice, must harmonize with the bike’s overall design language, the rider’s maintenance routine, and the expected riding environment.
For those who want a practical starting point, the logic remains simple: begin with a purpose-driven material, choose a process that aligns with your tooling and skill level, and plan the finish to guard against the elements. If you’re aiming for a look that is both functional and contemporary, carbon fiber or high-grade ABS can deliver the necessary performance while still presenting a desirable surface for finishing touches. If you’re prototyping or pursuing a visually bold, experimental profile, fiberglass or PVC can keep costs down while you test fit and overall aerodynamics. As you design, keep in mind that the fairing should complement the motorcycle’s engine and chassis, not overwhelm them. The airflow around the bike, the rider’s posture, and the bike’s overall silhouette are a system; the material is a key enabler within that system.
To help visualize practical decisions, consider exploring a catalog of shapes and fit as you plan. For instance, you might look at a broad collection that showcases different fairing contours and mounting options. The catalog can offer a sense of how various shapes interact with wind flow, how tight radii influence molding or forming, and how color and finish choices complement each profile. While the catalog cannot replace hands-on testing, it can provide a mental map of how material choices translate into form. In practice, you’ll test fit on a mocked-up frame, run wind-tunnel-inspired checks, and adjust curvature and thickness as needed to balance rigidity with flexibility. This iterative approach—design, choose, test, refine—keeps the project grounded in real-world performance while maintaining the creative freedom that makes custom fairings engaging.
As you navigate the material landscape, you may find yourself returning to the idea that the most effective fairing is a synthesis rather than a single hero material. The front nose may be formed from ABS for its pristine surface and weather resilience, while the side panels incorporate fiberglass for easy shaping and stroke of artistry, and a few structural brackets use aluminum for heat dissipation and robust mounting. Such a mixed-material strategy is common in professional practice because it aligns specific performance targets with the most appropriate substrate. The final panel, whether it is a fully integrated shell or a series of modular pieces, should present a coherent aero profile and a consistent surface experience. And, from a maintenance standpoint, the material system should be serviceable, with replacement sections that can be swapped without dismantling the entire assembly. These realities shape the long-term value of a DIY project and influence how you document the build for future maintenance or upgrades.
In closing, material selection is the backbone of a successful fairing project. It guides performance, weight, durability, cost, and appearance. It frames how you form and finish the piece, how you mount it, and how it holds up to daily riding. It also determines how easily you can repair, refinish, or replace portions as your needs evolve. By balancing these factors with the bike’s intended use and your fabrication capabilities, you can craft a fairing that does more than cover a frame—it enhances the motorcycle’s whole character, from wind comfort to the subtle sheen of a well-prepared paint job. If you want a quick place to start, consider cataloging options that feel true to your design brief, then align those choices with a forming method that suits your workshop. The result will be a fairing that not only looks right but performs right under the road, in the sun, and at the speeds you chase.
For readers who want a practical jumping-off point into cataloged shapes and availability, you can explore a curated selection that helps visualize how different forms might suit your build. See the Honda fairings collection for a sense of real-world forms and mounting options that can influence your own material decisions and design approach. This reference point can help you imagine how a given shape behaves when crafted from ABS, fiberglass, or carbon fiber, and how it sits with the bike’s frame and optics. While shopping or planning, keep in mind that the right material and the right process are not merely about surface appeal; they are about substantial, ride-ready performance that ages gracefully and supports your intended riding style.
In addition to these practical considerations, it’s helpful to draw on broader fabrication guidance as a companion to your decision-making. For those seeking deeper, technique-focused instruction, an established guide on fairing design and construction can provide structured insight into how professionals approach shaping, joining, and finishing procedures. You’ll find that a thoughtful blend of theory and hands-on practice strengthens your ability to select materials that not only look good but work well when the bike is on the move. For more detailed fabrication techniques, you can consult the Motorcycle Mechanics Institute guide, which offers current industry standards and curated methods for fairing design and construction. This external resource complements the practical information outlined here and can help you align your project with established best practices.
If your path includes exploring external sources, remember to balance theory with what you can accomplish in your workshop. The materials you choose should harmonize with wind behavior, rider comfort, and the bike’s overall handling. The best result is a fairing that feels integrated with the machine and with your riding style, rather than a standalone shell. This approach keeps your build coherent, focused, and genuinely enjoyable as you ride through the learning curve of design, fabrication, and finish. And when you’re ready to expand, the same principles apply as you scale up to more ambitious panels or even full streamline efforts.
External resource: https://www.motorcycle-mechanics.com/fairing-design-guide
Shaped for Speed: Advanced Techniques in Designing and Assembling Motorcycle Fairings
A motorcycle fairing is more than a shell that conceals mechanics. It is a disciplined synthesis of aerodynamics, material science, and storytelling—an object that can transform the way a rider feels the machine beneath their hands and how the bike moves through air. This chapter follows that synthesis as a cohesive journey, from the first sketches that capture line and proportion to the final, durable assembly that can endure road wear while carrying a rider’s narrative. In practice, making fairings begins with an idea: a shape that tames breeze and supports the bike’s identity. Designers gather references and study real-world silhouettes, seeking proportions that sit flush with the bike’s frame and rider posture. They imagine how curves will guide airflow around headstock, tanks, and side panels, and they test variations not by guesswork alone but by a language of ratios, streamlines, and surface continuity. The goal is not just to look fast; it is to become fast in the wind. The dialogue between form and function then turns concrete as measurements are translated into blueprints and, eventually, into physical parts that fit with precision.
In the transition from concept to construct, material selection becomes a fundamental hinge. For a traditional, production-like fairing, high-strength plastics such as fiberglass, ABS, or polycarbonate provide the right balance of stiffness, impact resistance, and weight. These materials stand up to heat and vibration while offering the possibility of long, smooth curves. Yet for hobbyists chasing a more affordable or experimental path, initial prototyping often starts with lighter, transparent or translucent sheets—acrylic or polycarbonate—cut to shape and held in place with simple hardware. The contrast between a temporary shield and a finished, structural panel reveals a practical truth: the material choice shapes the engineering approach. Lightweight sheets can be useful for testing fit and visual impact, while a molded, layered system pushes toward a durable, aerodynamically sound product. When the objective is a long-lasting, road-ready fairing, the manufacturing mindset shifts toward molds, reinforcement strategies, and surface finishes that can resist weather and UV exposure over thousands of miles.
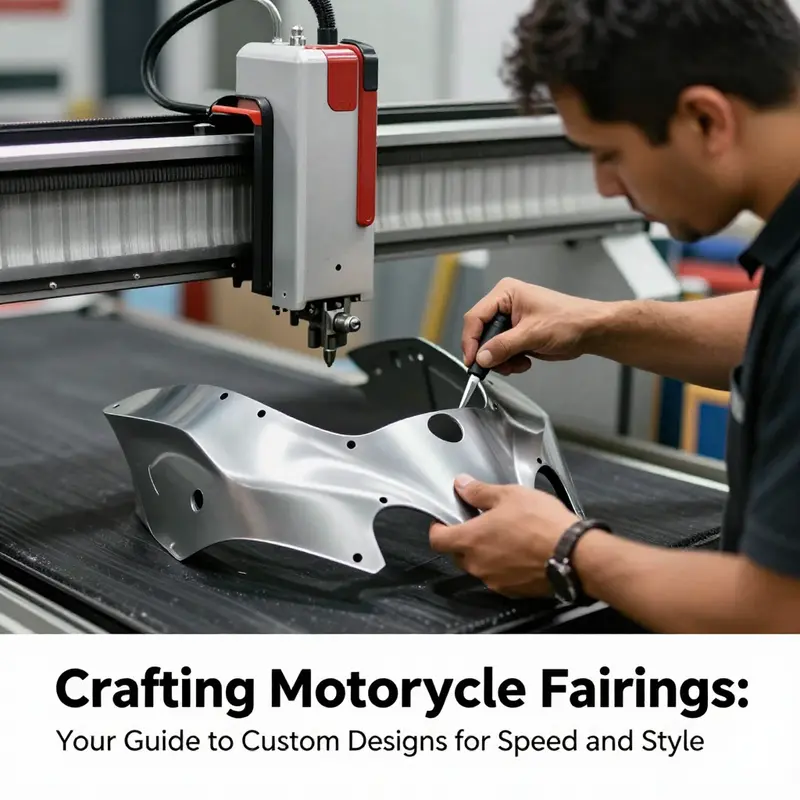
Shaping a fairing into a credible, aerodynamic form requires more than a design sketch. It demands a disciplined shaping process, often involving heat-forming, vacuum forming, or CNC routing to mold the chosen material into the soft, continuous curves that define modern sport and touring fairings. The key is to create a single, uninterrupted surface that guides air with minimal separation. For simple, removable panels, this might mean forming individual sections that can be joined later with brackets and adhesive. For more complex intersections—around the instrument cluster, the radiator shrouds, or the bike’s frame tubes—engineers rely on precise molds and careful planning of joint lines. A well-made mold reduces the risk of warping and ensures that each panel aligns with adjacent surfaces as the rider moves through corners and gusts. When used properly, heat and form techniques help achieve the delicate balance between a smooth outer face and the structural stiffness required to resist flex and noise at speed.
The practical path from mold to finished part often runs through a controlled layup schedule. For fiberglass or carbon fiber composites, layers are laid into a mold with resin, gel coat, and careful vacuum to remove air pockets. The chosen resin system interacts with the reinforcement fabric to produce a shell that can resist impact while remaining light. In a professional context, a carbon fiber mock-up might use a hand-laid layup or a pre-impregnated (prepreg) system, with thickness carefully tuned to the expected loading conditions. The result is a shell whose surface can be finished to a high gloss, with the deep, woven appearance of composite skin or a smooth, uniform appearance that emphasizes the clarity of a thermoplastic. The finishing stage then seals the surface, providing resistance to weather, UV, and abrasion, and creating a canvas for paint, decals, or a clear protective layer.
Yet a fairing is not only a rigid exterior. It must meet a spectrum of performance criteria, and the modern workflow often embraces a modular design. By breaking the fairing into distinct parts—front, side panels, and rear covers—manufacturers and builders gain the flexibility to update or replace sections without reworking the entire assembly. This modular approach is not merely about convenience; it reflects how aerodynamics, rider position, and visibility evolve with different configurations or rider preferences. The modular mindset simplifies testing, too. It allows for targeted wind-tunnel or road testing on individual panels before the entire assembly is finalized. When this approach is paired with a strong attention to mounting points, brackets, and fasteners, the fairing becomes a resilient interface between rider, bike, and environment, capable of withstanding the stresses of long rides, rough roads, and changing weather without sacrificing aesthetics.
A modern fairing project can also leverage digital modeling to streamline the bridge between concept and production. Skilled modelers begin with a digital block, using programs such as Cinema 4D, Maya, or ZBrush to shape the initial form. They ensure continuity of curvature by working with edge loops and subdivision surfaces that preserve smoothness at every transition. Boolean operations in sculpting software are employed to manage complex intersections—around speedometer housings, light assemblies, or brake lines—without creating topology disasters that would complicate later stages. Retopology then optimizes the mesh, a crucial step when the final model will be used in game engines, simulations, or high-fidelity renders. The aim is a topology that preserves detail where it matters while minimizing polygon count for performance. In practice, a well-balanced model might stabilize around tens of thousands of triangles, rather than millions, enabling faster iteration and smoother integration with other digital assets.
Non-destructive texturing workflows bring color, material, and wear into the model without committing to a final material assignment too early. Material IDs and masking allow designers to layer metallic paints, matte plastics, and weathered finishes in a way that can be tweaked later without reworking texture maps or UVs. Texturing also unlocks visual storytelling—a fairing can reveal its history through subtle scuffs, fading edges, and chipped corners that suggest long hours on the road. This level of detail is especially important if the model will serve as a reference for a real-world build or as a storytelling element in a concept presentation. The digital pipeline, in turn, informs the physical approach. When the model suggests a straightforward layup path, the builder can choose a corresponding manufacturing sequence that minimizes resins, reduces waste, and ensures uniform surface quality. Conversely, if the digital study reveals tight radii or unusual junctions, the builder may pivot to a mechanical solution—reversing the order of operations, splitting parts differently, or planning inserts that simplify assembly and maintenance.
A truly robust fairing project balances aesthetics with engineering, and that balance is where finish and texture become as important as geometry. Surface finishing is the moment when the speed dream is made tangible. Sanding removes minor print lines or mold marks; primer builds a uniform base to accept color and gloss; the paint system then layers color, metallic pearlescent tones, and clear coats that resist UV exposure. Techniques such as paintovers enable the artist to refine reflections, deepen shadows, and simulate wear along edge lines where rubs would occur. The finished surface must be hard enough to gate out stones and gravel yet flexible enough to resist micro-cracking under load. The final sheen is not cosmetic only; it communicates a sense of speed and protection, a visible promise that the fairing will perform as designed in both wind and rain.
Even as the physical build advances, the relationship between the digital model and the real part continues. A well-conceived digital-to-physical workflow considers not only fit but also fitment across a full range of bikes or rider configurations. Accordingly, the fairing can be designed with mounting features, gaskets, or rubber isolators that damp vibration and reduce creak or noise at high speeds. The result is a panel system that feels integrated with the bike’s overall silhouette and geometry rather than slapped on as an afterthought. For the builder, this means less rework, fewer misfits, and more opportunities to refine the illusion of speed without compromising rider comfort. The process invites experimentation—testing different edge radii, channel shapes, or spoiler integrations within the digital space before committing to a single physical path. By aligning the digital model with real-world manufacturing constraints, the final product achieves both fidelity and feasibility.
In the broader arc of making fairings, the practical and the poetic coexist. The craft must respect the bike’s existing chassis and electronics, but it also offers an opportunity to tell a rider’s story through surface language—the way a panel catches light, how weathering traces a rider’s journey, or how a badge or decal hints at personality. The final assembly is more than the sum of its parts; it is a narrative that travels with the rider, an interface that blends performance with identity. The journey from concept to concrete is, in essence, a careful negotiation between lightness and strength, between the static geometry of a mold and the dynamic realities of road use. When executed with attention to material behavior, molding challenges, paint behavior, and precise alignment, a fairing becomes an active partner in the rider’s experience rather than a mere cover. In that sense, making fairings is not about chasing a single look but about fostering a resilient, elegant language of form that speaks to speed, weather, and craft in equal measure.
For practitioners who want to immerse themselves more deeply in the digital side of this craft, the modern toolkit offers powerful pathways. A disciplined modeling workflow that begins with a solid reference, moves through careful polygonal shaping, and ends with a practical texturing and render pass can inform every physical decision. In the end, the best fairings marry a believable aerodynamic form with a believable surface story. The result is a component that looks right at home on the bike, feels right to lean into, and carries the rider’s narrative from the garage to the highway. In this sense, the work is less about creating a flawless replica and more about charting a credible arc from design idea to ride-ready reality.
As you continue this chapter and move toward applying these ideas to your own build, keep in mind the continuum that links sketching, digital sculpting, mold-making, layup, and finishing. Each stage informs the next, and each choice—whether a material thickness, a joint strategy, or a paint sequence—has a ripple effect on weight, rigidity, and aesthetics. The skill, then, is maintaining coherence across the chain. The design should govern the process, but the process should also respect the bike’s mechanical and ergonomic realities. When these threads are woven together with care—through thoughtful reference gathering, deliberate material selection, precise shaping, and patient finishing—the result is a fairing that does more than look fast. It feels fast when you mount up, and it endures the journey of every ride with grace and confidence.
External resources for broader context and technique exploration can offer valuable depth. For those who want a structured dive into professional-grade modeling workflows, a detailed CINEMA 4D tutorial series on motorcycle modeling provides a rigorous approach to shaping, topology, and texturing that translates well into fabrication planning. See https://www.aigei.com/video/123456 for more on these techniques. While the exact steps may vary with material choice and shop capabilities, the underlying philosophy remains consistent: start with a strong concept, push the geometry toward clean, continuous curves, and layer in material realism to tell the rider’s story through surface and form.
Durable Shine: Finishing Techniques to Make Motorcycle Fairings Last and Look Brilliant
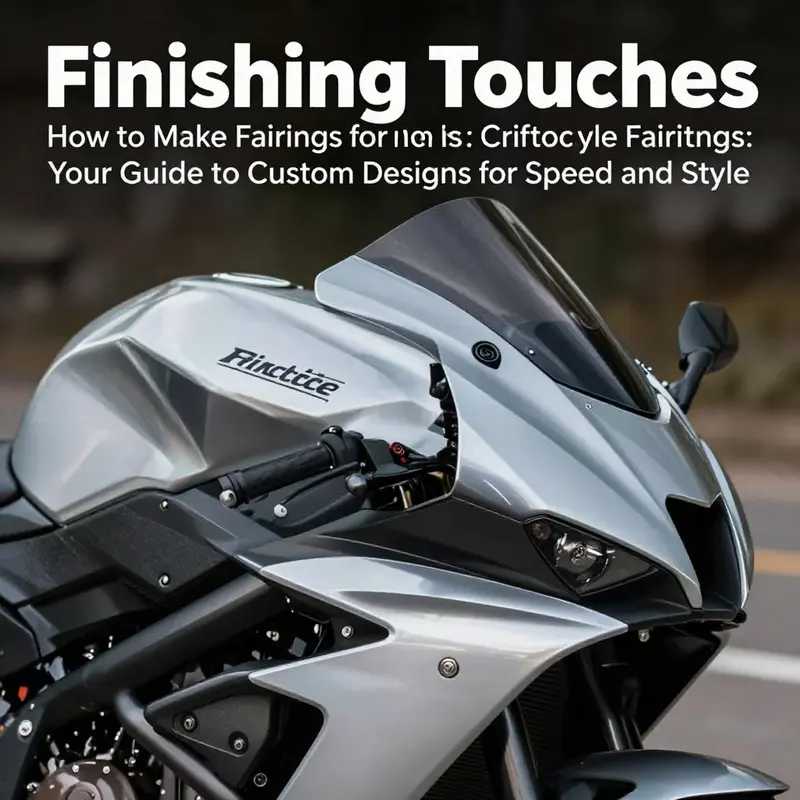
The finishing touches on a motorcycle fairing are not mere cosmetic afterthoughts; they are the final performance layer that determines a panel’s endurance under sun, rain, and straight-line wind, as well as how the bike presents itself on the road. A fairing is both a functional shield for the rider and a sculptural element of the machine’s character. When you reach this stage, you are not simply painting a piece of plastic or fiberglass; you are sealing a designed shape with a skin that can resist environmental stress, deflect abrasion, and retain its luster for years. The approach blends careful material choice, disciplined surface preparation, precise color work, and protective technology. It demands attention to detail and a mindset that the finish is as much about longevity as it is about appearance. With the right sequence and environment, you can transform a rough parapet of a fairing into a resilient, showroom-grade surface that ages gracefully and continues to turn heads as the miles accumulate.
Designing a finish begins with an honest assessment of the base material, its exposure, and the rider’s expectations. Fiberglass, ABS, and polycarbonate each respond differently to primers, paints, and topcoats. The profile of the panel—whether it is a full fairing or a smaller wind deflector—also influences how the finish behaves at edges and seams. Before any pigment touches the surface, the underlying structure must be stable and free of defects. A warped or warped-looking panel will always telegraph through the finish, making the final work look compromised even if the color is correct. This is why the process often starts with a thorough inspection, sanding away resin ridges, and smoothing out trip-hazard steps from previous repairs. The aim is a surface that invites uniform adhesion and offers a forgiving base for subsequent coatings.
From there, the path converges on three core activities: surface refinement, color and gloss discipline, and protective layering. First, you undertake a deliberate, staged sanding regime. Wet sanding with progressively finer grits—from 400 to 600, then 800, and finally up to 1200 or even 1500—remains the backbone of a flawless finish. The goal is not to strip but to reveal a pristinely flat canvas where tiny scratches are minimized or eliminated. A common mistake is rushing the final sanding or skipping the intermediate grits, which leaves a clouded surface that fights clarity under clear coats. The skilled maker pays attention to dust, humidity, and temperature during this phase, because these factors subtly influence scratch patterns and the way the subsequent coatings settle. In a well-lit, clean space, each pass with the sander should reveal a surface that looks almost mirror-like under inspection lamps, even before primer is applied.
Next comes priming—a step that often feels routine but is in fact foundational to durability. An automotive-grade primer with good adhesion properties provides a bridge between the raw substrate and the paint system. It fills minor imperfections and, crucially, reduces the risk of pinholes or solvent-induced dehydration that can sabotage gloss. Primers come in various formulations, including filler and surface-tinish varieties. The right choice depends on the material, the solvent system you intend to use, and the expected service conditions. After the primer cures, a light, controlled re-sanding ensures that the surface remains perfectly flat and free of dust nibs. The painter’s touch here is quiet and patient—too aggressive a pass, and you risk lifting primer; too light a pass, and you leave texture that later manifests as micro-scratches. The objective is a uniformly smooth, gray-to-neutral ground that emphasizes the color and depth of the subsequent coats rather than competing with them.
With the prepared surface in hand, color enters as a strategic design choice, not just a decorative one. Automotive-grade base coats deliver color depth, while the clear layer that follows defines the perceived brightness and richness. Color matching is especially important when panels must blend with existing bodywork or when multiple panels are painted to achieve a seamless look. The process benefits from a controlled spray environment and calibrated equipment to ensure even bleed, consistent pigment density, and minimal solvent pop. In practice, this means a consistent distance from the nozzle, steady movement, and a coherent sequence that prevents runs or sags. Some riders prefer a deeper, glassy finish with a high gloss, while others favor a more subdued, matte appearance for a rugged, street-ready look. Each choice demands different clear-coat or topcoat strategies. For a high-gloss result, the clear layer must be laid down with meticulous control to avoid orange-peel texture and to preserve a uniform reflection across curved surfaces. For matte or satin finishes, the flattening agents and the final coat must be chosen to maintain the desired texture while preserving color depth and evenness.
UV resistance is a recurrent concern for outdoor riding, where sunlight is an ongoing, variable exposure. A UV-protective topcoat is a practical investment. It helps stabilize color, slows photo-oxidation, and reduces chalking on clear or pigmented layers. The inclusion of UV inhibitors in the topcoat contributes to long-term color fidelity, particularly for light colors that are more susceptible to solar fading. The UV layer should be compatible with the underlying paints and clear coats to avoid hazing or delamination. The discussion of UV protection should not be confused with simply adding a tinted film for aesthetics; rather, it is about balancing chemical stability with optical performance. When done well, UV protection supports the perception of depth and clarity, ensuring the fairing continues to reflect the ride and its environment rather than a tired, sun-bleached surface.
A professional finish culture also recognizes the value of a controlled environment during the actual spraying. A dust-free spray booth, or at least a clearly isolated, well-sealed workspace, dramatically elevates the outcome. Dust nibs and micro-particles can mar what would otherwise be a flawless finish, particularly on clear coats and high-gloss surfaces. The presence of even tiny particles can create micro-blemishes that catch the eye and undermine the illusion of depth. Achieving a dust-free result is more than keeping the air clean; it is about maintaining consistent air pressure and airflow, using clean protocol for loading and operating guns, and scheduling paint runs when ambient airflow is least disruptive. In the best studios, a meticulous routine governs every pass of coating, with continuous monitoring of humidity and temperature to ensure consistent film formation. The reward is a finish that looks as flawless under showroom lighting as it does in the shade, and it remains stable when exposed to the day’s heat and rain.
Color and gloss are not only about the choice of paint but also about the relationship between layers. The final clear coat defines the surface’s life and soundness—the tactile feel of the paint and the way light plays on its curvature. Automotive clear coats are designed to resist UV, airborne contaminants, and minor abrasions, but their longevity hinges on preparation and application. A properly engineered film with adequate thickness reduces risk of micro-cracking at the edges, especially where fasteners penetrate or where the panel overlaps with other components. The edge treatment matters, too. Sharp edges are natural stress concentrators. A slight radius or bevel at the edge of the fairing helps spread stress and reduces the chance that micro-cracks propagate under the impact of everyday riding and temperature cycling. The finish must not only look uniform on broad surfaces but also deliver consistent quality along creases, radii, and attachment points where movement and vibration are greatest.
Beyond traditional coatings, some riders explore advanced surface technologies to preserve aesthetics and resistance. Transparent protective films or nano-coatings can offer an additional shield against scratches, road salt, and moisture. A clear, sacrificial shield can be applied to high-contact areas or to whole panels for riders who expect extreme exposure. When applied correctly, these layers resist micro-abrasion and are easier to cleanse than bare paint, helping to maintain the surface’s clarity over time. The choice between a film and a nano-coating depends on the panel’s geometry, the expected exposure, and maintenance practices. Films require careful alignment and pressure to avoid air bubbles, whereas nano-coatings demand a meticulous cleaning routine before application and a curing period that allows the finish to harden without contamination. In either case, the objective remains the same: to preserve the integrity of the color, the depth of the gloss, and the sense of tactile smoothness that defines a well-finished fairing.
The finishing stage also encompasses the practicalities of assembly and maintenance. A beautifully finished fairing will not stay pristine if it is not mounted and sealed correctly. The junctions with brackets, screws, or automotive-grade adhesive must remain secure while allowing for the motion and thermal expansion that riding induces. Proper sealing at seams prevents moisture ingress and minimizes the risk of paint lifting at the edges. Even the best coatings can fail if the base panel shifts or flexes under load; thoughtful mounting and protective strategies help ensure long-term performance. Once installed, the fairing should be inspected periodically for micro-movements, cracks at fasteners, or signs of coating wear near edges. Small touch-ups, when performed with care and using the same materials and process, can extend the life of the finish without requiring a full repaints job.
The aesthetic aspect of finishing is not separate from the performance reality of the piece. A finish that looks pristine should also communicate the rider’s intent—whether it is a clean, stealthy appearance, a high-contrast racing look, or a vintage-inspired patina. The best finishes hold their color and gloss as the light shifts across the fairing’s curves, and they do so without appearing overly artificial. For many builders, achieving this balance means spending extra time on color matching, on leveling the color with different lighting conditions, and on choosing between a traditional clear coat and a specialty topcoat that best suits the panel’s curve. The result is a fairing that feels integrated with the bike’s silhouette and exudes a sense of durability that riders can rely on when the road becomes rough or the sun bears down on the highway.
In practical terms, the finishing journey is a narrative of tension and release: the tension of achieving a perfectly smooth, uniform surface and the release of knowing that the finish will endure. The practitioner learns to read the surface, to anticipate how the pigment will settle in the curves, and to plan the sequence to minimize friction between layers. The best outcomes emerge when you treat each stage as part of a single articulation rather than disjointed steps. If you design with the finish in mind, if you prepare with the same discipline you would apply to metal or glass, and if you follow a consistent, patient routine, the fairing will not merely survive its next ride but will actively contribute to the rider’s confidence and comfort. The finish then becomes a kind of armor and ambassador—a shield that looks deliberate, feels durable, and communicates the rider’s care for the machine.
As a practical note for ongoing projects, consider establishing a standard operating rhythm for finishing tasks. Create a repeatable workflow that begins with surface preparation, passes through primer and base coats with controlled drying times, and ends with a protective layer that aligns with your environmental conditions and riding climate. Documenting the exact grit sequence, the product types, and the curing timings you use makes future touch-ups and repairs predictable instead of improvisational. In time, this documentation becomes a reference you can consult when you are matching a new panel to an existing one or when you are rebuilding a project after a crash or storage. The discipline pays off, especially when a panel must be matched for color and gloss across complex assembly. The result is a suite of fairings that look consistent, feel resilient, and perform reliably through countless miles of weather, wind, and road texture.
To explore further possibilities and source ideas about panel shapes, thickness, and fitment options, you can consult the broader catalog of fairing components. This approach helps align finishing decisions with the actual geometry you will mount on the bike, ensuring that the gloss, edge treatment, and protective layers harmonize with the rest of the bodywork. For readers seeking examples of finish-ready options and compatible shapes for a variety of models, the catalog page provides a starting point to visualize how different shapes respond to painting and protection, and how they can be integrated into your project with attention to mounting and durability. This catalog of fairings offers a generic reference frame for imagining how your finished surface communicates with the entire motorcycle silhouette, without tying you to a specific model or color scheme. The goal is not to copy a finished product but to understand the relationships between shape, surface, and protection so you can apply the same principles to your own design.
For a deeper dive into proven finishing techniques that balance aesthetics with long-term performance, a professional reference worth consulting is a comprehensive finishing guide from an industry source. It addresses practical details such as dust control, air quality, drying times, cure schedules, and environmental considerations that affect surface integrity. The guide emphasizes consistency, controlled variables, and meticulous attention to the order of operations—principles that echo through every successful fairing project, from the smallest windscreen to a full fairing package. Adopting these principles helps you craft surfaces that stay true to color, gloss, and clarity as the bike ages. A reliable external resource for this reference is a widely cited finishing guide that outlines the nuances of protection, abrasion resistance, and long-term stability in motorcycle fairing surfaces. https://www.motorcycle.com/tech-tips/motorcycle-fairing-finishing-guide
In summary, finishing motorcycle fairings is a synthesis of art and engineering. It requires deliberate material choices, patient surface refinement, careful color strategy, and protective layering designed for durability. The finish should reinforce the rider’s experience by providing a shield that remains visually striking after many miles and seasons. When you combine a dust-controlled environment, a thoughtful edge treatment, and a protective topcoat, the result is not only a beautiful surface but a resilient one. The fairing becomes part of the bike’s story—one that endures sun, road grit, and weather, while continuing to reflect the rider’s intention and style. The work invites ongoing care, with routine evaluation and touch-ups that preserve the finish’s depth and clarity. The finishing journey, properly executed, turns a well-made panel into a longtime companion on the road, pairing performance with presentation in a singular, lasting statement.
Final thoughts
In conclusion, mastering the craft of motorcycle fairing creation involves a comprehensive understanding of design principles, material science, advanced shaping, and finishing techniques. By integrating these elements, business owners can offer high-quality, custom fairings that not only meet but exceed customer expectations. Investing in knowledge and resources will not only enhance your business reputation but also ensure customer satisfaction and loyalty. As markets evolve, staying ahead through innovation and quality will keep your customization services in demand.