Introduction
Motorcycle fairings hold powerful appeal for riders seeking aesthetics, aerodynamics, and protection, making custom fairings a lucrative business niche. Understanding how to make your own motorcycle fairings offers business owners a competitive edge by enabling unique product lines tailored to customer preferences. This guide walks through the critical stages of fairing fabrication: from initial design and mold creation to material layering, curing, sanding, painting, and final installation. Concluding with practical beginner tips and alternative strategies, each chapter equips business owners with actionable insights to elevate their custom fairing capabilities and meet market demands effectively.
Tables of Contents
Chapter 1: Mastering Design and Mold Creation for Custom Motorcycle Fairings
- Harnessing Digital Innovation: Advanced Techniques for Motorcycle Fairing Design and Mold Fabrication
- Selecting Materials and Mastering Composite Layup for Durable Custom Motorcycle Fairing Molds
- Mastering Mold Fabrication and Finishing Techniques for Custom Motorcycle Fairings
- Refining Fit: Essential Test Fitting and Adjustment Techniques for Motorcycle Fairing Molds
Chapter 2: Material Selection and Layering Techniques for Crafting Custom Motorcycle Fairings
- Choosing the Right Material: Balancing Durability, Weight, and Cost in Motorcycle Fairings
- Mastering Composite Layering: Effective Molding, Curing, and Assembly for Durable Motorcycle Fairings
- Mastering Surface Finishing and Protective Coatings for Durable and Stunning DIY Motorcycle Fairings
- Optimizing Hardware Choice and Fastening Methods for Durable, Lightweight Motorcycle Fairings
Chapter 3: Curing and Sanding Processes in How to Make Your Own Motorcycle Fairings
- Tailoring Curing and Sanding Techniques to Your Fairing Material for Optimal Results
- Achieving Flawless Surfaces Through Progressive Sanding Techniques in Motorcycle Fairing Fabrication
- Mastering Surface Preparation and Finishing Techniques for Durable Motorcycle Fairings
- Essential Tools and Safety Practices for Effective Curing and Sanding of Motorcycle Fairings
Chapter 4: Painting and Finishing Methods for Custom Motorcycle Fairings: Achieving a Flawless Surface
- Mastering Surface Preparation and Priming to Ensure Durable, Professional Motorcycle Fairing Finishes
- Essential Techniques and Creative Approaches to Applying Paint and Customizing Colors on Your Motorcycle Fairings
- Enhancing Longevity: Protective Clear Coats and Surface Durability for DIY Motorcycle Fairings
- Sanding, Buffing, and Care: Elevating Your Motorcycle Fairings to a Flawless Finish
Chapter 5: Innovative Installation and Mounting Hardware Techniques for Custom Motorcycle Fairings
- Precision and Protection: Modern Methods for Installing and Securing DIY Motorcycle Fairings
- Balancing Cost and Quality: Smart Economic Choices in Fairing Installation and Mounting
- Navigating Global Supply Challenges: Sourcing and Sustainability for Motorcycle Fairing Hardware
- Enhancing Rider Experience and Community Impact through Thoughtful Fairing Installation
Chapter 6: Beginner Tips and Alternative Approaches in How to Make Your Own Motorcycle Fairings
- Mastering the Essentials of Planning, Materials, and Installation for Your First Custom Fairings
- Innovative DIY Fabrication and Custom Design Techniques for Motorcycle Fairings
- Essential Installation Techniques and Safety Practices for DIY Motorcycle Fairings
- Boosting Longevity: Practical Maintenance and Durability Strategies for DIY Motorcycle Fairings
Chapter 1: Mastering Design and Mold Creation for Custom Motorcycle Fairings

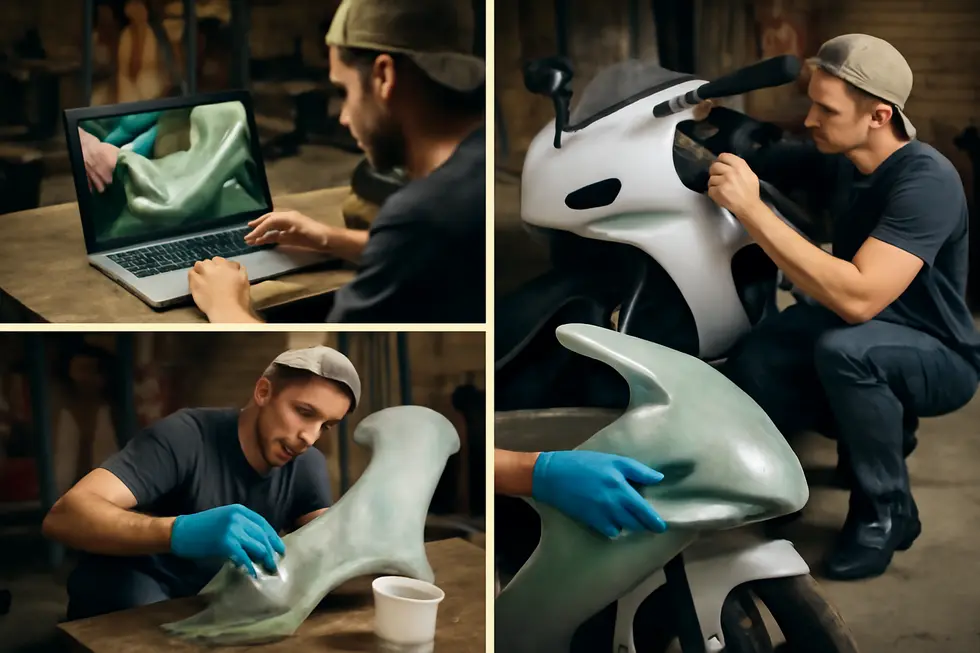
1. Harnessing Digital Innovation: Advanced Techniques for Motorcycle Fairing Design and Mold Fabrication
The integration of digital tools has revolutionized the design and mold creation process for custom motorcycle fairings. Utilizing Computer-Aided Design (CAD) software, builders can craft precise, three-dimensional models that allow for detailed visualization and iterative refinement. This digital approach enables adjustments to fit and style before any physical work begins, significantly reducing trial and error. Adding to this, 3D scanning technology captures the exact contours of a motorcycle or rider ergonomics, helping personalize fairings for optimal fit and comfort.
For mold creation, advanced machining techniques such as electrical discharge machining (EDM) and high-speed milling deliver precise, durable tooling suited for forming complex shapes. Meanwhile, additive manufacturing—commonly known as 3D printing—supports rapid prototyping and production of intricate parts that might be costly or impossible to machine traditionally. Polymer 3D prints can serve as molds for vacuum forming, whereas metal 3D printing yields high-precision components essential for durability.
Together, these digital innovations streamline the transition from concept to physical fairing, enhancing both accuracy and creative freedom. To explore a broad range of options and insights in motorcycle fairings, visit Explore the best motorcycle fairings at Summit Fairings.
2. Selecting Materials and Mastering Composite Layup for Durable Custom Motorcycle Fairing Molds
Choosing the right materials and mastering composite layup are foundational steps in designing and creating motorcycle fairing molds. Typically, molds are crafted from durable fiberglass due to its affordability and heat resistance, ensuring they hold shape through multiple curing cycles. When it comes to the fairings themselves, composite fibers like carbon fiber and fiberglass are layered with resin over molds to achieve the ideal blend of strength, weight, and surface finish. Careful composite layup involves orienting fibers strategically to handle stresses typical for motorcycle bodywork, optimizing durability without excess weight. Techniques such as manual hand layup or vacuum bagging help eliminate air bubbles and ensure consistent layer consolidation, while advanced approaches like Automated Fiber Placement offer precise control of fiber direction for complex curves. Effective mold design incorporates features like draft angles to simplify demolding and reduce finishing work on final parts. This coordinated approach to material choice and layup within a well-designed mold enables enthusiasts to fabricate motorcycle fairings that balance aesthetics, reliability, and performance. For deeper insights into composite technologies and motorbike applications, resources like CompositesWorld’s exploration of automated fiber placement provide valuable guidance. Additionally, to explore affordable options and inspiration for your project, check out custom motorcycle fairings ideas and resources.
3. Mastering Mold Fabrication and Finishing Techniques for Custom Motorcycle Fairings
Creating a precise mold is essential for crafting durable and visually appealing motorcycle fairings. The process begins by shaping a master pattern that defines the exact form of the fairing. From this, a fiberglass mold is built, coated with a smooth gel coat layer to ensure a flawless finish on the final piece. Applying a mold release agent is crucial to facilitate easy separation after curing. Composite materials such as fiberglass cloth are then layered into the mold with resin, binding the fibers and forming a strong, lightweight shell. Techniques like vacuum bagging can enhance this bond, removing air pockets for superior strength. Once fully cured, the molded part is carefully demolded and undergoes sanding to smooth edges and eliminate imperfections. Final finishing steps—including painting or coating—protect the surface while adding customized aesthetics. Whether approached with hand layups or industrial tools like CNC milling for mold crafting, mastering these fabrication and finishing steps ensures your fairings meet both functional and stylistic goals with precision. For further insights on achieving optimal finishes, explore detailed resources on motorcycle fairings here. External reference on mold release and layup details can be found here.
4. Refining Fit: Essential Test Fitting and Adjustment Techniques for Motorcycle Fairing Molds
Creating high-quality motorcycle fairings demands more than initial mold fabrication; it requires meticulous test fitting and iterative adjustments to guarantee an optimal fit and flawless function. This phase combines precise dimensional inspection—using calipers and gauges—with direct prototype placement on the motorcycle frame to identify alignment issues or interference early. Throughout mold development, continuous in-process inspections catch warping or surface flaws, prompting timely refinements.
Functional testing expands beyond fit to verify factors like vibration resistance and accessory compatibility, ensuring lighting mounts and electrical components integrate seamlessly. These iterative evaluations lead to fine-tuning mold cavities or adjusting material flow to counteract shrinkage and misalignment, avoiding costly errors down the line.
A comprehensive final inspection confirms that fairings match design specifications and installation requirements perfectly, laying the groundwork for smooth painting and assembly. This strategic approach harmonizes form and function, creating durable, aesthetically pleasing fairings tailored precisely to your motorcycle.
For further insights on dimensional inspection and functional testing workflows, consider exploring detailed resources such as Autodesk’s Fusion 360 blog.
Chapter 2: Material Selection and Layering Techniques for Crafting Custom Motorcycle Fairings
1. Choosing the Right Material: Balancing Durability, Weight, and Cost in Motorcycle Fairings
Material selection is essential when crafting motorcycle fairings, as it influences durability, weight, and fabrication complexity. Common choices include ABS plastic, aluminum, carbon fiber, and fiberglass, each offering distinct benefits. ABS plastic is popular for its excellent impact and heat resistance, ease of molding, and cost-effectiveness, making it ideal for durable, budget-conscious projects. Aluminum provides strength and is lightweight compared to steel but is mainly suited for structural parts due to its higher cost and complex fabrication. Carbon fiber excels with an exceptional strength-to-weight ratio and rigidity, making it the premium option for high-performance builds, though it demands specialized manufacturing and higher expense. Fiberglass strikes a balance with decent strength and moldability, favored for custom or aftermarket fairings while remaining more affordable than carbon fiber. Layering techniques for composites like fiberglass and carbon fiber involve multiple resin-soaked fabric plies to optimize strength and shape retention, unlike ABS or aluminum which rely on thickness and design. Selecting the right material hinges on your priorities—durability and ease for ABS, structural utility for aluminum, weight savings for carbon fiber, or versatility and repairability for fiberglass. For a deeper dive into professional-grade composite manufacturing, resources like Turn1’s carbon fiber fabrication insights are invaluable. For additional guidance on affordable and customizable options, exploring affordable motorcycle fairings can be beneficial.
2. Mastering Composite Layering: Effective Molding, Curing, and Assembly for Durable Motorcycle Fairings
Mastering Composite Layering: Effective Molding, Curing, and Assembly for Durable Motorcycle Fairings
Creating strong, lightweight motorcycle fairings relies on carefully selecting materials like fiberglass, carbon fiber, or ABS plastic and expertly layering them over a mold. The process begins with preparing a clean, shaped mold, upon which thin layers of fabric or plastic sheets are laid and thoroughly saturated with resin—most often epoxy or polyester. Each additional layer enhances structural integrity and refines the fairing’s form. Curing the resin is critical; it typically requires about 24 hours at room temperature but can be sped up with heat or vacuum bagging, which compresses layers and eliminates air pockets for a superior bond.
After curing, trimming and meticulous sanding smooth the surface, preparing it for primer and paint coats that protect and customize the finish. When assembling multiple pieces, proper surface preparation and using strong two-part epoxy adhesives with clamping ensure lasting bonds. Attention to resin compatibility, layering thickness, and curing environment dramatically improves the final product’s strength and aesthetics, enabling DIY builders to achieve professional-quality results. For guidance on expert bonding and finishing techniques, see this comprehensive resource on carbon fiber part bonding and finishing.
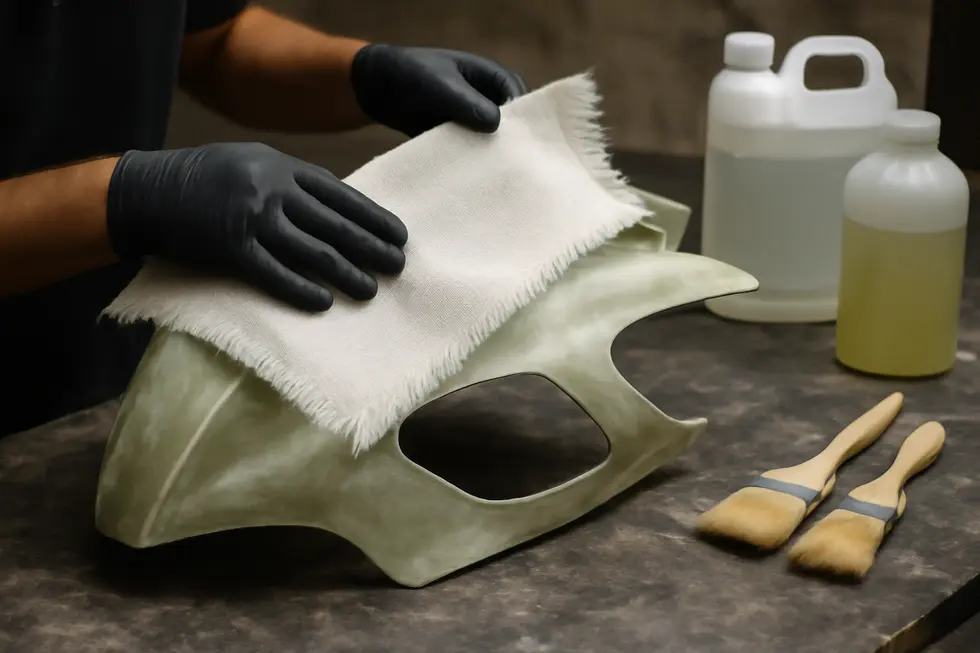
3. Mastering Surface Finishing and Protective Coatings for Durable and Stunning DIY Motorcycle Fairings
Achieving long-lasting durability and vibrant aesthetics for your motorcycle fairings requires careful surface finishing and the right protective coatings. Starting with a well-chosen base material such as ABS plastic or carbon fiber ensures a solid foundation. Applying a primer layer is essential to improve paint adhesion, followed by multiple paint layers that bring your design to life. To guard against environmental damage, especially UV rays that can cause fading or yellowing, a clear coat with UV inhibitors seals the paint effectively. For enhanced resilience, professional-grade ceramic coatings provide a semi-permanent shield against scratches, grime, and weathering, preserving both appearance and structural integrity. Paint Protection Films or vinyl wraps offer an additional physical barrier against abrasions and sun exposure, often at a lower cost and with easier application. Special care is required for materials like carbon fiber, where cutting with diamond-coated tools avoids fraying before sealing with UV-resistant clear coats. This thoughtful combination of material choice, layering, and finishing techniques ensures your handcrafted fairings remain both beautiful and protected through years of use. For further insights on selecting the right fairings, explore the comprehensive resources at Summit Fairings, your go-to destination for motorcycle fairings.
4. Optimizing Hardware Choice and Fastening Methods for Durable, Lightweight Motorcycle Fairings
Selecting the right hardware is vital when crafting motorcycle fairings, balancing strength, weight, and corrosion resistance. Stainless steel fasteners are durable but heavier, while titanium offers exceptional corrosion resistance and a superior strength-to-weight ratio, ideal for performance-focused builds. For fragile materials like carbon fiber, nylon or rubber-lined fasteners prevent cracking by cushioning vibrations and thermal expansion. Proper alignment during assembly is critical to avoid stress that could cause warping or fractures, especially with ABS or composite panels. Fasteners should be easy to remove and reinstall, as fairings often require periodic disassembly. When layering composites such as fiberglass or carbon fiber, fasteners need to be positioned in reinforced areas or embedded inserts to maintain structural integrity. Using frame jigs or alignment tools ensures precise fitting, protecting aerodynamic shape and durability. Welding methods like TIG welding complement corrosion-resistant frames supporting the fairings. These hardware and fastening choices collectively contribute to long-lasting, lightweight fairings tailored to your motorcycle. For in-depth guidance, explore expert advice on proper fasteners and assembly techniques in affordable motorcycle fairings.
Chapter 3: Curing and Sanding Processes in How to Make Your Own Motorcycle Fairings
1. Tailoring Curing and Sanding Techniques to Your Fairing Material for Optimal Results
Material-specific approaches define effective curing and sanding when crafting motorcycle fairings. Carbon fiber fairings rely on two-part epoxy resin cured under firm clamping for about 24 hours, ensuring structural integrity. Preparing the surface with light sanding and thorough cleaning optimizes resin adhesion, while careful sanding after curing avoids damaging delicate fibers. Applying a ceramic coating post-cure enhances scratch resistance and gloss if done without harsh heat. Plastic fairings demand meticulous surface cleaning before repair, sometimes aided by V-grooving to stabilize cracks. Wet sanding prevents overheating and preserves the plastic, while UV protectants shield against future degradation. For 3D-printed or composite hybrids, removing supports and applying heat treatments like annealing relieve internal stresses. Precision sanding or machining creates smooth finishes. Adhesives cure under controlled pressure and temperature to secure durable bonds. Finishing methods—polishing, painting, or anodizing—depend on material compatibility. Attention at material joints is critical to prevent bonding failures and corrosion. Understanding these distinctions ensures your motorcycle fairings not only look great but endure the road’s demands. For a deeper dive into fairing customization options, explore affordable motorcycle fairings.
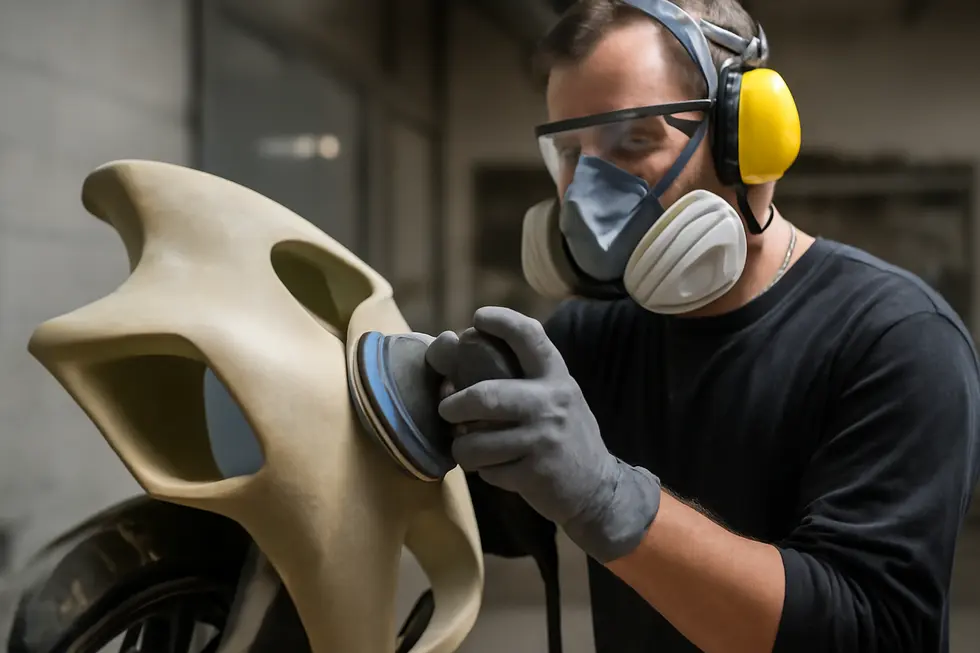
2. Achieving Flawless Surfaces Through Progressive Sanding Techniques in Motorcycle Fairing Fabrication
Progressive sanding is a crucial step in refining the surface of your motorcycle fairings after curing. This method involves starting with coarser grit sandpaper, such as 400 to 600 grit, to remove major imperfections and shape the panel. Once the surface is even, moving to medium grit between 800 and 1000 refines the texture by eliminating scratches made by the earlier sanding. The final phases use fine and ultra-fine grits—ranging from 1500 up to 3000—to polish the surface, often employing wet sanding to minimize dust and prevent heat buildup. This technique ensures the fairing’s surface becomes perfectly smooth, essential for proper adhesion of primer and paint, and ultimately a professional-looking finish. Using sanding blocks and cleaning the surface between grit changes prevents unevenness and grit contamination. After sanding, polishing compounds and buffing restore clarity and shine, especially on clear-coated panels. These steps, adapted from automotive bodywork practices, transform cured fairings into durable, visually appealing parts ready for installation. To explore more about custom fairings and quality finishes, visit our explore the best motorcycle fairings at Summit Fairings. For detailed sanding insights, see this guide on wet sanding and polishing automotive surfaces: https://www.fresh-layer.com/blog/car-paint-oxidation-causes-prevention-and-restoration
3. Mastering Surface Preparation and Finishing Techniques for Durable Motorcycle Fairings
Achieving a flawless finish on homemade motorcycle fairings hinges on meticulous surface preparation and careful curing. Begin by thoroughly cleaning the fairing with a degreaser to eliminate dirt and oils, which ensures strong adhesion for fillers and primers. Sanding follows, starting with coarser grits like 80 to shape the surface and expose imperfections, then progressing to finer grits for smoothing and leveling any applied fillers. Once the primer or filler is applied, allowing sufficient curing time is critical; curing stabilizes the surface and prevents defects caused by dust or temperature fluctuations. After curing, a process known as color sanding removes minor surface irregularities, enhancing smoothness. Finally, polishing with an orbital buffer and protective coatings like wax or ceramic treatments not only boosts shine but also prolongs durability. If applying decals, ensure the surface is clean and dry before placement, then seal with a clear coat for lasting protection. For detailed guidance on these finishing steps, automotive painting resources offer valuable techniques applicable to motorcycle fairings. To explore expert tips on fairing fabrication and finishing, consider visiting Summit Fairings’ comprehensive blog.
4. Essential Tools and Safety Practices for Effective Curing and Sanding of Motorcycle Fairings
Successfully curing and sanding motorcycle fairings requires the right tools and strict adherence to safety practices. Start with layered sanding using progressively finer grits—from around 1000 up to 3000—to achieve a smooth finish without damaging the resin surface. Foam-backed sanding discs help maintain a consistent touch on curves, while specialized rotary tools fitted with diamond-coated or carbide bits prevent chipping when cutting tougher materials like carbon fiber. Throughout this process, personal protection is vital. Always wear a dust mask, nitrile gloves, and eye protection to shield against irritating dust and resin fumes. Whenever possible, opt for wet sanding to cut airborne particles and keep your workspace ventilated to minimize inhalation risks. Pay close attention to curing conditions; follow resin manufacturer guidelines on optimal temperature and humidity to ensure structural integrity before sanding. Proper disposal of resin waste and contaminated materials safeguards your environment. This approach blends precision with safety, essential for crafting durable, high-quality fairings. For deeper insight on cutting composites safely, refer to expert advice such as Turn1’s guidance on carbon fiber handling and tools. For more resources on fairing fabrication, consider exploring your ultimate source for affordable motorcycle fairings.
Chapter 4: Painting and Finishing Methods for Custom Motorcycle Fairings: Achieving a Flawless Surface
1. Mastering Surface Preparation and Priming to Ensure Durable, Professional Motorcycle Fairing Finishes
Surface preparation and priming are vital for creating a smooth, durable finish on custom motorcycle fairings. Begin by thoroughly cleaning the fairings to eliminate dirt, grease, and contaminants that hinder paint adhesion. Next, carefully sand the surface with medium-grit sandpaper (typically 600-800 grit) or specialized sanding pads to create a slightly rough texture. This step enhances primer and paint bonding without damaging the underlying material. For plastic or resin-based fairings, sanding techniques may slightly differ, so adjusting grit and pressure is important to avoid warping. When repainting, light sanding of existing paint improves adhesion, but if the old coating is compromised, stripping to bare material is advised. Priming follows, applying thin, even coats of primer designed for your fairing’s substrate. Using epoxy primers on metal and high-build primers for minor imperfections helps create a uniform base. Allow each primer layer to dry fully and sand lightly between coats to maintain smoothness. This careful preparation ensures subsequent paint layers adhere well, resulting in a resilient and visually striking finish that withstands environmental stresses. For practical insights and detailed product guidance, consider exploring in-depth tutorials and expert DIY resources such as this comprehensive guide.
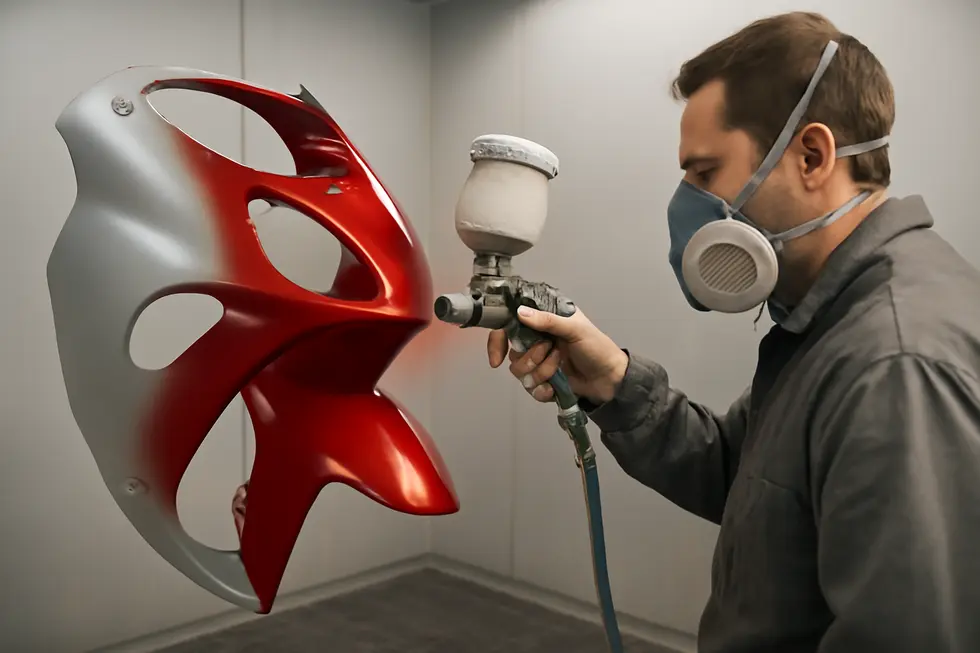
2. Essential Techniques and Creative Approaches to Applying Paint and Customizing Colors on Your Motorcycle Fairings
Achieving a vibrant, durable finish on your handmade motorcycle fairings demands meticulous surface preparation and strategic layering of materials. Begin by sanding the fairing panels with fine (600-800 grit) sandpaper to ensure a smooth surface that promotes strong paint adhesion. Clean the panels thoroughly to eliminate dust and oils that could cause imperfections. Applying a plastic-compatible primer is crucial—it enhances paint adherence and extends the paint’s lifespan. When selecting colors, automotive-grade paints tailored for motorcycle use yield the best results; you can customize hues precisely by matching factory codes or blending pigments. Artistic techniques like airbrushing or candy finishes add unique visual depth, allowing creative expression beyond solid colors. Multiple clear coat layers protect the artwork from UV rays, weather, and chips while imparting glossy richness. For even coverage, use spray guns or quality aerosols designed for plastics, avoiding drips or sags. Regular maintenance, including gentle washing and protective waxing, preserves your fairings’ finish over time. Beginners are encouraged to practice on sample pieces and explore advanced tutorials for mastering these steps. This comprehensive approach ensures your DIY fairings stand out aesthetically and endure the demands of the road. For further inspiration and resources on custom fairings, visit the motorcycle fairings blog.
3. Enhancing Longevity: Protective Clear Coats and Surface Durability for DIY Motorcycle Fairings
Achieving durable, visually striking motorcycle fairings involves more than just paint—protective clear coats are essential to safeguard your work. Applying multiple layers of a UV-resistant clear coat seals the paint, preventing fading and dulling caused by sun exposure. This clear finish also shields the surface from scratches and environmental hazards like dirt and moisture, while enriching gloss and color depth. Starting with high-quality ABS plastic fairing blanks provides a flexible, impact-resistant base that supports long-lasting finishes. Incorporating multi-step painting and clear coating processes builds depth and strength, ensuring the finish resists wear and tear. For added protection, ceramic or polymer-based coatings can be applied, creating an ultra-hard shell that guards against chemicals and abrasions akin to automotive-grade treatments. Maintenance plays a vital role; gentle cleaning and occasional waxing preserve the clear coat’s integrity. Combining proper material selection with layered protective painting techniques and mindful upkeep guarantees your custom motorcycle fairings maintain their fresh, vibrant look over time. For further insights on styling and protection techniques, explore this resource on affordable motorcycle fairings and finishing tips. Additional details on clear coating systems can be found at Kings Motorcycle Fairings’ blog: https://www.kingsmotorcyclefairings.com/blogs/news
4. Sanding, Buffing, and Care: Elevating Your Motorcycle Fairings to a Flawless Finish
Achieving a professional, high-gloss finish for your DIY motorcycle fairings hinges on meticulous sanding, buffing, and ongoing maintenance. Initially, sanding progresses through increasingly fine grit papers to smooth uneven surfaces and imperfections, ensuring paint and clear coats adhere flawlessly. Post-painting, wet sanding with ultra-fine grit—known as color sanding—removes subtle flaws like orange peel or dust particles, preparing the panel for polishing. Buffing then refines the surface using a mechanical buffer paired with polishing compounds, erasing micro-scratches and amplifying shine to a mirror-like gloss crucial for curved fairing shapes. When working with plastic fairings, hand polishing using gentle abrasive compounds and microfiber applicators restores clarity and surface depth without damage. To preserve this finish, regular cleaning combined with protective coatings, such as waxes or UV-resistant sealants, is essential. Gentle pressure and working in a ventilated space reduce risks during polishing. Following these careful techniques not only enhances your fairings’ look but also prolongs their durability, making your custom work truly stand out. For detailed step-by-step visuals, check out this comprehensive polishing guide. Additionally, explore expert tips and fairing options at the Summit Fairings blog.
Chapter 5: Innovative Installation and Mounting Hardware Techniques for Custom Motorcycle Fairings
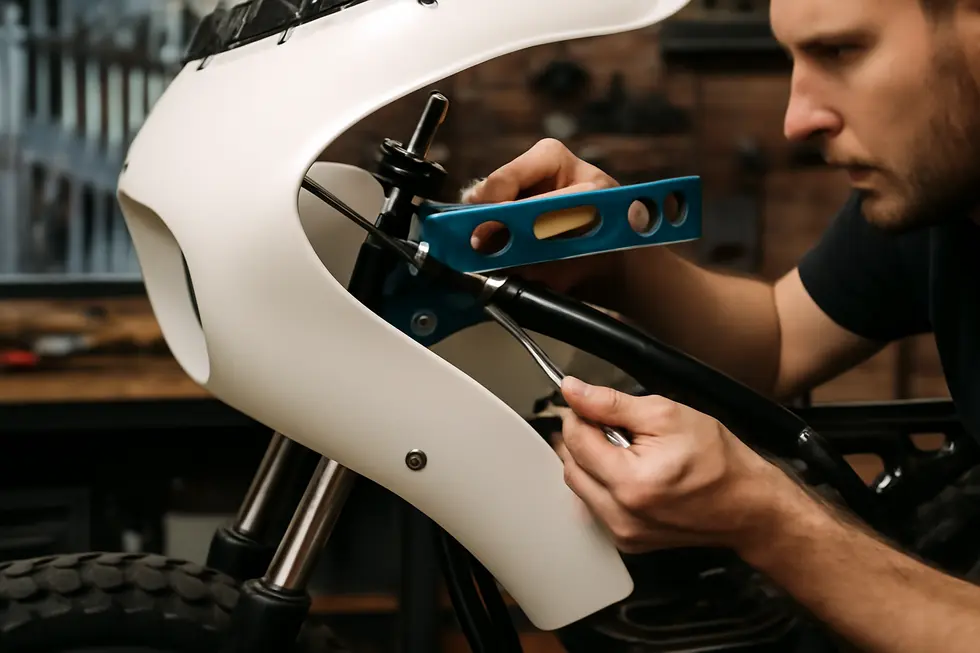
1. Precision and Protection: Modern Methods for Installing and Securing DIY Motorcycle Fairings
Installing custom motorcycle fairings demands a blend of technical precision and protective care to ensure lasting performance and visual appeal. The process begins with carefully removing existing parts and thoroughly inspecting the motorcycle’s mounting points. When these points don’t align perfectly with the new fairings, installing custom brackets is necessary—often requiring drilling exact holes while shielding the bike’s finish from metal shavings using magnets or tape. Employing high-quality, durable fasteners like stainless steel bolts enhances resistance against vibration and weather exposure, crucial for road durability. Ensuring perfect alignment prevents stress fractures and maintains aerodynamic flow, while preassembling components such as windshields or lighting before mounting streamlines installation and improves stability. These techniques merge traditional mechanical fastening with modern attention to detail, creating a secure and refined look that complements personalized fairings. For more insights on securing and fitting aftermarket panels accurately, explore this comprehensive resource.
For practical demonstrations, detailed video tutorials provide invaluable guidance on these technological strategies in action, enhancing understanding and execution.
2. Balancing Cost and Quality: Smart Economic Choices in Fairing Installation and Mounting
When tackling installation and mounting hardware for DIY motorcycle fairings, managing costs without sacrificing quality is key. The price range of mounting hardware—from brackets and spacers to bolts—varies widely, influencing both durability and fitment. Opting for high-quality components may have a higher upfront cost but prevents frequent replacements and alignment issues. Labor costs significantly impact total expenses as professional installations can run into thousands, while DIY approaches require mechanical skills and tools but cut costs dramatically. The chosen fairing material also affects economic strategy; fiberglass kits are budget-friendly yet may demand extra fitting, whereas ABS or carbon fiber kits cost more but offer cleaner installations. Ensuring hardware compatibility with your bike’s frame and aftermarket parts minimizes expensive modifications later. Planning your installation method and documenting all fasteners improve efficiency and reduce costly errors. Smart investment in compatible, quality mounts paired with your skill level can strike the right balance between reasonable outlay and long-term reliability. For more insights on affordable materials and mounting solutions, explore this affordable motorcycle fairings guide.
3. Navigating Global Supply Challenges: Sourcing and Sustainability for Motorcycle Fairing Hardware
The installation and mounting hardware for DIY motorcycle fairings is deeply influenced by global supply chain shifts and geopolitical realities. Manufacturers relocating production to cost-efficient, sustainable regions affect the availability and pricing of essential components like corrosion-resistant bolts and fasteners. Such movements also encourage environmentally conscious practices, with many suppliers adopting recyclable and reusable mounting hardware to align with circular economy principles. Trade restrictions and tariffs can complicate sourcing, prompting enthusiasts to seek local or alternative suppliers to maintain part quality and affordability. Model compatibility further challenges hardware selection, often making universal or adaptable kits the preferred choice over specific fittings, especially when supply is unpredictable. This evolving landscape demands that DIY builders remain flexible, prioritize durable materials like stainless steel or aluminum, and consider hardware longevity to ensure their fairings not only install securely but endure wear over time. For a comprehensive view on selecting quality fairings and components, explore resources like Explore the Best Motorcycle Fairings at Summit Fairings. These global dynamics are pivotal for successful, sustainable fairing projects that balance cost, performance, and environmental impact.
4. Enhancing Rider Experience and Community Impact through Thoughtful Fairing Installation
Installation and mounting hardware choices directly shape the rider’s experience and the broader motorcycle community. Well-engineered mounting systems, featuring precision-fit holes and durable materials, simplify installation, reduce mounting errors, and increase safety by minimizing vibrations and risk of detachment at speed. Riders benefit not only from improved functionality but also from customization flexibility, enabling adjustments for style and ergonomic comfort. This personalization fosters a deeper connection between rider and machine, promoting satisfaction and confidence.
Beyond individual gains, accessible and streamlined mounting strategies empower diverse riders to embrace DIY repairs and modifications, nurturing mechanical literacy and lowering financial barriers. This accessibility strengthens community bonds as enthusiasts share tips and support. Environmentally, durable hardware extends fairing lifespan, reducing waste from frequent replacements. Economically, affordable, quality mounting components support niche aftermarket markets, encouraging small business growth.
Together, these factors reinforce safe, sustainable, and inclusive motorcycle cultures, where customization serves both personal expression and collective advancement. For riders seeking detailed insights on DIY fairings and installation, exploring expert resources such as this guide on motorcycle fairings can provide valuable support.
For further reading on how mounting affects stability and rider safety, see relevant technical insights from industry leaders.
Chapter 6: Beginner Tips and Alternative Approaches in How to Make Your Own Motorcycle Fairings
1. Mastering the Essentials of Planning, Materials, and Installation for Your First Custom Fairings
Creating your own motorcycle fairings starts with meticulous planning and understanding the materials and installation methods involved. Begin by designing fairings that precisely fit your bike, measuring mounting points carefully to decide if you’ll use existing holes or need to drill new ones. Removing old fairings and cleaning attachment areas ensures a secure fit. Fiberglass is a favored material for beginners due to its lightweight strength and ease of shaping, while ABS plastic and sheet metal offer viable alternatives depending on your project’s needs. Essential tools include drills, sanding equipment, screwdrivers, and safety gear, all helping to shape and secure your fairings properly. When mounting, it’s crucial to align panels carefully before tightening fasteners and to protect the bike’s finish if new holes are drilled by using magnets to catch metal shavings. Assembling complex pieces off the bike first can simplify installation. Cleaning surfaces and using quality fasteners ensures durability. Painting after fitting but before final assembly allows for a flawless finish. For a thorough walkthrough of installation techniques and tips, refer to the detailed installation walkthrough guide. Practical preparation combined with material knowledge lays the groundwork for successful fairing fabrication and installation.
2. Innovative DIY Fabrication and Custom Design Techniques for Motorcycle Fairings
Creating custom motorcycle fairings offers diverse approaches beyond traditional fiberglass molding. Starting with cardboard or paper templates allows shaping and refining designs before committing to sturdier materials. For more durable builds, artisans often turn to sheet metal, such as 20-gauge mild steel, shaped using tools like nylon hammers, English wheels, and shrinker-stretchers. These tools help contour metal precisely for distinctive café racer cowls or chain guards. Alternatively, heat-formed thermoplastic sheets soften with heat, enabling exact fits and easy sanding, ideal for seat pans and flexible panels. For precise, complex shapes, digital design via CAD software bridges modern technology with craftsmanship, generating exact patterns transferable to aluminum or PVC for cutting, drilling, and forming. Combining metal fabrication skills—cutting, welding, and finishing—with digital design offers strength and style, producing personalized, resilient fairings. Depending on your skill set and resources, mixing these methods helps represent your vision while honing your fabrication abilities. Beginners can explore these techniques through detailed videos, such as those demonstrating metal shaping and digital-assisted projects, for a hands-on learning curve. For more insights on motorcycle fairing options and customization, explore our detailed guides at Summit Fairings blog.
External resource for metal fabrication basics and finishing: https://xtool.com
3. Essential Installation Techniques and Safety Practices for DIY Motorcycle Fairings
Successful installation of homemade motorcycle fairings demands more than just fitting parts—it requires a meticulous approach to ensure safety and durability. Begin by securing your bike on a stable platform, such as a stand, to prevent tipping during work. Clean all mounting areas carefully; dirt or debris can compromise fit and adhesion. Pre-assemble components like windshields or lights following instructions to streamline mounting. Proper bracket installation is critical—often necessitating cautious drilling for new holes without risking frame integrity. Use appropriate tools such as screwdrivers, wrenches, and drills patiently to avoid scratching or misaligning panels. Prioritize safety by disconnecting the battery when working near electrical components and wearing eye and hand protection to prevent injury. Document disassembly with photos to ease reassembly, and avoid forcing clips or fasteners. After mounting, double-check all fasteners for tightness to guarantee stability. Maintaining compliance with safety regulations and performing regular checks on structural and mechanical aspects safeguard both rider and bike. For beginners eager to see these steps in action, visual guides like the video “How Do I Install Motorcycle Fairings?” offer invaluable, step-by-step assistance. To explore more about motorcycle fairings and their customization, visit the Summit Fairings blog.
External resource: https://www.youtube.com/watch?v=3YTuEWH770U
4. Boosting Longevity: Practical Maintenance and Durability Strategies for DIY Motorcycle Fairings
Enhancing the durability and ease of maintenance for homemade motorcycle fairings begins with selecting the right materials and preparing surfaces carefully. Durable options like fiberglass or ABS plastic provide impact resistance and weatherproof qualities, while thorough sanding and cleaning improve paint adhesion and longevity. After painting, applying clear coats or specialized protective sprays shields the surface from UV rays and corrosion, preserving aesthetics and structural integrity.
Internally reinforcing fairings with ribs or supports adds strength, reducing vulnerability to vibrations and minor impacts. Regular upkeep plays a crucial role: using gentle cleaners, avoiding harsh chemicals, and routinely checking and tightening mounting brackets prevent damage caused by movement or loosening hardware. Lubricating nearby moving parts also helps prevent corrosion that might affect mounting stability.
Beginners may find alternative methods like vacuum forming or utilizing pre-made molds simplify fabrication and produce consistent, robust shapes with fewer weak points. Repair kits tailored for fiberglass or plastic allow quick fixes that extend the life of fairings without complete remakes. These practical strategies balance beginner accessibility with proven ways to keep DIY fairings functional and visually appealing over time.
For additional insights, see this ultimate source for affordable motorcycle fairings.
Final thoughts
Custom motorcycle fairings represent an intersection of craftsmanship, technical skill, and business opportunity. From designing molds to selecting the right materials and mastering each stage of fabrication—including curing, sanding, and painting—understanding this process is vital for business owners expanding their motorcycle customization offerings. Additionally, careful installation guarantees fitment quality that customers value. By embracing beginner-friendly tips and considering alternative approaches, businesses can innovate and offer premium, personalized products that enhance rider experience and satisfaction. With dedication and the right knowledge, making your own motorcycle fairings becomes a strategic asset that drives both brand differentiation and customer loyalty.
Ready to elevate your ride? Summit Fairings delivers premium, custom-fit fairings that blend style and durability. Whether you’re chasing speed or turning heads, we’ve got your bike covered. Don’t wait—transform your machine today. Click, customize, and ride with confidence. Your perfect fairing is just a few clicks away. Act now!
About us
undefined