Introduction
Painting motorcycle fairings goes beyond simple aesthetics—it defines the quality and durability of your business offering. For business owners focused on delivering standout finishes, mastering the entire painting process is vital. This begins with precise surface preparation and priming techniques that set the foundation for paint adhesion and longevity. Next, understanding the nuances of paint application and clear coat finishes ensures the final product protects and embellishes motorcycle parts effectively. Finally, integrating the right tools, safety protocols, and finishing touches guarantees both professional results and workplace efficiency. Each chapter builds a comprehensive understanding designed to elevate your motorcycle fairing painting services and solidify your reputation for excellence.
Tables of Contents
Chapter 1: Mastering Surface Preparation and Priming for Flawless Motorcycle Fairing Paints
- Essential Cleaning and Degreasing Techniques to Optimize Paint Adhesion on Motorcycle Fairings
- Mastering Sanding and Surface Texturing for Optimal Primer Adhesion on Motorcycle Fairings
- Ensuring Perfect Paint Bonding: The Essential Role of Adhesion Promoters on Plastic Motorcycle Fairings
- Mastering Primer Selection and Application for Durable, Flawless Motorcycle Fairing Finishes
- Mastering Paint Application and Clear Coating for a Durable, Flawless Motorcycle Fairing Finish
Chapter 2: Mastering Paint Application and Clear Coat Procedures for Motorcycle Fairings
- Essential Surface Preparation and Priming Techniques for a Flawless Paint Base
- Expert Guide to Mixing and Applying Paint for a Flawless Motorcycle Fairing Finish
- Mastering Clear Coat Techniques for a Durable and Glossy Finish on Motorcycle Fairings
- Essential Tools and Materials for Flawless Paint Application and Clear Coating of Motorcycle Fairings
- Mastering Paint Application and Clear Coat Techniques: Avoiding Pitfalls for Durable Motorcycle Fairings
Chapter 3: Tools, Safety, and Finishing Touches for Perfectly Painted Motorcycle Fairings
- Mastering Essential Tools and Safety Gear for Flawless Motorcycle Fairing Paint Jobs
- Essential Safety Practices for Using Tools and Achieving Flawless Finishes on Motorcycle Fairings
- Mastering Advanced Finishing Techniques: Precision Tools, Safety, and Polishing for Motorcycle Fairings
- Mastering Preparation and Surface Treatment: The Foundation for Durable and Smooth Motorcycle Fairings
- Essential Step-by-Step Multi-Coat Painting and Finishing Techniques for Motorcycle Fairings
Chapter 1: Mastering Surface Preparation and Priming for Flawless Motorcycle Fairing Paints

1. Essential Cleaning and Degreasing Techniques to Optimize Paint Adhesion on Motorcycle Fairings
Achieving a durable, flawless finish on motorcycle fairings starts with impeccable cleaning and degreasing, fundamental steps that define the success of all following paintwork. Dirt, dust, oils, and residues on the fairing’s surface create invisible barriers that inhibit primer and paint from bonding properly. Therefore, the first priority is to thoroughly cleanse the fairing with a mild detergent or a specialized cleaning solution designed to remove contaminants without damaging the plastic substrate. After washing, rinsing with clean water is necessary to eliminate any soap remnants, followed by complete drying to prevent water spots that compromise adhesion.
Degreasing goes a step beyond typical cleaning by targeting petroleum-based contaminants, waxes, and oils that can persist even after washing. Choosing a gentle solvent-based degreaser suited for plastic fairings is critical, as harsh chemicals risk deforming or weakening the material. Once the degreaser is applied and wiped away with a lint-free cloth, the fairing’s surface becomes a pristine canvas, ready to accept primer. This level of cleanliness ensures that the adhesion promoter, which is applied after sanding, can effectively bond the primer to the plastic surface—an essential step to prevent peeling and flaking of paint over time.
Combined, these cleaning and degreasing processes create a flawless foundation that advances the overall longevity and aesthetic quality of the paint job. Proper preparation minimizes the chance of imperfections emerging during or after painting, elevating the professional quality of the finished fairings. For those seeking visual guidance on these preparatory steps and more, this detailed tutorial provides practical demonstrations and nuanced insight: https://www.youtube.com/watch?v=yk3ANq82BWM
Enhancing your understanding of motorcycle fairing preparation can also be explored through comprehensive resources on affordable and quality motorcycle fairings, which further support the painting journey.
2. Mastering Sanding and Surface Texturing for Optimal Primer Adhesion on Motorcycle Fairings
Sanding motorcycle fairings is not just a step but a foundational technique that dictates the overall quality and durability of the paint job. Starting with fine-grit sandpaper, usually around 400 grit or higher, the goal is to gently remove the glossy finish without creating deep scratches. This controlled abrasion both smooths out any surface imperfections and creates a subtle micro-texture essential for mechanical adhesion. Using sanding blocks ensures uniform pressure and even strokes, helping maintain a perfectly flat surface that avoids uneven paint application.
The sanding process should be deliberate and consistent, focused on dulling the surface just enough to eliminate shine and enhance primer bonding. For plastic fairings, this micro-roughness becomes even more critical, as it allows the primer to physically grip the surface better. Over-sanding can cause scratches that may show through the paint, so careful progression from coarser to finer grits helps achieve the right balance of texture and smoothness.
Immediately following sanding, an adhesion promoter is typically applied for plastic components, bridging the chemical gap between the fairing material and primers. This step amplifies primer effectiveness, reinforcing the bond to prevent peeling and flaking once the paint cures.
The primer itself, often a two-component formula, forms a chemically durable base. It must be sprayed evenly and left to cure fully to lock in the sanded texture’s benefits. Subsequent paint application should build upon this foundation by layering thin coats, preserving the smooth surface texture established through sanding.
Ultimately, the combination of precision sanding, proper adhesion promotion, and careful priming ensures the painted motorcycle fairing achieves a flawless look with maximum longevity. For an in-depth visual walkthrough, see the Ride or Die Motorcycles guide. This method reflects professional best practices and is supported by trusted sources in motorcycle fairing painting.
3. Ensuring Perfect Paint Bonding: The Essential Role of Adhesion Promoters on Plastic Motorcycle Fairings
Achieving a flawless, long-lasting finish on motorcycle fairings hinges significantly on how well the paint adheres to their plastic surfaces. Since plastic is inherently non-porous and smooth, paint struggles to bond without proper treatment. This is where adhesion promoters become indispensable in surface preparation and priming techniques. Acting as a specialized chemical bridge, adhesion promoters enhance the mechanical and chemical grip between the plastic substrate and subsequent paint layers.
The process begins with meticulous cleaning and gentle sanding of the plastic fairings to remove contaminants and create a microscopically rough surface that supports better adhesion. Unlike standard primers, adhesion promoters are formulated specifically for plastics, ensuring compatibility and flexibility to withstand vibrations and thermal expansion typical for motorcycle components. Multiple light coats are sprayed evenly, allowing the promoter to fully cure and develop an optimal bonding surface.
Following the adhesion promoter application, some paint systems call for an additional primer layer to further improve surface uniformity and corrosion resistance. The promoter serves as the crucial foundation, preventing common issues such as peeling, flaking, or blistering that can occur when paint is applied directly onto untreated plastic. This preparation step not only improves durability but also contributes to a richer, more consistent color once the base coat and clear coat are applied.
By integrating adhesion promoters into the preparation process, painters create a robust and reliable bond that endures operational stresses and environmental exposure. This attention to detail ensures every layer from primer to clear coat performs at its best, culminating in a professional-grade finish. For practical insights and visual guidance on these techniques, experts recommend reviewing comprehensive tutorials from industry leaders that demonstrate the entire fairing painting process step by step.
For more in-depth tips on quality parts and finishing, check out this detailed resource on exploring the best motorcycle fairings.
External reference: Adhesion Promoter Application for Plastics
4. Mastering Primer Selection and Application for Durable, Flawless Motorcycle Fairing Finishes
Achieving a durable and visually flawless paint finish on motorcycle fairings begins with mastering primer selection and application. Given that fairings are primarily made from plastic composites, using a primer specifically formulated for plastic or epoxy-based materials is essential. These primers create a strong chemical bond between the fairing surface and subsequent paint layers, preventing peeling and enhancing overall adhesion. The choice of primer not only impacts paint longevity but also guards against surface degradation, including rust protection for any underlying metal components.
Before priming, thorough cleaning is crucial to eliminate contaminants like oils, grease, and dirt that could interfere with adhesion. Following cleaning, lightly sanding the surface with fine-grit sandpaper—typically around 800 grit—creates the microscopic texture needed for the primer to grip effectively. This step balances surface smoothness with adhesion capability.
Primer application requires a steady hand and patience. Using spray equipment or automotive-grade aerosol cans designed for plastic ensures an even distribution of thin primer coats. Applying primer too thickly can lead to runs or uneven texture, so multiple light layers are preferred, each allowed to fully dry per manufacturer guidelines. After the final coat, wet sanding again with fine-grit paper refines the surface by removing minor imperfections and prepares it perfectly for the basecoat.
This approach significantly reduces the risk of chipping and peeling once the paint cures, accommodating the flex and exposure motorcycle fairings endure. For those seeking more insight and step-by-step guidance, resources like the comprehensive DIY auto paint guides on plastic primer usage provide invaluable support. Integrating these primer techniques lays a critical foundation for high-quality finishes described in subsequent stages such as painting and clear coating.
For additional tips and insights on fairing surface preparation, explore the detailed Summit Fairings blog.
Eastwood’s DIY auto paint guide offers extensive information on plastic primers and surface prep best practices.
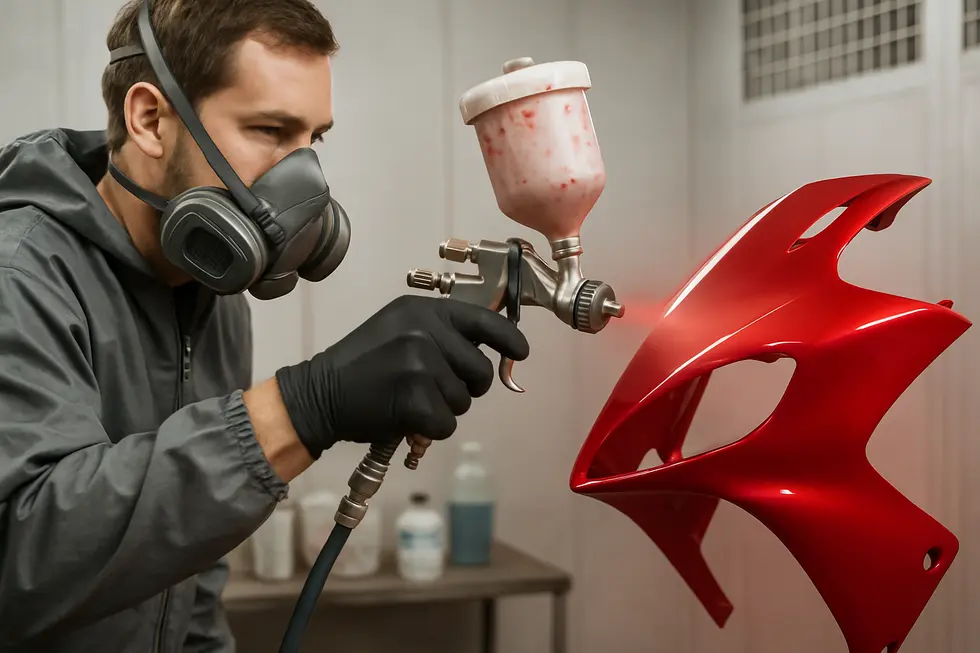
5. Mastering Paint Application and Clear Coating for a Durable, Flawless Motorcycle Fairing Finish
Following thorough surface preparation and the application of a high-quality two-component primer, the process of painting motorcycle fairings demands precision and patience to ensure a smooth, long-lasting finish. For plastic fairings, an adhesion promoter applied before priming is vital, as it enhances the bond between the surface and subsequent layers, preventing peeling or flaking later.
When ready to paint, mixing the paint with a reducer typically at a 1:1 ratio is essential for achieving the correct viscosity suited for spray application. Rather than applying one thick coat, multiple thin layers should be sprayed evenly, allowing sufficient drying time between coats. This method not only minimizes runs and drips but ensures uniform color consistency and texture.
After the paint layers have fully dried, applying two to three coats of clear coat protects the paintwork from UV rays, moisture, and abrasions. A steady and consistent spray technique is critical during this stage to avoid uneven textures such as an orange peel effect. The clear coat must be given ample time to cure fully; premature handling can compromise hardness and adhesion.
Throughout painting and clear coating, using the appropriate tools—including respirators for safety, spray guns for precise application, sanding blocks, and polishing pads for finishing—significantly impacts the quality of the end result. Each step requires deliberate care and patience to transform primed fairings into a professional-grade finish that combines durability with visual appeal.
For expanded practical guidance on painting motorcycle fairings, including detailed demonstrations, refer to this comprehensive video tutorial. Additionally, exploring the variety of high-quality plastic fairings available can enhance your project, as detailed in this collection of affordable motorcycle fairings options.
Chapter 2: Mastering Paint Application and Clear Coat Procedures for Motorcycle Fairings
1. Essential Surface Preparation and Priming Techniques for a Flawless Paint Base
Achieving a flawless finish on motorcycle fairings begins with meticulous surface preparation and priming. These foundational steps are vital for paint adhesion, durability, and creating a smooth canvas for your chosen color. Initially, thorough cleaning removes any grease, oils, or contaminants that could compromise the primer’s grip. Using solvents such as isopropyl alcohol or lacquer thinner ensures the surface is pristine and ready for sanding.
Sanding plays a dual role: it smooths imperfections and creates a slightly rough texture for the primer to latch onto effectively. Typically, medium grit sandpaper around 400 grit is ideal to prepare the surface without causing deep scratches. For plastic fairings, sanding also improves the performance of adhesion promoters—chemical agents that enhance the bond between the plastic and primer, crucial to prevent peeling or flaking after painting.
Once the surface is prepared, the application of a two-component primer establishes a robust base. This primer chemically bonds to the fairing’s surface, sealing it and preventing paint lifting or damage over time. Even, careful spraying is necessary to avoid runs and to ensure full coverage. After the primer dries, inspect for minor flaws like pinholes or cracks. Filling these with body filler or spot putty and sanding again with a finer grit (600 or above) guarantees an even, imperfection-free foundation.
By following this sequence—cleaning, sanding, adhesion promotion for plastics, priming, and smooth finishing—you set the stage for superior paint application and clear coating. This careful preparation directly translates into a professional-grade finish that combines visual appeal with long-lasting protection. For a detailed walkthrough of these critical processes, the video “Can I Paint My Fairing? – Ride or Die Motorcycles” offers practical insights and demonstrations.
For more on fairing quality and options, explore this resource for comprehensive motorcycle fairings guidance: https://blog.summitfairings.com/explore-the-best-motorcycle-fairings-at-summit-fairings/
External reference: https://www.youtube.com/watch?v=yk3ANq82BWM
2. Expert Guide to Mixing and Applying Paint for a Flawless Motorcycle Fairing Finish
Achieving a smooth, durable finish on motorcycle fairings hinges on the precise mixing and application of paint coupled with clear coat techniques. The process begins by carefully blending paint with a reducer, typically in a 1:1 ratio, as recommended by the paint manufacturer. This ensures the proper viscosity for spraying, which is critical for even coverage and preventing runs or drips. Thorough agitation of the mixture is essential for consistency, avoiding color or texture irregularities that could compromise the final result.
When applying paint, it is best to layer multiple thin coats rather than a single heavy one. Thin coats build color depth gradually, reduce the risk of imperfections, and promote faster drying between layers. The painter should maintain a steady, consistent spray pattern and move the spray gun evenly across the surface to avoid overspray and uneven texture. Each coat must dry completely before applying the next, requiring patience but yielding a professional-grade finish that can withstand wear.
For plastic fairings, using an adhesion promoter before the primer is vital to enhance bonding and prevent peeling, but once this step is completed, a high-quality two-component primer creates a robust base layer essential for paint longevity. Only after the primer has cured should the paint be applied.
Following the paint layers, clear coat application protects the color from UV damage, moisture, and abrasion. Two to three coats of a 2K clear coat, applied smoothly and uniformly, deliver a glossy, resilient finish. Allowing the clear coat to cure fully before handling or reinstalling the fairings ensures maximum hardness and adhesion, preserving the aesthetic and structural integrity of the paintwork.
Alongside these steps, using appropriate tools such as respirators, properly calibrated spray guns, sanding blocks, and polishing pads protects both the user and the quality of the finish. The entire process demands attention to detail and patience, culminating in a motorcycle fairing that looks striking and lasts under demanding conditions.
For an in-depth visual demonstration, see this comprehensive tutorial: https://www.youtube.com/watch?v=yk3ANq82BWM
To explore further detailed techniques and top-quality parts, visit the Explore the Best Motorcycle Fairings at Summit Fairings blog.
3. Mastering Clear Coat Techniques for a Durable and Glossy Finish on Motorcycle Fairings
Achieving a flawless, protective clear coat is the final and crucial step in painting motorcycle fairings. Applying the clear coat properly not only enhances the paint’s gloss but also shields it from UV rays, moisture, and physical abrasions. The key to success lies in spraying multiple thin layers rather than one heavy coat. Each thin coat ensures even coverage without runs or drips, which preserves the smooth texture of the underlying color. Consistency in spraying direction is equally important; maintaining a steady, uniform pass across the surface helps avoid uneven textures like orange peel.
Generally, two to three coats of clear coat are recommended for optimal protection and shine. Prior to clear coating, verify that the paint has fully dried and cured, following manufacturer drying times closely. This step prevents trapping solvents beneath the clear coat that could cause clouding or peeling later. For plastic fairings, using an adhesion promoter during earlier stages improves primer bonding, indirectly aiding clear coat durability.
Preparation for clear coating also includes ensuring the spray gun and clear coat mixture are properly filtered. Straining the clear coat minimizes clogging and enables a smooth, even nebulization. Sanding with progressively finer grits before clear coating can enhance adhesion, though care must be taken to avoid damaging the paint below.
After application, allowing ample curing time is vital. Handling the fairings before the clear coat cures completely risks fingerprints, dull spots, or damage that can compromise the finish. Environmental conditions such as humidity and temperature during curing also influence final hardness and longevity.
Using proper protective gear like respirators ensures safety, while tools like spray guns and polishing pads contribute to a high-quality outcome. For those seeking professional guidance or visual walkthroughs, detailed video tutorials offer practical demonstrations on clear coat techniques.
For a deeper dive into options and care for motorcycle fairings, explore expert advice at Explore the Best Motorcycle Fairings at Summit Fairings.
Further practical insights and step-by-step clear coat applications can be found in this comprehensive instructional video: https://www.youtube.com/watch?v=yk3ANq82BWM
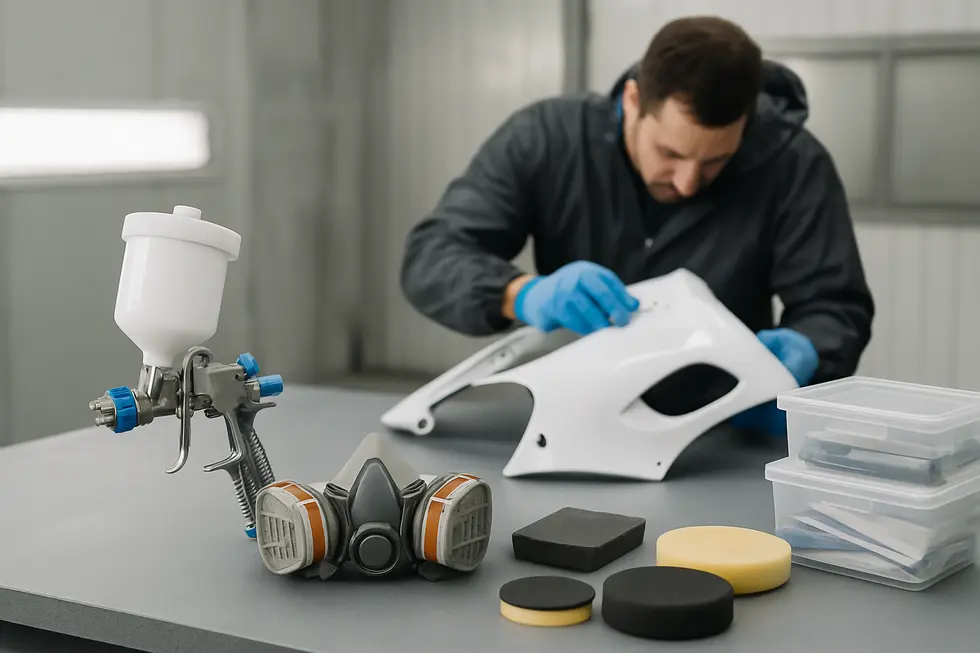
4. Essential Tools and Materials for Flawless Paint Application and Clear Coating of Motorcycle Fairings
Achieving a professional, long-lasting finish on motorcycle fairings begins with selecting the right tools and materials. Safety equipment like respirators is indispensable to protect from harmful paint fumes during the spraying process. The choice between spray guns or high-quality aerosol cans depends on the detail and volume of paint application, but both must deliver an even, controlled mist for flawless coverage.
Surface readiness is enhanced by sanding blocks, which provide smoothness and promote adhesion when used carefully before and between coats. For plastic fairings, using an adhesion promoter is critical; this chemical bridge ensures that the primer locks firmly onto the surface, preventing peeling or flaking later on. A two-component primer further secures this base layer, combining durability with excellent paint bonding qualities.
Paint preparation requires precise mixing—often in a 1:1 ratio with a reducer—to maintain sprayable viscosity. Applying multiple thin coats rather than one thick layer is essential, allowing each coat to dry thoroughly to avoid runs or texture irregularities. After color application, the clear coat serves a dual role: shielding the paint from UV rays, moisture, and scratches, while providing a glossy, professional shine. A consistent spray technique over two to three coats yields the best results without orange peel or sags.
Once dry, polishing pads and microfiber towels finalize the finish, gently buffing out minor imperfections and enhancing the fairings’ luster. Adequate lighting throughout the process is crucial; it reveals surface defects early, ensuring corrections before curing. Importantly, avoid harsh chemicals like methylated spirits during prep to protect the surface integrity—bike-friendly cleaners are safer alternatives.
For a visual walkthrough and detailed guidance on assembling the right toolkit, a comprehensive tutorial by a reputable motorcycle painting expert can provide invaluable practical insights to complement this process. For those preparing to revamp their motorcycle’s appearance, this foundational setup guarantees a smooth progression into painting and clear coating steps.
For more on acquiring quality parts before starting your painting journey, explore this comprehensive guide to motorcycle fairings.
Learn more from the detailed step-by-step process here: https://www.youtube.com/watch?v=yk3ANq82BWM
5. Mastering Paint Application and Clear Coat Techniques: Avoiding Pitfalls for Durable Motorcycle Fairings
Painting motorcycle fairings demands a meticulous approach where precision and patience make all the difference. The process begins with removing the fairings from the bike, allowing unrestricted access and minimizing risk of damage. Proper cleaning and sanding are essential to eliminate contaminants and create a receptive surface, especially for plastic fairings that require a specialized primer to ensure strong adhesion. Applying paint in multiple thin coats rather than one heavy layer is a fundamental practice. This technique reduces the likelihood of runs, drips, and uneven textures while promoting uniform color depth. Each coat must be allowed to dry thoroughly as rushing this step leads to lifting or peeling of earlier layers.
Equally important is the environment during spraying. High humidity or dusty surroundings introduce defects like the adverse orange peel effect, impairing finish smoothness. The primer chosen should be compatible with plastic substrates to avoid adhesion failures common with inappropriate primers. After layering the base color, clear coats must be applied carefully—four to six thin coats strike the right balance between protective durability and a glossy finish without clouding or peeling.
Over-applying clear coats in an attempt to conceal imperfections often backfires, highlighting the need to fix underlayer issues first. Once the clear coat cures fully, polishing with the correct techniques and equipment enhances gloss and removes minor surface flaws. Patience during polishing is crucial; hurried attempts risk damaging the clear coat and necessitating repainting.
Following these best practices avoids frequent painting pitfalls and results in a long-lasting, professional-quality finish that withstands environmental and mechanical wear. For those seeking detailed step-by-step demonstration and polishing insights, a comprehensive DIY guide covering priming through clear coating and color sanding provides an excellent resource.
For more comprehensive insights on selecting the right fairings and prepping them effectively, explore our ultimate source for affordable motorcycle fairings.
Chapter 3: Tools, Safety, and Finishing Touches for Perfectly Painted Motorcycle Fairings
1. Mastering Essential Tools and Safety Gear for Flawless Motorcycle Fairing Paint Jobs
Achieving a professional finish when painting motorcycle fairings hinges on having the right combination of tools, safety equipment, and finishing supplies at hand. The foundation of a quality paint job starts with proper surface preparation, requiring soap and water to remove contaminants followed by fine grit sandpaper or sanding blocks to texture the surface, improving paint adhesion. Repairing imperfections with body filler smooths the fairing for an even topcoat application. Precision in paint application relies heavily on spray guns or dual-action airbrushes paired with compressors, enabling you to apply multiple thin, consistent coats that avoid runs and ensure uniform coverage.
Masking tools such as tape, stencils, and film protect areas from overspray and facilitate custom designs. For personal safety, respirator masks are indispensable, guarding against harmful fumes and particulates generated during spraying and sanding. Gloves protect the skin from chemicals and abrasives, while working in a well-ventilated, well-lit area further reduces health risks and helps detect surface flaws before painting.
The finishing phase demands sanding blocks for smooth transitions between coats, followed by mechanical polishers with buffing pads to enhance gloss and remove minor imperfections. Microfiber towels gently eliminate polish residue without scratching the surface. Finally, protective sealants or ceramic coatings shield the paint from UV damage, moisture, and scratches, extending the durability and vibrancy of the finish.
By combining these specialized tools and safety measures, the painting process becomes both efficient and safe, producing fairings that look as good as factory-finished or custom-painted parts. For those seeking additional guidance and step-by-step instruction, practical visual resources like detailed video tutorials are invaluable in solidifying technique and confidence. This comprehensive toolkit and safety protocol form the backbone of expertly painted motorcycle fairings.
For further insights on selecting quality motorcycle fairings to complement your paintwork, explore the extensive offerings at Summit Fairings here.
(Source: Various professional motorcycle painting guides)
2. Essential Safety Practices for Using Tools and Achieving Flawless Finishes on Motorcycle Fairings
When painting motorcycle fairings, safety measures are just as crucial as the tools and techniques applied to achieve a professional finish. Using proper personal protective equipment (PPE) is the first and most vital step. Respirators guard against inhaling harmful paint fumes and dust generated during sanding and spraying, protecting your respiratory system from toxic chemicals that can cause long-term health issues.
Before starting, the fairings must be carefully removed from the motorcycle to prevent accidental overspray and to allow unobstructed access. This step not only protects other components but provides a safer, more controlled workspace. Once removed, cleaning the fairings thoroughly with soap and water removes dirt, grease, or wax, creating an optimal surface for paint adherence.
Surface preparation involves sanding the fairings evenly with fine grit sandpaper, often aided by sanding blocks to maintain consistent pressure and avoid uneven textures or damage. Special attention is required when handling cracks or chips; reinforcing mounting points delicately reduces the risk of worsening existing damage during further handling.
Appropriate tools enhance safety and quality. Spray guns ensure even primer and paint application, reducing overspray and waste. During finishing, polishing pads and microfiber towels are essential to buff the surface gently without scratching it, preserving the integrity of the clear coat. After the paint cures properly, applying a motorcycle-specific protective wax layer adds shine and a barrier against environmental factors.
Combining these safety precautions with the right equipment not only safeguards your health but also guarantees a flawless, durable paint job on your fairings. For more in-depth guidance on tool selection and safety during painting, refer to this detailed tutorial at Ride or Die Motorcycles.
Implementing these practices ensures that every phase, from preparation to finishing touches, maintains both high standards of safety and craftsmanship.
3. Mastering Advanced Finishing Techniques: Precision Tools, Safety, and Polishing for Motorcycle Fairings
Achieving a flawless, long-lasting finish on motorcycle fairings requires mastering advanced finishing techniques that integrate precision tools, thorough safety measures, and expert polishing methods. Using a dual-action airbrush paired with a compact compressor allows for exceptional control when applying paint layers and intricate details such as pinstripes or subtle gradients on curved surfaces. This tool helps deliver consistent atomization that traditional spray guns may struggle with, especially on complex contours.
Surface readiness remains paramount; a light sanding before painting smooths out imperfections and promotes better adhesion. Following this, meticulous cleaning removes dust and residue, which could compromise the finish. Some cutting-edge kits even incorporate UV light solidification technology, which deepens color saturation and enhances gloss beyond conventional drying methods, making the finish more vibrant and durable.
Safety cannot be overlooked—working in a well-ventilated, low-dust environment minimizes contaminant risks, and protective gear such as respirators, gloves, and goggles is essential when handling solvent-based or aerosol coatings. These precautions not only safeguard health but also maintain paint integrity.
Once painting and clear coating are complete, professional polishing techniques refine the surface. Employ layering methods using varied pressure and movement, such as a crosshatch pattern, to correct imperfections. Softer passes follow firmer ones to lift haze and enhance shine. Edge work and tight corners often need slower tool speeds or hand-finishing for optimal results. For minor scratches or customization, blending touch-ups with an airbrush produces smooth transitions and can introduce unique graphics or minimalist accents without harsh lines.
This careful orchestration of advanced tools, safety practices, and polishing nuances ensures motorcycle fairings emerge with striking visuals and enduring protection. For those seeking guided, step-by-step instruction on refining these skills, detailed resources are available from specialized motorcycle paint application tutorials. For further reading about motorcycle fairings and customization options, explore Summit Fairings’ expert insights.
Additional practical demonstrations can be found through comprehensive video tutorials offered by enthusiasts like Ride or Die Motorcycles, which delve into these advanced finishing stages.
4. Mastering Preparation and Surface Treatment: The Foundation for Durable and Smooth Motorcycle Fairings
Achieving a professional, durable finish on motorcycle fairings begins well before the first coat of paint is applied. Preparation and surface treatment form the essential foundation that ensures paint adhesion, even coverage, and long-lasting results. The process starts with meticulous sanding, which smooths imperfections and creates a uniform surface conducive to bonding. Typically, sanding blocks equipped with 800 to 1000 grit sandpapers are used to gradually refine the surface without causing scratches that show beneath paint. After sanding, it is crucial to remove all dust, grease, and contaminants using a clean cloth and solvents such as isopropyl alcohol or degreasers. Any residue can severely compromise paint adhesion and lead to peeling or flaking later.
For plastic fairings, an additional surface treatment step is mandatory: the application of an adhesion promoter. This chemical agent acts as a bridge between the plastic substrate and the primer, chemically enhancing the paint’s grip to prevent future chipping or lifting. Without it, paint layers struggle to anchor securely on plastic materials.
Next comes the application of a two-component primer. Its chemical bonding properties provide a robust, even base coat that seals the surface and resists peeling. The primer should be sprayed evenly in thin layers and allowed to dry thoroughly, adhering closely to manufacturer drying time instructions to avoid imperfections.
Equipped with respirators and working in a clean, well-ventilated space, the painter is prepared to apply paint and clear coats seamlessly. Proper tools such as spray guns and polishing pads ensure control and quality at every stage.
This detailed approach to preparation and surface treatment is vital to producing a flawless, tough paint finish that can withstand the rigors of riding. For further insight into the step-by-step process, refer to practical demonstrations like this detailed tutorial from Ride or Die Motorcycles.
To explore quality components that complement the painting process, visit Summit Fairings’ blog to discover a range of motorcycle fairings designed for optimum finish results.
5. Essential Step-by-Step Multi-Coat Painting and Finishing Techniques for Motorcycle Fairings
Painting motorcycle fairings to a professional standard requires a methodical, multi-layered approach combined with the right tools and strict safety measures. The process begins by carefully removing the fairings from the motorcycle to gain full access and avoid accidental damage. Thorough sanding is critical; starting with a coarser grit to remove old paint or surface flaws, then progressing to a finer grit (around 800 to 1000) ensures a smooth base ready for painting. After sanding, cleaning with alcohol or a degreaser eliminates dust and oils that compromise adhesion. When working with plastic fairings, applying an adhesion promoter forms a chemical bridge between the primer and the plastic, preventing future peeling or flaking.
Next, a two-component primer tailored for plastics or the fairing’s material is applied in even coats. This primer chemically bonds and creates a sturdy foundation for the subsequent paint layers. Adequate drying times between coats prevent surface defects and maximize durability. Mixing paint with the recommended reducer at typically a 1:1 ratio achieves the correct spraying viscosity. Instead of a single thick layer, multiple thin coats of paint are sprayed in smooth, overlapping motions. This method minimizes runs, drips, and uneven coloring while promoting a uniform finish.
To safeguard the color and add gloss, 2-3 clear coats are applied using the same consistent technique. The clear coat acts as a protective barrier against UV rays, scratches, and weather exposure. After all layers have dried and fully cured—which can vary depending on environmental conditions—the fairings can be handled safely. For a refined appearance, optional color sanding followed by polishing with an orbital polisher and appropriate compounds creates a glass-like shine. Using polishing pads at controlled speeds and finishing with microfiber cloth buffing enhances depth and smoothness.
Throughout every step, wearing a respirator mask, gloves, and working in well-ventilated spaces is essential to protect from paint fumes and dust. Employing quality sanding tools, spray equipment, and polishing accessories streamlines the workflow and elevates the finish quality. By following these careful, multi-coat painting and finishing techniques, you ensure your motorcycle fairings not only look stunning but also stand up to time and the elements.
For a practical demonstration and in-depth guidance, detailed video tutorials from sources like Ride or Die Motorcycles offer valuable visual support.
Final thoughts
Painting motorcycle fairings entails a disciplined, stepwise process that significantly influences the quality and longevity of finished motorcycle parts. For business owners, understanding and mastering surface preparation and priming techniques creates a strong foundation preventing premature paint failures. Applying paint in well-controlled thin layers topped with durable clear coats guarantees vibrant aesthetics and robust protection, elevating customer satisfaction and brand reputation. Equally important are the right tools, safety measures, and finishing touches, which safeguard health and optimize results. Integrating these chapters into your operational workflow empowers your business to deliver professional-grade painted fairings that stand the test of time and competition.
Ready to elevate your ride? Summit Fairings delivers premium, custom-fit fairings that blend style and durability. Whether you’re chasing speed or turning heads, we’ve got your bike covered. Don’t wait—transform your machine today. Click, customize, and ride with confidence. Your perfect fairing is just a few clicks away. Act now!
About us
We are one of the leading motorcycle fairing export sites, with over 3,000 styles across almost all motorcycle models. Buy from summitfairings.com, and pay 10-40% less than the prices on other sites. If you have any questions, we promise we will have your answer within six hours.