Painting motorcycle fairings is not just about aesthetics; it’s an essential skill for business owners seeking to enhance their brand image in the competitive motorcycle industry. A meticulously painted motorcycle can set your offerings apart, creating a personal connection with passionate riders. The process begins with careful preparation, followed by priming, application of paint using effective techniques, and finally, adding a clear coat for protection and shine. Each chapter of this guide delves into these steps, ensuring you gain a comprehensive understanding of how to achieve stunning results while adhering to industry practices and legal requirements.
From Bare Plastic to Pristine Shine: Mastering Preparation for Motorcycle Fairings
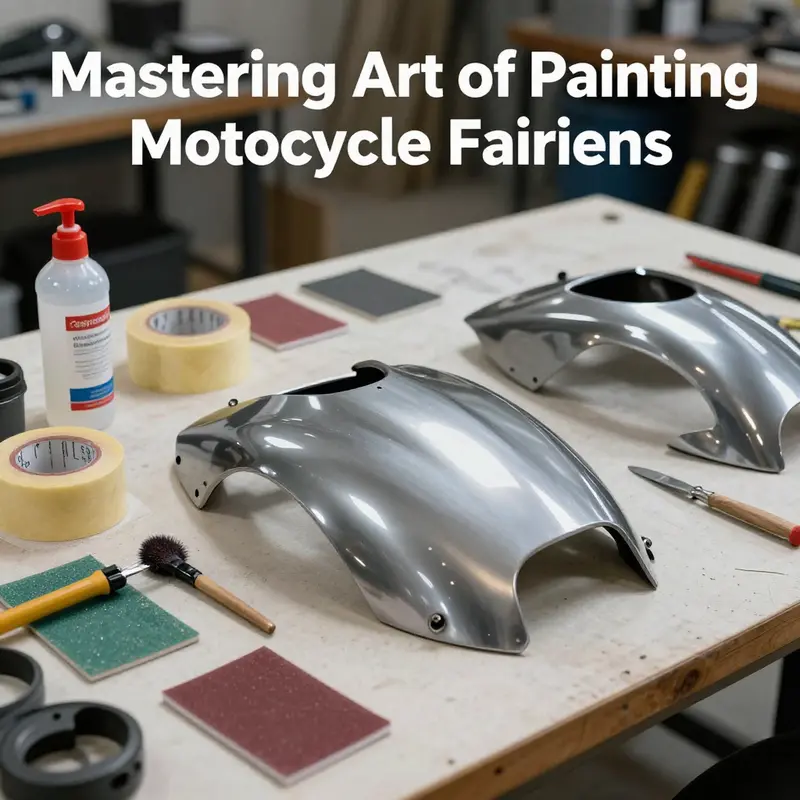
A motorcycle’s aesthetic begins long before the color goes on. The true art of painting fairings lies in preparation, the patient work that determines adhesion, uniform texture, and the final look. When the surface is clean, even, and properly masked, the subsequent layers—primer, paint, and clear coat—settle as if the fairings were born anew. Skipping or rushing preparation often shows up as peel, peel, orange-peel, or “dust-trapped” flaws that no color alone can fix. In this chapter, the emphasis is on the quiet, meticulous work that makes the rest of the process possible. The goal is not merely color but a durable finish that can withstand sun, rain, and the daily handling of a bike in motion and in storage. As you work, remember that the same care you invest in one fairing will echo across the entire set, keeping tones even and shading consistent from panel to panel. This is the foundation upon which every successful paint job rests, and it should be performed in a controlled, clean, ventilated space where dust and temperature are managed as carefully as the tools you choose to wield.
Begin by removing the fairings from the motorcycle and arranging them in a way that lets you move around each piece with ease. A dedicated workspace—one that can be maintained cleanly and free of traffic and debris—greatly reduces the chance of accidental contamination. The removal itself is not a mere convenience; it creates a controlled environment where you can lay parts flat, mask edges precisely, and inspect every contour for defects. Once the fairings are off, a quick, thorough wipe-down with a soft cloth can reveal surface inconsistencies that might otherwise go unnoticed until paint is applied. A soft microfiber cloth is ideal for this first pass, as it won’t mar the plastic or grind dust into any existing scratches. If the surface shows residual oils or fingerprints, gently wipe with a dedicated automotive cleaner and then move on to a more thorough degreasing when necessary. This dual approach—surface clean followed by targeted degreasing—ensures that nothing will interfere with paint adhesion.
The next phase is where the surface begins to reveal its readiness for color: the mechanical abrasion that creates a proper “tooth” for the paint. Light scuffing with 600- to 800-grit paper is standard practice, and using a dual-action sander can help keep the motion even and forgiving. The aim is not to remove material but to dull the surface enough to give the new coating something to grip. If you are working by hand, use even strokes and broad motions rather than concentrated pressure in one spot. After this initial scuff, wipe away the loosened dust with a tack cloth; this sticky barrier pulls out the fine particles that could otherwise hold onto dirt or lift into the primer coat. Then switch to a finer grit, such as 1200- to 1500-ker, to reduce visible scratches and to refine the texture into a uniformly matte base that will disappear under the final finish. Sand in one direction whenever possible to avoid crisscross patterns that manifest as circular swirls in the paint. A calm, patient approach here pays dividends later.
Masking is the bridge between the part you want to paint and the areas you want to preserve. The aim is thorough protection of the frame, mounting points, edges, and any neighboring components that should stay the original color or remain unpainted. High-quality painter’s tape—blue tape with clean edges—and masking film are essential tools for this step. Apply the tape in generous frames around the edges, overlapping corners to ensure a tight seal; where possible, create multiple micro-seals at seams that could otherwise permit paint bleed. The masking film should be laid to cover larger surface areas that are flat or gently curved, such as the top surfaces of the fairing or the areas around a vent or grill. Smooth out any air pockets, and run a finger along the edge of the tape to press it firmly into place. The precision of masking cannot be overstated. A small misalignment at this stage can become a conspicuous flaw once the paint is dry.
With masking complete, you’ll perform a final inspection before priming begins. Dust removal is critical at this stage; a tack cloth is again your best ally, gathering the last micro-particles that escaped the initial cleaning and masking. In a clean, well-ventilated space, that tack cloth can mean the difference between a surface that looks broadcast-wide and a surface that appears perfectly smooth under light. The environment itself matters just as much as the steps you perform. A dedicated spray booth is ideal, but a well-sealed garage with minimal airflow and a stable temperature can also work. Avoid direct sunlight, which can prematurely dry coatings and cause shrinkage or orange-peel in later layers. Temperature and humidity influence how evenly the coating lays down and cures, so aim for a consistent environment—roughly a comfortable room temperature with moderate humidity. If you notice dust motes drifting in from outside, shut doors and, if possible, use a filtered air source to keep the air clean during the critical initial stages.
Throughout these steps, you are not simply preparing a surface for color; you are shaping the final appearance by controlling texture, edge definition, and overall harmony across multiple panels. The slightest inconsistency in the base layer will magnify beneath the clear coat, much as a ripple on a calm pond travels outward and alters the entire surface’s reflection. Therefore, take the time to re-check your edges after masking, verify that there are no gaps where dust or paint can hide, and run a final pass with the tack cloth on the whole set. If you notice any rough patches or residual slicks that could repel primer, address them with a careful, light re-sand and re-cleaning. The goal is not to achieve perfection in one sweep but to methodically guide the surface toward a level of readiness that makes subsequent layers behave predictably and evenly.
As you contemplate the next chapter in this process, consider how a compatible reference or gallery of parts can inform your choices. If you’re building toward a multi-model look or sampling different shapes and contours, it helps to observe how different fairing shapes interact with the same preparation technique. For instance, some angular panels will show any texture differences more readily than smoothly curved sections. In practice, that means you may want to allocate slightly more attention to certain areas where curvature introduces subtle optical quirks or where edges are more prone to paint buildup if the surface is not perfectly uniform. This awareness—that preparation is not a one-size-fits-all step but a tailored discipline for each panel—will carry through into priming and beyond. For model-matching ideas or a reference point for fit and texture, a visit to a general catalog of fairings can provide a sense of proportion and texture expectations across various models. In this spirit of exploration, you might explore the broader range of compatible fairings and see how different profiles respond to the same careful prep process, such as the options in the Honda-fairings category that illustrate common shapes and mounting strategies. You can browse that collection here: Honda fairings collection.
In the end, preparation is a quiet act of respect for the work that follows. It is the discipline that transforms a raw plastic shell into a canvass capable of reflecting color with depth and resilience. The steps described here—cleaning, degreasing, light sanding, masking, and a final dust-free check—are not mere boxes to tick; they are the essential conditions that determine how well the primer will cling and how evenly the paint will lay down. When done carefully, the result is a uniform texture free of micro-scratches, a crisp edge between painted and masked areas, and a surface that invites the subsequent layers to perform as designed. The fairings, once treated with this level of care, reveal any imperfections gently rather than shouting them out. The surface becomes a partner in the painting process, not an obstacle. And as you prepare to prime, you will find that the knowledge you’ve built in the preparation stage informs every stroke of the spray gun or the spray can that follows. The patience you invest now pays off in the final gloss, the even color, and the lasting durability you expect from a high-quality paint job.
For readers who want to situate their project within a broader catalog or to compare component shapes and fit, the Honda-fairings collection offers a practical sense of how design influences preparation. This reference point can guide your approach to masking and edge treatment across panels, helping you anticipate where a tighter seal or a gentler mask is necessary to accommodate complex contours. As you move forward, keep this sense of line and form in mind while you prime, paint, and clear coat. A well-prepared surface is not only a technical prerequisite but a creative foundation that invites you to translate your vision into a durable, professional-looking finish.
External resource for additional context and deeper surface theory: https://en.wikipedia.org/wiki/Automotive_paint
Priming for Perfection: Ensuring Adhesion on Your Motorcycle Fairings
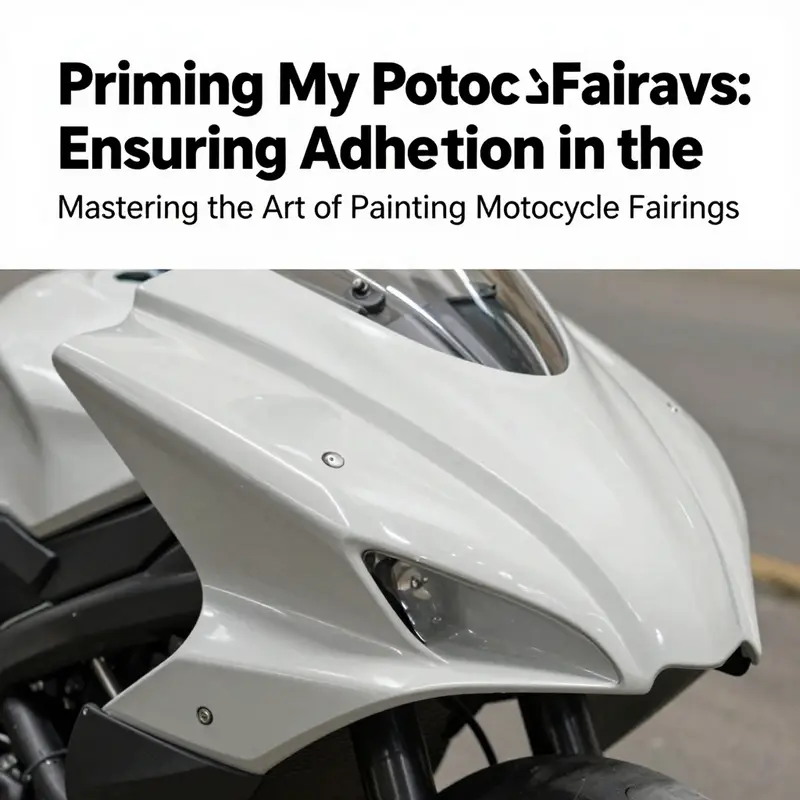
Priming is the quiet architect of a durable, showroom-worthy paint job. It does not grab the spotlight, but it defines whether the color you lay over it will stay put through sun, rain, and daily road abuse. When you strip away the glossy surface and lay bare the ABS plastic of your fairings, you are not just preparing to paint; you are preparing the bond that will carry the finish for years. Without a thoughtful primer, even the most meticulous topcoat can peel, bubble, or fret away at the edges where flex and heat stress the fairings most. The primer acts as a bridge between the plastic beneath and the tone you intend to apply above it. It fills microscopic pores, it evens out the surface texture, and it exposes no flaws that could later telegraph through the topcoat. In a well-executed primer layer, you can see the difference between a finish that looks good in the shop light and one that holds up in the bright glare of a sunny highway dash. And the truth is simple: primer is not optional if you want long-term adhesion and a finish that resists the elements over time. The decision to prime is a decision to invest in durability and in the professional quality that distinguishes a DIY repaint from a finish that lasts.
The choice of primer matters as much as the technique itself. ABS plastic, the common base material for modern fairings, naturally resists wetting and has a slight slickness that can frustrate paint adhesion. A plastic-specific primer formulated for automotive or motorcycle use is designed to chemically bond with that plastic, creating a receptive surface for the subsequent color layers. It is not enough to use any old primer or to rely on a simple surface rinse. The primer you select should be engineered to target plastics, to resist lifting with heat and UV exposure, and to provide a texture that the paint can grab onto without creating an overly porous or chalky finish. In practice, this means choosing a product that explicitly states compatibility with ABS or ABS/PC blends and that promises good adhesion, flexibility, and a clean cure. You may hear terms like adhesion promoters, plastic bonding primers, or dual-cure formulations. What matters is that the primer is designed for the conditions your fairings will face—outdoors, at highway speeds, in the sun, and with the occasional rain splash—while remaining compatible with the topcoat you plan to apply.
The application itself follows a disciplined path. Begin by thoroughly cleaning the surface, removing any residual wax, grease, or polish that could sabotage bonding. Use a degreaser or a mild solvent and finish with a wipe-down that leaves no film. Dry completely before you even think about primer. The next step is to apply thin, even coats. The goal is to lay down a uniform sheet that seals the surface without pooling into drips or sags. Several light coats often outperform a single heavy one, because they minimize runs and improve coverage. The exact drying time between coats depends on the product you choose, but in general you should allow a short window—often 10 to 20 minutes in ambient conditions—before applying the next layer. Patience here pays dividends later, as a rough or uneven primer will telegraph through to the final color regardless of how carefully you lay on the topcoat.
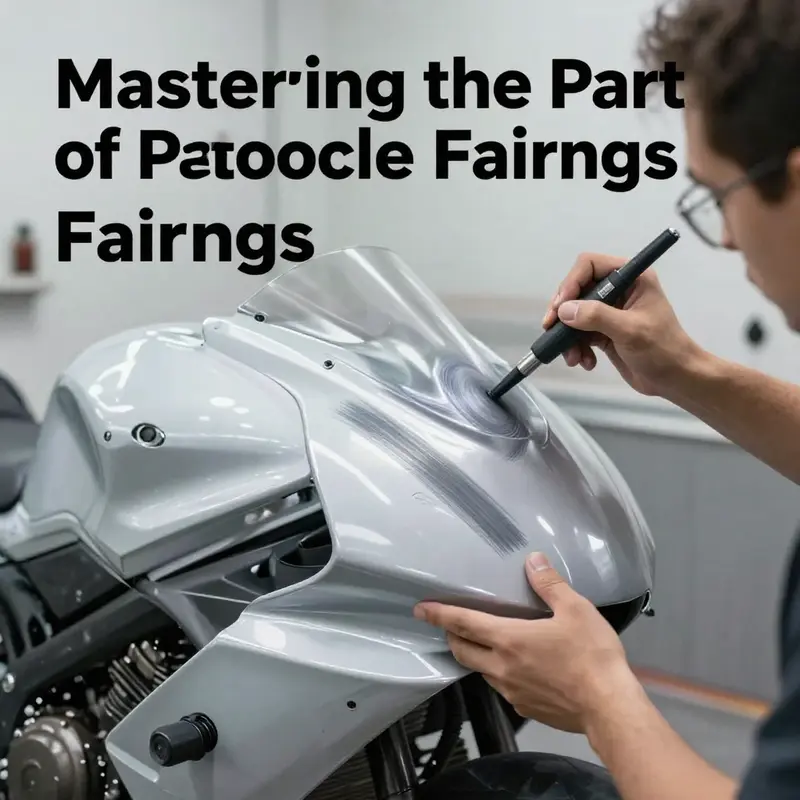
After the primer has cured, the surface should be lightly sanded to create a micro-roughness that gives the paint something to grip. This step is not about removing the primer but about creating a controlled texture that helps the topcoat adhere and lay down evenly. A fine abrasive, typically in the 1000 to 1500 grit range, is sufficient for most plastic primers. The objective is a finish that feels smooth to the touch while offering enough surface texture to grab the color in the next layers. Following sanding, wipe away the dust with a tack cloth and inspect the surface under bright light. Any imperfections, such as tiny craters or sanding scratches, should be addressed before you move on. It is better to correct a small flaw now than to discover it after you have sprayed the color and the clear coat.
The preparation mindset during priming also extends to the environment and workflow. Work in a clean, well-ventilated space where dust control is achievable. Temperature and humidity can subtly influence how primers cure. Inadequate ventilation or excessive humidity can slow down drying, encourage dust attraction, or lead to surface blemishes. A controlled environment helps you maintain consistent spray behavior, which in turn yields a more uniform color laydown later. It is not merely about how you spray, but about the consistency of the surface you spray onto. A coated surface that cures evenly is more forgiving during subsequent color work and less prone to microscopic defects that reveal themselves after the finish has set.
A practical chorus runs through the primer stage: clean, prime, dry, sand, re-clean, and then re-check. Each of these steps supports the next, and the sequence matters. When executed with care, primer becomes the reliable partner to the topcoat. If you have already prepared the fairings in the earlier chapter—removed the parts, cleaned, and masked the edges—you now have a canvas that is both receptive and predictable. The primer’s job is to commit to that canvas with a bond that is strong enough to withstand the normal flexing and environmental stress the fairings will experience. The chemistry matters as much as the technique. If the primer is not a good match for the plastic, no amount of effort will sustain adhesion over time. If you allow dust, oil, or moisture to remain on the surface, even a high-quality primer may fail to bond properly, producing a finish that ages poorly and may peel away around fasteners or edge joints.
For readers who are ready to browse options, the broader landscape of fairing components offers a view into compatibility. A well-curated catalog like the Honda fairings collection can be a helpful starting point when you are sourcing panels to repaint or replace. The link is provided here for convenience, but the core guidance remains universal: select a primer designed for plastic, ensure it explicitly supports bonding to ABS, and follow the manufacturer’s directions for dry times and coats. The exact product you choose should feel predictable in its behavior—sprays that cover evenly, dry to a satin finish, and tolerate a light sanding without grit tearing the surface. As with any painting project, the primer serves as a teacher for the eye, showing you where the surface is truly ready for color and where a touch more effort is needed before you move forward.
Beyond the mechanics, there is a broader ethic to priming that aligns with the craft of painting itself. Take pride in the micro-details: the evenness of the spray pattern, the absence of solvent runs, the consistency of color capture across edges and contours. The fairy tale you want to tell with your finish begins in this quiet, meticulous moment when the primer settles into the plastic and secures its bond. The better this bond, the less you will hear about complaints like peeling or color delamination in the months that follow. The primer’s silence should reassure you that the surface beneath your color is stable, uniform, and ready to receive the transformation you envision.
As you wrap the primer stage into your workflow, keep a few simple reminders in mind. First, always abide by the primer’s instructions for cure times between coats. Rushing to the color layer can trap solvents or create a weak underlying film, undermining adhesion. Second, do not skip the light sanding after priming, even if the surface looks flawless. That micro-roughness is the invisible handshake that tells the color, you and the environment, that this surface is ready. Third, keep the workspace free from dust and contaminants. A clean scene today saves you a great deal of touch-up work tomorrow. Finally, if you are repainting a broader area or multiple panels, consider practicing on a spare piece or a test panel first. This practice helps you calibrate spray speed, distance, and fan pattern before the final application on your fairings.
When the primer step is finally complete and the surface is smooth, dry, and sealed, you are ready to approach the color coat with greater confidence. The bond you have established is the backbone of the finished piece, a visible guarantee that your effort will translate into a durable, even, and vibrant finish once the topcoats go on. The next chapter will guide you through the color application itself, with emphasis on layered coats, controlled drying, and the subtle negotiation between distance, coverage, and time. If you are curious about the practical mechanics that accompany that stage, a comprehensive external reference offers a detailed walkthrough of paint application techniques and troubleshooting tips that align with the principles you have learned in priming. For readers who want a broader context on paint systems and finish behavior, the external resource is a valuable companion and is linked at the end of this chapter.
In sum, priming is the unsung foundation of a professional-looking, durable motorcycle fairing finish. It is where the surface learns to hold color well, where adhesion becomes a predictable property rather than a gamble, and where patience yields lasting results. The practice is simple in concept but precise in execution. When you respect the material, the primer, and the environmental conditions, you will see the payoff in a color that sits true, a finish that remains sound, and edges that stay clean through years of riding. If you are assembling this project room by room, piece by piece, let priming be the hinge that binds your preparation to your ultimate design. And as you move forward, remember that the fairings you repaint are not merely panels; they are the theater for your craft and the long-term home for your color and finish. To keep momentum, refer back to your earlier prep steps, confirm the surface is spotless, and proceed with the confidence that comes from a job that has earned its adhesion through careful choice, controlled application, and disciplined patience. The path from primer to finish is a careful conversation between material, environment, and technique, and priming is the opening line that sets the tone for what follows.
External reference for further techniques and verification of methods can be found here: How to Paint Motorcycle Fairings – A Practical Guide. For hands-on exploration of compatible fairings and parts to practice on, you can browse a representative catalog such as the Honda fairings collection, which provides a sense of the shapes and edges you will be working with as you plan your repaint project.
null
null
The Final Shield: Mastering Clear Coat for Showroom-Worthy Motorcycle Fairings

The clear coat is more than a glossy finish. It is the final shield that holds color, depth, and realism together while defending the painted surface from the elements. When applied correctly, it adds a sense of depth that makes a flat color appear as if it has breath and life. It also forms a tough, abrasion-resistant barrier against UV rays, rain, road grit, and everyday wear. The step from color to clear coat marks the transition from a good paint job to a durable, showroom-worthy finish. The goal is not simply to spray another layer on top but to create a coat that cures into a uniform, hard, smooth skin. The process is precise, but with patient preparation and disciplined technique, it yields results that endure and impress.
Before you even begin applying the clear, you must allow the base color to cure fully. The base color needs to set according to the manufacturer’s instructions, typically around 24 hours in a controlled environment. Rushing this stage invites trouble: lifting, clouding, or uneven adhesion can ruin the final appearance. The workspace for clear coating should be clean, dust-free, and climate-controlled. A comfortable temperature range of about 20 to 25 degrees Celsius and relative humidity below 60 percent helps the clear lay down evenly and flash off predictably. A well-ventilated space is indispensable, both for safety and for achieving a consistent, fine spray pattern. The preparation is not glamorous, but it is the backbone of a durable finish. The moment you accept that the line between color and gloss is drawn in the air rather than on the surface is the moment you start working toward a professional result.
With the environment prepared, you gather the right tools. A high-quality airless spray gun or an HVLP (high-volume low-pressure) system is preferred for the best atomization and control. These tools help you maintain a consistent fan pattern and minimize spray pressure fluctuations that create texture or sags. The exact settings will depend on your equipment, the type of clear, and the color under it, but the aim is a smooth, feathered edge between coats and a uniform film thickness across the fairing surface. You will also need a tack cloth or a lint-free rag and a dedicated prep solvent to wipe away any submicron dust that can interfere with adhesion. The habit of keeping the workspace immaculate cannot be overstated; particles in the air can settle after each pass and cause tiny imperfections that are particularly noticeable under clear.
In all, the clear coat process hinges on two foundational practices: meticulous surface preparation and meticulous spray technique. The surface must be free of grease, dust, fingerprints, and any streaks. Even tiny residues act like little hills under the clear, inviting runs and orange-peel texture. Begin with a thorough wipe-down using a prep solvent that is compatible with automotive finishes. Follow this with a final pass with a tack cloth to remove any last traces of dust. A surface that looks clean in daylight should look clean under the glow of your spray light. In practice, you will often catch yourself re-checking the surface as you move from panel to panel. It is not a sign of hesitation; it is a sign of care. The simplest imperfection in the base layer—dust speck, fingerprint, or smear—will be made larger and more stubborn by the clear coat, so you take extra care here, even if it feels tedious.
The application itself is where some of the most satisfying moments occur, because the clear coat finally ties everything together with a glassy, mirror-like finish. The technique calls for consistency, patience, and respect for the material. You begin by ensuring the base is properly cured and that the temperature and humidity in the shop remain within the recommended range. Then, you perform a final wipe-down, and you are ready to spray. The recommended distance from the surface is moderate, typically between 15 and 20 centimeters. This distance helps you maintain a steady, controlled spray without creating heavy, dripping coats or a thick edge that would later require sanding and rework. The pattern should be even and overlapping, with smooth passes that lay down a film without pooling. A common approach is to use a slightly zigzag or circular motion, ensuring that each pass overlaps the previous one by about half of the spray width. By applying 2–3 light coats rather than one heavy layer, you reduce the risk of runs and sags while achieving better depth and build.
Between coats, you allow a brief period for the solvent to flash off. Flash-off times are shorter than full cure times, often in the range of 10 to 15 minutes, depending on the specific product and the environmental conditions. During this interval, you inspect the surface for dust nibs or minor flaws that can be addressed before the next coat. If you notice anything noticeable, a quick pass with the tack cloth can remove it before you spray again. The goal is a consistently smooth, glossy finish across the entire fairing surface. If a single coat shows a mild imperfection after it dries, you can lightly re-spray that area with another thin coat, rather than attempting to blend a heavy coat over the top in one go. This method minimizes the risk of creating a visible edge or a footprint that will melt into the final appearance after curing.
The number of coats you apply depends on the clarity of the color, the depth you want, and the specific product you are using. The standard practice for a durable, eye-catching finish is 2–3 light coats, followed by a final, more even topcoat that forms the protective layer. You should avoid saturating the surface with too much clear in a single pass; excessive film thickness can lead to longer cure times and a higher likelihood of micro-marring or solvent pop. In some cases, technicians apply a fourth coat as a decorative, high-build layer to achieve maximum depth or a particular effect. If you are working with specialty clears—such as those designed for metallics, candy colors, or UV-resistant formulations—follow the manufacturer’s guidelines to the letter. The temptation to improvise here is strong, but the clear coat is the final film that seals the color and sets the gloss. Precision early on yields a superior finish later.
As soon as the final coat has been applied, the curing phase begins. Curing is a critical window in which you must protect the fairings from dust, touching, and abrupt temperature changes. The recommended curing period is at least 24 hours in a dust-free, temperature-controlled environment. A longer cure is beneficial if the ambient conditions are less than ideal, but even under optimal conditions, you should resist the urge to handle, wash, or mount the fairings until the coating has fully set. Temperature fluctuations during curing can cause the clear to develop tiny crazes or blisters, which mar the final result. If your shop experiences temperature swings, you may use a controlled cabinet or a small heat source designed for finishing work to maintain a stable environment during curing.
At this stage, you might wonder about the final gloss and the possibility of minor imperfections that still show after curing. If minor imperfections persist after full cure, you may perform a light sanding with 1500- to 2000-grit wet/dry sandpaper to remove minor swirl marks or dust nibs. After sanding, you would re-polish using a dual-action (DA) polisher and a high-grade polishing compound to restore a flawless mirror-like finish. It is essential to keep the pad and the polishing compound clean and to use light, even pressure so you do not remove too much of the clear or create new swirls. You will be surprised by how equitable and luminous the surface becomes after gentle, deliberate polishing. The ultimate test of success is a surface so smooth and uniform that no micro-scratches or color inconsistencies catch the eye under bright light.
If you later decide to refresh the look or swap to a different color scheme, the clear coat makes future work reliable and predictable. It remains important to consider the long-term maintenance of the finish. When cleaning the fairings after you ride, use a mild detergent and avoid abrasive brushes that could scratch or dull the glossy surface. A soft microfiber cloth is ideal for wiping away grime, and you should always dry the surface with a clean microfiber towel to avoid water spots. For any future color changes or repairs, you will rely on the same careful process: re-sand the affected area lightly, re-prime if necessary, and apply new coats in a controlled manner. The clear coat itself forms the durable shield that makes this possible, preserving the color beneath and enhancing the overall appearance.
Throughout this stage, the interaction between color and clear is essential to achieving depth. The clear coat accentuates the hue and the metallics, if present, by adding a three-dimensional quality. It is a subtle, almost magical transformation: the color becomes richer, the highlights become crisper, and the entire surface gains a reflective quality that feels resilient rather than fragile. The gloss level is a product of both the clear’s formulation and the craftsmanship of the painter. You cannot rush this. The patience you invest in cleanliness, technique, and curing translates into a finish that stands up to sun exposure and road debris while continuing to look fresh after miles of use.
If you are seeking additional context on best practices and authoritative guidance, consult comprehensive resources and manuals that standardize these operations. A reputable source from the coatings industry provides detailed procedures for applying clear coats on complex surfaces like motorcycle fairings, including recommended equipment and safety practices. It is wise to ground your technique in those standards while adapting to the specifics of your environment and the particular clear you choose. For instance, you might want to review technical notes from a leading coatings provider that cover UV resistance, adhesion strategies, and environmental considerations. This broader context supports your hands-on work and helps you navigate any challenge that arises during the finishing phase. The aim is not to mimic a factory line but to apply the same principles of cleanliness, control, and patience that elevate a standard paint job into a durable, aesthetically striking finish.
In the spirit of practical guidance, consider the practicalities of sourcing materials and parts for future touch-ups. If you plan to modify or refresh parts of the bike later, you might explore nearby sources for compatible fairings or panels. For example, a curated collection of fairings can provide compatible options if you ever need to refresh specific panels without redoing the entire set. This approach minimizes downtime and keeps your painting project manageable while preserving the integrity of your hard-won finish. The internal ecosystem of parts stores, online catalogs, and community recommendations can help you locate the right pieces when you need them. If you are browsing for compatible components, you can explore the Honda fairings collection, which offers a range of panels that align with your project goals. You can view the collection here: Honda fairings collection.
Finally, when you complete the clear coat and begin the long, quiet period of curing, you carry with you a sense of the work’s culmination. The fairings now carry a protective layer that not only makes the color sing but also stands up to the realities of riding and weather. The finish should feel solid and purposeful, with a depth that invites light to reflect and refract in a way that reveals the skill behind each stroke of the spray gun. The ride home with freshly clear-coated fairings is not just about function; it is about the satisfaction of a job done with discipline and care. The results speak in the subtle glow that greets you when you walk into the garage and in the way the color seems to glow rather than merely sit on the surface. This is the moment when the last step of painting truly becomes art—where science, patience, and craft converge to deliver a finish that is both durable and deeply, almost emotionally, satisfying.
External resources for further study can deepen your understanding of the chemistry and technique behind clear coats. For authoritative guidance on this process, consult a leading provider’s technical manuals and industry standards. These resources offer detailed, field-tested recommendations on application parameters, curing conditions, and environmental controls that help ensure consistent results across projects and settings. https://www.ppg.com/automotive-coatings
Final thoughts
Understanding the intricacies of painting motorcycle fairings allows business owners to elevate their brand and meet customer expectations. By following the structured steps from preparation through to applying a clear coat, you can achieve remarkable results that enhance both the look of your products and the loyalty of your clientele. Investing time in these details can set your business apart in a competitive market, ultimately leading to increased sales and customer satisfaction. Embrace the artistry of motorcycle painting, and watch your efforts pay off.