Introduction
Sanding motorcycle fairings is a critical step in maintaining and restoring the aesthetic and structural integrity of a motorcycle’s body. For business owners specializing in motorcycle repair or customization, mastering the sanding process can significantly elevate the quality of work, ensuring durability and customer satisfaction. This guide breaks down the sanding procedure into essential stages—from initial preparation to advanced wet sanding techniques—equipping you with the knowledge to produce flawless finishes. Each chapter builds a deeper understanding of how to approach sanding in a way that safeguards the fairings’ shape, optimizes paint adhesion, and enhances final results.
Tables of Contents
Chapter 1: Initial Preparation Steps for How to Sand Motorcycle Fairings
- Thorough Cleaning and Detailed Surface Inspection: Foundations for Perfectly Sanded Motorcycle Fairings
- Mastering Primer and Guide Coat Application for Flawless Motorcycle Fairing Surfaces
Chapter 2: Mastering Coarse Grit Sandpaper Techniques for Motorcycle Fairing Sanding
- Essential First Steps: Preparing Motorcycle Fairings with Coarse Grit Sandpaper
- Mastering Progressive Sanding Stages: From Coarse to Fine for Flawless Motorcycle Fairings
Chapter 3: Mastering the Progressive Grit Technique for Motorcycle Fairing Sanding
- Seamless Surface Preparation: The Art of Gradual Grit Advancement in Motorcycle Fairing Sanding
- Refining Surfaces with Precision: Expert Techniques for Progressive Grit Sanding on Motorcycle Fairings
Chapter 4: Techniques and Tools for Curved Surfaces in How to Sand Motorcycle Fairings
- Mastering Hand and Power Sanding Methods for Smooth Curves on Motorcycle Fairings
- Mastering Material-Specific Sanding Progressions for Smooth Curved Motorcycle Fairings
Chapter 5: Special Considerations for Fiberglass Fairings in How to Sand Motorcycle Fairings
- Mastering Surface Preparation and Sanding for Durable Fiberglass Motorcycle Fairings
- Mastering Fiberglass Fairing Repairs: From Structural Reinforcement to Flawless Finishing
Chapter 6: Mastering Wet Sanding Techniques for Flawless Motorcycle Fairings
- Essential Surface Preparation and Strategic Grit Progression for Wet Sanding Motorcycle Fairings
- Refining Shine and Safeguarding the Surface: Polishing and Protection After Wet Sanding Motorcycle Fairings
Chapter 1: Initial Preparation Steps for How to Sand Motorcycle Fairings

1. Thorough Cleaning and Detailed Surface Inspection: Foundations for Perfectly Sanded Motorcycle Fairings
Achieving a flawless finish on motorcycle fairings begins well before the first stroke of sandpaper. The foundation lies in thorough cleaning and meticulous surface inspection, essential to ensure the sanding process is effective and the paint adheres properly. Before any abrasion, all dirt, grease, and debris must be completely removed from the fairings. Residual contaminants can cause uneven sanding, rough spots, or adhesion failures during painting. Generally, this cleaning involves washing the surface with specifically formulated cleaners or degreasers followed by careful wiping to eliminate any trace residues.
Once cleaned, a detailed inspection of the fairings’ surface is critical. This examination identifies cracks, dents, or other imperfections that could compromise the fairing’s structural integrity or the final appearance. Damage detected at this stage guides any necessary repairs, such as the application of fillers or fiberglass restoration, ensuring that sanding will not simply mask flaws but properly prepare the surface. Without this step, sanding might leave underlying defects visible or cause further damage.
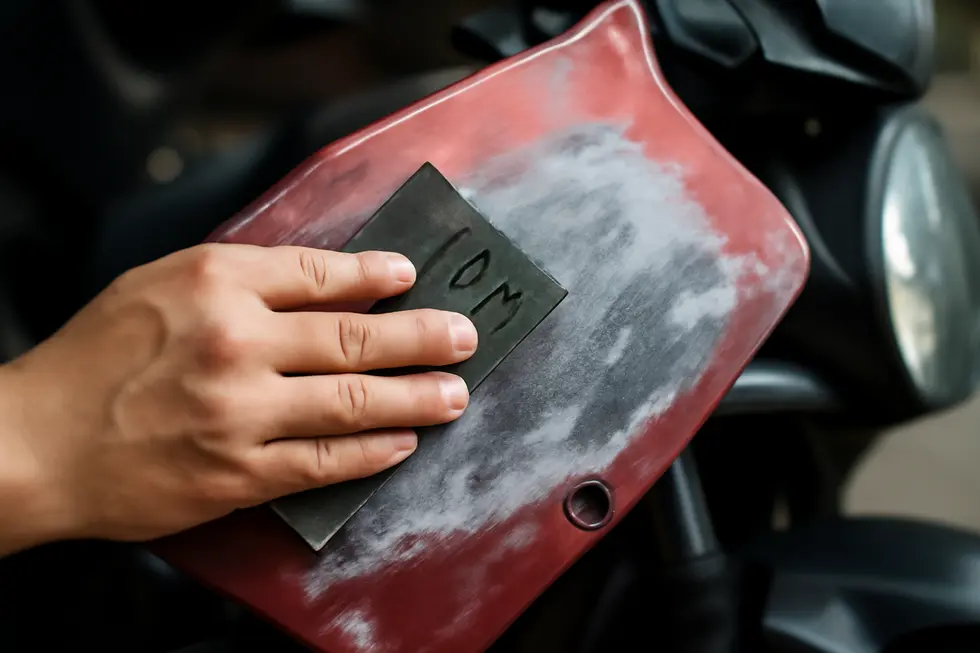
When the surface is deemed sound, sanding preparation begins with coarser grit sandpaper, typically ranging from 180 to 220 grit. This removes old paint, smooths out rough areas, and levels the surface. Importantly, after each sanding phase, it is vital to clean the fairing once again with products like wax and grease removers. This step removes sanding dust and oils that, if left, would impede primer and paint adhesion and compromise the longevity of the finish.
By carefully integrating thorough cleaning and detailed inspection into initial preparation, you lay the groundwork for the next stages, ensuring each sanding pass refines rather than damages, ultimately leading to a smooth, durable surface ready for primer and paint. For further insight on selecting and maintaining quality fairings, consider exploring Summit Fairings’ extensive motorcycle fairings resource.
2. Mastering Primer and Guide Coat Application for Flawless Motorcycle Fairing Surfaces
Achieving a smooth, flawless surface on motorcycle fairings begins with the critical steps of applying primer and guide coat during initial preparation. Primer serves as the foundational layer, creating a uniform base that promotes paint adhesion while subtly filling minor surface imperfections. Once the freshly cleaned fairing is evenly coated with primer and allowed to cure, it must be sanded carefully using progressively finer grit sandpaper. Starting typically around 320 grit, this sanding smooths any unevenness and primes the surface for the next stage.
After the primer is properly prepared, a guide coat is lightly sprayed over it. This contrasting layer—often a dark hue against the lighter primer—acts as a visual inspector of sorts. As you sand the guide coat, it gradually wears off smooth, raised areas while lingering in small depressions and scratches. This stark contrast sharply highlights flaws that might otherwise be missed, enabling precise blocking and refinement of the fairing’s contours.
Using this method, every low spot, scratch, or imperfection is exposed clearly, allowing the surface to be perfected before the base coat paint goes on. Sanding with care is essential to avoid sanding through the primer while ensuring the guide coat adequately reveals defects. This meticulous process helps build a flawlessly smooth canvas, crucial for a professional-grade finish that lasts.
Proper primer and guide coat application tie directly into the overall fairing sanding workflow, methodically advancing the surface from cleaned and inspected to polished and paint-ready. For those interested in further refining their technique and understanding material-specific tips, comprehensive visual tutorials on primer and guide coat application provide an excellent resource.
To explore more about selecting and preparing quality motorcycle fairings for sanding and finishing, visit the detailed collection of resources at Summit Fairings’ blog, which offers extensive insights into materials and repair methods.
Chapter 2: Mastering Coarse Grit Sandpaper Techniques for Motorcycle Fairing Sanding
1. Essential First Steps: Preparing Motorcycle Fairings with Coarse Grit Sandpaper
Proper initial surface preparation is the cornerstone of a successful sanding and refinishing process for motorcycle fairings. The first critical phase involves thoroughly cleaning the fairings to remove dirt, grease, and any residual debris. This ensures that contaminants don’t interfere with sanding or paint adhesion later, preventing imperfections or adhesion failures.
Once the fairings are clean and dry, coarse grit sandpaper—typically ranging between 80 and 120 grit—is used to tackle the surface. This abrasive stage serves multiple purposes. It effectively removes old paint layers and roughens the surface to create a mechanical bond, essential for strong primer or filler adhesion. Moreover, it smooths out damaged or uneven areas, feathering the edges of scratches or minor repairs to blend seamlessly with the surrounding sections.
When sanding, it is important to use consistent, controlled pressure to avoid gouging or uneven spots, especially on plastic or fiberglass fairings which can be sensitive to aggressive sanding. The coarse grit’s abrasiveness exposes any low areas or imperfections that need additional attention during subsequent refinishing stages. This step sets a solid foundation for the progressive use of finer grits, which refine the surface texture.
After the coarse sanding, a second thorough cleaning removes sanding dust and particles. This step is vital to maintain a pristine surface before moving on to applying primers or fillers. For plastic or fiberglass fairings, this preparation significantly enhances the durability and finish quality of the final coats.
By carefully executing this initial sanding and cleaning sequence with coarse grit sandpaper, you establish a uniform, receptive surface ready for the detailed refinishing processes. For further insights into plastic repair and surface preparation techniques, comprehensive guidance can be found in specialized resources such as those shared by the plastic repair community.
For more on choosing and preparing motorcycle fairings effectively, visit Explore the Best Motorcycle Fairings at Summit Fairings.
2. Mastering Progressive Sanding Stages: From Coarse to Fine for Flawless Motorcycle Fairings
After completing the initial sanding with coarse grit sandpaper, the process of progressive sanding is essential to achieve a flawlessly smooth motorcycle fairing surface. This technique involves gradually transitioning through finer grit sandpapers in methodical stages, each serving a specific purpose in refining the surface texture and readying it for primer or paint application.
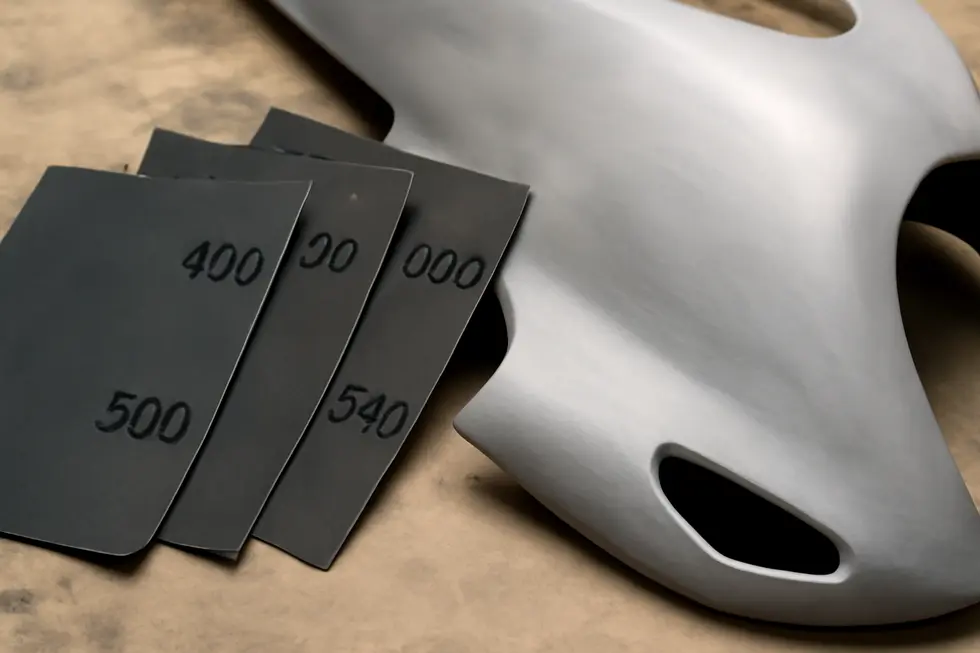
Starting with a coarse grit such as 320 or 400 removes noticeable surface imperfections, old paint, and uneven areas effectively. Once the coarser abrasions are leveled, the next phase uses medium grit sandpapers, typically ranging from 600 to 800 grit, to diminish the scratches left behind. This step smooths the surface without aggressively removing material, preserving the fairing’s shape while evening out the texture.
Following medium sanding, finer grits—often from 1000 up to 1500 or even higher—are applied, especially when aiming for a nearly polished finish. From this stage onward, wet sanding becomes an invaluable technique. Keeping the surface wet during sanding reduces abrasive dust, prevents paper clogging, and helps produce a consistently smooth and scratch-free finish. This wet sanding approach is particularly critical on curved or delicate plastic and fiberglass fairings, where surface integrity is paramount.
Uniformity in sanding is maintained by overlapping each pass by about 50%, ensuring even abrasion without creating high or low spots. Whether sanding by hand or with a dual-action sander, applying consistent pressure prevents gouging or uneven wear. After reaching the finest grit stage, thorough cleaning is necessary to eliminate any residual sanding dust or grit, which can compromise adhesion of primers or paints.
For fairings with existing clear coats or when a high-gloss finish is desired, polishing compounds and appropriate pads can be employed as a final enhancement to restore clarity and luster. This progressive sanding and polishing approach mirrors professional automotive restoration practices, adapting them to motorcycle fairings for optimal results.
For more insights on selecting quality motorcycle fairings and preparation tips, consider exploring options at Summit Fairings’ extensive collection.
Chapter 3: Mastering the Progressive Grit Technique for Motorcycle Fairing Sanding
1. Seamless Surface Preparation: The Art of Gradual Grit Advancement in Motorcycle Fairing Sanding
Achieving a flawlessly smooth motorcycle fairing surface hinges on systematic surface preparation through progressively finer sandpaper grits. The process begins with a meticulous cleaning to remove grease, dust, and debris; this ensures effective sanding and enhances primer or paint adhesion. Starting with coarser grits—typically between 150 and 400—efficiently eradicates imperfections, faded paint, or rough patches, delivering a leveled base without harming the fairing’s substrate.
The key lies in advancing through finer grits carefully. After the initial smoothing, sanding transitions through medium to fine grits such as 800, 1200, and eventually up to 2000. Each increment eliminates the scratches left by the previous grit, culminating in a surface primed for flawless painting or priming. For finer sanding stages, wet sanding is often employed. Using water as a lubricant prevents paper clogging and reduces dust, facilitating a silky, even finish that highlights the contours of either plastic or fiberglass fairings without distortion.
Special attention during this progression is necessary when blending repairs. Feathering edges and smoothing over filled cracks or dents ensures repairs integrate invisibly with the existing structure. Wiping the surface clean between grit changes removes abrasive residue, preventing unwanted scratches as you move toward finer grades. After the final sanding pass, the surface should feel uniform and pristine, ready for primer or additional filler if necessary.
This deliberate and practiced approach to sanding not only enhances the paint’s durability but also restores the fairing’s aesthetic appeal. For riders aiming to refine their craft further, exploring visual guides on blending repairs and sanding techniques can provide valuable insight. This method is foundational for anyone seeking professional results in motorcycle fairing restoration or customization. For more insights into selecting quality motorcycle fairings and maintaining their finish, visit the comprehensive resources available at Explore the Best Motorcycle Fairings at Summit Fairings.
2. Refining Surfaces with Precision: Expert Techniques for Progressive Grit Sanding on Motorcycle Fairings
When preparing motorcycle fairings for paint or repair, the key lies in a careful progression through finer grit sandpapers. This method begins with a coarse grit, usually between 150 and 320, to remove old paint, clear imperfections, and smooth rough patches. This foundational step levels the surface and exposes a fresh layer for subsequent refinement.
As the process advances, sandpaper grits become progressively finer—moving to 400, 600, and beyond—to erase scratches left by previous, coarser abrasives. Applying this technique ensures a smooth, even surface without visible sanding marks, essential for flawless primer and paint adhesion. Wet sanding is often incorporated starting at 600 grit or higher, using water or a mild soap solution as lubrication. This approach decreases dust, avoids clogging of the abrasive surface, and reduces heat buildup that can damage delicate fiberglass or plastic fairings.
Applying light, consistent pressure is vital throughout. Pressing too hard can gouge or unevenly wear the surface, while an even touch allows abrasives to gently refine the texture without distortion. Maintaining a uniform sanding pattern, typically circular or back-and-forth strokes, further promotes an even finish and prevents unsightly scratches.
Between grit changes, thorough cleaning removes residual dust and debris, which could otherwise cause scratches and compromise the final finish. After sanding, inspecting the surface for imperfections such as pinholes or cracks allows timely application of fillers before priming.
A typical sanding sequence might begin with 320 grit for defect removal, move to 600 grit for surface refinement, then use 1000 grit for wet sanding, and finish with 1500 to 2000 grit to create a perfectly smooth base for paint. This meticulous progression prevents over-sanding and optimizes surface quality.
For those seeking a deeper dive into sanding and repairing fiberglass motorcycle fairings, detailed guides and demonstrations can offer valuable insights into these techniques, enhancing the quality and durability of your work. Discover more about masterful fairing preparation and selection at the Explore the Best Motorcycle Fairings at Summit Fairings.
Chapter 4: Techniques and Tools for Curved Surfaces in How to Sand Motorcycle Fairings

1. Mastering Hand and Power Sanding Methods for Smooth Curves on Motorcycle Fairings
Sanding motorcycle fairings with curved surfaces requires a careful blend of hand and power tool techniques to maintain the integrity and shape of the contours. Hand tools remain invaluable for their adaptability and precision. A flexible sanding drum attached to a hand-held shaft allows smooth sanding along complex curves by conforming to the fairing’s shape. Additionally, tools such as nylon hammers, sandbags, and dollies enable manual shaping and fine smoothing by applying controlled pressure to high spots or subtle curves without risking deformation.
On the power tool front, random orbit sanders stand out for their ability to deliver swirl-free finishes while adapting to mild curves. Their random orbital motion minimizes sanding marks and evenly smooths surfaces when used with progressively finer grit sandpapers. Flexible shaft sanders equipped with sanding sleeves also excel at navigating complex contours, offering a combination of reach and control. For aggressive material removal—often necessary during paint stripping or surface preparation—high-pressure sandblasting can be used with caution to avoid warping the fairing.
Specialized metalworking tools, such as the English wheel, come into play for final shaping and smoothing of metal fairings. This tool helps achieve consistent, smooth curves and eliminates imperfections that hand sanding alone may not fully address. Moreover, abrasive belts designed specifically for curved surfaces—like zirconium belts—allow refined grinding and finishing tailored to the fairing’s geometry.
Combining these approaches effectively balances the need for precision and efficiency. Hand sanding tools provide delicate control on complex shapes, while power tools accelerate smoothing and shaping. This synergy ensures fairing curves maintain their aesthetic appeal and structural correctness, setting a flawless foundation for subsequent primer and paint application. For more insights on maintaining and restoring motorcycle fairings, explore detailed resources on explore the best motorcycle fairings at Summit Fairings.
2. Mastering Material-Specific Sanding Progressions for Smooth Curved Motorcycle Fairings
Sanding curved motorcycle fairings demands a nuanced approach that respects the material’s characteristics while preserving the contours. Plastic and fiberglass fairings are the most common and require a careful progression through grit sizes to remove imperfections without compromising curves. Starting with a medium grit, such as 320, allows you to eliminate scratches or old paint layers, but it’s essential to use flexible sanding blocks or sponges that conform to these curves. This flexibility prevents flattening and maintains the original shape. Moving gradually to finer grits between 400 and up to 1500 refines the surface, smoothing out abrasive marks and preparing it for paint or primer. Employing wet sanding on the finest grits reduces dust while enhancing control and surface uniformity, vital for a flawless finish. Using light, even pressure and sanding in multiple directions prevents grooves or uneven texture that might ruin the visual flow of curved panels.
Metal fairings, such as aluminum, require different sandpaper grades and tools due to their hardness and finish demands. Beginning with medium grit (220–320) removes oxidation or dents, while progressing to finer grits like 600 to 800 smooths the surface further. Rigid sanding blocks or pads shaped to the fairings’ curves ensure consistent contact and avoid creating flat spots. After sanding, polishing compounds restore shine, which is especially important for showcasing the natural metallic look.
The key throughout is balancing material hardness, sanding progression, and tool flexibility to maintain the integrity of complex curves. Adopting this organized approach enhances the durability of paint applications and ensures the fairing’s shape and finish remain true to their design. For deeper insight on sourcing quality fairings suitable for detailed work like sanding and finishing, explore the best motorcycle fairings available to complement your restoration or customization projects.
Chapter 5: Special Considerations for Fiberglass Fairings in How to Sand Motorcycle Fairings
1. Mastering Surface Preparation and Sanding for Durable Fiberglass Motorcycle Fairings
Proper surface preparation is indispensable when working with fiberglass motorcycle fairings, as their composition demands a careful balance between smoothing imperfections and preserving structural integrity. After applying fiberglass resin and cloth layers, it is critical to allow the resin to fully cure before any sanding begins. This curing phase can vary depending on the type of resin and environmental conditions but generally requires several hours to solidify completely. Starting with coarser grit sandpaper—usually in the 180 to 220 grit range—helps level rough patches and blend repair areas seamlessly into the existing surface. However, aggressive sanding must be avoided to prevent exposing or damaging the fiberglass cloth layers beneath. Instead, feathering edges with a gentle hand protects the fairing’s original thickness and contours, ensuring the repaired section integrates smoothly without flattening curved surfaces.
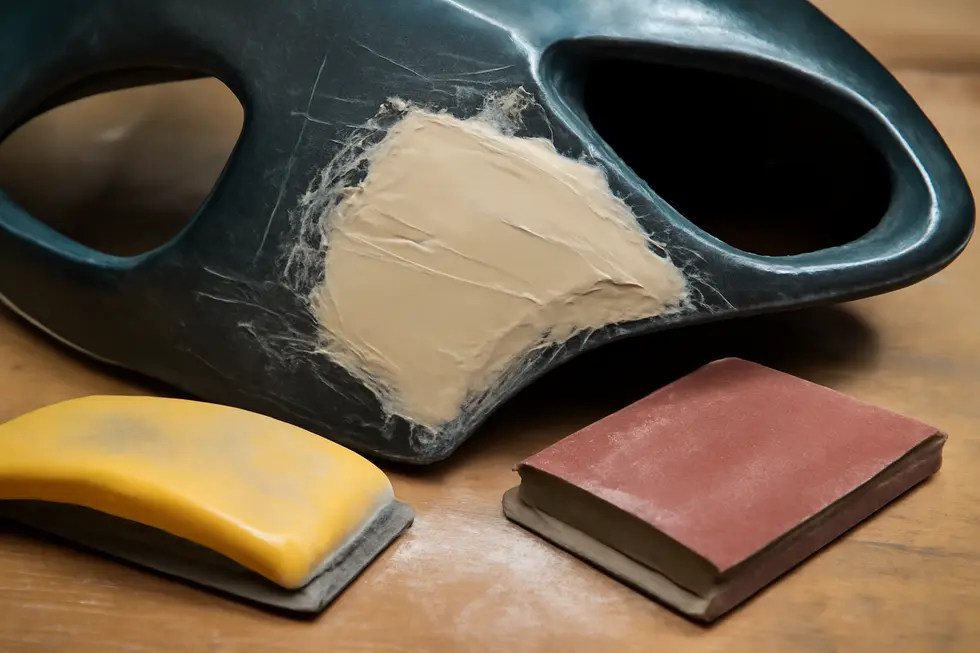
Once the surface is uniformly leveled, transitioning to finer grit sandpapers, such as 400 to 600 grit, refines the finish by eliminating scratches left from the coarse stage. Minor imperfections or pinholes often require filling with body filler or glazing putty, which should then be sanded smooth after curing to maintain a consistent surface ready for primer application. Considering fiberglass’s porous nature, sealing is essential; a proper primer not only enhances paint adhesion but also prevents moisture absorption that could degrade the fairing over time. Throughout the process, keeping the workspace clean is crucial to avoid dust contamination that can compromise paint quality.
For those seeking additional visual guidance, practical repair and sanding demonstrations available online offer valuable step-by-step insights into optimal layering, curing, and finishing techniques. As fiberglass fairings are lighter and more rigid than ABS plastic, adhering to these specialized sanding methods is key to achieving a durable, professional finish that preserves both function and aesthetic appeal. For further exploration of motorcycle fairings and their maintenance, consider insights from leading resources focused on advancing quality and care in fairing restoration.
2. Mastering Fiberglass Fairing Repairs: From Structural Reinforcement to Flawless Finishing
Repairing and finishing fiberglass motorcycle fairings demand a careful balance between restoring structural integrity and preparing the surface for a smooth, durable finish. The process begins with a thorough damage assessment, inspecting for cracks, holes, or weakened areas. Cleaning the affected region is essential to remove any dirt, grease, or loose debris that could compromise adhesion. Light sanding of the damaged area creates the ideal roughness needed for repair materials to bond effectively, ensuring a solid foundation.
When tackling cracks or holes, reinforcing the fairing from the inside when accessible yields the strongest results. This method involves cutting fiberglass cloth or mat pieces slightly larger than the damaged zone and applying resin—typically polyester or epoxy—to saturate the cloth after laying it over the repair site. While polyester resin is commonly used due to its ease and cost-effectiveness, epoxy resin offers superior bonding and durability and is preferable when maximum strength is needed. Applying multiple layers of fiberglass and resin creates a reinforced patch that restores the fairing’s original strength.
After the resin has fully cured, sanding begins with coarser grit paper to level the repaired area, then progressively finer grits smooth imperfections and blend the patch seamlessly into the surrounding surface. This gradual refinement is crucial to avoid damaging the fiberglass layers beneath and to ensure a flawless transition. Once sanding is complete, applying primer and matching paint finishes the repair, returning the fairing to its original aesthetic quality.
Avoiding weak repairs starts with removing any loose or compromised fiberglass material prior to patching, as relying solely on fillers can result in brittle spots. Structural repairs should always incorporate fiberglass cloth to maintain integrity under vibration and stress. Additionally, during replacement or installation of new fairings, proper alignment and secure fastening prevent undue stress that can lead to premature damage.
For those interested in seeing these steps in action, comprehensive visual guides available online provide clear demonstrations of fiberglass motorcycle fairing repair and finishing techniques. To explore more about motorcycle fairings and quality replacements suited for various needs, visit this detailed resource on exploring the best motorcycle fairings at Summit Fairings.
Chapter 6: Mastering Wet Sanding Techniques for Flawless Motorcycle Fairings
1. Essential Surface Preparation and Strategic Grit Progression for Wet Sanding Motorcycle Fairings
Proper surface preparation and thoughtful grit selection are the foundation of successful wet sanding on motorcycle fairings. Before any abrasive work begins, it’s vital to thoroughly clean the fairing’s surface. Dirt, grease, and old paint residues must be completely removed to prevent contamination that could hinder smooth sanding or impair new paint adhesion. Using a mild detergent and water, followed by drying with a clean cloth, ensures a pristine starting point.
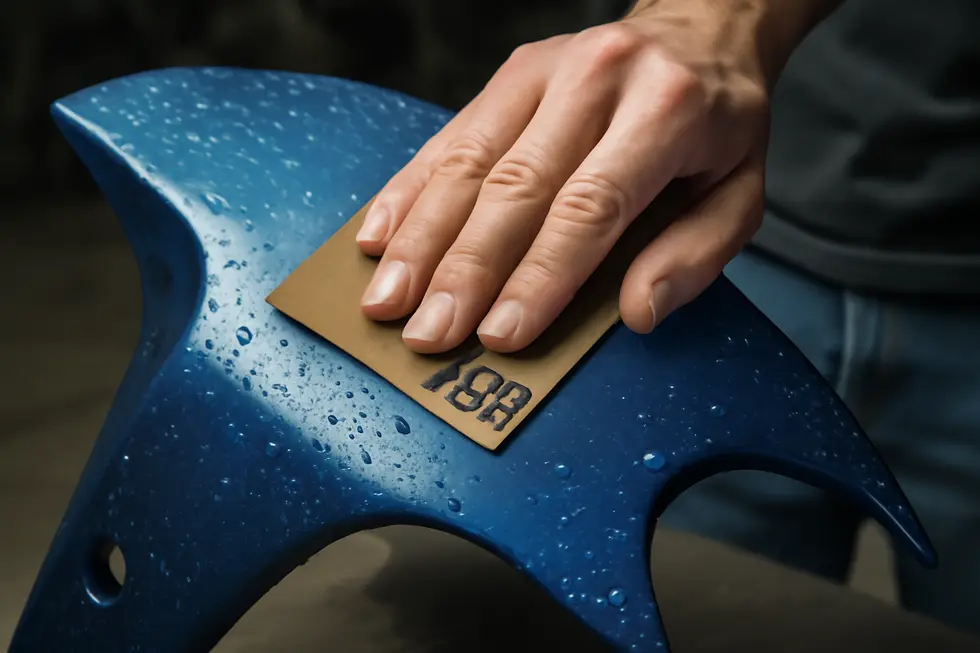
When transitioning to wet sanding, selecting the right sequence of sandpaper grits optimizes surface refinement and prepares the fairing for primer or paint applications. Typically, sanding starts with a medium grit around 400 to 600. This stage focuses on eliminating surface imperfections such as oxidation, minor scratches, or dull clear coats. The water lubricates the sandpaper, reducing clogging and allowing abrasives to cut more cleanly without creating deep scratches.
Following initial smoothing, sanding progresses to finer grits between 800 and 1200. This step is critical for removing the coarse sanding marks left behind and for gently feathering any transitions near chips or repaired areas. These finer grits ensure the surface becomes increasingly smooth and consistent, ready to accept primer or a fresh coat of paint with improved adhesion and longevity.
Throughout the wet sanding process, it’s important to maintain a wet surface to minimize dust and heat buildup, which can cause uneven abrasion or premature clogging of the sandpaper. Using a flexible sanding block or foam pad helps conform to the fairing’s curved shapes, preserving the original contours without sanding flat spots.
Ultimately, this combination of meticulous cleaning and progressive grit use in wet sanding crafts a flawless base that contributes directly to the fairing’s finished appearance. For deeper insight and practical demonstrations on preparing motorcycle fairings, exploring detailed guides at Explore the Best Motorcycle Fairings at Summit Fairings can enhance your technique and results.
2. Refining Shine and Safeguarding the Surface: Polishing and Protection After Wet Sanding Motorcycle Fairings
Wet sanding motorcycle fairings is the foundational step in achieving a smooth, defect-free surface ready for a vibrant finish. After carefully working through progressively finer grit sandpapers with constant lubrication, the surface no longer shows rough flaws but often retains subtle sanding marks needing further refinement. This is where polishing and protective treatments become crucial to complete the process and ensure a lasting, glossy finish.
During wet sanding, starting at around 400 grit and advancing up to 2000 grit, water acts as a lubricant that cools both the sandpaper and fairing surface. This prevents friction damage and abrasion buildup on the paper, ensuring a consistent and gentle smoothing effect. Although sanding eliminates larger imperfections, the microscopic scratches left behind create a dull, matte appearance.
To restore brilliance, polishing compounds are applied. These abrasives work to dissolve and remove the fine sanding marks by gently abrading the top surface, revealing clarity beneath. This stage can be carried out manually or with tools like a dual-action polisher that uses cutting and finishing pads in succession. Initially, a cutting compound erases deeper scratches, followed by a finishing polish that boosts gloss and transparency, producing the flawless mirror-like effect expected from quality motorcycle fairings.
Following polishing, preserving the refined finish requires applying protective layers. Two-component clear coats are preferred for their durability and depth of shine; multiple thin coats are carefully sprayed and allowed to cure for optimal toughness. In addition, sealants offer an extra shield against UV rays, oxidation, and dirt, prolonging the fairing’s appearance and structural integrity. For plastic trims on the fairings, specialized conditioners help prevent fading and degradation caused by sun exposure.
This integrated process—careful wet sanding, meticulous polishing, and effective protective coatings—not only enhances aesthetic appeal but also extends the lifespan of your motorcycle fairings. For further insights and expert guidance on achieving exceptional fairing finishes, explore comprehensive resources available in the Summit Fairings blog.
Final thoughts
Sanding motorcycle fairings with precision and understanding is vital to delivering top-tier repair and repainting results. Business owners who implement a methodical sanding process—from thorough preparatory cleaning to the use of coarse and progressively finer grits—can greatly improve paint adhesion and surface smoothness. Utilizing specialized tools for curves and addressing the unique demands of fiberglass fairings further enhances finish quality. Incorporating wet sanding techniques completes the process by providing the ultimate polished look. Embracing these steps not only boosts the durability of your work but positions your business as a reliable provider of superior motorcycle restoration and customization services.
Ready to elevate your ride? Summit Fairings delivers premium, custom-fit fairings that blend style and durability. Whether you’re chasing speed or turning heads, we’ve got your bike covered. Don’t wait—transform your machine today. Click, customize, and ride with confidence. Your perfect fairing is just a few clicks away. Act now!
About us
undefined