Introduction
For business owners in the motorcycle aftermarket or customization industry, mastering the process of making your own motorcycle fairing presents a significant opportunity to diversify product offerings, reduce costs, and deliver bespoke solutions that resonate with riders. Creating custom fairings demands a strategic balance of design innovation, material expertise, and mechanical precision. This guide unfolds the essential stages—from initial design and mold creation to fabrication, fitting, and the finishing touches—each integral to producing high-quality, durable fairings. Understanding these steps empowers businesses to optimize workflows, enhance customization capabilities, and ultimately improve customer satisfaction and competitive positioning.
Tables of Contents
Chapter 1: Design and Planning Essentials for Make Your Own Motorcycle Fairing
- Key Design Considerations for Crafting Your Custom Motorcycle Fairing
- From Vision to Reality: Effective Planning and Precise Execution in Motorcycle Fairing Fabrication
Chapter 2: Mastering Mold Creation Methods for Your Custom Motorcycle Fairing
- Essential Fiberglass Layup Techniques for Crafting Durable Motorcycle Fairing Molds
- Harnessing Resin Casting and Precision Sand Casting for Custom Motorcycle Fairings
Chapter 3: Fabrication Processes in Make Your Own Motorcycle Fairing Using Fiberglass and ABS Plastic
- Mastering Fiberglass Fabrication: Techniques and Materials for Durable Motorcycle Fairings
- Mastering ABS Plastic: Thermoforming, Injection Molding, and Composite Assembly Techniques for Custom Motorcycle Fairings
Chapter 4: Fitting, Installation, and Adjustment in Crafting Your Own Motorcycle Fairing
- Mastering the Art of Fairing Fitment: Ensuring Precision and Stability in Your Custom Motorcycle Panels
- Expert Techniques for Installing and Adjusting Your Motorcycle Fairing with Confidence
Chapter 5: Finishing and Customization in Make Your Own Motorcycle Fairing: Painting and Protective Coating
- Mastering Surface Preparation and Painting for Durable, Custom Motorcycle Fairings
- Durability and Design: The Role of Protective Coatings Amid Economic and Cultural Influences in Motorcycle Fairing Finishing
Chapter 1: Design and Planning Essentials for Make Your Own Motorcycle Fairing
1. Key Design Considerations for Crafting Your Custom Motorcycle Fairing
Creating a custom motorcycle fairing starts with a thoughtful design process that balances aesthetics, functionality, and fitment. The visual style is foundational—your fairing should enhance the bike’s lines while expressing your personal taste. Whether you aim for a sleek, aerodynamic look for high-speed performance or a minimalist design for urban riding, the fairing’s form influences both appearance and air flow. Style choices often dictate the type of fairing, from full coverage that shields against wind to smaller panels focusing on specific areas.
Material selection plays a pivotal role in how your fairing performs and feels. Fiberglass is a popular choice for its lightweight properties and ease of shaping, making it ideal for custom curves and contours. ABS plastic offers durability and impact resistance at a reasonable cost, lending itself well to street use and regular wear. For those seeking superior strength combined with lightness, carbon fiber stands out, though it requires a larger budget and more specialized handling. Each material comes with unique fabrication demands and finish treatments, so consider your workshop capabilities when choosing.
Equally critical is ensuring that your design accommodates precise fitment and compatibility with your motorcycle’s framework. This means carefully measuring mounting points and adjusting your plan to align with the bike’s geometry and accessories. Overlooking fit can lead to installation difficulties, misalignments, or compromised structural integrity. It’s essential to build in allowances for hardware, wiring, and any modifications needed for a secure attachment.
Functionality goes beyond just appearance and fit. Thoughtful fairing designs incorporate features like windshields to minimize rider fatigue and elements that improve aerodynamic stability at speed. Additionally, customization options such as paint colors and graphics not only personalize your fairing but protect its surface from sun damage and wear. Maintenance ease should also inform design choices to keep your fairing looking sharp over time.
Balancing these considerations ensures your motorcycle fairing project delivers a finished product that harmonizes with your ride’s character and practical needs. For further insights on designing and customizing motorcycle fairings, exploring dedicated resources can provide inspiration and technical guidance.
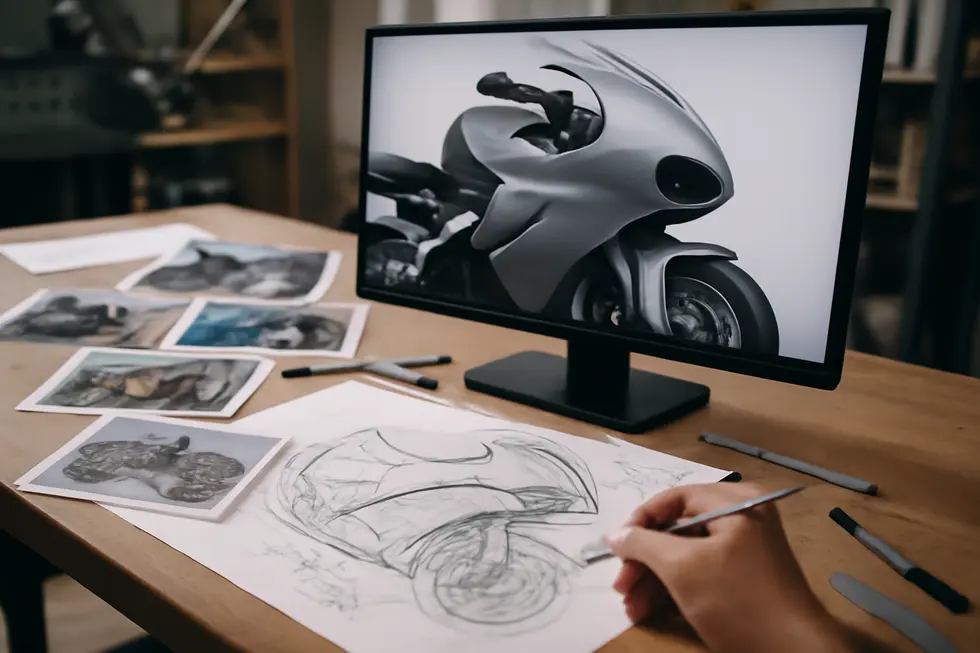
2. From Vision to Reality: Effective Planning and Precise Execution in Motorcycle Fairing Fabrication
Creating a custom motorcycle fairing begins with detailed planning that transforms your vision into a tangible design tailored specifically for your bike. This process requires clear visualization of the fairing’s shape, style, and functional demands, ensuring it not only enhances aesthetics but also preserves or improves aerodynamics and safety. Whether using hand-drawn sketches or digital 3D modeling, the design phase sets the foundation for what follows.
Choosing the right materials is critical during planning. Fiberglass remains a popular option due to its combination of strength, lightweight characteristics, and affordability. Alternatively, ABS plastic offers excellent moldability and high impact resistance, making it well suited for fairings that demand a more flexible approach. Carbon fiber, while costlier, provides superior strength-to-weight performance for racers and enthusiasts seeking premium quality. Each material choice affects the fabrication process and final durability, so matching it to your goals and skills is essential.
Efficient fabrication begins with creating precise patterns or templates, often from cardboard or paper, to ensure the fairing fits the motorcycle’s unique contour and mounting points perfectly. This preparatory step helps reduce costly errors later. For fiberglass or carbon fiber, material preparation involves careful layering of fabric saturated with resin in a mold. When working with thermoplastics like ABS, heating and vacuum forming techniques shape the material smoothly around the mold.
Following molding, assembly and finishing refine the fairing’s appearance and functionality. Sanding smooths the surface for paint or decals, and adding elements such as vents or mounting hardware enhances performance and fitment. Throughout this stage, attention to detail guarantees both a visually striking and structurally sound product.
A key consideration during planning and execution is maintaining safety and compliance. The fairing must not obstruct rider visibility, airflow, or interfere with essential controls and wiring. Checking local regulations helps ensure your custom modification remains legal and roadworthy.
For additional inspiration and insights on assembling professional-looking fairings and exploring a variety of design choices, visiting resources dedicated to affordable and customizable motorcycle fairings can be invaluable.
Chapter 2: Mastering Mold Creation Methods for Your Custom Motorcycle Fairing
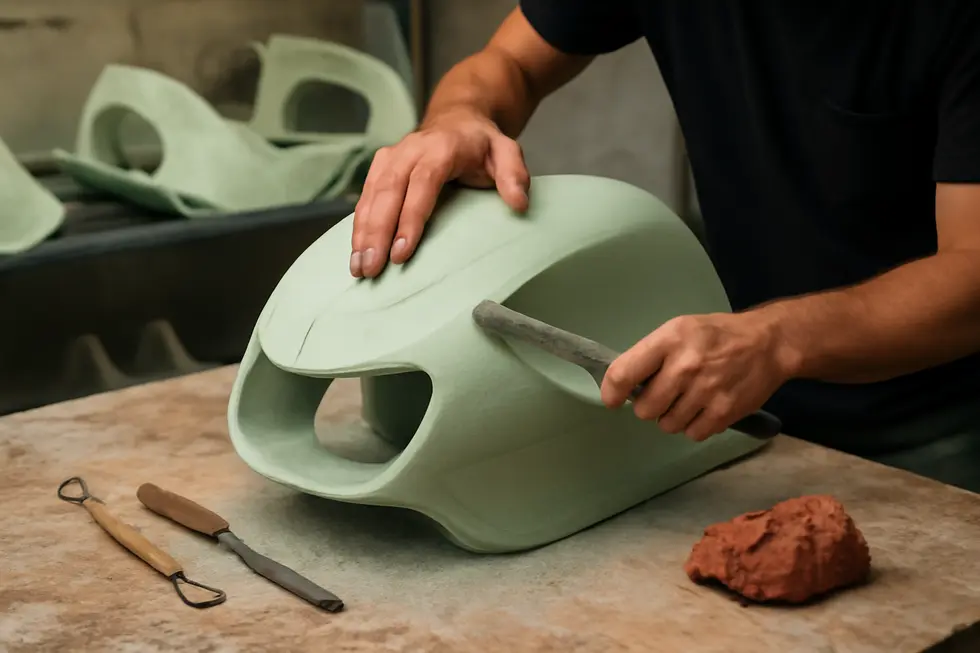
1. Essential Fiberglass Layup Techniques for Crafting Durable Motorcycle Fairing Molds
Crafting a motorcycle fairing mold through fiberglass layup is a foundational skill for customizing your bike’s aesthetics and performance. This process hinges on precise preparation, from designing an accurate mold base to carefully layering fiberglass and resin for a strong yet lightweight structure. Traditionally, mold bases are sculpted from foam or wood, shaped meticulously to mirror the fairing’s contours. These bases are then coated with a release agent, a critical step that prevents the fiberglass from bonding permanently and facilitates clean demolding.
The fiberglass layup itself involves applying several layers of fiberglass cloth or mat onto the prepared mold. Each layer is impregnated with resin—often polyester resin due to its user-friendly curing properties and cost efficiency—using brushes or rollers that ensure thorough saturation while avoiding air pockets. To achieve a smooth, professional finish, an initial gelcoat layer is applied to the mold surface before layup begins. This gelcoat sets the tone for the final appearance, providing gloss and durability to the finished fairing.
Patience is key, as each resin-soaked layer must cure properly before subsequent layers are added. This incremental build-up reinforces the mold’s strength without excessively increasing weight, essential for maintaining the motorbike’s agility. Upon full curing, the newly formed fiberglass mold is carefully separated from the base, revealing a rigid, precisely detailed form ready for fairing fabrication.
Moreover, choosing the right materials directly influences the mold and eventual fairing’s performance. Marine-grade resins, for example, introduce robustness and weather resistance, ideal for motorcycles exposed to diverse climates. Equally, the mold’s smoothness enables clean paint application and sharp fairing edges, aspects crucial for both style and aerodynamics.
By mastering fiberglass layup methods, you lay the groundwork for creating custom molds that marry design intent with functional integrity. This expertise not only enhances the craftsmanship of your project but also expands possibilities for tailored modifications that fit your motorcycle perfectly. For additional inspiration and tips on motorcycle fairings, explore expert insights at Summit Fairings’ dedicated blog hub.
2. Harnessing Resin Casting and Precision Sand Casting for Custom Motorcycle Fairings
Creating a motorcycle fairing mold requires selecting techniques that balance accessibility, durability, and precision. Among these, resin casting stands out as a favored method for DIY enthusiasts crafting custom fairings, while advanced sand casting plays a specialized role in mold and tooling creation.
Resin casting involves forming a detailed mold—typically made from silicone or fiberglass—into which liquid resin is poured and allowed to cure. This process results in lightweight, robust parts that capture intricate design details ideal for motorcycle fairings. By applying a release agent to the mold before layering fiberglass cloth with catalyzed resin, the finished panels achieve both strength and a smooth finish that supports further customizations like painting or decal application. This technique is highly accessible for home workshops and small fabrication settings, as it avoids complex machinery while offering control over the design and shape of the fairing components.
In contrast, advanced sand casting, traditionally used for metal components, is adapted here chiefly to produce precise, durable molds or tooling essential for repeated resin layups. It involves creating a sand mold around a pattern and then introducing molten metal such as aluminum. Though heavier and more complex, these metal molds provide long-lasting forms and excellent surface finishes, aiding professional composite manufacturing processes. However, actual fairing parts made by sand casting are rare due to weight and material constraints, making this approach more relevant for auxiliary tooling rather than the body panels themselves.
The synergy between these methods is notable: sand casting can create robust molds facilitating repeated production, whereas resin casting enables the crafting of the fairing panels with composite reinforcements like fiberglass or carbon fiber. Incorporating modern enhancements such as 3D scanning and precision mold fabrication can elevate resin mold accuracy, ensuring a seamless fit tailored exactly to the motorcycle’s contours.
For those pursuing custom fairings, resin casting remains the most practical and efficient approach, combining lightweight construction with aesthetic versatility. Some enthusiasts also explore 3D printing to produce prototypes or initial molds, blending technology with traditional resin techniques for optimal results.
More detailed insights on resin panel molding and composite fabrication techniques can be found at Summit Fairings’ comprehensive blog, offering valuable guidance for those serious about crafting high-quality motorcycle fairings.
Chapter 3: Fabrication Processes in Make Your Own Motorcycle Fairing Using Fiberglass and ABS Plastic
1. Mastering Fiberglass Fabrication: Techniques and Materials for Durable Motorcycle Fairings
Crafting a motorcycle fairing using fiberglass requires careful attention to material selection, preparation, layup, curing, and finishing. Fiberglass cloth paired with polyester or epoxy resin forms the backbone of a durable fairing. The choice of resin influences strength and flexibility: polyester resin offers a workable balance, ideal for standard fabrication, while epoxy resin delivers enhanced adhesion and resilience, particularly beneficial when bonding with ABS plastic parts.
ABS plastic itself is favored for its impact resistance and flexibility, often serving as a base or reinforcement in custom fairing projects. To ensure effective bonding with fiberglass resin, the ABS surface must be cleaned and lightly sanded, creating a rough texture that improves adhesion.
The wet layup method is the common fabrication technique. It begins by applying a thin resin coat to the prepared surface, immediately followed by laying fiberglass cloth larger than the intended coverage area. Saturating the cloth thoroughly with resin using a brush or roller removes air pockets and ensures even resin distribution. Layering is essential; multiple fiberglass layers can be applied with partial curing intervals to build strength without compromising interlayer bonds.
Once the layup is complete, the curing phase solidifies the composite. Curing at room temperature or as specified by the resin manufacturer secures rigidity and impact resistance essential for riding conditions. A properly cured fairing panel will have balanced flexibility and toughness, crucial for longevity and safety on the road.
The final stage integrates surface finishing techniques. After sanding to smooth imperfections, primers and UV-resistant paints can be applied to protect and customize the fairing’s appearance. Clear coats add durability and gloss, enhancing both aesthetics and weather resistance.
Combining fiberglass and ABS plastic leverages the strengths of both materials, yielding a custom fairing that balances lightweight construction with rugged durability. For further insight into effective fiberglass application techniques, the detailed guides found at Summit Fairings’ blog provide valuable tips on resin selection and cloth handling for motorcycle fairings.
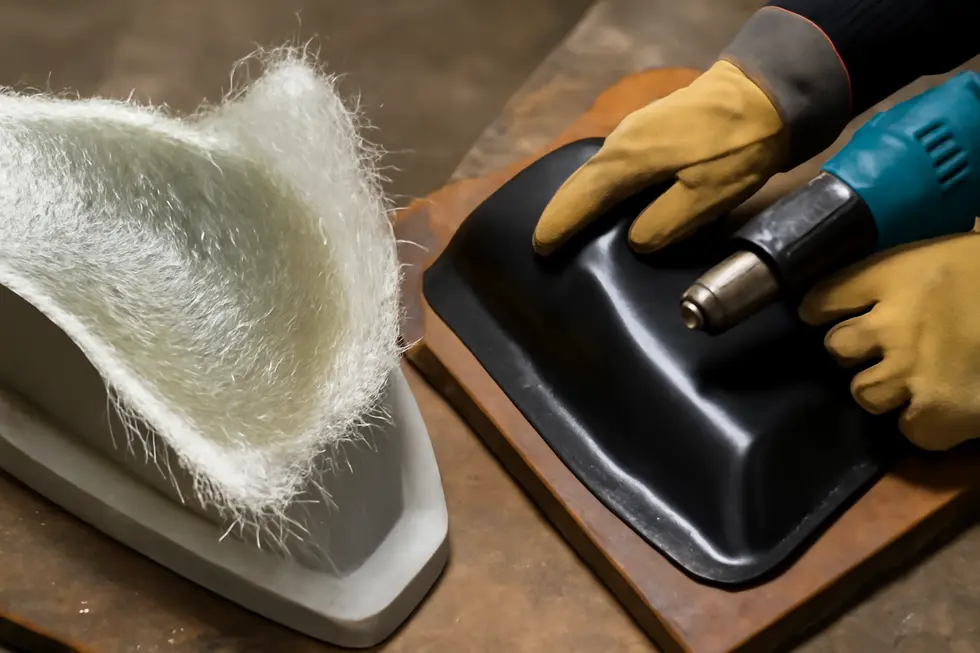
2. Mastering ABS Plastic: Thermoforming, Injection Molding, and Composite Assembly Techniques for Custom Motorcycle Fairings
ABS plastic stands out as a versatile material choice when crafting custom motorcycle fairings, prized for its toughness, impact resistance, and ease of molding into complex curves. Unlike fiberglass, which involves layering and resin curing, working with ABS requires understanding specific plastic fabrication techniques, chiefly thermoforming and injection molding, each suited to different scales and design needs.
Injection molding remains the go-to method for producing high-precision ABS fairing components in larger quantities. This technique heats ABS pellets until molten, then injects the liquid plastic into a durable mold with the exact shape of the desired panel. Once cooled, the molded piece emerges with clean lines and consistent thickness, ideal for replicating intricate contours and fitting tightly to a motorcycle’s frame. While injection molding demands upfront mold fabrication cost and specialized equipment, it delivers sharp detail and repeatability difficult to match with other methods.
For small batches or prototypes, thermoforming offers an accessible alternative. Sheets of ABS plastic are heated until pliable, then carefully shaped over a pre-made mold manually or with vacuum assistance. Though thermoforming sacrifices some dimensional precision compared to injection molding, it allows builders to quickly produce unique or one-off fairing parts without expensive tooling. Its flexibility suits custom modifications and iterative design adjustments during the fabrication process.
Integrating ABS plastic with fiberglass elements combines the best of both worlds: the lightweight strength and rigidity of fiberglass with the resilience and smooth finish of ABS. This hybrid approach typically involves securely bonding ABS panels to fiberglass frameworks using strong adhesives or mechanical fasteners. This not only reinforces the fairing’s structure but also enhances overall impact resistance while maintaining manageable weight. Careful alignment and fitment are paramount here to ensure the composite fairing maintains aerodynamic flow and mounting integrity.
Harnessing these ABS-specific fabrication methods while skillfully merging ABS and fiberglass extends design possibilities and performance. For those interested in exploring such fabrication techniques further, detailed resources like the comprehensive guides found at Explore the Best Motorcycle Fairings at Summit Fairings provide valuable insights and inspiration for DIY enthusiasts aiming for professional results.
Chapter 4: Fitting, Installation, and Adjustment in Crafting Your Own Motorcycle Fairing
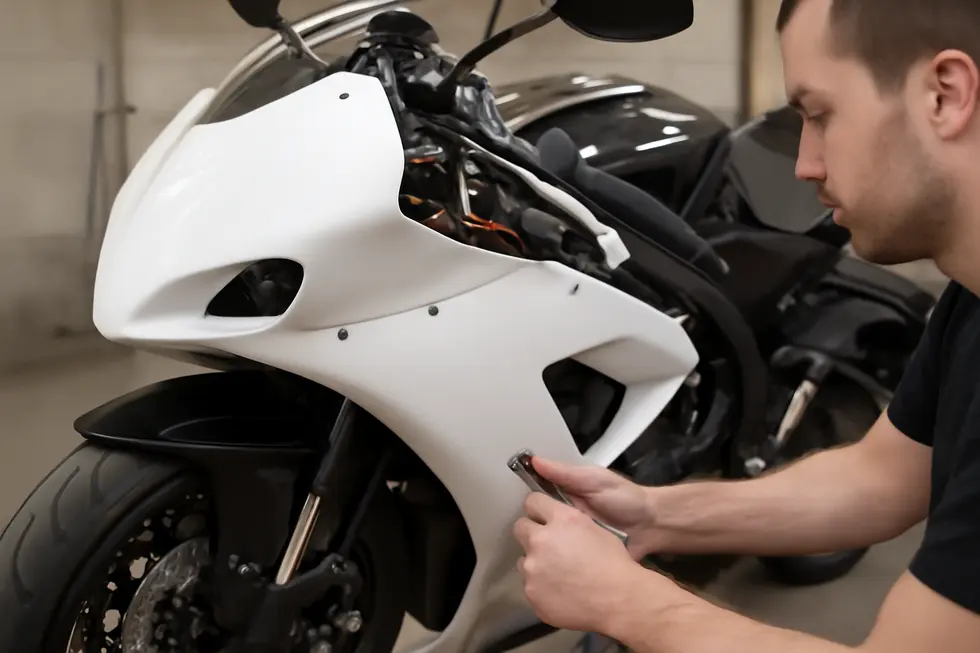
1. Mastering the Art of Fairing Fitment: Ensuring Precision and Stability in Your Custom Motorcycle Panels
Achieving a perfect fit when installing custom motorcycle fairings is a delicate balance of precision, patience, and technique. The process starts by thoroughly preparing the bike—this means carefully removing existing fairings and any obstructive components while disconnecting electrical fixtures like lights or sensors to avoid damage. Clearing this workspace allows for an unobstructed view of all mounting points, which is critical to aligning your new panels correctly.
Once the motorcycle is prepped, the new fairing panels are positioned to match the original or desired mounting locations. The alignment phase is pivotal; misaligned panels can cause undue stress on the materials, potentially leading to cracks or instability. Using the proper tools like torque wrenches and screwdrivers ensures fasteners are tightened evenly and securely without over-stressing the fairing. Many custom builders recommend loosely attaching panels initially, allowing small adjustments before the final tightening.
Beyond mechanical fit, attention must be paid to the routing and reconnection of all wiring harnesses. Properly integrating electrical components such as indicator lights or sensors ensures both functionality and safety are maintained. Testing these connections before fully securing the fairing helps prevent tedious disassembly later.
After the initial fitment and fastening, subtle adjustments often become necessary. These fine-tunings may involve repositioning mounting brackets or using shims to close any undesirable gaps and to enhance aerodynamic flow. Careful walking around the bike during this stage provides insight into how panels align from multiple angles and ensures no protrusions interfere with handlebars, foot controls, or the rider’s ergonomics.
Multiple sources detail how to approach the fitting and installation phase with care and precision, and exploring comprehensive guides on affordable motorcycle fairings can offer helpful tips on achieving a professional, race-ready look without compromising durability. Precision during this stage directly impacts the longevity of the fairing and the overall performance aesthetic, resulting in a custom build that is both visually striking and mechanically sound.
2. Expert Techniques for Installing and Adjusting Your Motorcycle Fairing with Confidence
Achieving a flawless fit and secure installation is crucial when integrating your custom motorcycle fairing. The process starts by thoroughly preparing both the fairing and the motorcycle’s mounting points—cleaning these areas removes dirt, grease, and old adhesives, ensuring surfaces are ready for reliable attachment. Proper alignment demands patience: carefully positioning the fairing to match the bike’s contours minimizes stress on mounting hardware and prevents interference with vital controls like handlebars, brake lines, and turn signals. Temporary clamps or soft fasteners help maintain precise placement during this stage.
Once aligned, selecting the correct fasteners is essential. Screws, bolts, and clips should fit snugly without overtightening, which can cause cracks or warping in fiberglass or thermoplastic panels. Even tightening distributes pressure evenly, preserving both form and function. Adjustment is not merely about fit but also optimizing aerodynamics and rider comfort. Small positional tweaks can reduce wind buffeting, improve airflow, and even enhance the bike’s aesthetics by ensuring smooth panel transitions. This phase often involves repeated test fittings and minor refinements until the desired harmony between fairing and frame is achieved.
Customization opportunities arise naturally during installation and adjustment. Adding frame-mounted accessories or comfort features like highway pegs can be integrated seamlessly, provided mounting points are well-considered and do not compromise structural integrity. It’s important to maintain clearances for wiring, lights, and controls, avoiding any tangling or obstruction that could affect safety or performance.
Mastering these steps requires patience and a methodical approach; rushing can lead to misalignment and fragile mounts. Referring to detailed guides and tutorials tailored to your motorcycle model enriches your understanding and helps anticipate specific challenges during assembly and fine-tuning. For further insights into choosing and installing tailored fairings, exploring expert resources such as the comprehensive Summit Fairings blog offers valuable knowledge on achieving both precision fit and striking design.
Ultimately, the key to a successful fit and lasting installation lies in meticulous preparation, careful fastening, and thoughtful adjustment—elements that together elevate the look, feel, and performance of your custom motorcycle fairing.
Chapter 5: Finishing and Customization in Make Your Own Motorcycle Fairing: Painting and Protective Coating
1. Mastering Surface Preparation and Painting for Durable, Custom Motorcycle Fairings
Achieving a professional, long-lasting finish on your custom motorcycle fairing demands meticulous surface preparation followed by expert painting techniques. The process begins by thoroughly cleaning the fairing panels to eliminate all dirt, grease, and any existing residues. This step is essential to avoid imperfections and ensure that subsequent coatings adhere properly. For materials like fiberglass or ABS plastic—both popular choices for fairings—a gentle sanding with 600 to 800 grit pads creates a subtle roughness. This surface texture enhances primer and paint bonding without scratching or damaging the base material.
Choosing the right primer is crucial. It acts as a sealant, smoothing out minor surface inconsistencies and providing a uniform base that ensures the paint applies evenly and resists peeling. The primer must match the substrate; plastics often require specific formulations that promote adhesion. Once the primer fully cures, applying the base coat involves maintaining a consistent spray distance and smooth, overlapping motions. This avoids runs or thick spots, contributing to a flawless surface.
Building up the color coat in multiple thin layers rather than one heavy pass encourages vibrant, uniform saturation while minimizing drips. Between coats, sufficient drying time prevents defects and facilitates a richer finish. The final and most protective layer is the clear coat, which confers a high gloss, shields against UV damage, scratches, and weathering, and reinforces overall durability. Modern clear coats can also incorporate ceramic additives for additional wear resistance and easier cleaning.
Customization opportunities flourish at this stage. Mixing in special effect pigments or subtle additives during the color coat can create eye-catching finishes like chrome or fluorescent sheens. These personalized touches elevate the fairing’s aesthetics, reflecting the rider’s unique style.
Throughout this process, ensuring all surfaces are clean and dry before applying adhesives or assembly aids is vital. Proper curing of these components stabilizes mounting points against vibration and motion stresses often experienced on motorcycles. This attention to detail guarantees both beauty and structural integrity in your finished fairing.
For more insights on selecting materials and techniques to complete your custom motorcycle fairing, explore expert resources available at your trusted motorcycle fairings source.
2. Durability and Design: The Role of Protective Coatings Amid Economic and Cultural Influences in Motorcycle Fairing Finishing
Applying protective coatings to your custom motorcycle fairing is crucial not only for aesthetic appeal but also for long-term durability. These coatings, such as automotive-grade epoxies and ceramic finishes, shield the fairing from UV damage, moisture, and chemicals encountered on the road. Their ability to bond effectively with typical fairing materials like fiberglass and ABS plastic depends highly on careful surface preparation—scuffing and priming ensures adhesion and prevents premature peeling. A multi-layered application process is common, beginning with primer, followed by base color coats, and sealed with clear coats or polymer-based sealants that provide gloss and toughness.
The economic landscape surrounding finishing materials reflects a balance between quality and cost. While pre-painted kits save time and often deliver consistent results, they limit customization scope compared to hand-applied paint jobs. Material choice, paint quality, and application methods impact the overall expenditure and the fairing’s lifespan. Investing in durable finishes can also enhance a motorcycle’s resale value by preserving its appearance and structural integrity. The market offers a wide range of aftermarket options for varying budgets, influenced further by discounts or bundled services in certain regions.
Geopolitical factors can affect access to specialty finishing supplies. Trade restrictions and tariffs may raise prices or reduce availability of high-performance coatings that originate internationally. Additionally, environmental regulations push manufacturers toward water-based paints with lower volatile organic compound emissions, sometimes requiring users to adapt techniques or accept slight differences in finish characteristics.
Beyond technical and economic considerations, customized finishing embodies a rich cultural expression within rider communities. Unique paint schemes, sponsor logos, and race-replica designs allow enthusiasts to convey identity and pride, fostering a sense of belonging. Expanding inclusivity brings new perspectives on safety and aesthetics, encouraging diverse design approaches and product features tailored to various rider demographics. As youth engagement grows, responsible manufacturing also ensures safety without compromising creative freedom.
For a deeper dive into selecting compatible coatings and mastering application techniques for your project, resources like the detailed guides on custom motorcycle fairings and finishing can offer valuable insights tailored to DIY fabricators.
Final thoughts
Understanding the complete process of making your own motorcycle fairing—from conceptual design through to the final finishing touches—enables business owners to deliver superior, custom solutions that meet market demands. Each stage contributes vital expertise: designing ensures form and function align with rider needs; molding lays a foundation for reproducible, precise panels; fabrication turns concepts into durable realities through material mastery; fitting guarantees safe and aesthetic integration; and finishing elevates the product’s appeal and longevity. Embracing these stages equips businesses to expand their product lines, attract discerning customers, and establish an edge in the fiercely competitive motorcycle customization industry. Ultimately, investing in the craftsmanship and knowledge behind custom fairing production is an investment in sustainable business growth and customer satisfaction.
Ready to elevate your ride? Summit Fairings delivers premium, custom-fit fairings that blend style and durability. Whether you’re chasing speed or turning heads, we’ve got your bike covered. Don’t wait—transform your machine today. Click, customize, and ride with confidence. Your perfect fairing is just a few clicks away. Act now!
About us
undefined