Introduction
In the competitive motorcycle repair market, understanding motorcycle fairing fillers is essential for craftsmanship and customer satisfaction. Fairing fillers serve not only to repair surface blemishes but also to maintain the aesthetic integrity and function of motorcycle fairings. This article dives deep into the various types of motorcycle fairing fillers available, techniques for effective application, a comparative analysis of options, and critical safety compliance measures. Each chapter is designed to empower business owners with the knowledge necessary for making informed decisions, thus leading to higher-quality repairs and improved customer trust.
Tables of Contents
Chapter 1: Exploring Advanced Materials for Motorcycle Fairing Fillers
- The Material Science Behind Optimal Motorcycle Fairing Fillers
- Balancing Costs and Benefits: The Economic Landscape of Motorcycle Fairing Fillers
Chapter 2: Mastering Motorcycle Fairing Filler Application Techniques for a Flawless Finish
- Crafting a Seamless Repair: The Art of Preparing and Applying Motorcycle Fairing Filler
- Crafting a Seamless Finish: Essential Techniques for Sanding and Priming Motorcycle Fairing Filler
Chapter 3: Unpacking the Variety: How Different Materials Shape Motorcycle Fairing Fillers
- Examining Material Choices: Their Functions and Benefits in Motorcycle Fairing Repairs
- Precision in Repair: Techniques and Efficacy of Motorcycle Fairing Fillers
Chapter 4: Navigating the Essential Standards of Motorcycle Fairing Filler Selection
- Prioritizing Safety in Motorcycle Fairing Filler Choices: Compliance and Performance In Focus
- Mastering Application Techniques for Motorcycle Fairing Fillers to Guarantee Safety and Compliance
Chapter 1: Exploring Advanced Materials for Motorcycle Fairing Fillers
1. The Material Science Behind Optimal Motorcycle Fairing Fillers
When delving into the realm of motorcycle fairing fillers, an understanding of the underlying material science adds profound insight into the decision-making process for repair and modification strategies. The choice of filler material directly impacts performance, weight, cost, and production methodologies, making the study of these materials a pivotal element for both manufacturers and enthusiasts alike. Among the various options found in the composite materials landscape, fiberglass, carbon fiber, and a mix of composites with materials such as Kevlar and polypropylene mar the playing field.
Fiberglass has long held a prominent position in motorcycle fairing construction due to its favorable strength-to-weight ratio and relatively affordable cost. By combining fiberglass cloth with either epoxy or unsaturated polyester resin, manufacturers can utilize techniques like hand lay-up or vacuum bagging to create components that exhibit impressive rigidity and durability. While fiberglass performs admirably for numerous applications, its denser nature can deter its use in high-performance racing or lightweight designs where every gram matters.
In contrast, carbon fiber has emerged as the preferred choice for high-performance motorcycle fairings, celebrated for its unrivaled strength-to-weight ratio and remarkable fatigue resistance. Specifically, 3K dry carbon fiber has gained traction within racing circuits and high-end modifications due to its exceptional tensile strength and modulus properties. This material’s aesthetic appeal, showcased through its unique woven texture, adds to its desirability among enthusiasts. Carbon fiber’s fabrication techniques, including vacuum infusion and autoclave curing, ensure optimal resin distribution while minimizing voids, resulting in components that not only meet OEM standards but also deliver on both performance and visual charm. Although the financial investment for carbon fiber components is considerably higher than its counterparts, the benefits it brings in enhancing dynamic capabilities and overall visual aesthetics is often justified in the competitive motorcycle scene.
Beyond single-material compositions, the integration of hybrid composites represents an innovative solution that balances performance with cost-efficiency. Utilizing wet-lay carbon fiber or developing carbon-Kevlar hybrids demonstrates the drive toward combining varied properties to meet specific needs. Such composites leverage the high stiffness of carbon fiber against the toughness of Kevlar, making them ideal for applications requiring high impact resistance—such as the edges of fairings or crash-prone areas. The delicate balance between these materials ensures that manufacturers can create products that endure impacts while still maintaining the performance characteristics vital to motorcycling.
The innovation does not end there; the introduction of engineering plastics through injection molding processes has reshaped the landscape for specific models. Materials like ABS are now used in lower fairings, providing impressive dimensional stability (±0.5 mm tolerance) and rapid production capabilities. Although these engineering plastics may slightly lack in stiffness compared to composites, their impact resistance and cost-effectiveness deliver significant advantages for mass-production motorcycles, ensuring durability without breaking the bank.
From a materials science perspective, the choice of filler material for motorcycle fairings reflects a complex interplay of multiple optimization objectives. Engineers and manufacturers must continually assess mechanical performance, thermal stability, corrosion resistance, manufacturability, and economic feasibility. The current trend involves a tactical selection of materials—whether fiberglass, dry carbon, wet carbon, or engineering plastics—tailored to the specific use cases such as street riding, racing on tracks, or the production line.
The future of motorcycle fairing materials is ever-evolving, shaped by technological advancements and consumer demands. Research efforts are increasingly focused on discovering lighter composites with superior mechanical properties, revealing a promising landscape for new entrants in the market. The interplay of sustainability considerations adds another layer of complexity; clients are keen to explore eco-friendly alternatives that do not compromise the performance attributes essential for motorcycle safety and operation.
As the material science landscape continues to evolve, staying educated on developments is critical for both manufacturers and motorcycle owners alike. Engaging with current trends fosters a deeper understanding of how materials not only influence immediate repairs but also lay the groundwork for long-term vehicle performance. Motorcyclists seeking replacements or upgrades for their fairings are encouraged to explore trusted resource platforms for OEM-grade parts that leverage these advanced materials.
For those interested in comprehensive solutions, fairings tailored to specific models are just a few clicks away. Ensure that your motorcycle is equipped with high-performance parts that not only enhance safety but also elevate aesthetic appeal. Such attention to detail can turn routine repairs into opportunities for upgrading your machine’s capabilities, enhancing both performance and owner satisfaction.
2. Balancing Costs and Benefits: The Economic Landscape of Motorcycle Fairing Fillers
When exploring the realm of motorcycle fairing fillers, it is imperative to delve into the economic implications that underpin material choices. The economic landscape concerning motorcycle fairing fillers is not merely a matter of immediate costs; it encompasses broader considerations, including long-term value, durability, and sustainability. Material selection plays a pivotal role in shaping production costs, maintenance expenses, and ultimately, the value retained in the vehicle.
The choice of filler materials can drastically influence manufacturing efficiency and material acquisition costs. High-performance materials such as carbon fiber or fiberglass-reinforced polymers present compelling advantages; they boast superior strength-to-weight ratios essential for performance-oriented motorcycles. However, they also come with significant upfront costs due to their complex fabrication processes and the pricier raw materials involved. On the contrary, more cost-effective fillers—like standard thermoplastics or polyurethane foams—present an enticing option for manufacturers aiming to keep initial production costs low. Yet, the attraction of lower prices must be balanced against potential compromises in durability and resistance to environmental conditions.
Consideration for lifecycle costs sheds light on the value equation. While an initial investment in a higher-end fairing filler material might lead to increased upfront costs, the long-term benefits can paint a different picture. More durable fillers tend to require fewer repairs over time, leading to lower maintenance expenses and a decrease in the frequency of replacements. For instance, polyurethane fillers may incur lower initial costs than their fiberglass counterparts, but their lower resilience under repeated stress and exposure to environmental factors can translate into higher long-term costs. Therefore, striking a balance between material choice and financial implications is crucial in making informed decisions.
Sustainability is another recent trend that influences the economic landscape of motorcycle fairing fillers. The introduction of sustainable materials, such as jute fiber-reinforced epoxy composites, reflects a growing industry emphasis on environmental responsibility. These materials reduce reliance on petroleum-based resources and align with evolving regulatory frameworks and consumer preferences for eco-friendly products. Brands embracing sustainable options often find themselves with an enhanced company image and improved market competitiveness. This trend dovetails with shifts in consumer demand—many motorcycle enthusiasts today prioritize brands that demonstrate environmental stewardship, potentially translating their values into purchasing decisions. Thus, opting for sustainable fairing fillers does not merely satisfy regulatory compliance; it may also open new market avenues and enhance profitability through improved brand value.
Moreover, the integration of advanced composites in motorcycle manufacture has demonstrated a pivotal shift in the industry. For instance, the lightweight nature of these materials means less energy is required for operation, impacting the overall cost of ownership from a fuel efficiency perspective. Motorcycles employing high-tech fillers tend to have enhanced performance metrics, which can be particularly valuable in a market that is increasingly sensitive to performance measures as selling points. This performance advantage can positively affect resale values, allowing manufacturers or resellers to command higher prices in competitive marketplaces. Therefore, thoughtfulness in material selection not only serves practical functions but also elevates the economic stance of the motorcycle in the eyes of potential buyers.
In essence, navigating the economic implications of motorcycle fairing filler materials demands a comprehensive perspective that spans immediate costs to long-term financial outcomes. Each material presents a unique blend of benefits and drawbacks that must be weighed carefully against the backdrop of the motorcycle’s intended use—be it casual riding, racing, or off-road adventures. A material that excels in performance might attract enthusiasts while justifying the higher price tag through longevity and enhanced aesthetic retention. Alternatively, a more economical filler might appeal to budget-conscious riders or manufacturers focused on reducing immediate expenditures.
In conclusion, as the motorcycle industry evolves, the economic aspects of fairing material selection are becoming increasingly intricate. Understanding the ramifications of choosing one filler over another involves a multifaceted assessment of costs, sustainability, maintenance, and performance. This multifaceted approach allows manufacturers and consumers to make informed choices that optimize both financial outlay and motorcycle quality. As motorcycling enthusiasts seek to balance performance with affordability, assessing the long-term value of their choices in fairing fillers will undoubtedly influence the future landscape of motorcycle manufacturing and consumer preferences. Manufacturers and consumers alike must remain vigilant about these economic paradigms as they navigate the evolving shifts in motorcycle technology and market demands.
For those interested in exploring specific fairing options that might best suit their objectives, a glance through dedicated collections can unveil suitable choices, such as those available for Honda, Suzuki, and Yamaha models. Understanding the versatility of materials available, alongside their economic implications, can significantly enhance decision-making processes and ultimately, the satisfaction derived from motorcycling experiences.
Chapter 2: Mastering Motorcycle Fairing Filler Application Techniques for a Flawless Finish
1. Crafting a Seamless Repair: The Art of Preparing and Applying Motorcycle Fairing Filler
When it comes to restoring the aesthetics and structural integrity of motorcycle fairings, the application of filler is a critical step that demands attention to detail. Effective application techniques begin well before the filler touches the fairing; they root deeply in a meticulous process of surface preparation and treatment that sets the foundation for a successful repair.
The journey begins with cleaning the motorcycle’s bodywork. This initial step cannot be overstated. A clean surface is essential for ensuring maximum adhesion of the filler, as contaminants can lead to a weak bond and premature failure of the repair. It is imperative to remove dust, grease, and any remnants of old paint. To thoroughly eliminate oils or residues, utilizing a degreaser specifically designed for plastics or painted surfaces is advisable. After engaging in a comprehensive cleaning round, be sure to allow the area to dry completely. It’s critical to recognize that moisture can create bubbles or lead to poor bonding in the filler, resulting in an unattractive finish and reduced longevity.
With a clean slate, the next task is the preparation of the surface itself. This entails lightly sanding the area where the filler will be applied. Employ fine-grit sandpaper, typically ranging from 400 to 600 grit. The objective here is to create a slightly rough texture—effectively increasing mechanical bonding between the filler and the original fairing surface. It’s imperative to be cautious during this process to avoid sanding too deep, especially on delicate plastic components, as this may compromise the structural integrity of the fairing. Once sanding is complete, wipe down the area with a tack cloth or a lint-free rag that has been dampened with isopropyl alcohol. This step is essential to remove fine particles that may interfere with the adhesion of the filler, ensuring an impeccable application.
After preparing the surface, attention turns to mixing the filler. It is crucial to follow the manufacturer’s instructions closely when combining components, especially in a two-part epoxy system. An accurate mix ratio not only affects the curing process but also determines the overall strength and flexibility of the filler. Taking the time to achieve a precise mixture can prevent issues down the line, enhancing both the durability and appearance of the repair.
Next comes the application of the filler, a step that demands both technique and patience. When applying the filler, use a plastic spreader or a flexible putty knife, as these tools allow for a controlled and smooth application. It is advisable to apply the filler in thin, even layers to minimize the risk of shrinkage and cracking. Overloading the area with too much filler in a single application can lead to complications during the curing process. After applying each layer, it’s vital to allow it to cure fully before proceeding with the subsequent application or sanding. Following the recommended curing time as stated in the product guidelines is essential; hurrying this step can yield poor durability and an unsatisfactory finish.
Once the filler application is complete and the final layer has cured, the process shifts to final sanding and finishing. To achieve the best results, progressively sand the filled area using finer grits, typically from 800 to 1500 grit. This gradual approach helps to create an increasingly smooth surface that aligns flush with the surrounding fairing. Careful sanding not only gives the repaired section a refined look but also ensures that it blends seamlessly with the motorcycle’s overall aesthetic. Finally, a polishing compound can be employed to enhance the finish, achieving a factory-like appearance. This step is the crowning touch that reflects the meticulous work invested in the repair process.
To summarize, proper preparation and application techniques for motorcycle fairing filler are the bedrock of ensuring long-lasting performance and captivating aesthetics. From the initial cleaning to the final polishing, each step holds significance in crafting a seamless repair that stands the test of time.
For those seeking additional insights into motorcycle fairing repairs and to dive deeper into the world of fairing restoration, there are many resources available. One such guide can be explored at Motorcycle Fairing Repair Tips. By mastering these techniques, enthusiasts and professionals alike can ensure their motorcycle fairings look immaculate and maintain their durability on the road.
2. Crafting a Seamless Finish: Essential Techniques for Sanding and Priming Motorcycle Fairing Filler
Ensuring a perfect finish on motorcycle fairings after applying fillers requires a blend of technical skills and an artistic touch. The process begins with the careful application of appropriate filler materials, such as flexible glazing putty or marine epoxy fairing compounds. Allowing these materials to cure fully—typically taking around 4 to 5 hours—is crucial, as the integrity of repairs directly hinges on this initial step. Rushing into sanding before the filler has adequately cured can compromise the structure of your repair, creating a need for rework that can be frustrating and time-consuming.
Once the filler is completely cured, it’s time to start the sanding process. This involves a series of stages, each designed to progressively refine the surface. The sanding should begin with 120-grit sandpaper. This coarse grit is effective in removing excess material and leveling the surface. It’s essential to apply consistent pressure and to make wide, sweeping strokes, allowing the sandpaper to cover the repair area evenly, which minimizes the risk of creating unsightly dips or uneven edges.
Following the coarse sanding, it is time to move to the intermediate sanding stage. Here, you will switch to 240-grit sandpaper. This step serves two main purposes: it refines the area further and smooths out any visible scratches left from the coarser grit. Ensuring that the repaired area blends seamlessly into the surrounding original bodywork is paramount in delivering a professional finish.
After achieving a satisfactory smoothness with 240-grit, the final stage of sanding involves using 400-grit sandpaper. This fine grit is essential for creating a near-perfectly smooth surface, preparing it for the next steps. Applying too much pressure at this stage can inadvertently scuff the surface, so soft and light-handed techniques work best. The aim is to create a flawless surface that feels smooth to the touch while maintaining dimensions that reflect the motorcycle’s aesthetic design.
Once sanding is complete, the surface must be cleaned thoroughly to prevent any dust or debris from affecting the quality of the next stages. A tack cloth does an excellent job of picking up fine particles, ensuring that the area is pristine and ready for further treatment. Skipping this cleaning step could lead to poor adhesion of subsequent layers, resulting in an uneven finish and requiring additional work.
Before proceeding to prime the repaired area, applying a plastic bonder specifically formulated for motorcycle fairings is crucial, particularly if you’ve utilized epoxy-based fillers or are working with ABS plastics. This plastic bonder acts as an adhesive intermediary that enhances the bond between the filler and the primer, substantially reducing the risk of future delamination or peeling. Following the manufacturer’s recommendations, it is important to allow adequate curing time for this bonding agent, as its effectiveness increases with proper adherence time.
After the bonder has cured, lightly sand the treated area once more. This may seem redundant, but this light sanding ensures a strong mechanical bond with the primer layer, creating a surface that the primer can grip effectively. It’s essential here to use fine sandpaper, typically around 600-grit, ensuring that you are only roughening the surface slightly, rather than removing much material.
Now, we move to the priming stage, a critical moment in the repair process. Selecting a high-quality primer designed specifically for plastic materials is crucial, as it will effectively cover the filled area while providing an even base for painting. When applying the primer, maintain consistent, even strokes, ideally using a spray can for the finest results, as this technique helps prevent drips and thick spots. Multiple light coats will yield a smoother finish than a single heavy application, as each light coat will help the previous layer set without pooling.
Following the priming, patience is vital. Allow the primer to dry completely, following manufacturer specifications before proceeding with painting. The sequence you’ve carefully followed—filling, curing, progressively sanding, applying the bonder, re-sanding, and priming—ensures that the filler will have the longevity needed to withstand the environmental challenges motorcycles often face, such as vibration and fluctuating temperatures.
As an essential note, remember that the final steps towards achieving a painted finish should incorporate additional sanding of the primer layer once it has fully cured. This follows the same principle of seamless blending seen in earlier stages. A final light sanding with 800-grit sandpaper can bring a glass-like smoothness to the primer, which will notably enhance the overall quality of the paint job.
Utilizing careful techniques throughout the repair process not only ensures durability but also significantly improves aesthetic appeal. For anyone looking to repair or modify their motorcycle fairings, mastering these essential techniques of sanding and priming will elevate your project from mediocre to professional-grade. For further guidance on motorcycle fairing repairs, you can refer to detailed tutorials available in dedicated repair manuals or recognized online resources.
Chapter 3: Unpacking the Variety: How Different Materials Shape Motorcycle Fairing Fillers
1. Examining Material Choices: Their Functions and Benefits in Motorcycle Fairing Repairs
Motorcycle fairing fillers play a crucial role in the aesthetics and functionality of motorbike bodies. The choice of material for these fillers directly influences not only the visual appeal but also the durability and protective capabilities of motorcycle fairings. As riders seek to maintain the performance and style of their motorcycles, an understanding of various filler materials becomes vital.
One widely used material in motorcycle fairing applications is polypropylene (PP). This engineering plastic stands out for its remarkable strength-to-weight ratio, making it an excellent choice for both fairing repairs and new designs. For instance, products like SHAD’s motorcycle touring gear, constructed from high-strength polypropylene, exemplify how this material not only withstands impact but also remains lightweight, ensuring that motorcycle design does not compromise performance. PP’s lightweight nature enhances handling and fuel efficiency, which is particularly important for those who prioritize speed and agility on the road.
In addition to polypropylene, riders often find carbon fiber-style materials employed in fairing designs. While not made of genuine carbon fiber, these synthetic variants simulate the luxurious appearance of actual carbon fiber. They are particularly favored for components such as tail sections and windshields, where aesthetics are paramount. This material choice emphasizes not just visual allure but also a sense of exclusivity, catering to riders looking to invest in their motorcycle’s unique identity. The increased visual impact can elevate a motorcycle from ordinary to extraordinary, captivating the attention of onlookers and enhancing the owner’s pride in their ride.
Another material gaining traction in the realm of fairing fillers is leather and synthetic leather. Although traditionally not associated with bike fairing due to their flexible nature, leather’s contemporary application in vintage cruiser modifications demonstrates its versatility. When incorporated into various components like seats and side bags, leather adds a distinct tactile quality and enhances the overall luxury feel of the motorcycle. This unique material appeals to enthusiasts seeking a retro or classic aesthetic, further pushing the boundaries of conventional motorcycle design.
On a more pragmatic note, metal materials, particularly stainless steel, are often used in structural applications where security and durability are critical. For example, stainless steel components like mounting hardware and brackets are ideal as they resist corrosion and withstand significant stress, ensuring the integrity of the motorcycle long-term. They serve a dual purpose: offering a strong foundation for fairings while also contributing to the durable nature of the bike overall. This resilience is especially essential for those who ride in various environmental conditions, where exposure to moisture and humidity can compromise weaker materials.
The impact of these materials on motorcycle performance and aesthetics manifests in several critical areas.
-
Visual Appeal and Customization: The materials chosen for fairing fillers significantly enhance the motorcycle’s personality. Riders drawn to carbon fiber-like appearances often enjoy the sleek and modern look that aligns with competitive racing vibes. Those opting for leather components embrace a nostalgic essence that connects their ride to history and craftsmanship. Thus, material selection becomes a reflection of personal style, allowing for extensive customizability.
-
Protection and Resilience: Materials such as high-strength polypropylene and metals like stainless steel provide superior protective qualities, guarding against impacts while retaining the motorcycle’s structural integrity. Their ability to absorb shocks and withstand the elements makes them indispensable for lovers of long-distance travel where durability is a must. In contrast, materials that prioritize appearance may compromise on protective aspects, highlighting the importance of balancing aesthetics with performance needs.
-
Weight and Efficiency: Lightweight materials not only contribute to performance but also enhance maneuverability, especially in sports bikes. For instance, the use of polypropylene ensures that the bike remains agile, promoting a better riding experience at higher speeds. Conversely, while heavier metal components provide strength, they can inadvertently affect the bike’s overall weight distribution if not carefully integrated, demanding thoughtful design approaches.
-
Cost-Effectiveness and Maintenance: Cost and ease of maintenance are pragmatic considerations in material selection for fairing fillers. While premium materials offer longevity and performance, they can incur higher upfront costs. Standard plastic fillers, such as those made from polypropylene, may be more budget-friendly and suitable for the average rider seeking functional repairs without luxury concerns. Understanding the trade-offs between initial investment and long-term maintenance can help riders choose wisely according to their riding style and budget constraints.
In summary, the choice of motorcycle fairing filler materials encompasses far more than mere aesthetics. Material implications extend to visual appeal, protective capabilities, operational efficiency, and cost considerations, marking the decision-making process as multifaceted. Riders aiming for performance must weigh the functional properties against their design aspirations to ensure that their choices not only enhance looks but also embody the essence of riding. As riders explore options in materials like polypropylene, carbon fiber styles, leather alternatives, and metals, each choice invites a deeper conversation about the interplay between functionality and artistry in motorcycle repair and enhancement. To dive deeper into various fairing options, riders can visit specific collections tailored to their motorcycle models, such as the Honda CBR1000RR fairings or the Yamaha YZF-R1 fairings, to see how different fillers influence their aesthetic and functional appeal.
2. Precision in Repair: Techniques and Efficacy of Motorcycle Fairing Fillers
When restoring or customizing motorcycle fairings, the selection and application of fillers are pivotal to delivering a finish that is not only visually appealing but also structurally sound. Motorcycle fairing fillers serve a fundamental purpose in the repair process, addressing imperfections such as scratches, dents, and seams. The effectiveness of these fillers significantly depends on the adherence to proper application techniques, which ultimately dictate performance outcomes and aesthetic results.
To begin, the cornerstone of successful filler application lies in surface preparation. This crucial phase cannot be overstated; it directly influences how well the filler adheres to the fairing material. The surface must be scrupulously clean and dry, devoid of any grease, dust, and remnants of previous finishes. Employing a systematic sanding approach using progressively finer grits, typically starting from 80 to 120 grit, creates an adequate “key” for the filler to bond effectively, ensuring a robust and durable repair.
Once the surface is primed for application, the next step involves mixing the filler. Most fillers, especially putty-based ones, require precision in their mixtures, blending a resin component with a hardener. It is essential to adhere strictly to the manufacturer’s recommended mixing ratios. Deviations can lead to unfavorable outcomes—too much hardener may induce rapid curing and excessive heat, whereas insufficient hardener can result in weak adhesion and defects in the filler itself. This careful balance is vital for achieving a repair that is both resilient and reliable.
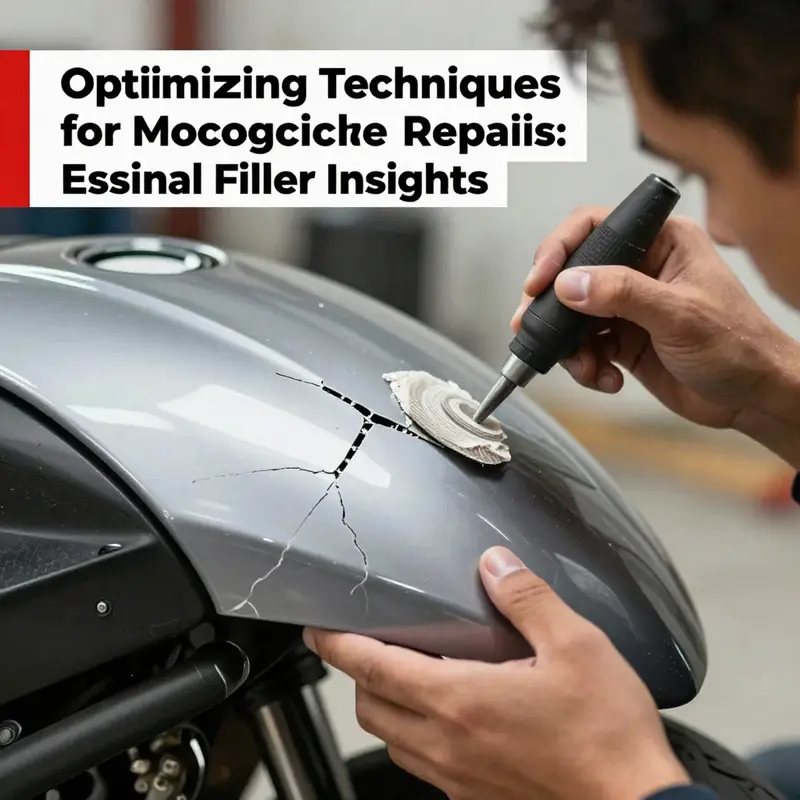
With the filler mixed, application can begin. Techniques here can vary based on the size of the imperfection being addressed. For small dents, it is advisable to apply a thin initial layer of filler. This allows the filler to set partially before adding more material, contributing to a smoother end result. For larger areas, applying a somewhat thicker layer is necessary; however, caution must be exercised not to overfill. The practitioner should aim for a slight overfill to accommodate for subsequent sanding, ensuring that the final surface is level and cohesive with the surrounding fairing.
The curing process must be observed carefully, with respect to the product specifications. The curing time can range widely, from 30 minutes to several hours, dependent on environmental conditions and the characteristics of the filler used. Inadequate curing time can lead to underperformance in the filler’s structural integrity, underscoring the importance of patience and adherence to guidelines.
As the filler cures, the focus shifts to sanding and finishing. This step starts with coarser grits to remove excess material and transitions to finer grits for a polished appearance. The use of a sanding block is advised, preserving a flat surface and ensuring an even finish. Following sanding, it is critical to wipe the repaired area with a damp cloth to eliminate all dust before applying primer and paint, as this facilitates a better bond with the topcoat and enhances the overall finish.
The performance of various fillers can be categorized, each exhibiting distinct advantages and disadvantages. A comparative assessment of filler types reveals significant insights into their applicability in motorcycle repairs:
-
Epoxy Putty (e.g., Bondo): Known for unmatched strength and durability, epoxy fillers excel in handling structural repairs. Their resistance to impacts and chemicals is remarkable, and they can be easily sanded. However, the mixing process can be sensitive, as uneven mixtures may lead to heat generation or brittleness when applied excessively thick. Best utilized for large dents and significant structural repairs, epoxy putties are ideal where mechanical strength is paramount.
-
Acrylic-Based Fillers (e.g., PDR Filler, Bodyshop Epoxy): These fillers offer a compelling advantage in terms of their quicker curing times and reduced heat generation during application. Their elasticity is beneficial in areas subject to vibrations and temperature fluctuations. Nevertheless, they may not withstand severe impacts as robustly as epoxy fillers. Suitable for general-purpose repairs and minor dents, acrylics are user-friendly, making them a popular choice for both amateur and professional repair work.
-
Polyester Putty (Traditional): A budget-friendly choice, polyester fillers are widely available and straightforward to apply. However, their high exothermic reaction during curing can produce toxic fumes and diminish the filler’s overall durability. They may crack under stress and often require longer curing times. Polyester putties are best for basic repairs where cost and simplicity take precedence over performance.
Ultimately, while the quality of the filler matters, the skillful application of these materials is paramount. A lower-quality filler applied with precision can yield satisfactory results, while a high-grade filler mishandled can lead to failures. To maximize the aesthetics and longevity of repairs, using a two-stage process is often advisable. An initial layer of a robust epoxy provides essential structural support, laying the groundwork for a superior finish with a top layer of flexible acrylic filler, which is ideal for achieving a seamless, paintable surface.
For those who appreciate comprehensive guidance, various resources abound, offering in-depth video tutorials and expert insights into motorcycle fairing repair techniques. Effective repair, however, is not solely about the materials but also about the craftsmanship involved in their application, ensuring that every motorcycle not only looks its best but also retains its inherent strength and performance capabilities for the long haul.
Chapter 4: Navigating the Essential Standards of Motorcycle Fairing Filler Selection

1. Prioritizing Safety in Motorcycle Fairing Filler Choices: Compliance and Performance In Focus
Selecting the right motorcycle fairing filler is crucial for both aesthetic and performance considerations, particularly in terms of safety and compliance with industry standards. As riders, we often prioritize speed and style, but the integrity of our motorcycle’s fairings plays an essential role in maintaining safety on the road. Motorcycle fairing fillers, designed to repair surface blemishes such as scratches, dents, and seams, function as the first line of defense against structural failures and aesthetic degradation.
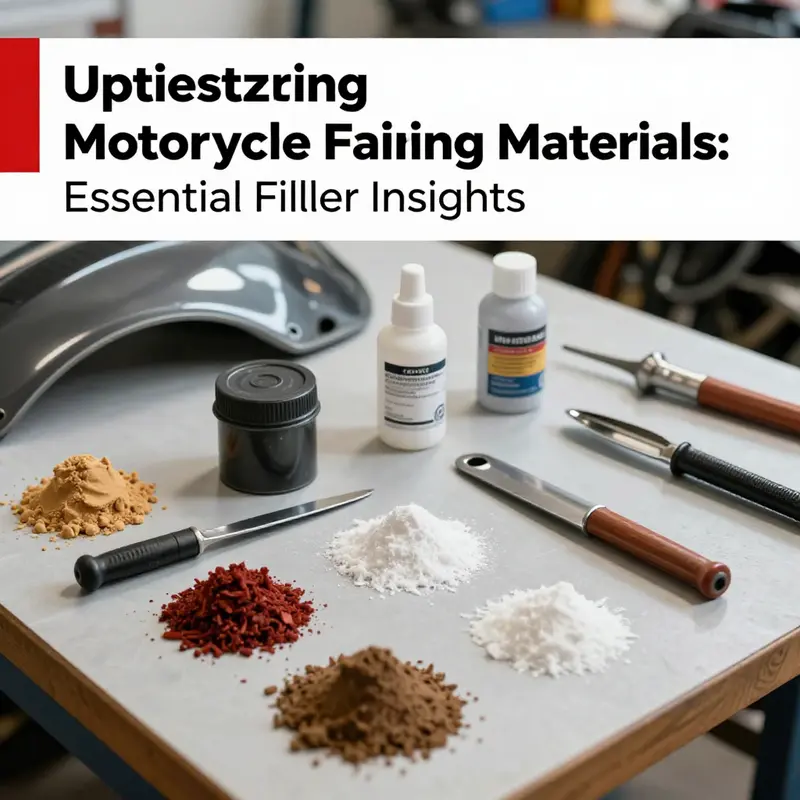
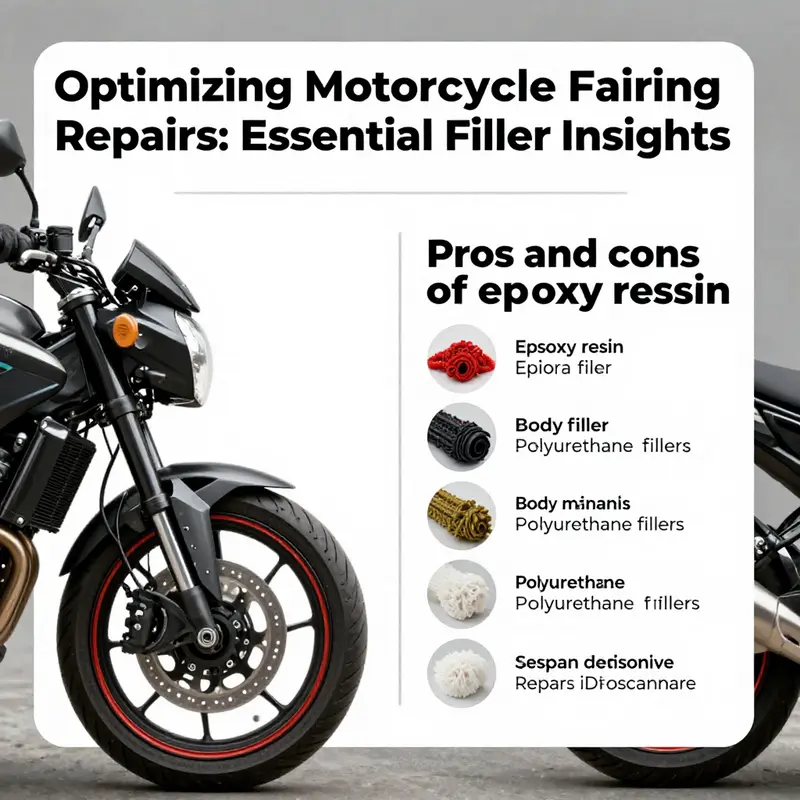
When faced with damaged fairings, choosing suitable filler materials can significantly impact the performance of a motorcycle. Among the most prevalent options available are epoxy resins, body fillers, and polyurethane fillers, each with distinct characteristics suited for specific applications. Epoxy resins are lauded for their excellent adhesion and durability, making them ideal for filling larger depressions or structural damages. On the other hand, body fillers, commonly used in both automotive and motorcycle arenas, provide ease of application and can be sanded down to prepare for painting. Each filler type has its pros and cons, influencing not only the repair process but also the longevity of the fairing.
Understanding Compliance is fundamental when selecting a fairing filler. Many filler products are manufactured to meet specific industry standards, ensuring that they perform well under a range of conditions. It is crucial for both DIY enthusiasts and professional mechanics to familiarize themselves with these standards to avoid using subpar materials that can lead to compromised safety. Compliance not only guards against structural failure but also aligns with regulatory guidelines that aim to protect the rider’s safety. Products that lack certification may not withstand the environmental stresses a motorcycle endures, such as exposure to UV light, extreme temperatures, and mechanical vibrations. Therefore, seeking out fillers approved by industry standards or those recommended by original manufacturers is vital for ensuring a safe riding experience.
Performance is tied closely to the characteristics of the filler used. For instance, polyurethane fillers are celebrated for their flexibility and impact resistance, making them a popular choice for areas subject to high vibrations or temperature variations. Unlike more rigid materials, these fillers can adapt to the dynamic environment of a motorcycle, helping to stave off cracking or separation over time. Ensuring that selected fillers offer performance fidelity similar to or exceeding that of the original material is essential. Should a filler fail to maintain such standards, it compromises not only the look of the motorcycle but can also lead to serious safety hazards.
The application process of motorcycle fairing fillers must be approached with diligence. Proper preparation, which includes cleaning the surface, sanding, and applying a primer, ensures that the filler adheres correctly to the fairing. Without careful preparation, even the highest quality fillers can fail to perform effectively, leading to uneven finishes or structural issues. Following the recommended guidelines for the application of fillers is important for achieving a professional-grade repair. Techniques such as feathering the edges of the filler to blend it seamlessly with the surrounding surface and achieving a gradual transition in thickness can contribute to a more aesthetic and reliable repair.
Furthermore, it is advisable to engage in top-coating techniques post-application. A quality paint job not only enhances the visual appeal but also protects the filler from environmental damage. When top-coating, selecting products that are compatible with the filler used is vital. Non-compatible products could react poorly and result in a compromised structural integrity. Here, consulting with manufacturer recommendations becomes imperative to guarantee an effective outcome.
Choosing fillers should not be a decision driven solely by cost. Opting for inexpensive, non-compliant fillers often seems like a quick fix, but this can lead to more costly repairs in the long run due to failures. Certified products may carry a higher initial price tag but offer reassurance in terms of safety and longevity. Riders must weigh the cost against the potential risks associated with inadequate repairs. The investment in high-quality filler materials should be seen as an investment in one’s safety on the road.
As enthusiasts increasingly engage in customizing their motorcycles, the importance of using compliant, performance-driven fairing fillers cannot be overstated. Modifications often require precision and skill, and any shortcuts can diminish the results and safety of the motorcycle. While the allure of aesthetic improvements and performance modifications is powerful, it is essential to remember that structural safety must remain at the forefront of any modification or repair work.
In light of these considerations, riders should look to trusted sources for their parts and repair materials. For those in search of reliable motorcycle fairing fillers, exploring OEM (Original Equipment Manufacturer) parts or certified aftermarket options can offer peace of mind. By prioritizing safety and compliance alongside performance, riders can ensure that their motorcycle not only looks good but also performs reliably on the road.
In conclusion, the choice of motorcycle fairing filler is not merely a benign decision; it reflects a rider’s commitment to ensuring their own safety as well as the health of their motorcycle. Utilizing compliant and high-performing materials, compounded with meticulous application techniques, lays a crucial foundation for a safe and aesthetically pleasing ride. Investing in superior fillers protects the motorcycle’s integrity while safeguarding the rider for future journeys, underscoring that in the world of motorcycle maintenance, safety should always reign supreme. For insights into specific parts and repair solutions, enthusiasts may explore collections relevant to their motorcycles.
2. Mastering Application Techniques for Motorcycle Fairing Fillers to Guarantee Safety and Compliance
The effective application of motorcycle fairing fillers plays a crucial role in both the aesthetic appeal and structural integrity of motorcycle fairings. It is essential to master the proper techniques and adhere to best practices to ensure not only a flawless finish but also safety and compliance with standard regulations. This subchapter delves into these application strategies while emphasizing the importance of using high-quality fillers tailored to specific motorcycle models.
One of the first steps to achieving optimal results is the careful selection of the appropriate filler material. Each type of filler—be it epoxy resin, body filler, or polyurethane—comes with unique properties suited to specific repair needs. Epoxy resins are favored for robust adhesion and durability. They are ideal for larger depressions or structural issues, especially in high-stress areas of the fairing. On the other hand, body fillers are commonly used for medium-sized dents, facilitating smooth sanding and painting, which allows for artistic expression in customization. Polyurethane fillers, known for their flexibility and impact resistance, are particularly effective in areas subjected to significant vibration or temperature fluctuation, making them an excellent choice for various motorcycle fairings.
After selecting the right filler, preparation becomes the next pivotal step. The surface of the fairing must be free from contaminants, dirt, and grease before any repair work begins. Using a degreaser or rubbing alcohol during this phase can significantly improve adherence. Once the surface is clean, sand the area around the defect using a sandpaper grit that suits the filler type. This creates a rough texture that enhances bonding and ensures a stronger repair. For deeper chips or significant cracks, it may be beneficial to widen the affected area slightly to allow the filler to enter more securely, thereby enabling a more lasting repair.
Application of the filler itself requires precision and care. It’s crucial to follow the manufacturer’s instructions on mixing ratios and curing times. Over or under-mixing can lead to weak spots in the repair, jeopardizing both aesthetics and structural integrity. When applying the filler, use a spreader or putty knife at a slight angle for an even distribution over the surface. It’s advisable to apply multiple thin layers rather than one thick application. This technique not only speeds drying but also reduces the chances of air pockets forming within the filler, which can lead to weaknesses as the motorcycle is subjected to vibrations and harsh conditions on the road.
Once the filler has cured properly—typically overnight for body filler and shorter for quick-setting epoxies—it’s time for sanding. Start with a coarser grit to level the surface close to the fairing, followed by finer grits until the surface feels smooth and even to the touch. This step is critical to achieving a finish that matches the OEM (original equipment manufacturer) standards. Testing the surface by touching it can help determine if it requires more sanding; it should not only feel smooth but also look visually uniform.
In parallel with these technical considerations, it is vital to think about safety during the application process. Personal protective equipment (PPE) such as gloves, goggles, and masks should be utilized to protect against inhalation of dust and fumes generated during sanding and filler application. Ventilation is equally important; working in a well-ventilated area can prevent the build-up of hazardous chemicals present in many fillers. Furthermore, tools should be maintained and inspected for any wear and tear, ensuring that they function correctly, which also contributes to safe work habits.
Following the final sanding, the next phase involves priming the repaired area. Priming not only helps in adhering paint to the surface but also reveals any remaining imperfections that need addressing. If any defects appear post-sanding, they should be resolved with additional filler and sanding before moving on to painting. Selecting a paint that matches the fairing’s color is important for achieving an aesthetically pleasing result. Using an automotive-grade paint ensures durability and resilience against UV exposure and weather conditions.
Finally, for those seeking professional-grade results or undertaking extensive customization, it is recommended to use factory-original or certified high-performance products. This not only helps in maintaining brand integrity but also ensures that safety regulations are met, as these products are specifically engineered to provide the strength and durability needed in high-performance motorcycle parts.
By mastering these application techniques, motorcyclists can ensure that their repairs not only look good but also stand the test of time. Utilizing proper filler materials and application techniques is essential to maintaining the motorcycle’s performance and safety. Understanding the nuances of each filler type, combined with rigorous application, prime and paint processes contribute to a finish that not only meets compliance standards but enhances the motorcycle’s overall design.
For a comprehensive approach to sourcing high-quality fairings and related parts, enthusiasts might consider exploring various motorcycle fairing collections that cater to their specific model preferences. By investing in quality fairings and effective repair principles, riders can embark on a journey to restore their motorcycles, ensuring they remain stylish, safe, and road-worthy for many rides to come.
Final thoughts
Understanding and utilizing motorcycle fairing fillers correctly can significantly elevate repair standards and customer satisfaction. By grasping the various materials available, honing application techniques, comprehensively analyzing product performance, and following safety regulations, business owners can enhance their service offerings. This not only leads to higher-quality repairs but also fosters trust and loyalty among customers. The market for motorcycle renovations is robust, and well-informed decisions regarding fairing fillers can be pivotal in capitalizing on this opportunity.
Ready to elevate your ride? Summit Fairings delivers premium, custom-fit fairings that blend style and durability. Whether you’re chasing speed or turning heads, we’ve got your bike covered. Don’t wait—transform your machine today. Click, customize, and ride with confidence. Your perfect fairing is just a few clicks away. Act now!
About us
We are one of the leading motorcycle fairing export sites, with over 3,000 styles across almost all motorcycle models. Buy from summitfairings.com, and pay 10-40% less than the prices on other sites. If you have any questions, we promise we will have your answer within six hours.