Motorcycle fairing pinstriping is an art form that adds both flair and personalization to motorcycles, capturing the attention of enthusiasts and casual riders alike. As a business owner, understanding this customization technique can enhance your offerings and attract a wider clientele looking to distinguish their rides. This article delves into the intricacies of motorcycle fairing pinstriping, examining techniques and tools, material choices, custom design trends, and the distinction between DIY and professional applications. Additionally, we will discuss the importance of pinstriping in the broader context of motorcycle culture, ensuring that you are equipped with the knowledge to capitalize on this popular trend.
Mastering Lines and Curves: Techniques and Tools for Motorcycle Fairing Pinstriping

The craft of pinstriping begins with a clear vision of how lines alter perception. A single, precise stripe can make a fairing appear narrower, longer, or more aggressive. On curved surfaces, pinstripes guide the eye, emphasize flow, and unify separate panels into a coherent silhouette. Achieving that effect depends on three intertwined elements: planning, steady technique, and the right tools and materials. This chapter walks through each element as a practical narrative, blending the freedom of hand work with the predictability of modern materials so riders and builders can choose an approach that matches their skill and goals.
Start with planning. Look at the motorcycle as a collection of planes and curves. Study the fairings from three distances: close enough to see edge details, mid-range to gauge how lines connect across panels, and far enough to sense overall balance. Sketch a few concepts on paper or trace the panels with tracing paper taped to the body. Use simple strokes to test where a line begins and ends. Consider how a stripe will interact with vents, badges, and fasteners. A stripe that begins at a headlight cutout and terminates at a lower fairing lip can create a purposeful diagonal motion; a mirrored pair that follows the tank and tail can reinforce symmetry. Planning ensures every stripe has intent.
Masking is the bridge between concept and paint. High-quality pinstriping tape allows you to define edges without relying on a ruler alone. Apply tape in sections, not one long run on complex curves. Overlap tape slightly at joints and use a gentle finger roll to seat it to the contour. For tight radii, cut slits on the backing side of the tape to let it conform without stretching. Tape also protects panel adjacent areas during airbrush or spray work when a bordering fade or shadow is part of the design. For freehand brush lines, tape can serve as a temporary guide to train a steady stroke; remove it while the paint is still wet to avoid lifting cured layers.
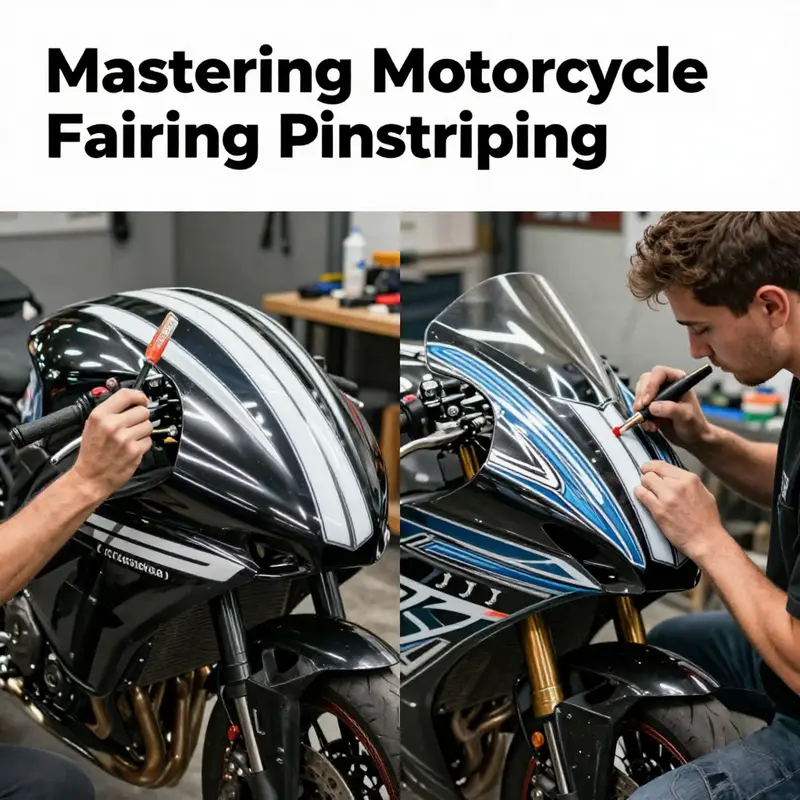
Brush technique is the heart of traditional pinstriping. Specialized brushes with long, natural bristles hold a bead of paint and release it smoothly. Load the brush with a controlled amount of enamel or lacquer paint thinned to the right viscosity. A bead that’s too thin spawns runs; too thick and the brush will skip. Rest your forearm against the bike or a padded support and move the wrist, not the fingers, for longer, fluid strokes. Pulling a line in one continuous motion yields the most consistent width. Short, interrupted strokes can create uneven edges. Keep breathing controlled and eyes focused on the destination, not the brush tip. For tapered ends, use a flicking motion as the brush reaches the termination point. Practice on scrap material until your hand knows the motion.
Decals have evolved into a powerful alternative for those who want precise, repeatable results. Modern vinyl pinstripes come pre-cut in various widths and colorways. They adhere using pressure-sensitive adhesives designed to flex with panels and resist road vibration. Vinyl works best on gentle curves and when a crisp edge is the priority. Application requires a clean surface free of oil and wax. Use a soapy water solution to allow slight repositioning; squeegee out bubbles and allow the adhesive to tack overnight before trimming edges. When panels contain severe compound curves, consider segmenting the decal to avoid puckering, or choose a thinner, more conformable vinyl rated for automotive applications.
Choosing paints and solvents is a technical decision that affects longevity. Enamel paints offer toughness and gloss, while lacquers can produce a fast, bright finish but may require careful layering and more frequent thinning. Reducers are used to fine-tune viscosity; ambient temperature dictates the amount to add. Warm weather calls for slower evaporating reducers to prevent brush drag. Cold conditions need faster reducers so the paint sets properly. Always work in a well-ventilated area and wear appropriate protection. Test a paint and reducer combination on scrap fairing material, then bake or cure per manufacturer guidance if possible. Proper curing prevents soft edges, smudging, and eventual failure under UV exposure.
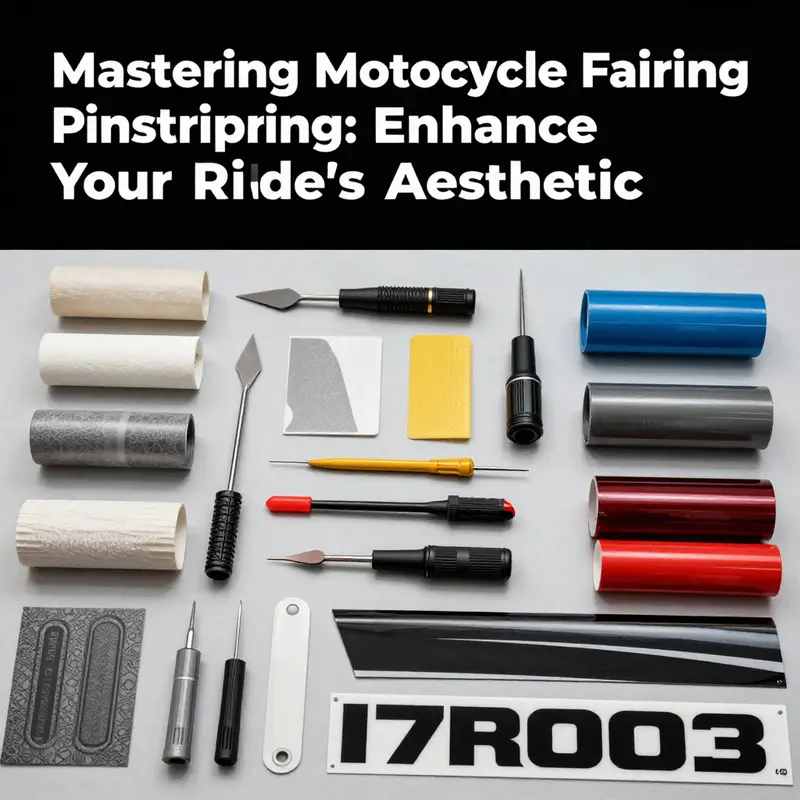
Tools extend beyond brushes and tape. A good kit contains mixing cups for custom colors, a selection of reducers, precision brushes, and a storage box. Other helpful items include a light source that reveals surface imperfections, magnification for detail work, and a steady bench or foam supports to rest panels during paint. For decals, a heat gun helps conform material to mild curves, but use it sparingly to avoid overstretching adhesives. Micron-fine marker pens can lock down transitions or touch up tiny gaps after decal application or painting. Keep a supply of high-grit sandpaper and polish to remove minor surface flaws before the final clear coat.
Surface preparation is often overlooked but is decisive. Clean the fairing thoroughly with a solvent that removes wax and oils. Light scuffing with fine sandpaper promotes adhesion for paint and adhesives alike. When reusing original panels, inspect for cracked clear coats, underlying repair seams, or old adhesive residues that can telegraph through new work. Fill low spots and feather edges of previous paint transitions so pinstripes lay flat. For hand-painted lines over a freshly applied base color, let the base cure fully. A rushed workflow increases the risk of lifting or dulling when subsequent clear coats are applied.
Durability is a function of both method and finish. Hand-painted stripes followed by a high-quality clear coat can endure for years with proper curing. Decals require edge sealing and careful cleaning to remain secure in high-vibration zones. When planning a design near exhausts, chains, or areas prone to frequent contact, favor paint sealed under clear rather than exposed vinyl edges. For racing or heavy-weather use, consider an extra layer of clear specifically formulated for abrasion resistance. Reapply protective films or ceramic coatings as part of routine maintenance to prolong the crispness of the stripe.
Stylistic choices matter: single thin lines create subtle emphasis, while double lines evoke a classic look. Contrast determines visibility; a metallic pinstripe on a matte base behaves differently from a gloss stripe on a gloss base. Metallics and pearls add sparkle but require more careful layering and clear coat technique to avoid mottling. For a modern, minimalist approach, use monochrome tones and mirror symmetry across both sides. For vintage or custom builds, asymmetrical accents and tapered hand-drawn flourishes celebrate the human touch that decals cannot replicate.
Finally, consider the practical pathway from concept to completed stripe. If you lack confidence in freehand technique, start with decals to learn how placement and proportion affect perception. Use that knowledge to sketch and practice brush strokes on the bench. Join communities and study portfolios to expand your visual vocabulary. When taking on a full repaint or a multi-panel wrap, plan pinstripes early so panel joins and fastener placement do not interrupt key lines. A carefully thought-out stripe becomes part of the motorcycle’s language, speaking to motion even when the engine is off.
For riders who want to explore readily available fairing shapes and pre-cut panel templates to practice layouts, the Honda CBR1000RR fairings collection is a useful resource for panel references and dimensions: https://www.summitfairings.com/collections/honda-cbr1000rr-fairings-2012-2016. For a deep dive into techniques, materials, and hands-on tips, consult this detailed external guide on mastering pinstriping methods: https://www.bikeexif.com/how-to-master-motorcycle-pinstriping-techniques-guide
Edge Lines That Endure: Durability of Motorcycle Pinstriping on Fairings
Pinstriping on motorcycle fairings is more than decoration; it is a test of materials, adhesion, and surface prep. The lifespan of a stripe depends on substrate, film type, laminates, and weather exposure. Cast vinyl with UV inhibitors and a protective laminate offers the best long-term performance. Cast vinyl is more stable than calendered, resisting stretching and edge lift. UV inhibitors help resist sun fading. Lamination adds a protective layer against moisture and abrasion, helping maintain edge integrity. The result is lines that stay crisp for years, not months.\n\nCalendered vinyl is cheaper and quicker but less durable. It can shrink, curl at edges, and crack under heat cycles on complex curves. For temporary looks, it’s attractive, but expect more frequent refresh.\n\nSubstrates like PET (polyethylene terephthalate) withstand heat and moisture, maintaining dimensional stability under sun and engine heat. Appropriate adhesives and lamination allow PET to keep lines legible during ride-and-wash cycles.\n\nReflective and specialty materials add safety and unique aesthetics but require careful placement and durable adhesives to avoid glare or fading. Laminates also affect gloss and visibility.\n\nSurface preparation is critical: clean, dry surfaces free of wax/oils; alignment is essential to avoid misfit around curves; edge sealing prevents peeling.\n\nColor, line width, and gloss interact with durability: wider lines tolerate substrate imperfections; fine lines show waviness or micro-tears more readily as the film ages.\n\nIn practice, premium materials, proper lamination, and a careful installation deliver a durable pinstripe that survives sun, rain, and road debris, while decals and hand-painted options offer alternatives with trade-offs.\n\nMaintenance matters: gentle washing, avoiding abrasive cleaners, and periodic refresh to restore crispness as needed.
Signature Strokes: Evolving Trends and Inspirations in Motorcycle Fairing Pinstriping
Signature Strokes: Evolving Trends and Inspirations in Motorcycle Fairing Pinstriping
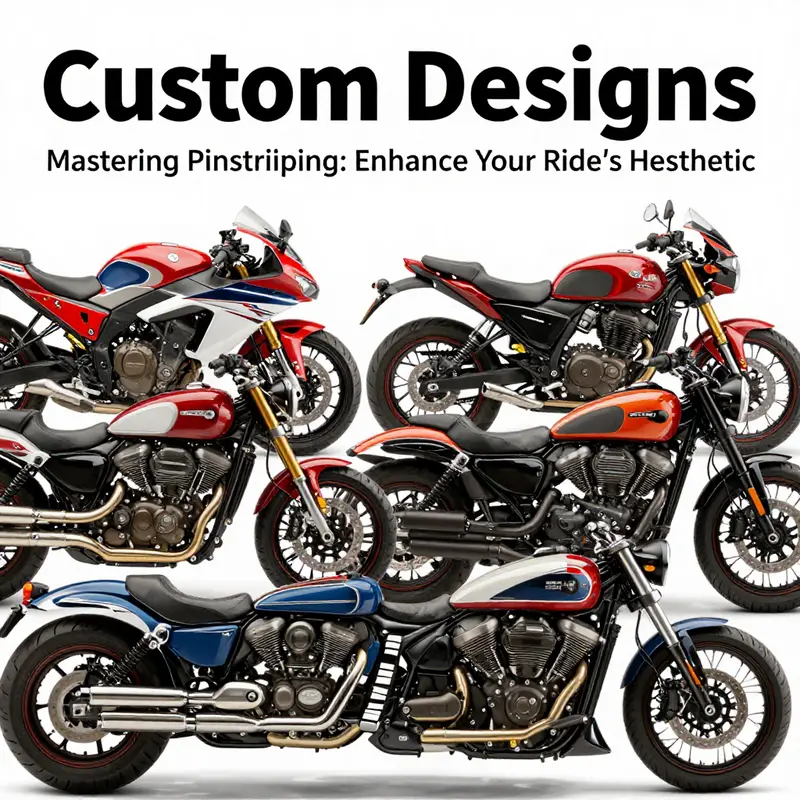
Motorcycle fairing pinstriping occupies a unique crossroads of craft and identity. A few narrow lines can change the character of a bike, accentuate its curves, and tell a rider’s story without words. Over recent years the practice has shifted from purely decorative trim to a layered language of style: hand-drawn flourishes that nod to heritage, digitally influenced motifs that suggest speed, and durable vinyl solutions that let owners experiment without commitment. This chapter explores the creative trends shaping pinstriping today, the sources riders turn to for inspiration, and the materials and techniques that make modern custom designs both striking and practical.
Trends in pinstriping for 2025 reflect a balance between nostalgia and technical innovation. Many builders and hobbyists embrace intricate, hand-painted lines that recall traditional coachwork and vintage motorcycles. These hand techniques often reference tribal shapes and Art Deco geometry, but they are applied with a contemporary sensibility—sharper angles, tighter spacing, and more deliberate negative space. The result reads as handcrafted yet engineered, flattering the fairing’s natural flow while creating visual motion even when the bike stands still.
Parallel to those hand-painted traditions, designs inspired by digital aesthetics have surged. Gradient pinstripes that shift subtly across a surface simulate motion and depth. These gradients sometimes incorporate color-shifting or pearlescent paints, which appear to change hue based on the viewing angle. When combined with metallics, they produce a layered effect: a primary stripe that defines the silhouette and secondary accents that catch light and create contrast. Airbrushing enhances these effects, enabling smooth transitions and soft edges that are difficult to achieve with rigid masking techniques.
Materials and application methods have diversified to match creative ambition. High-quality automotive paints remain the gold standard for hand and airbrush work, prized for their finish and longevity. Yet vinyl pinstripe kits and full-width wraps have become mainstream alternatives. Vinyl’s appeal is practical: it resists weathering, peels off cleanly, and offers textures like matte, gloss, metallic, and carbon fiber look. For riders who value flexibility, this allows seasonal updates—bold stripes for one year, a subtler palette the next—without committing to a permanent repaint.
Choosing between paint and vinyl often comes down to intent. Hand-painted stripes carry prestige and permanence. They are ideal when a rider seeks a cohesive, bespoke identity that integrates with other custom touches: chrome accents, trimmed seats, or bespoke badging. Vinyl excels when the goal is experimentation or when budget and time matter. Modern vinyl materials also mimic painted finishes closely, making them a strong choice for those who want a custom look with minimal downtime.
Inspiration for pinstriping comes from many visual wells. Historical references are evergreen: classic motorcycle liveries, early racing stripes, and the refined ornamentation of coach-built automobiles. Cultural motifs—tribal patterns, Japanese wave forms, or Celtic knots—add a personal or regional narrative. Contemporary influences include geometry from street art, asymmetrical layouts found in modern graphic design, and even interfaces from digital displays, which inspire pixelated or segmented striping.
Visual platforms play a major role in how trends spread. Curated galleries and mood boards accelerate cross-pollination, letting a rider view dozens of approaches in minutes. These collections highlight successful color pairings, common placement strategies, and how pinstripes interact with underlying bodywork lines. Seeing a design applied to a similar fairing can be the deciding factor when adapting a concept to one’s own bike.
Placement choices are as important as color and pattern. The fairing has planes, ridges, and vent cutouts that change how a stripe reads at a glance. Good pinstriping follows these three-dimensional cues: thin lines that trace edges emphasize sharpness, while sweeping curves soften a front profile. Designers often use a primary line to define the bike’s motion and secondary accents to guide the eye toward logos, headlight clusters, or tank shapes. Placement should always account for functional elements—air intakes, mounting points, and fasteners—so the stripe endures both visually and physically.
Color selection requires both theory and intuition. High-contrast pairings—black on gold, white on matte black—remain powerful because they read clearly at speed. Subtle approaches, like tone-on-tone stripes, reward close inspection and suit riders who prefer understated refinement. When metallics and color-shifting paints are used, they ought to complement rather than compete with other finishes such as chrome or matte panels. Designers often add a thin outline in a contrasting or reflective hue to make the stripe pop under varying light conditions.
Technique matters. Hand pinstriping starts with a steady hand and a specialist brush, then builds a line in a single controlled stroke. Mastery takes practice: pressure, wrist rotation, and brush size all influence consistency. Airbrush work uses stencils and masks to create gradients and soft transitions. Vinyl application is methodical: surfaces must be perfectly clean, and installers use heat to conform the material to complex contours. In all methods, preparation is the unsung hero. Proper sanding, priming, and surface cleaning extend the life of paint and ensure vinyl adhesion.
Maintenance is straightforward but essential for longevity. Painted stripes benefit from proper curing and then regular gentle washing and waxing. Vinyl stripe longevity depends on the film quality and adhesive technology; cleaning with mild soap and avoiding harsh solvents preserves adhesion and color. For both painted and vinyl solutions, parking under cover and avoiding prolonged exposure to UV light will reduce fading over time.
Accessibility plays a role in the art’s popularity. Pinstriping is among the most cost-effective ways to personalize a motorcycle. Riders can commission a bespoke hand-painted set, buy pre-cut vinyl kits, or try a DIY approach. For those considering a DIY route, studying successful examples on curated pages helps refine color choices and placement ideas before buying materials. If a fairing requires replacement or restoration prior to pinstriping, sourcing a compatible fairing can simplify the process and provide a fresh canvas for the design. For riders working on a popular model, ready-made fairing options are available that fit common sport and cruiser bikes.
The dialogue between tradition and technology keeps pinstriping vibrant. A hand-drawn flourish can coexist with a holographic vinyl accent; a classic black-and-gold motif sits comfortably beside a subtle matte wrap. The most compelling designs respect the bike’s architecture and the rider’s personality. They read well from a distance and reward a closer look. They use color and line to balance aggression and elegance.
As trends progress, the practice remains rooted in an elementary truth: a precisely placed line can define an identity. Whether achieved with a sable brush, an airbrush, or an advanced vinyl film, pinstriping remains a potent tool for expression. It invites participation—riders select motifs, tweak palettes, and place accents to reflect who they are. And because modern materials allow reversibility, experimentation is encouraged. The ongoing fusion of craftsmanship and materials ensures pinstriping will keep evolving, offering new ways to personalize fairings while honoring the bike’s form and spirit.
For riders looking to explore parts and fairing options before committing to a design, consider browsing available fairing selections such as the Yamaha YZF-R1 fairings (2009-2012) to find a compatible canvas. For technical guidance on decal materials, standards, and engineering uses, consult this detailed resource: https://www.engineering.com/Articles/MotorbikeStickers.
Razor Lines and Real Craft: Navigating DIY Pinstriping Versus Professional Precision on Motorcycle Fairings
External resources can provide deeper technical grounding on materials, adhesion, and durability when considering decals or paints. For a broader technical understanding of materials and durability in motorbike stickers and related finishes, readers can consult established engineering resources that discuss material properties and standards in practice. Understanding Motor Bike Stickers: Material Properties, Technical Standards, and Uses in Engineering.
Line as Signature: The Cultural Craft of Motorcycle Fairing Pinstriping
Pinstriping on a motorcycle fairing is seldom mere decoration. It is a dialogue between line and curvature, a deliberate act that frames motion with quiet precision. When a rider glides past, the lines on the fairing catch the eye not just because they are bright or contrasting, but because they trace a story—of stance, of speed, of individual taste—across a surface built for wind and function. Pinstriping is the spoken word in a language of chrome and gloss, a subtle but unmistakable assertion of personality that sits at the intersection of craft and culture. In this space, a thin line becomes a badge of identity, a craft flourish that communicates the rider’s confidence, the builder’s patience, and a shared reverence for the art of manual precision. The fairing, already a piece of engineering that houses radiators, electronics, and the rider, becomes a moving canvas when a painter’s hand or a skilled installer’s stencil turns it into something more legible, more expressive, more alive.
The lineage of pinstriping extends back to the mid-20th century, when builders and painters began to elevate the visual impact of motorcycles in American hot rod and chopper communities. It was a time when lines could bend and swerve with the machine’s silhouette, amplifying speed through shape as much as through a tuned engine. Pinstriping emerged as a signature technique, a way to leave a personal mark that could be admired by peers and rivals alike. It was less about flashy flourish and more about disciplined line work—the kind of craft that rewarded steady hands, patient masking, and a keen eye for balance. The culture around pinstriping valued authenticity: lines had to follow the fairing’s contours, respect its negative space, and enhance legibility at a glance. Those are the same principles that guide modern riders who seek a clean, purposeful aesthetic rather than mere ornamentation.
Today, pinstriping on fairings sits comfortably at the heart of customization culture. It is where artistry meets engineering, where a builder’s eye for proportion complements a rider’s taste for storytelling through color and line. Pinstripes can be painted by hand with ultra-fine brushes and rubbed-out lines that settle with a quiet permanence, or they can come as vinyl decals that cling to the fairing with weather-resistant durability. In either case, the outcome is a refined, professional look that communicates care and craftsmanship. Hand-painted stripes carry the legacy of the studio practice: slight imperfections in a curve, a breath of wobble in a hope line, all of which translate into character. Vinyl decals, by contrast, offer versatility and simplicity—an attractive option for riders who want to switch lifestyles as easily as they switch gloves. The decision between paint and decal is in itself a statement about how deeply a rider wants to anchor their identity to a particular visual script.
The language of the lines is itself telling. Some riders prefer the crisp geometry of modern minimalism—single, decisive strokes that run along the fairing’s edges, echoing the bike’s aerodynamics and manufacturing tolerances. Others opt for classic motifs—flame motifs, racing stripes, or tribal-inspired scrolls—that evoke a long-standing conversation with speed legends and custom shops. Color choice matters as much as the line shape. Chrome-silver can read as a premium accent against dark backgrounds, white lines can illuminate subtle curves, and contrasting hues can create a striking visual separation that makes the fairing appear sculpted rather than painted. A color strategy that matches the inner panels or blends with the seat and tank can unify a customized look, while a bold, contrasting stripe can emphasize a bike’s aggressive stance. In one memorable setup, a color-matched Alpine Green inner fairing can illuminate the wordless drama of a matte black screen and speaker grills, drawing the eye to the striping’s precision and the build’s attention to detail. In another example, a vivid black front fender wrapped with clean, crisp lines can reinforce the bike’s forward‑leaning silhouette, turning the fender into an active part of the machine’s narrative rather than a static shell.
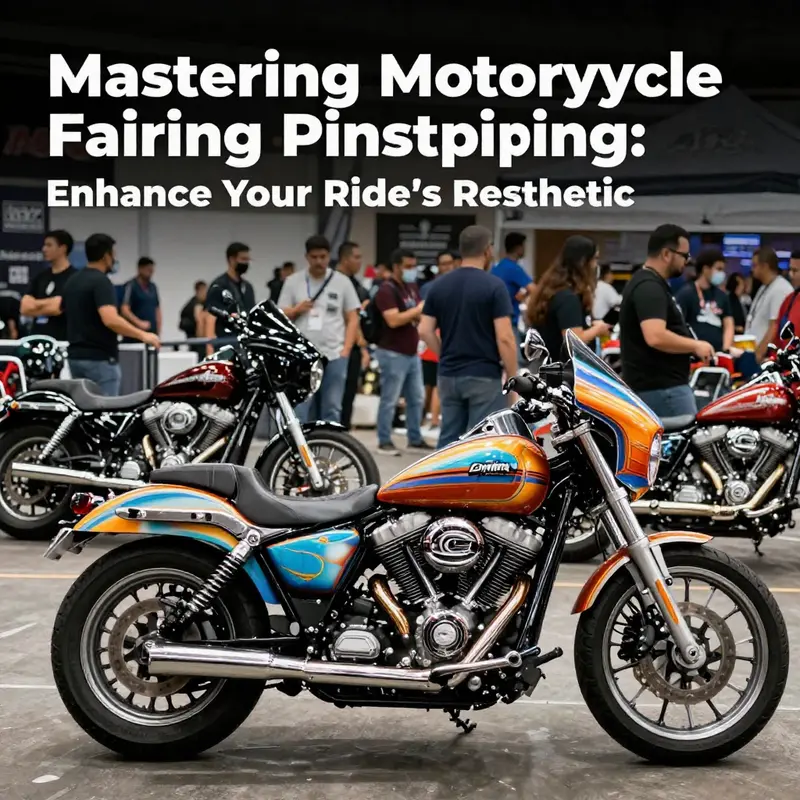
Cultural significance runs deeper than aesthetics alone. Pinstriping has always functioned as a cultural signifier within the customization scene. It communicates that a machine has been carefully built or curated, not merely purchased or slapped together. When a rider chooses a motif, it is a statement about what the machine represents—rebellion, performance, nostalgia, or a blend of all three. The craft connects builders across generations; the same careful tape, stencil, and brush technique that defined early hot rods persists in today’s workshops, though the tools may have evolved. This continuity gives pinstriping a rare staying power in a culture that prizes novelty. It acts as a through-line that ties present-day riders to a broader history of craftsmanship and self-expression, a reminder that a modern bike is both a product of engineering and a vessel for personal legend.
The practice is also becoming more accessible without sacrificing quality. For many riders, the ability to add or change pinstriping without committing to permanent alterations is liberating. Hand-painted stripes, while demanding in time and skill, offer an authenticity that vinyl cannot fully imitate; they respond to the curvature of each fairing with a brush’s micro-gestures, a memory of each pass that leaves a trace no decal can replicate. Vinyl decals, on the other hand, provide consistency, repeatability, and confidence for those who want to explore multiple identities within a single season. This accessibility helps pinstriping to retain its place in the toolbox of customization, not as a niche or fringe practice, but as a standard method for storytelling on two wheels. The result is a culture in which the fairing becomes a narrative surface—a stage where lineage meets innovation, and where today’s riders can write tomorrow’s legends with lines that catch the wind.
From a practical standpoint, the craft requires a blend of discipline and restraint. The most effective pinstriping respects the fairing’s geometry: it follows the contours with true curvature, avoids crowding precious surface area, and preserves the machine’s functional elements such as vents, grills, and panels. Good pinstriping is legible at speed and in varying light, so the lines often run parallel to edges or radiate from focal points that draw the eye toward the bike’s core features. The tools—fine brushes, masking tapes, stencils for consistent repeatability, and high-gloss or matte finishes—are chosen to preserve durability and sheen under sun, rain, and road grime. The decision to seal the lines with a durable clear coat or to rely on a vinyl laminate adds another layer of consideration: longevity versus ease of removal. Modern riders frequently weigh these factors at the outset, balancing the desire for a fresh, bespoke look with the realities of ownership, maintenance, and potential resale. In this sense, pinstriping is not simply about making the bike look fast; it is about making the bike tell a continuous, coherent story that can endure through seasons of use and ownership.
For practitioners seeking a concrete reference point on fairing linework, there is a broad spectrum of aesthetic and technical resources to study. The exploration of fairing shapes, line thickness, and motif compatibility with specific fender and cockpit designs can be enriched by examining curated collections that group common fairing styles and lines. An accessible entry point is the Honda fairings collection, which provides a framework for understanding how lines interact with standard shapes and mounting points. This repository can serve as a practical baseline for riders who want to imagine how a given motif will breathe across a familiar silhouette before committing to custom work. Engaging with these references helps ensure that the final result feels integrated and purposeful, rather than an afterthought layered onto a shell. The goal is not to overwhelm with decoration but to harmonize embellishment with form, light, and movement.
Ultimately, pinstriping on the fairing is a cultural act as much as a technical one. It embodies a tradition of craft, a respect for a machine’s anatomy, and a rider’s desire to claim space and narrative through line. When done with precision and restraint, pinstriping can elevate the entire silhouette, making the bike look as if it were designed around the stripe rather than the stripe added after the fact. It is a reminder that customization is a dialogue between maker and rider, between surface and speed, between memory and motion. The result is a moving artifact—a vivid testament to personal taste, to the beauty of skilled linework, and to a community that continues to celebrate the art of turning a bike into a story told in the language of line.
External resource: Understanding Motor Bike Stickers: Material Properties, Technical Standards, and Uses in Engineering.
Internal link reference: For riders exploring fairing shapes and line compatibility, you can peruse the Honda fairings collection for baseline silhouettes and line flow: Honda fairings collection.
Final thoughts
Understanding motorcycle fairing pinstriping not only enriches a business’s offerings but also aligns with the ethos of customization culture within the biking community. By integrating sophisticated techniques, selecting durable materials, and staying attuned to current design trends, businesses can cater to riders looking for individuality in their machines. Emphasizing the choice between DIY and professional services allows for tailored marketing strategies, appealing to a broad audience. The significance of pinstriping in motorcycle culture elevates it beyond mere aesthetics—it’s a celebration of identity and expression. Armed with this knowledge, business owners can enhance their services and connect with a passionate customer base seeking unique motorcycle aesthetics.