In the world of motorcycle maintenance, appearances and structural integrity play crucial roles in a bike’s performance and aesthetic appeal. Motorcycle fairing repair kits offer a practical solution for business owners looking to restore damaged bodywork efficiently and economically. This article delves into the types of repair kits available, a detailed step-by-step repair process, and the cost-effectiveness and sustainability these kits bring to your motorcycling business. Each chapter aims to provide comprehensive insight into how these kits can enhance both the service quality and profitability of your business, ensuring you meet the diverse needs of your clientele.
Beyond the Patch: Understanding the Landscape of Motorcycle Fairing Repair Kits and Their Components
A motorcycle’s fairings are more than just a shield against wind and debris; they define the bike’s silhouette, influence aerodynamics, and carry the visual language that riders use to express their style. When damage occurs, the repair path chosen can either preserve the original look and shape or require a broader replacement that alters a bike’s femininity of line. This chapter explores the spectrum of motorcycle fairing repair kits, not as a catalog of products but as a practical map for riders who want to restore both appearance and function with confidence. The fundamental truth is simple: repair kits are designed to repair, reinforce, and restore plastics used on modern fairings, chiefly ABS, but the real difference lies in what those kits contain, how they are intended to be used, and how well they match the material, the model, and the finish. To navigate this landscape, it helps to imagine four broad families that cover most repair scenarios: basic plastic repair kits for minor damage, full fairing replacement kits for severe damage or ambitious customization, half-fairing repair and refinishing kits for upper panels, and custom or aftermarket kits that blend aesthetics with performance. Each family has its own logic, its own set of components, and its own implications for cost, time, and final appearance. As you read, you may find yourself drawn toward a particular pathway, but the crucial step is to assess the damage honestly and align your choice with your riding priorities, whether that is preserving the factory look, maintaining OEM fit, or pursuing a lighter, more aggressive aesthetic through aftermarket options. For model-specific fit, riders often begin by checking the catalog of components designed for ABS-based fairings and other plastics, because the adhesive, filler, and primer systems are engineered with particular substrates in mind. In practice, the aim is to achieve adhesion that lasts, a surface that sews the repair into the surrounding finish, and a color match that disappears on the bike at a glance. In this sense, repair kits function like a compact workshop in a box, offering the essential tools and materials to handle a range of contingencies without inviting a disassembly that stretches into days. A careful approach—cleaning, de-greasing, sanding, filling, curing, priming, painting, and sealing—lets a rider ride back into the world with a fairing that looks as if nothing ever happened, or at least as if the damage had never breached the surface in the first place. To keep this approach grounded, it is helpful to recall that many kits are built around a few core principles: compatibility with ABS-based or other plastics, alignment with the original color and finish, and a resin chemistry that resists weather, UV exposure, and road debris while remaining workable for a home workspace. The result is not a miracle cure but a repeatable, controllable process that, when done patiently, preserves the bike’s geometry, its aesthetics, and its value. For hands-on riders and professional technicians alike, this chapter is an invitation to look past the lure of fast fixes and toward a structured repair workflow that respects the material realities of modern fairings and the demands of daily riding. When you approach a damaged panel, you are really choosing a strategy: repair, replace, or refine. The section that follows lays out what each strategy typically includes and what it implies in terms of skills, tools, and outcomes. The four families share a common spine—the need for surface preparation, proper bonding, and a color-accurate finish—but they diverge in the scale of intervention and the degree to which the original form is saved or replaced. The best repairs begin with a realistic assessment: a cosmetic scratch or chip that can be filled and painted to near invisibility is a different job than a crack that travels through a mounting point or a panel that has lost its structural integrity. In the latter case, the cost and complexity often push the rider toward a replacement kit that brings new panels, new hardware, and an installation pathway that resembles a factory process. Across these scenarios, the material science underlying ABS or other plastics matters a great deal. ABS responds to fillers and adhesives differently than polycarbonate, and the best repair kits speak to that difference with specialized primers, bond promoters, and topcoats designed for outdoor exposure. The practical implication is straightforward: compatibility with the substrate is not a luxury but a prerequisite. Without it, even a perfectly executed repair can fail prematurely, leaving a repaired area more vulnerable than before. This is why careful reading of instructions, verifying model compatibility, and selecting a kit that includes a primer and a finishing coat tailored to ABS or the specific plastic used by the fairing are essential steps in the process. The narrative of repair kits also reveals a broader truth about riding culture: the balance between cost, time, and quality. For many riders, a minor scratch or chip is a chance to practice technique, learn the nuances of adhesion, and preserve factory lines without resorting to full panel replacement. For others, damage may be more consequential—cracks near mounting points, delamination, or dented sections that compromise aerodynamics and protection. In every case, the kit you choose is a decision about how you want the bike to present itself tonight, next week, and in the long run. This pivot—from a one-off patch to a disciplined, repeatable repair approach—forms the backbone of understanding the kit landscape. The basic logic remains the same: identify the damage, select the appropriate kit family, prepare the surface to a clean, neutral baseline, apply the filler or patch, sand to a smooth contour, prime to ensure adhesion, apply the color-matched base, and finally seal with a clear coat that provides UV resistance and gloss. The order matters, and so does the quality of each step. Even in the simplest repair, the paint system has to be tolerant of color variation, subtle shade shifts, and the possibility of weathering that could bring back discrepancies after months or seasons of riding. A robust repair kit anticipates these realities by offering not only the patch or panel but also the color-matching guidance, including primers and base coats, that are calibrated to a series of factory shades. This attention to color is not mere aesthetics; it is a practical decision that supports resale value, visual consistency, and the sense that the repaired area belongs to the rest of the bike rather than standing out as a mismatched blemish. The process of color matching itself deserves emphasis. Some kits come with color-matched paint or with a system that allows the user to mix a base shade and then adjust tone and depth with additional coats. The closer the match, the less obvious the repair will be under outdoor light and varied angles. For riders who care about the last details, a well-executed color match can be indistinguishable from OEM paint, even after years in sun and rain. This nuance—color fidelity—often makes the difference between a repair that feels temporary and one that feels enduring. Beyond color, there is the matter of finish. Clear coats seal and protect, but they also influence gloss, texture, and even the subtle reflection of light. A high-quality clear coat blends seamlessly with the underlying paint if the application is even and the curing conditions are controlled. For those who are restoring a vintage model or maintaining a classic finish, the ability to reproduce a factory-like gloss and depth is as important as structural integrity. It is the combination of adhesion, color, and finish that makes a repair kit truly effective, because a great repair disappears into the overall form of the bike rather than announcing itself with a telltale ridge, mismatch, or dull spot. Another practical dimension of repair kits is their ease of use. Some riders prefer kits that minimize the number of steps while still delivering reliable results; others are drawn to advanced formulas that include deeper primers, surface primers, or specialized degreasers and masking materials. The choice here hinges on the rider’s skill level, the workspace, and the time they can invest. The infrastructure of a good repair kit—filler putty, sanding pads, primers, color-matched paints, clear coats, and application tools—mirrors the rhythm of a small workshop: prepare, fill, sand, prime, paint, seal. A well-rounded kit reduces the guesswork and provides a coherent sequence that can be followed with predictable outcomes. It also lowers the risk of over-sanding, under-filling, or misapplying primer, all of which can lead to a patch that is either too visible or prone to failure under sun and rain. In the end, the goal is to preserve the fairing’s original geometry and surface language. A precise contour is critical, especially on sport and race-inspired designs where even small deviations can feel wrong to the rider. Repair kits that align with the fairing’s original geometry—from the curvature of a wheel fairing to the taper of a side panel—facilitate a seamless transition between old and new material. This is particularly true for half-fairing or upper-panel repairs, where the proximity to critical assemblies such as headlights, instrument clusters, or cooling intakes makes precise reproduction essential. A carefully chosen half-fairing repair kit recognizes that the panel’s shape and mounting points must align with the surrounding components, ensuring that grommets, fasteners, and seals cooperate rather than clash. For riders who are curious about the model-specific landscape, there are collections and kits designed to accommodate particular families of bikes. For example, those who own a model from a certain brand family will find compatible panels and hardware within the corresponding catalog. If you’re seeking model-aware options, you can explore the Honda fairings collection to identify panels that share OEM fit and tone. Honda fairings collection This alignment matters not only for aesthetics but for the structural integrity of mounting points and the reliability of fasteners, especially under vibration and heat. The interplay between repair kit components and the bike’s construction illuminates another natural constraint: some repairs are best left to professionals when the damage threatens the fairing’s mounting structure, its routing for wires and coolant lines, or the integrity of the headlight enclosure. In such cases, a full replacement kit, with exact panels and step-by-step installation guidance, can preserve safety margins and ensure a consistent finish. Even when replacement is not necessary, many riders benefit from the option to upgrade or customize through aftermarket or custom kits that offer lighter materials or more aggressive styling while maintaining compatibility with original attachment points. These kits may employ high-performance composites, reinforced ABS, or even hybrid materials that improve impact resistance and reduce weight. They often come with integrated brackets and new fastener systems designed to optimize aerodynamics and reduce vibration. This option is particularly attractive to riders who are balancing repair with the desire for a refreshed look or a performance-oriented upgrade. The decision to pursue a custom route should consider both the aesthetic ambition and the practical realities of fitment, engineering tolerances, and thermal expansion under riding conditions. It is here that the repair kit ecosystem shows its versatility: you can repair, replace, refine, or upgrade, depending on the damage’s scope and your goals for the bike’s form and function. As with any mechanical or cosmetic project, preparation is everything. Before any filler or patch is applied, the surface must be cleaned of oils, waxes, and fingerprints, followed by a careful degreasing and drying. The next step—scuffing the surface with appropriate sandpaper—helps create a mechanical key for adhesion. The abrasive choice matters; too aggressive a grade can introduce scratches that require more work to correct, while too gentle a grade can leave a surface that won’t hold a bond. The selection of filler or patch then follows the nature of the damage: a small scratch or chip may respond to a quick-drying plastic filler putty, while a dent with a crack behind the layer may require a patch or a more robust repair plate. In all cases, curing conditions, humidity, and temperature will influence the performance of adhesives and fillers. This is not a one-size-fits-all field; the chemistry of each product matters because it defines how well a repair will endure exposure to sun, rain, heat, and road debris. The final layer—the color-matched paint and clear coat—must be applied with attention to moisture levels and dew point to avoid blooming or cracking. A careful, patient approach yields the most convincing results. As you consider these options, remember that durability is not only about the strength of the bond but also about how well the finish resists UV degradation and chemical attack. The right primers and sealants provide a stable base that prevents color shift and keeps the repaired area from becoming brittle under long-term sunlight. And while a cosmetic fix might look clean at the moment, a robust repair also requires protection from the environment. UV-stable clear coats and weather-resistant paints extend the life of the repair, preserving the bike’s appearance across seasons. The landscape of repair kits also begs a practical question: how to choose the right kit for the job. The answer depends on several factors: the severity of the damage, the model and material of the fairing, the rider’s skill level and patience, and the balance between cost and future maintenance. Mild surface blemishes might be resolved with a basic plastic repair kit that emphasizes quick turnaround and minimal disruption to riding. More serious damage that compromises the panel’s contour, mounting points, or protective function can justify a replacement kit or a half-fairing repair kit when the upper section is still serviceable but requires refinishing. In many cases, the best choice lies in a hybrid approach: repair the minor damage in place while planning a more comprehensive update with a replacement panel or upgraded aftermarket option later. This approach allows for gradual investment and testing of techniques while preserving the bike’s usability and visual impact. The repair journey, however, is always personal. Some riders treat it as a weekend project, enjoying the hands-on satisfaction of restoring a bike they love. Others prefer to treat it as a professional service, especially when the damage risks misalignment, leaks around fasteners, or the reliability of the headlight seal. Either path can yield excellent results if the steps are followed with discipline and respect for the material’s limits. In closing, the world of motorcycle fairing repair kits is a finely tuned ecosystem of materials science, craftsmanship, and practical riding needs. The four kit families described here—basic repair, full replacement, half-fairing repair, and custom or aftermarket options—cover the majority of repair scenarios a rider might face. The common thread is an emphasis on proper surface preparation, compatible bonding systems, and a finish that respects the bike’s original look. The choice is not merely about fixing a blemish; it is about sustaining the integrity of the fairing, preserving the lines and aerodynamics that define the motorcycle’s character, and protecting the investment that is the rider’s time, money, and passion. For the curious reader who wants to explore a wider range of model-specific options, consider diving into model-aligned catalogs that curate panels and hardware tailored to ABS-based fairings. The right kit, implemented with care, can keep a bike looking factory-fresh and performing reliably for seasons to come. With these distinctions in hand, riders can navigate the market with a steady eye and a methodical approach, while the next chapter of this article will turn toward practical considerations such as timing, cost ranges, and availability, helping you translate knowledge into action. External resource: https://www.bikeexif.com/2026/01/motorcycle-fairing-repair-kit-guide
From Crack to Coating: Mastering the Step-by-Step Repair of Motorcycle Fairings with Repair Kits

Repairing a motorcycle fairing with a dedicated repair kit is more than a quick fix for a dent or scratch. It is a craft that blends material science, color theory, and practical technique to restore not just the look but the structural integrity of a plastic shell that bears the brunt of road debris, weather, and the daily rhythm of riding. The allure of these kits lies in their promise: a targeted repair that avoids the expense and downtime of full panel replacement. Yet the outcome hinges on understanding the materials at play, choosing the right kit for the fairing’s composition, and following a disciplined process that respects the fragility of plastics while leveraging the resilience built into modern repair formulations. In this chapter, we explore the journey from damaged surface to a factory-like finish, weaving together the principles that underpin successful repairs with the practical steps that keep riders safely back on the road.
At the heart of most motorcycle fairings is a family of plastics designed to balance lightness, rigidity, and weather resistance. ABS, or acrylonitrile butadiene styrene, is a common protagonist in modern fairings because it resists impact while offering workable properties for shaping and finishing. Some high-quality repair kits are formulated specifically for ABS, while others are designed to work with a broader spectrum of plastics, including polycarbonate and fiberglass-reinforced composites. The key is compatibility: the adhesive, filler, and primer must bond well to the base material and withstand sun exposure, temperature swings, and the flex that occurs during riding. When a kit speaks to ABS plastic technology and corrosion resistance, it is signaling that the contents have been tested to handle the elements, the grit of road salt, and the wear of UV light—factors that compound over time and can undermine repairs if not addressed properly. This attention to durability matters because a cosmetic fix that fails under sunlight or heat becomes a longer-term problem than the original damage.
The repair process, when seen as a cohesive workflow rather than a sequence of isolated tasks, reveals why these kits are well suited to riders who want control over maintenance without sacrificing aesthetics or safety. The journey begins with a careful assessment of the damage. A crack that runs along a seam across a fairing surface may require different attention than a shallow chip that merely skims the finish. A dent that has not penetrated to the internal foam or core may be treated with filler and a supportive skim, while deeper fissures may require more robust reinforcement or even panel replacement. This initial appraisal is less a hurdle and more a design brief: it informs what materials in the kit will do the heavy lifting and what steps will ensure long-term adhesion. It is easy to underestimate the importance of this stage, but the margin for error grows if the damage is mischaracterized. A small crack that is treated as a mere surface imperfection can propagate if the substrate is compromised, and that is the moment when a repair becomes more than cosmetic—it becomes a structural concern.
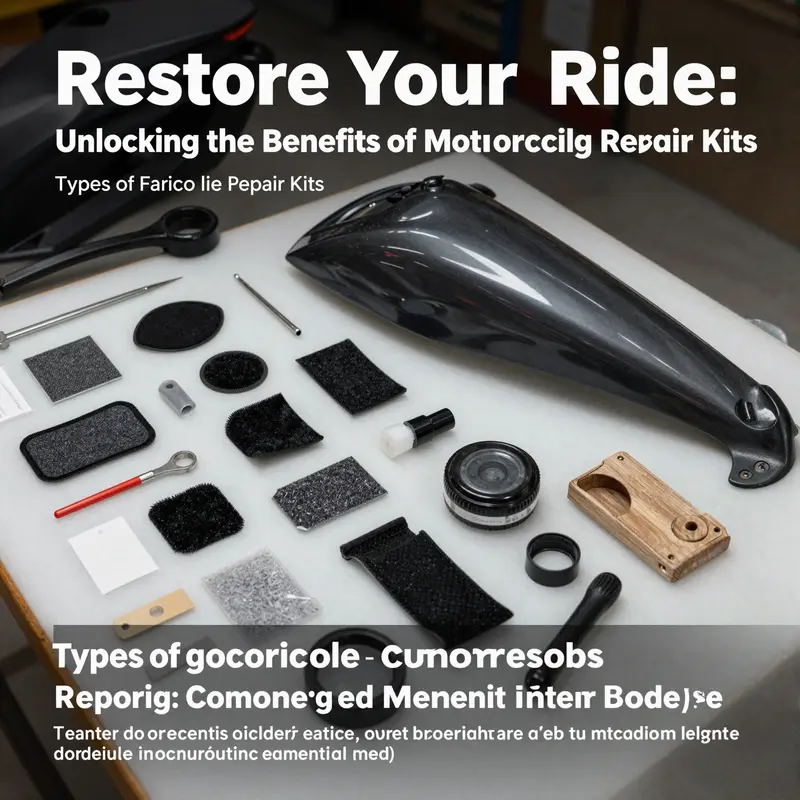
Any repair begins with preparation, because the bond between repair materials and plastic is only as strong as the clean slate they adhere to. The typical toolkit assumes the surface has accumulated grease, dust, and microabrasions that will undermine adhesion. The recommended approach is straightforward: wipe the area with isopropyl alcohol and a clean cloth, then allow it to dry completely. A light sanding using 80 to 120 grit paper creates just enough texture to grip the adhesive and filler, but not so much that you remove material or alter the fairing’s contour. A tack cloth is then used to remove the last grainy particles. This precise, careful preparation reduces the risk of pinholes, air voids, or peeling that could compromise the finish later on. It also sets the stage for uniform filler deposition, ensuring that the repair sits flush with the surrounding surface rather than mounded up as a visible scar.
With a prepared surface, the repair kit’s filler putty or epoxy resin comes into play. The instruction set in these kits is usually explicit about ratios, curing times, and working temperature. In practice, mixing a filler with a hardener in the recommended proportions and applying it in thin, even layers yields the best results. For dents, lay the first layer into the cavity and allow it to cure. For cracks, the approach may include slightly overfilling to account for shrinkage as the material cures, followed by subsequent skim coats. The wisdom here is to build up gradually, layer by layer, rather than attempting a single, thick fill. Thick applications tend to cure unevenly, crack, or separate from the substrate as temperatures fluctuate. The curing window—often a couple of hours in moderate conditions—gives you the chance to assess a repair for firmness, uniformity, and the absence of air pockets. Deep dents benefit from a multi-pass approach: a first layer to shape the bed, a second to level with the surrounding surface, and a final skim to feather the edges to indistinguishability.
Sanding is the bridge between filling and finishing. Once the filler has fully cured, the next phase is to bring the surface to a uniform plane. Start with a coarser grit such as 200–320 to knock down high spots and establish a level plane, then progress to 400–600 for a smoother finish. The goal is to blend the repaired area into the surrounding fairing so that light reflections fall evenly across the surface. An even touch matters here; uneven sanding can create subtle hills or valleys that betray the repair under paint. A sanding block or orbital sander helps maintain even pressure, preventing gouges that will show once color is added. Dust removal is crucial at every stage; foggy or dusty surfaces will foul primers and paints, leading to micro-pits and a finish that doesn’t reflect the bike’s original luster.
Paint and primer choices are another critical hinge point. Many factory-finished fairings require a practical primer that adheres well to plastic and tolerates the gloss of automotive paints. The color-matching step, though sometimes outsourced to professional shops, is increasingly approached with at-home color matching tools or sample chips taken from inconspicuous areas of the bike. The reality is that color matching is less about perfect pigment equality and more about achieving a close, visually seamless blend under typical riding and lighting conditions. The process usually involves applying a few light coats of primer, allowing them to dry completely, then pre-sanding with a fine grit to create a slick base for color. The paint is laid on in multiple ultra-thin coats to minimize runs and sag, with drying time observed between coats. If a clear coat is advised by the kit, it serves to protect the paint and provide a UV shield that preserves the finish against future sun exposure and weathering.
The final polish then becomes the stage on which the repair reveals its true quality. After the clear coat cures, a fine polishing compound and a soft cloth or a dedicated polishing wheel can bring back the high gloss that makes a fairing look as though it never left the bike. A protective wax or sealant adds another layer of defense, helping to repel dirt and moisture while maintaining the finish’s glow. These finishing touches may seem cosmetic, but they contribute to durability. The clear coat, for instance, is not only a color layer; it is also the shield that prevents UV degradation of the underlying paint and micro-scratches that would otherwise accumulate quickly with daily use.
Throughout this process, it is essential to be mindful of the material-specific notes embedded in the repair kit’s guidance. If the fairing is ABS-based, the selected primer and paint types should mesh with plastic surfaces and provide good elongation and adhesion under temperature swings. If the part proves to be polycarbonate or another material, the adhesive system must be compatible with that substrate. Some kits bring prep solutions and primers as part of the bundle, and using these as directed improves long-term adhesion and the repair’s resistance to peeling, cracking, or color fading. The fundamental rule remains simple: follow the package’s instructions. The chemistry and timing of each component matter as much as the mechanics of the repair itself.
A practical consideration for riders who value speed is the balance between a thorough repair and the time-to-ride. Repair kits are designed to deliver professional-grade results within a reasonable timeframe, but patience remains a virtue. Rushing any step—especially prep, curing, or painting—can undermine the entire effort and force a redo later. In this context, the value proposition of a repair kit lies not only in cost savings but also in the educational arc it provides. Each repair teaches discipline: how to assess damage, how to select compatible materials, and how to reproduce a consistent finish across a body panel that is seldom perfectly flat. That experiential knowledge translates into more confident maintenance in the future, making the difference between a repair that merely hides damage and one that sustains the bike’s integrity and appearance for years to come.
One of the most common questions relates to color accuracy. Light reflection, ambient lighting, and the fairing’s curvature can make a color look different in the shop than on the road. In practice, many riders accept a close match rather than an exact pigment, then rely on the clear coat to help harmonize the repaired area with the rest of the bike. For those who pursue an exact match, color-matching services at local paint shops or the color codes from the original manufacturer become part of the toolkit. It is worth noting that the repair kit ecosystem often emphasizes color guidance—whether through test color chips, a color-matching card, or an integrated color guide—because the final appearance is as important as the physical bond that underpins the repair.
Beyond the technical steps, there is a broader judgment about repair versus replacement. Some damage is simply beyond the amenity of a do-it-yourself fix: large cracks that threaten structural integrity, shattered sections, or repairs that would require more material than the panel can logically hold. In such cases, replacement remains the safer path. The decision matrix needs to weigh the cost and effort of a repair against the potential for future failure and the rider’s performance expectations. An important caveat is material compatibility. Carbon fiber composites, certain reinforced plastics, or unusual polymer blends may respond differently to standard repair kits. When in doubt, the simplest rule is to err on the side of a proper replacement rather than risk a repair that could compromise safety or wind protection.
As riders consider their options, the question of model compatibility surfaces again. A repair kit’s effectiveness is amplified when it is paired with fairings that share material characteristics with the kit’s design. This is why model-specific considerations matter, even in a general guide. If you ride a sport model with a high-gloss finish and a delicate edge, the precision of the sanding and the finesse of the color blending will determine whether the repair is virtually invisible or a telltale repair line. For those working with vintage pieces or models with limited aftermarket support, the value of a well-chosen ABS-based kit becomes even more evident. It allows an owner to preserve originality while ensuring the repair can withstand daily ride conditions.
In practice, selecting a kit that is well-suited to the bike’s personality matters as much as technical fit. A well-matched kit aligns with the fairing’s material, color palette, and the rider’s willingness to invest time in leveling textures and matching tones. For riders who appreciate the community aspect of restoration and customization, there is additional value in the possibility of keeping a classic machine looking authentic without surrendering modern resilience. When a kit is thoughtfully applied, the result is a seamless transition from damaged to restored—a transformation that respects the bike’s lines, the rider’s pride, and the road ahead.
A further dimension of this topic is the practical integration of repair into a broader maintenance routine. Regular inspection of fairings for micro-damage, early prevention of UV cracking, and the use of protective films to shield from stones and debris can reduce the likelihood of needing more extensive repairs in the future. The repair kit becomes part of a larger strategy, not a solitary fix. In the long run, this approach supports a more economical ownership experience, reduces downtime, and preserves the bike’s resale value by maintaining a more consistent cosmetic and structural profile.
For readers seeking a concrete touchpoint in their repair journey, consider exploring the range of compatibility options available for bikes that share common fairing architectures. If your ride is a popular model with broad aftermarket support for fairings, you’ll typically find ABS-based repair solutions that align with the vehicle’s shape and mounting geometry. This alignment is helpful not only for aesthetics but also for ensuring repairs do not interfere with mounting points, air intakes, or sensor housings embedded in some modern fairings. The goal is to achieve a repair that respects the original design intent while standing up to the same environmental challenges the bike faces every season. In that sense, the repair kit is less a Band-Aid and more a precise instrument for extending the life of the fairing’s geometry and finish.
As a practical aside, the choice of where to source a kit can influence the repair’s outcome. Some riders prefer kits that emphasize ABS plastic technology and associated adhesives, while others prioritize color-matching capabilities and the inclusion of primers. The contents and instructions can vary by brand, but the underlying philosophy remains consistent: prepare, bond, finish, and protect. The first three steps demand patience and attention to detail, while the final stage—the finish—depends on your ability to reproduce a surface that is both smooth to the touch and visually coherent with the rest of the bike. When done well, the repair looks and feels like a part of the original assembly rather than an add-on patch.
An essential practical detail involves model-specific fit and compatibility. Within the maintenance ecosystem, some models have longer or more complex fairing curves, which can influence how you apply filler and how you sand to achieve an even contour. In these cases, a steady hand and a willingness to work in micro-adjustments pay dividends. The smoother the surface and the more precise the color match, the less visible the repair becomes. This is especially important for riders who take pride in a showroom-like finish or who showcase their machines at gatherings where every detail is scrutinized. The repair kit, when used with a patient mindset and a careful eye for color, becomes a bridge between factory perfection and the realities of road wear.
In closing, the practical value of motorcycle fairing repair kits is not merely in the hidden cost savings. It is in the empowerment they provide—empowerment to fix a damaged panel without surrendering control of the bike’s appearance, to learn a repeatable process that yields professional results, and to keep a beloved machine on the road with minimal downtime. The steps outlined here, rooted in material science, surface preparation, controlled application, and patient finishing, offer a path toward durable, aesthetically pleasing repairs that respect the integrity of modern fairings. For riders who want to explore further, a practical path is to engage with a resource that helps connect model-specific fairing choices with compatible repair solutions. For those with Honda models in mind, you can explore compatible options that align with the wide range of Honda fairings inside the collection dedicated to Honda. This curated pathway reflects how the repair ecosystem works best when it matches both material realities and the rider’s model-specific needs: a harmonized approach where the repair kit becomes a dependable ally in the ongoing maintenance of a bike that deserves to look as good as it performs.
External resource for broader guidance: Motorcycle.com’s Fairing Repair Guide offers tutorials and expert tips that complement the hands-on work described here, with model-specific advice and demonstrations that can help you refine your technique as you gain experience. Motorcycle.com – Fairing Repair Guide
Internal reference for model-specific kit compatibility: If your bike belongs to a familiar family with wide aftermarket support, you might explore compatible options within the Honda fairings collection to understand how a kit aligns with common ABS-based fairings and their color ranges. This alignment helps ensure the repair is not only strong but visually coherent with the rest of the bodywork.
Repair, Reuse, and Ride: The Cost-Effectiveness and Sustainability of Motorcycle Fairing Repair Kits

Motorcycle fairings protect vital components and balance aerodynamics, but they take a beating from weather, stones, and gravel. Replacing a damaged panel is tempting but not always the most economical or sustainable choice. High-quality repair kits, applied correctly, can restore function and appearance while reducing downtime and material waste. The cost picture is lifecycle-based: upfront kit cost, labor time saved, durability of the repair, and the eventual resale value of the bike. When the kit materials closely match the original—adhesives, fillers, and color-matching guidance—the repaired surface can blend with the surrounding panels and wear like the rest of the fairing.
Sustainability emerges when we consider material use and energy, not just price. Repairing avoids producing new plastics, resins, and paints and minimizes waste. A well-executed repair preserves more of the original panel, which reduces downstream environmental impact and keeps older bikes on the road longer.
Material compatibility matters greatly. ABS and fiberglass behave differently with patches and fillers. Good kits specify compatible resins, primers, and color-matching data for the target material, making the repair more durable and easier to finish. The more the kit aligns with the panel’s material, the longer the fix lasts and the fewer consumables are consumed over time.
Labor and downtime are central to value. A DIY repair can cut the time from damage to road readiness, especially when kits are clear about surface preparation, crack assessment, patching, curing, sanding, priming, and painting. Durable adhesion and careful finishing reduce micro-cracks and rework, translating into real savings for individuals and fleets alike.
Color matching and finishing are not cosmetic niceties but financial levers. Accurate color matching protects resale value and reduces rework in the body shop. A kit that includes color-matching guidance or ready-to-apply paints offers a practical path to a factory-like finish.
Risk management is critical. If damage involves structural elements or mounting points, a cosmetic patch may fail or cause misalignment. Honest assessment and, when needed, professional evaluation help protect investment and safety.
Model diversity and aftermarket ecosystems matter. A repair pathway that adapts to different curves, edges, and attachment points reduces the likelihood of a full-panel replacement and supports a broader ownership community. This is where model-aware planning and careful execution show their value.
In sum, motorcycle fairing repair kits can offer real cost savings and environmental benefits when used as part of a thoughtful maintenance strategy. By emphasizing material compatibility, surface preparation, and restrained finishing, riders and fleets can extend the life of fairings, maintain aesthetics, and keep bikes riding longer with less waste.
Final thoughts
The integration of motorcycle fairing repair kits into your service offerings not only enhances your business’s operational efficiency but also significantly increases customer satisfaction. By providing a cost-effective and practical solution for minor to moderate damage, you position your business as a comprehensive service provider. As motorcycles continue to be a beloved choice for riders, harnessing the benefits of high-quality repair kits can ensure you meet market demands while promoting sustainability. Embracing these kits can lead to better income and broaden the appeal of your services, making you a competitive player in the motorcycle maintenance sector.