Motorcycle fairings serve critical functions in protecting various components from external damage. For business owners in the motorcycle industry, understanding fairing repair is vital—not just for customer satisfaction but also for maximizing profitability. This article delves into essential repair techniques, materials, and professional services that can elevate your repair offerings, ensuring quality and efficiency in your business operations. By examining these pivotal aspects, this guide empowers you to better serve your customers while maintaining the integrity and performance of their motorcycles.
From Cracks to Clean Lines: The Craft of Rebuilding Motorcycle Fairings
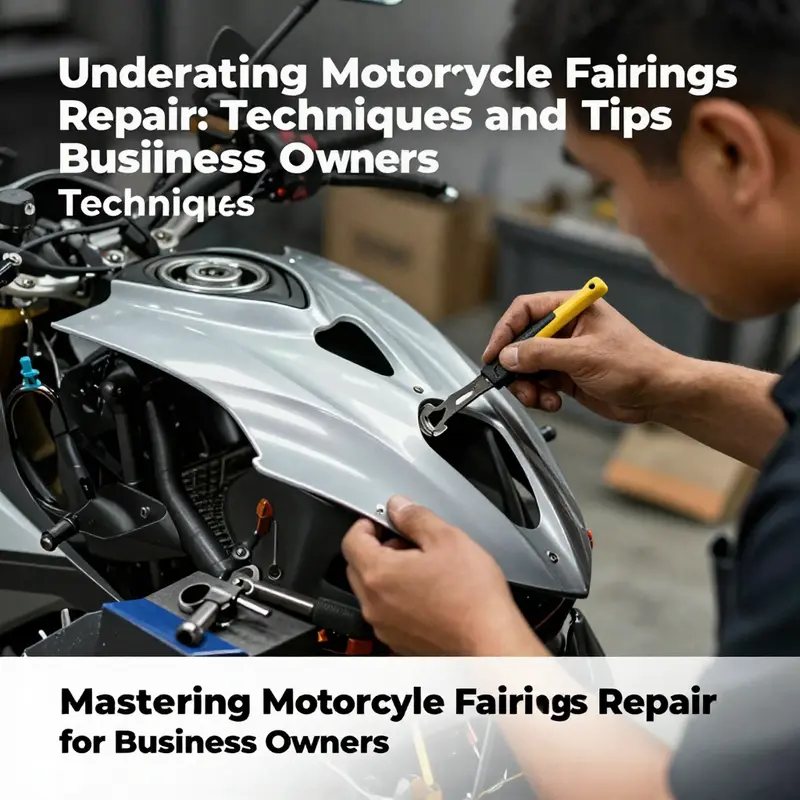
The fairing is more than a look on a motorcycle; it is a functional shield that shapes how air moves around the chassis, protects delicate components, and frames the rider in a shelter that minimizes fatigue at speed. When a fairing sustains damage—whether from a low-speed tumble in a parking lot or a high-speed scrape along a windy highway—the repair process becomes a careful balance between restoring structural integrity, preserving aerodynamic efficiency, and maintaining an aesthetic that reflects the rider’s identity. Repairing motorcycle fairings is, at its core, a study in materials science, manufacturing realities, and practical riding needs. It is about choosing the right path for the right problem and executing it with patience, precision, and respect for the bicycle’s geometry and the rider’s safety margins. This chapter invites you to move beyond quick fixes and to approach fairing repair as a cohesive practice that honors the original shape while embracing the imperfections that time and use inevitably leave behind.
The first step in any repair is damage assessment. Not all cracks are created equal, and not every dent or hole calls for the same cure. A visual survey will identify cracks, splits, or missing chunks, but a tactile check is equally important. Run a gloved hand along the damaged area to feel for delamination, a soft give indicating a skin that has separated from the internal structure, or ripples that suggest deeper warping. For modern fairings, which are typically molded from plastics such as ABS due to their lightweight and impact resistance, the location of the damage relative to mounting points and edge radii matters as much as the size of the fracture. A crack near a mounting boss or the edge will often require reinforcement not just to hold air and load, but to preserve the mounting geometry that secures the panel against the frame, the indicator of alignment and airflow that riders rely on during hours in the saddle.
Once the scope of damage is understood, the material and the severity guide the repair strategy. A clear distinction should be drawn between minor cosmetic issues, moderate structural concerns, and extensive damage that might demand replacement. Minor cracks and chips in an ABS shell, for instance, can often be treated with adhesive repair using a high-strength epoxy resin or a two-part glue formulated for plastics. The adhesive must bond well to ABS or similar polymers, creating a seamless seam that can later be finished to blend with the surrounding surface. The typical workflow for these smaller repairs begins with meticulous cleaning of the area. Removing grease, dirt, and loose particles is essential because any residual contamination will compromise adhesion. A solvent such as isopropyl alcohol is commonly used for this purpose, followed by a careful drying that ensures no moisture remains in the patch region. The next step is surface preparation: light sanding with a 200–400 grit abrasive creates micro-roughness that improves mechanical interlock between the plastic, the adhesive, and any reinforcing layer that might be added. With the surface ready, the adhesive is applied along the crack and the pieces are carefully realigned. A clamp or a jig holds the pieces in place as the epoxy cures, often for 24 hours, to achieve maximum strength. For extra reassurance, a reinforcing mesh or a thin fiberglass patch can be embedded within the epoxy layer, distributing load across the repair and reducing the likelihood of re-cracking under vibration and wind loads.
Larger damages, or areas that experience a great deal of stress, require a more robust approach. In these cases, there is a practical argument for plastic welding. A hot-air welder, when used with compatible filler material drawn from the same polymer family as the fairing, can fuse the crack closed, restoring the original mechanical continuity of the shell. The process is technically demanding; it demands control over heat input to prevent additional warping, blistering, or discoloration. Welds executed by skilled technicians can outperform adhesive bonds in terms of rigidity and long-term durability, particularly for large fractures or panels that are anchored near mounting points where loads are most dynamic. For metal fairings—though far less common—metal bonding agents and aluminum powder can be used in specialized circumstances, but this is a niche area that relies on a different set of materials and techniques. In practice, most riders encounter ABS or polymer-based shells, and the most reliable path for damaged sections remains a combination of careful bonding, cautious welding for key structural zones, and judicious reinforcement.
A critical consideration is whether repair or replacement yields the better long-term result. Repair can restore functionality and appearance, but the economics and the return on investment matter. When the damage is extensive—large holes, severe warping, or multiple fractures—the power of a single, well-executed replacement often surpasses a conservative patchwork. Replacement panels, especially when designed as modular units, enable a rider to swap in a new section without disassembling the entire fairing system. This approach can be more cost-effective in the long run, particularly for race or track-focused builds where aerodynamic geometry and surface smoothness are paramount. The decision also hinges on availability and fit. OEM or high-quality aftermarket panels are engineered to meet factory tolerances, ensuring that the repaired shape will align with the rest of the assembly and preserve the intended airflow performance. It is not only about the patch but about how that patch integrates with the broader geometry of the fairing system.
From a performance viewpoint, the aerodynamic integrity of the repaired surface cannot be an afterthought. Even minor imperfections can disturb the laminar flow that minimizes drag and reduces wind noise and rider fatigue. A patch that sits a few thousandths of an inch above the surrounding surface or a slight wave in the paint layer can alter how air travels over the curve of the panel at speed. Therefore, finishing the repair takes on equal importance with the repair itself. Cosmetic finishing is a sequence that mirrors automotive bodywork: sanding to a uniform contour, priming to create a uniform base for paint adhesion, and color matching that respects the original appearance. Here, the goal is to recreate the surface texture and curvature as much as possible so that the repaired area behaves like the surrounding shell under wind loads, aiding in predictable handling and rider comfort on long rides. In practice, professional painters are often called upon to handle the final color and gloss, ensuring a seamless appearance that can withstand the elements over time.
The repair workflow, then, is not a one-off event but a staged process that requires attention at every step. It begins with damage assessment and ends with finish work that hides the repair beneath a coating of convincing coloration and sheen. Between those bookends, there is a sequence of cleaning, surface preparation, adhesion, reinforcement, and curing. For larger repairs, there may be a transition from adhesives to welding and back to reinforcement. Each stage requires proper tools, careful technique, and an understanding of how the panel fits within the entire fairing system. A well-executed repair preserves the fairing’s role as an aerodynamic shield and as a protective shell around critical components—engine electronics, fuel lines, and wiring—that could be exposed by a poorly considered patch. The rider who engages in track days or long-distance touring must also consider how repair choices affect vibration damping and load transfer. A repaired seam that cannot tolerate vibration will eventually fail again, negating the initial effort and cost.
In addition to the technical steps, there is a practical dimension: sourcing materials and parts. For minor repairs, the field benefits from a range of filler materials, bonding agents, and color-matching paints designed for ABS and similar polymers. For larger repairs or full-panel replacements, it becomes necessary to seek out replacement fairings from OEM or reputable aftermarket suppliers. The practicality of modular designs—where a single panel can be swapped without removing the entire fairing set—helps riders maintain their bikes with minimal downtime and reduced overall cost. This modular approach also supports customization; fairings can be swapped to reflect team color schemes, sponsor branding, or rider preferences without compromising the base structure’s integrity.
In parallel with the mechanical and aerodynamic concerns, there is a need to consider safety and reliability. A repaired fairing must still perform its protective function in the event of another mishap. The repair must maintain a strong bond at joints that could fail under load while ensuring that surfaces remain smooth enough to avoid catching air or causing turbulent flow. A rough repair left unfinished risks not only aesthetic disappointment but also teaching the bike a poor aerodynamics lesson that depletes efficiency and increases fatigue. For riders who ride aggressively, the margin for error is small; thus, the repair path chosen should reflect the rider’s needs, the bike’s role, and the expected operating conditions.
To bring this discussion to a practical close, consider the idea that high-quality replacement fairings can offer a durable throughline for riders who value long-term reliability. Reinforced ABS panels, engineered to meet safety and durability standards, provide a robust foundation for high-performance riding and everyday use alike. If the objective is to maximize uptime and minimize the risk of recurrent damage, investing in a replacement panel or a modular upgrade can be more economical than repeatedly repairing a compromised section. The choice between repair and replacement need not be binary, however. A blended approach—repair for localized damage followed by a replacement for larger sections or whole panels—can offer the best blend of cost, performance, and aesthetic continuity. This strategy respects the nuanced realities of riding styles, track exposure, and the rider’s budget, while preserving the fairing’s essential function: to shape airflow cleanly, protect core components, and sponsor a rider’s confidence on every kilometer traveled.
In the broader landscape of repair techniques, it matters that the approach aligns with the frame geometry, the panel’s curvature, and the surface finish. The use of adhesives, welds, and reinforcement must be guided by how the panel interfaces with adjacent sections and how it will respond to future stresses. A well-executed repair sequence results in a surface that behaves as if the damage never happened, at least from the rider’s perspective. It becomes a matter of restoring form and function so that the bike handles predictably, the ride remains comfortable, and the visual impression remains clean and cohesive. This requires steady hands, patience, and an understanding that the best repair is often the one that anticipates future performance and minimizes the likelihood of repeat issues.
For readers who want to explore further, a comprehensive guide on materials and repair methods offers deeper technical context and visual demonstrations of the processes described here. The guide provides detailed steps, including how to evaluate different plastics, how to choose appropriate welding methods, and how to approach finishing with professional-level results. This resource can be a valuable companion as you plan a repair project, select parts, and budget for the work ahead. As you consider your own bike, you may also want to explore the broader ecosystem of fairings and panels that support modular replacement strategies. A practical starting point is to browse a curated selection of fairing components by category, which helps you visualize how a rider might reconstitute the overall silhouette of a bike while preserving its essential aerodynamic and protective functions. Such a catalog can be a useful reference as you evaluate whether to repair or replace a given section, and it can help you track the alignment and finish required to maintain a cohesive appearance across the entire bike.
If you’re seeking a route to connect theory with practice, consider the following approach. Begin with a careful assessment of the damage, noting its location, size, and proximity to mounting points and edge radii. Decide whether the crack requires adhesive bonding, welding, or replacement, based on the severity and the panel’s role in the overall geometry. Gather compatible materials—adhesives engineered for plastics, reinforcing fabrics, primers, and paints that can be color-matched—and prepare your workspace to control dust, moisture, and temperature. When applying adhesive or welding, prioritize cleanliness and alignment; misalignment at any point will reveal itself once the surface is refinished and painted. If the repair extends into a seam line or a high-stress region, consider reinforcing with a fabric patch or a secondary bond to distribute load. Finish with a primer and paint that reproduces the surface texture of the surrounding area, then cure in controlled conditions before reassembly. Finally, reassemble the fairing, test fit, and validate that the panel aligns cleanly with adjacent sections. The moment of truth arrives when you reinstall the panel on the bike and ride a short loop to check for alignment, wind noise, and vibration. A well-executed repair will feel almost invisible, a silent testament to the craft involved and the discipline required to respect the bike’s original design intent.
In this chapter, the threads that tie everything together are clarity of purpose and respect for the fairing’s role. The repair method you choose—adhesive bonding, welding, or replacement—should be guided by structural concerns, aerodynamic considerations, and practical realities such as budget and turnaround time. The best outcomes are those that restore confidence in the bike’s appearance and performance, while preserving the integrity of the rider’s protective shell. The journey from a damaged piece to a repaired surface is a blend of science and art, where material properties, mechanical engineering principles, and aesthetic judgment converge. The aim is not merely to fix a crack or patch a dent; it is to bring the fairing back to its intended geometry, to reseal the air flow path, and to ensure that the rider can ride with certainty and comfort over many miles to come. In this sense, the repair becomes part of a larger practice: treating the bike as a living system that, even when damaged, can be restored to a state of reliable performance, safety, and visual coherence. For readers who want to explore practical examples and see how these principles translate to real-world repair scenarios, there is a wealth of accessible guidance and case studies that illustrate the path from damaged to restored. And as you plan your next project, remember that the right combination of materials, technique, and finishing care can make a repaired fairing as durable as the day it rolled off the factory line.
Internal resource for further exploration: Honda fairings collection.
External resource: Motorcycle fairing repair guide
Contour, Courage, and Composite Care: A Material-First Approach to Motorcycle Fairing Repair
The motorcycle fairing is more than a curbside cosmetic shell. It is the primary shield between engine heat, weather, debris, and the rider’s body. When a fairing cracks, chips, or splits, the impact is felt across handling, performance, and safety. A repair that is sturdy, smooth, and aerodynamically faithful to the original shape can restore confidence and protect the motorcycle’s most exposed systems. The durable return of a fairing rests on choosing the right materials, applying them with care, and understanding how the finished surface will perform in real-world riding. This chapter binds those threads into a practical, narrative guide that flows from the fundamentals of materials science to the realities of shop work and on-road performance, all while maintaining an eye toward cost, safety, and long-term durability.
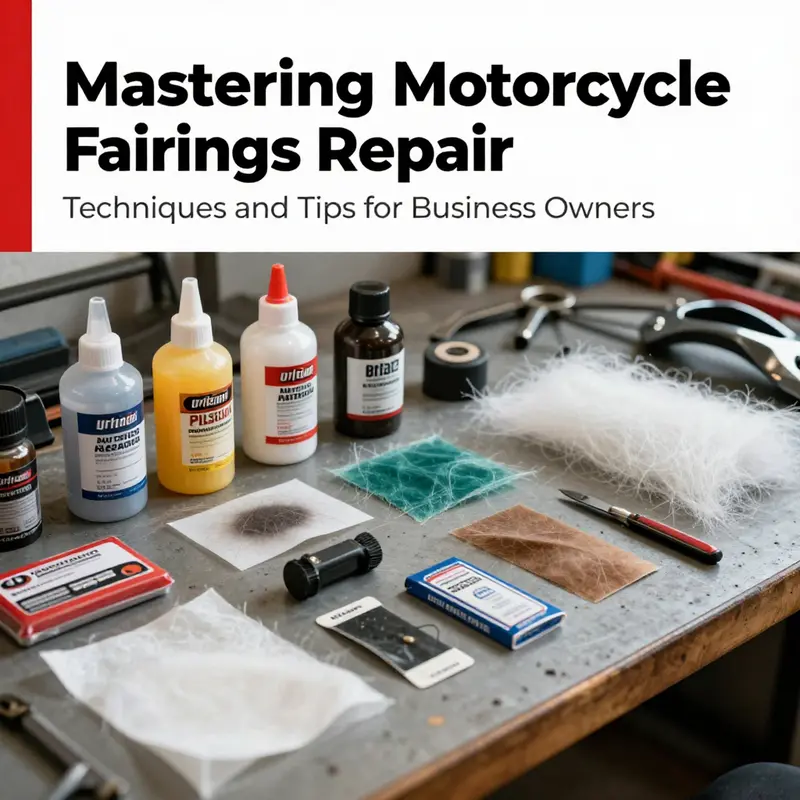
At the core of any fairing repair is a decision tree about material compatibility, structural reinforcement, and surface finish. The most common materials used in contemporary repairs are a two-part body filler chosen for its ability to fill dents and cracks, a reinforced patch system such as fiberglass or carbon fiber for structural support, and a finish layer that seals, colors, and protects the repaired area. The chain of work begins with an assessment of the damage. Small chips and superficial scratches demand a different approach than deep cracks that penetrate into the underlying structure or break a mounting point. In either case, the objective remains the same: restore the fairing’s original contour, preserve its surface integrity, and ensure the repair endures the next ride, whether that be a long highway run, a limited track session, or a routine city commute.
The material choices are guided by the most common fairing materials today, which are ABS plastics and fiberglass. ABS is favored for its light weight and impact resistance, and it is compatible with many repair kits and adhesives designed to something that can be shaped and refinished. While the specifics of adhesives and fillers may vary, the guiding principle is that every patch, filler, and finish layer must bond well to plastic or fiberglass, withstand temperature swings, and resist the UV exposure that paints and clear coats inevitably face. For repairs that require reinforcements, a patch layer of fiberglass or carbon fiber cloth, soaked with a resin system, offers the needed stiffness to resist future cracks along the same line of stress. The combination of a strong structural patch and a well-prepared surface creates a repair that is less prone to delamination or further cracking when the motorcycle is pushed to its performance envelope.
In the world of repairs, a clean starting point is essential. The process usually begins with a thorough cleaning of the damaged area. Dirt, grease, wax, and solvents can prevent the resin or filler from bonding properly. After cleaning, the panel is carefully sanded to create a mechanical key for adhesion. The sandpaper progression typically moves from a coarse grade for initial leveling to a very fine grade for surface preparation. The goal is a uniform, matte surface where the repair will take place, free of glossy residues that might trap air or prevent even curing. During sanding, it is crucial to wear protective gear and work in a well-ventilated area. Dust management matters, not only for the quality of the finish but for the safety of the technician.
Once the surface is prepared, the repair strategy becomes clear. For cosmetic imperfections, a polyester or epoxy-based body filler is applied to fill pits, dents, or shallow cracks. The filler is then shaped using gentle pressure and sculpted with metal or plastic finishing tools. A crucial step follows: the filler must be cured fully before any further work. Rushing this step can trap moisture or solvents, leading to cracking once the paint system is applied. When the damage is more extensive or when the fairing shows integrity flaws around mounting points, a reinforcing patch is introduced. Fiberglass cloth or a carbon fiber patch is cut to fit, then embedded with a compatible resin system. The intersection between patch and base plastic is where the real durability is built. The resin’s chemistry must be chosen to ensure excellent adhesion to both the base material and the patch, while also offering good fatigue resistance for the vibrational and thermal cycles the bike experiences in daily riding and on the track.
The matter of resin choice is more than a technical preference. It is a decision with long-term consequences for heat exposure, chemical exposure from cleaners and fuels, and the mechanical stresses generated by wind and engine vibration. The two most common families of resins are epoxy and polyester. Epoxy resins typically deliver stronger adhesion, better fatigue performance, and higher moisture resistance—critical when a repair sits on the underside of a fairing or near heat-exposed areas. Polyester systems, while perhaps more forgiving and easier to work with, can be more prone to shrinkage and less robust in high-stress scenarios. The selection is guided by the extent of the damage, the use case of the bike, and the level of professional finish desired. For enthusiasts who ride on track days, the durability of an epoxy-based repair often makes it the preferred choice for structural patches, while cosmetic areas may still rely on a compatible filler and topcoat after the repair has cured.
After the structural patch has cured, attention turns to the surface finish. The patch and filler present a new surface that must be made smooth and uniform with the surrounding fairing. This begins with a light sanding that feather-edges the repaired area into the adjacent panels. The aim is not to create sharp lines but to blend the repaired section into the rest of the curve. In time, a primer is applied. The primer serves multiple purposes: it seals the repaired surface, reveals imperfections that may not be visible under raw filler, and provides an ideal bonding surface for paint. The primed surface is then visually inspected under varied lighting. Any pinholes, runs, or unevenness becomes evidence of areas that require additional attention before the color layer is applied.
Paint and finish bring both color and protection. Modern plastics and fiberglass respond well to two-stage paint systems, consisting of a base coat and a clear topcoat. A single-stage paint can be faster and easier for casual riders, but it often sacrifices some durability and UV protection when exposed to the sun and high-speed airflows. A two-stage system, however, offers better color depth, improved gloss, and greater resistance to sun fading. The color-matching process is meticulous, especially when repairs are visible from multiple angles or under varying light conditions. The clear coat provides the final protective layer, with UV inhibitors and a hard finish that resists micro-scratches from wind-blown debris and routine handling. It is the clear coat that gives the repaired surface the high-gloss, showroom-like appearance that many riders expect from a professionally finished panel. Yet, beyond aesthetics, the clear coat is doing serious work: it shields the underlying paint from UV radiation, reduces chalking, and guards against environmental degradation.
A fairing repair is not complete until reattachment is considered. The mechanics of reattachment are a separate but equally important part of the process. Accurate alignment is essential to preserving the fairing’s aerodynamics and the rider’s line-of-sight. Adhesives and sealants used for mounting must strike a balance between strong initial grip and the option for eventual disassembly should a future replacement be needed. The wrong adhesive can lead to adhesive residue on paint, sudden loosening, or misalignment that compromises airflow and rider comfort. As a practical matter, the most reliable installations involve a combination approach: reassert the mounting points with mechanical fasteners where feasible and supplement with adhesives designed for plastics or composite materials. The result is a secure, serviceable bond that preserves the support the mounting hardware provides while allowing for any future panel service without damage to surrounding structures.
The aerodynamics of the fairing are more than cosmetic considerations. The fairing’s curves and surface finish interact with air to shape drag, lift, and stability. Any repair-induced irregularity can disrupt airflow, leading to subtle but measurable penalties such as increased drag, reduced fuel efficiency, and rider fatigue on long rides. The repair must respect the fairing’s original contour, maintain smooth transitions at seam lines, and avoid feathered edges that could produce turbulent flow. This is particularly important where fairings meet the windscreen, around edges that trace the throttle body area, or near the engine intake where even small deviations can alter the thermal balance of the bike’s operation.
An efficient repair strategy also contends with cost and practicality. For riders who encounter frequent potholes, tight race circuits, or rough roads, the temptation to over-reinforce can lead to unnecessary weight or stiffness, altering handling characteristics subtly. Conversely, an under-repaired panel risks crack propagation and possible detachment in high-speed scenarios. The middle path—durable enough for the road yet light enough to preserve performance—emerges when the specialist demonstrates a precise balance between filler, patch material, resin, and finish. This balance is not a singular recipe but a spectrum that depends on the area of the fairing being repaired, the level of exposure to the elements, and the rider’s own expectations for aesthetics and endurance.
For those who want to avoid repeated repairs and maintain a consistent look and feel, a high-quality replacement fairing can be a practical alternative. Replacement panels, designed as modular units, can be swapped with relative ease and typically align with the vehicle’s original geometry. This approach eliminates the guesswork attached to patching and repainting, especially when the damage is concentrated on a single panel or when the original panel has suffered multiple impact points that would be too labor-intensive to repair repeatedly. The availability of modular panels means riders can plan a repair strategy that fits their budget, riding frequency, and risk tolerance. In the long view, replacements can offer better return on investment, particularly for motorcycles that undergo aggressive use on tracks or demanding touring routes. If replacement is chosen, attention to fit, finish, and compatibility with the bike’s overall aerodynamics remains essential; the new panel must integrate seamlessly with the other panels, forming a coherent airflow pattern that supports handling and stability.
To illustrate how the philosophy of material choice translates into practice, consider a scenario where a midsection panel develops a long crack that radiates toward a mounting point. A typical, well-considered repair would begin with stabilizing the crack to prevent further propagation, then applying a fiberglass patch carefully aligned with the crack’s direction. The patch is secured with a resin that offers robust adhesion to the base material, and the seam is ground and feathered to disappear under the final primer. The filler is used strategically to fill recessed areas and to create a smooth transition between the repaired section and the surrounding surface. After the primer, base coat, and clear coat are applied, the finished panel should look indistinguishable to an observer who enters the garage for the first time, yet it should also behave as a continuous surface in wind and heat. If a customer values speed and ease, a modular replacement panel might be the more pragmatic option, particularly when the panel is readily available and the rest of the bike remains sound. In either case, the repair’s success depends on the same fundamentals: surface preparation, appropriate adhesion, controlled curing, and a finish that resists the wear of time.
For a reader seeking a structured path through this decision-making, the practical takeaway is straightforward. Start with honest damage assessment. Decide whether you need cosmetic remediation or structural reinforcement. Choose the materials that align with the damage type, the panel’s exposure to heat and UV, and the rider’s performance goals. Execute with patience: clean, sand, bond, cure, and finish with a protective layer. And finally, evaluate aerodynamics and mounting integrity after the repair is complete. A well-executed repair should feel like a seamless continuation of the bike’s original lines, preserving the rider’s confidence as much as optical alignment does. If the aim is to maintain a pristine look or to pursue a track-ready finish, consider the chapter’s underlying theme: repair work is as much about preserving contour as it is about reinforcing structure.
From an educational standpoint, the chain of steps outlined here underscores why a thoughtful, methodical approach to materials matters. It is not enough to wield a filler or a patch and call it done. The layers of preparation, adhesion, curing, and finish are each critical to the integrity and appearance of the final product. A well-chosen filler must bond to the surface without shrinking or cracking, while a reinforcing patch must distribute stress evenly without creating a hard edge that could become a fracture line. The primer, base, and clear coats must lay down evenly, avoid runs, and resist weathering. The result is a repaired fairing that not only looks like the original but also behaves like it under the duress of riding, wind, and heat. In the end, the materials do the work; the craft ensures that work translates into a reliable, aerodynamic, and durable surface that preserves both rider safety and performance.
For those who want further guidance or a deeper dive into specific repair techniques, a comprehensive guide on motorcycle fairing repair techniques and materials is a useful resource to consult. You can explore broader approaches to fairing restoration and gain a deeper understanding of the interplay between materials, surface preparation, and finish quality by visiting a trusted technical guide. In addition, those interested in sourcing parts can find modular options that simplify the repair path and expand customization possibilities. If you are exploring options for specific models or generations, you may also find value in dedicated collections that categorize parts by manufacturer and model family. For example, riders pursuing a Honda-based restoration or customization can benefit from dedicated collections that group compatible panels and reinforcement options. In this context, those who want to browse a curated selection can explore the Honda fairings collection to identify panels that align with the bike’s original geometry and aesthetic. Honda fairings collection.
In the broader ecosystem of repair and customization, the decision to repair or replace hinges on several practical considerations. Availability of replacement panels for a given model, the cost of the panels versus the cost of a professional repair, and the rider’s long-term plans for the bike all shape the final choice. A well-executed repair that preserves contour and surface finish can be a cost-effective path for many riders, especially when the lower weight and better fit of the original panel are important for handling characteristics. Conversely, if the damage compromises mounting points or if the panel is outdated or difficult to repair with a living warranty in mind, a modular replacement could offer a quicker, more predictable outcome with a more consistent finish across all panels. Regardless of the route chosen, the end goal remains the same: a fairing that supports performance, aesthetics, and safety, while withstanding the rigors of real-world riding.
For readers who are curious about further reading, a broader, authoritative resource on fairing repair techniques and materials can be consulted to reinforce the concepts outlined here. This external resource provides a structured overview of surface preparation, material compatibility, and finishing strategies, helping riders and technicians alike deepen their understanding of repair science and practical execution. External resource: https://www.motorcyclecruiser.com/motorcycle-fairing-repair-guide
Precision and Protection: The Value of Professional Motorcycle Fairing Repair Services
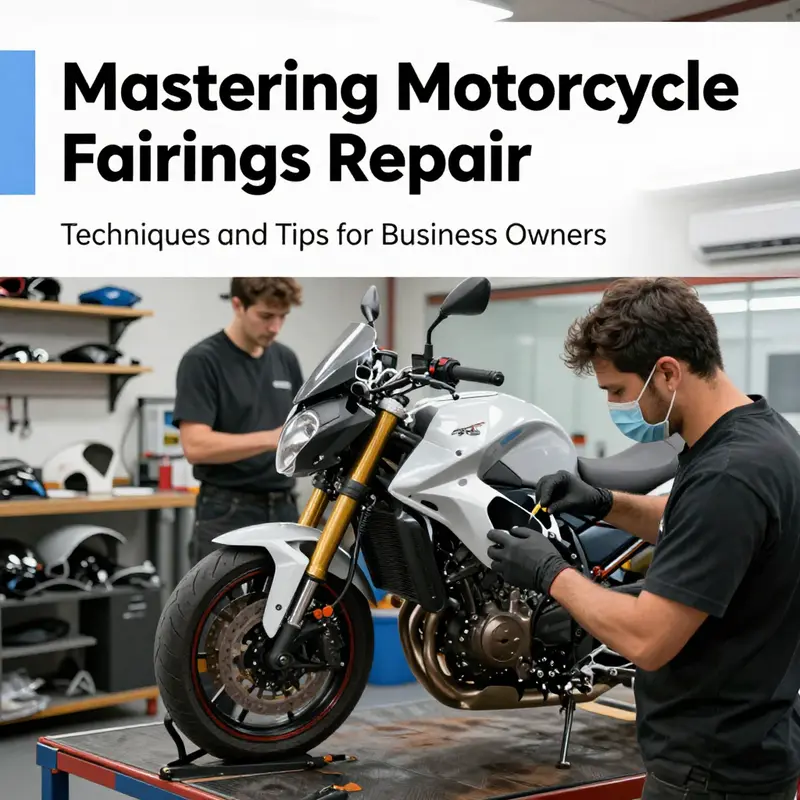
Dented, cracked, or faded fairings do more than mar the look of a bike; they can undermine protection, aerodynamics, and rider confidence. When a fairing bears the marks of a crash or a high-speed encounter with debris, riding still matters, but how it’s repaired matters even more. Professional motorcycle fairing repair services emerge as a synthesis of art and engineering, combining cosmetic finesse with structural science to restore a unit that not only looks correct but also behaves correctly at speed. This is where the expertise of the shop becomes as essential as the patch or resin used. The repair professional begins with a careful assessment, weighing the visible damage against the fairing’s role in shielding the engine, electronics, and the rider. It is not simply a matter of filling a crack or repainting a surface; it is about reinstating the fairing’s original geometry, thickness, and surface finish to preserve both protection and aerodynamics. For riders who push performance on track days, long tours, or demanding sport riding, this distinction can translate into meaningful differences in downforce, drag, and fatigue over hundreds of miles. In practice, the work unfolds through a cohesive sequence that blends preparation, reinforcement, alignment, and finishing. Cosmetic repairs, as the gateway to restoring appearance, are never just about color matching. They set the stage for a seamless transition from damaged panel to a surface that looks factory-finished. The process begins with meticulous sanding and removal of damaged material, followed by careful application of fillers and an approach that respects the original contour radii. The goal is not merely to fill but to recreate the smooth curves and edge profiles that influence airflow. When color is involved, technicians perform color correction with a patient eye for hue, saturation, and gloss, ensuring that the repaired section blends with adjacent panels under different lighting conditions and angles. The final touches—primers, base coats, and clear finishes—demand an expert hand to achieve uniform film thickness and a flawless surface that resists UV exposure and micro-scratches. But the cosmetic work is only the surface of professional repair. The structural fixes sit at the core of the repair’s durability and the bike’s safety. Large cracks or broken junctions require more than filler; they require resin systems and reinforcement methods that restore stiffness and load transfer paths. Fiberglass reinforcement remains the classic workhorse, but modern practice often integrates carbon fiber patches where weight savings and stiffness are paramount. The technician blends these materials with the existing shell to create a seamless bond that does not introduce sharp corners or abrupt thickness changes, which could become stress risers during future impacts. The key is to re-create the fairing’s internal structure so that the windscreen, side panels, or belly pan behave as a single, unified unit again. Equally important is achieving precise alignment. A misaligned fairing can obstruct the rider’s view, disturb airflow, or even collide with the forks, radiator, or frame during aggressive cornering. Proficient shops verify fitment using careful mounting trials and reference measurements, often simulating real-world stressing to confirm that the panel remains in place under vibration and wind loads. The alignment checks extend to fastener quality and torque control, ensuring that screws, clips, and grommets secure the panels without introducing new gaps or misfits. The emphasis on precise fitment is not merely cosmetic; it has direct consequences for safety and performance. Any deviation in surface contour can alter the boundary layer of air around the bike, changing how the wind flows over the fairing and around the rider. Even subtle disparities can generate drag, which over extended riding sessions translates into higher fuel consumption and rider fatigue. In professional repair, then, the work is both restoration and verification. The technicians’ aim is to deliver a panel that feels, in every sense, factory-integrated: smooth to the touch, perfectly aligned to adjacent panels, and resilient enough to withstand weather, road debris, and another unforeseen mishap. That is why reputable shops often emphasize the use of OEM-equivalent materials and industry-standard techniques. These choices are not about brand loyalty; they are about predictable performance and long-term durability. Reinforcement layers are chosen for compatibility with the original resin system, and the finished surface is calibrated to match the expected hardness, gloss, and resistance to environmental exposure. The overall result is a fairing that recovers its protective function and its aerodynamic profile, restoring confidence for riders who demand high performance on sport bikes or supersport machines. The repair process itself is a careful choreography. Sanding lays a level foundation, removing micro-highs and lows while preserving core geometry. Priming follows, giving the surface a uniform anchor for subsequent coatings and enhancing adhesion. Painting then reproduces the color and finish with attention to the complexities of metallic or pearlescent effects, where lighting can dramatically alter perceived color. Clear-coating adds the protective layer that defends against UV light and minor abrasions, while also locking in color and gloss. Each step is evaluated under controlled lighting and travel-height checks to ensure the repaired area remains visually indistinguishable from its neighbors. Where a fairing is a semi-unit—common on touring and sport-touring motorcycles—the same principles apply, albeit with an emphasis on maintaining a balance between wind protection and weight. Semi-fairings must preserve rider comfort without compromising the bike’s center of gravity or reducing fuel efficiency through added drag. Professional technicians recognize this balance by selecting materials and construction methods that mirror the original design intent as closely as possible. They understand that the rider’s experience is intimately tied to the fairing’s integrity: the way it shields against wind and weather, the way it encases the electronics, and the way it contributes to the machine’s overall balance at speed. When a repair is chosen, it may be accompanied by a broader service package that addresses related components such as mounting points, brackets, and adjacent panels. On-site diagnostics may be offered to assess the entire enclosure for signs of fatigue or prior damage that may have influenced the current condition. This holistic approach helps avoid patchwork fixes that simply relocate stress to another area. Instead, the professional solution treats the fairing as a complete system, preserving its protective function and its aesthetic coherence. The value proposition of professional repair extends beyond immediate appearance and performance. It encompasses longevity, resale value, and rider safety. A properly repaired fairing retains its protective capacity, which is critical if another impact occurs. In this sense, the repair becomes a strategic investment rather than a cosmetic fix. Riders who anticipate future use—whether returning to track days, weekend rides, or long adventures—benefit from the assurance that the repair has been executed to recognized standards. Some shops even offer warranties on workmanship, a sign that they stand behind the durability of their repairs. The pursuit of quality in professional repair also invites a broader discussion about replacement options. For many riders, replacing a damaged fairing with a new or refurbished panel can be more cost-effective in the long run than repeated patchwork. In particular, modular replacement panels allow for targeted changes without rebuilding the entire fairing system. This modular approach supports customization as well, enabling riders to refresh the look and optimize aerodynamics without compromising safety and fit. When considering replacements, it is natural to weigh durability, compatibility, and the continuity of fit with the rest of the bike. Shops that specialize in motorcycle fairings typically maintain a catalog of OEM-equivalent panels and can guide owners toward the most practical path—whether it’s a repair that restores the original geometry or a modular swap that preserves the bike’s character and performance. For riders who prefer a concrete path back to showroom-like condition, a professional repair can be the most straightforward route, especially when the damage is complex or has altered the fairing’s shape. Yet even here, technicians emphasize the importance of a judicious approach: assessing whether repair will truly restore the panel’s protective role and aerodynamic efficiency, or whether it would be wiser to replace. The decision is rarely a simple one, but it is guided by a disciplined framework that values safety, performance, and value retention. In practice, the professional repair journey invites a few practical considerations that owners should keep in mind. First, choose a repair service with proven experience in motorcycle-specific components. Certifications, reference cases, and honest diagnostic conversations signal a shop that can balance aesthetics with engineering. Second, seek a clear estimate that itemizes cosmetic work, structural reinforcement, alignment checks, and finishing. Transparent pricing helps riders understand what is being done and why. Third, inquire about warranties or guarantees. A reliable service will stand behind its workmanship for a defined period, reflecting confidence in the materials and methods used. Fourth, consider the broader value of on-site diagnostics or mobile service if the rider’s schedule or the bike’s condition makes transport challenging. Ultimately, the greatest payoff of professional fairing repair lies in restoring more than just a surface. It is about returning the bike to a state where protection, performance, and pride converge. A well-executed repair preserves the bike’s aerodynamic envelope, protects important systems, and ensures a seamless interaction between rider and machine. It also preserves the bike’s value and the rider’s peace of mind, knowing the repair respects the original design intent while offering practical longevity against future wear and potential impacts. For those who want a tangible sense of how this translates into choices, a closer look at the available replacement panels and modular options can be illuminating. If you’re exploring replacement routes or considering a staged approach to a full fairing refresh, you may find it helpful to browse the Honda fairings collection to see how different panels integrate with various body styles and mounting conventions. Honda fairings collection offers a glimpse into how modular components can be organized to suit different models and riding goals, providing a practical reference point for decisions about color, texture, and fit. In the end, professional fairing repair is about trust—the trust that the work will reinforce, not compromise, the bike’s performance envelope. It is about technicians who blend skill with evidence-based practice, who treat each damaged panel as a unique part of a larger system, and who communicate openly with riders about what is possible, what is advisable, and what will deliver the best long-term value. For readers seeking a deeper dive into techniques and standards, a comprehensive external reference on fairing repair practices can be found in established maintenance guides that detail sanding, priming, painting, and finishing sequences, as well as recommended resin and reinforcement methodologies. External reference: https://www.motorcyclecruiser.com/motorcycle-fairing-repair-guide
Final thoughts
In conclusion, understanding the intricacies of motorcycle fairings repair is crucial for business owners who wish to provide quality, effective service to their customers. By mastering the various repair techniques and familiarizing yourself with essential materials, you can not only enhance your service offerings but also improve customer satisfaction. If you consider professional repair service options, ensure they maintain the highest standards for safety and performance. The knowledge gained from this article positions you to meet the evolving demands of motorcycle maintenance effectively.