Selecting the right paint for motorcycle fairings is crucial for maintaining aesthetic appeal, enhancing durability, and ensuring long-lasting performance. As a business owner in the motorcycle industry, being informed about paint options can significantly affect customer satisfaction and product longevity. This article outlines the essentials of painting motorcycle fairings, starting with the importance of choosing the right paint to ensure quality. Following chapters delve into types of suitable paint, techniques for proper surface preparation, effective application methods, and maintenance tips for preserving painted fairings, offering a comprehensive guide for optimizing your motorcycle services.
Gloss That Guards: Choosing the Right Paint for Motorcycle Fairings
The surface of a motorcycle fairing is more than just a panel. It is a shield, a streamlining element, and a canvas that keeps the bike looking sharp through miles of sun, rain, heat from the engine, and the occasional fuel vapor encounter. When riders talk about color, gloss, and texture, they are really discussing how a coating system will stand up to the life a fairing must endure. This is not a generic painting project. It is a high-stakes material choice, where the wrong paint can fade quickly, crack under thermal cycles, or peel away, revealing a dull shell beneath. The right paint, by contrast, is a deliberate blend of chemistry, surface science, and application discipline. It is engineered for plastic, for flexibility, and for the kind of exposure a fairing faces at highway speeds and in shifting weather. Understanding why that matters means looking at the nature of plastic fairings, the demands of their environment, and how a coating system must be engineered to meet those demands with lasting grace.
Plastic fairings are not metal. They respond differently to heat, impact, and solvents. ABS and polycarbonate blends, common in modern fairings, demand coatings that can flex without cracking, adhere without aggressive primers, and resist UV-induced fading. This is where two-part polyurethane systems shine. They bring a combination of elasticity and hardness, resilience against chemical attack from fuels and solvents, and stable color through years of sun exposure. In plain terms, these systems stay flexible enough to resist micro-cracking under thermal stress, while remaining hard enough to resist scuffs and small abrasions that occur with road use. In contrast, single-component acrylics or standard automotive enamels, though easier to apply, often lack the long-term durability required by plastic fairings. They can become brittle as heat cycles wear on the surface, leading to cracking, chalking, and color shift. The choice between them is not merely color preference; it is a judgment about how the coating will behave during the lifespan of the bike.
The philosophy of a durable fairing finish begins with surface preparation. A proper foundation is essential. Sanding the existing surface smooth removes gloss and creates a micro-roughness that improves mechanical interlock with the primer. Cleaning follows, because oils, waxes, and fingerprint residues can defeat adhesion. This step is not cosmetic; it is a prerequisite for a uniform, durable bond that will tolerate years of vibration, heat, and fuel exposure. The preparation does not end with the first pass of sandpaper. It continues through the primer, the base coat, and the clear. Each layer must have a clean, compatible surface to cling to, and each must be allowed to cure or flash off as required. The sequence is deliberate: abrasion, degrease, rinse, dry, recheck, then proceed. Skipping steps here is a temptation many riders confront in the name of saving time, but the payoff is a finish that peels or fades in months rather than years.
Material compatibility matters as much as technique. Many modern fairings rely on ABS plastics or blends that bond best with primers designed to function in harmony with plastic substrates. An incompatible primer can be a silent saboteur, leading to delamination, bubbling, or poor adhesion that becomes visible only after exposure to sun and rain. Even the finish itself must be selected with compatibility in mind. A paint system labeled for plastic should come with recommendations for primers and thinners that maintain adhesion and performance. The goal is a coherent system where primer, base, and clear act as a single, well-mbalanced coat rather than a mismatched stack that fails under stress.
The practical consequences of material choices become clearer when you consider the bike’s real-world scenario. Fairings experience rapid thermal fluctuations, especially near the engine and exhaust, and endure UV light relentlessly during long rides in bright sun. The paint must resist chalking and color shift while staying flexible enough to absorb tiny impacts that would be inconsequential on metal but can crack a brittle coating on plastic. Durability under exposure to fuel vapors and solvents is another critical factor. A coating that erodes or softens in contact with gasoline is not only unsightly but dangerous, potentially compromising the fairing’s integrity and the rider’s confidence. A robust system achieves a balance: it remains vivid and glossy when new, while maintaining structural integrity after many heat cycles and variable weather conditions.
In practice, the application process for a long-lasting plastic paint system is a careful choreography. Viscosity management is essential. The thinner used must be compatible with the chosen base and with the sprayer. If the mixture is too thick, it will not atomize properly, leading to orange-peel texture, sagging, or insufficient coverage. If it is too thin, it may run or compromise film thickness, reducing hardness and abrasion resistance. The spray parameters—air pressure, nozzle size, and distance from the part—must be tuned to the shop environment and the coating’s chemistry. Temperature and humidity exert subtle, yet significant, influence. High humidity or cold surfaces can affect drying rates and film formation, producing surface defects or extended cure times. The painter’s experience and the equipment’s calibration become part of the finish’s predictability and reproducibility. The art of achieving a superior finish lies in managing these variables with discipline, not improvisation.
A high-quality finish also depends on the number of layers and the film thickness that accumulates on the fairing. In optimal practice, a primer layer is applied to establish adhesion and to create a uniform base tone. A base color layer follows, providing the bulk of the visual effect, and a clear coat seals and stabilizes the color, protecting against UV and minor impacts. Each layer adds protective capacity and contributes to the final look. The base coat should be chosen for colorfastness and depth, while the clear should be selected for gloss retention and resistance to environmental weathering. When a metallic or flaked effect is desired, the pigment package must be handled with care. The distribution of metallic particles or glitter must be uniform, and the topcoat must lock those particles in place to avoid losing the effect after washing or abrasion. Even such aesthetic choices, which might seem purely cosmetic, require forethought about wear resistance and color stability, because the visual impact is intertwined with durability.
The fairing’s shape and contour also influence coating performance. Complex curves can trap solvents or trap dust if not managed properly, creating imperfections that become visible under light. A well-ventilated, clean spray booth or a well-ventilated outdoor setup, with careful masking and dust control, helps minimize these risks. When masking, attention to edges and transitions prevents bleed-through and ensures crisp lines along panel joints, which matters for the overall perception of quality. A finish that looks flawless from a few feet away but shows micro-blemishes up close undermines confidence in maintenance as soon as the bike is trailered or parked in bright light. The challenge is to translate careful preparation, compatible materials, and precise technique into a final finish that remains visually compelling and mechanically durable over time.
The decision to pursue a plastic-specific paint system is, at its core, a decision about continuity. It preserves color integrity and gloss across years of use, preserves the shield against abrasion and weather, and sustains the bike’s aerodynamic and aesthetic performance. The choice is less about chasing the trend of a moment and more about creating a finish that harmonizes with the plastic substrate’s behavior, the engine’s heat footprint, and the rider’s daily rhythm. In this sense, the right paint is an infrastructure decision—one that underpins how a rider experiences the bike as a whole. It ensures that the fairing remains a proud, protective shell rather than a fragile shell that demands constant touch-ups.
For readers exploring practical entries into this work, consider examining how specific parts of a motorcycle fairing might interact with the chosen coating system. The accumulation of experience from previous projects—sanding rigor, degreasing, and layering in a controlled environment—will inform future decisions. It is also valuable to reflect on how the blend of resins, certain imported additives, and weather-resistant pigments shapes not just color, but the very resilience of the surface. The visual impact—whether a solid hue, a deep metallic, or a sparkling effect—must align with the coating’s performance characteristics. Beyond the aesthetic, the finished surface communicates care: it is a sign the rider protects the investment in the bike and in the time spent maintaining it.
As a practical note, an informed painter will periodically verify compatibility with the fairing material by performing a small test patch on a hidden area. This reduces risk and helps confirm adhesion, color stability, and surface feel before committing to a full panel. The goal is predictability—knowing that the chosen combination of plastic paint, primer, and thinner behaves consistently under the expected conditions. Such forethought pays off in fewer reworks and a finish that continues to look freshly applied long after the first ride in the rain. In many ways, painting for plastic fairings resembles craft born from a careful balance of chemistry, technique, and patience. It is not the impulse to finish quickly that yields excellence, but the discipline to prepare thoroughly, apply precisely, and protect aggressively.
For those seeking further reading that expands on the practical mechanics of this process, a broader perspective on painting motorcycle fairings can provide insightful context and technique refinements. See the extended guidance and practical tips in this resource: Honda fairings collection.
In sum, the right paint for motorcycle fairings is not merely a color choice. It is a carefully engineered system that respects the plastic substrate, endures the elements, and preserves the ride’s visual and functional integrity over time. When the layers come together—proper surface preparation, a compatible plastic paint system, controlled application, and thoughtful attention to environmental conditions—the finish does more than look good. It stands up to the demands of real-world riding and keeps the bike’s appearance consistent, year after year. This is the essence of choosing the right paint for motorcycle fairings: durability, compatibility, and a look that remains as exhilarating as the first ride, long after the first coating has cured.
External resource: https://www.motorcycle.com/how-to-paint-motorcycle-fairings/
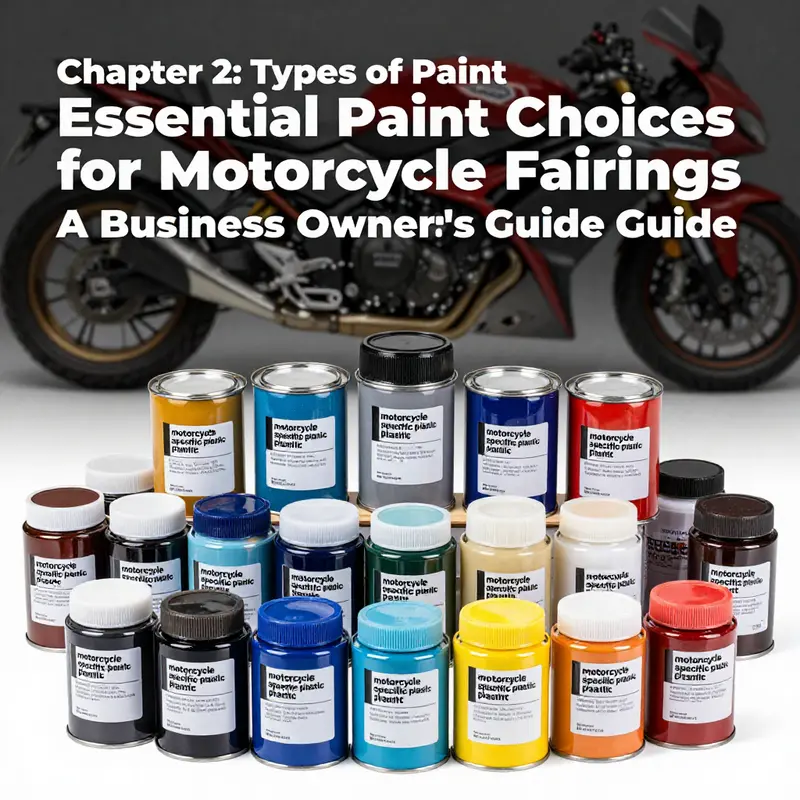
Chapter 2: The Right Coat for Plastic Wings: Navigating Paint Systems for Motorcycle Fairings
Painting motorcycle fairings is more than choosing a color. It is selecting a coat that can bend with plastic under heat, cope with fuel splashes, shrug off sun, and still look glossy after countless road miles. The fairings themselves are often made from ABS, polycarbonate, or composite plastics. Each substrate responds differently to primers, binders, and topcoats, so the path to a durable, long-lasting finish begins with understanding what works best on plastic. When a rider looks for the ideal coating, there are several distinct paint systems to consider, each with its own strengths and compromises. In practice, the choice comes down to how seriously you ride, your budget, and how much patience you have for surface preparation. The goal is a coating that adheres well, resists cracking, stays vivid in sunlight, and can shrug off chemical exposure from fuels and road grime. The discussion that follows weaves together the practical realities of racing-inspired finishes and the more relaxed, DIY approach that many hobbyists pursue, all with plastic as the governing substrate in mind.
Among professional options, two-component polyurethane paints stand out as the gold standard for motorcycle fairings. These involve a base color component and a hardener, which, when mixed, form a tough, highly durable film. The resulting coating offers exceptional resistance to ultraviolet light, which keeps colors from washing out after long exposure to sun. It stands up to fuels, oil, and other chemicals far better than most single-component systems. Importantly, 2K polyurethane bonds well with primer and fillers, which makes it ideal after scratch repair or other surface preparation work. The film is both hard and flexible enough to resist chipping and cracking as the bike flexes at speed and as temperatures swing from cool mornings to hot afternoons. Yet this durability does not come without trade-offs. The mixing ratios must be precise, and the work demands proper ventilation and protective equipment. The finishes tend to carry a premium in both materials and labor. For a serious rider or a professional shop, the payoff is a finish that looks factory-like for years, with color integrity that remains sharp through the bike’s entire lifecycle.
DIY enthusiasts often explore more approachable alternatives, particularly single-component acrylic paints. These products typically come ready-to-use from the can or jar, promising ease of application for beginners. While the simplicity is appealing, these 1K acrylic paints lack the chemical resistance and flexibility of 2K systems. Under prolonged sun exposure, colors can fade or chalk, and the coating may lose gloss or begin to degrade more quickly than a true polyurethane system. In addition, these paints tend to be less forgiving of substrate movement and vibration, which can manifest as micro-cracking in fairings that experience frequent temperature shifts and road vibration. For full fairing repaints or any project where longevity and performance matter, 1K acrylics are generally a short hop from a cosmetic fix to a wear-and-tear problem rather than a lasting solution.
Epoxy-based paints present another option, with a reputation for exceptional hardness and classic adhesion. They are widely used in industrial contexts and can be very effective on metal and rigid substrates. On plastic fairings, however, epoxy paints can be less forgiving. The rigidity that makes epoxy appealing for metal can translate into a higher risk of cracking or delamination on plastics that expand, contract, or flex with temperature changes. If epoxy is used on plastic fairings, it is typically paired with a flexible topcoat and sometimes with a special flexible primer or additive to preserve some give. This approach suits particular repair scenarios where structural integrity is critical and where the surface has been prepped to accommodate the substrate’s movement. For most riders seeking a robust, all-around finish, epoxy alone is not the ideal long-term solution for plastic fairings; it requires careful matching of products and technique.
Specialty plastic-capable paints, including formulations designed to adhere to ABS and polycarbonate and to flex with the substrate, occupy a practical middle ground. These coatings often incorporate adhesion promoters and are designed to account for the thermal expansion and contraction of plastic. They outperform generic acrylics in adhesion and durability, with notably better resistance to minor fuel splashes and weathering. Yet they do not typically reach the long-term durability and chemical resistance of a true 2K system. For many DIYers who want a product that behaves reliably on plastic without the complexity of a full 2K finish, these plastics-capable paints offer a compelling balance. They provide better scratch resistance and color retention than basic aerosols or conventional acrylics, while keeping the process more approachable than a full professional paint setup.
The reality of working with plastic fairings is that the coating’s success hinges on preparation. Surface preparation is the gatekeeper of adhesion and longevity. The existing paint, if any, must be thoroughly cleaned to remove oils, waxes, and residues from road grime. Degreasing with an appropriate cleaner is standard, followed by gentle sanding to create a micro-roughness that gives the new coating something to bite into. The sanding step is crucial; it should be precise and progressive, moving from a coarser to a finer grit to avoid deep scratches that show through the topcoat. Filler and primer then come into play to level the surface and seal the plastic. For plastics, primers with good adhesion to plastic substrates are essential. The primer layer should be allowed to cure fully and then lightly sanded to create a uniform base for the color coat. Only after this preparatory work should the color and clear coats be applied.
Color matching and finish are the next frontiers. With 2K systems, you often obtain a crisp, true color and a glassy surface after clear coating. The clear coat not only adds depth and gloss but also provides an additional layer of protection against UV rays and road exposure. If a metallic or pearlescent finish is desired, the formulation must be handled with care to avoid mottling or color drift, especially over a plastic substrate where heat and sunlight can alter appearance. For some riders, a glitter or metallic addition can enhance the visual impact, but it also stresses the finishing process because metallics can reveal surface imperfections more readily. Thus, the quality of the prep work becomes even more important when a complex finish is planned.
In practice, choosing a paint system for a motorcycle fairing is a decision about risk, reward, and the rider’s expectations. If the goal is maximum durability and a factory-like appearance, the 2K polyurethane route is the clearest path. It pairs the right kind of chemistry with the adaptability required by plastic fairings and provides strong resistance to UV exposure and fuel attack. The cost and the complexity are higher, but the results often justify the investment for riders who demand longevity and performance from their paint job. For hobbyists or those repainting a single fairing or practicing color matching, specialty plastic-capable paints offer a robust, more forgiving pathway that still respects the plastic’s needs. They deliver a finish that holds color and gloss better than entry-level acrylics and aerosols while keeping the process accessible and controllable in a home shop environment.
No matter which route is chosen, proper surface preparation remains non-negotiable. Cleaning, sanding, priming, and using compatible scratch-filling compounds are essential steps that apply across the spectrum. Without a sound foundation, even the best paint system can fail prematurely. Once the base coat or color layer is applied, careful curing at appropriate temperature and humidity levels helps ensure solvent outgassing completes and the film forms a resilient, uniform surface. The final finish should be evaluated under varied lighting to confirm there are no solvent pops, sags, or micro-blemishes. Any issue should be corrected before the clear coat is laid down or, if necessary, by a controlled color-matching process to maintain overall harmony with the design.
For readers seeking practical reference points during a hands-on session, consider using a target collection like the Honda fairings as a test bed for color and finish layering. The collection provides a familiar canvas to practice adhesion, color matching, and layering techniques before tackling a personal project. Honda fairings collection offers a useful frame of reference when planning how a color will align with OEM lines, how metallics shift with lighting, and how clear coats respond to plastic. While the exact shade choices may vary, the underlying principles of preparing the surface, selecting the coating system, and applying it in controlled conditions remain the same across brands and projects.
Finally, to ground the discussion in real-world expectations, remember that the chemistry of paint on plastic is a dynamic balance. The substrate does not behave like metal; it expands and contracts with temperature, and the pigment must tolerate fuel and environmental exposure while staying flexible enough to resist cracking. The most durable outcomes arise from a commitment to surface prep, the right choice of coating system, careful mixing and application, and a disciplined curing process. When these elements align, the resulting fairing finish not only looks spectacular but also endures through seasons of riding, weather, and wear. For readers who want to explore the technical depths of 2K polyurethane finishes and how they behave on plastic fairings, a practical overview can be found in the external reference that examines real-world applications and performance benchmarks: https://www.motorcycle-maintenance.com/2k-polyurethane-paint-for-motorcycle-fairings/.
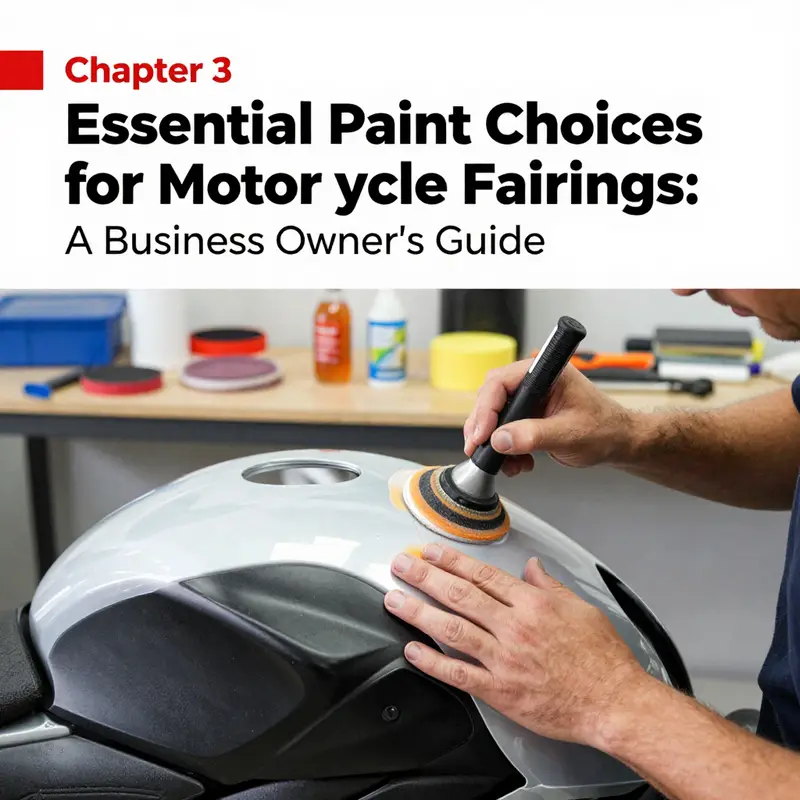
From Raw Plastic to a Pro-Grade Gloss: Surface Preparation Techniques for Painting Motorcycle Fairings
Surface preparation is not glamorous, but it is the difference between a fairing that looks good for a season and one that lasts for years. Plastic fairings present a different challenge than metal panels: their resin composition can trap oils and mold release residues, and their surface energy changes with humidity and temperature. A proper prep regime acknowledges these realities and treats every step as a safeguard against adhesion failure. When your goal is a long-lasting, showroom-worthy finish, you start with clean, dry, bare plastic free of gloss and oils. You do not skip this; every contamination molecule acts like a tiny barrier, creating micro-delaminations and dull spots that only widen with time. This is why surface prep is not a single action but a disciplined sequence that, once learned, pays dividends in color retention and scratch resistance.
Cleaning and degreasing anchor the entire process. Begin with a thorough cleaning to cut through grease, wax, fingerprints, and dust. Use a dedicated automotive cleaner or a mild degreaser, following the product’s instructions to the letter. Work in a clean, dust-free area and rinse off any cleaner with plenty of water. After rinsing, dry the panels completely with a lint-free towel or a clean microfiber. Any residual moisture can create tiny water spots or dilute primer coats, undermining adhesion. If you suspect silicone from wax removal, rewash and re-rinse to ensure the surface is truly residue-free. Let the fairings air-dry in a shaded space until no moisture beads remain. The goal is a surface that reflects light evenly rather than a film that traps contaminants. In practice, this means avoiding towel fibers catching on the plastic and limiting contact with bare hands, as sweat and skin oils reintroduce oils that can ruin the bond.
Decontamination and old finish removal may be necessary before you proceed. If an old paint layer is peeling or soft, you should remove it to the bare plastic. Mechanical removal with careful sanding and chemical strippers is common, but you must ensure you do not gouge or heat the plastic. After stripping, clean again and inspect the surface for residual waxes or solvents. Some finishes leave a ghost of gloss; that gloss can hinder adhesion. The most reliable indicator is a simple test: a piece of scotch tape pressed on the surface should pull away with no adhesive residue. If it does pull, continue cleaning and possibly re-sanding before you proceed. This diligence prevents surprises when you finally apply adhesion-promoting primers and the topcoat.
Sanding to create a key is the next crucial act. With the surface clean, you create the mechanical key that allows the primer to bite into the plastic. Start with 800- to 1000-grit sandpaper, dry, to lightly abrade the surface and remove any remaining gloss. The goal is not to remove material but to roughen the surface enough to give the primer grip. After this initial sanding, wipe with a tack cloth to lift dust and small particles. For an even smoother base, switch to wet sanding with 2000-grit paper. Wet sanding cools the surface, reduces clogging, and yields a glassy texture ideal for a high-gloss finish. Keep the surface consistently damp, rinse occasionally, and avoid letting the sandpaper load with plastic dust. Once you finish, perform a final wipe-down to ensure you have a dust-free micromesh-like surface that reads perfectly under lights before priming.
Priming is the bridge between raw plastic and color. Use a primer specifically formulated for plastics or composite materials used on fairings. A good plastic primer acts as a sealer, an adhesion promoter, and a consistent base for the topcoat. Apply in light, even coats, building coverage gradually rather than dumping product on in heavy blasts that can pool in crevices. Allow each coat to cure according to the manufacturer’s instructions, then inspect for pinholes or unevenness. Lightly sand between coats with a fine paper to knock down imperfections, being careful not to remove primer. If you notice any bare spots, apply another thin coat and re-sand. In the end, you want a uniformly matte, sound base with no cross-grain scratches that could telegraph through the paint. This is where the separation between a good job and a great one often occurs.
Addressing minor imperfections before topcoat saves headaches later. Small scratches, pitting, or rough areas can ruin a flawless finish, so address them before topcoat. Use a plastic-specific filler or glazing putty that adheres to the resin without lifting. Apply sparingly to the affected area, then sand flush with very fine grit once cured. Be mindful of creating new edges or ridges; the goal is a smooth, continuous surface that accepts paint evenly. After filling and sanding, perform another dust-free wipe to remove abrading residues. If you can, do a quick test spray on a small, inconspicuous area to confirm that the filler accepts paint and does not react with the primer. This extra check helps you adjust technique early rather than discovering flaws after you apply color.
Edge protection and masking demand precision. Masking is a discipline, because you want clean lines and no bleed while protecting areas that must stay unpainted, such as mounting tabs or quick-release hardware. Use high-quality masking tape and a protective film for large flat areas. Press tape edges down firmly to avoid seepage; remove any trapped dust before applying tape. For curved sections, choose tapes that bend without lifting and use small pieces to follow the contour. When you remove masking, do so slowly at a slight angle to prevent lifting the fresh primer or base coat. If a panel has already been prepped and masked, work in a clean room or under a controlled light. The better your masking, the more professional your final edge will look.
Environmental control and application conditions set the pace for a successful spray. Work in an environment where dust and temperature are controlled. Temperature and humidity influence both how quickly primer and paint dry and how well they cure. A moderate, constant temperature—neither too hot nor too cold—and relatively low humidity are ideal. Avoid spraying in direct sunlight or on very hot or cold surfaces, as this can cause tackiness or cracking later. Use appropriate spray equipment settings to deliver a fine, even spray without heavy runs or dry spray. If your shop has an airflow system, protect the surface from gusts that can blow dust into the wet film. The goal is a smooth, self-leveling coating that hides minor imperfections and yields a glossy finish. This is where the preparation work pays dividends; a well-prepped surface makes the final color and gloss look uniform across every panel.
From prep to paint is a larger, integrated vision. When the prep is done correctly, the paint system—whether a motorcycle-specific plastic paint or a similar plastic-friendly coating—adheres as intended and resists wear. The primer’s bite, the sanding cues, and the sealing properties align to give you a durable base for a topcoat and, if used, a clear coat. The base color then becomes a true representation of your chosen hue, with consistent depth and a uniform sheen across all fairings. The steps described above also reduce the chances of color changes that come from trapped moisture or solvent attractants. In practice this means you can achieve a lasting, resilient finish that resists UV fading and keeps its gloss for seasons of riding. For riders who want to source panels or components that fit their bike model, you can explore the Honda fairings collection to find compatible options, which helps maintain a cohesive look across all bodywork pieces. Honda fairings collection.
A note on resources. For further guidance and a pro-level walkthrough, consider a trusted how-to resource that outlines practical steps for achieving a pro finish. It reinforces that plastic-specific coatings are the right choice for fairings, given their formulation for plastic surfaces, weather resistance, and long-lasting color retention. It also reinforces that careful surface prep is the foundation for paint adhesion and durability. External resources can extend your understanding and provide additional checklists you can apply in the workshop. See a detailed professional approach here: https://www.motorcycle.com/tech-tips/how-to-paint-motorcycle-fairings-like-a-pro
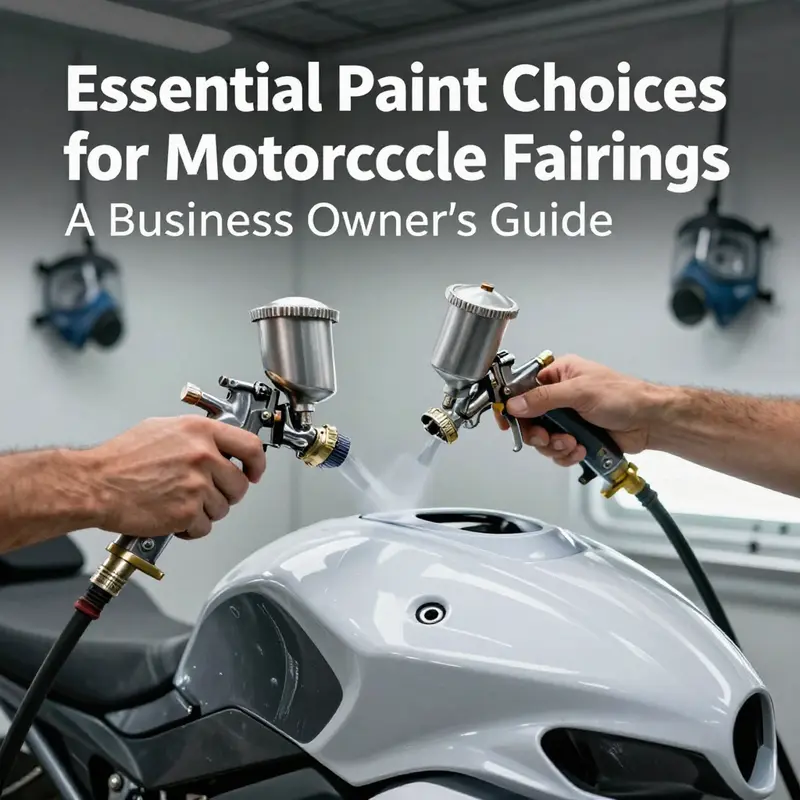
Gloss, Grip, and Durability: Selecting and Applying Plastic-Specific Paint for Motorcycle Fairings
Paint choices for motorcycle fairings are rarely about color alone. They are decisions about adhesion, resilience, and how a finish stays true under sun, rain, and the constant friction of wind and road grime. The central premise is simple but powerful: use a paint system designed for plastic, because the substrate itself behaves differently from metal. Plastic fairings expand and contract with temperature, tolerate flex, and shed or absorb moisture differently. A paint engineered for these materials bonds chemically or with specialized adhesion promoters, resists UV degradation, and can maintain a glossy, rich appearance for years with proper care. In practice, this means starting with the right base product—motorcycle-specific plastic paint that blends resin chemistry, weathering pigments, and compatible hardeners or clear coats into a cohesive system. It also means recognizing that preparation and technique are inseparable from material choice. If the surface is not properly prepared, even the most advanced plastic paint will fail to grip, peel, or fade. When you approach a fairing repaint, you are effectively rebuilding a microstructure. Your aim is a smooth, uniform canvas that respects the plastic’s behavior while delivering a finish that can resist chips, scratches, and the elements. To that end, the recommended workflow blends science with craft in a way that is practical for hobbyists and professionals alike. Begin with a clean slate. The surface, whether the fairing is polycarbonate, ABS, or another plastic blend, should be free of oils, waxes, and silicone residues that could undermine adhesion. A high-quality automotive cleaner or degreaser is essential, and the rag or dedicated wipe should be changed frequently to avoid reintroducing contaminants. Once the fairing is clean, the sanding process begins. The goal is not to remove the old paint but to create micro-mechanical anchors for the new layer. A progression from 600–800 grit up to 1200–2000 grit is typical. Each step opens the surface slightly to receive the subsequent layer, while the finer grits minimize the risk of visible scratches through the paint. Over-sanding is a common pitfall; shallow, controlled abrasion is what you want because the final color and gloss will reveal any deep gouges. After sanding, masking becomes critical. You must shield the frame, electronics, and any non-painted features with high-quality masking tape and film. The goal is clean edges and intimate control over where the new color ends and the old surface begins. A lapse here can incur a cascade of costs: a repaint, a compromised finish, or an uneven line that betrays your effort under gloss. The choice of primer follows naturally. Plastic primers are formulated to bond with polymer substrates and to accept subsequent coatings without lifting. They often contain adhesion promoters that chemically interact with the plastic and create a receptive base for color and clear coats. Apply primers in several light coats rather than one heavy layer, and allow adequate drying time between passes. The spray technique matters: keep the gun or can at a consistent distance—roughly 15–20 centimeters—from the surface, and use long, overlapping passes that mimic mowing the lawn. This approach minimizes runs and builds a uniform film. Two to three thin coats are typically enough to create a solid foundation, with each coat drying completely before the next one is introduced. Curing times vary, but a fully cured primer is not merely dry to the touch; it has achieved a stable bond and surface score that will support the color you lay on top. The base coat that yields the desired hue is the heart of the project. If you can access a factory-matched color, use it; otherwise, a color-matching service can provide a custom tone that aligns with your bike’s original aesthetics or a new design you envision. The application logic mirrors the primer: thin, even layers, with a short flash time between coats to allow solvents to evaporate and the film to settle. Color depth and uniformity depend on patience here. The base coat should be allowed to cure for a period dictated by the product and conditions—usually a few hours—before moving to the protective layer that will seal and enhance the color. The clear coat is where depth, gloss, and durability emerge. A clear layer not only enhances shine but also contributes significantly to impact resistance and UV protection. Techniques for applying clear mirror those used for the color: consistent distance, controlled passes, and deliberate spacing between coats. Often two to three thin coats yield the balance of clarity and buildup that prevents muddiness or orange-peel texture. The final coat should feel slightly wet to the touch, a signal that the film is continuous and self-leveling. Once the clear coat has been applied, let the surface cure fully. The first drying phase may be measured in hours, but the chemical cure will take days. During this period, avoid washing or exposing the bike to extreme temperature swings. Any motion from wind or dust in the shop can mar a fresh finish, so consider a clean, dust-controlled environment or a dedicated spray booth. Polishing after full cure is optional but highly recommended for achieving a mirror-like gloss that showcases color and depth. A dual-action polisher combined with a fine polishing compound can remove micro-imperfections and refine the luster. This step, performed with care, often reveals a more vivid color and a smoother surface than the raw film alone. The environmental conditions during painting cannot be ignored. Temperature and humidity influence how the paint flows, dries, and cures. The ideal temperature range is roughly 20–25°C (68–77°F), with humidity held around 40–60% to minimize dust settling and to reduce the risk of moisture entrapment under the surface. A well-ventilated area is essential for the health of the painter and the quality of the finish. If a dedicated spray booth is available, it should be equipped with proper filtration and airflow management to prevent dust from marring the surface and to control solvent exposure. The practical payoff of these steps extends beyond appearances. Plastic paints designed for motorcycle fairings are formulated to resist UV rays, moisture, and the occasional scuff that comes with street use. They maintain color retention and a high hardness that resists chips from gravel and road debris. The result is a durable, glossy finish that endures weather and abuse while staying true to the chosen hue. A well-executed paint job also respects the plastic’s flexibility. Unlike metal, plastic can respond to temperature shifts differently, and a good coating accommodates minor flex without cracking. As you progress from primer to base to clear, you’re not simply applying layers; you are creating a multilayered shield that tolerates movement and aging. If you plan to customize further, consider the visual language of the finish beyond color alone. Metallics or subtle pearlescents can add depth, while glitter or flake particles must be incorporated in a balanced way to avoid sharp glittering in bright sun. Even with special effects, the fundamental rule remains: choose a compatible system designed for plastic, use precise technique, and control the environment to protect the investment. For readers who want an accessible path to these concepts, a practical step-by-step guide in published tutorials highlights the same sequence described here and reinforces how critical each link in the chain is to success. In addition, the broader community frames these practices not as rigid rules but as a toolkit you adapt to your bike’s shape, color goals, and available workspace. If you’re looking to explore related assets before committing to a color, you can browse a general collection of fairings to understand the shape, fit, and panel architecture of your model and see how color interacts with the bike’s lines. Fairings collection can serve as a reference point for the kinds of contours you’ll encounter when planning your painting project. The point is not to imitate a specific model but to appreciate how a well-executed paint job interacts with the fairing’s geometry and the rider’s perspective. Finally, the painting journey is as much about process as product. The materials and methods described here are intended to yield a lasting finish that protects the fairing and elevates its appearance. Achieving that outcome requires attention to detail at every stage—from sanding and masking to primer selection, color matching, and the careful application of clear. The rhythm of the work is deliberate: clean surface, bond with primer, lay color with control, seal in depth with clear, and allow time for full cure and gentle refinement. When accomplished with patience, the result is not merely a color on plastic; it is a durable, showroom-worthy surface that embraces the bike’s form and withstands the realities of road life. External knowledge and professional guidance underscore this approach, even as the everyday painter embraces a practical cadence that fits a garage or studio space. By respecting the material properties of plastic, using a paint system designed for those substrates, and adhering to disciplined technique and environment, you can achieve a finish that truly lasts. External reference for further insights into established practical painting guidelines is available at https://www.motorcycle.com/tech-tips/motorcycle-fairing-painting-guide
Preserving the Gloss: Long-Term Care for Painted Motorcycle Fairings
Paint on motorcycle fairings is a resilient coating, but its real test comes after the ride. The color you choose and the gloss you admire are the surface story; the real drama unfolds in how the paint endures sun, rain, and the daily grind of road debris. Fairings are made of plastic and shaped into complex curves, so the coating must be elastic enough to move with the substrate, hard enough to resist minor impacts, and stable enough to resist the sun’s ultraviolet push. When the coating meets those requirements, the finish stays vibrant and ages with dignity rather than cracking into dullness. This chapter connects the painting decision to maintenance: the right motorcycle specific plastic paint is not only about color and shine, but about a finish that can withstand exposure, a coating system that adheres to plastic, and a care routine that keeps the gloss from fading or cracking over time. A practical maintenance mindset treats the fairings as a living skin on the bike, not a one off cosmetic job. Regular cleaning with pH neutral cleaners and soft tools, drying with a clean lint free cloth, and careful storage in a breathable cover help protect the finish. After washing, applying a wax or sealant designed for automotive or motorcycle finishes creates a durable barrier against UV rays, dirt, and minor scratches and helps resist micro marring from road debris. Reapplication every few months, or at the end of a riding season, keeps the film nourished and the color stable. Environment matters: sun, heat, cold and humidity fluctuations can challenge the film, so storage and climate awareness are part of the plan. Regular inspections for early signs of trouble, such as chips or small bubbles, allow timely intervention and reduce the risk of larger repairs later. If damage is detected, seek professional advice for repairs on edges and fasteners to avoid trapping moisture or creating uneven adhesion. Maintenance is most effective when it becomes a seamless part of riding life: clean after rides, seal as needed, and inspect monthly to keep the gloss alive for years. For further practical guidance on painting and care, consult reputable resources and model specific panels from Yamaha fairings collection to refresh or replace sections while preserving the overall color story.
Final thoughts
Choosing the right paint and employing proper techniques for motorcycle fairings can make the difference between a visually appealing finish and one that deteriorates quickly. As a business owner, enhancing the knowledge of your team on painting processes will not only reinforce your brand’s reputation but also lead to more satisfied customers. Invest in motorcycle-specific paints, adhere to thorough surface preparation, utilize appropriate application methods, and promote regular maintenance practices among your clientele. A well-painted fairing can significantly elevate the overall look and durability of any motorcycle, providing the performance and aesthetic that riders cherish.